

Page 1
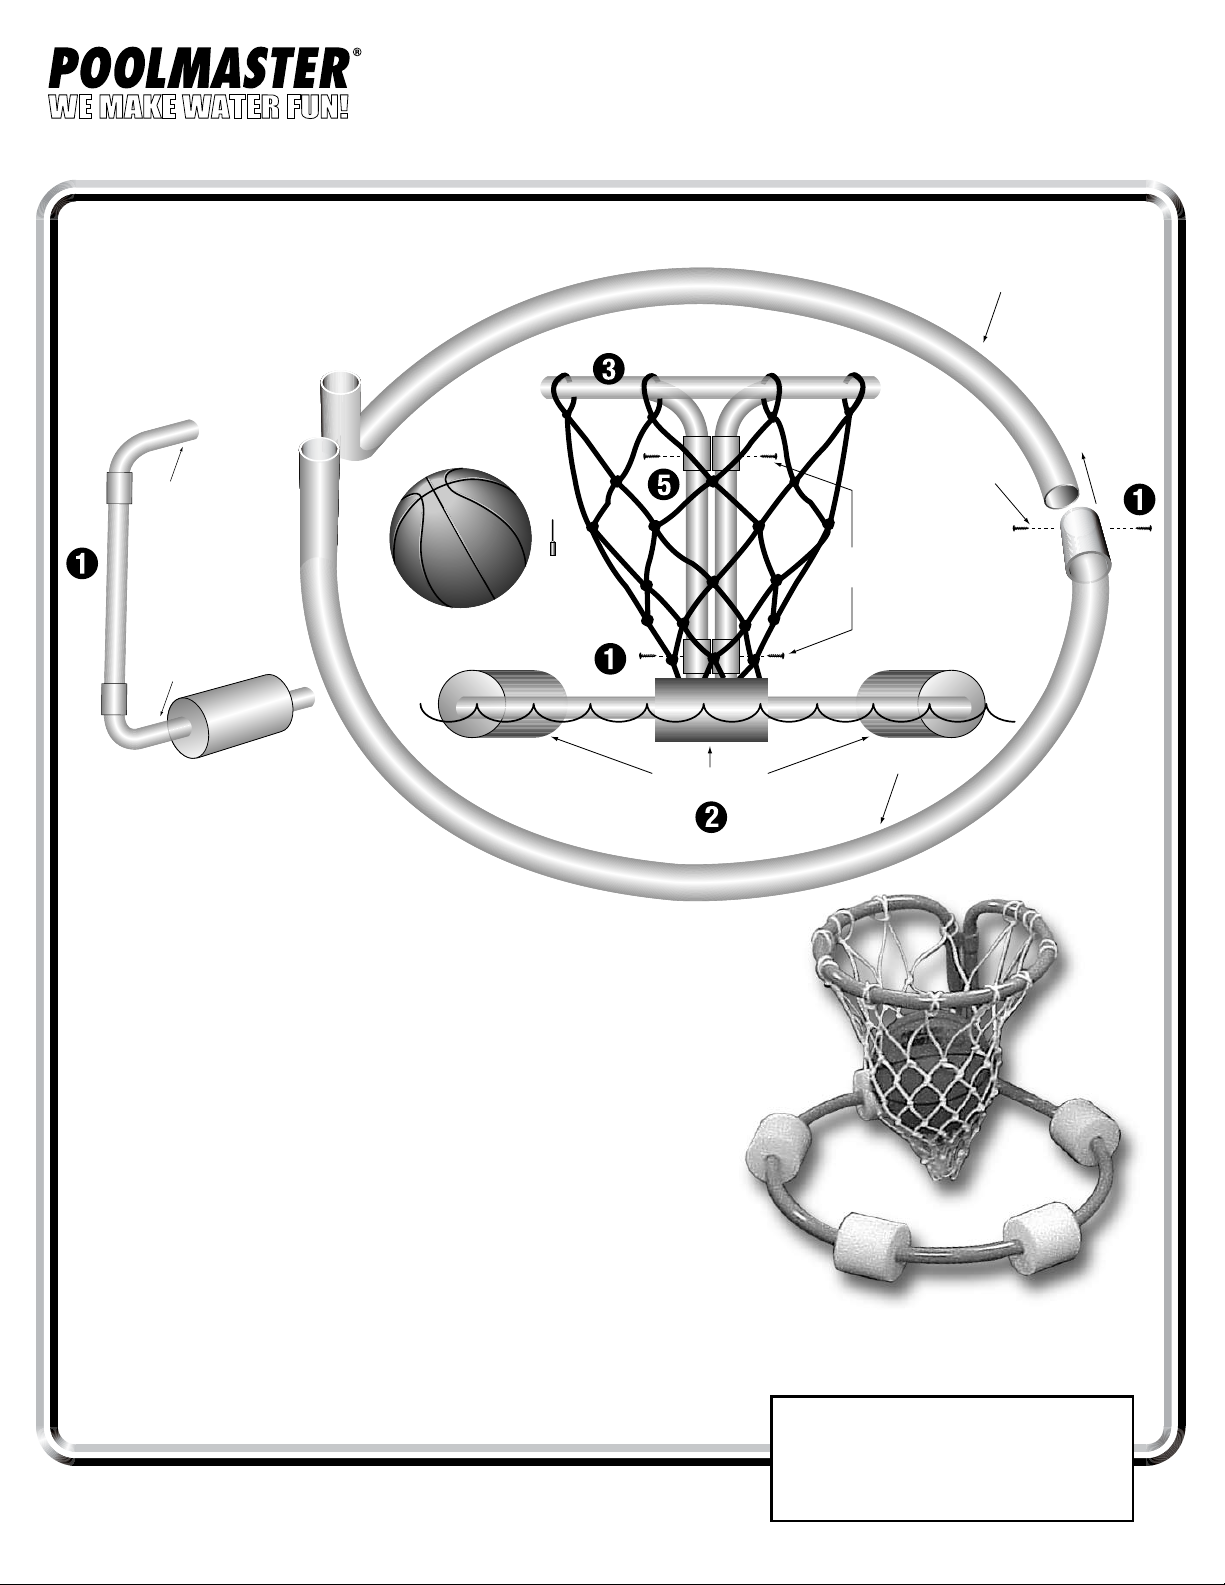
FLOATING
Upright with
Bell Ends
Small Hoop
Lar
ge Hoop
3" Foam Floats
Set
Screws
U-Shaped Pipe
Set Screws
Coupling
U-Shaped Pipe
P.O. Box 340308
Sacramento, CA 95834-0308
BASKETBALL GAME NO. 72705
ASSEMBLY INSTRUCTIONS
Contents (First, please check contents and organize in set-up sequence)
One—Small Hoop (Top Hoop)
Two—Half Circles (U-shaped Pipes)
with Coupling
One—Net
Five—3" Foam Floats
Two—Uprights with Bell Ends
Six—Set Screws
One—Ball with Needle
Ball & Needle
Assembly Instructions:
1. To assemble Large Hoop insert U-shaped Pipe
into Coupling and secure with Set Screws.
2. Twist 3" Foam Floats on Large Hoop (Bottom Hoop).
3. Install Net on the Small Hoop (Top Hoop). Net should be knotted
and tied to Top Hoop. Detailed Net Installation on reverse side.
4. Insert plastic pipe from Large Hoop into bottom of Uprights and tighten Set Screws.
5. Insert plastic pipe from Small Hoop into top of Uprights and tighten Set Screws.
Note: Material is PVC plastic and PVC Cement may be substituted for Set Screws.
Instructions For Inflating Ball:
Heavy duty deflated ball may be inflated with a small hand pump, bicycle pump
or service station air hose. This ball is manufactured to be inflated to a Maximum Size
of 9" in Diameter. CAUTION: DO NOT OVER INFLATE.
Ball Inflation Hints: Hand or Bicycle Pump - For easy inflation, use a standard ball pin
that attaches to the pump nozzle. Insert the ball inflating needle (or pin) into the hole
in the ball. Inflate to the desired size being careful you do not over inflate.
, INC.
Care & Storage:
Your new Poolside game has been made with many non-corrosive quality materials and
should provide you with many years of enjoyment with proper care. However, sun and chemically
treated pool water (chlorine) are natural enemies of many synthetic materials. For maximum life of your game, please do the following:
A. Do not leave the game ball floating around the pool when not in use.
B. After use, wash away the chlorine pool water with plain water using a garden hose.
C. When not in use, store your game in a dry place away from direct sunlight.
© POOLMASTER
705-5 4/05
NEED ASSISTANCE?
Call our Consumer Service Line
800-854-1492
See our web page @ http:/www.poolmaster.net
e-mail address:[email protected]
Page 2
P.O. Box 340308
Sacramento, CA 95834-0308
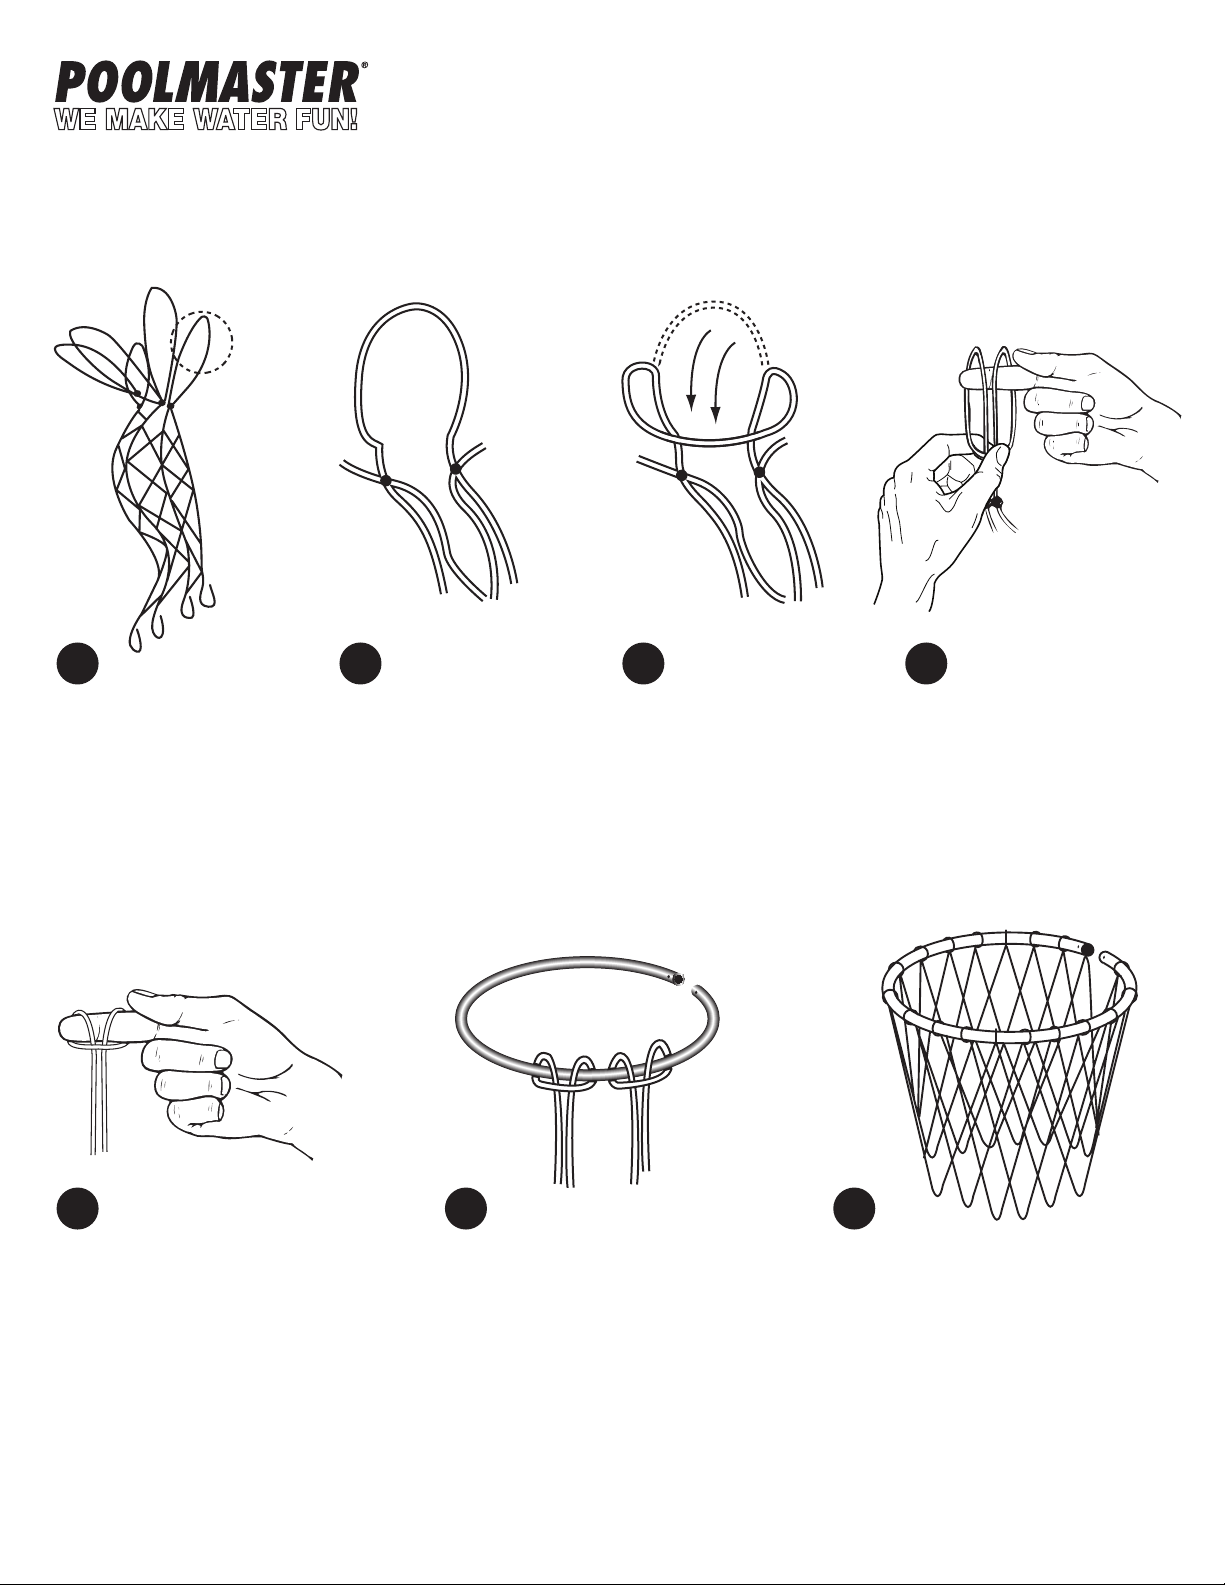
NET ASSEMBLY INSTRUCTIONS
1 2
This is the net right out of the
package. You will be working
with the longer looped end.
5
This is a close-up of the
circled portion on diagram #1.
This is one loop.
6
3 4
Fold the loop toward you,
creating two loops.
7
Insert your finger through the
two loops (as pictured)
Release the thumb holding the loop
in place and pull on the two middle
strings. The loop should slide up and
catch your finger.
Take the loop from your finger
and slide onto the basketball hoop.
Continue this process with each
loop until all loops are on the hoop.
 Loading...