

Page 1
Royal Hawaiian
Adjustable Floating Chaise Lounge
70771/70772
ASSEMBLY INSTRUCTIONS
770 Del Paso Road
Sacramento, CA 95834-0308
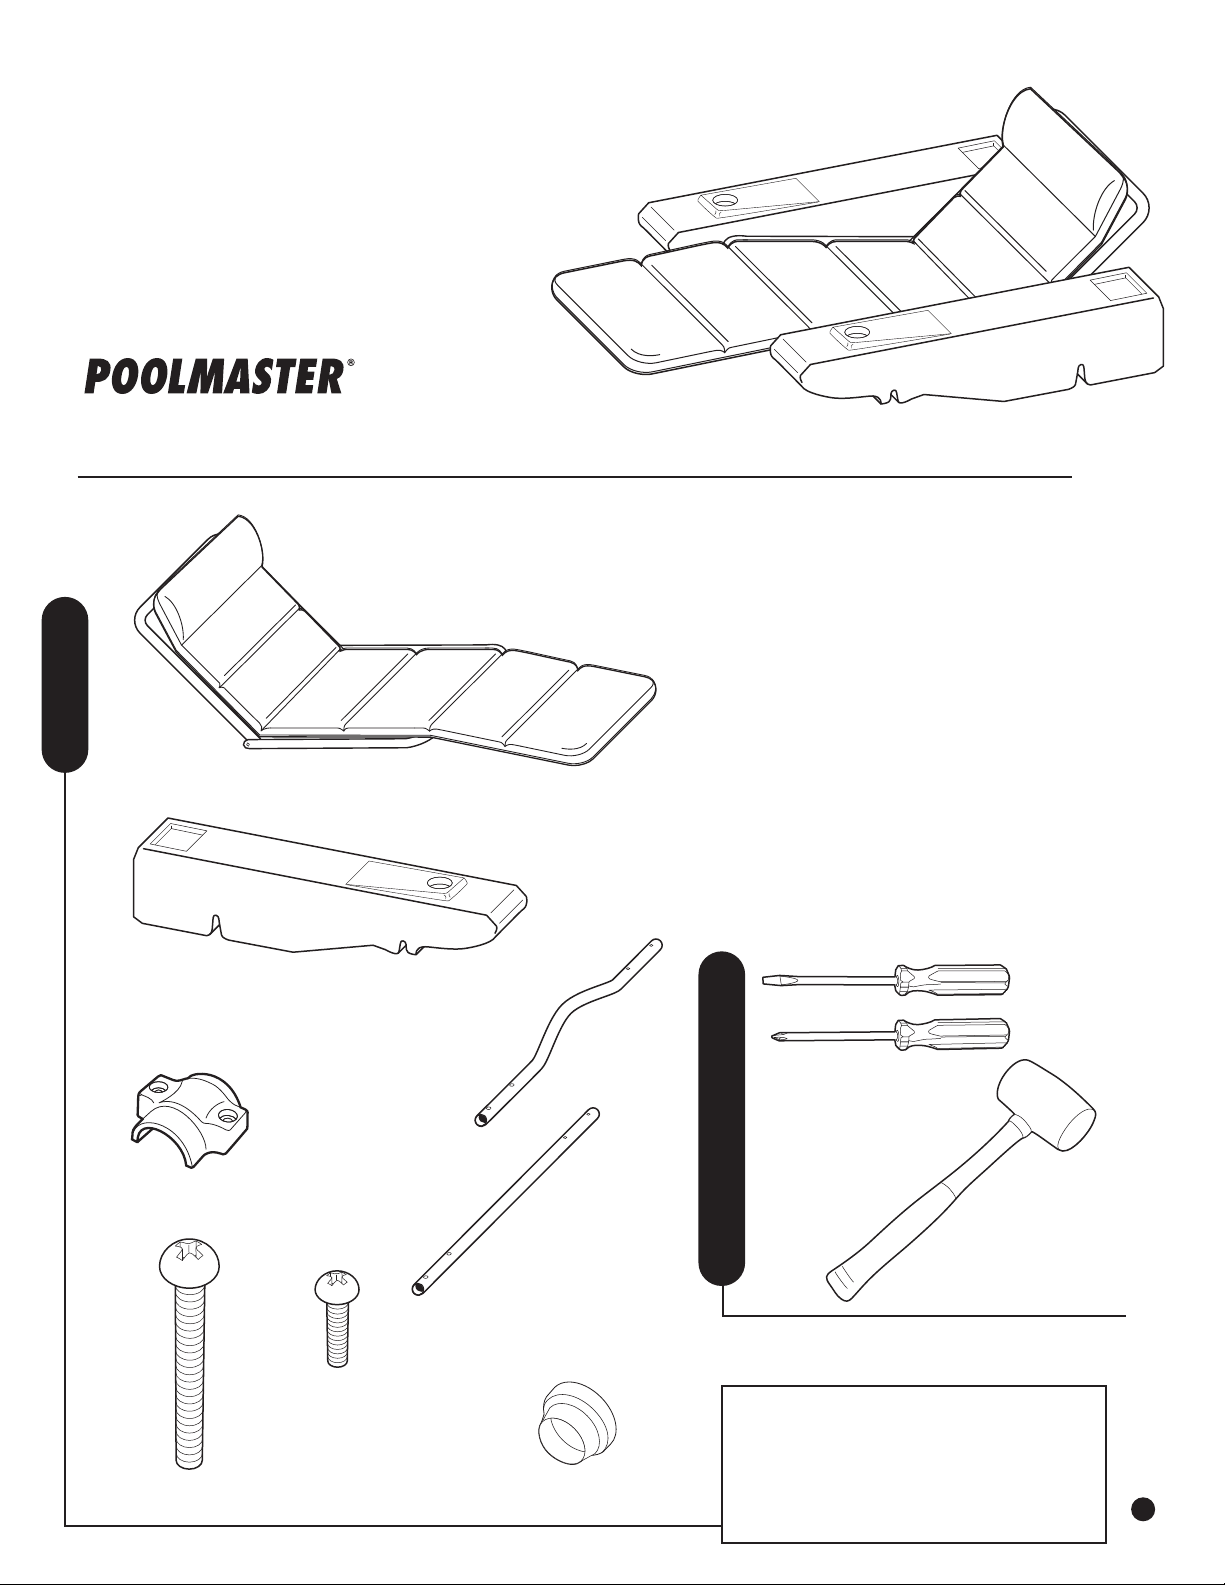
Lounge Seat
with Frame & Mounting Slides
Contents
Product Care & Storage
This device is designed for comfort to lounge in the pool.
Each Float is made of durable, non-corrosive materials.
However, prolonged exposure to sunlight and pool
chemicals can cause permanent weakening of product.
To extend product enjoyment:
1. Remove from pool when not in use.
2. Rinse with plain water after each use.
3. Store in a dry place away from direct sunlight and
pool chemicals.
Polyform™ Pontoons (2)
Mounting Caps (4)
For Safety:
1. Do not jump on Lounge.
2. Keep Lounge out of rough play.
3. Make sure all nuts and bolts and attachments
are secured. Tighten as needed.
4. Check regularly for wear and tear.
Flathead
Screwdriver
Phillips
Screwdriver
Curved
Rear Crossbar (1)
Rubber Mallet
Straight
Front Crossbar (1)
Recommended Tools
8-32 x ⁄” Bolts (8)
8-32 x 1½” Bolts (8)
White End Caps (4)
Need Assistance?
Call our Consumer Service Line:
800.854.1492
See our web page: poolmaster.com
eMail: [email protected]
03131302769-4
1
Page 2
Step 1 Step 2
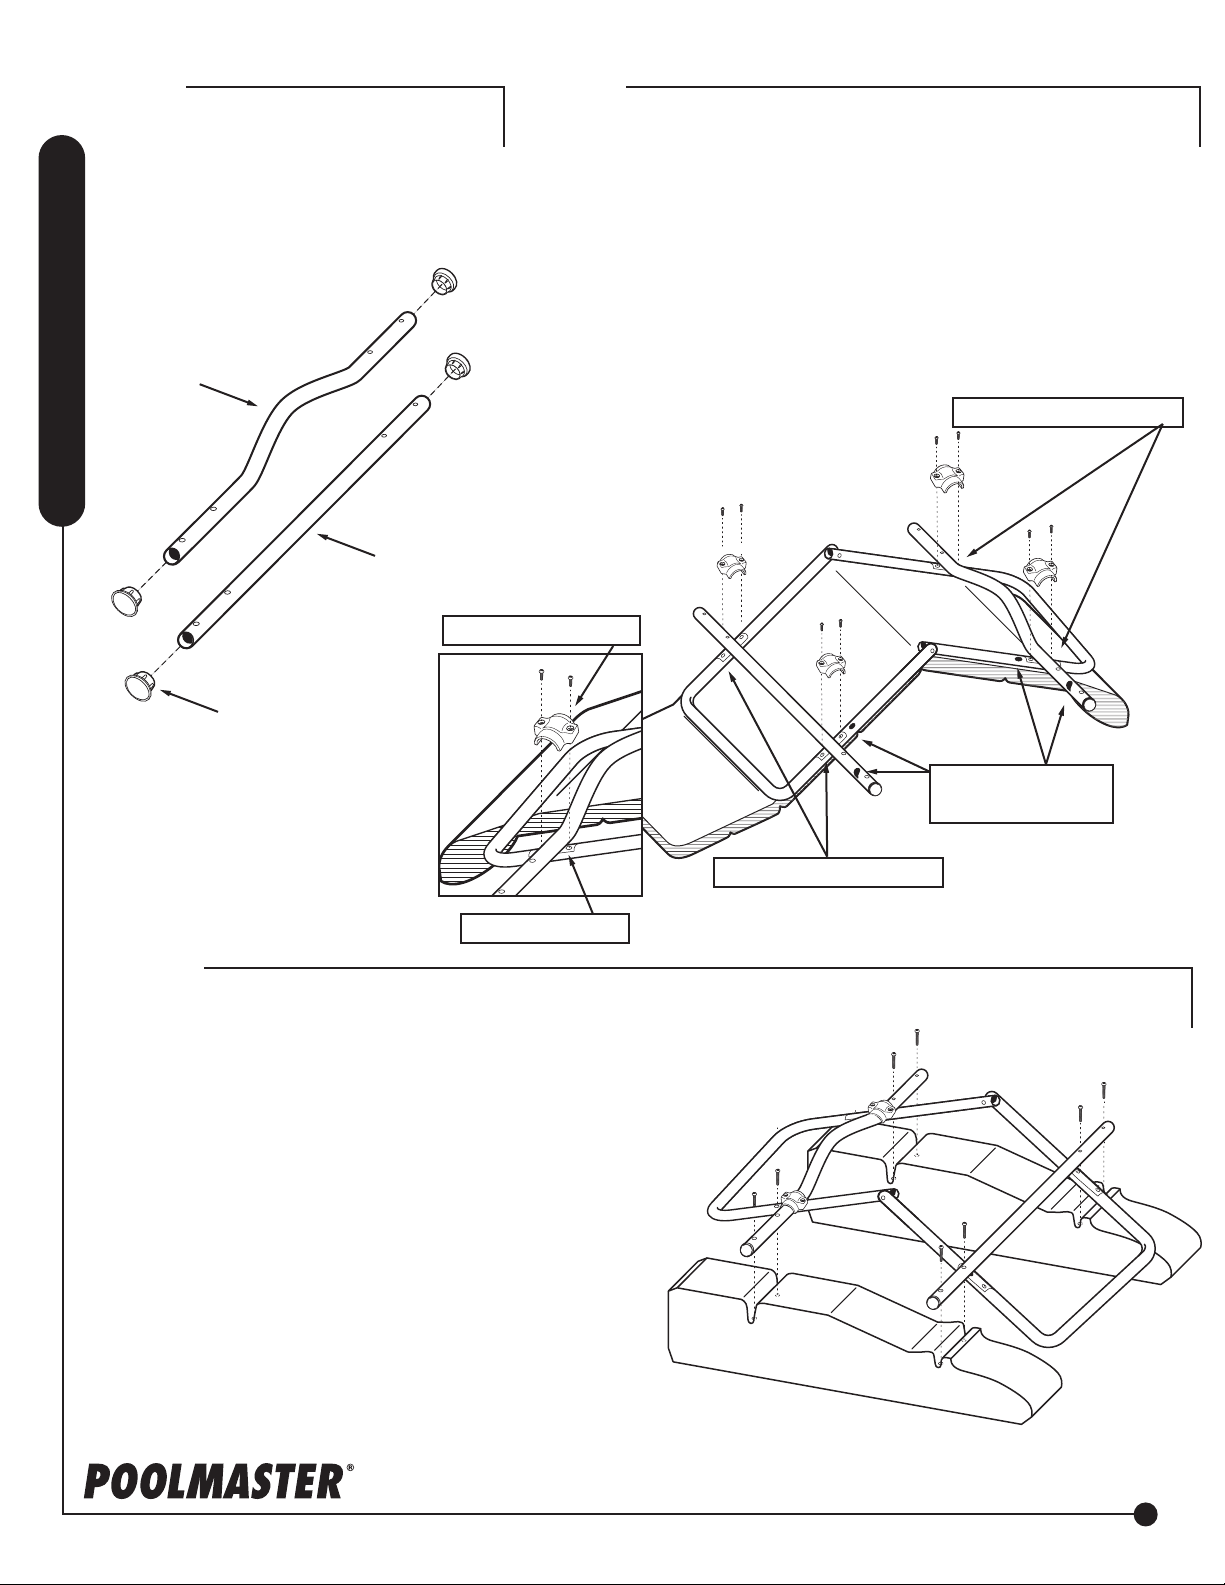
• Insert White End Cap on each end of
both the Curved Rear Crossbar and
the Straight Crossbar.
Tip: Soften caps in warm water if dicult to insert
Curved Rear
Crossbar
Assembly Instructions
Straight Front
Crossbar
Mounting Bracket
• Turn the Lounge Seat upside down.
• For proper alignment, match Color Dots on Curved Rear
Crossbar to the back of the Lounge Back. Attach to the
back of the Lounge Seat by inserting Rear Crossbar into
pre-installed Mounting Slide. Secure bar to Mounting Slide
with Mounting Caps and four 8 -32 x 5/8” Bolts.
• For proper alignment, match Color Dots on Striaght Front
Crossbar to the back of the Lounge Back. Connect Straight
Front Crossbar to the Lounge Seat by inserting Crossbar into
pre-installed Mounting Slide. Secure bar to Mounting Slide
with Mounting Caps and four 8 -32 x 5/8” Bolts.
Rear Mounting Slides
White End Caps
Head
Foot
Mounting Slide
Step 3
• Place Floats on a table, workbench or on the
original carton. Turn Polyform™ Pontoon bottom
side up with the smaller end to the back of the
table.
• Place the Straight Front Crossbar on the front
groove of the Polyform™ Pontoon and the Curved
Rear Crossbar on the rear groove of the Polyform
™ Pontoon.
• Insert a 1.5” Bolt through the hole that is closer
to the Lounge Seat Frame, one on each side of
the Crossbar and into the molded nut of the
Polyform™ Pontoon (Do not tighten until all bolts
are in place).
• Finally, insert a 1.5” Bolt through the outside hole,
one on each side of the Crossbars and into the
molded nut of the Polyform™ Pontoon. Tighten
all bolts.
Head
Note: Red Dots
(On Right hand Sides)
Front Mounting Slides
Note: Complete lounge seat
assembly from step 2 not shown.
poolmaster.com
2
 Loading...