

Page 1

Page 2

2002 Pontiac Sunfire
Owner’s Manual
Litho in U.S.A.
Part Number 22673534 A First Edition All Rights Reserved
E
Copyright General Motors Corporation 06/06/01
i
Page 3
GENERAL MOTORS, GM, the GM Emblem,
PONTIAC, the PONTIAC Emblem and the name
SUNFIRE are registered trademarks of General
Motors Corporation.
This manual includes the latest information at the time
it was printed. We reserve the right to make changes
after that time without further notice. For vehicles first
sold in Canada, substitute the name “General Motors
of Canada Limited” for Pontiac Division whenever it
appears in this manual.
Please keep this manual in your vehicle, so it will
be there if you ever need it when you’re on the road.
If you sell the vehicle, please leave this manual in it
so the new owner can use it.
We support voluntary
technician certification.
For Canadian Owners Who Prefer a French Language Manual:
Aux propriétaires canadiens: Vous pouvez vous
procurer un exemplaire de ce guide en français chez
votre concessionaire ou au:
Helm, Incorporated
P.O. Box 07130
Detroit, MI 48207
ii
Page 4
How to Use this Manual
Many people read their owner’s manual from beginning
to end when they first receive their new vehicle. If you
do this, it will help you learn about the features and
controls for your vehicle. In this manual, you’ll find
that pictures and words work together to explain
things quickly.
Safety Warnings and Symbols
You will find a number of safety cautions in this book.
We use a box and the word CAUTION to tell you
about things that could hurt you if you were to ignore
the warning.
CAUTION:
These mean there is something that could hurt
you or other people.
In the caution area, we tell you what the hazard is.
Then we tell you what to do to help avoid or reduce
the hazard. Please read these cautions. If you don’t,
you or others could be hurt.
You will also find a circle
with a slash through it in
this book. This safety
symbol means “Don’t,”
“Don’t do this” or “Don’t
let this happen.”
iii
Page 5
Vehicle Damage Warnings
Also, in this book you will find these notices:
NOTICE:
These mean there is something that could damage
your vehicle.
In the notice area, we tell you about something that can
damage your vehicle. Many times, this damage would
not be covered by your warranty, and it could be costly.
But the notice will tell you what to do to help avoid
the damage.
When you read other manuals, you might see
CAUTION and NOTICE warnings in different
colors or in different words.
You’ll also see warning labels on your vehicle.
They use the same words, CAUTION or NOTICE.
Vehicle Symbols
Your vehicle may be equipped with components and
labels that use symbols instead of text. Symbols,
used on your vehicle, are shown along with the text
describing the operation or information relating to a
specific component, control, message, gage or indicator.
If you need help figuring out a specific name of a
component, gage or indicator reference the following
topics in the Index:
D
“Engine Compartment Overview”
D
“Instrument Panel”
D
“Comfort Controls”
D
“Audio Systems”
Also see “Warning Lights and Gages” in the Index.
iv
Page 6
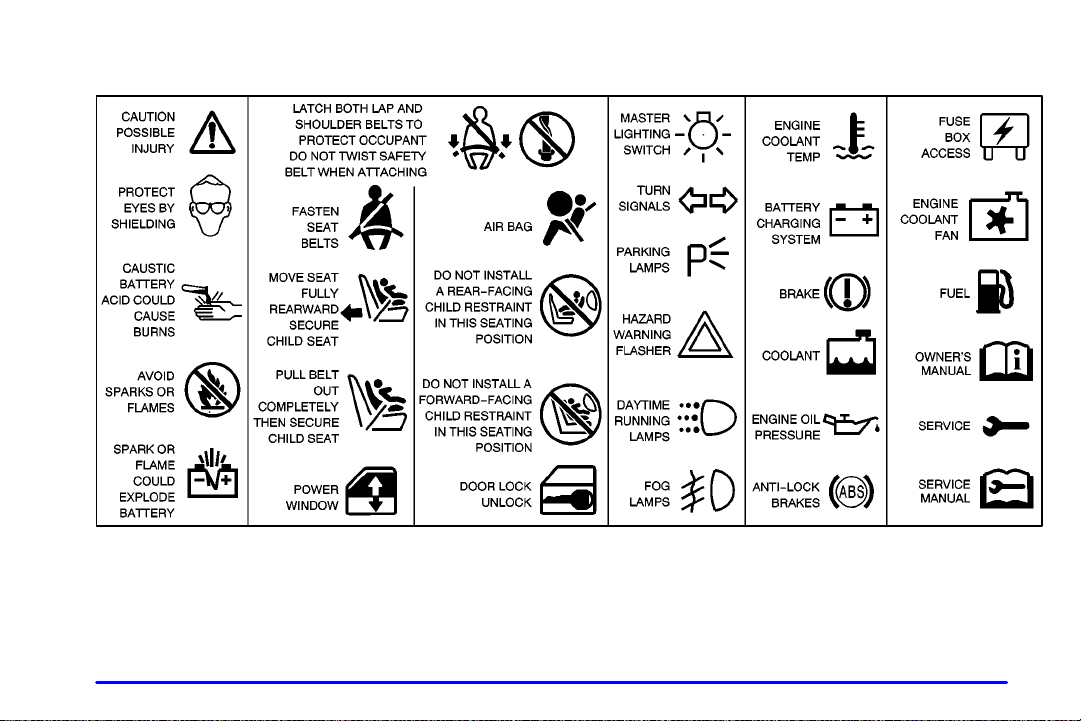
These are some examples of vehicle symbols you may find on your vehicle:
v
Page 7
Section 1 Seats and Restraint Systems
Here you’ll find information about the seats in your vehicle and how to use your safety belts properly. You can also
learn about some things you should not do with air bags and safety belts.
1
-2 Seats and Seat Controls
1
-8 Safety Belts: They’re for Everyone
-13 Here Are Questions Many People Ask About
1
Safety Belts
-14 How to Wear Safety Belts Properly
1
1
-14 Driver Position
1
-21 Safety Belt Use During Pregnancy
-22 Right Front Passenger Position
1
1
-22 Supplemental Restraint System (SRS)
-28 Rear Seat Passengers
1
-- and the Answers
-32 Rear Safety Belt Comfort Guides for Children
1
and Small Adults
1-34 Center Passenger Position
1
-36 Children
-40 Restraint Systems for Children
1
1
-52 Older Children
1
-55 Safety Belt Extender
-55 Checking Your Restraint Systems
1
1
-55 Replacing Restraint System Parts
After a Crash
1-
1-1
Page 8
Seats and Seat Controls
This section tells you about the seats -- how to
adjust them
head restraints.
-- and also about reclining seatbacks and
Manual Front Seats
CAUTION:
You can lose control of the vehicle if you try to
adjust a manual driver’s seat while the vehicle is
moving. The sudden movement could startle and
confuse you, or make you push a pedal when you
don’t want to. Adjust the driver’s seat only when
the vehicle is not moving.
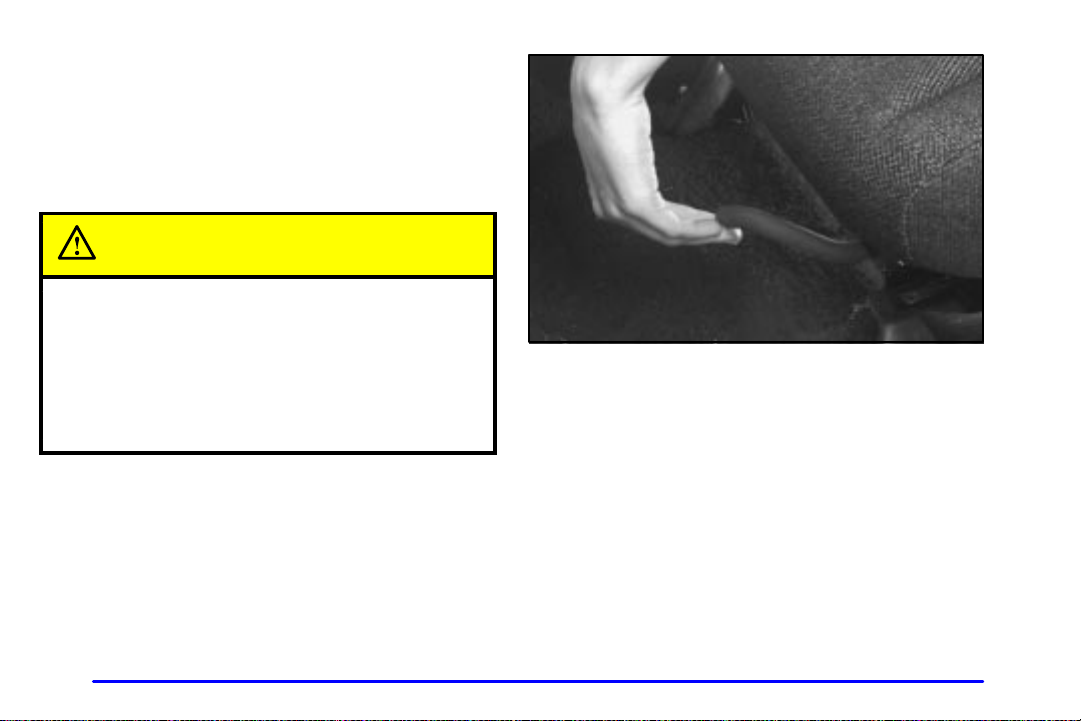
Lift the lever located on the front of the driver’s seat to
unlock it. Slide the seat to where you want it and release
the lever. Then try to move the seat with your body, to
make sure the seat is locked into place.
Your vehicle will be equipped with one of the following
passenger seat adjusters.
1-2
Page 9
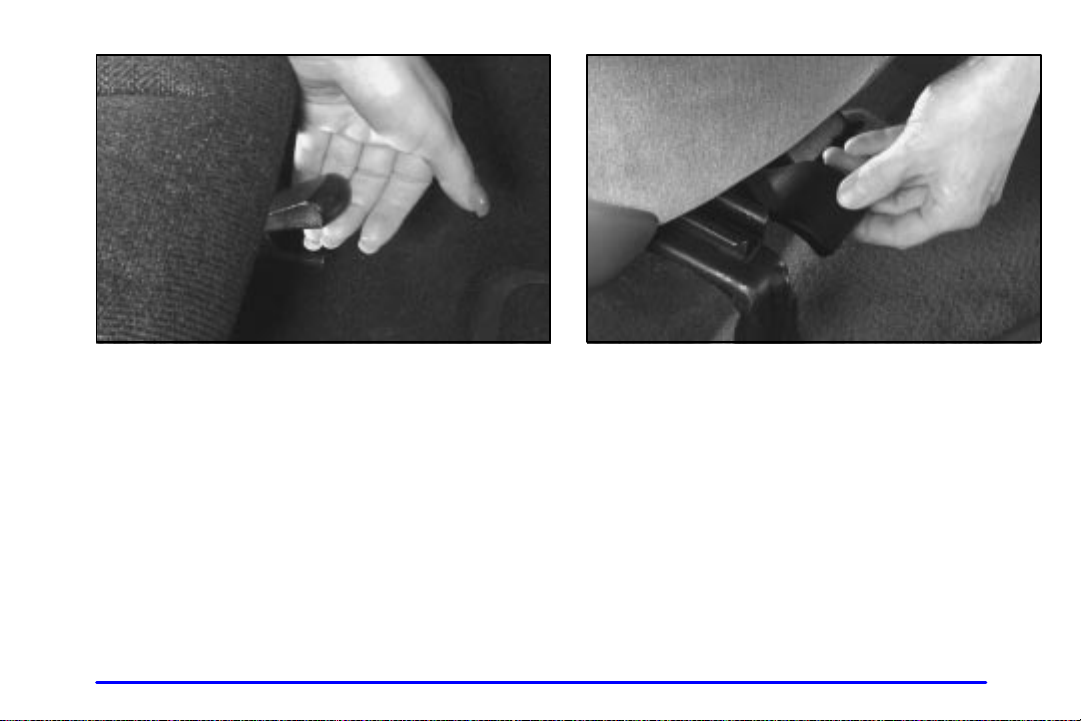
If your vehicle is not equipped with easy entry seats,
your passenger seat adjuster looks like this. Slide the
lever located under the passenger’s seat to the right to
unlock it. Slide the seat to where you want it and release
the lever. Then try to move the seat with your body, to
make sure the seat is locked into place.
If your vehicle is equipped with easy entry seats, this is
your front passenger seat adjuster. Pull up on the lever
located at the front of the passengers seat to unlock it.
Slide the seat to a comfortable position and release the
lever. Then try to move the seat with your body, to make
sure the seat is locked into place.
1-3
Page 10
Reclining Front Seatbacks
T o adjust the seatback, lift the lever located on the
outboard side of the seat and move the seatback to
where you want it. Release the lever and push rearward
on the seatback to make sure it is locked. Pull up on the
lever without pushing on the seatback and the seatback
will go to an upright position.
1-4
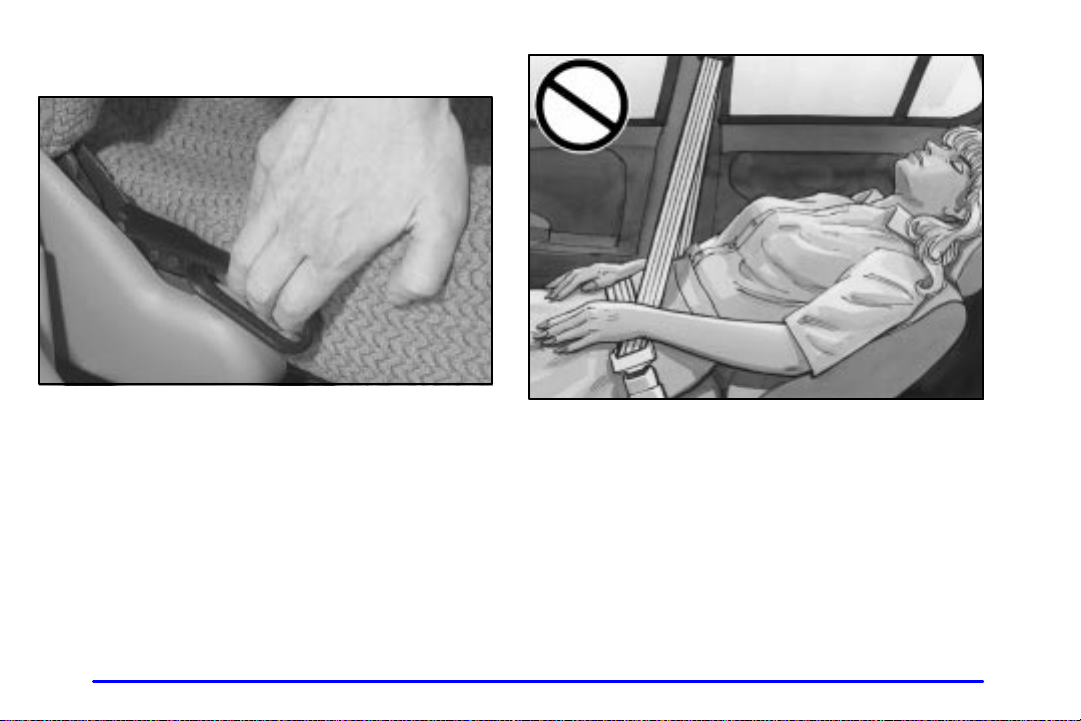
But don’t have a seatback reclined if your vehicle is moving.
Page 11
CAUTION:
Sitting in a reclined position when your vehicle is
in motion can be dangerous. Even if you buckle
up, your safety belts can’t do their job when
you’re reclined like this.
The shoulder belt can’t do its job because it
won’t be against your body. Instead, it will be in
front of you. In a crash you could go into it,
receiving neck or other injuries.
The lap belt can’t do its job either. In a crash the
belt could go up over your abdomen. The belt
forces would be there, not at your pelvic bones.
This could cause serious internal injuries.
For proper protection when the vehicle is in
motion, have the seatback upright. Then sit
well back in the seat and wear your safety
belt properly.
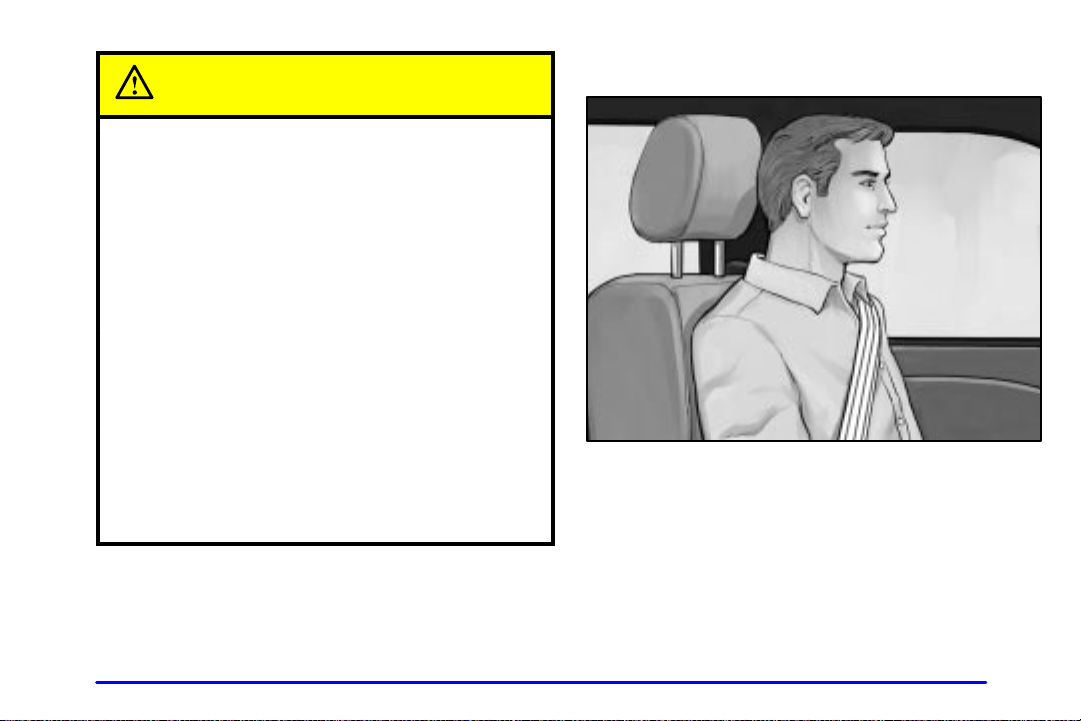
Head Restraints
Slide the head restraint up or down so that the top of the
restraint is closest to the top of your head. This position
reduces the chance of a neck injury in a crash.
1-5
Page 12
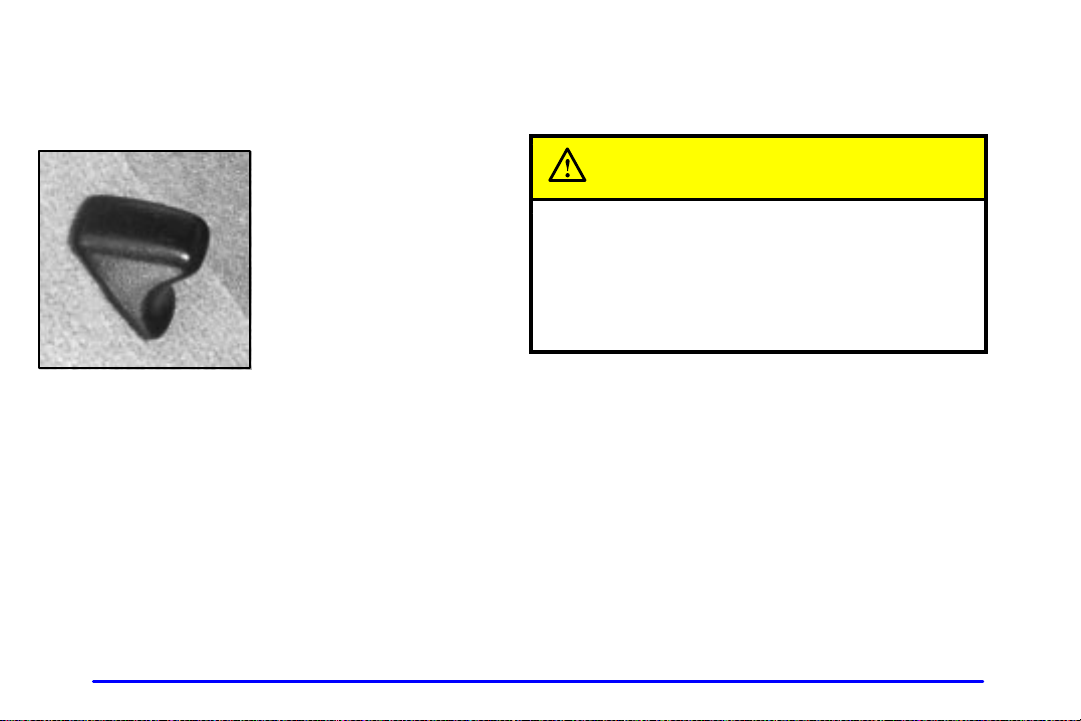
Seatback Latches (Two-Door Models)
The front seatback folds forward to let people get into
the back seat.
When you return the seatback to its original position,
make sure the seatback is locked. The latch must be
down for the seat to work properly.
1-6
T o fold a front
seatback forward, lift
the latch located on the
lower backside of the
seatback and push the
seatback forward.
CAUTION:
If the seatback isn’t locked, it could move
forward in a sudden stop or crash. That could
cause injury to the person sitting there. Always
press rearward on the seatback to be sure it
is locked.
Page 13
Easy Entry Seat (If Equipped)
CAUTION:
If an easy entry right front seat isn’t locked, it
can move. In a sudden stop or crash, the person
sitting there could be injured. After you’ve used
it, be sure to push rearward on an easy entry seat
to be sure it is locked.
The right front seat of some two-door vehicles makes it
easy to get in and out of the rear seat.
1. Lift the right front seatback latch to release
the seatback.
2. Tilt the seatback completely forward and the whole
seat will slide forward.
3. Move the right front seatback to its original position
after someone gets into the rear seat area.
4. Then move the seat rearward until it locks.
Tilt the seatback completely forward again to get out.
Rear Seats
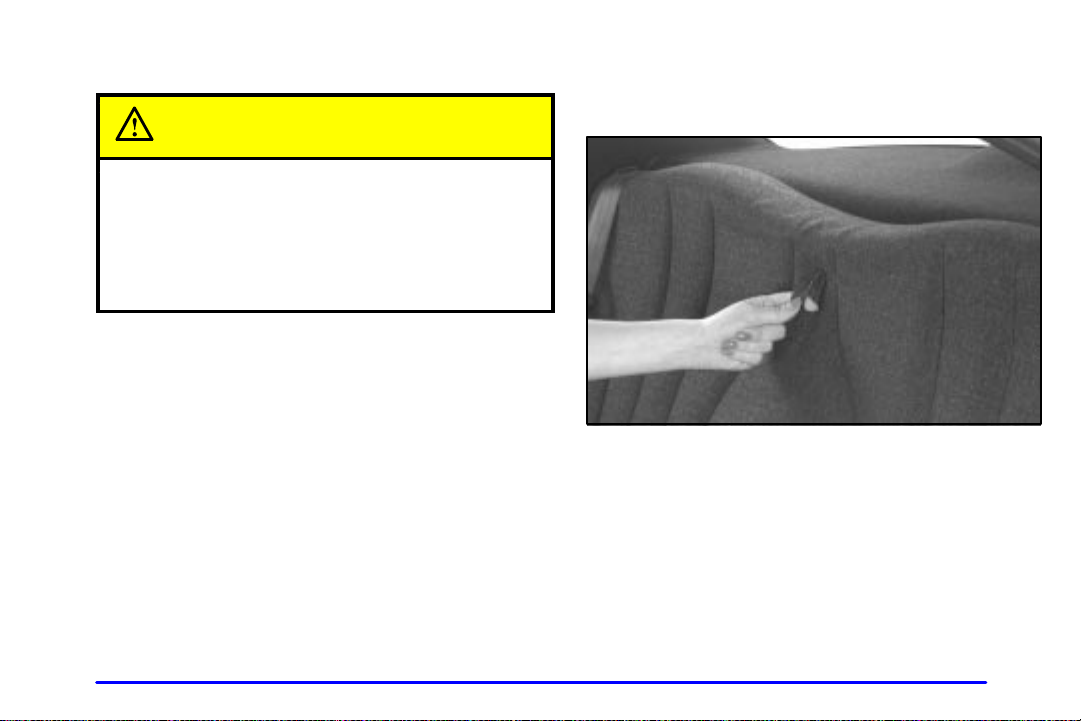
Folding the Rear Seat
T o fold down rear seat, pull forward on the seat tab to
unlatch the seatback.
1-7
Page 14
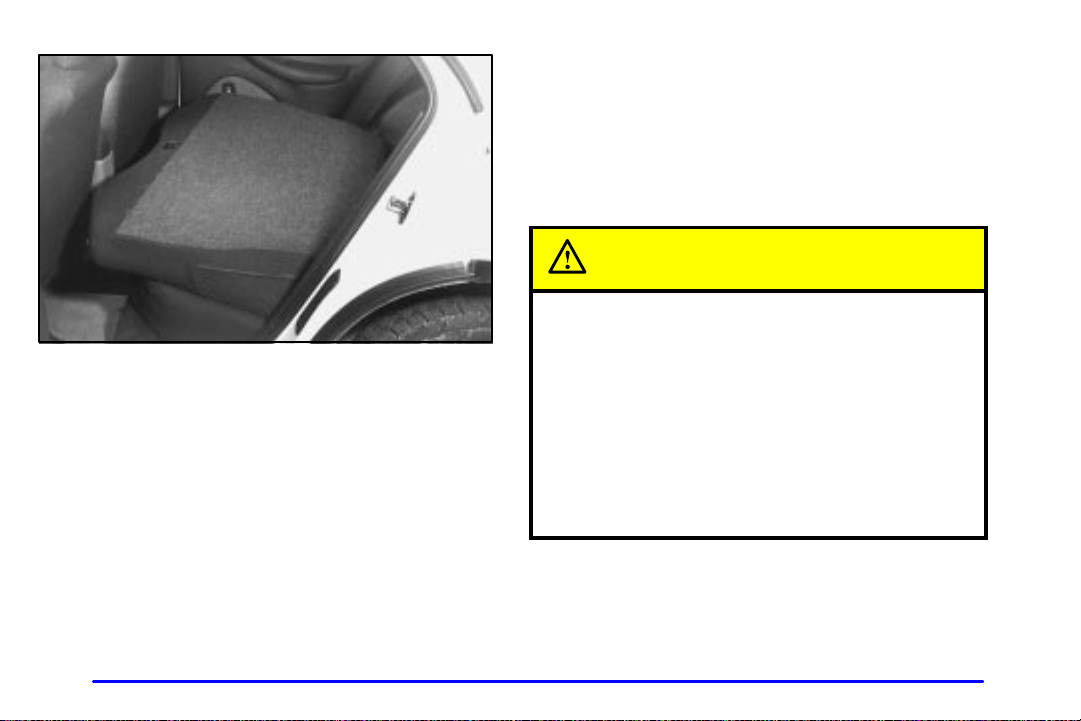
T o return the seat to its upright position, push the
seatback up to its original latched position.
Check to ensure the seatback is in its original position
and securely latched by pulling forward on the top of the
seatback. Move any objects in the trunk compartment
that prevent the seatback from closing.
Safety Belts: They’re for Everyone
This part of the manual tells you how to use safety belts
properly. It also tells you some things you should not do
with safety belts.
And it explains the Supplemental Restraint System
(SRS), or air bag system.
CAUTION:
Don’t let anyone ride where he or she can’t wear
a safety belt properly. If you are in a crash and
you’re not wearing a safety belt, your injuries
can be much worse. You can hit things inside the
vehicle or be ejected from it. You can be seriously
injured or killed. In the same crash, you might
not be if you are buckled up. Always fasten your
safety belt, and check that your passengers’ belts
are fastened properly too.
1-8
Page 15
CAUTION:
It is extremely dangerous to ride in a cargo area,
inside or outside of a vehicle. In a collision,
people riding in these areas are more likely to be
seriously injured or killed. Do not allow people to
ride in any area of your vehicle that is not
equipped with seats and safety belts. Be sure
everyone in your vehicle is in a seat and using a
safety belt properly.
Your vehicle has a light
that comes on as a reminder
to buckle up. See “Safety
Belt Reminder Light” in
the Index.
In most states and Canadian provinces, the law says to
wear safety belts. Here’s why: They work.
You never know if you’ll be in a crash. If you do have a
crash, you don’t know if it will be a bad one.
A few crashes are mild, and some crashes can be so
serious that even buckled up a person wouldn’t survive.
But most crashes are in between. In many of them,
people who buckle up can survive and sometimes walk
away . Without belts they could have been badly hurt
or killed.
After more than 30 years of safety belts in vehicles,
the facts are clear. In most crashes buckling up does
matter ... a lot!
1-9
Page 16
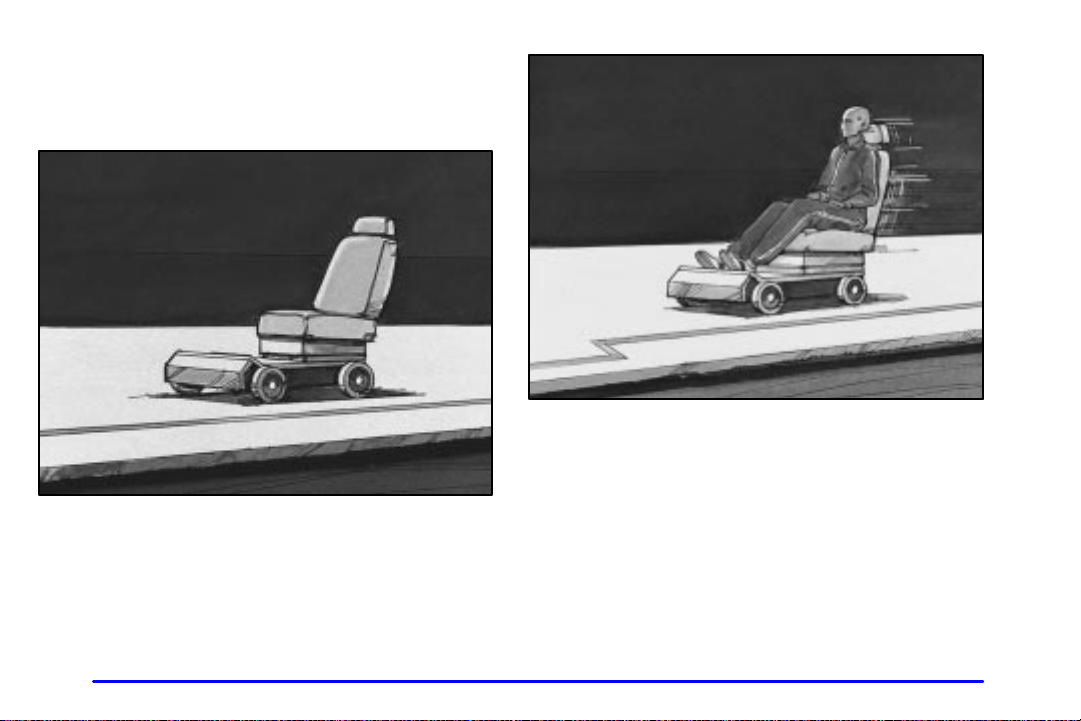
Why Safety Belts Work
When you ride in or on anything, you go as fast as
it goes.
Take the simplest vehicle. Suppose it’s just a seat on wheels.
Put someone on it.
1-10
Page 17
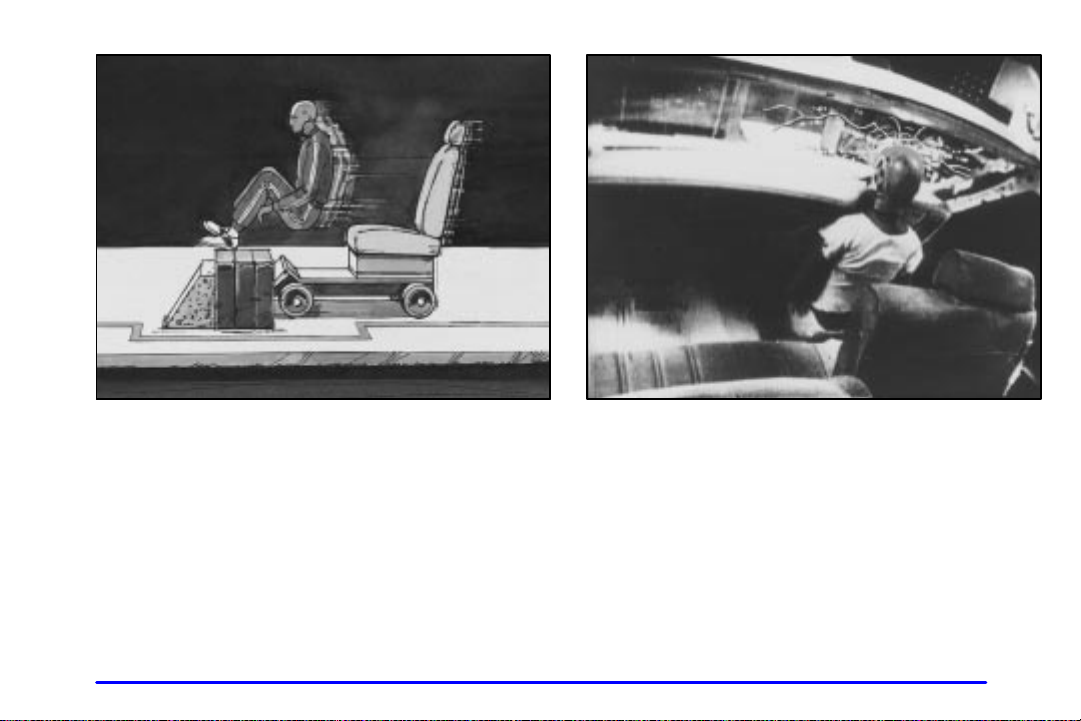
Get it up to speed. Then stop the vehicle. The rider
doesn’t stop.
The person keeps going until stopped by something.
In a real vehicle, it could be the windshield ...
1-11
Page 18
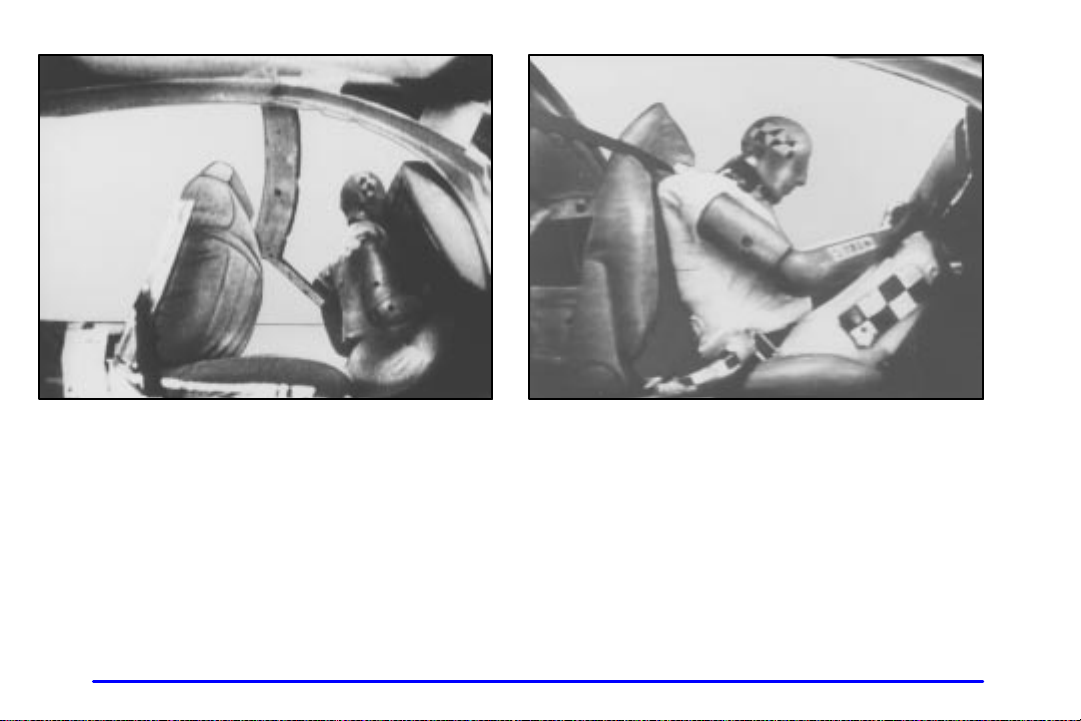
or the instrument panel ... or the safety belts!
With safety belts, you slow down as the vehicle does.
You get more time to stop. You stop over more distance,
and your strongest bones take the forces. That’s why
safety belts make such good sense.
1-12
Page 19

Here Are Questions Many People Ask
About Safety Belts
Won’t I be trapped in the vehicle after an
Q:
accident if I’m wearing a safety belt?
-- and the Answers
A: You could be -- whether you’re wearing a safety
belt or not. But you can unbuckle a safety belt,
even if you’re upside down. And your chance of
being conscious during and after an accident, so
you can unbuckle and get out, is much greater if
you are belted.
Q: If my vehicle has air bags, why should I have to
wear safety belts?
A: Air bags are in many vehicles today and will be in
most of them in the future. But they are
supplemental systems only; so they work with
safety belts
system ever offered for sale has required the use of
safety belts. Even if you’re in a vehicle that has air
bags, you still have to buckle up to get the most
protection. That’s true not only in frontal collisions,
but especially in side and other collisions.
-- not instead of them. Every air bag
Q: If I’m a good driver, and I never drive far from
home, why should I wear safety belts?
A: You may be an excellent driver , but if you’re in an
accident
and your passengers can be hurt. Being a good
driver doesn’t protect you from things beyond your
control, such as bad drivers.
Most accidents occur within 25 miles (40 km)
of home. And the greatest number of serious
injuries and deaths occur at speeds of less
than 40 mph (65 km/h).
Safety belts are for everyone.
-- even one that isn’t your fault -- you
1-13
Page 20
How to Wear Safety Belts Properly
Adults
This part is only for people of adult size.
Be aware that there are special things to know
about safety belts and children. And there are different
rules for smaller children and babies. If a child will
be riding in your vehicle, see the part of this manual
called “Children.” Follow those rules for
everyone’s protection.
First, you’ll want to know which restraint systems your
vehicle has.
We’ll start with the driver position.
Driver Position
This part describes the driver’s restraint system.
Lap-Shoulder Belt
The driver has a lap-shoulder belt. Here’s how to wear
it properly.
1. Close and lock the door.
2. Adjust the seat so you can sit up straight. T o see
how , see “Seats” in the Index.
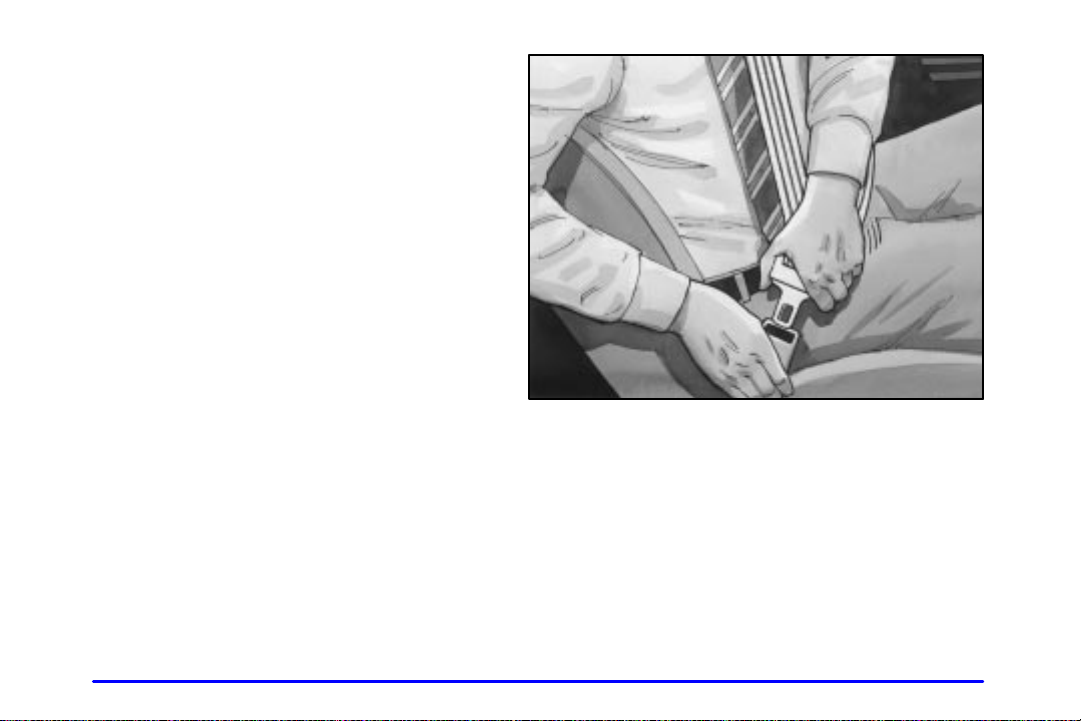
3. Pick up the latch plate and pull the belt across you.
Don’t let it get twisted.
The shoulder belt may lock if you pull the belt across
you very quickly. If this happens, let the belt go back
slightly to unlock it. Then pull the belt across you
more slowly.
1-14
Page 21
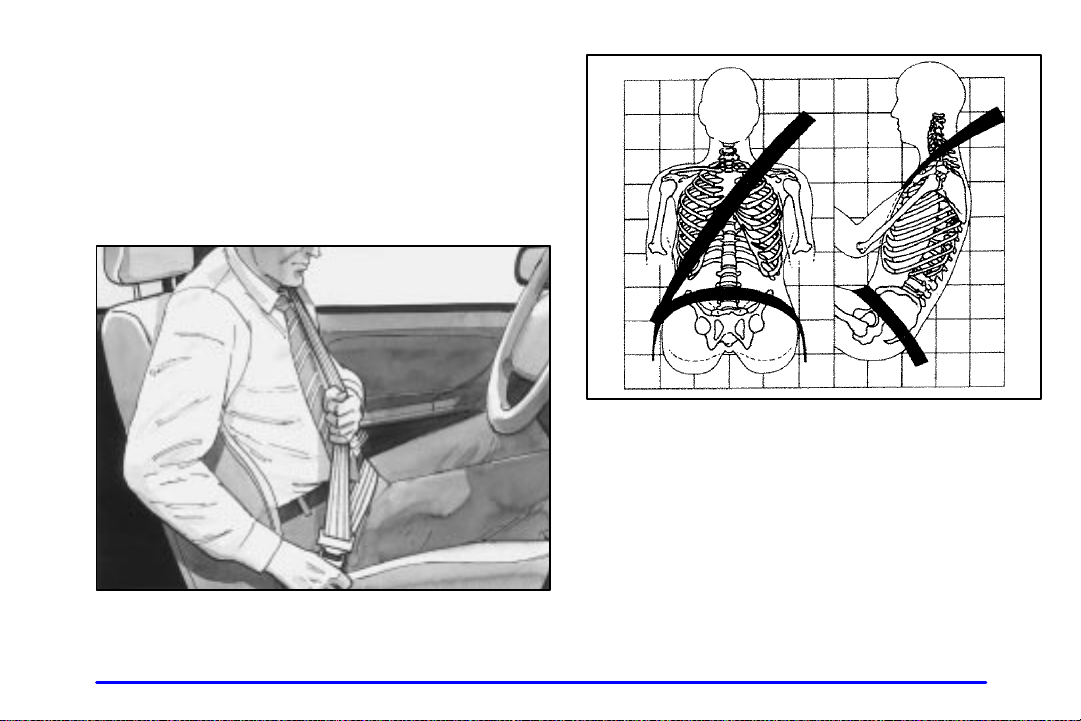
4. Push the latch plate into the buckle until it clicks.
Pull up on the latch plate to make sure it is secure.
If the belt isn’t long enough, see “Safety Belt
Extender” at the end of this section.
Make sure the release button on the buckle is
positioned so you would be able to unbuckle the
safety belt quickly if you ever had to.
5. T o make the lap part tight, pull down on the buckle
end of the belt as you pull up on the shoulder belt.
The lap part of the belt should be worn low and snug on
the hips, just touching the thighs. In a crash, this applies
force to the strong pelvic bones. And you’d be less likely
to slide under the lap belt. If you slid under it, the belt
would apply force at your abdomen. This could cause
serious or even fatal injuries. The shoulder belt should go
over the shoulder and across the chest. These parts of the
body are best able to take belt restraining forces.
The safety belt locks if there’s a sudden stop or crash, or
if you pull the belt very quickly out of the retractor.
1-15
Page 22
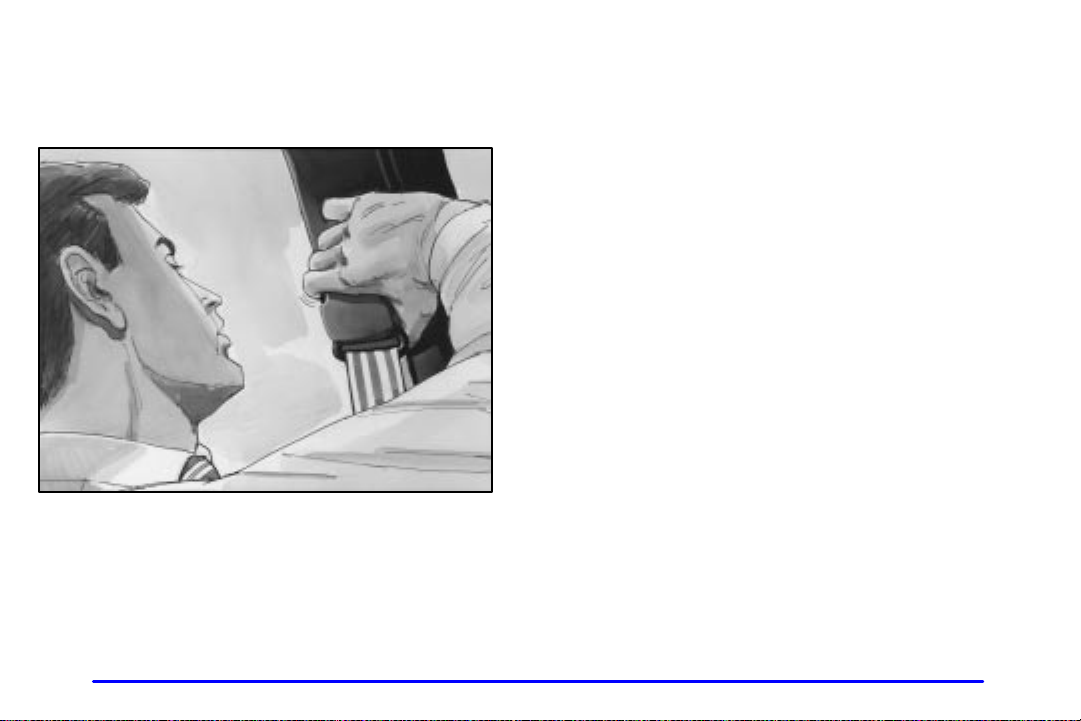
Shoulder Belt Height Adjuster (Four-Door Models)
Before you begin to drive, move the shoulder belt
adjuster to the height that is right for you.
T o move it down, squeeze the release button and move
the height adjuster to the desired position. You can move
the adjuster up just by pushing up on the shoulder belt
guide. After you move the adjuster to where you want it,
try to move it down without squeezing the release button
to make sure it has locked into position.
Adjust the height so that the shoulder portion of the
belt is centered on your shoulder. The belt should be
away from your face and neck, but not falling off
your shoulder.
1-16
Page 23
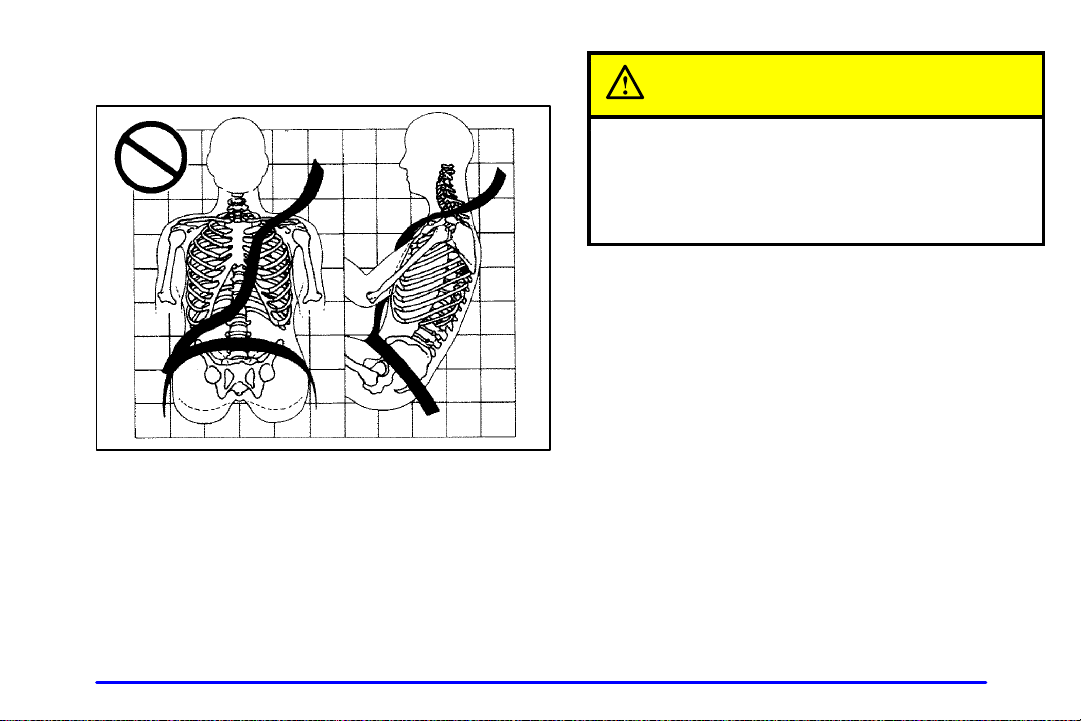
Q: What’s wrong with this?
A: The shoulder belt is too loose. It won’t give nearly
as much protection this way.
CAUTION:
You can be seriously hurt if your shoulder belt is
too loose. In a crash, you would move forward
too much, which could increase injury. The
shoulder belt should fit against your body.
1-17
Page 24
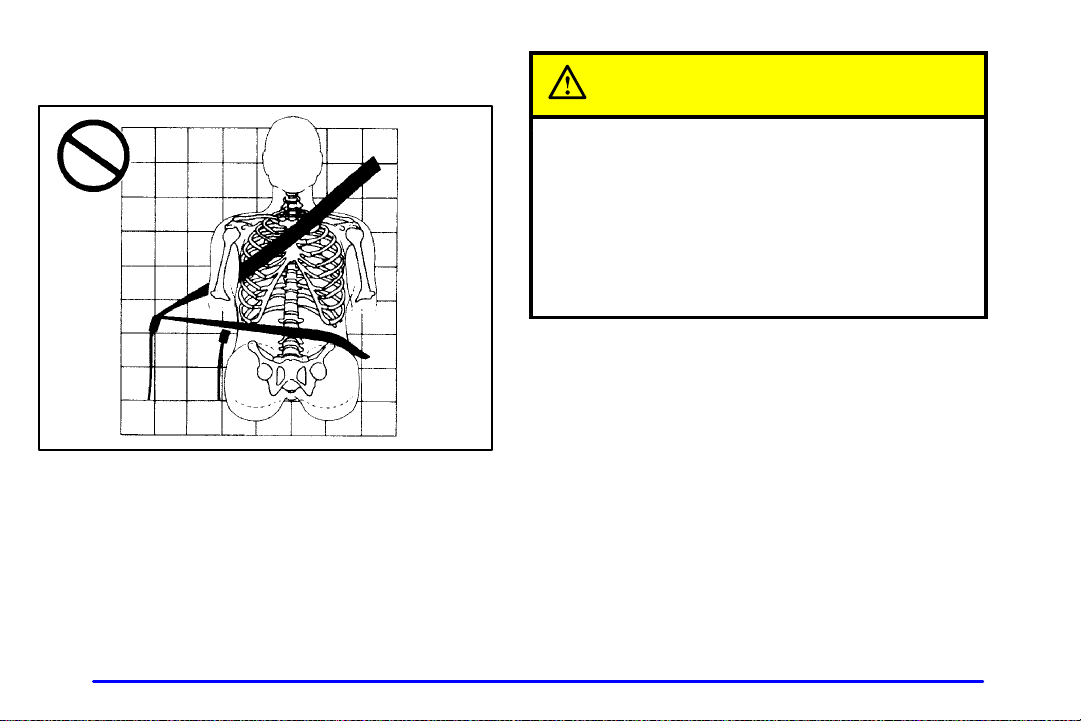
Q: What’s wrong with this?
A: The belt is buckled in the wrong place.
CAUTION:
You can be seriously injured if your belt is
buckled in the wrong place like this. In a crash,
the belt would go up over your abdomen. The
belt forces would be there, not at the pelvic
bones. This could cause serious internal injuries.
Always buckle your belt into the buckle
nearest you.
1-18
Page 25
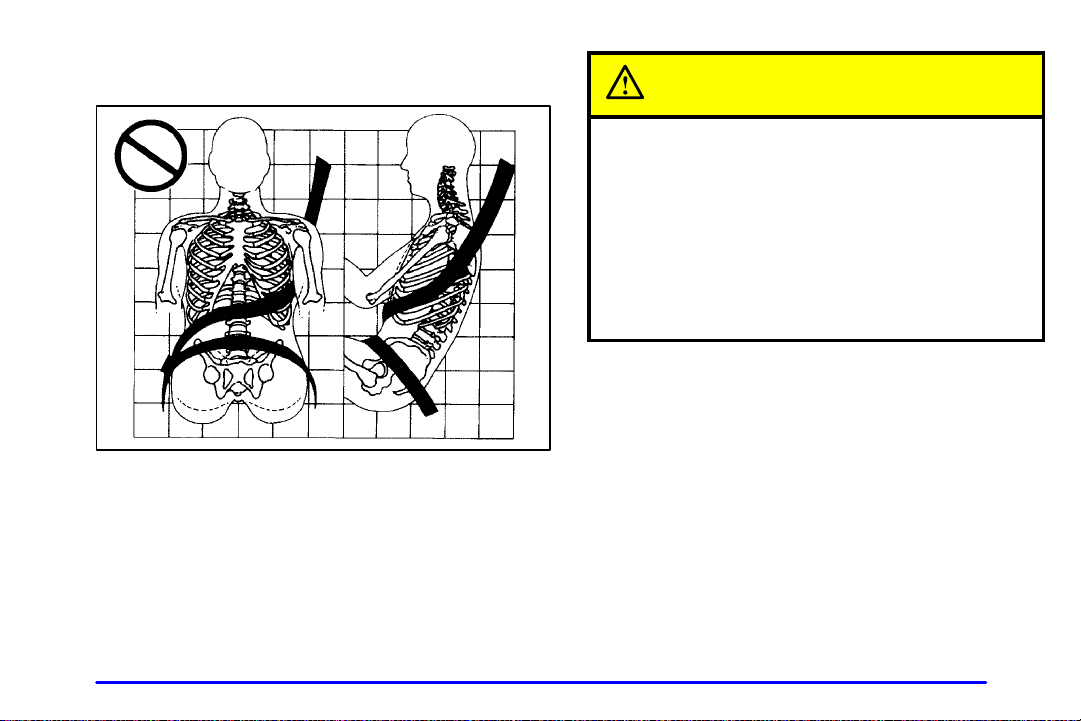
Q: What’s wrong with this?
A: The shoulder belt is worn under the arm. It should
be worn over the shoulder at all times.
CAUTION:
You can be seriously injured if you wear the
shoulder belt under your arm. In a crash, your
body would move too far forward, which would
increase the chance of head and neck injury.
Also, the belt would apply too much force to the
ribs, which aren’t as strong as shoulder bones.
You could also severely injure internal organs
like your liver or spleen.
1-19
Page 26
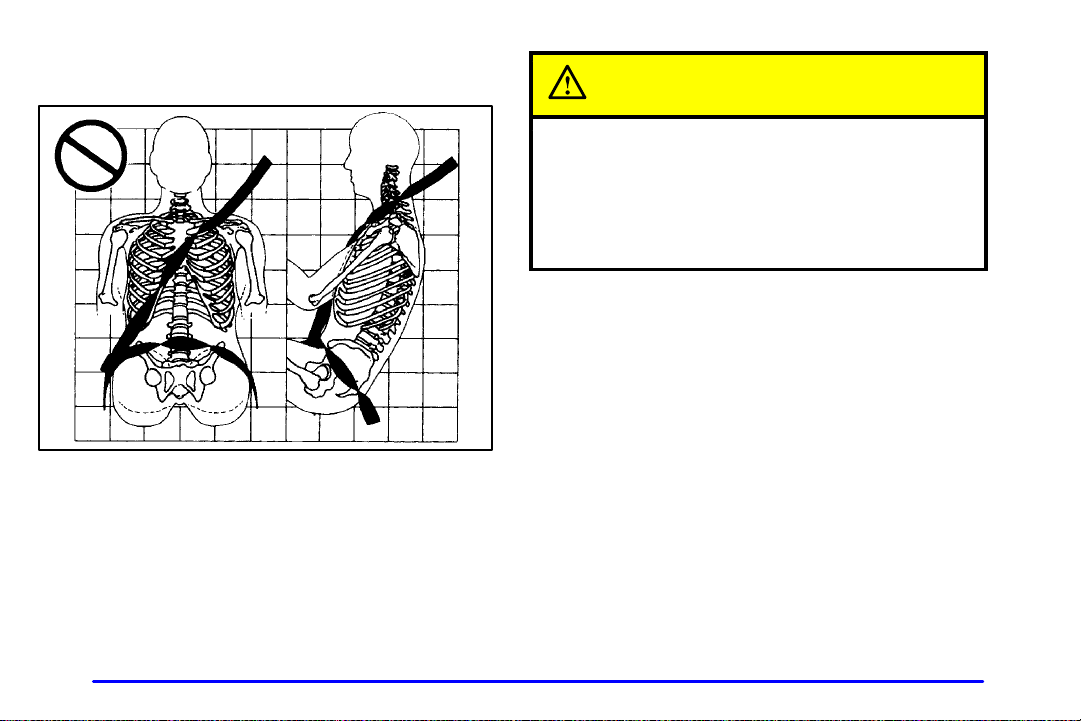
Q: What’s wrong with this?
A: The belt is twisted across the body.
CAUTION:
You can be seriously injured by a twisted belt. In
a crash, you wouldn’t have the full width of the
belt to spread impact forces. If a belt is twisted,
make it straight so it can work properly, or ask
your dealer to fix it.
1-20
Page 27
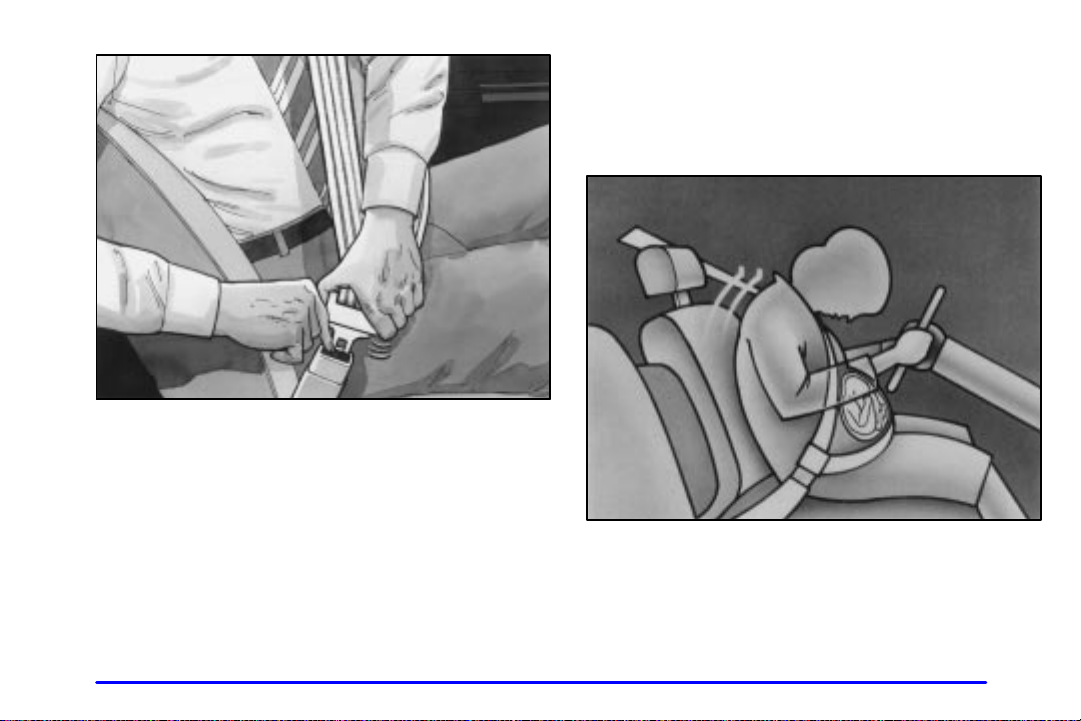
T o unlatch the belt, just push the button on the buckle.
The belt should go back out of the way.
Before you close the door, be sure the belt is out of the
way . If you slam the door on it, you can damage both the
belt and your vehicle.
Safety Belt Use During Pregnancy
Safety belts work for everyone, including pregnant
women. Like all occupants, they are more likely to be
seriously injured if they don’t wear safety belts.
A pregnant woman should wear a lap-shoulder belt, and
the lap portion should be worn as low as possible, below
the rounding, throughout the pregnancy.
1-21
Page 28
The best way to protect the fetus is to protect the
mother. When a safety belt is worn properly, it’s more
likely that the fetus won’t be hurt in a crash. For
pregnant women, as for anyone, the key to making
safety belts effective is wearing them properly.
Here are the most important things to know about the air
bag system:
CAUTION:
Right Front Passenger Position
T o learn how to wear the right front passenger’s
safety belt properly, see “Driver Position” earlier
in this section.
The right front passenger’s safety belt works the same
way as the driver’s safety belt
If you ever pull the shoulder portion of the belt out all
the way, you will engage the child restraint locking
feature. If this happens, just let the belt go back all the
way and start again.
-- except for one thing.
Supplemental Restraint System (SRS)
This part explains the Supplemental Restraint System
(SRS) or air bag system.
Your vehicle has air bags
and another air bag for the right front passenger.
Frontal air bags are designed to help reduce the risk of
injury from the force of an inflating air bag. But these
air bags must inflate very quickly to do their job and
comply with federal regulations.
1-22
-- one air bag for the driver
You can be severely injured or killed in a crash if
you aren’t wearing your safety belt
have air bags. Wearing your safety belt during a
crash helps reduce your chance of hitting things
inside the vehicle or being ejected from it. Air
bags are designed to work with safety belts, but
don’t replace them. Air bags are designed to
work only in moderate to severe crashes where
the front of your vehicle hits something. They
aren’t designed to inflate at all in rollover, rear
or low
-speed frontal crashes, or in many side
crashes. And, for some unrestrained occupants,
air bags may provide less protection in frontal
crashes than more forceful air bags have
provided in the past. Everyone in your vehicle
should wear a safety belt properly
not there’s an air bag for that person.
-- even if you
-- whether or
Page 29
CAUTION:
Air bags inflate with great force, faster than the
blink of an eye. If you’re too close to an inflating
air bag, as you would be if you were leaning
forward, it could seriously injure you. Safety belts
help keep you in position before and during a
crash. Always wear your safety belt, even with air
bags. The driver should sit as far back as possible
while still maintaining control of the vehicle.
CAUTION:
Anyone who is up against, or very close to, any
air bag when it inflates can be seriously injured
or killed. Air bags plus lap
the best protection for adults, but not for young
-shoulder belts offer
CAUTION: (Continued)
CAUTION: (Continued)
children and infants. Neither the vehicle’s safety
belt system nor its air bag system is designed for
them. Young children and infants need the
protection that a child restraint system can
provide. Always secure children properly in your
vehicle. To read how, see the part of this manual
called “Children.”
There is an air bag readiness
light on the instrument
panel, which shows the
air bag symbol.
The system checks the air bag electrical system for
malfunctions. The light tells you if there is an electrical
problem. See “Air Bag Readiness Light” in the Index
for more information.
1-23
Page 30
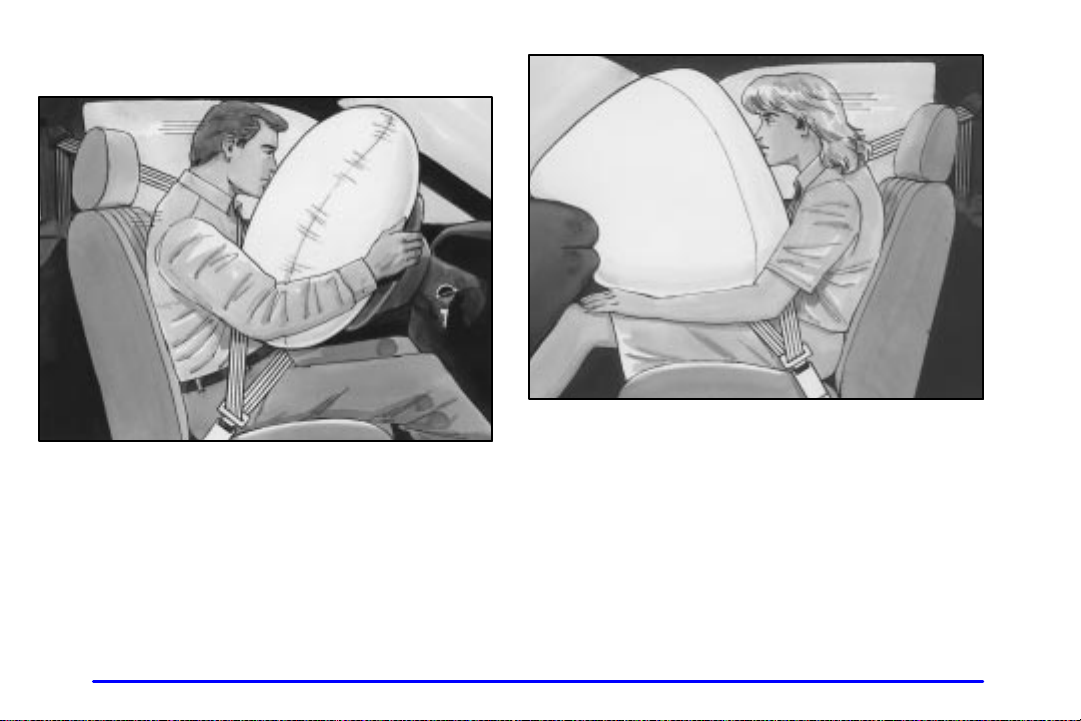
How the Air Bag System Works
Where are the air bags?
The driver’s air bag is in the middle of the steering wheel.
The right front passenger’s air bag is in the instrument
panel on the passenger’s side.
1-24
Page 31
CAUTION:
If something is between an occupant and an
air bag, the bag might not inflate properly or it
might force the object into that person causing
severe injury or even death. The path of an
inflating air bag must be kept clear. Don’t put
anything between an occupant and an air bag,
and don’t attach or put anything on the
steering wheel hub or on or near any other air
bag covering.
When should an air bag inflate?
An air bag is designed to inflate in a moderate to severe
frontal or near
only if the impact speed is above the system’s designed
“threshold level.” If your vehicle goes straight into a
wall that doesn’t move or deform, the threshold level is
about 9 to 14 mph (14 to 23 km/h). The threshold level
can vary, however, with specific vehicle design, so that
it can be somewhat above or below this range. If your
vehicle strikes something that will move or deform, such
as a parked car, the threshold level will be higher. The
air bag is not designed to inflate in rollovers, rear
impacts, or in many side impacts because inflation
would not help the occupant.
In any particular crash, no one can say whether an air
bag should have inflated simply because of the damage
to a vehicle or because of what the repair costs were.
Inflation is determined by the angle of the impact and
how quickly the vehicle slows down in frontal or
near
-frontal impacts.
-frontal crash. The air bag will inflate
1-25
Page 32
What makes an air bag inflate?
In an impact of sufficient severity, the air bag sensing
system detects that the vehicle is in a crash. The sensing
system triggers a release of gas from the inflator, which
inflates the air bag. The inflator, air bag and related
hardware are all part of the air bag modules inside the
steering wheel and in the instrument panel in front of the
right front passenger.
How does an air bag restrain?
In moderate to severe frontal or near
even belted occupants can contact the steering wheel or
the instrument panel. Air bags supplement the protection
provided by safety belts. Air bags distribute the force of
the impact more evenly over the occupant’s upper body,
stopping the occupant more gradually. But air bags
would not help you in many types of collisions,
including rollovers, rear impacts and many side impacts,
primarily because an occupant’s motion is not toward
those air bags. Air bags should never be regarded
as anything more than a supplement to safety belts,
and then only in moderate to severe frontal or
near
-frontal collisions.
-frontal collisions,
What will you see after an air bag inflates?
After an air bag inflates, it quickly deflates, so quickly
that some people may not even realize the air bag
inflated. Some components of the air bag module
steering wheel hub for the driver’s air bag, or the
instrument panel for the right front passenger’s
bag
-- will be hot for a short time. The parts of the bag
that come into contact with you may be warm, but not
too hot to touch. There will be some smoke and dust
coming from vents in the deflated air bags. Air bag
inflation doesn’t prevent the driver from seeing or from
being able to steer the vehicle, nor does it stop people
from leaving the vehicle.
-- the
CAUTION:
When an air bag inflates, there is dust in the air.
This dust could cause breathing problems for
people with a history of asthma or other
breathing trouble. To avoid this, everyone in the
vehicle should get out as soon as it is safe to do so.
If you have breathing problems but can’t get out
of the vehicle after an air bag inflates, then get
fresh air by opening a window or door.
1-26
Page 33
In many crashes severe enough to inflate an air bag,
windshields are broken by vehicle deformation.
Additional windshield breakage may also occur from the
right front passenger air bag.
D
Air bags are designed to inflate only once. After they
inflate, you’ll need some new parts for your air bag
system. If you don’t get them, the air bag system
won’t be there to help protect you in another crash.
A new system will include air bag modules and
possibly other parts. The service manual for your
vehicle covers the need to replace other parts.
D
Your vehicle is equipped with a crash sensing and
diagnostic module, which records information about
the air bag system. The module records information
about the readiness of the system, when the system
commands air bag inflation and driver’s safety belt
usage at deployment.
D
Let only qualified technicians work on your air bag
system. Improper service can mean that your air
bag system won’t work properly. See your dealer
for service.
NOTICE:
If you damage the covering for the driver’s or the
right front passenger’s air bag, the bag may not
work properly. You may have to replace the air
bag module in the steering wheel or both the air
bag module and the instrument panel for the
right front passenger’s air bag. Do not open or
break the air bag coverings.
1-27
Page 34
Servicing Your Air Bag-Equipped Vehicle
Air bags affect how your vehicle should be serviced.
There are parts of the air bag system in several places
around your vehicle. You don’t want the system to
inflate while someone is working on your vehicle. Your
dealer and the service manual have information about
servicing your vehicle and the air bag system. T o
purchase a service manual, see “Service and Owner
Publications” in the Index.
CAUTION:
For up to 10 minutes after the ignition key is
turned off and the battery is disconnected, an air
bag can still inflate during improper service. You
can be injured if you are close to an air bag when
it inflates. Avoid yellow connectors. They are
probably part of the air bag system. Be sure to
follow proper service procedures, and make sure
the person performing work for you is qualified
to do so.
The air bag system does not need regular maintenance.
Rear Seat Passengers
It’s very important for rear seat passengers to buckle up!
Accident statistics show that unbelted people in the rear
seat are hurt more often in crashes than those who are
wearing safety belts.
Rear passengers who aren’t safety belted can be thrown
out of the vehicle in a crash. And they can strike others
in the vehicle who are wearing safety belts.
Rear Seat Outside Passenger Positions
Lap-Shoulder Belt
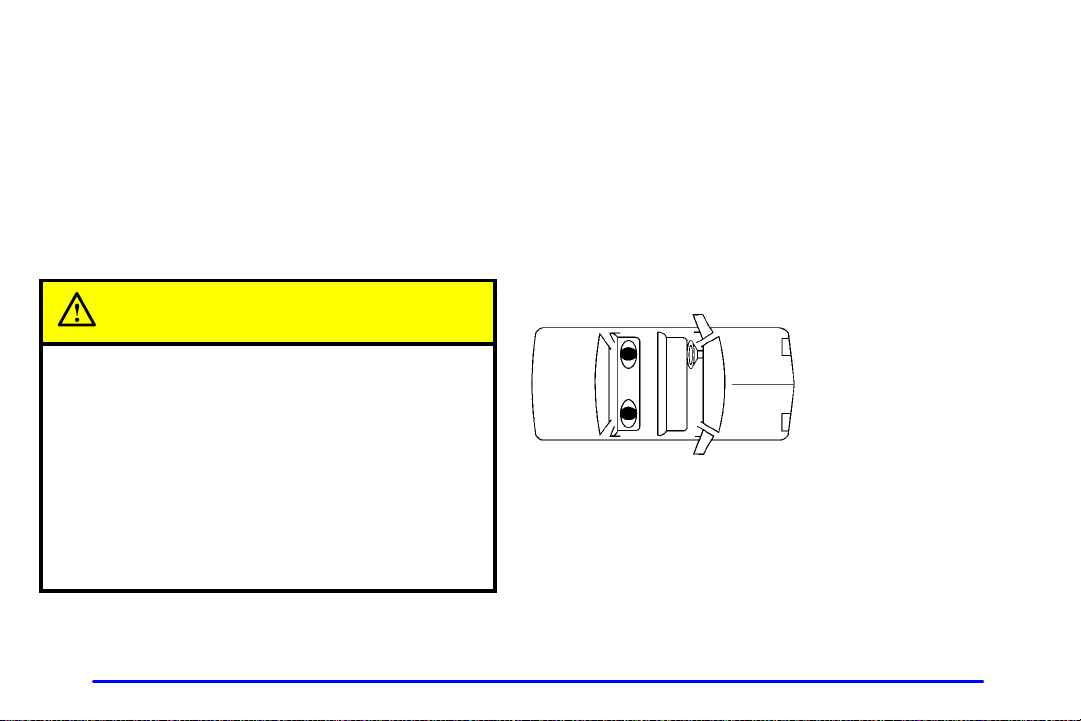
The positions next to the windows have lap
belts. Here’s how to wear one properly.
-shoulder
1-28
Page 35
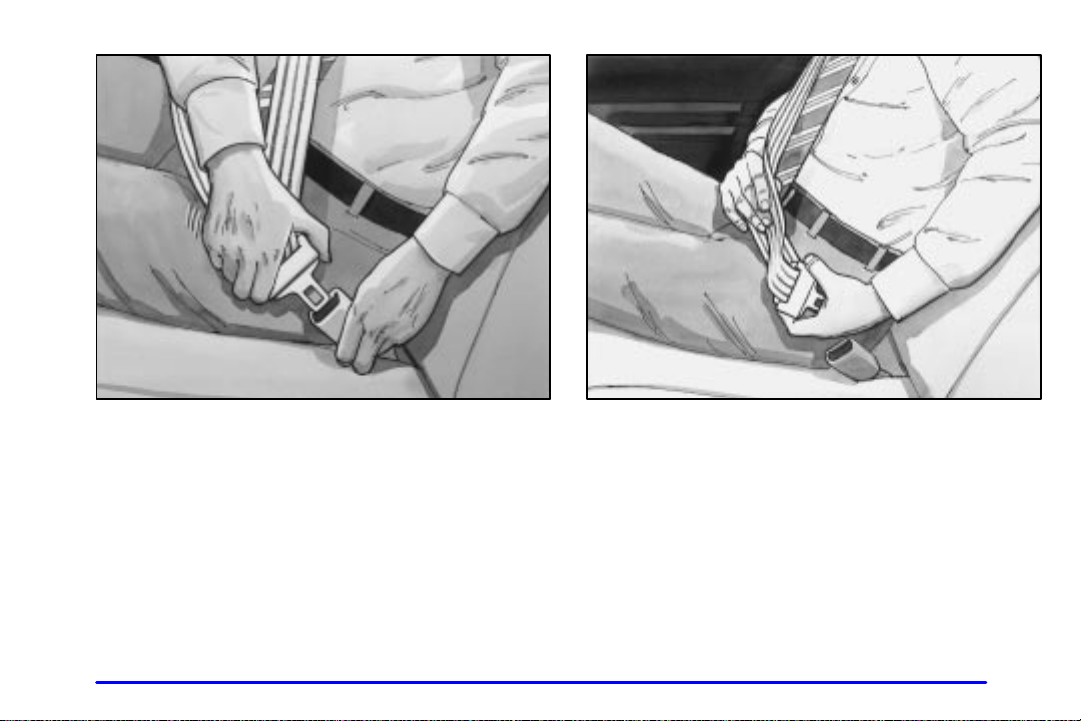
1. Pick up the latch plate and pull the belt across you.
Don’t let it get twisted.
The shoulder belt may lock if you pull the belt across
you very quickly. If this happens, let the belt go back
slightly to unlock it. Then pull the belt across you
more slowly.
2. Push the latch plate into the buckle until it clicks.
If the belt stops before it reaches the buckle, tilt the
latch plate and keep pulling until you can buckle it.
Pull up on the latch plate to make sure it is secure.
If the belt is not long enough, see “Safety Belt
Extender” at the end of this section. Make sure the
release button on the buckle is positioned so you
would be able to unbuckle the safety belt quickly if
you ever had to.
1-29
Page 36
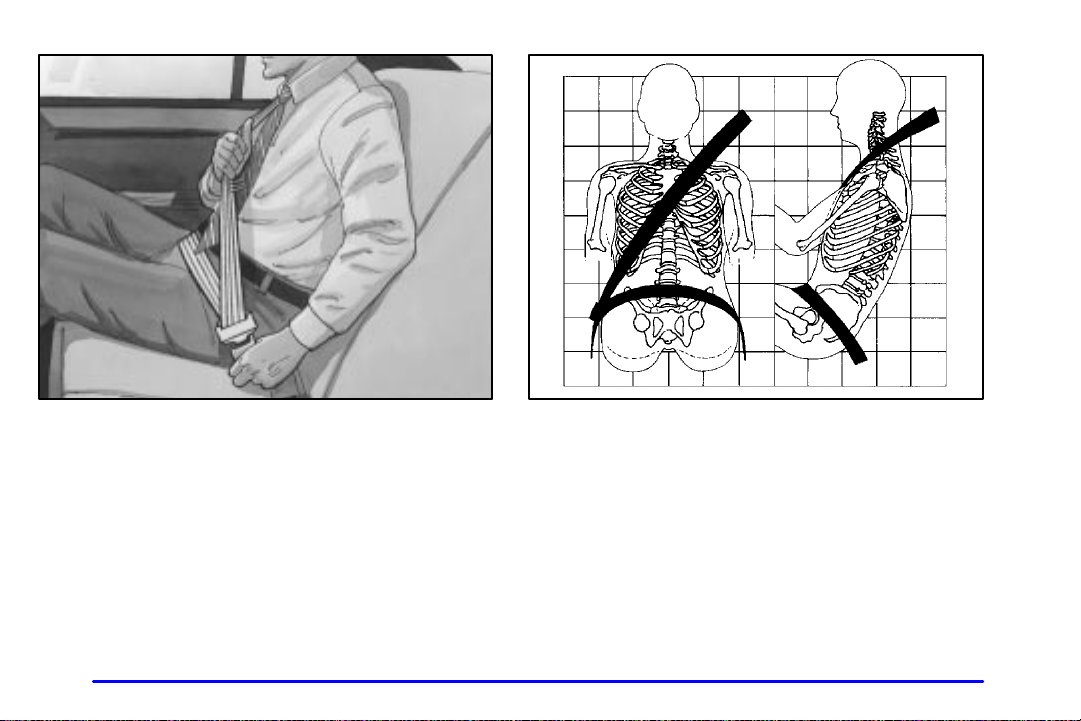
3. T o make the lap part tight, pull down on the buckle
end of the belt as you pull up on the shoulder part.
1-30
The lap part of the belt should be worn low and snug on
the hips, just touching the thighs. In a crash, this applies
force to the strong pelvic bones. And you’d be less likely
to slide under the lap belt. If you slid under it, the belt
would apply force at your abdomen. This could cause
serious or even fatal injuries. The shoulder belt should go
over the shoulder and across the chest. These parts of the
body are best able to take belt restraining forces.
Page 37
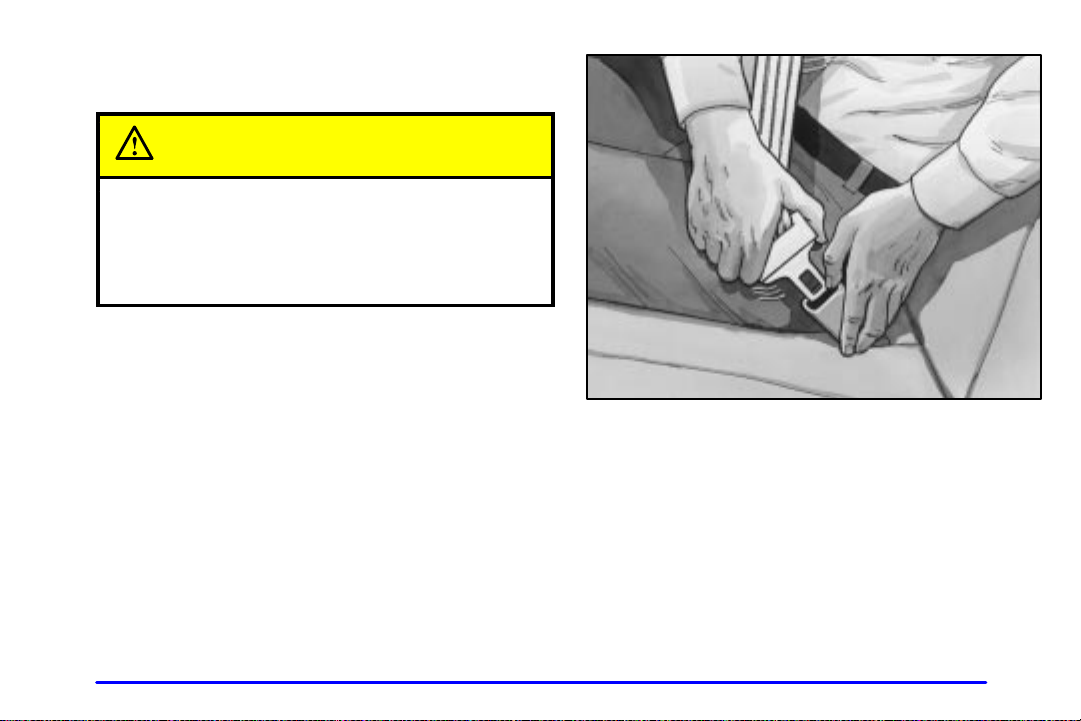
The safety belt locks if there’s a sudden stop or a crash,
or if you pull the belt very quickly out of the retractor.
CAUTION:
You can be seriously hurt if your shoulder belt is
too loose. In a crash, you would move forward
too much, which could increase injury. The
shoulder belt should fit against your body.
T o unlatch the belt, just push the button on the buckle.
1-31
Page 38
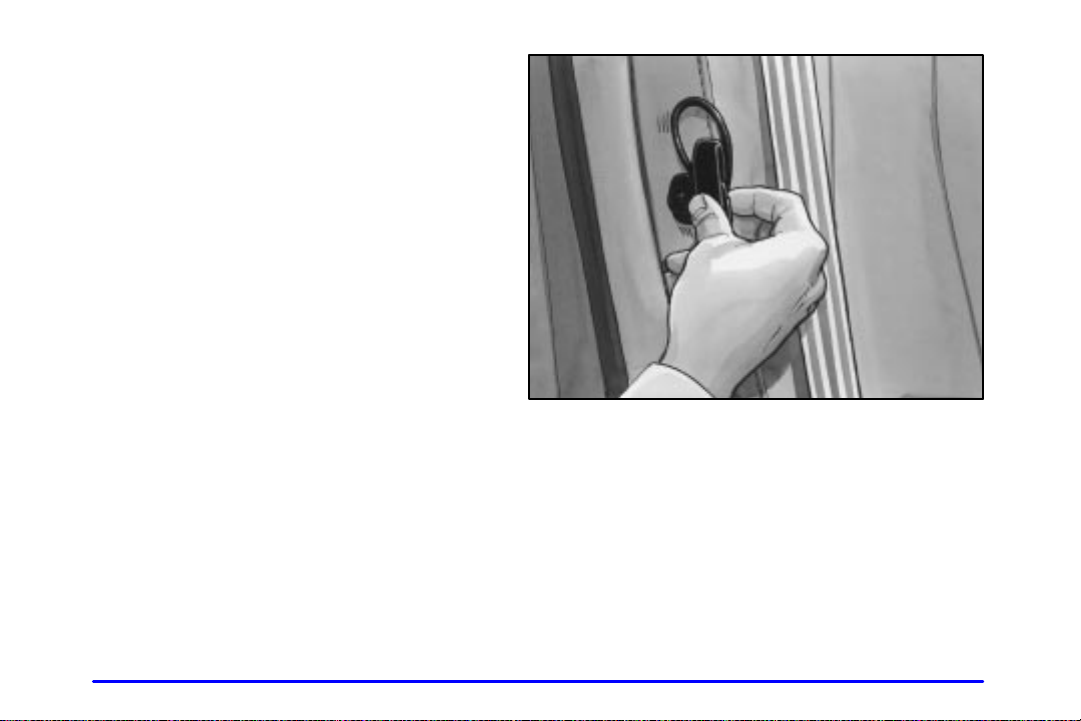
Rear Safety Belt Comfort Guides for Children and Small Adults
Rear shoulder belt comfort guides will provide added
safety belt comfort for older children who have
outgrown booster seats and for small adults. When
installed on a shoulder belt, the comfort guide better
positions the belt away from the neck and head.
There is one guide for each outside passenger position in
the rear seat. T o provide added safety belt comfort for
children who have outgrown child restraints and for
smaller adults, the comfort guides may be installed on
the shoulder belts. Here’s how to install a comfort guide
and use the safety belt:
1. Pull the elastic cord out from between the edge of
the seatback and the interior body to remove the
guide from its storage clip.
1-32
Page 39
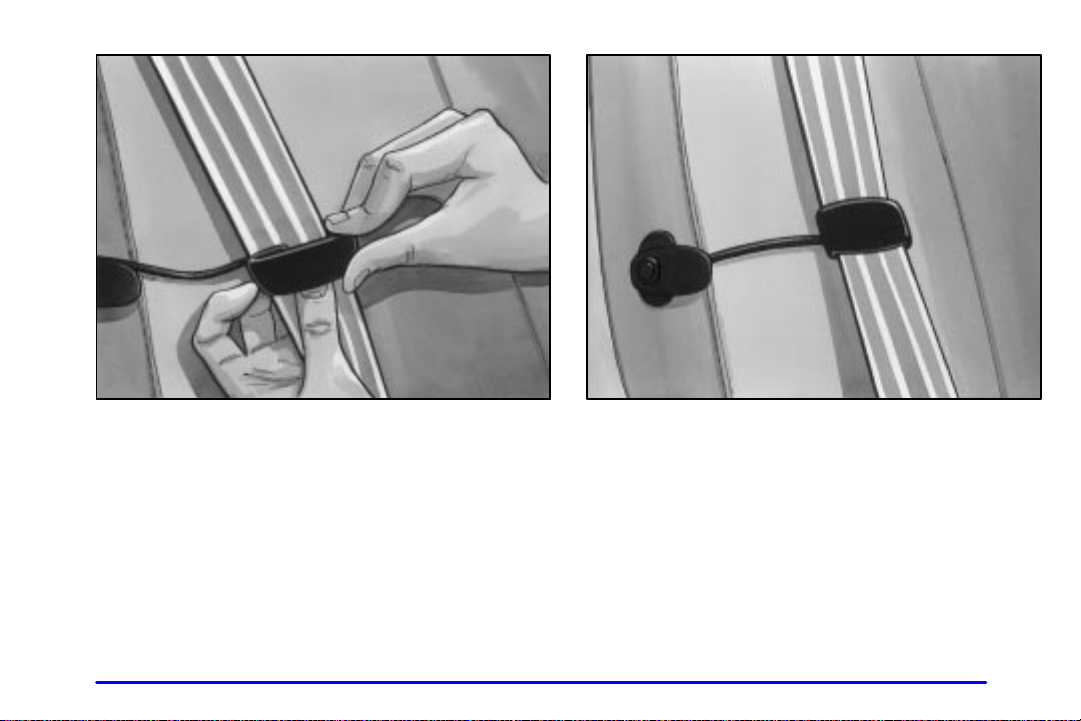
2. Slide the guide under and past the belt. The elastic
cord must be under the belt. Then, place the guide
over the belt, and insert the two edges of the belt into
the slots of the guide.
3. Be sure that the belt is not twisted and it lies flat.
The elastic cord must be under the belt and the guide
on top.
1-33
Page 40
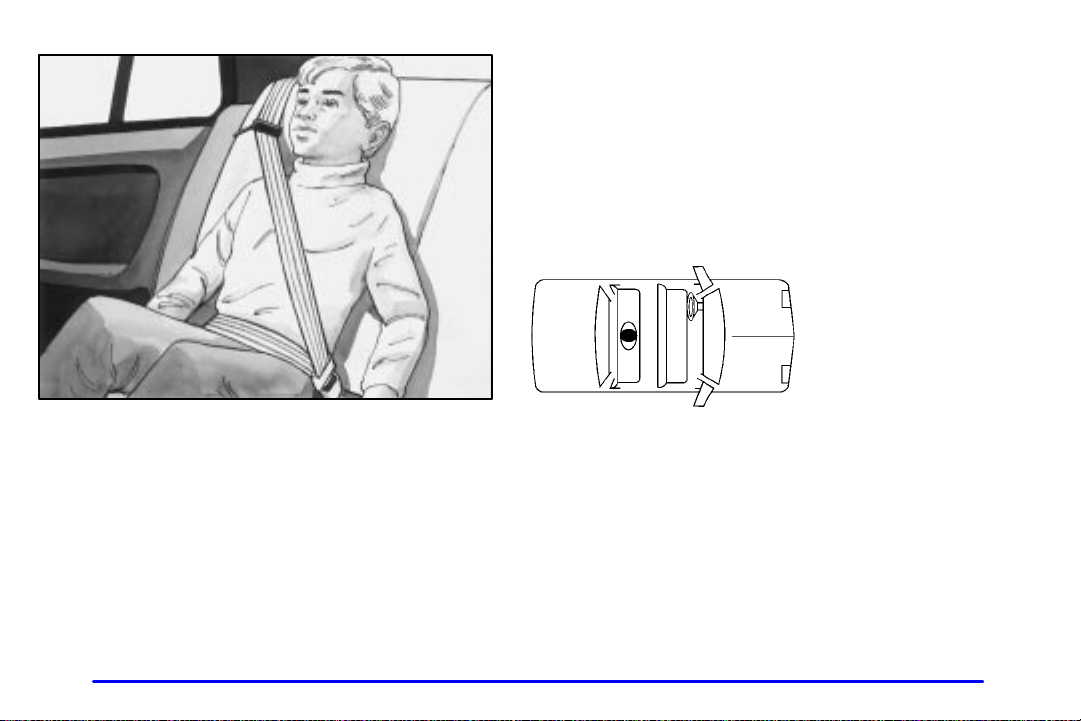
4. Buckle, position and release the safety belt as
described in “Rear Seat Outside Passenger Positions”
earlier in this section. Make sure that the shoulder
belt crosses the shoulder.
T o remove and store the comfort guides, squeeze the
belt edges together so that you can take them out of
the guides. Pull the guide upward to expose its storage
clip, and then slide the guide onto the clip. Turn the
guide and clip inward and in between the seatback
and the interior body, leaving only the loop of elastic
cord exposed.
Center Passenger Position
1-34
Page 41
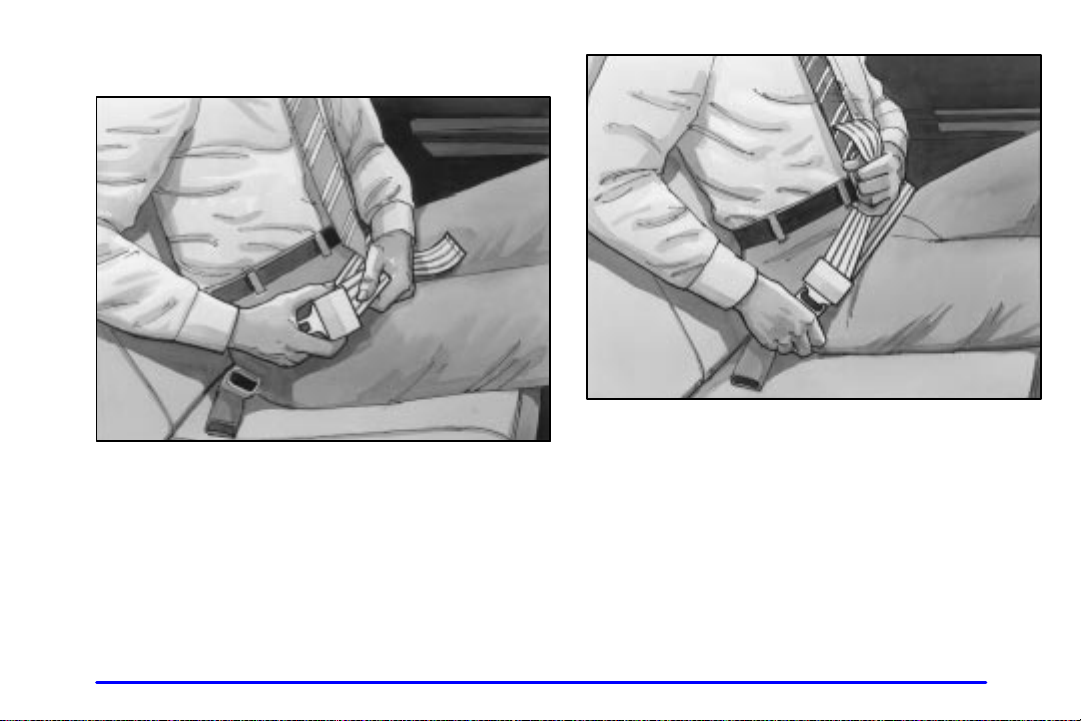
Lap Belt
When you sit in the center seating position, you have a
lap safety belt, which has no retractor. To make the belt
longer, tilt the latch plate and pull it along the belt.
T o make the belt shorter, pull its free end as shown until
the belt is snug.
Buckle, position and release it the same way as the lap
part of a lap
see “Safety Belt Extender” at the end of this section.
Make sure the release button on the buckle is positioned
so you would be able to unbuckle the safety belt quickly
if you ever had to.
-shoulder belt. If the belt isn’t long enough,
1-35
Page 42
Children
Everyone in a vehicle needs protection! This includes
infants and all other children. Neither the distance
traveled nor the age and size of the traveler changes the
need, for everyone, to use safety restraints. In fact, the
law in every state in the United States and in every
Canadian province says children up to some age must be
restrained while in a vehicle.
Infants and Young Children
Every time infants and young children ride in vehicles,
they should have the protection provided by the
appropriate restraint. Young children should not use the
vehicle’s safety belts, unless there is no other choice.
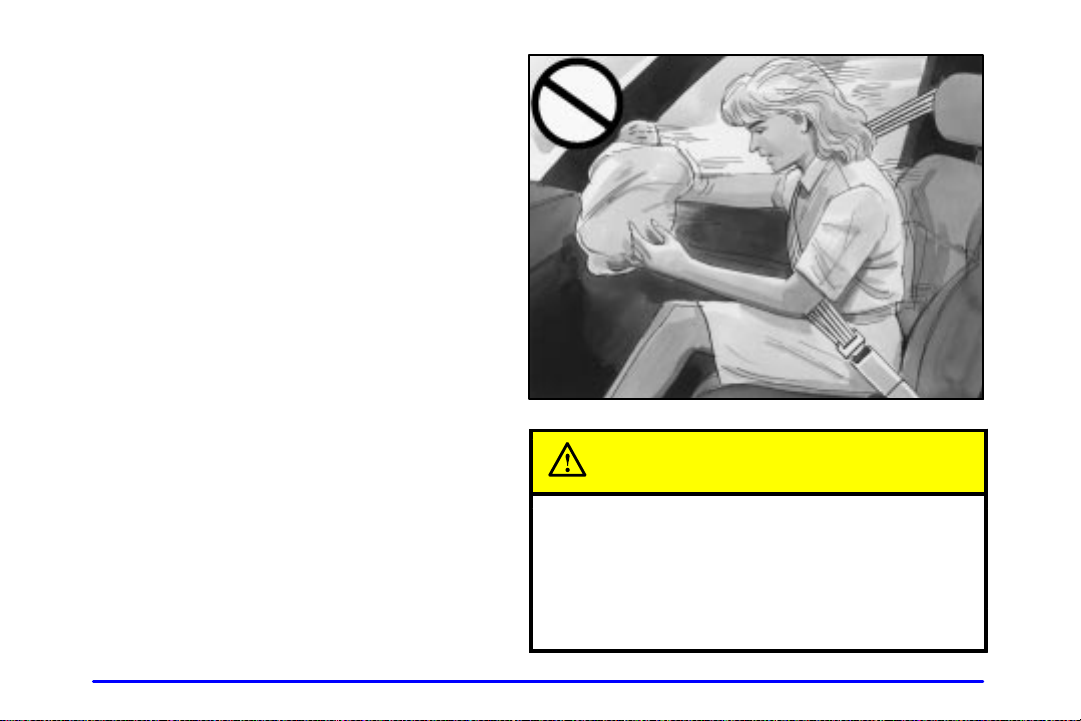
CAUTION:
People should never hold a baby in their arms
while riding in a vehicle. A baby doesn’t weigh
much
-- until a crash. During a crash a baby will
become so heavy it is not possible to hold it.
CAUTION: (Continued)
1-36
Page 43
CAUTION: (Continued)
For example, in a crash at only 25 mph
(40 km/h), a 12
become a 240
arms. A baby should be secured in an
appropriate restraint.
-lb. (5.5 kg) baby will suddenly
-lb. (110 kg) force on a person’s
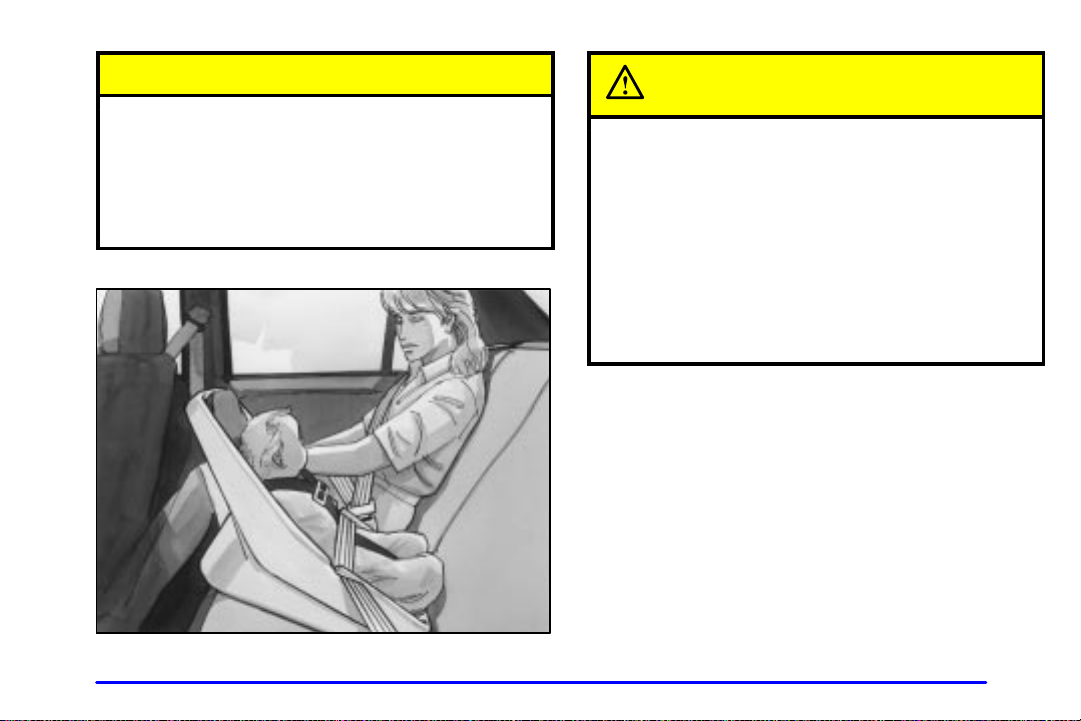
CAUTION:
Children who are up against, or very close to, any
air bag when it inflates can be seriously injured
or killed. Air bags plus lap
outstanding protection for adults and older
children, but not for young children and infants.
Neither the vehicle’s safety belt system nor its air
bag system is designed for them. Young children
and infants need the protection that a child
restraint system can provide.
-shoulder belts offer
1-37
Page 44

Q: What are the different types of add-on
child restraints?
A: Add-on child restraints, which are purchased by the
vehicle’s owner, are available in four basic types.
Selection of a particular restraint should take into
consideration not only the child’s weight, height
and age but also whether or not the restraint will be
compatible with the motor vehicle in which it will
be used.
For most basic types of child restraints, there are
many different models available. When purchasing
a child restraint, be sure it is designed to be used in
a motor vehicle. If it is, the restraint will have a
label saying that it meets federal motor vehicle
safety standards.
The restraint manufacturer’s instructions that come
with the restraint state the weight and height
limitations for a particular child restraint. In
addition, there are many kinds of restraints
available for children with special needs.
1-38
Page 45
CAUTION:
CAUTION:
Newborn infants need complete support,
including support for the head and neck. This is
necessary because a newborn infant’s neck is
weak and its head weighs so much compared with
the rest of its body. In a crash, an infant in a
rear
-facing seat settles into the restraint, so the
crash forces can be distributed across the
strongest part of an infant’s body, the back and
shoulders. Infants always should be secured in
appropriate infant restraints.
The body structure of a young child is quite
unlike that of an adult or older child, for whom
the safety belts are designed. A young child’s hip
bones are still so small that the vehicle’s regular
safety belt may not remain low on the hip bones,
as it should. Instead, it may settle up around the
child’s abdomen. In a crash, the belt would apply
force on a body area that’s unprotected by any
bony structure. This alone could cause serious or
fatal injuries. Young children always should be
secured in appropriate child restraints.
1-39
Page 46
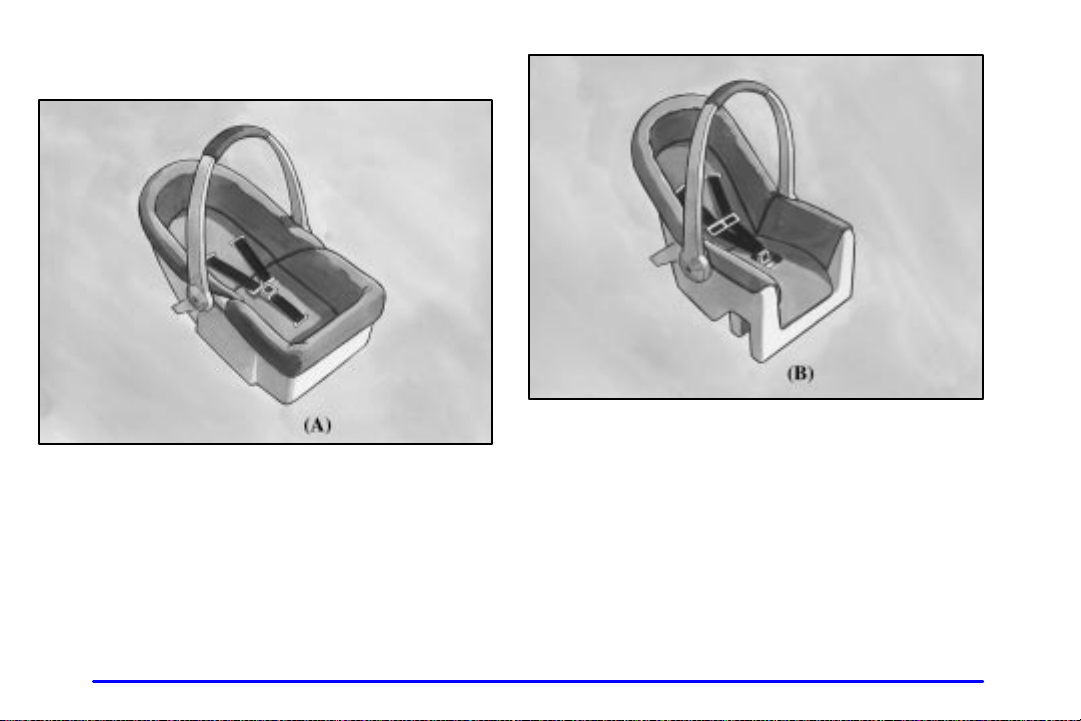
Restraint Systems for Children
An infant car bed (A), a special bed made for use in a
motor vehicle, is an infant restraint system designed to
restrain or position a child on a continuous flat surface.
Make sure that the infant’s head rests toward the center
of the vehicle.
A rear-facing infant seat (B) provides restraint with the
seating surface against the back of the infant. The
harness system holds the infant in place and, in a crash,
acts to keep the infant positioned in the restraint.
1-40
Page 47
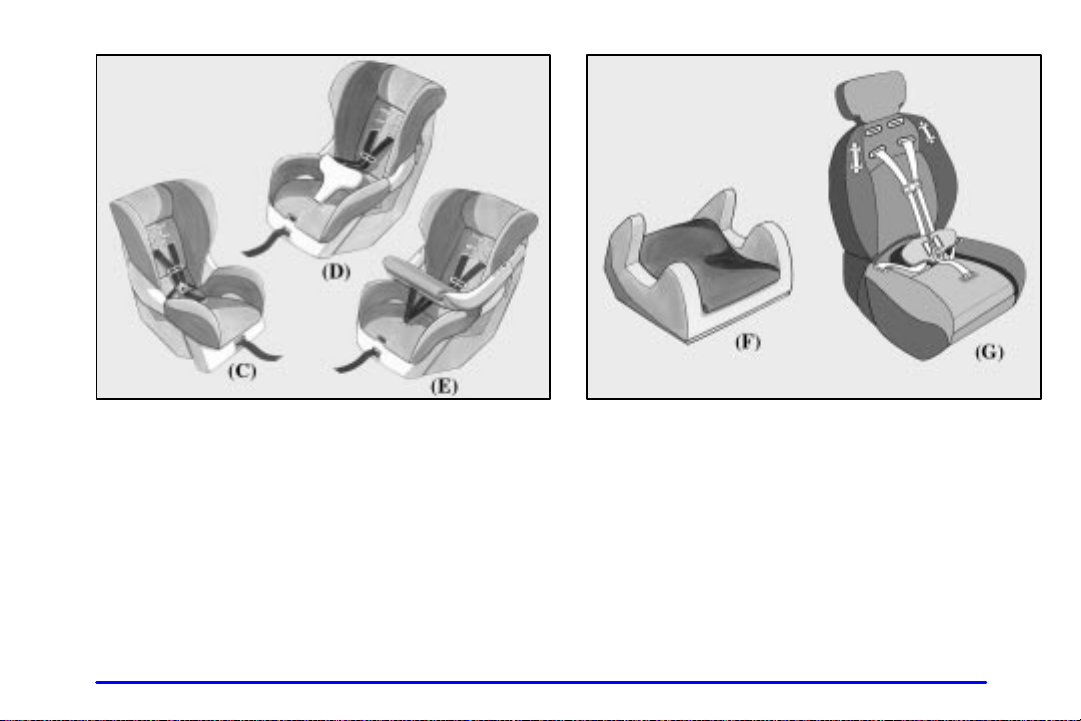
A forward-facing child seat (C-E) provides restraint for
the child’s body with the harness and also sometimes
with surfaces such as T
-shaped or shelf-like shields.
A booster seat (F-G) is a child restraint designed to
improve the fit of the vehicle’s safety belt system. Some
booster seats have a shoulder belt positioner, and some
high
-back booster seats have a five-point harness. A
booster seat can also help a child to see out the window.
1-41
Page 48

Q: How do child restraints work?
A: A child restraint system is any device designed for
use in a motor vehicle to restrain, seat, or position
children. A built
permanent part of the motor vehicle. An add
child restraint system is a portable one, which is
purchased by the vehicle’s owner.
For many years, add
the adult belt system in the vehicle. T o help reduce
the chance of injury, the child also has to be
secured within the restraint. The vehicle’s belt
system secures the add
vehicle, and the add
system holds the child in place within the restraint.
One system, the three
come down over each of the infant’s shoulders and
buckle together at the crotch. The five
harness system has two shoulder straps, two hip
straps and a crotch strap. A shield may take the
place of hip straps. A T
straps that are attached to a flat pad which rests low
against the child’s body. A shelf
shield has straps that are attached to a wide,
shelf
-like shield that swings up or to the side.
-in child restraint system is a
-on
-on child restraints have used
-on child restraint in the
-on child restraint’s harness
-point harness, has straps that
-point
-shaped shield has shoulder
- or armrest-type
When choosing a child restraint, be sure the child
restraint is designed to be used in a vehicle. If it is, it
will have a label saying that it meets federal motor
vehicle safety standards.
Then follow the instructions for the restraint. You may
find these instructions on the restraint itself or in a
booklet, or both. These restraints use the belt system in
your vehicle, but the child also has to be secured within
the restraint to help reduce the chance of personal injury.
When securing an add-on child restraint, refer to the
instructions that come with the restraint which may be
on the restraint itself or in a booklet, or both, and to this
manual. The child restraint instructions are important, so
if they are not available, obtain a replacement copy from
the manufacturer.
Where to Put the Restraint
Accident statistics show that children are safer if they
are restrained in the rear rather than the front seat.
General Motors, therefore, recommends that child
restraints be secured in the rear seat including an infant
riding in a rear
forward
booster seat. Never put a rear
the front passenger seat. Here’s why:
-facing infant seat, a child riding in a
-facing child seat and an older child riding in a
-facing child restraint in
1-42
Page 49
CAUTION:
A child in a rear-facing child restraint can be
seriously injured or killed if the right front
passenger’s air bag inflates. This is because the
back of the rear
very close to the inflating air bag. Always secure
a rear
-facing child restraint in a rear seat.
You may secure a forward-facing child restraint
in the right front seat, but before you do, always
move the front passenger seat as far back as it
will go. It’s better to secure the child restraint in
a rear seat.
Wherever you install it, be sure to secure the child
restraint properly.
Keep in mind that an unsecured child restraint can move
around in a collision or sudden stop and injure people in
the vehicle. Be sure to properly secure any child
restraint in your vehicle
-facing child restraint would be
-- even when no child is in it.
Top Strap
Some child restraints have a top strap, or “top tether.”
It can help restrain the child restraint during a collision.
For it to work, a top strap must be properly anchored
to the vehicle. Some top strap
are designed for use with or without the top strap being
anchored. Others require the top strap always to be
anchored. Be sure to read and follow the instructions
for your child restraint. If yours requires that the top
strap be anchored, don’t use the restraint unless it is
anchored properly.
If the child restraint does not have a top strap, one can
be obtained, in kit form, for many child restraints.
Ask the child restraint manufacturer whether or not a kit
is available.
-equipped child restraints
1-43
Page 50
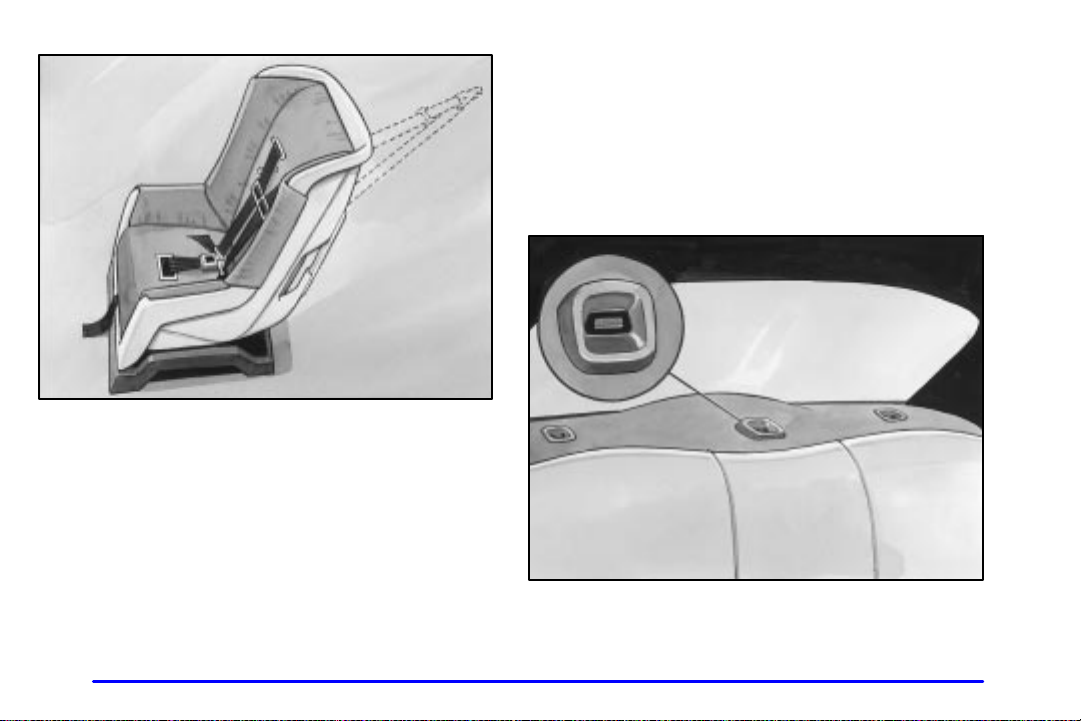
In Canada, the law requires that forward-facing child
restraints have a top strap, and that the strap be
anchored. In the United States, some child restraints also
have a top strap. If your child restraint has a top strap, it
should be anchored.
Anchor the top strap to one of the following anchor
points. Be sure to use an anchor point located on the
same side of the vehicle as the seating position where
the child restraint will be placed.
Once you have the top strap anchored, you’ll be ready to
secure the child restraint itself. Tighten the top strap
when and as the child restraint manufacturer’s
instructions say.
T op strap anchors are already installed in your vehicle
for the rear seating positions. You’ll find them behind
the rear seat on the filler panel.
1-44
Page 51
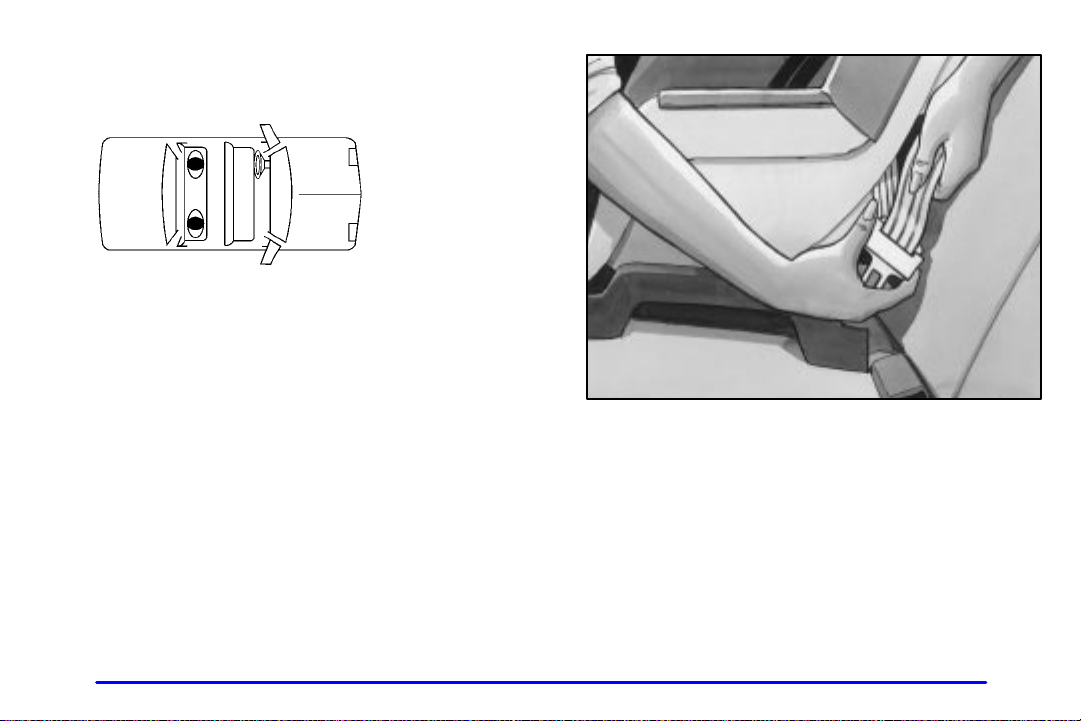
Securing a Child Restraint in a Rear Outside Seat Position
You’ll be using the lap-shoulder belt. See the earlier part
about the top strap if the child restraint has one. Be sure
to follow the instructions that came with the child
restraint. Secure the child in the child restraint when and
as the instructions say.
1. Put the restraint on the seat.
2. Pick up the latch plate, and run the lap and shoulder
portions of the vehicle’s safety belt through or
around the restraint. The child restraint instructions
will show you how.
Tilt the latch plate to adjust the belt if needed.
If the shoulder belt goes in front of the child’s face or
neck, put it behind the child restraint.
1-45
Page 52
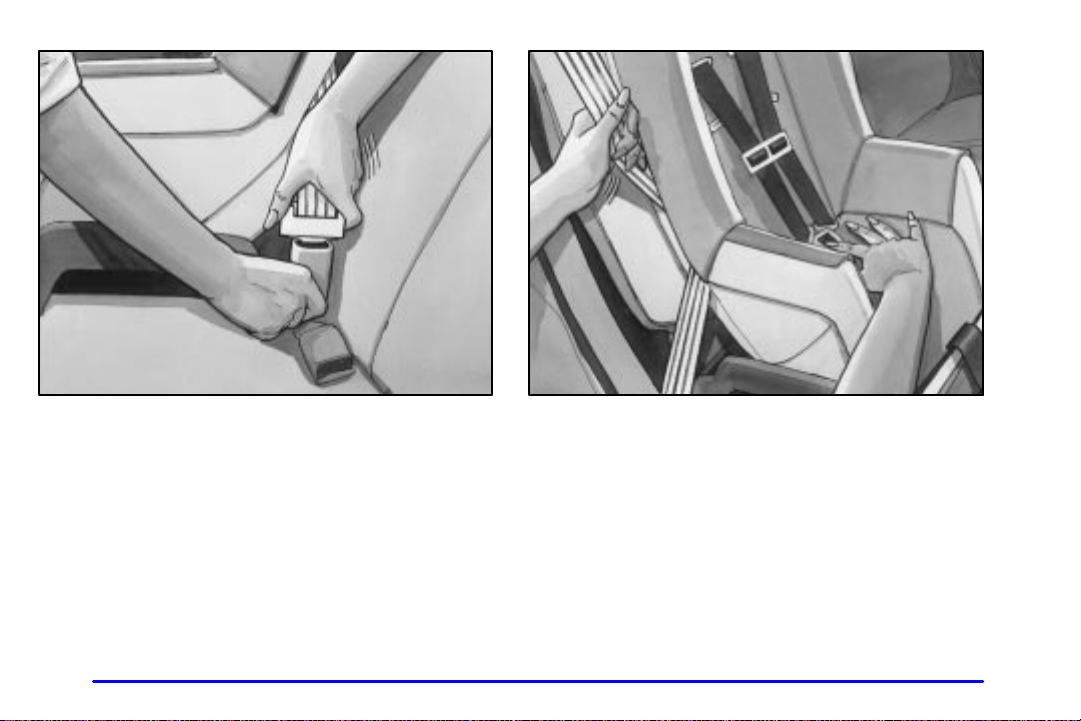
3. Buckle the belt. Make sure the release button is
positioned so you would be able to unbuckle the
safety belt quickly if you ever had to.
1-46
4. T o tighten the belt, pull up on the shoulder belt while
you push down on the child restraint. If you’re using
a forward-facing child restraint, you may find it
helpful to use your knee to push down on the child
restraint as you tighten the belt.
5. Push and pull the child restraint in different
directions to be sure it is secure.
T o remove the child restraint, just unbuckle the vehicle’s
safety belt and let it go back all the way. The safety belt
will move freely again and be ready to work for an adult
or larger child passenger.
Page 53
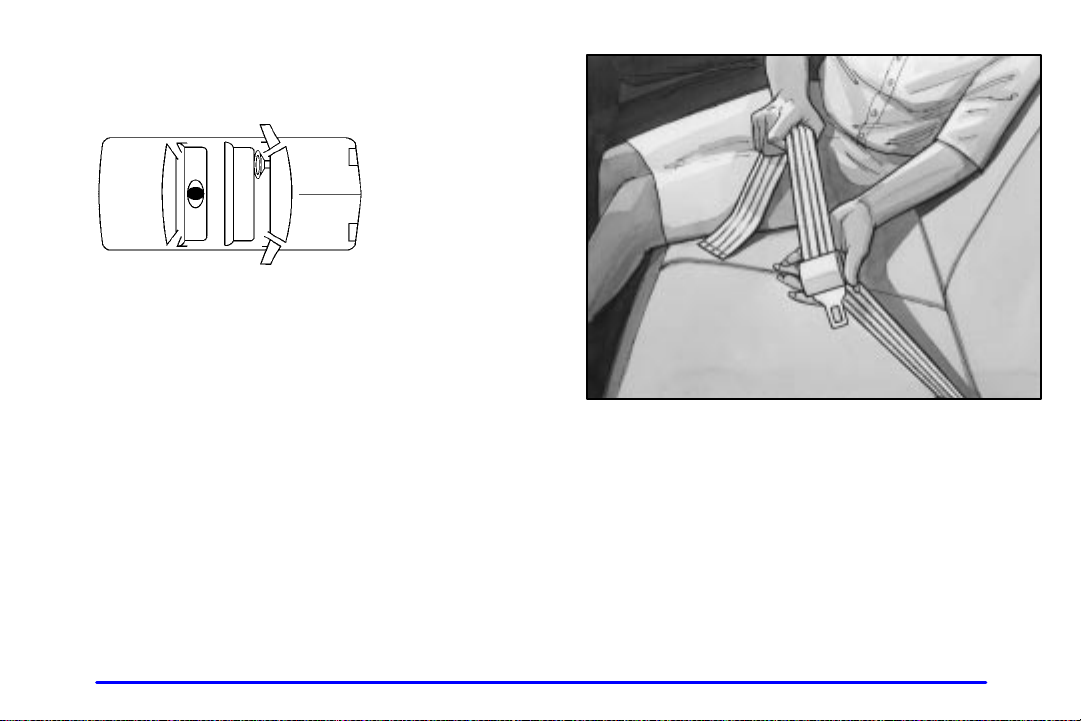
Securing a Child Restraint in the Center Rear Seat Position
You’ll be using the lap belt. Be sure to follow the
instructions that came with the child restraint. Secure
the child in the child restraint when and as the
instructions say.
See the earlier part about the top strap if the child
restraint has one.
1. Make the belt as long as possible by tilting the latch
plate and pulling it along the belt.
2. Put the restraint on the seat.
3. Run the vehicle’s safety belt through or around the
restraint. The child restraint instructions will show
you how.
1-47
Page 54
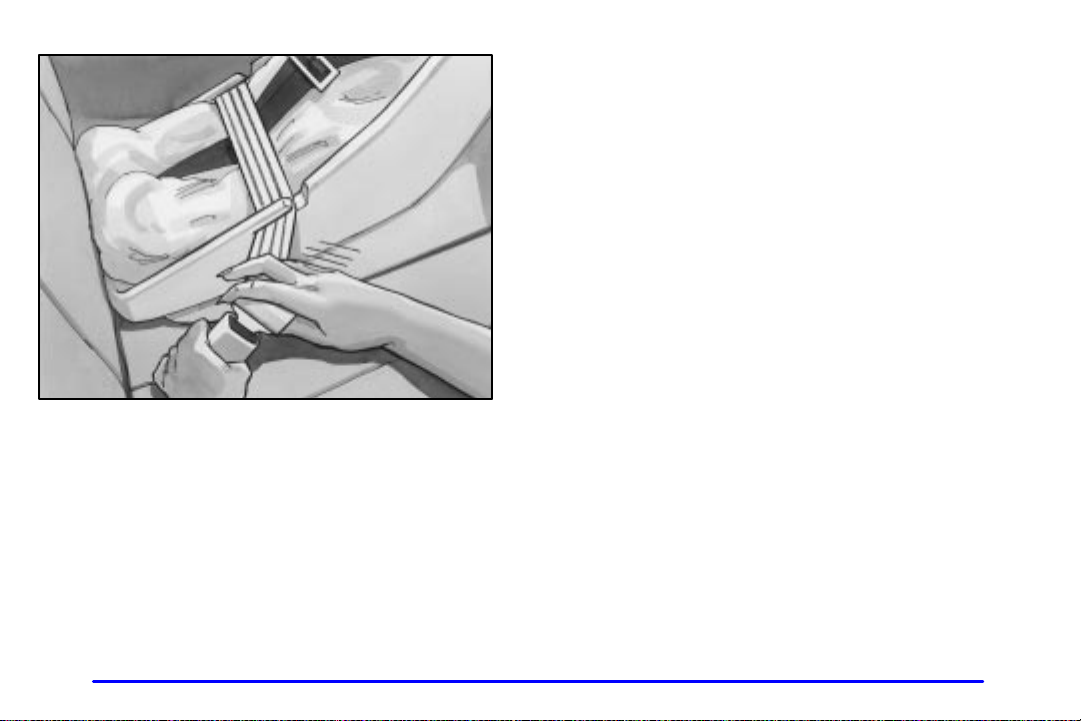
4. Buckle the belt. Make sure the release button is
positioned so you would be able to unbuckle the
safety belt quickly if you ever had to.
5. T o tighten the belt, pull its free end while you push
down on the child restraint. If you’re using a
forward
helpful to use your knee to push down on the child
restraint as you tighten the belt.
6. Push and pull the child restraint in different
directions to be sure it is secure.
T o remove the child restraint, just unbuckle the vehicle’s
safety belt. It will be ready to work for an adult or larger
child passenger.
-facing child restraint, you may find it
1-48
Page 55
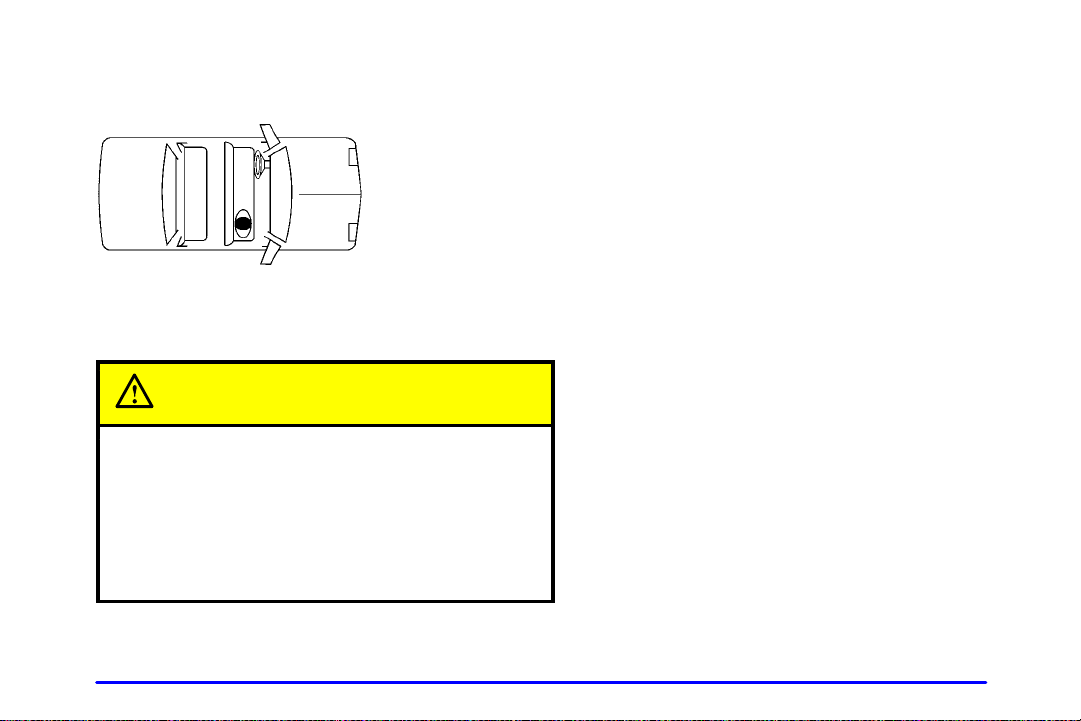
Securing a Child Restraint in the Right Front Seat Position
Your vehicle has a right front passenger air bag. Never
put a rear
-facing child restraint in this seat. Here’s why:
CAUTION:
A child in a rear-facing child restraint can be
seriously injured or killed if the right front
passenger’s air bag inflates. This is because the
back of the rear
very close to the inflating air bag. Always secure
a rear
-facing child restraint in the rear seat.
-facing child restraint would be
Although a rear seat is a safer place, you can secure a
forward
You’ll be using the lap
about the top strap if the child restraint has one. Be sure
to follow the instructions that came with the child
restraint. Secure the child in the child restraint when and
as the instructions say.
1. Because your vehicle has a right front passenger air
2. Put the restraint on the seat.
3. Pick up the latch plate, and run the lap and shoulder
-facing child restraint in the right front seat.
-shoulder belt. See the earlier part
bag, always move the seat as far back as it will go
before securing a forward
See “Seats” in the Index.
portions of the vehicle’s safety belt through or
around the restraint. The child restraint instructions
will show you how.
If the shoulder belt goes in front of the child’s face or
neck, put it behind the child restraint.
-facing child restraint.
1-49
Page 56
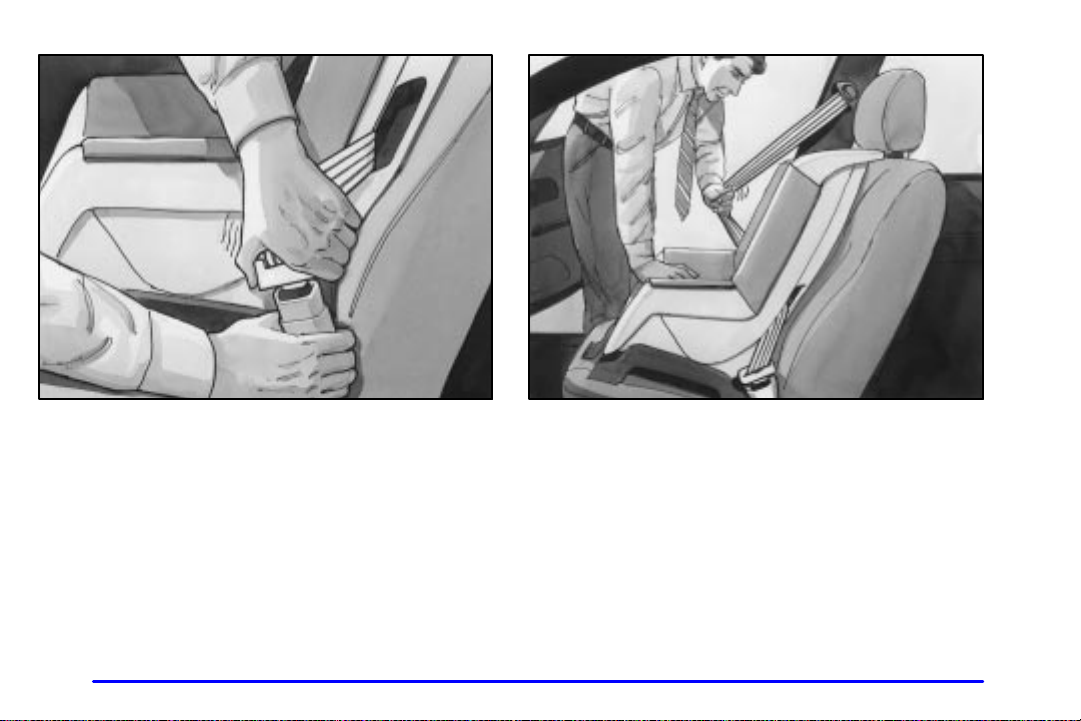
4. Buckle the belt. Make sure the release button is
positioned so you would be able to unbuckle the
safety belt quickly if you ever had to.
1-50
5. Pull the rest of the shoulder belt all the way out of
the retractor to set the lock.
Page 57
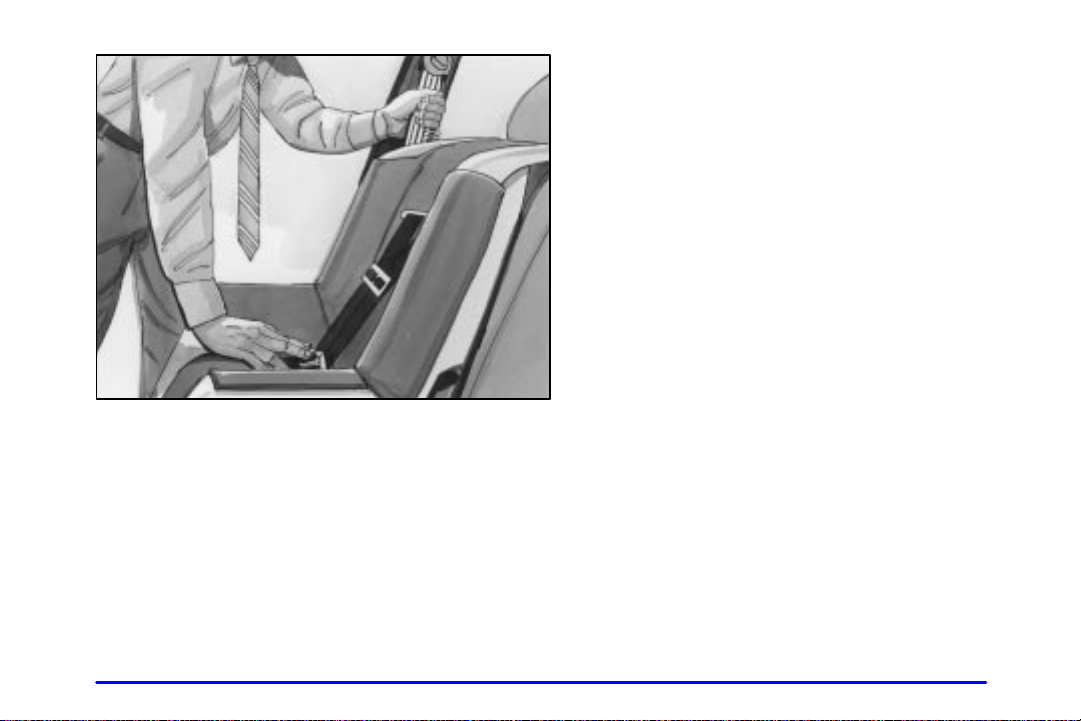
6. To tighten the belt, feed the shoulder belt back into the
retractor while you push down on the child restraint.
You may find it helpful to use your knee to push down
on the child restraint as you tighten the belt.
7. Push and pull the child restraint in different
directions to be sure it is secure.
T o remove the child restraint, just unbuckle the vehicle’s
safety belt and let it go back all the way. The safety belt
will move freely again and be ready to work for an adult
or larger child passenger.
1-51
Page 58
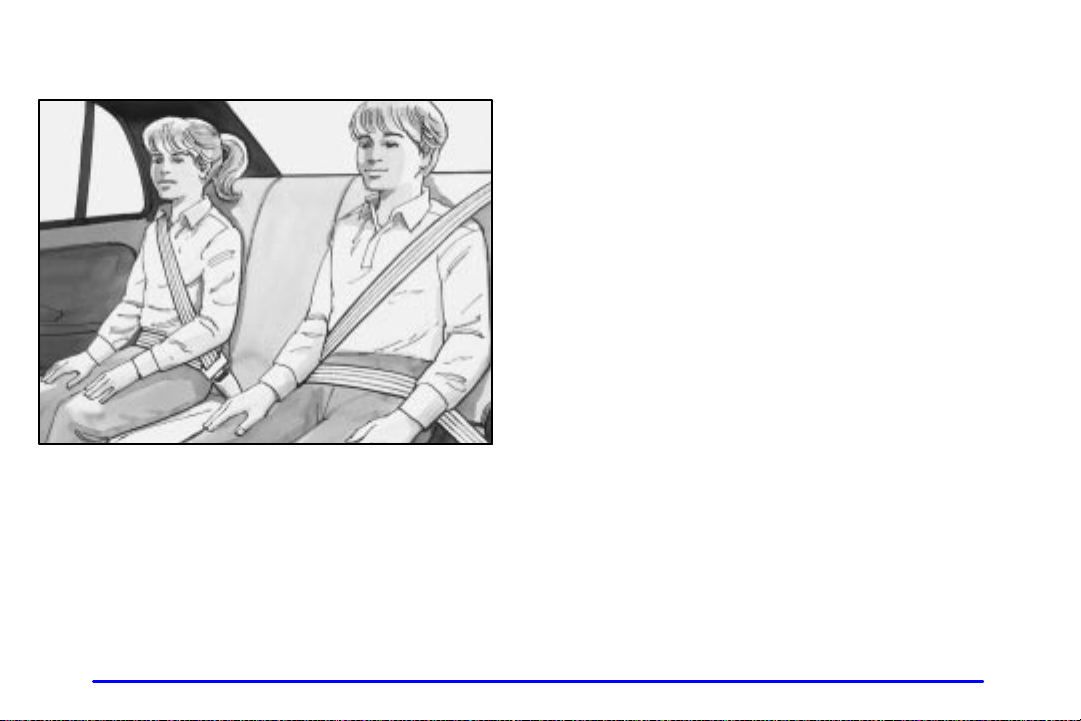
Older Children
Older children who have outgrown booster seats should
wear the vehicle’s safety belts.
If you have the choice, a child should sit next to a
window so the child can wear a lap
get the additional restraint a shoulder belt can provide.
-shoulder belt and
Q: What is the proper way to wear safety belts?
A: If possible, an older child should wear a
lap
-shoulder belt and get the additional restraint a
shoulder belt can provide. The shoulder belt should
not cross the face or neck. The lap belt should fit
snugly below the hips, just touching the top of the
thighs. It should never be worn over the abdomen,
which could cause severe or even fatal internal
injuries in a crash.
Accident statistics show that children are safer if they
are restrained in the rear seat.
In a crash, children who are not buckled up can strike
other people who are buckled up, or can be thrown
out of the vehicle. Older children need to use safety
belts properly.
1-52
Page 59
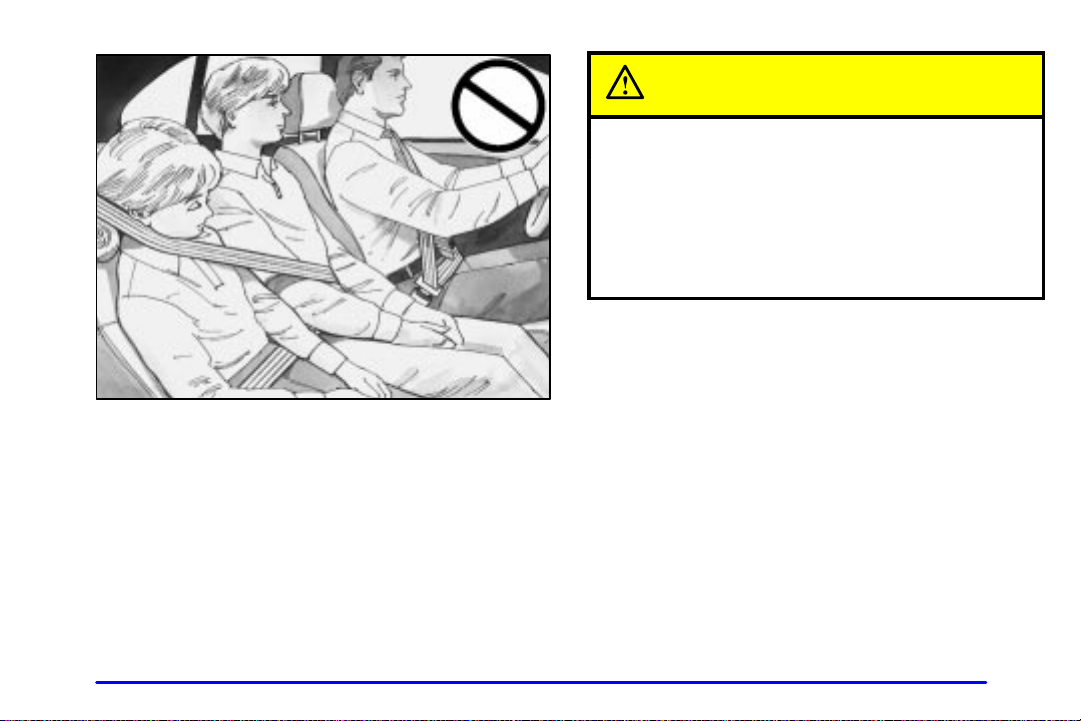
CAUTION:
Never do this.
Here two children are wearing the same belt. The
belt can’t properly spread the impact forces. In a
crash, the two children can be crushed together
and seriously injured. A belt must be used by
only one person at a time.
Q: What if a child is wearing a lap-shoulder belt,
but the child is so small that the shoulder belt is
very close to the child’s face or neck?
A: Move the child toward the center of the vehicle, but
be sure that the shoulder belt still is on the child’s
shoulder, so that in a crash the child’s upper body
would have the restraint that belts provide. If the
child is sitting in a rear seat outside position, see
“Rear Safety Belt Comfort Guides” in the Index.
If the child is so small that the shoulder belt is still
very close to the child’s face or neck, you might
want to place the child in the center seat position,
the one that has only a lap belt.
1-53
Page 60
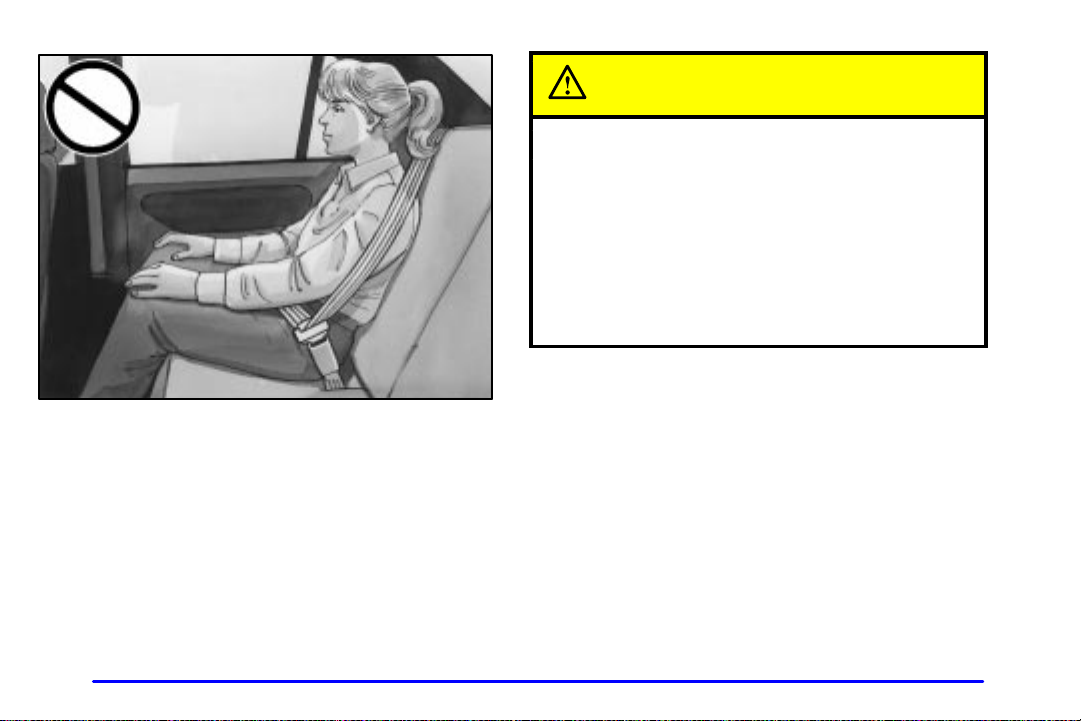
CAUTION:
Never do this.
Here a child is sitting in a seat that has a
lap
-shoulder belt, but the shoulder part is behind
the child. If the child wears the belt in this way, in
a crash the child might slide under the belt. The
belt’s force would then be applied right on the
child’s abdomen. That could cause serious or
fatal injuries.
Wherever the child sits, the lap portion of the belt
should be worn low and snug on the hips, just touching
the child’s thighs. This applies belt force to the child’s
pelvic bones in a crash.
1-54
Page 61

Safety Belt Extender
If the vehicle’s safety belt will fasten around you, you
should use it.
But if a safety belt isn’t long enough to fasten, your
dealer will order you an extender. It’s free. When you go
in to order it, take the heaviest coat you will wear, so the
extender will be long enough for you. The extender will
be just for you, and just for the seat in your vehicle that
you choose. Don’t let someone else use it, and use it
only for the seat it is made to fit. T o wear it, just attach it
to the regular safety belt.
Checking Your Restraint Systems
Now and then, make sure the safety belt reminder light
and all your belts, buckles, latch plates, retractors and
anchorages are working properly. Look for any other
loose or damaged safety belt system parts. If you see
anything that might keep a safety belt system from
doing its job, have it repaired.
T orn or frayed safety belts may not protect you in a
crash. They can rip apart under impact forces. If a belt is
torn or frayed, get a new one right away.
Also look for any opened or broken air bag covers, and
have them repaired or replaced. (The air bag system
does not need regular maintenance.)
Replacing Restraint System Parts After a Crash
If you’ve had a crash, do you need new belts?
After a very minor collision, nothing may be necessary.
But if the belts were stretched, as they would be if worn
during a more severe crash, then you need new parts.
If belts are cut or damaged, replace them. Collision
damage also may mean you will need to have safety belt
or seat parts repaired or replaced. New parts and repairs
may be necessary even if the belt wasn’t being used at
the time of the collision.
If an air bag inflates, you’ll need to replace air bag
system parts. See the part on the air bag system earlier in
this section.
1-55
Page 62
Section 2 Features and Controls
Here you can learn about the many standard and optional features on your vehicle, and information on starting,
shifting and braking. Also explained are the instrument panel and the warning systems that tell you if everything is
working properly -- and what to do if you have a problem.
-2 Windows
2
2
-6 Door Locks
-9 Remote Keyless Entry (If Equipped)
2
2
-13 Trunk
-16 Theft
2
2
-17 Content Theft Security System (If Equipped)
2
-18 Passlock
2-19 New Vehicle “Break-In”
2
-19 Ignition Positions
-21 Starting Your Engine
2
2
-24 Engine Coolant Heater (If Equipped)
2
-26 Automatic Transaxle Operation
-29 Manual Transaxle Operation
2
2
-32 Parking Brake
-33 Shifting Into PARK (P)
2
(Automatic Transaxle Only)
2-35 Shifting Out of PARK (P)
(Automatic Transaxle Only)
R
2-
2
-35 Parking Your Vehicle
(Manual Transaxle Models Only)
2-36 Parking Over Things That Burn
2
-36 Engine Exhaust
-37 Running Your Engine While You’re Parked
2
(Automatic Transaxle)
2
-38 Tilt Wheel (If Equipped)
-38 Turn Signal/Multifunction Lever
2
2
-44 Exterior Lamps
-47 Interior Lamps
2
2
-48 Mirrors
2
-51 Storage Compartments
-52 Ashtrays and Cigarette Lighter (If Equipped)
2
2
-52 Sun Visors
-53 Sunroof (If Equipped)
2
2
-54 The Instrument Panel -- Your
Information System
2-56 Instrument Panel Cluster
2
-58 Warning Lights, Gages and Indicators
2-1
Page 63
Windows
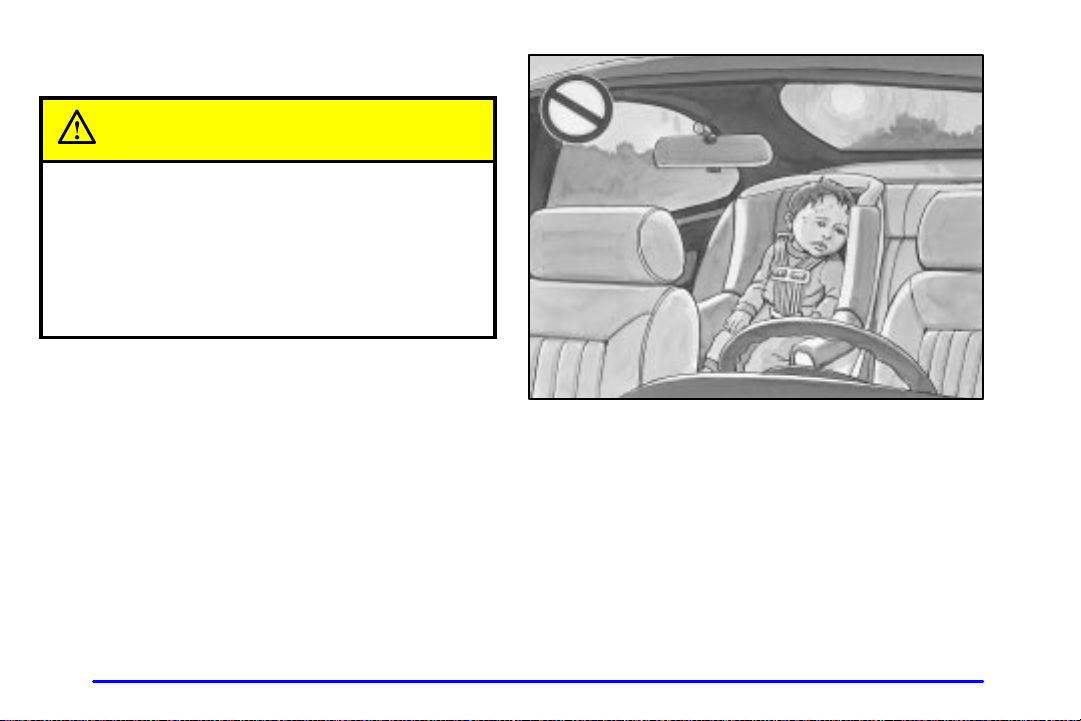
CAUTION:
Leaving children in a vehicle with the windows
closed is dangerous. A child can be overcome by
the extreme heat and can suffer permanent
injuries or even death from heat stroke.
Never leave a child alone in a vehicle, especially
with the windows closed in warm or hot weather.
2-2
Page 64
Manual Windows
On a vehicle with manual windows, use the window
crank to open and close each window.
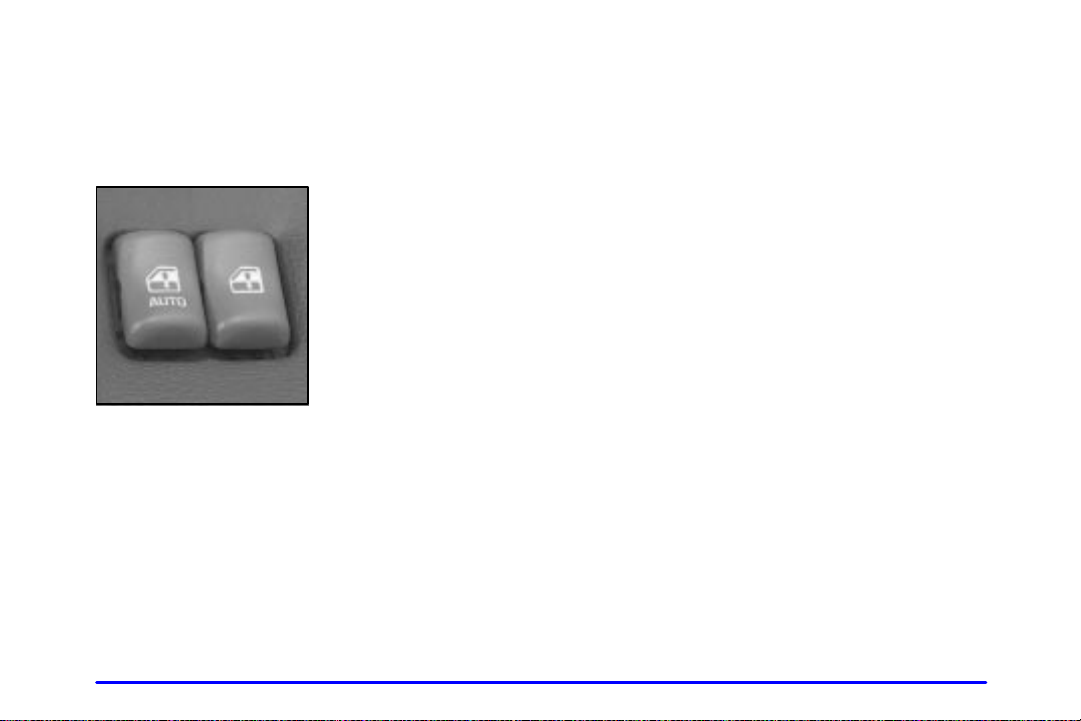
Power Windows (If Equipped)
The switches on the center
console control each of the
power windows when the
ignition is on. In addition,
on four-door models, each
rear passenger door has a
switch for its own window.
T o lower a window, press and hold the rear of the
switch. T o raise the window, press and hold the
switch forward.
Auto Down Window
The driver’s window switch has an auto
The driver’s window can be opened to the desired
position by pressing the rear of the switch to the first
detent. T o use the auto
the switch all the way down. The window will continue
down until it is fully open.
T o stop the window while it is lowering, briefly press
the switch forward, then release it.
-Out Switch
Lock
Four
-door models also have a lock-out switch. Press the
lock
-out switch to disable the rear passenger’s power
window switches. This will prevent rear passengers from
opening and closing the windows. The driver can still
control all windows with the switch in the lock position.
Press the lock
passenger’s window switches.
-out switch again to unlock the
-down feature, press the rear of
-down feature.
2-3
Page 65
Keys
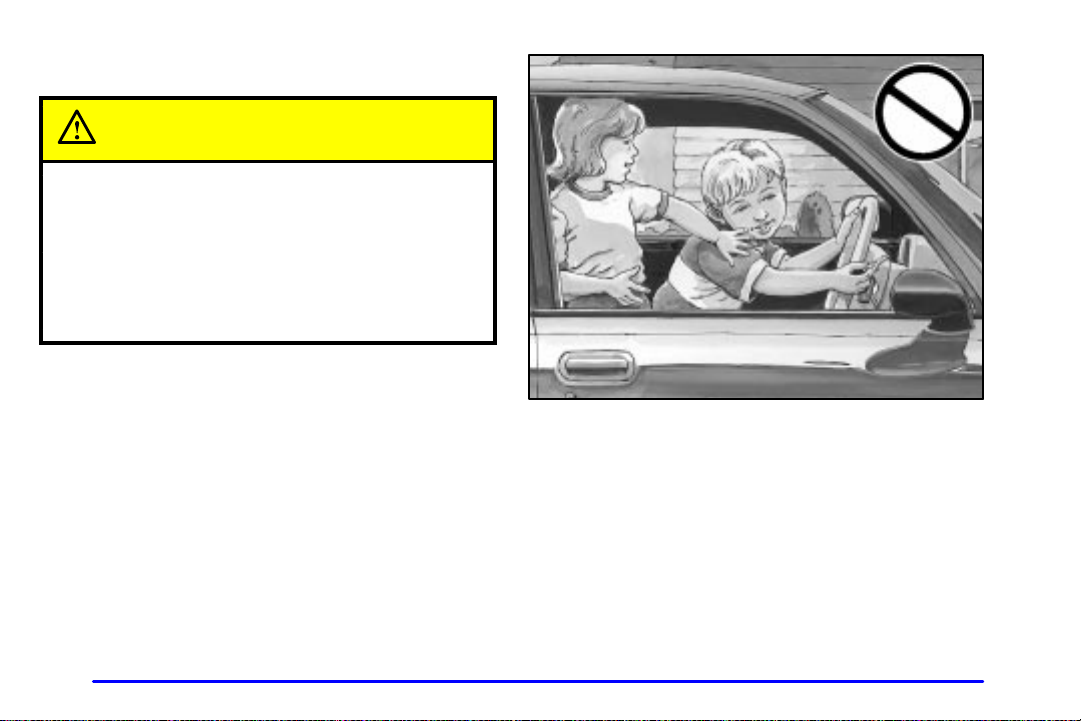
CAUTION:
Leaving children in a vehicle with the ignition
key is dangerous for many reasons. A child or
others could be badly injured or even killed.
They could operate the power windows or
other controls or even make the vehicle move.
Don’t leave the keys in a vehicle with children.
2-4
Page 66
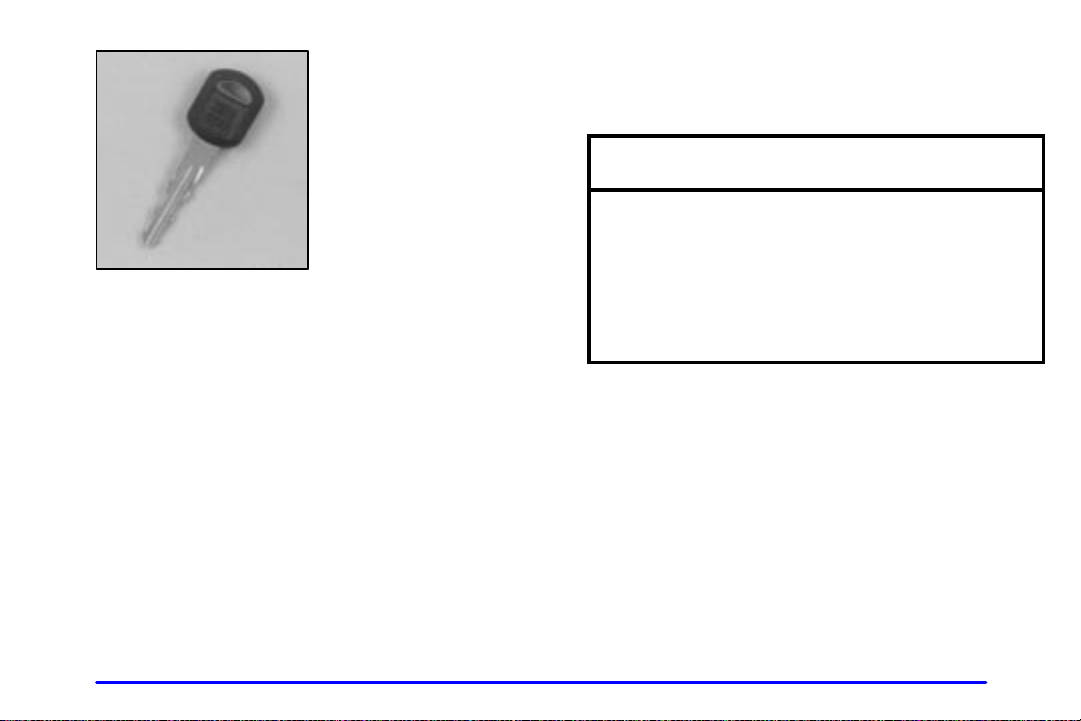
One key is used for the
ignition, the doors and
all other locks.
When a new vehicle is delivered, the dealer removes
the key tag from the key and gives it to the first owner.
Each tag has a code on it that tells your dealer or a
qualified locksmith how to make extra keys. Keep the
tag in a safe place. If you lose your key, you’ll be able
to have a new one made easily using the tag.
If you need a new key, contact your Pontiac dealer
who can obtain the correct key code. See “Roadside
Assistance” in the Index for more information.
NOTICE:
Your vehicle has a number of new features that
can help prevent theft. But you can have a lot of
trouble getting into your vehicle if you ever lock
your key inside. You may even have to damage
your vehicle to get in. So be sure you have an
extra key.
2-5
Page 67
Door Locks
CAUTION:
Unlocked doors can be dangerous.
D
Passengers -- especially children -- can
easily open the doors and fall out of a
moving vehicle. When a door is locked,
the handle won’t open it. You increase the
chance of being thrown out of the vehicle in
a crash if the doors aren’t locked. So, wear
safety belts properly and lock the doors
whenever you drive.
D
Young children who get into unlocked
vehicles may be unable to get out. A child
can be overcome by extreme heat and can
suffer permanent injuries or even death
from heat stroke. Always lock your vehicle
whenever you leave it.
D
Outsiders can easily enter through an
unlocked door when you slow down or stop
your vehicle. Locking your doors can help
prevent this from happening.
There are several ways to lock and unlock your vehicle.
Use your key to lock and unlock your vehicle from the
outside. If your vehicle is equipped with the remote
keyless entry system, you can use it to lock and unlock
your vehicle. See “Remote Keyless Entry System” in
the Index.
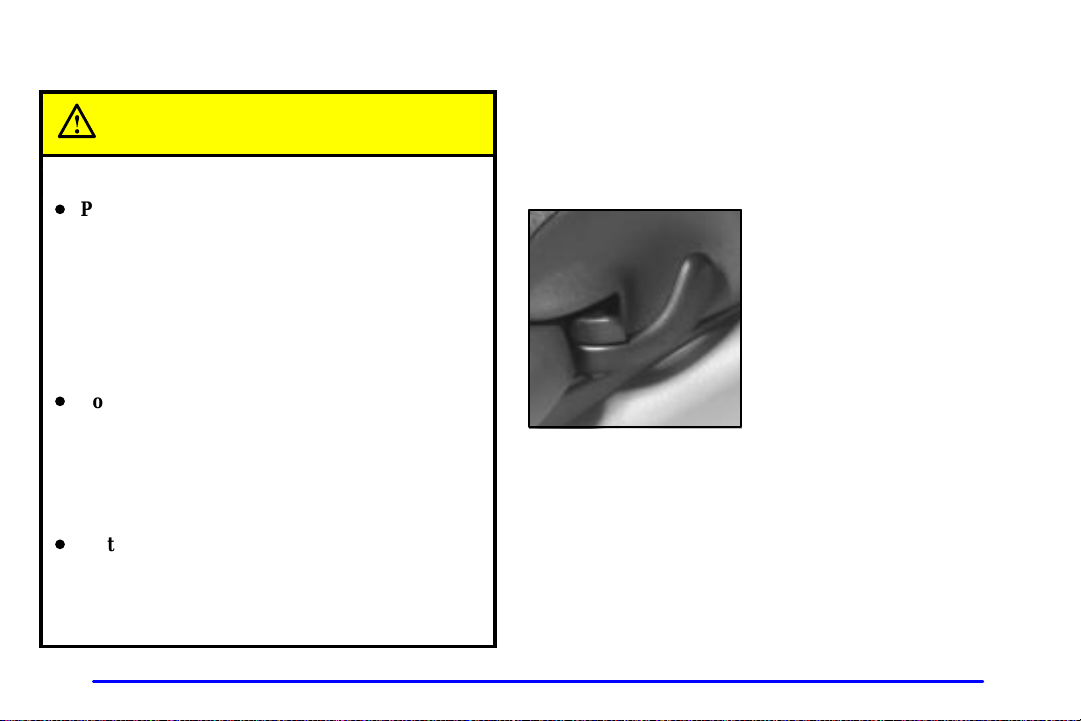
T o lock the door from
the inside, push the
locking lever forward.
T o unlock the door, pull the locking lever rearward.
2-6
Page 68
Power Door Locks (If Equipped)
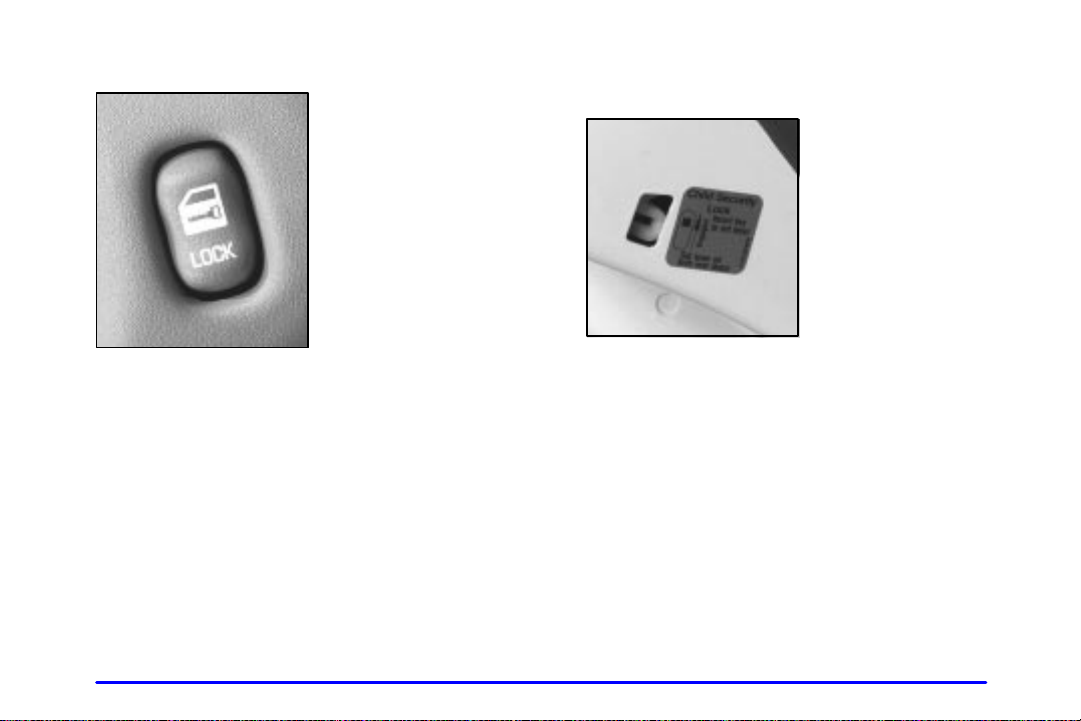
You can lock or unlock
all doors on your vehicle
from the driver’s or
front passenger’s door
lock switch.
Rear Door Security Lock (Four-Door Models)
Your vehicle is equipped
with rear door security
locks that help prevent
passengers from opening
the rear doors on your
vehicle from the inside.
Press the lower portion of the switch to lock the doors.
Press the upper portion of the switch to unlock the doors.
The locking lever on each rear door works only that
door’s lock. It won’t lock (or unlock) all of the
doors
-- that’s a safety feature.
To Use One of These Locks
1. Use a key to move the lock all the way up.
2. Close the door.
3. Do the same thing to the other rear door lock.
The rear doors on your vehicle cannot be opened from
inside when this feature is in use.
2-7
Page 69

To Open a Rear Door With the Security Lock
1. Unlock the door from the inside.
2. Then open the door from the outside.
If you don’t cancel the security lock feature, adults or
older children who ride in the rear won’t be able to open
the rear door from the inside. You should let adults and
older children know how to cancel the locks.
To Cancel the Rear Door Lock
1. Unlock the door from the inside and open the door
from the outside.
2. Use a key to move the lock all the way down.
3. Do the same for the other rear door.
The rear door lock will now work normally.
Lockout Prevention (If Equipped)
If your vehicle is equipped with remote keyless entry,
you have lockout protection. This feature stops the
power door locks from locking when the keys are in
the ignition and the door is open.
If the power door lock switch is pressed when a door
is open and the key is in the ignition, all the doors will
lock and the driver’s door will unlock.
Leaving Your Vehicle
If you are leaving the vehicle, open your door and set
the locks from inside. Then get out and close the door.
2-8
Page 70

Remote Keyless Entry (If Equipped)
If your vehicle has this feature, you can lock and unlock
your doors or unlock your trunk from about 3 feet (1 m)
up to 30 feet (9 m) away using the remote keyless entry
transmitter supplied with your vehicle.
In addition, the system illuminates the interior lamps
for a set period of time. Also, a content theft security
system can be activated to monitor and set a horn alarm
if the vehicle’s door or trunk is opened without first
unlocking the door or trunk with the transmitter.
The remote keyless entry system consists of a
receiver, which is located in the vehicle, and two
hand held transmitters.
Your remote keyless entry system operates on a radio
frequency subject to Federal Communications
Commission (FCC) Rules and with Industry Canada.
This device complies with Part 15 of the FCC Rules.
Operation is subject to the following two conditions:
(1) this device may not cause harmful interference,
and (2) this device must accept any interference
received, including interference that may cause
undesired operation.
This device complies with RSS
Operation is subject to the following two conditions:
(1) this device may not cause interference, and (2) this
device must accept any interference received, including
interference that may cause undesired operation of
the device.
Changes or modifications to this system by other than
an authorized service facility could void authorization to
use this equipment.
At times you may notice a decrease in range. This is
normal for any remote keyless entry system. If the
transmitter does not work or if you have to stand closer
to your vehicle for the transmitter to work, try this:
D
Check the distance. You may be too far from your
vehicle. You may need to stand closer during rainy
or snowy weather.
D
Check the location. Other vehicles or objects may be
blocking the signal. T ake a few steps to the left or
right, hold the transmitter higher, and try again.
D
Check to determine if battery replacement or
resynchronization is necessary. See the instructions
that follow.
D
If you’re still having trouble, see your dealer or a
qualified technician for service.
-210 of Industry Canada.
2-9
Page 71
Operation
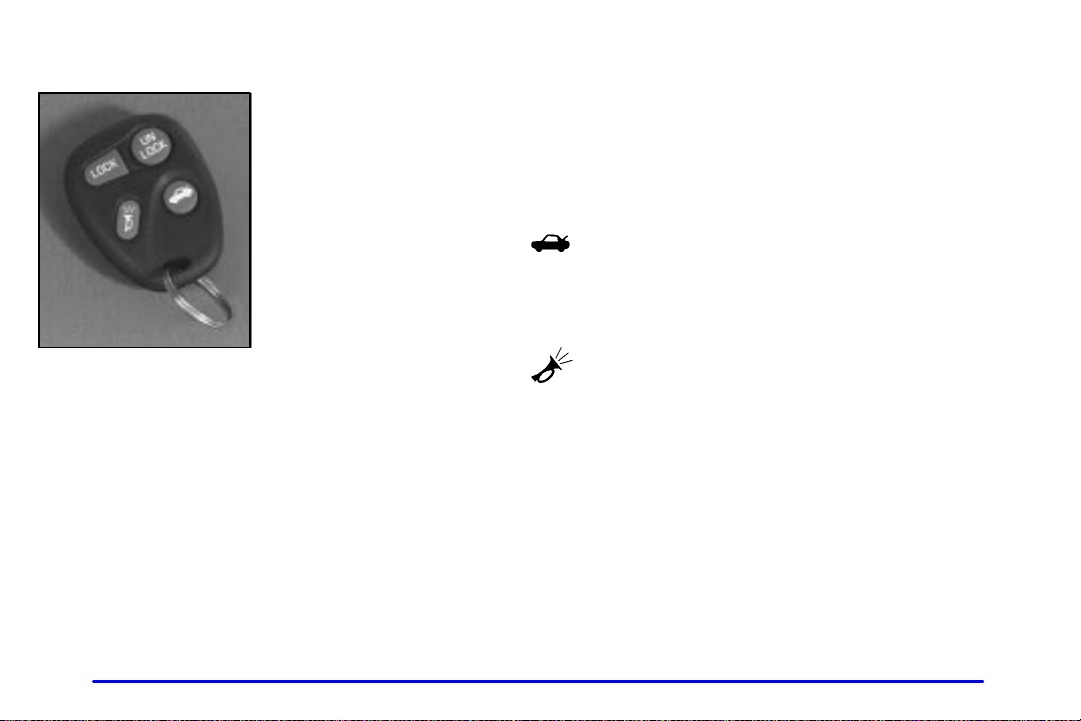
The following functions are
available with the remote
keyless entry system:
UNLOCK: The driver’s door will unlock when the
UNLOCK button on the transmitter is pressed. In
addition, the headlamps will flash twice, the interior
lamps will turn on for about 20 seconds or until the
ignition is turned on, and the content theft system will
disarm. See “Content Theft Security System” later
in this section. If you press UNLOCK again within
five seconds, all remaining doors will unlock.
(T runk Release): The trunk will unlock when the
vehicle symbol on the transmitter is pressed, as long as
the trunk lockout is not engaged. You can open the trunk
with the transmitter when the vehicle speed is less that
2 mph (3 km/h). The headlamps will flash twice.
LOCK: All doors will automatically lock when the
LOCK button is pressed. In addition, if all doors and
the trunk are closed, the headlamps will flash once, the
interior lamps will turn off, and the vehicle content theft
system will arm. See “Content Theft Security System”
later in this section.
2-10
(Panic): The horn will sound and the headlamps
and interior lamps will flash alternately when this button
is pressed. This can be turned off by pressing the
panic button again or by turning the ignition to ON.
The alarm will sound for two minutes unless cancelled
by the driver.
Your dealer can change the settings to disable the
headlamp flash and horn chirp features. Your dealer can
also change the settings to allow the horn chirp twice on
the first press of the UNLOCK button. See your dealer
for more information.
Page 72

Radio Personalization Feature
Your vehicle can store different radio preset stations
depending on which keyless entry transmitter you use
to unlock the doors. The radio will recall all the stored
settings associated with that transmitter. Any radio
setting changes will be assigned to the transmitter last
used to unlock the doors.
This feature can be disabled by your dealer if you desire.
Contact your dealer for further information.
Matching Transmitter(s) to Your Vehicle
Each remote keyless entry transmitter is coded to
prevent another transmitter from unlocking your vehicle.
If a transmitter is lost or stolen, a replacement can be
purchased through your dealer. Remember to bring
any remaining transmitters with you when you go to
your dealer. When the dealer matches the replacement
transmitter to your vehicle, any remaining transmitters
must also be matched. Once your dealer has coded
the new transmitter, the lost transmitter will not unlock
your vehicle. Each vehicle can have a maximum of four
transmitters matched to it.
Battery Replacement
Under normal use, the battery in your remote keyless
entry transmitter should last about two years.
You can tell the battery is weak if the transmitter won’t
work at the normal range in any location. If you have to
get close to your vehicle before the transmitter works,
it’s probably time to change the battery.
NOTICE:
When replacing the battery, use care not to
touch any of the circuitry. Static from your
body transferred to these surfaces may damage
the transmitter.
2-11
Page 73
Replacing the Battery in the Remote Keyless Entry System Transmitter
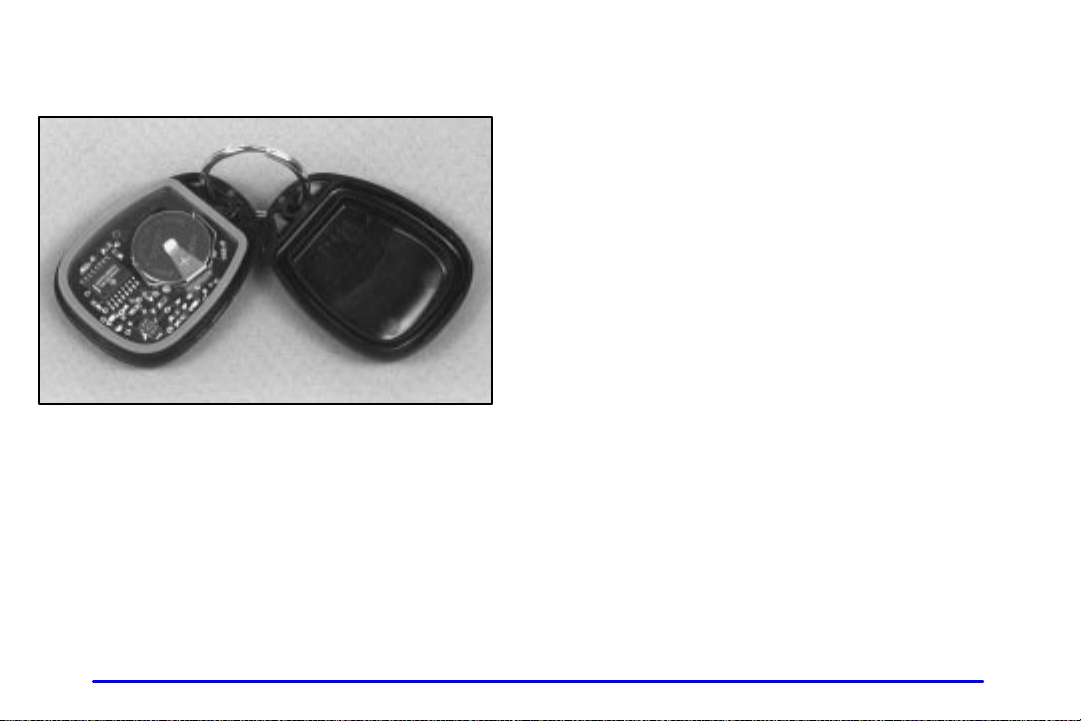
T o replace the battery in the transmitter:
1. Use a coin or similar object to separate the bottom
half from the top half of the transmitter.
2. Remove the battery and replace it with the new one.
Make sure the positive side of the battery faces
down. For battery replacement, use a three
battery , type CR2032, or equivalent.
3. Read the instructions inside the case.
-volt
4. Put the two halves back together. Make sure the
cover is on tightly, so water won’t get in.
5. Check the operation of the transmitter with your
vehicle. If the transmitter does not work, try
resynchronizing the transmitter with the receiver.
Resynchronization
Your remote keyless entry system is equipped with a
security system that prevents anyone from recording and
playing back your signal. The transmitter does not send
the same signal twice to the receiver. The receiver will
not respond to a signal that has been sent to it more
than once.
Normally , the transmitter and receiver resynchronize
automatically . However, under certain circumstances,
manual resynchronization may be required.
T o resynchronize your transmitter and receiver,
follow these directions:
1. Stand close to your vehicle.
2. Press and hold the LOCK and UNLOCK buttons
on the transmitter at the same time.
3. Hold the buttons for at least 10 seconds. During
this time, the doors should lock and unlock once.
This confirms the resynchronization. If the doors
do not lock and unlock, see your dealer for service.
2-12
Page 74
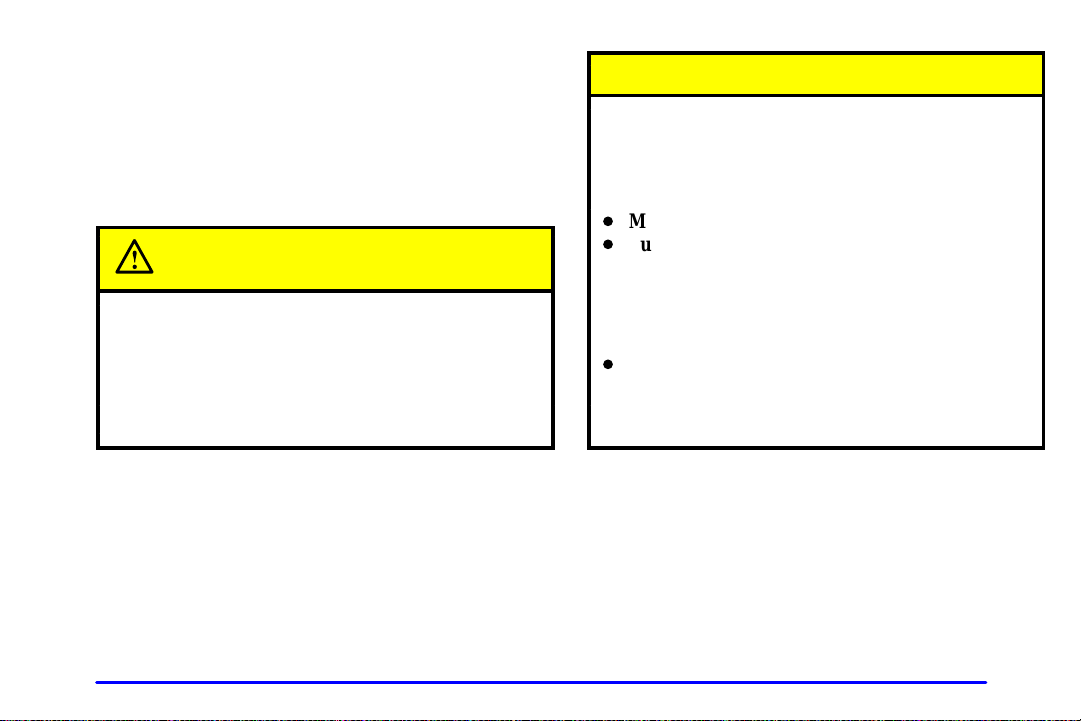
Trunk
T o unlock the trunk from the outside, insert the key and
turn the trunk lock cylinder or use the remote keyless
entry transmitter (if equipped).
When closing the trunk, close from the center to ensure
that it is fully secured.
CAUTION:
It can be dangerous to drive with the trunk lid
open because carbon monoxide (CO) gas can
come into your vehicle. You can’t see or smell CO.
It can cause unconsciousness and even death.
CAUTION: (Continued)
CAUTION: (Continued)
If you must drive with the trunk lid open or if
electrical wiring or other cable connections must
pass through the seal between the body and the
trunk lid:
D
Make sure all other windows are shut.
D
Turn the fan on your heating or cooling
system to its highest speed with the setting
on any airflow selection except maximum.
That will force outside air into your vehicle.
See “Comfort Controls” in the Index.
D
If you have air outlets on or under the
instrument panel, open them all the way.
See “Engine Exhaust” in the Index.
2-13
Page 75
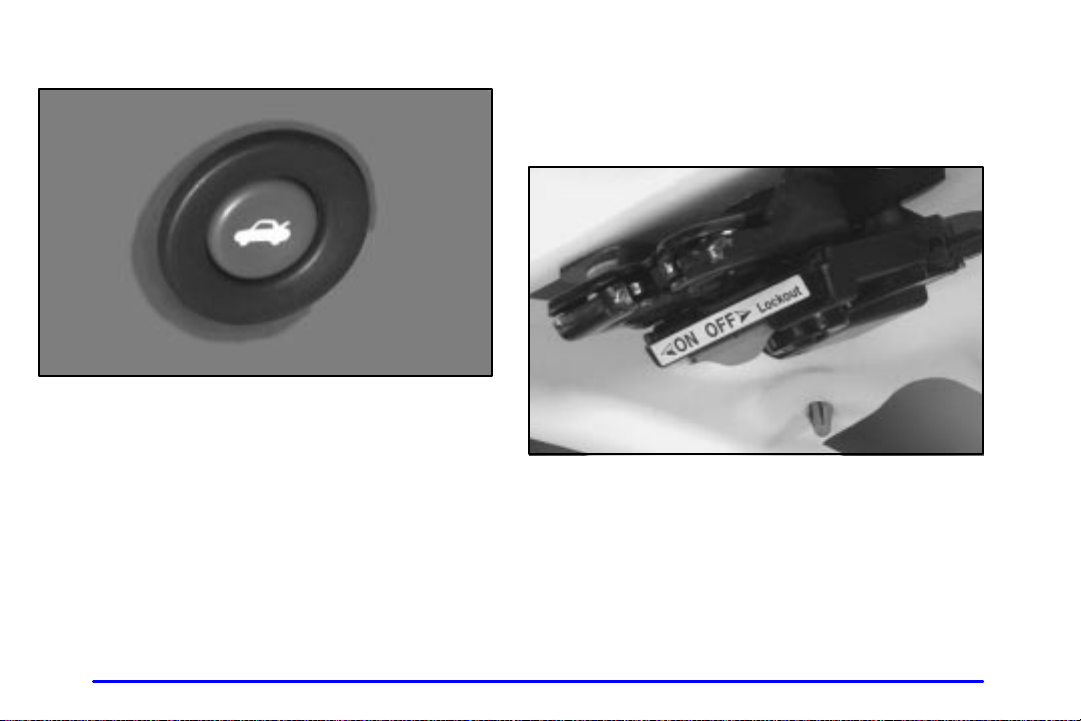
Remote Trunk Release
Press the remote trunk release button, located on the
lower left side of the instrument panel, to release the
trunk lid.
If your vehicle is equipped with the remote keyless entry
system, the daytime running lamps will flash twice.
Make sure the remote trunk release lockout feature
is not activated. Also, the remote trunk release will
only work when either the ignition is in OFF or
ACCESSORY or the vehicle speed is less than
2 mph (3 km/h).
Remote Trunk Release Lockout
Your remote trunk release is equipped with a lockout
feature. The switch is located on the inside of the trunk
lid, mounted to the trunk lid latch.
T o turn the lockout on, slide the switch all the way to the
left, to ON. T o turn the lockout off, slide the switch all
the way to the right to OFF.
When the lockout is on, the remote trunk release button
will not release the trunk lid. However, the trunk lid can
still be opened with the key, but not with the keyless
entry transmitter (if equipped).
2-14
Page 76
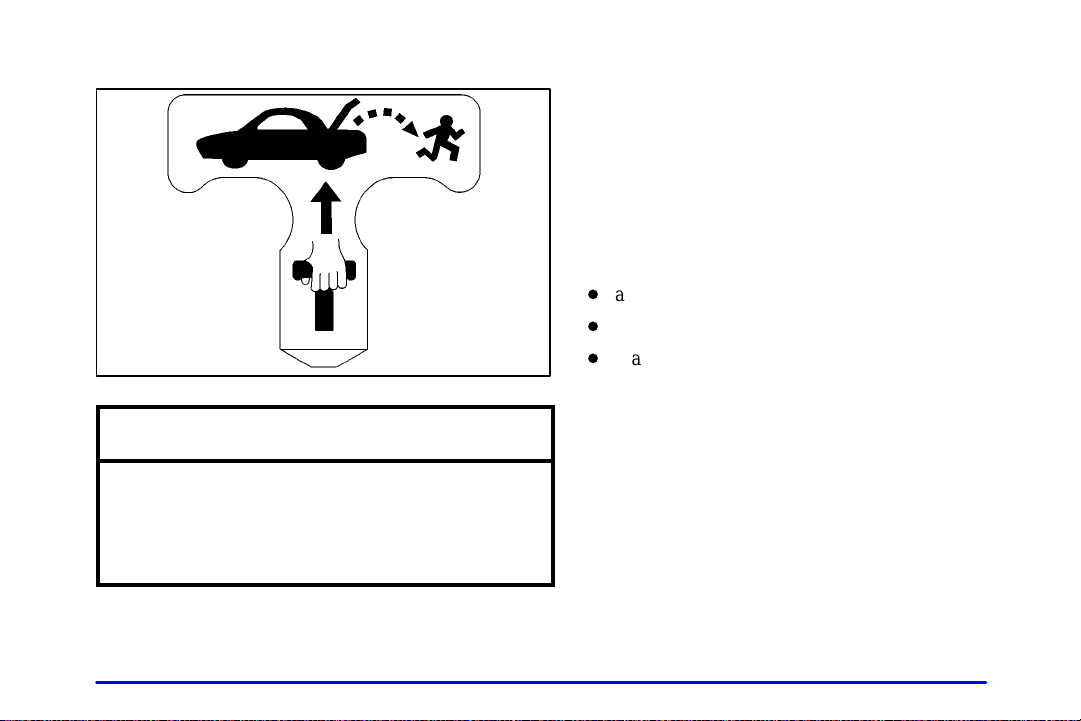
Trunk Release Handle
NOTICE:
The trunk release handle was not designed to be
used to tie down the trunk lid or as an anchor
point when securing items in the trunk. Improper
use of the trunk release handle could damage it.
There is a glow-in-the-dark trunk release handle
located on the inside of the trunk lid of your vehicle.
This handle will glow following exposure to light.
Pull the release handle up to open the trunk from
the inside.
Trap-Resistant Trunk Kit
T o help prevent a child from becoming trapped in your
trunk, you can order a trap
your dealer. This kit includes:
D
a modified trunk latch,
D
a lighted release handle, and
D
seatback tethers (for vehicles with folding
rear seatbacks).
See your dealer for additional information.
-resistant trunk kit from
2-15
Page 77

Theft
Vehicle theft is big business, especially in some cities.
Although your vehicle has a number of theft
features, we know that nothing we put on it can make it
impossible to steal. However, there are ways you can help.
Key in the Ignition
If you leave your vehicle with the keys inside, it’s an
easy target for joy riders or professional thieves
don’t do it.
When you park your vehicle and open the driver’s door,
you’ll hear a chime reminding you to remove your key
from the ignition and take it with you. Always do this.
Your steering wheel will be locked, and so will your
ignition. If you take the key with you, and you have an
automatic transaxle, it will be locked. And remember to
lock the doors.
Parking at Night
Park in a lighted spot, close all windows and lock your
vehicle. Remember to keep your valuables out of sight.
Put them in a storage area, or take them with you.
-deterrent
-- so
Parking Lots
Even if you park in a lot where someone will be
watching your vehicle, it’s still best to lock it up and
take your keys. But what if you have to leave your key?
D
If possible, park in a busy, well
D
Put your valuables in a storage area, like your trunk
or glove box.
D
Be sure to close and lock the storage area.
D
Close all windows.
D
Move the trunk release lockout switch to OFF.
D
Lock the glove box.
D
Lock all the doors except the driver’s.
D
If your vehicle has a remote keyless entry system,
take the transmitter with you.
-lit area.
2-16
Page 78

Content Theft Security System (If Equipped)
Arming the System
With the ignition off, pressing the transmitter LOCK
button will arm the system immediately after all doors
and trunk are closed. If the transmitter LOCK button is
pressed again within five seconds, the horn will chirp to
confirm that the system has been armed.
Once the system is armed, the THEFT SYSTEM light
on your instrument panel will flash and remain flashing.
This confirms the system is armed and monitoring the
doors and trunk. If the light is on solid, the system is
not properly activated due to either a door or the trunk
being ajar.
If you don’t want to arm the system, lock the car with
the lock levers on the doors or with the door lock switch.
Disarming the System
If the system is armed, pressing the UNLOCK button
on the transmitter will disarm the system. The THEFT
SYSTEM light will stop flashing.
If the system is armed, turning the key to START will
also disarm the system.
If the system is armed and the trunk is opened using the
trunk release button on the transmitter, the system will
temporarily disarm itself and re
has been closed. This allows the customer to exit the
vehicle, lock the doors using the transmitter, and open
the trunk using the transmitter without having to disarm
and subsequently re
-arm the system.
-arm when the trunk
How the System Alarm is Activated
If the system is armed, opening any door or the trunk,
or using a wrong key to start the vehicle will cause a
pre-alarm chirp for 10 seconds and then a full alarm
of horn and headlights for two minutes.
If an alarm event has finished and all doors and the
trunk are closed, the content theft security system
will re
-arm itself.
2-17
Page 79

How to Turn Off the System Alarm
If the system alarm is active, it can be deactivated by
doing the following:
D
Pressing the transmitter LOCK or panic button to
turn off the alarm. The system will also re
doors and trunk are later closed, or
D
pressing the transmitter UNLOCK or trunk button
to turn off the alarm and disarm the system, or
D
putting the key in the ignition and turning it to
STAR T to turn off the alarm and disarm the system.
-arm if all
How to Detect a Tamper Condition
If you hear three horn chirps when you press the
UNLOCK, LOCK or trunk release button on your
transmitter that means the content theft security
system alarm was triggered while you were away.
Passlock
Your vehicle is equipped with the Passlock
theft
-deterrent system.
Passlock is a passive theft-deterrent system. Passlock
enables fuel if the ignition lock cylinder is turned with a
valid key . If a correct key is not used or the ignition lock
cylinder is tampered with, fuel is disabled.
During normal operation, the THEFT SYSTEM light
will go off approximately five seconds after the key is
turned RUN following an engine start.
If the engine stalls and the THEFT SYSTEM light
flashes, wait until the light stops flashing before trying
to restart the engine. Remember to release the key from
STAR T as soon as the engine starts.
If the engine is running and the THEFT SYSTEM light
comes on, you will be able to restart the engine if you
turn the engine off. However, your Passlock system is
not working properly and must be serviced by your
dealer. Your vehicle is not protected by Passlock at this
time. You may also want to check the fuse (see “Fuses
and Circuit Breakers” in the Index). See your dealer for
service. Also, see “Roadside Assistance” in the Index
for more information.
R
2-18
Page 80
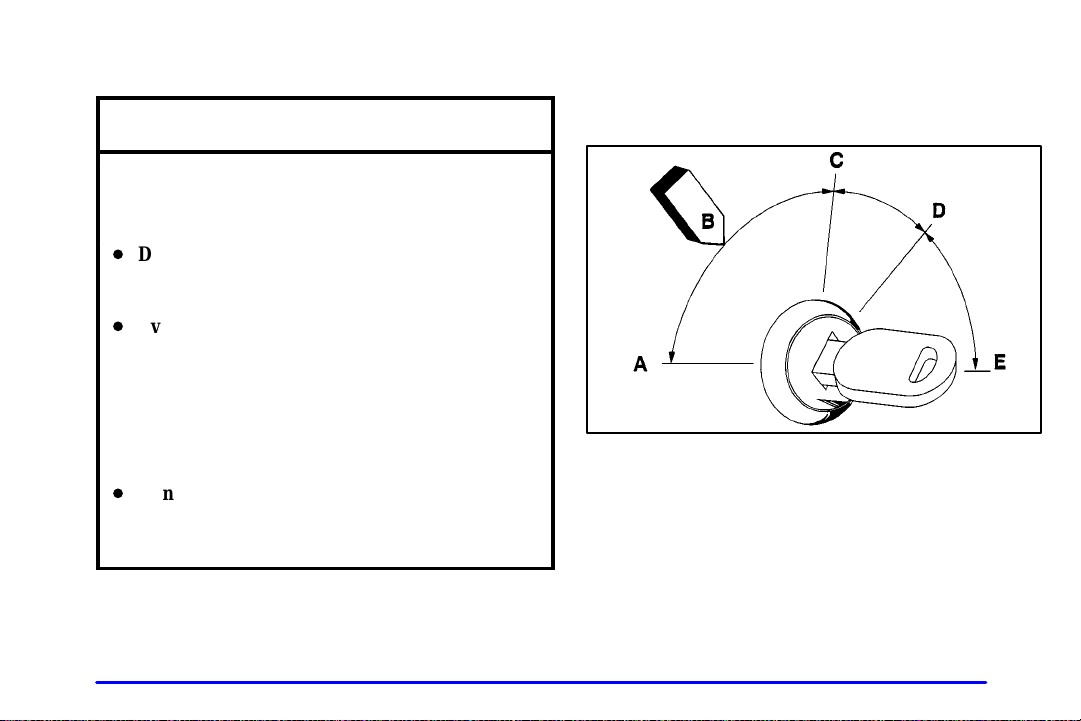
New Vehicle “Break-In”
NOTICE:
Your vehicle doesn’t need an elaborate
“break
-in.” But it will perform better in
the long run if you follow these guidelines:
D
Don’t drive at any one speed -- fast or
slow
-- for the first 500 miles (805 km).
Don’t make full
D
Avoid making hard stops for the first
200 miles (322 km) or so. During this time
your new brake linings aren’t yet broken
in. Hard stops with new linings can mean
premature wear and earlier replacement.
Follow this breaking
time you get new brake linings.
D
Don’t tow a trailer during break
See “Towing a Trailer” in the Index for
more information.
-throttle starts.
-in guideline every
-in.
Ignition Positions
With the key in the ignition switch, you can turn the key
to five positions.
A (ACCESSORY): This position operates your
electrical accessories. Press in the ignition switch as you
turn it toward you.
B (LOCK): This position locks your steering wheel,
ignition, shift lever and transaxle. This is the only
position from which you can remove the key. A warning
chime will sound if you open the driver’s door when the
ignition is in LOCK and the key is in the ignition.
2-19
Page 81
CAUTION:
On manual transaxle vehicles, turning the key to
LOCK will lock the steering column and result
in a loss of ability to steer the vehicle. This could
cause a collision. If you need to turn the engine
off while the vehicle is moving, turn the key only
to OFF. Don’t press the key release button while
the vehicle is moving.
NOTICE:
If your key seems stuck in LOCK and you can’t
turn it, be sure you are using the correct key;
if so, is it all the way in? If it is, then turn the
steering wheel left and right while you turn the
key hard. Turn the key only with your hand.
Using a tool to force it could break the key or the
ignition switch. If none of this works, then your
vehicle needs service.
C (OFF): This position unlocks the steering wheel,
ignition and transaxle, but does not send power to any
accessories. Use this position if your vehicle must be
pushed or towed, but never try to push
vehicle. A warning chime will sound if you open the
driver’s door when the ignition is in OFF and the key
is in the ignition.
D (RUN): This is the position to which the switch
returns after you start your engine and release the
switch. The switch stays in RUN when the engine is
running. But even when the engine is not running,
you can use RUN to operate your electrical accessories,
and to display some instrument panel warning lights.
E (START): This position starts the engine. When the
engine starts, release the key. The ignition switch will
return to RUN for normal driving.
Even if the engine is not running, the positions
ACCESSORY and RUN allow you to operate your
electrical accessories, such as the radio.
-start your
2-20
Page 82
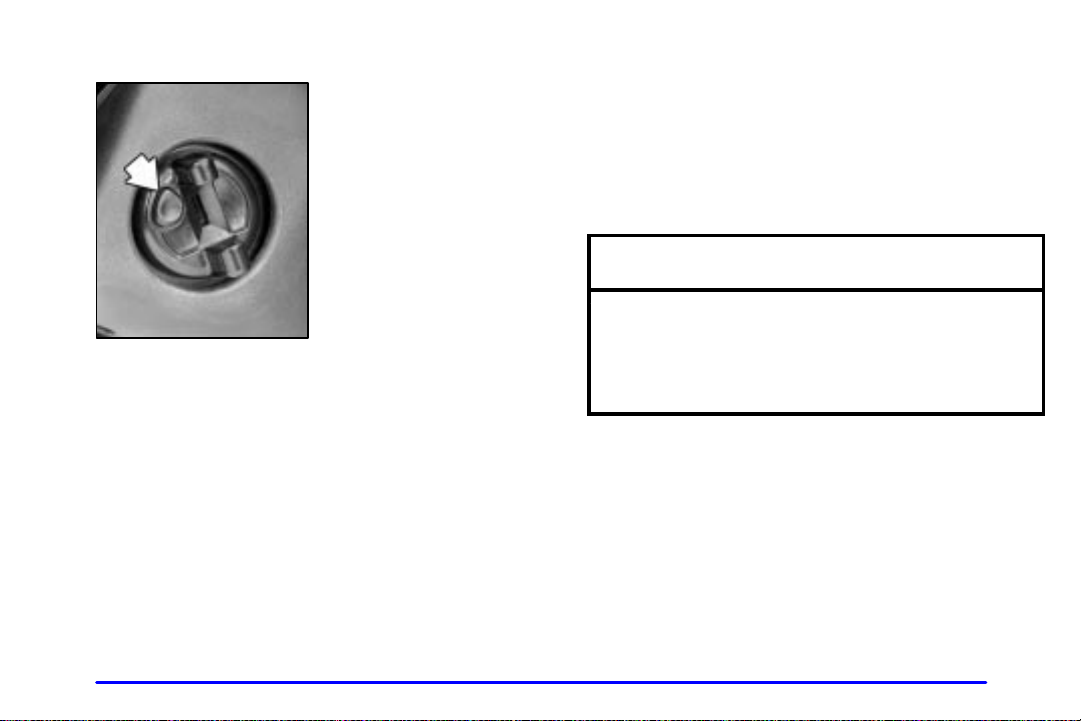
Key Release Button (Manual Transaxle)
The ignition key cannot be
removed from the ignition
unless the key release
button is used.
T o remove the key, turn the key to OFF. Then, while
pressing the key release button in, turn the key to LOCK
and pull it straight out.
Starting Your Engine
Automatic Transaxle
Move your shift lever to PARK (P) or NEUTRAL (N).
Your engine won’t start in any other position
a safety feature. T o restart when you’re already moving,
use NEUTRAL (N) only.
-- that’s
NOTICE:
Don’t try to shift to PARK (P) if your vehicle
is moving. If you do, you could damage the
transaxle. Shift to PARK (P) only when your
vehicle is stopped.
Retained Accessory Power (RAP)
Y our vehicle is equipped with a Retained Accessory Power
(RAP) feature which will allow the radio to continue to
work up to 10 minutes after the ignition is turned to OFF.
Your radio will work when the ignition key is in
RUN or ACCESSORY. Once the key is turned from
RUN to OFF, the radio will continue to work for up to
10 minutes or until the driver’s door is opened.
Manual Transaxle
The gear selector should be in neutral and the parking
brake engaged. Hold the clutch pedal to the floor and
start the engine. Your vehicle won’t start if the clutch
pedal is not all the way down
-- that’s a safety feature.
2-21
Page 83
Starting Your 2.2L L4 (LN2) or
ECOTECt (L61) Engine
1. With your foot off the accelerator pedal, turn your
ignition key to STAR T. When the engine starts,
let go of the key. The idle speed will go down as
your engine gets warm.
NOTICE:
Holding your key in START for longer than
15 seconds at a time will cause your battery to
be drained much sooner. And the excessive heat
can damage your starter motor. Wait about
15 seconds between each try to help avoid
draining your battery or damaging your starter.
2. If it doesn’t start, wait about 15 seconds and try
again to start the engine by turning the ignition key
to START. Wait about 15 seconds between each try.
When your engine has run about 10 seconds to warm
up, your vehicle is ready to be driven. Don’t “race”
your engine when it’s cold.
If the weather is below freezing (32_F or 0_C),
let the engine run for a few minutes to warm up.
3. If your engine still won’t start (or starts but then
stops), it could be flooded with too much gasoline.
Try pushing your accelerator pedal all the way to
the floor and holding it there as you hold the key in
STAR T for about three seconds. If the vehicle starts
briefly but then stops again, do the same thing, but
this time keep the pedal down for five or six seconds.
This clears the extra gasoline from the engine.
NOTICE:
Your engine is designed to work with the
electronics in your vehicle. If you add electrical
parts or accessories, you could change the way
the engine operates. Before adding electrical
equipment, check with your dealer. If you don’t,
your engine might not perform properly.
2-22
Page 84
Starting Your 2.4L L4 (LD9) Engine
1. With your foot off the accelerator pedal, turn your
ignition key to STAR T. When the engine starts,
let go of the key. The idle speed will go down as
your engine warms up.
NOTICE:
Holding your key in START for longer than
15 seconds at a time will cause your battery to
be drained much sooner. And the excessive heat
can damage your starter motor. Wait about
15 seconds between each try to help avoid
draining your battery or damaging your starter.
2. If the engine doesn’t start in 10 seconds, or if the
weather is very cold (below
push the accelerator pedal about one
way down while you turn the key to STAR T. Do this
until the engine starts. As soon as it does, let go of
the key.
-20
_
F or -29_ C),
-quarter of the
3. If your engine still won’t start (or starts but then
stops), it could be flooded with too much gasoline.
Try pushing your accelerator pedal all the way to
the floor and holding it there as you hold the key in
STAR T for a maximum of 15 seconds. This clears
the extra gasoline from the engine. If the engine still
won’t start or starts briefly but then stops again,
repeat Step 1 or 2, depending on temperature.
When the engine starts, release the key and the
accelerator pedal.
NOTICE:
Your engine is designed to work with the
electronics in your vehicle. If you add electrical
parts or accessories, you could change the way
the engine operates. Before adding electrical
equipment, check with your dealer. If you don’t,
your engine might not perform properly.
2-23
Page 85
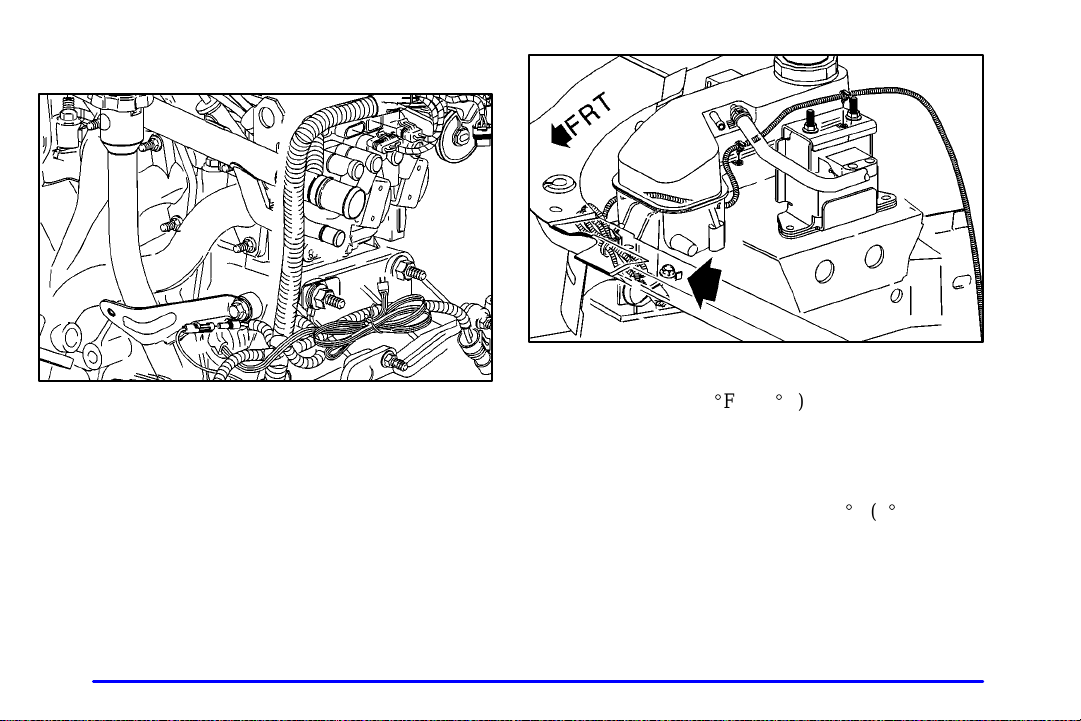
Engine Coolant Heater (If Equipped)
2.2L L4 (LN2) Engine
2.4L L4 (LD9) and 2.2L L4 ECOTEC (L61) Engine
-18
_
In very cold weather, 0_F (
the engine coolant heater can help. You’ll get easier
starting and better fuel economy during engine
-up. Usually , the coolant heater should be
warm
plugged in a minimum of four hours prior to starting
your vehicle. At temperatures above 32_F (0_C),
use of the coolant heater is not required.
C) or colder,
2-24
Page 86
To Use the Engine Coolant Heater
1. Turn off the engine.
2. Open the hood and unwrap the electrical cord. On a
vehicle with a 2.2L L4 (LN2) engine, the electrical
cord is located near the engine oil dipstick. On a
vehicle with a 2.4L L4 (LD9) or 2.2L L4 ECOTEC
(L61) engine, the electrical cord is located in front of
the coolant surge tank on the passenger’s side.
3. Plug it into a normal, grounded 110
-volt AC outlet.
CAUTION:
Plugging the cord into an ungrounded outlet
could cause an electrical shock. Also, the wrong
kind of extension cord could overheat and cause
a fire. You could be seriously injured. Plug the
cord into a properly grounded three
110
-volt AC outlet. If the cord won’t reach, use a
heavy
-duty three-prong extension cord rated for
at least 15 amps.
-prong
4. Before starting the engine, be sure to unplug and
store the cord as it was before to keep it away
from moving engine parts. If you don’t, it could
be damaged.
How long should you keep the coolant heater plugged in?
The answer depends on the outside temperature, the kind
of oil you have, and some other things. Instead of
trying to list everything here, we ask that you contact
your dealer in the area where you’ll be parking your
vehicle. The dealer can give you the best advice for that
particular area.
2-25
Page 87
Automatic Transaxle Operation
If your vehicle is equipped with an automatic transaxle,
the shift lever is located on the console between the seats.
There are seven different positions for the automatic
transaxle. See “Forward Gears” later in this section.
PARK (P): This position locks your front wheels.
It’s the best position to use when you start your
engine because your vehicle can’t move easily.
CAUTION: (Continued)
vehicle won’t move, even when you’re on fairly
level ground, always set your parking brake and
move the shift lever to PARK (P).
See “Shifting Into PARK (P)” in the Index.
If you’re pulling a trailer, see “Towing a Trailer”
in the Index.
CAUTION:
It is dangerous to get out of your vehicle if the
shift lever is not fully in PARK (P) with the
parking brake firmly set. Your vehicle can roll.
Don’t leave your vehicle when the engine is
running unless you have to. If you have left the
engine running, the vehicle can move suddenly.
You or others could be injured. To be sure your
CAUTION: (Continued)
2-26
Ensure the shift lever is fully in PARK (P) before
starting the engine. Your vehicle has an automatic
transaxle shift lock control system. You have to fully
apply your regular brakes before you can shift from
PARK (P) when the ignition key is in RUN. If you
cannot shift out of PARK (P), ease pressure on the shift
lever
-- push the shift lever all the way into PARK (P)
and also release the shift lever button on floor shift
console models as you maintain brake application.
Then move the shift lever into the gear you wish.
(Press the shift lever button before moving the shift
lever.) See “Shifting Out of PARK (P)” in the Index.
Page 88
REVERSE (R): Use this gear to back up.
NOTICE:
Shifting to REVERSE (R) while your vehicle is
moving forward could damage your transaxle.
Shift to REVERSE (R) only after your vehicle
is stopped.
T o rock your vehicle back and forth to get out of snow,
ice or sand without damaging your transaxle, see
“Stuck: In Sand, Mud, Ice or Snow” in the Index.
NEUTRAL (N): In this position, your engine
doesn’t connect with the wheels. To restart when you’re
already moving, use NEUTRAL (N) only. Also, use
NEUTRAL (N) when your vehicle is being towed.
CAUTION:
Shifting out of PARK (P) or NEUTRAL (N) while
your engine is “racing” (running at high speed)
is dangerous. Unless your foot is firmly on the
brake pedal, your vehicle could move very
rapidly. You could lose control and hit people
or objects. Don’t shift out of PARK (P) or
NEUTRAL (N) while your engine is racing.
NOTICE:
Damage to your transaxle caused by shifting out
of P ARK (P) or NEUTRAL (N) with the engine
racing isn’t covered by your warranty.
2-27
Page 89
Forward Gears
AUTOMATIC OVERDRIVE (D): This position is for
normal driving with the automatic transaxle. If you need
more power for passing, and you’re:
D
Going less than about 35 mph (55 km/h), push your
accelerator pedal about halfway down.
D
Going about 35 mph (55 km/h), push your
accelerator all the way down.
THIRD (3): This position is also used for normal
driving, however, it offers more power and lower fuel
economy than AUTOMATIC OVERDRIVE (D).
Here are some times you might choose THIRD (3)
instead of AUTOMATIC OVERDRIVE (D):
D
When driving on hilly, winding roads.
D
When going down a steep hill.
SECOND (2): This position gives you more power but
lower fuel economy. You can use SECOND (2) on hills.
It can help control your speed as you go down steep
mountain roads, but then you would also want to use
your brakes off and on.
NOTICE:
Don’t drive in SECOND (2) for more than
25 miles (40 km), or at speeds over 55 mph
(90 km/h), or you can damage your transaxle.
Use AUTOMATIC OVERDRIVE (D) or
THIRD (3) as much as possible. Don’t shift
into SECOND (2) unless you are going slower
than 65 mph (105 km/h), or you can damage
your engine.
2-28
Page 90
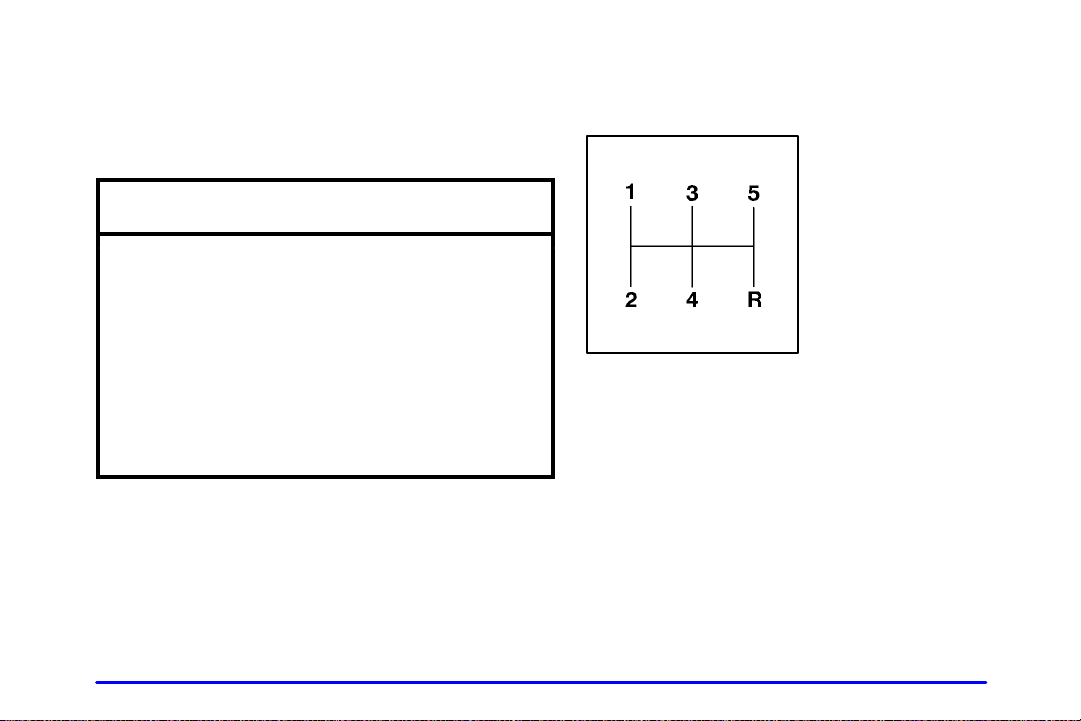
FIRST (1): This position gives you even more power
(but lower fuel economy) than SECOND (2). You can
use it on very steep hills, or in deep snow or mud. If the
shift lever is put in FIRST (1), the transaxle won’t shift
into first gear until the vehicle is going slowly enough.
NOTICE:
If your front wheels can’t rotate, don’t try to
drive. This might happen if you were stuck in
very deep sand or mud or were up against a solid
object. You could damage your transaxle. Also,
if you stop when going uphill, don’t hold your
vehicle there with only the accelerator pedal.
This could overheat and damage the transaxle.
Use your brakes or shift into PARK (P) to hold
your vehicle in position on a hill.
Manual Transaxle Operation
Five-Speed
This is your shift pattern.
Here’s how to operate your transaxle:
FIRST (1): Press the clutch pedal and shift into
FIRST (1). Then, slowly let up on the clutch pedal
as you press the accelerator pedal.
You can shift into FIRST (1) when you’re going less
than 20 mph (32 km/h). If you’ve come to a complete
stop and it’s hard to shift into FIRST (1), put the shift
lever in NEUTRAL (N) and let up on the clutch. Press
the clutch pedal back down. Then shift into FIRST (1).
2-29
Page 91

SECOND (2): Press the clutch pedal as you let up
on the accelerator pedal and shift into SECOND (2).
Then, slowly let up on the clutch pedal as you press
the accelerator pedal.
THIRD (3), FOURTH (4) and FIFTH (5): Shift into
THIRD (3), FOURTH (4) and FIFTH (5) the same way
you do for SECOND (2). Slowly let up on the clutch
pedal as you press the accelerator pedal.
To stop, let up on the accelerator pedal and press the
brake pedal. Just before the vehicle stops, press the clutch
pedal and the brake pedal, and shift to NEUTRAL (N).
NEUTRAL (N): Use this position when you start or
idle your engine.
REVERSE (R): To back up, press down the clutch
pedal, lift up the ring on the shift lever and shift into
REVERSE (R). Let up on the clutch pedal slowly while
pressing the accelerator pedal.
NOTICE:
Shift to REVERSE (R) only after your vehicle is
stopped. Shifting to REVERSE (R) while your
vehicle is moving could damage your transaxle.
Also, use REVERSE (R), along with the parking brake,
for parking your vehicle.
2-30
Page 92
Shift Speeds
CAUTION:
If you skip a gear when you downshift, you could
lose control of your vehicle. You could injure
yourself or others. Don’t shift down more than
one gear at a time when you downshift.
Up-Shift Light (Manual Transaxle)
If you have a manual
transaxle, you may have a
light. This light will show
you when to shift to the
next higher gear for best
fuel economy.
United States Only
When this light comes on, you can shift to the next
higher gear if weather, road and traffic conditions let
you. For the best fuel economy, accelerate slowly and
shift when the light comes on.
While you accelerate, it is normal for the light to go
on and off if you quickly change the position of the
accelerator. Ignore the light when you downshift.
2-31
Page 93
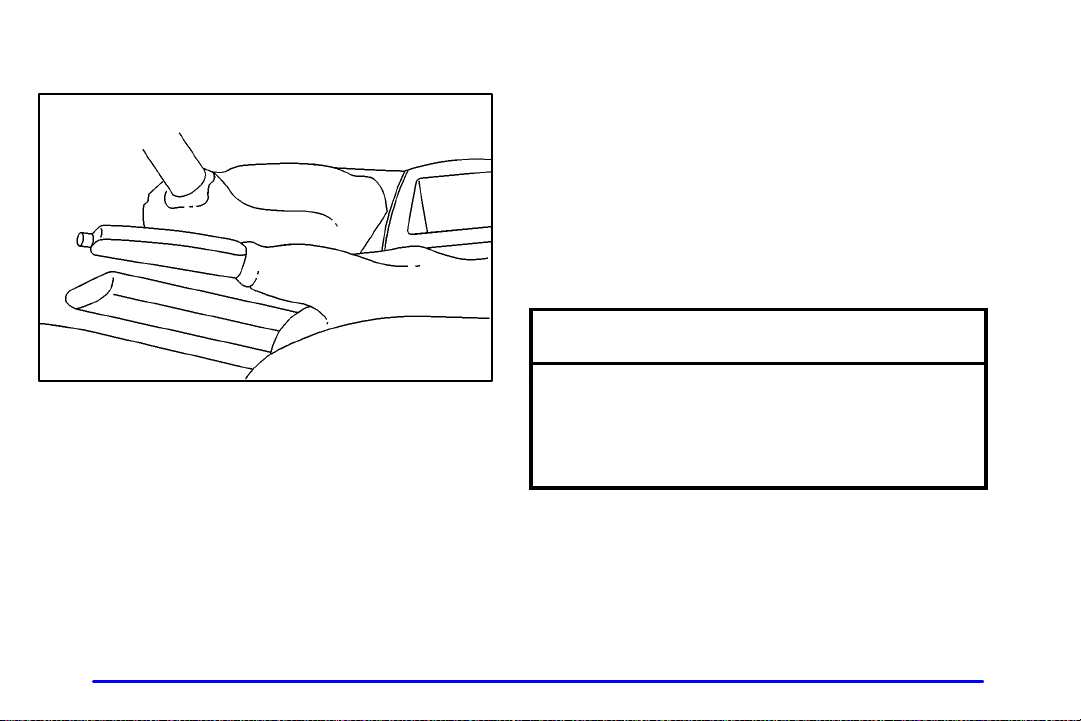
Parking Brake
T o set the parking brake, hold the brake pedal down and
pull up on the parking brake lever. If the ignition is on,
the brake system warning light will come on.
T o release the parking brake, hold the brake pedal down.
Pull the parking brake lever up until you can press the
release button. Hold the release button in as you move
the brake lever all the way down.
If you forget to release your parking brake prior to
driving away , a chime will sound to remind you to
release the parking brake.
NOTICE:
Manual shown, Automatic similar
The parking brake lever is located between the bucket seats.
2-32
Driving with the parking brake on can cause
your rear brakes to overheat. You may have to
replace them, and you could also damage other
parts of your vehicle.
Page 94
Shifting Into PARK (P) (Automatic Transaxle Only)
CAUTION:
It can be dangerous to get out of your vehicle if
the shift lever is not fully in PARK (P) with the
parking brake firmly set. Your vehicle can roll.
If you have left the engine running, the vehicle
can move suddenly. You or others could be
injured. To be sure your vehicle won’t move,
even when you’re on fairly level ground, use the
steps that follow. If you’re pulling a trailer,
see “Towing a Trailer” in the Index.
1. Hold the brake pedal down and set the
parking brake.
2. Move the shift lever into the PARK (P) position:
D
Hold in the button on the lever
D
Push the lever all the way toward the front
of your vehicle.
3. Turn the ignition key to LOCK.
4. Remove the key and take it with you. If you can
leave your vehicle with the ignition key in your
hand, your vehicle is in PARK (P).
2-33
Page 95
Leaving Your Vehicle With the Engine Running (Automatic Transaxle Only)
CAUTION:
It can be dangerous to leave your vehicle with
the engine running. Your vehicle could move
suddenly if the shift lever is not fully in PARK (P)
with the parking brake firmly set. And, if you
leave the vehicle with the engine running, it could
overheat and even catch fire. You or others could
be injured. Don’t leave your vehicle with the
engine running unless you have to.
If you have to leave your vehicle with the engine
running, be sure your vehicle is in PARK (P) and your
parking brake is firmly set before you leave it. After
you’ve moved the shift lever into PARK (P), hold the
regular brake pedal down. Then, see if you can move the
shift lever away from PARK (P) without first pushing
the button. If you can, it means that the shift lever
wasn’t fully locked into PARK (P).
Torque Lock (Automatic Transaxle)
If you are parking on a hill and you don’t shift your
transaxle into PARK (P) properly, the weight of the
vehicle may put too much force on the parking pawl in
the transaxle. You may find it difficult to pull the shift
lever out of PARK (P). This is called “torque lock.”
T o prevent torque lock, set the parking brake and then
shift into PARK (P) properly before you leave the
driver’s seat. To find out how , see “Shifting Into
PARK (P)” in the Index.
When you are ready to drive, move the shift lever out
of PARK (P) before you release the parking brake.
If torque lock does occur, you may need to have
another vehicle push yours a little uphill to take some
of the pressure from the parking pawl in the transaxle,
so you can pull the shift lever out of PARK (P).
2-34
Page 96

Shifting Out of Park (P) (Automatic Transaxle Only)
Your vehicle has an automatic transaxle shift lock
control system. You have to fully apply your regular
brakes before you can shift from PARK (P) when
the ignition is in RUN. See “Automatic Transaxle”
in the Index.
If you cannot shift out of PARK (P), ease pressure on
the shift lever
PARK (P) and also release the shift lever button as you
maintain brake application. Then move the shift lever
into the gear you wish. (Press the shift lever button
before moving the shift lever.)
If you ever hold the brake pedal down, and still can’t
shift out of PARK (P), try this:
1. Turn the key to OFF.
2. Apply and hold the brake until the end of Step 4.
-- push the shift lever all the way into
3. Shift to NEUTRAL (N).
4. Start the vehicle and then shift to the drive gear
you want.
5. Have the vehicle fixed as soon as you can.
Parking Your Vehicle (Manual Transaxle Models Only)
Before leaving your vehicle, fully press the clutch pedal
in, move the shift lever into REVERSE (R), and firmly
apply the parking brake. Once the shift lever has been
placed in REVERSE (R) with the clutch pedal pressed
in, you can turn the ignition key to OFF, remove the key
and release the clutch.
See “Manual Transaxle Operation” in the Index.
2-35
Page 97
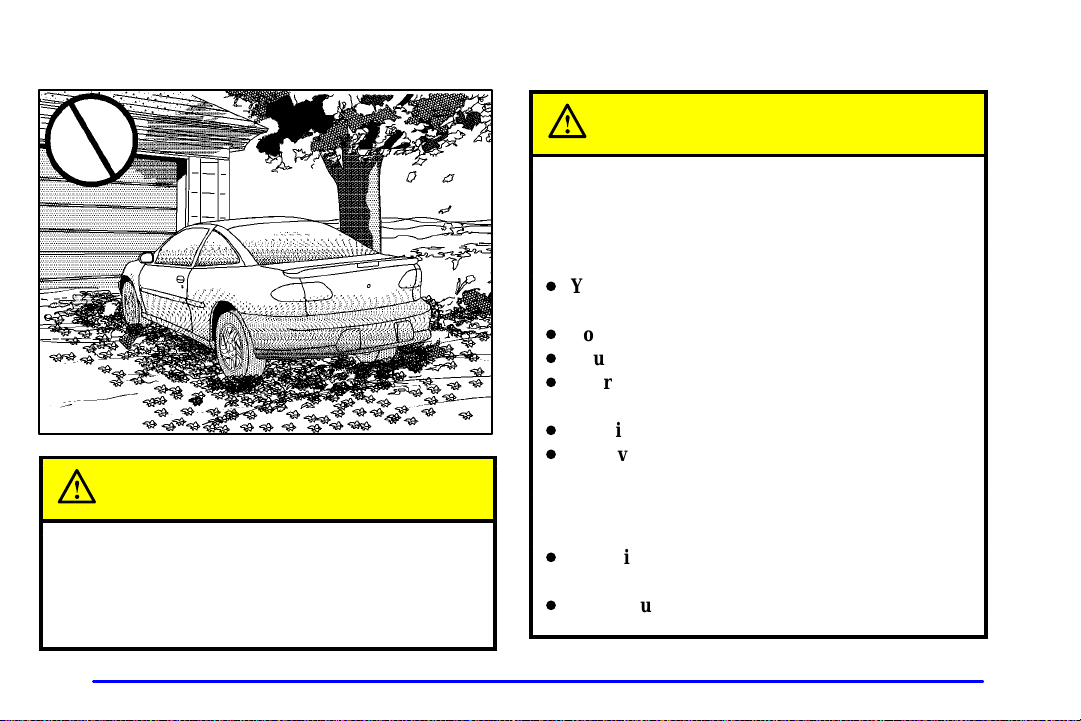
Parking Over Things That Burn
CAUTION:
Things that can burn could touch hot exhaust
parts under your vehicle and ignite. Don’t park
over papers, leaves, dry grass or other things that
can burn.
Engine Exhaust
CAUTION:
Engine exhaust can kill. It contains the gas
carbon monoxide (CO), which you can’t see or
smell. It can cause unconsciousness and death.
You might have exhaust coming in if:
D
Your exhaust system sounds strange
or different.
D
Your vehicle gets rusty underneath.
D
Your vehicle was damaged in a collision.
D
Your vehicle was damaged when driving over
high points on the road or over road debris.
D
Repairs weren’t done correctly.
D
Your vehicle or exhaust system had been
modified improperly.
If you ever suspect exhaust is coming into
your vehicle:
D
Drive it only with all the windows down to
blow out any CO; and
D
Have your vehicle fixed immediately.
2-36
Page 98
Running Your Engine While You’re
Parked (Automatic Transaxle)
It’s better not to park with the engine running. But if you
ever have to, here are some things to know.
CAUTION:
Idling the engine with the climate control
system off could allow dangerous exhaust into
your vehicle. See the earlier Caution under
“Engine Exhaust.”
Also, idling in a closed-in place can let deadly
carbon monoxide (CO) into your vehicle even if
the fan is at the highest setting. One place this can
happen is a garage. Exhaust
come in easily. NEVER park in a garage with the
engine running.
Another closed-in place can be a blizzard.
See “Blizzard” in the Index.
-- with CO -- can
CAUTION:
It can be dangerous to get out of your vehicle if
the shift lever is not fully in PARK (P) with the
parking brake firmly set. Your vehicle can roll.
Don’t leave your vehicle when the engine is
running unless you have to. If you’ve left the
engine running, the vehicle can move suddenly.
You or others could be injured. To be sure your
vehicle won’t move, even when you’re on fairly
level ground, always set your parking brake and
move the shift lever to PARK (P).
Follow the proper steps to be sure your vehicle won’t
move. See “Shifting Into PARK (P)” in the Index.
If you are parking on a hill and if you’re pulling a
trailer, also see “Towing a Trailer” in the Index.
Horn
You can sound the horn by pressing the center of
your steering wheel.
2-37
Page 99
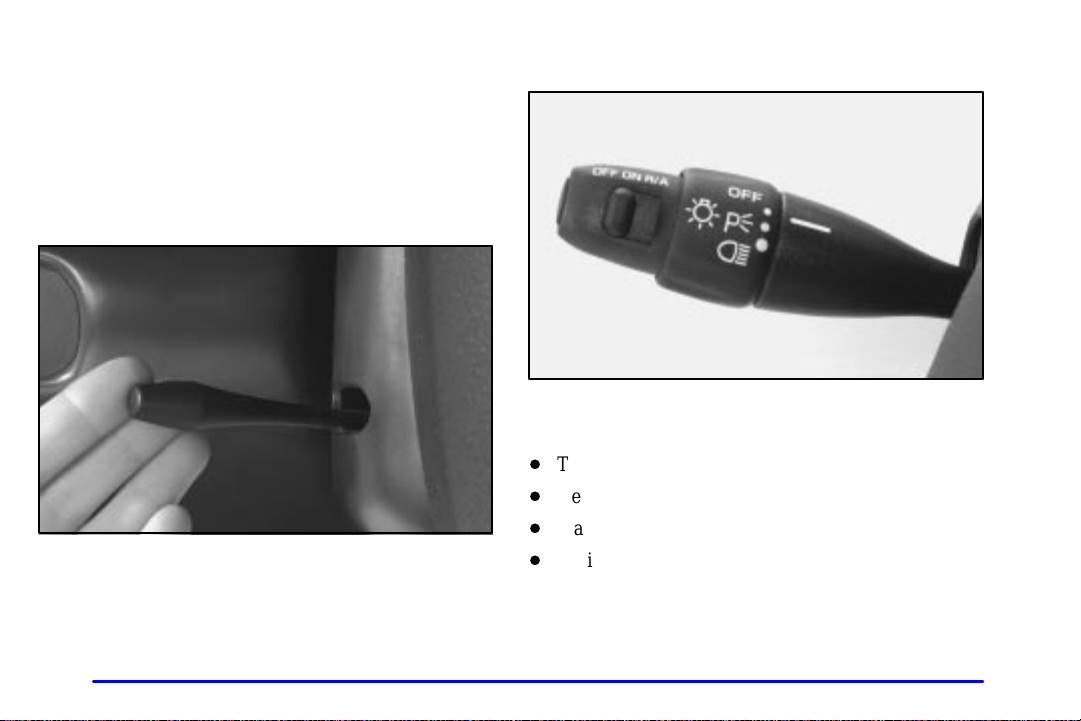
Tilt Wheel (If Equipped)
A tilt wheel allows you to adjust the steering wheel
before you drive. You can raise it to the highest level
to give your legs more room when you exit and enter
the vehicle.
The lever that allows you to tilt the steering wheel is
located on the left side of the steering column.
T o tilt the wheel, hold the wheel and pull the lever.
Then move the wheel to a comfortable position and
release the lever to lock the wheel in place.
Turn Signal/Multifunction Lever
The lever on the left side of the steering column
includes the following:
D
Turn and Lane
D
Headlamp High/Low
D
Flash
-to-Pass
D
Cruise Control (If Equipped)
For information on the exterior lamps, see “Exterior
Lamps” later in this section.
-Change Signals
-Beam Changer
2-38
Page 100
Turn and Lane-Change Signals
The turn signal has two upward (for right) and two
downward (for left) positions. These positions allow
you to signal a turn or a lane change.
T o signal a turn, move the lever all the way up
or down. When the turn is finished, the lever will
return automatically.
An arrow on the instrument
panel cluster will flash in
the direction of the turn
or lane change.
T o signal a lane change, just raise or lower the lever
until the arrow starts to flash. Hold it there until you
complete your lane change. The lever will return by
itself when you release it.
As you signal a turn or a lane change, if the arrows
flash rapidly, a signal bulb may be burned out and
other drivers won’t see your turn signal.
If a bulb is burned out, replace it to help avoid an
accident. If the arrows don’t go on at all when you
signal a turn, check the fuse (see “Fuses and Circuit
Breakers” in the Index) and for burned
-out bulbs.
Headlamp High/Low-Beam Changer
T o change the headlamps from low beam to high, or
high beam to low, pull the turn signal lever all the way
toward you. Then release it.
When the high beams
are on, this light on the
instrument panel cluster
will also be on.
Flash-to-Pass
This feature lets you use your high-beam headlamps
to signal a driver in front of you that you want to pass.
T o use it, pull the turn signal/multifunction lever
toward you until the high
then release the lever to turn them off.
-beam headlamps come on,
2-39
 Loading...