

Page 1
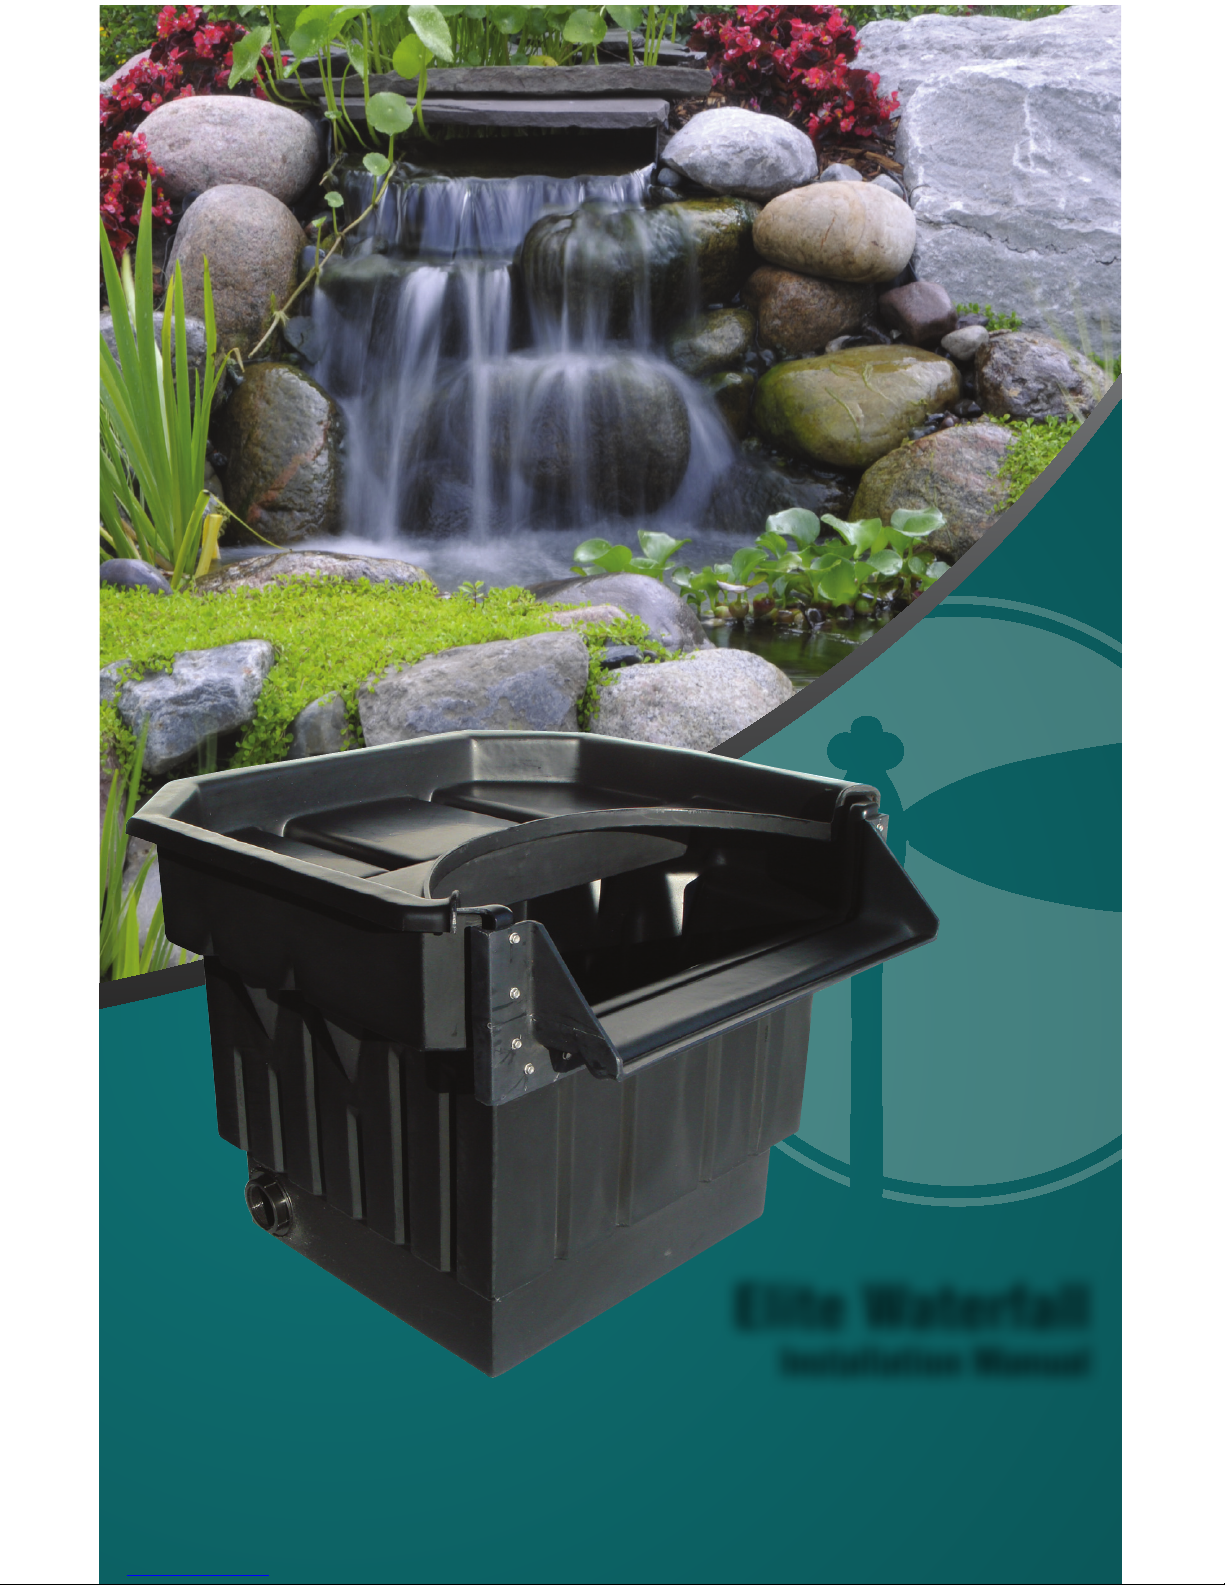
Elite Waterfall
Installation Manual
Item #PBEWIM
Page 2
Choose Waterfall Location
a. The waterfall should be positioned so that
the water fl owing from it enters the pond
opposite the skimmer to ensure proper
water circulation. The waterfall is best
positioned so that you can view it from the
outdoor and indoor areas where you plan
to enjoy your new water feature.
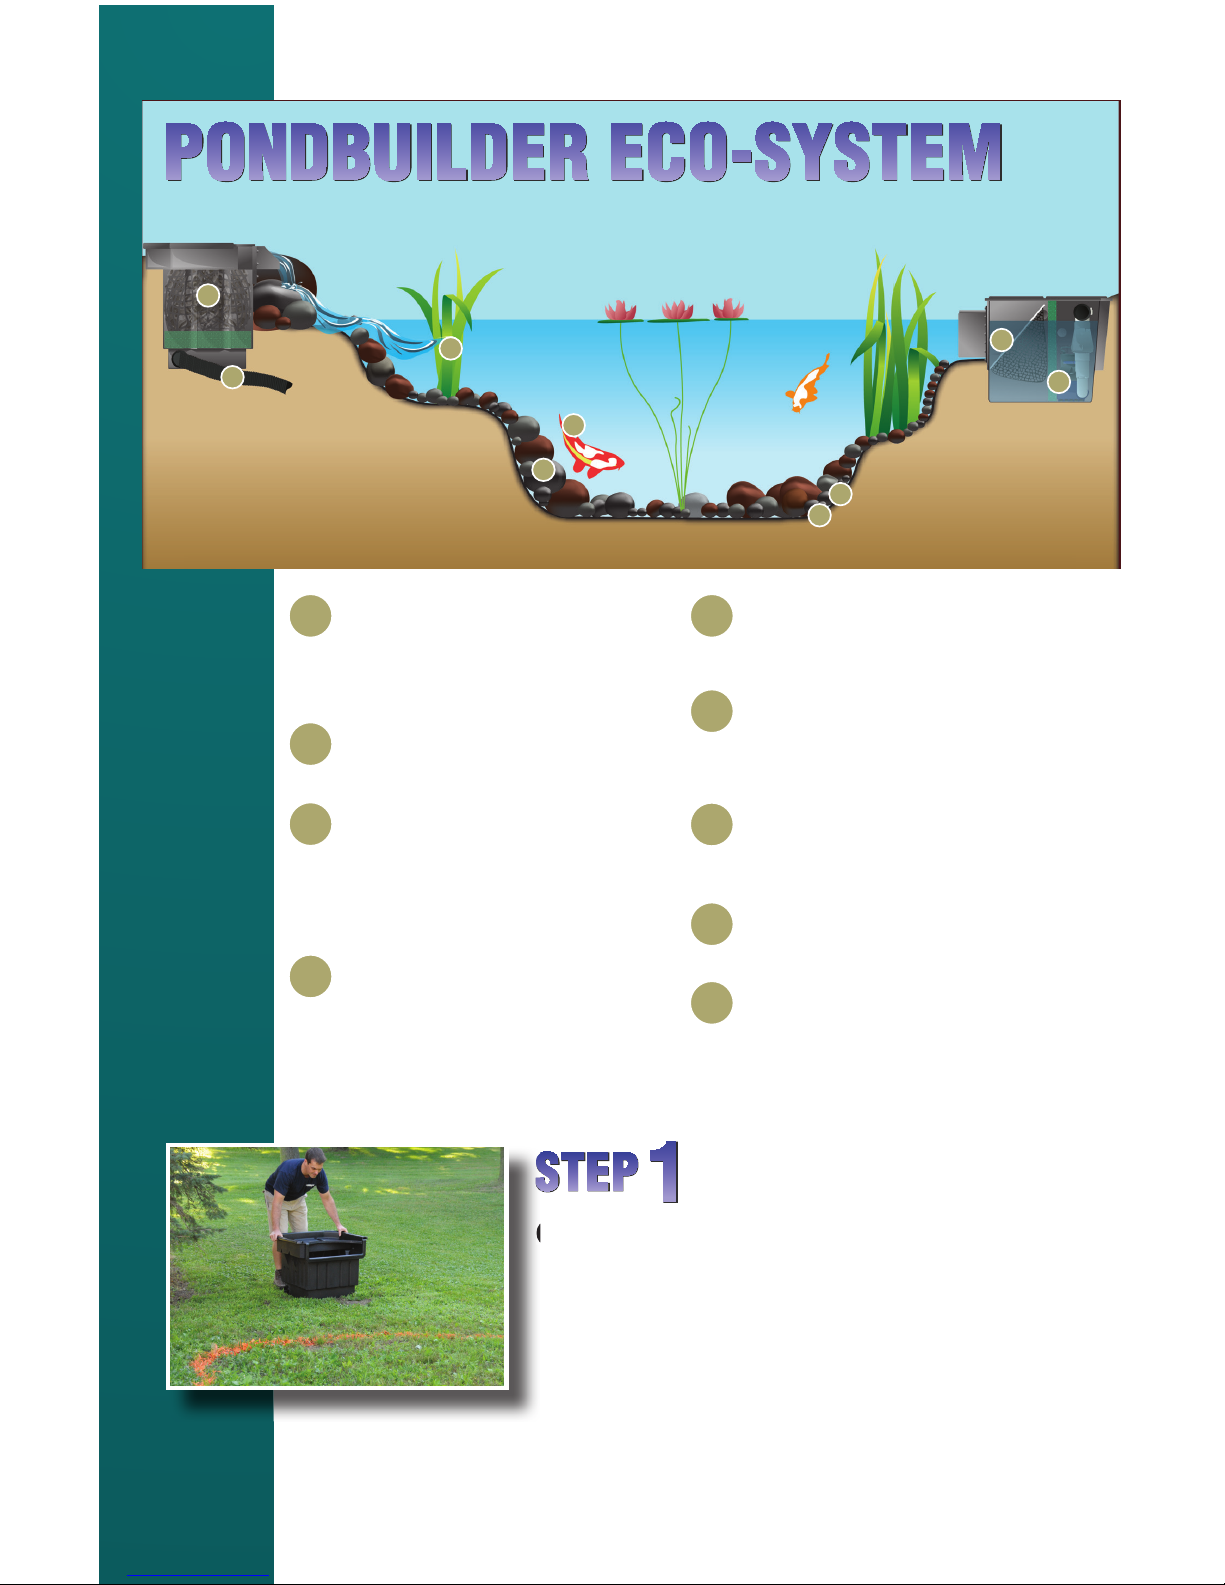
Fish
Adding colorful koi and goldfi sh creates an even
more dramatic display. Watergardens are great
for Goldfi sh and Koi.
High-Effi ciency Pump
Pump sits in back pump chamber protected from
clogging by nets and fi lter mats. PondBuilder
pumps are recommended as they will use far less
electricity and are meant to operate continuously.
Mechanical Skimmer Box
Simplifi es routine maintenance by removing
fl oating debris before it sinks to the bottom of
the pond. Protects the pump and hides unsightly
plumbing.
Protective Underliner
A non-woven, protective underliner fabric forms a
soft padding for the liner.
Fish-Friendly Rubber Liner
Super-strong 45-mil EPDM liner is the best choice
when building a pond. Very fl exible - conforms to
pond’s curves and slopes.
Biological Waterfall Box
Filters harmful waste and toxins from water, keeping your pond clean and clear. Provides excellent
surface area for benefi cial bacteria growth while
making a simple and artistic way of creating a waterfall. Easy to camoufl age-especially when using the
Landscape Lid™.
Black PVC Flex Hose
Carries water from skimmer box up to the biological waterfall box. Much easier to install than rigid
PVC.
Aquatic Plants
Add beauty to any pond! Plants can be placed
throughout or along the pond’s edge. There
are many varieties: fl oating, marginal, sinking,
oxygenators and lilies. Watergarden kits are great
when your desire is to keep many colorful and
beautiful aquatic plants.
Rocks & Gravel
Provides additional surface area for benefi cial bacteria to colonize. Protects liner from harmful UV
rays and damage from animals. Creates a very
natural look.
H
I
F
G
C
D
A
B
E
A
B
C
E
D
F
G
H
I
1a.
Page 3
b. You can position the waterfall right at the
ponds edge or at the top of a stream.
Assemble Waterfall Plumbing
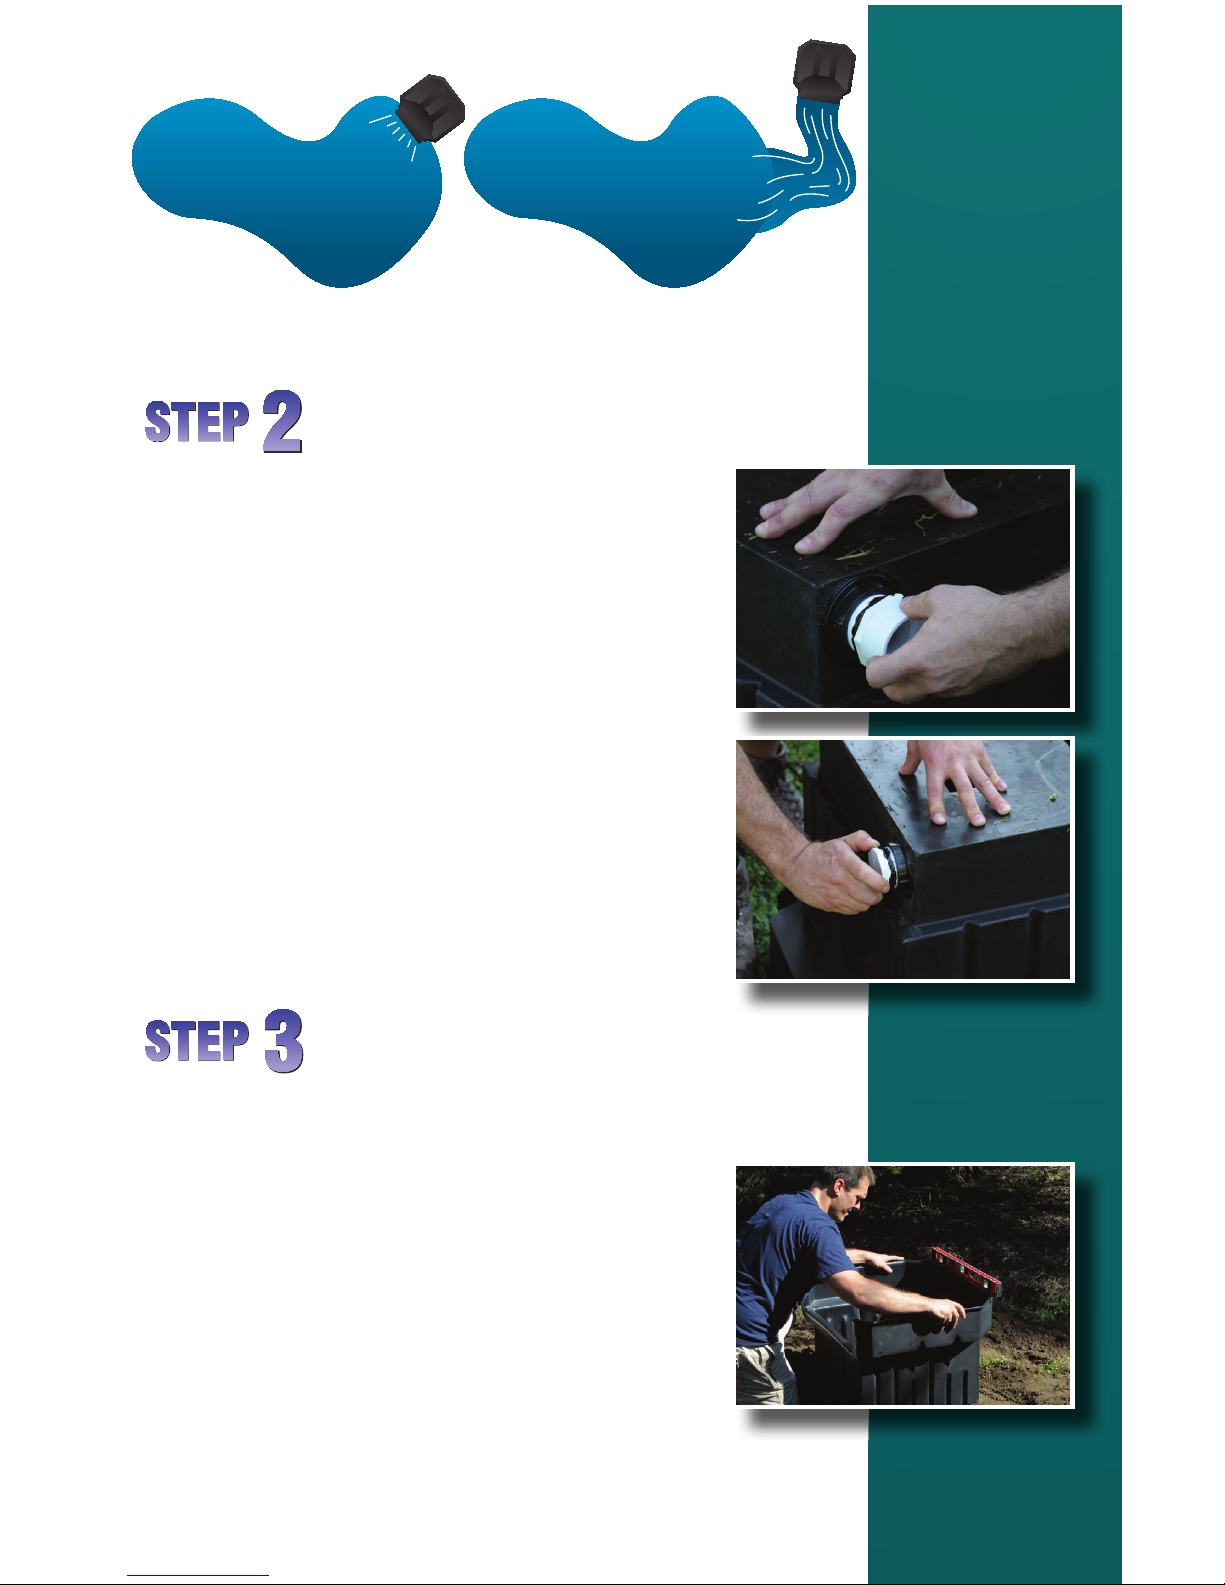
a. Your PondBuilder Elite Waterfall Box has
two spinweld fi ttings, one on each side of
the bottom of the box. Choose which side
your feed/hose line will come in and thread
the PVC male adapter into that spinweld
(use the Tefl on Tape included on the
threads fi rst).
b. Thread the PVC plug into the remaining
spinweld. Use the Tefl on Tape included on
the threads fi rst.
c. If desired, you can use the second spin-
weld for a second pump line or for a backfl ush system.
Position Waterfall Box
a. Compact the area where the waterfall box
will sit to prevent future settling. The waterfall box should sit level from side to side
and should be tilted forward slightly (about
¼ bubble on your level) to ensure that the
water fl ows forward through the spillway.
3a.
2b.
2a.
Page 4
Hook-Up Flexible PVC Pipe
a. The 14” & 22” Elite Waterfalls are plumbed
to accept 2” Flexible PVC Pipe; the 30”
Elite Waterfall is plumbed to accept either
2” or 3” Flexible PVC Pipe; and the 40”
Elite Waterfall is plumbed to accept 3”
Flexible PVC Pipe. We recommend using
Flexible PVC pipe as it is very fl exible and
easy to work with.
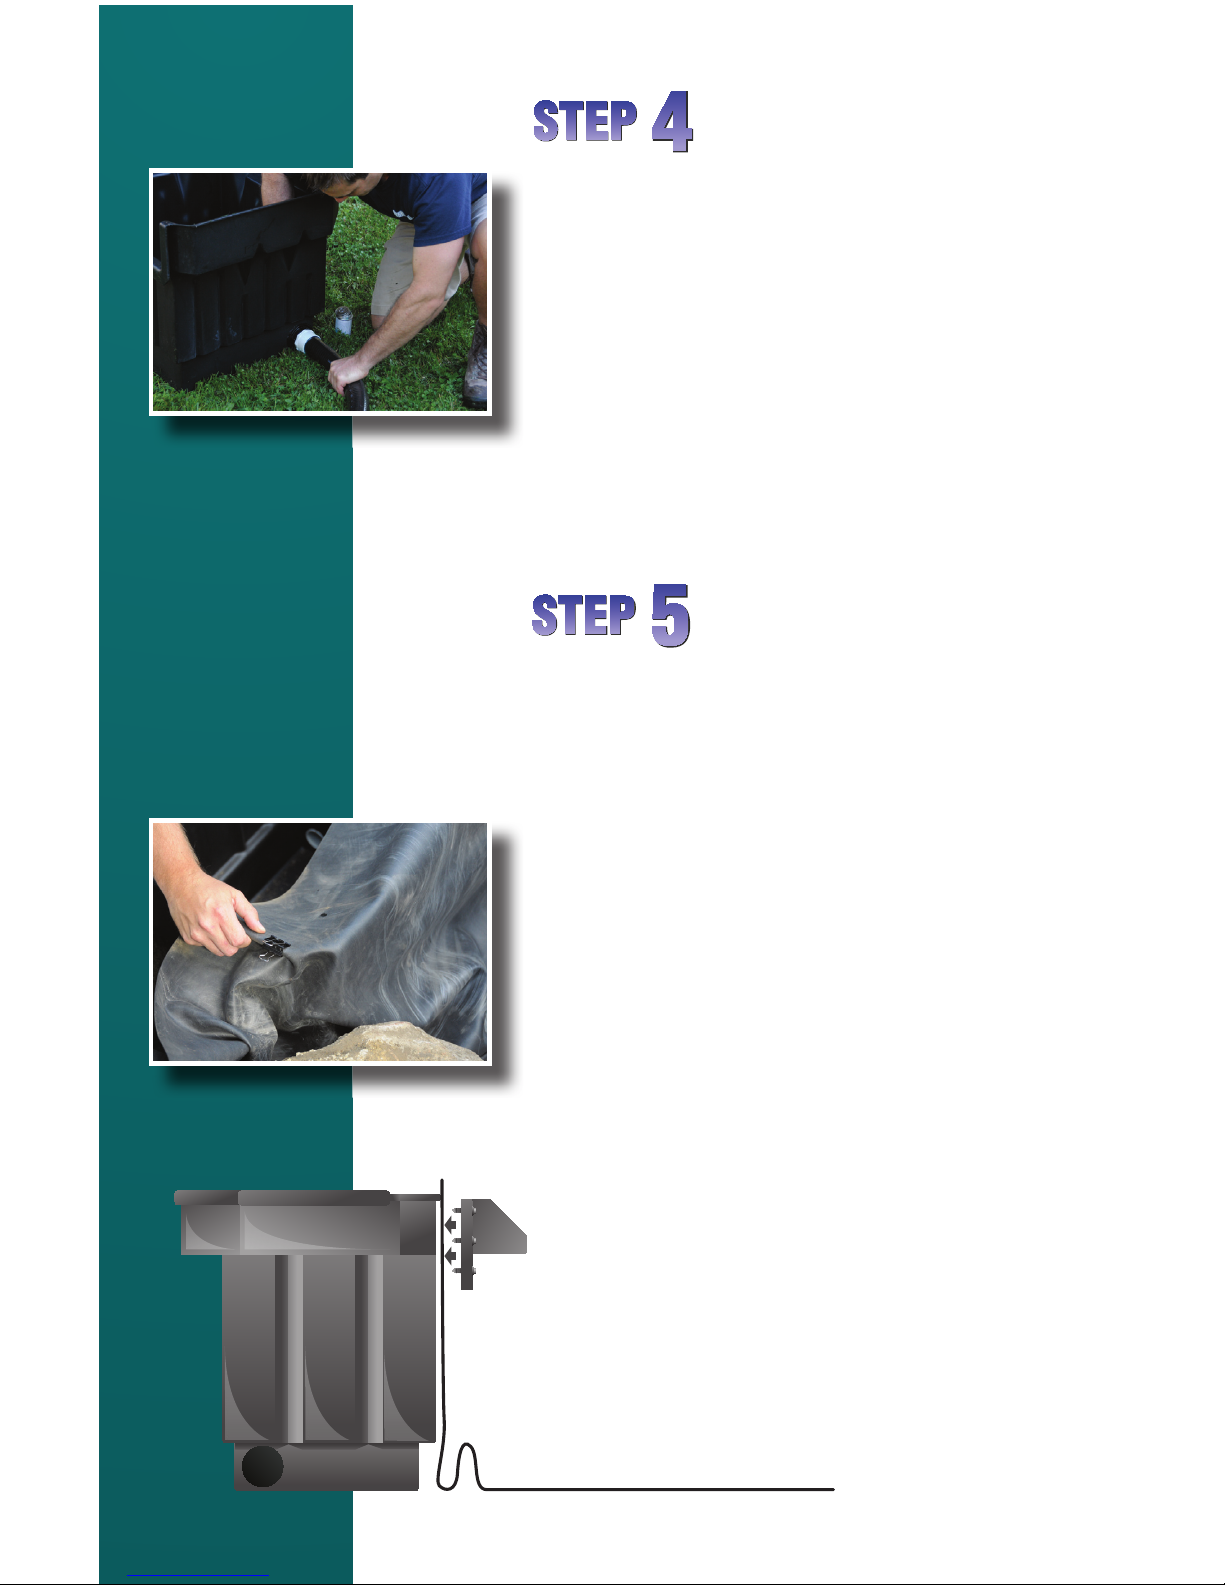
b. Using PVC Primer & Cement, glue the fl ex
pipe into the PVC male adapter.
Attach Liner to Waterfall
a. Bring the liner up to the face of the wa-
terfall box and check the positioning of
the liner against the waterfall box. Use
the liner clips (included) to temporarily
hold the liner to the box. The liner should
follow the contours of the pond edge or
stream and the face of the waterfall box.
It is a good idea to leave a little slack in
the liner where it transitions from the pond
edge or stream to the face of the waterfall
box. This will ensure that the weight of the
rocks used in the waterfalls will not pull
down on the liner once it is attached to the
waterfall box.
b. Kneel in front of the waterfall and have the
following within reach: cordless screwdriver, 5/16” nut driver bit, waterfall weir
(included), silicone (included), stainless
steel screws (included), utility knife (with
new blade), and a clean rag.
5b.
4b.
Page 5
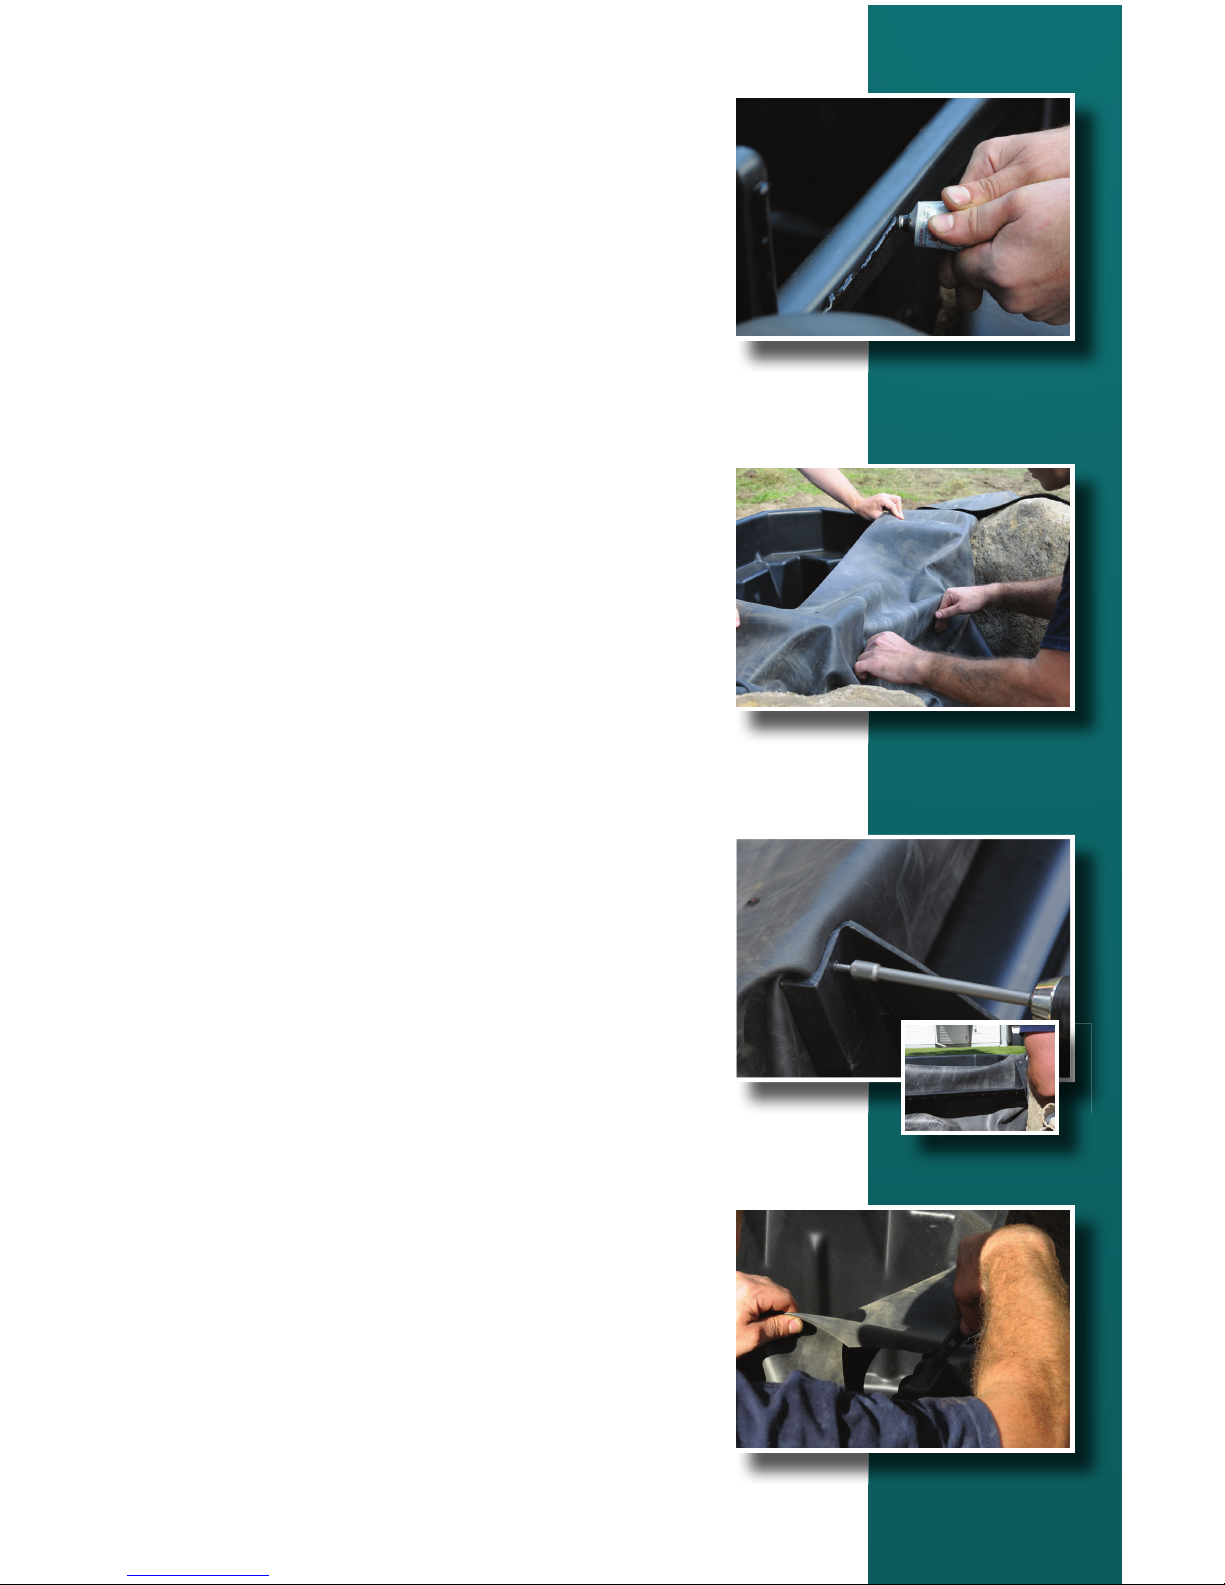
c. Kneeling in front of the waterfall box
remove the liner clips and fold the liner
back toward you leaving it to rest on your
lap. Using the clean rag wipe down the
face of the waterfall box around the area
where silicone will be applied. Also clean
the area on the liner that will be coming in
contact with the area you cleaned on the
waterfall box.
d. Apply a bead of silicone along the sides
and bottom of the opening on the face of
the waterfall, keeping the silicone bead
centered the entire way.
e. Bring the liner back up into position
against the face of the waterfall. Hold the
liner in place again with the liner clips to
help keep it from moving around as we
prepare to attach the waterfall weir. Gently
run your fi ngers along the liner over the
area where you applied the silicone and
fl atten the bead out slightly. This will help
ensure a more even distribution of the
silicone as we compress it when we screw
down the weir.
f. Bring the waterfall weir into position. The
weir has a return edge that will make it
easy to hold it against the waterfall box
in the correct position. Once in position
begin driving the stainless screws into
place. Start with the top screw on the left
and right fi rst to hold the weir in position.
Continue driving screws into the remaining
pilot holes on the weir with your next screw
going into the middle hole on the weir.
g. Carefully trim out the section of liner inside
of the waterfall area to open the channel
where the water will fl ow through.
5d.
5f.
5g.
5e.
Page 6
h. Use the remaining silicone to run an ad-
ditional bead along the joint where the waterfall box, liner, and weir come together.
Smooth out the bead using your fi nger.
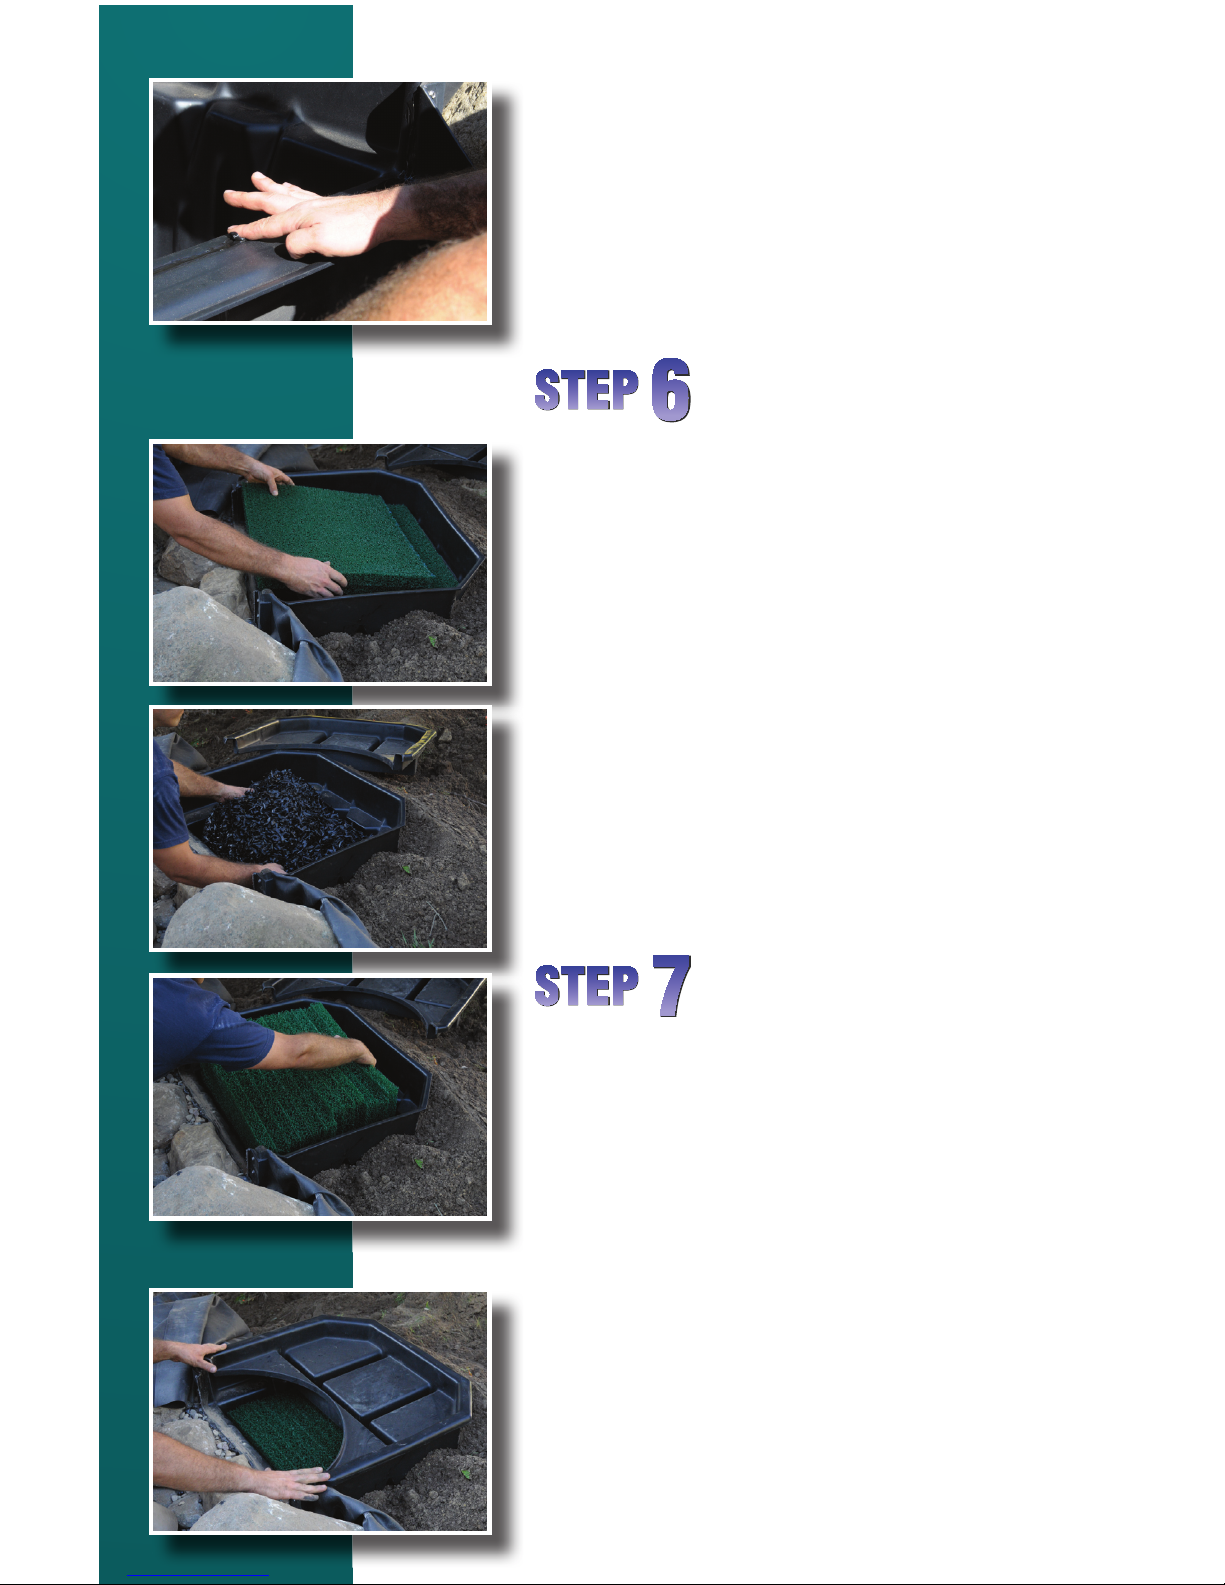
Install Filter Media
a. Position the fi lter mat(s) horizontally in
the bottom of the waterfall box. The Elite
Waterfalls include two green Matala Mats.
b. Fill the media bag(s) with biological media
(not included) and position on top of the fi lter mats. We recommend using Bio-Twist
media in the media bag(s). However, it is
best to stand the green Matala mats vertically in the box and add in additional mats
to fi ll the space (in this case you would
not use the media bags). Pre-Cut Matala
mats are available for the 14” & 22” Elite
Waterfalls from your PondBuilder Dealer.
Install Landscape Lid
a. The PondBuilder Landscape Lid allows
you to make the open top area of the
waterfall box disappear into the landscape. Position the Landscape Lid on the
waterfall box. The most popular method
of disguising the waterfall box is to plant
aquatic plants within the channels of the
landscape lid. Add pea gravel to fi ll the
rest of the channel and landscape lid area.
(cont.)
5h.
6a.
6b.
6b.
7a.
Page 7
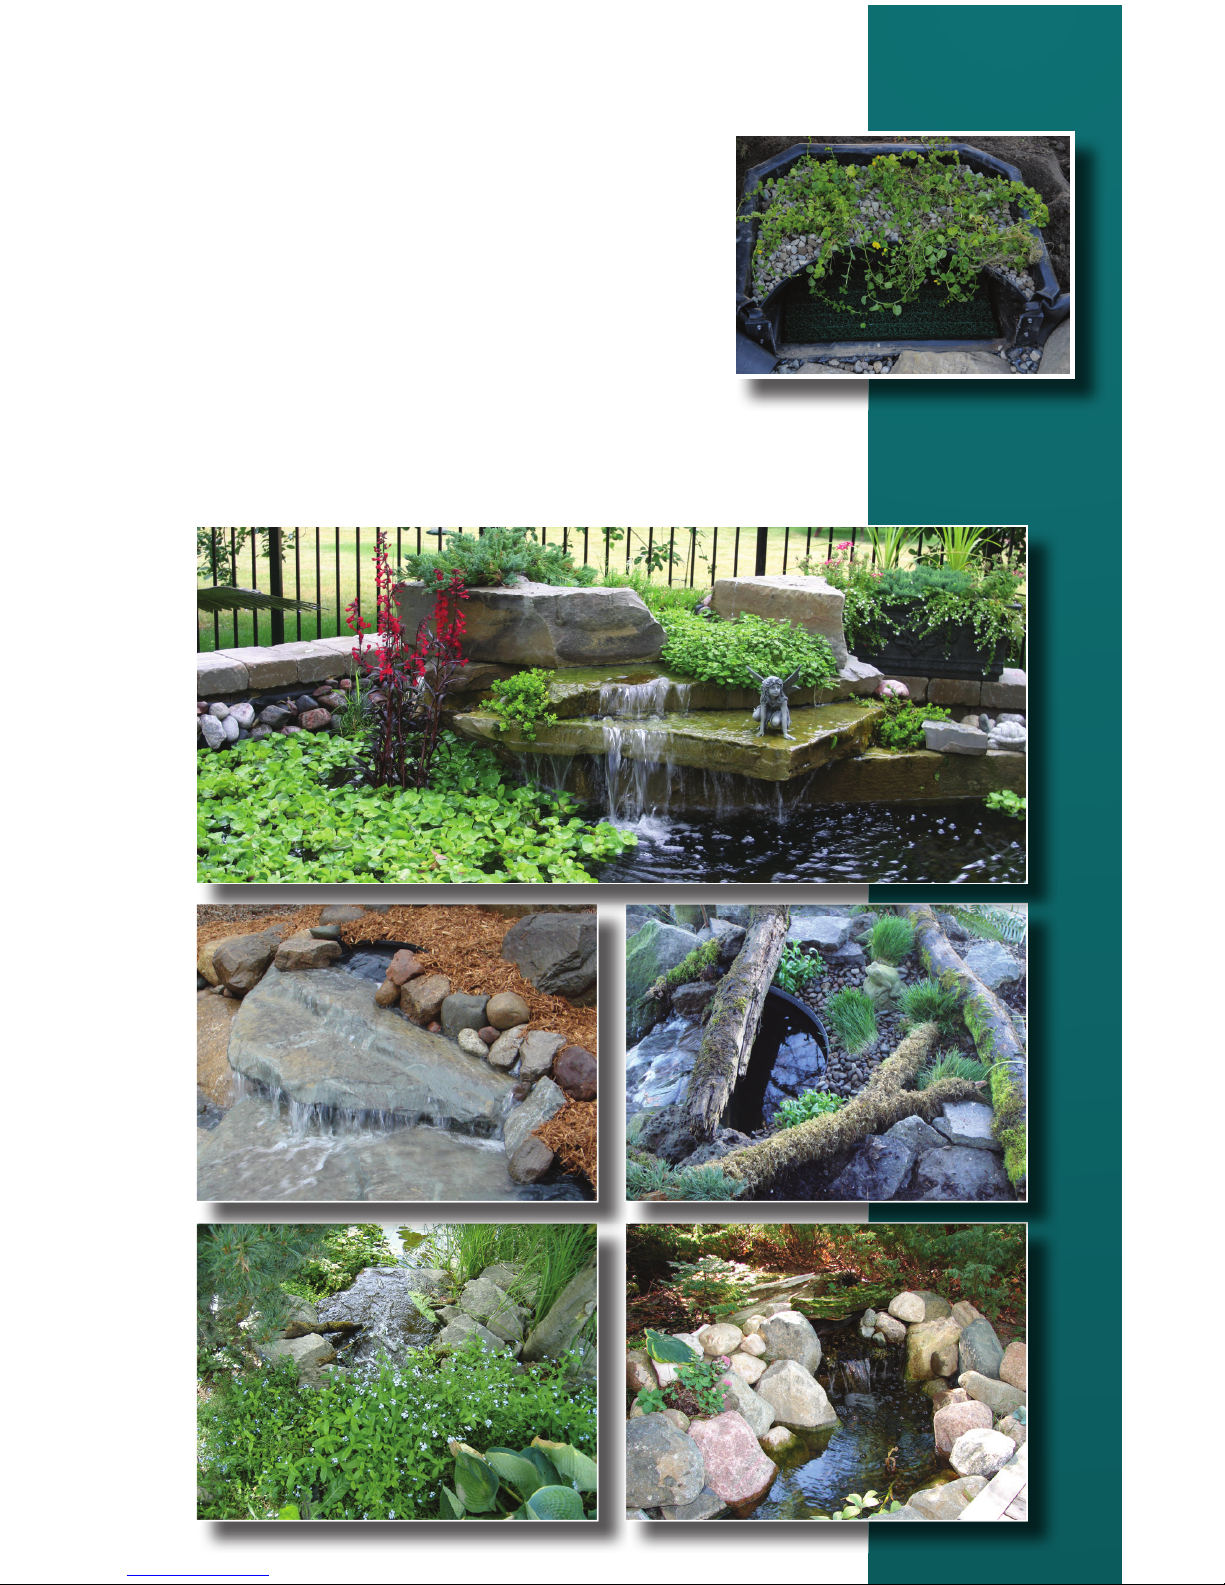
There are holes in the bottom of the landscape lid that will allow water to wick up
to the root system of the plants. Other options include hiding the waterfall box using
mulch or gravel. Adding in some driftwood
is a nice touch as well.
7a.
Hiding the Elite Waterfall Box using the
Landscape Lid is super easy! Here’s a
few samples from our customers:
Page 8
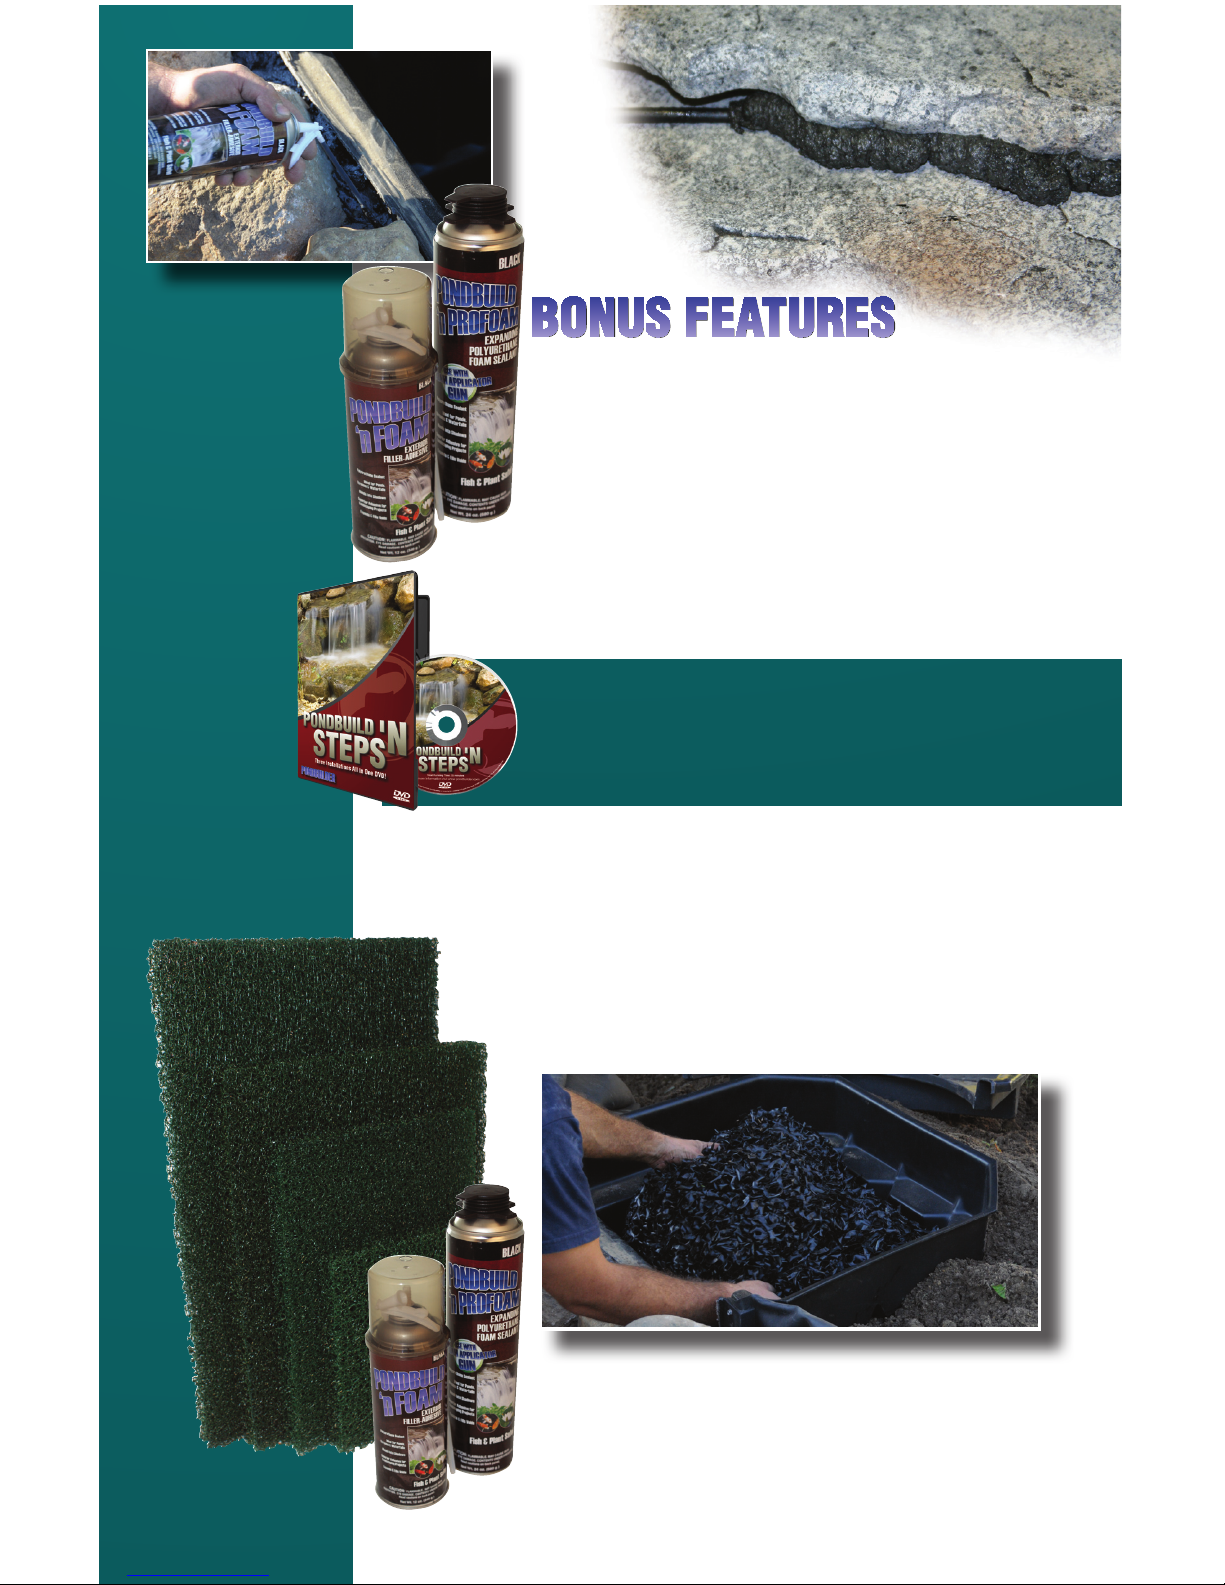
a. Use PondBuild ‘n Foam to fi ll in the gaps
of the rockwork leading up to the waterfall
box. The foam will force the water on
top of the rockwork rather than around
and behind it where it can’t be seen.
This will give you a much more dramatic
waterfall display!
View the waterfall attachment steps and a
complete water garden installation on the
PondBuild ‘n Steps DVD.
PondBuilder recommends the following
products for use with their line of Biological
Waterfall Filters:
• BioTwist Media
• PondBuild ‘n Foam Waterfall Foam
• Additional Matala Mats
 Loading...