

Pond Boss DWF16 Assembly Instructions Manual

ITEM #DWF16
PACKAG E CONTENTS
PREPARATION
PRODUCT DESCRIPTION
Part
Description
Quantity A Tank
1
B
Coupler
1
C
Gasket
1
D
Adapter
1 E Bio media balls with bag
2 F Filter pad
1
G
Clip
2
H
Cover
1 I Anchoring Flange
1
J
Screw
12
A
B
REMINDER
BEFORE RETURNING TO STORE.
Questions, problems, m i ssing parts? Before retur nin g
C
D
E
E F G H G I J
16 in. Waterfall Spillway
CALL 1-888-755-6750
to your retailer, call our cust om er ser vice department at
1-888-755-6750, 8 a.m.-6 p.m., EST, Monday-Friday, or
email us at customercare@thepondboss.net. Or v isit our
website www.thepondb oss.net.
Before beginning assem bl y of product, make sure all parts are pr esent. Compare parts w ith package
contents list and diagram above. If any part is missing or damaged, do not attempt to assemble, install or
operate the product. Contact customer service for replacement parts.
• Estimated Assembly Ti me: 45 minutes
• Tools required for assembly: Carpenter’s level, marker,utility knife , tempor ar y nail, philipshead
screwdriver, hacksaw,.
Waterfall spillway is specifically design to maxim iz e the natural processes that r emove ammonia from the
water. Water pumped into t ank brings the dissolved wastes into contact with bacterial colonies on the
many surfaces of the filter pad and bio ball. These colonies di gest , or metabolize the am mo nia. Some
types of bacteria turn it into nitr ites ; ot her s t ake the still toxic nitrites and dissolved oxygen and tur n t hem
into less toxic nitrates, a nat ur al fer t ilizer that is easily t aken up by plants. When water filter and b ack into
pond likes a beautiful waterfa ll, it will help to aerate the water. When the proper balance of fish, pla nts and
aeration is reached, you don't have to clean your pond for the ent ire season. This waterfal l spillway is
designed to work with a water pump that can circulate of 1200 to 3750 gallons per hour.
PLEASE CALL 1-888-755-6750 BEFORE RETURNING TO THE STORE.
WWW.THEPONDBOSS.NET
ASSEMBLY INSTRUCTIONS
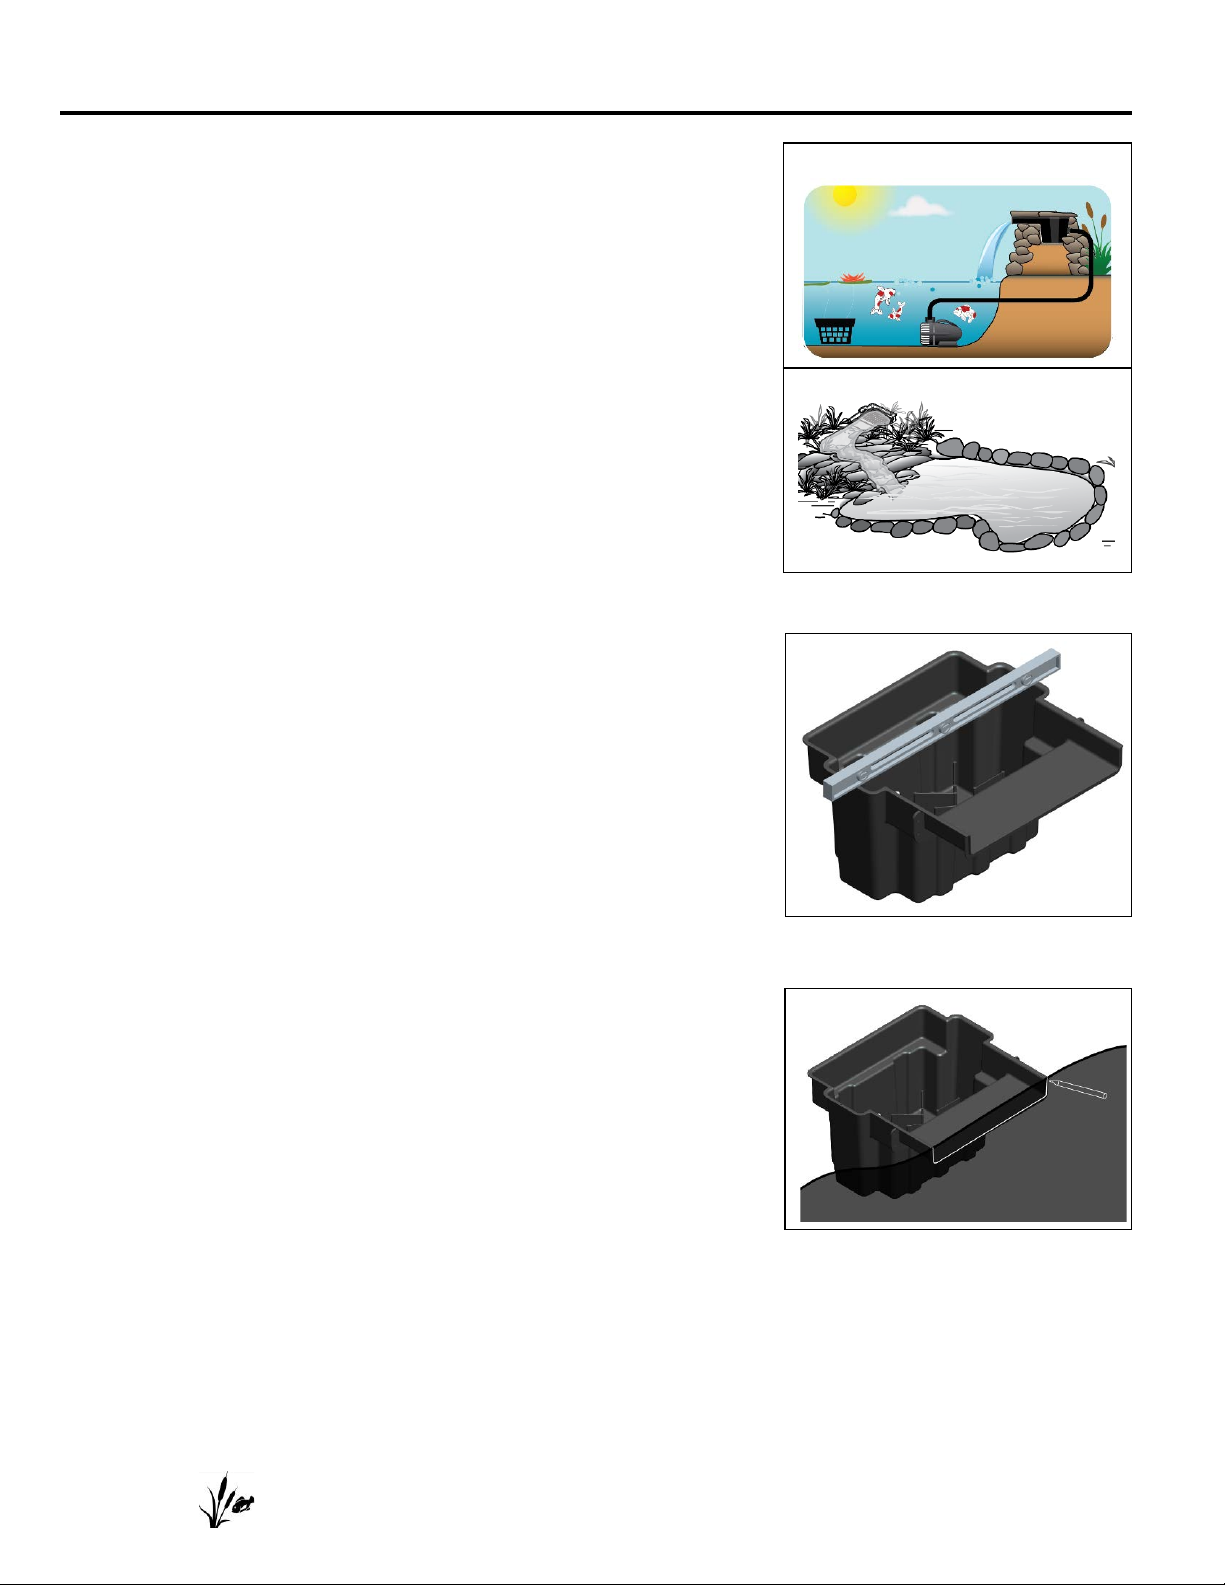
Waterfall returning directly to pond
Waterfall with stream
1. Choose a location for your waterfall spillway, it can sit inside
the liner or at the liner perimet er . M ost of the time it is placed
at the beginning of a stream. Th e i mp or tant thing to remember
is that all of the water coming o ut of t he f i lt er m ust stay within
the pond liner to avoid wat er loss. Fig. 1
Fig. 1
2. Place the tank in the place that you prepared for it and check
that it is level before burying. Fig. 2
Fig. 2
3. Check the liner will sit freely up your tank without wrinkling or
pulling. Carefully clean and rinse the liner inside and out with
water, then dry it with paper towels or a clean cloth. The
surface to be sealed must be c le an and dry for the sealer to
bond properly. Mark the li ner w it h t he shape of the spillway. A
white or yellow marker works well to do this. Fig. 3
Fig. 3
PLEASE CALL 1-888-755-6750 BEFORE RETURNING TO THE STORE.
WWW.THEPONDBOSS.NET
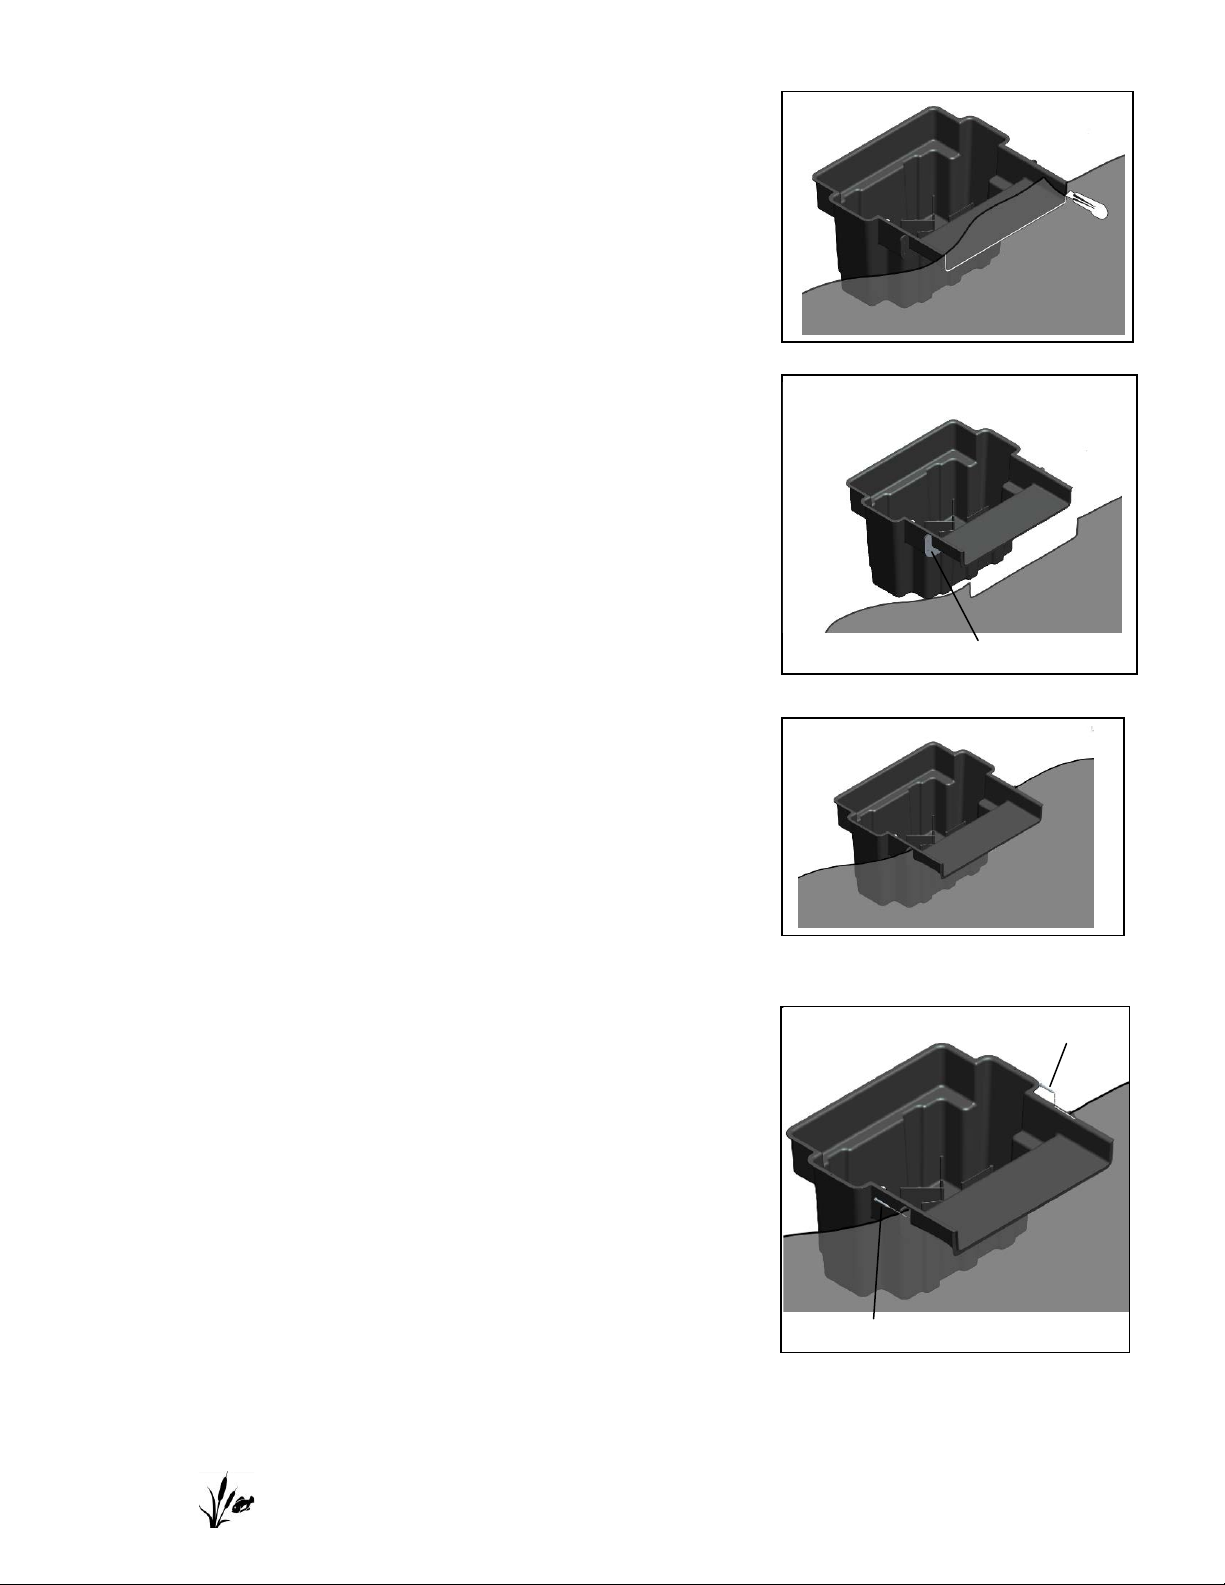
4. Carefully cut and remove the section of liner in the spillway
Apply silicone on this surface
Temporary nail
Temporary nail
opening. Fig. 4
Fig. 4
5. Apply a continuous 1/4" b ead of sealer around the flange of
tank. Make sure there are no spaces or voids in the bead
between the holes and the edge of the cut-out on the flange
of the tank. Fig. 5
Fig. 5
6. Align the liner on the flange of tank, make sure the liner sit flat
on the flange of tank without wrinkling or pulling. Fig. 6
Fig. 6
7. Insert 2 temporary nail int o t he fl ange top corner hole of tank,
then holding the nails in place w ith hand, push the nail
through the liner Fig. 7
Fig. 7
WWW.THEPONDBOSS.NET
PLEASE CALL 1-888-755-6750 BEFORE RETURNING TO THE STORE.
 Loading...