

Pond Boss DILM12B, DILM12W, DILM14W, DILM14B User Manual
Lit Waterfall Spillway
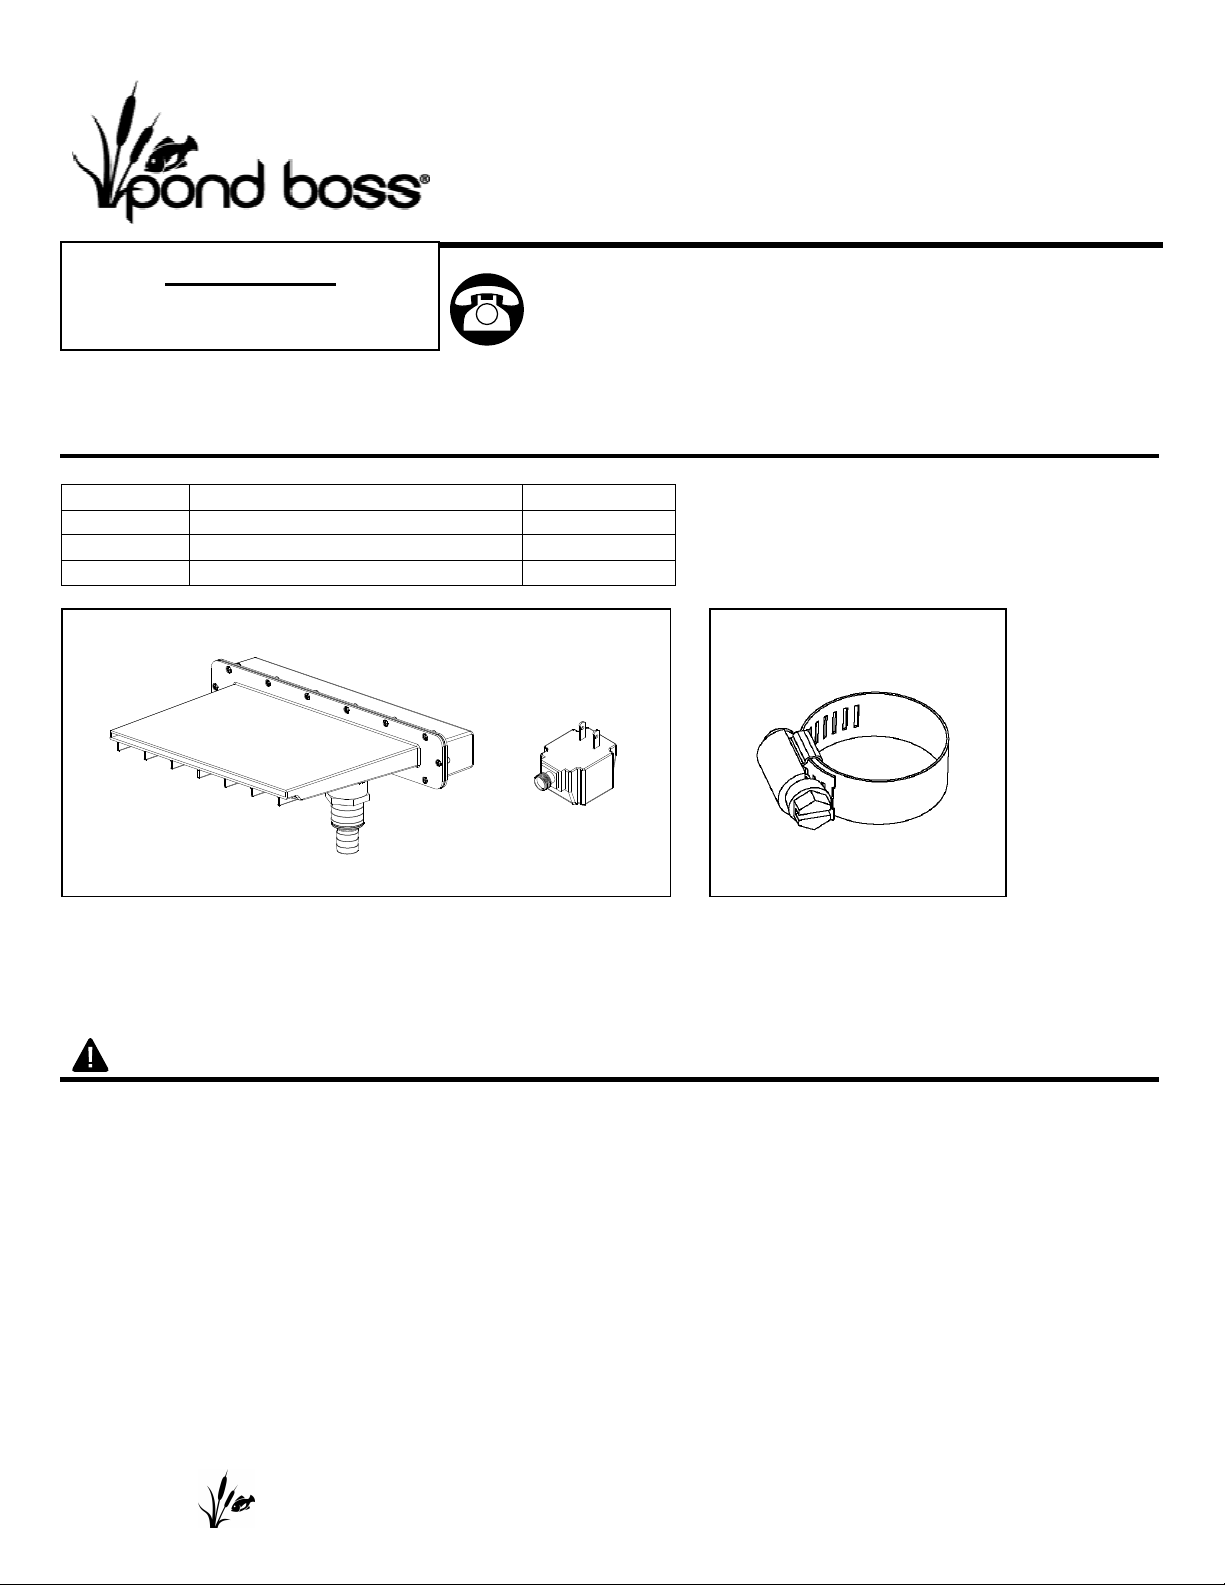
PACKAGE CONTENTS
A C
Questions, problems, missing parts?
B
REMINDER
CALL 1-888-755-6750
BEFORE RETURNING TO STORE.
Part Description Quantity
A Illumifalls spillway 1
B Transformer 1
C Hose clamp 1
to your retailer, call our customer service department at
1-888-755-6750, 8 a.m.-6 p.m., EST, Monday-Friday, or
email us at customercare@thepondboss.net. Or visit our
website www.thepondboss.net.
ITEM #DILM12B/DILM12W/DILM14B/DILM14W
Before returning
WARNINGS AND CAUTIONS
WARNING
• To reduce the risk of electrical shock, connect only to a properly grounded, grounding type receptacle .
• Do not exceed the input voltage shown on the transformer.
• Do not submerge the transformer.
• To reduce the risk of fire or injury, keep lamp away from materials that may burn.
• Always disconnect light from the power source before beginning any maintenance or work on the light.
• Inspect cord for damage before installation and/or maintenance. Replace the entire light/transformer
assembly if damage is found.
CAUTION
• Use a proper power source as indicated on the transformer label.
• Keep the cord away from high temperatures or other heat sources.
• Do not lift the light or the transformer by its power cord.
• This light assembly is not intended for use in swimming pools or hot tubs.
PLEASE CALL 1-888-755-6750 BEFORE RETURNING TO THE STORE.
WWW.THEPONDBOSS.NET
PREPARATION
Before beginning assembly or operation of product, make sure all parts are present. Compare parts with
OPERATION INSTRUCTIONS
package contents list and diagram above. If any part is missing or damaged, do not attempt to assemble,
install or operate the product. Contact customer service for replacement parts.
• Estimated Assembly Time: 1.5 hours
• Tools required for assembly: hammer, chisel, flathead screwdriver.
• All other materials required in this section can be purchased at www.thepondboss.net or at your local
homecenter.
• The instructions that follow will show a block wall and pond installation. Your lighted waterfall can be
used in a variety of applications.
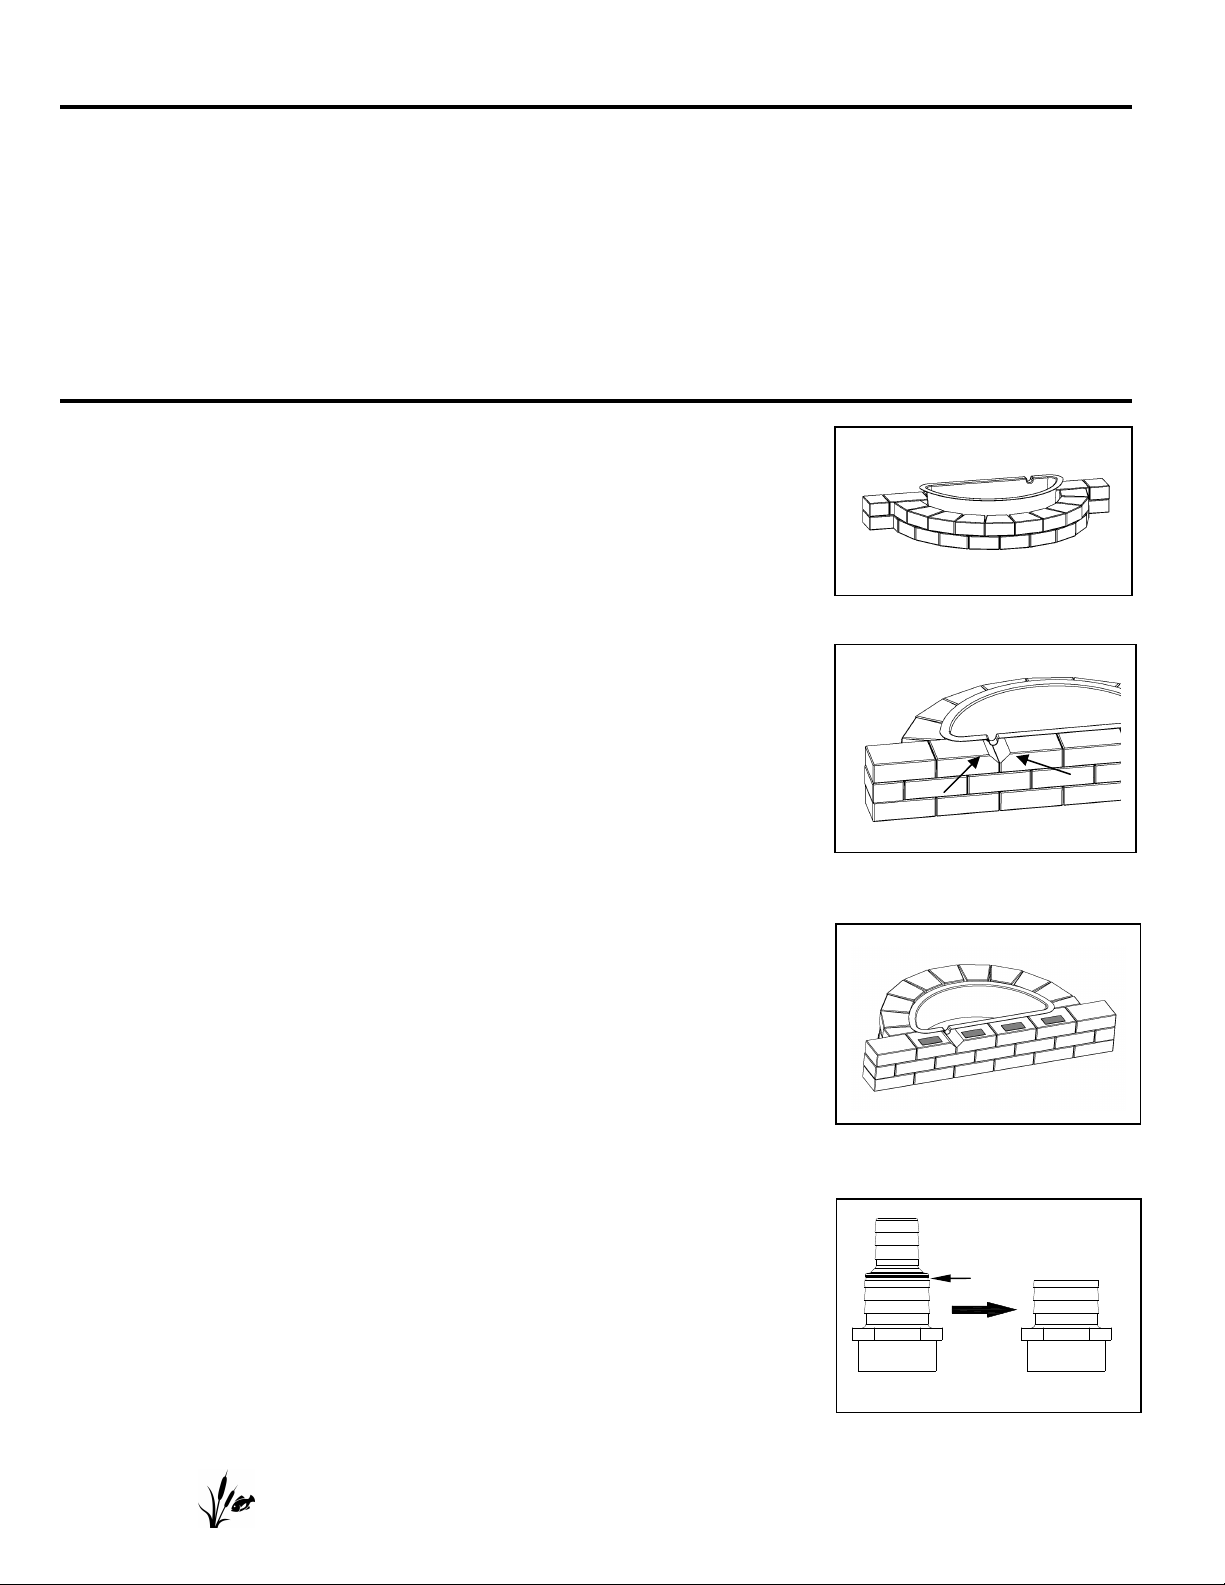
1. Select a level location to build the Lit Waterfall kit. Begin building
the kit by placing the tub on the ground and building the stones
around it. It is very important that the stones are level, so be sure
to check that the structure is level from front to back as well as left
to right. Fig. 1
Fig. 1
2. The two stones in the picture need to be cut in order to fit the half
round tub. The pump power cord and tubing will fit through this
hole. Fig. 2
Fig. 2
3. HINT: To assist with keeping the wall plumb, place a layer of
roofing shingles along the back wall on this layer. This will keep the
wall from leaning back due to the lip of the tub. Fig. 3
Fig. 3
4. For maximum water flow, cut the adapter as shown using a
hacksaw. Fig. 4
Fig. 4
Cut ring
PLEASE CALL 1-888-755-6750 BEFORE RETURNING TO THE STORE.
WWW.THEPONDBOSS.NET
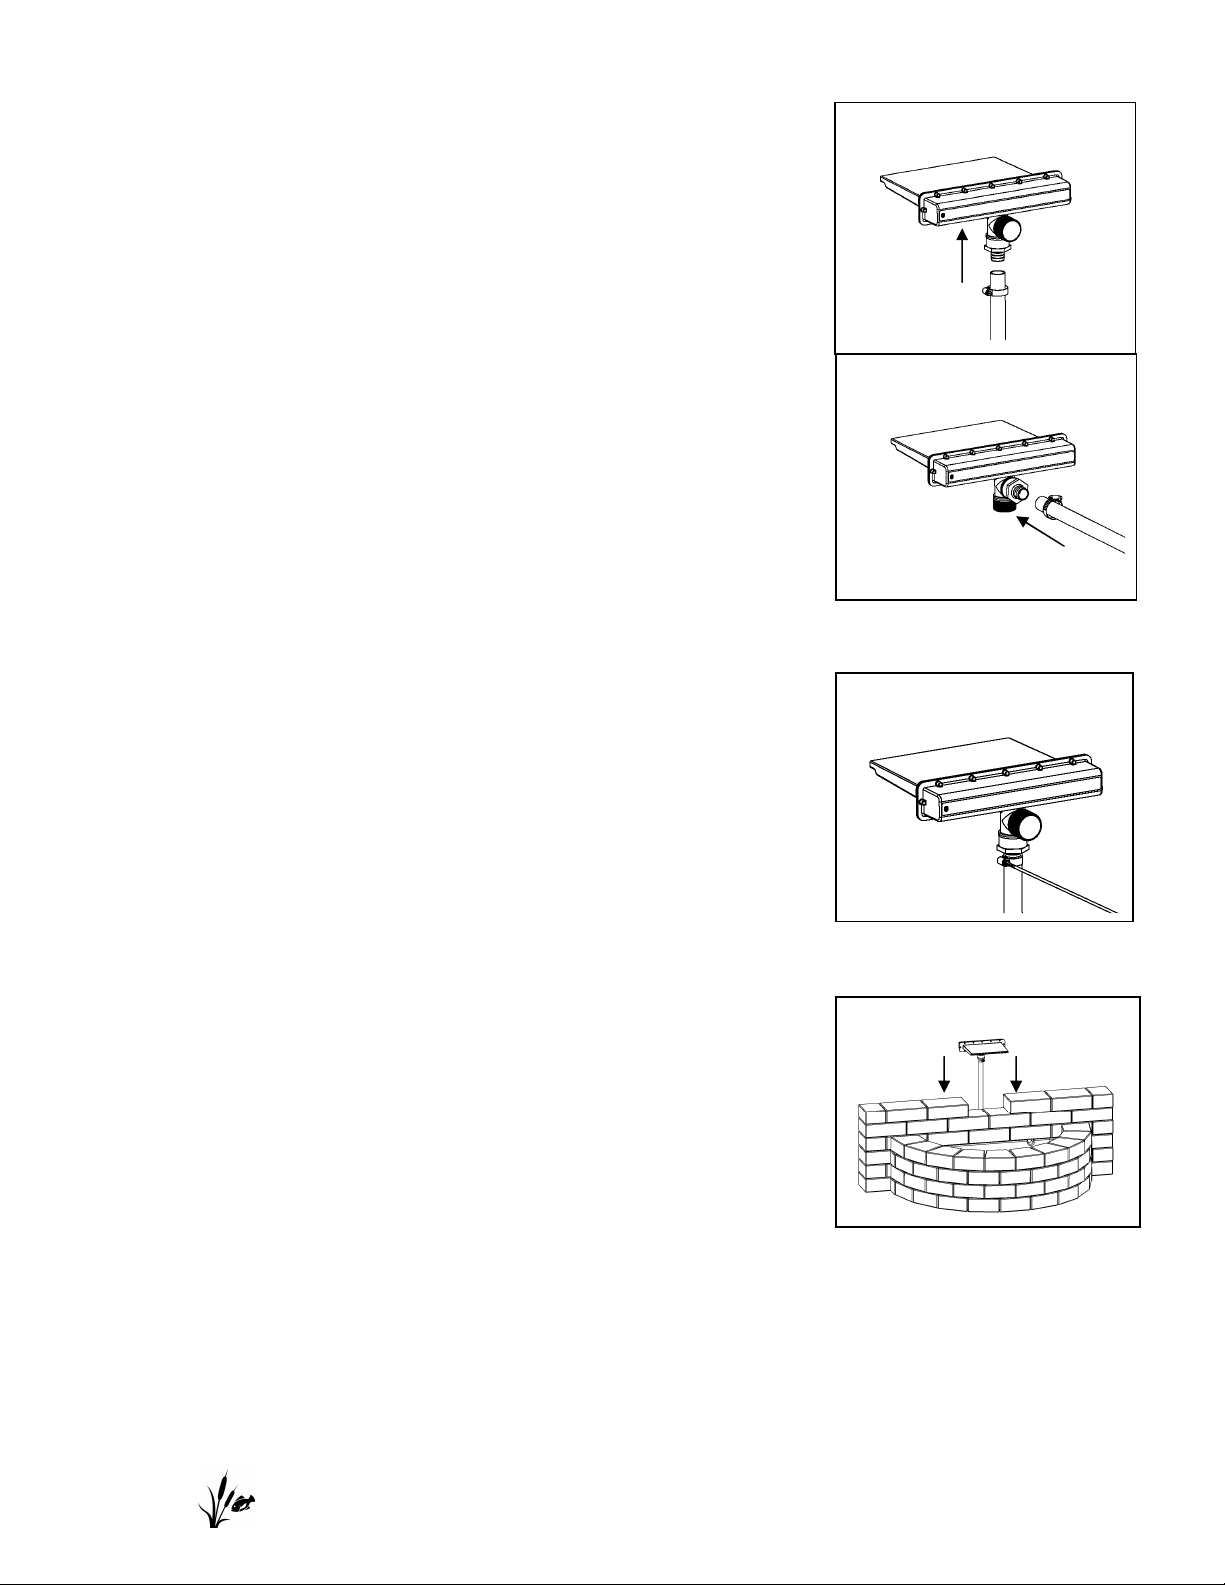
5. Connect the tubing to the inlet of the spillway using the adapter.
Connection method (a)
Connection method (b)
Slip the hose clamp on to the tubing but do not tighten it. Fig. 5
NOTE: The spillway has two ports to install the inlet. For installing
with this kit, using connection (a) is preferred. For other
installs use (b).
6. Tighten the hose clamp using a flathead screwdriver. Fig. 6
Fig. 5
7. Place the spillway onto the wall. Then continue building the rest of
the wall. Fig. 7
NOTE: You will need to cut the stone that goes on the top of the
spillway before building the next layer of stones.
PLEASE CALL 1-888-755-6750 BEFORE RETURNING TO THE STORE.
WWW.THEPONDBOSS.NET
Fig. 6
Fig. 7
 Loading...