

Page 1
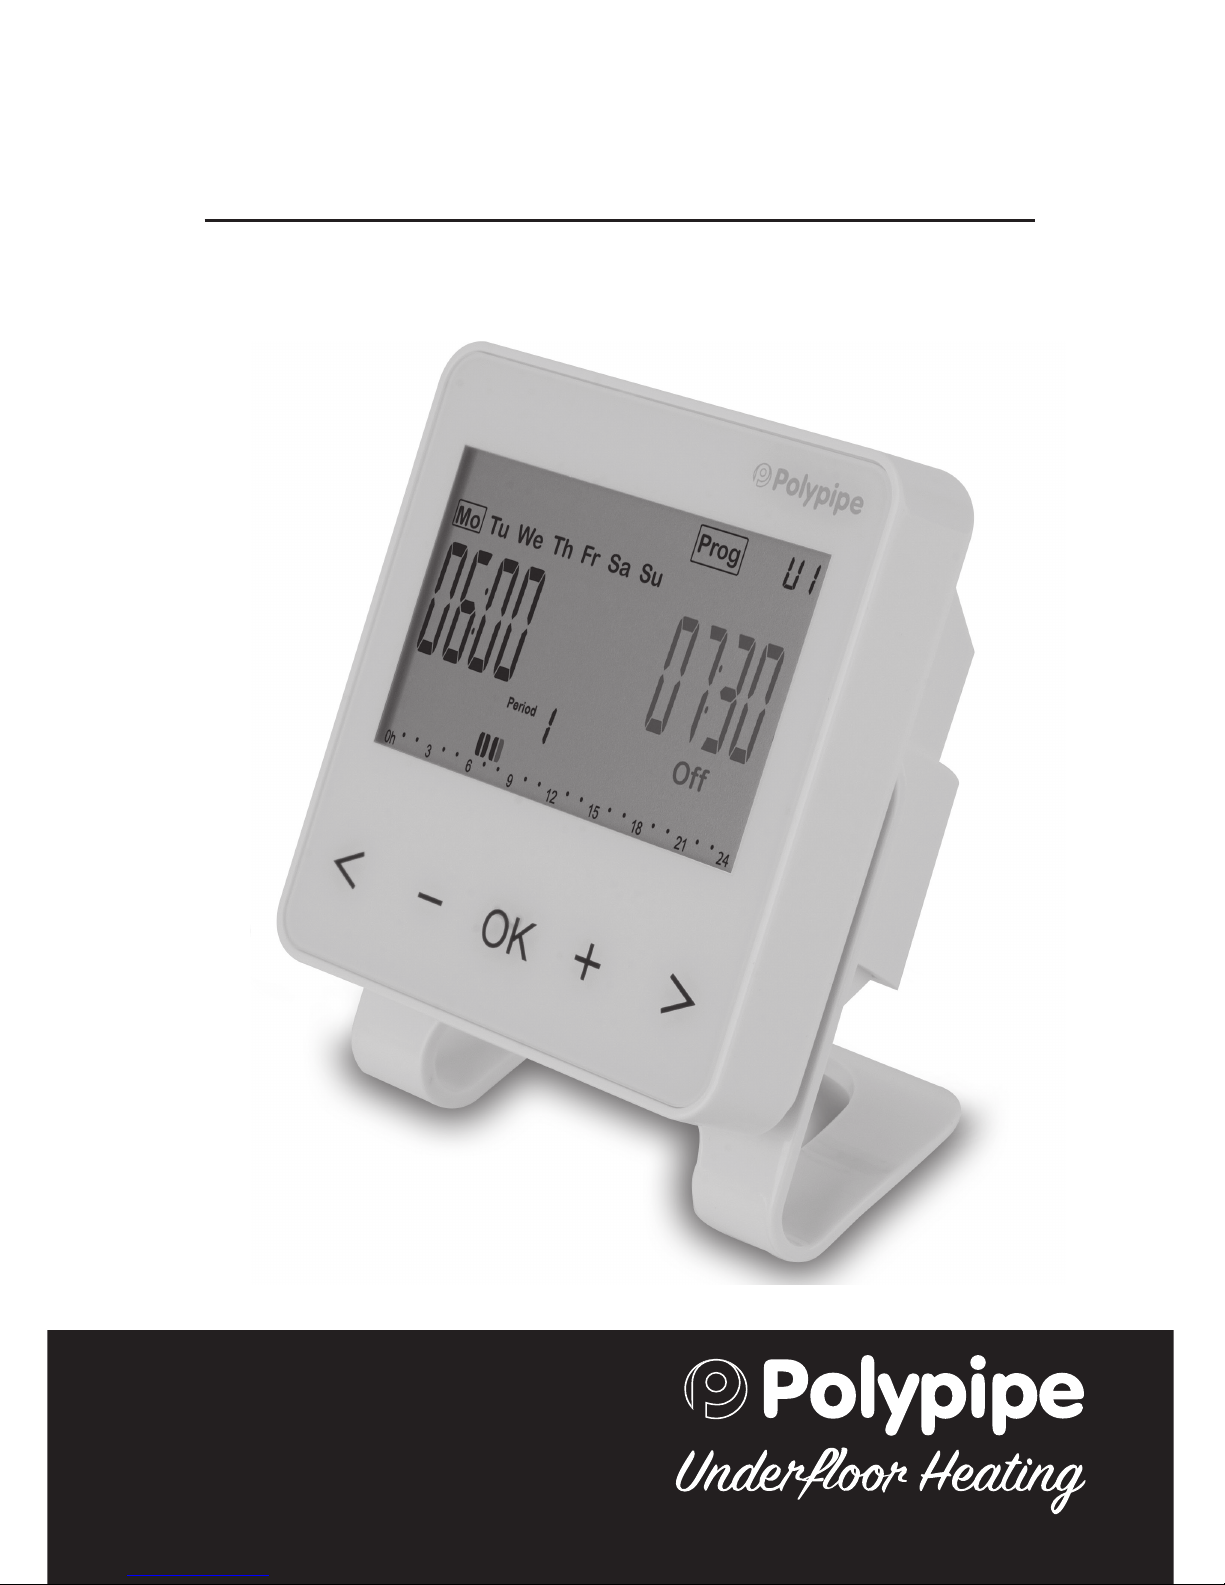
4 Zone RF Time Clock
User Guide UFHTIME4RFB
Page 2

2
Overview
The RF 4 Zone Time Clock is designed to work
with the Dial Thermostat (UFHDIALRFB) to
provide time control per manifold. Time clock
also has 3 other zones which can be used.
The unit is designed to be used with our range
of wireless master wiring centres and slave
units.
Details on how to initiate communication with
the receiver units in RF applications are provided
in the additional RF documentation.
This user guide provides user settings and
Programming details, these and the advanced
settings can also be downloaded from
www.polypipeufh.com in A4 format.
Page 3
3
Please Read Before
Programming Your Time Clock
Time settings
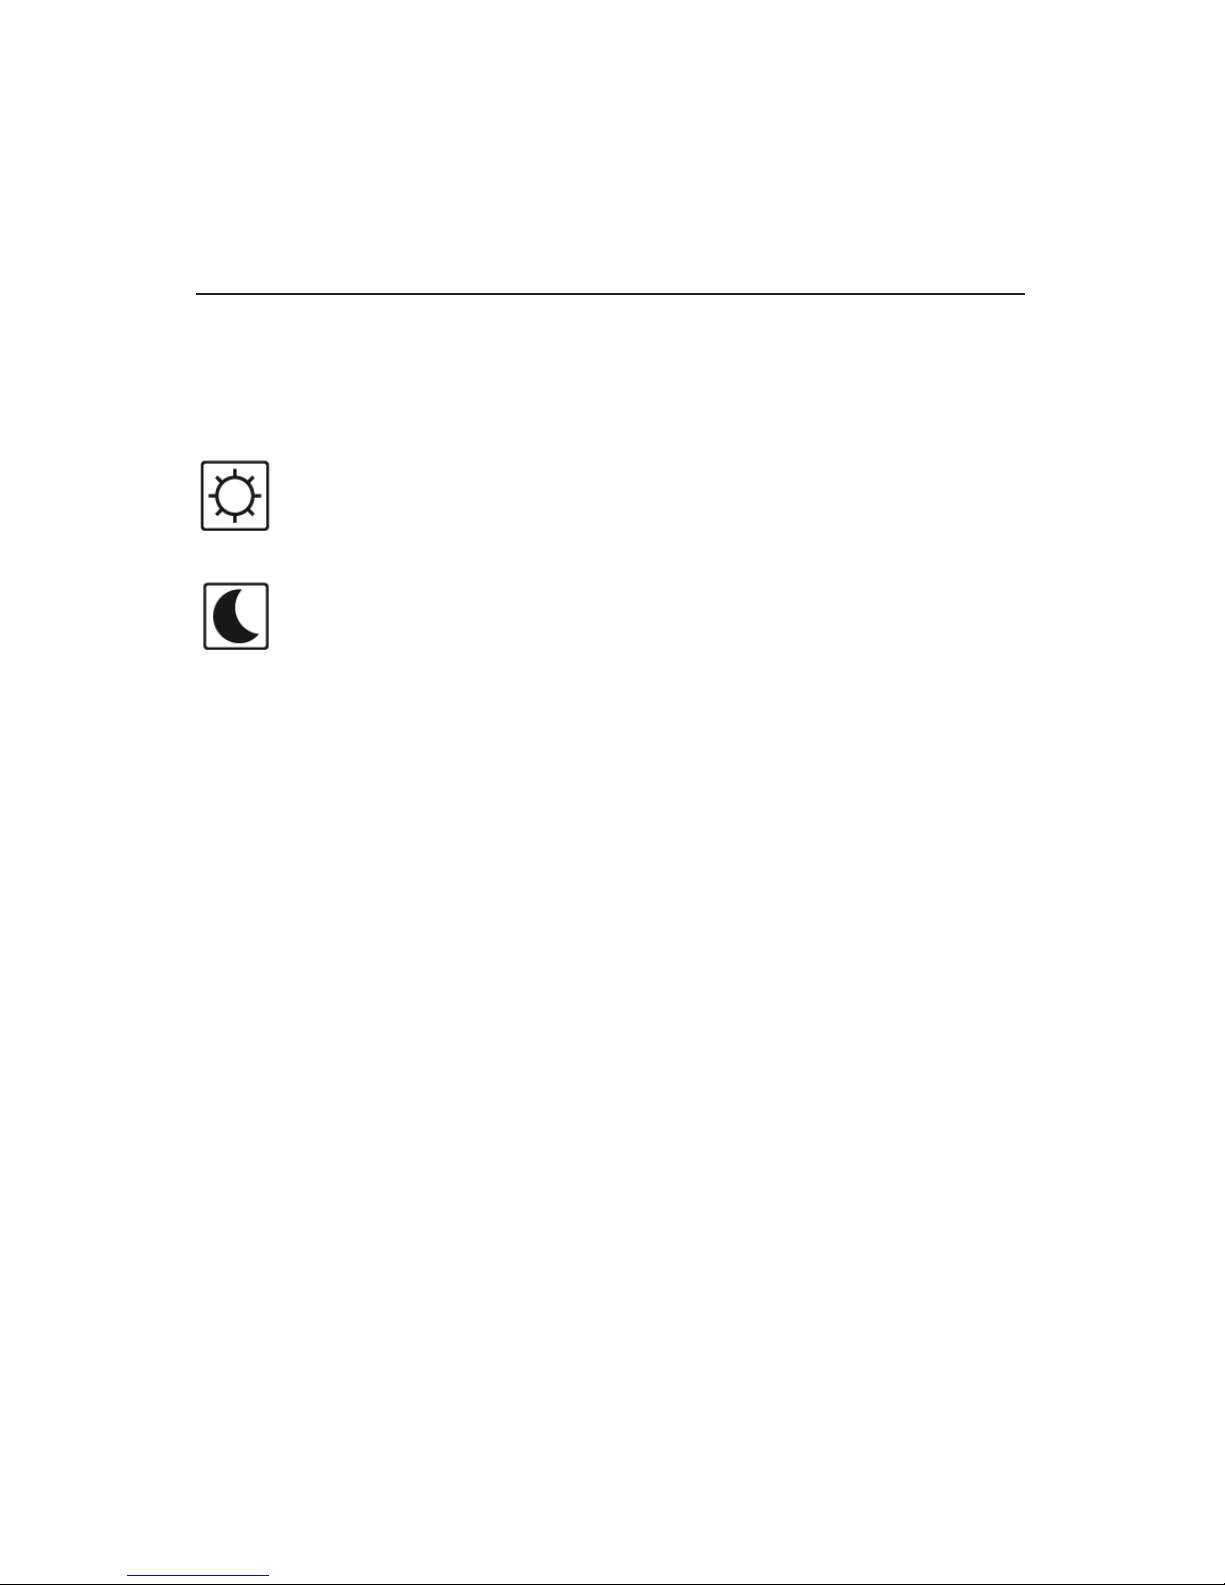
The Time Clock operates in 2 different modes:
Comfort - The time clock is on allowing
individual room thermostats to operate.
Setback - The time clock will be off,
meaning no room thermostats will
operate.
This is to assist the response time of the
heating system.
Page 4

4
Contents
1 Battery Access and User Controls
1.1 Keyboard
1.2 Display
2 First Time Installation
2.1 Installing Batteries
2.2 Time and Date Adjustment
2.3 Zone Allocation and RF Initiation
3 Selecting a Pre-set Program P1 - P9
4 User Defined Programs U1 - U4
4.1 Creating User Defined Program
Page 5

5
Contents
5 Operating Menus
5.1 Automatic Mode
5.2 Off Mode
5.3 Holiday Mode
5.4 Keyboard Lock Function
6 Pre-set Programs
7 Hidden Menus
8 Technical Specification
9 Fault Diagnostic
Page 6
6
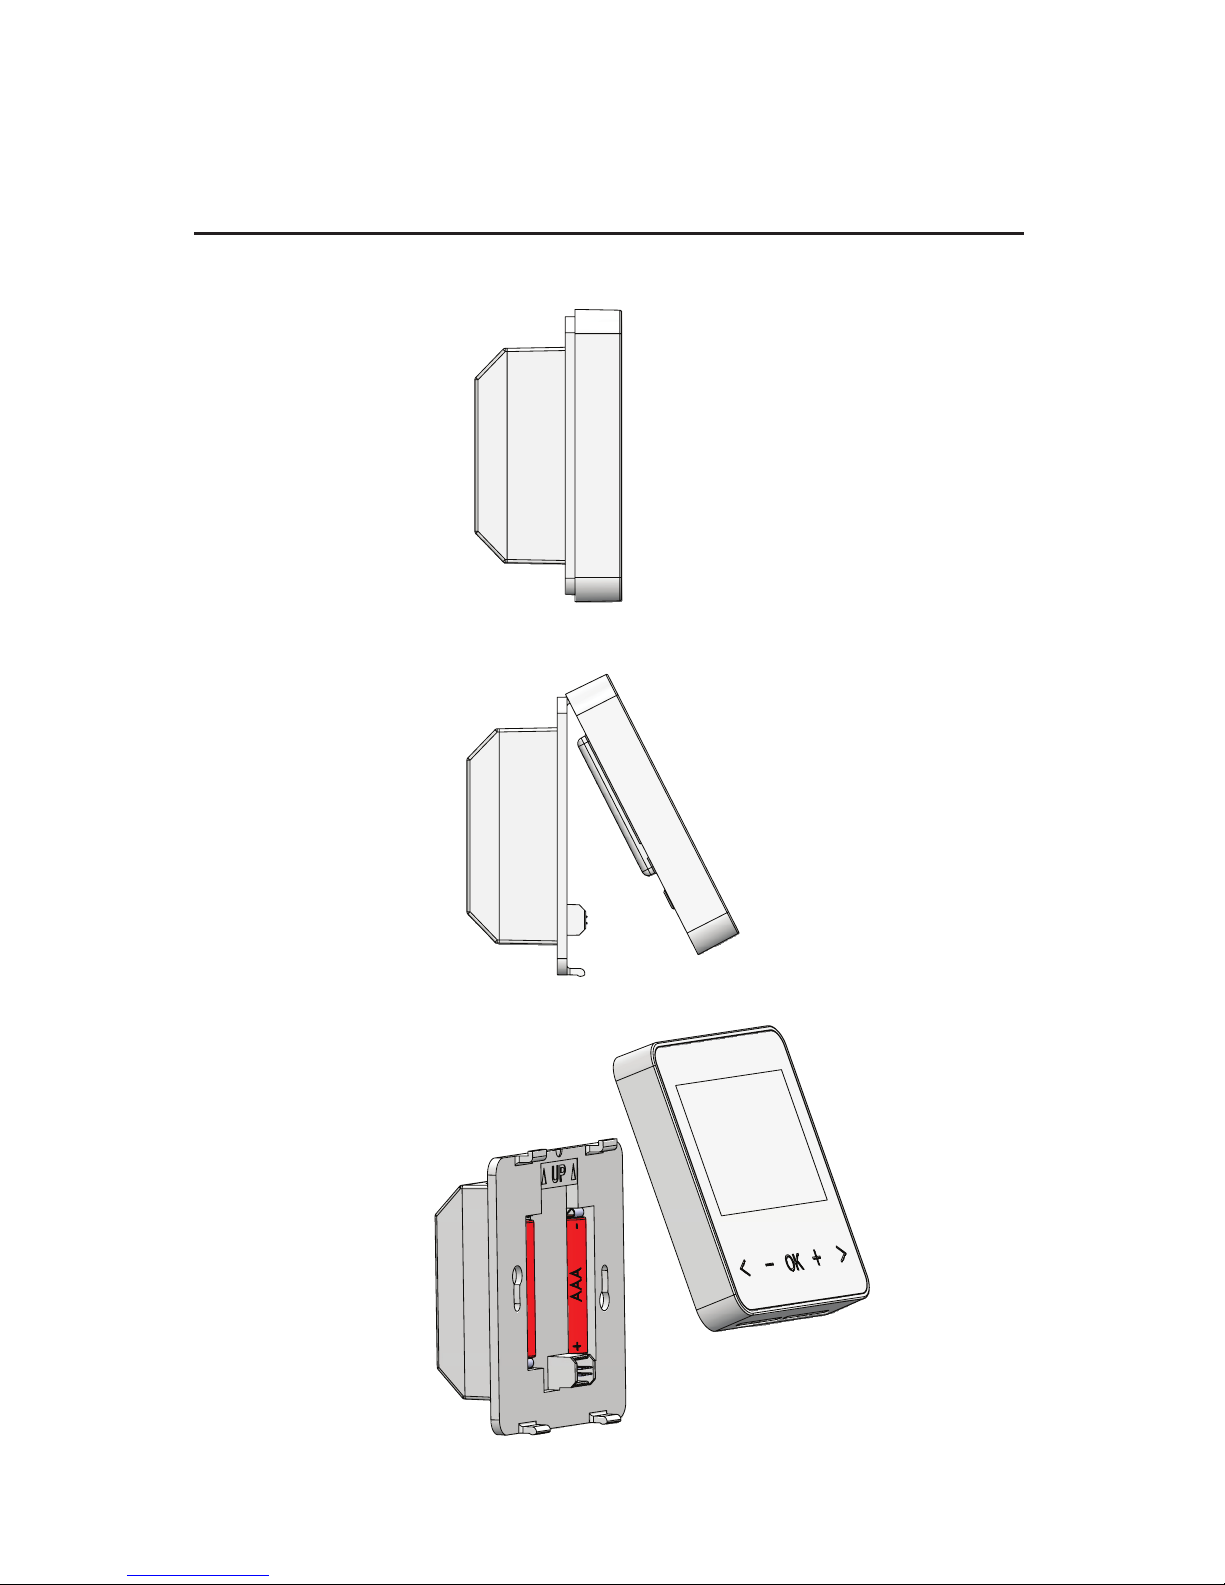
1 Battery Access and User Controls
1
2
3
Page 7
7
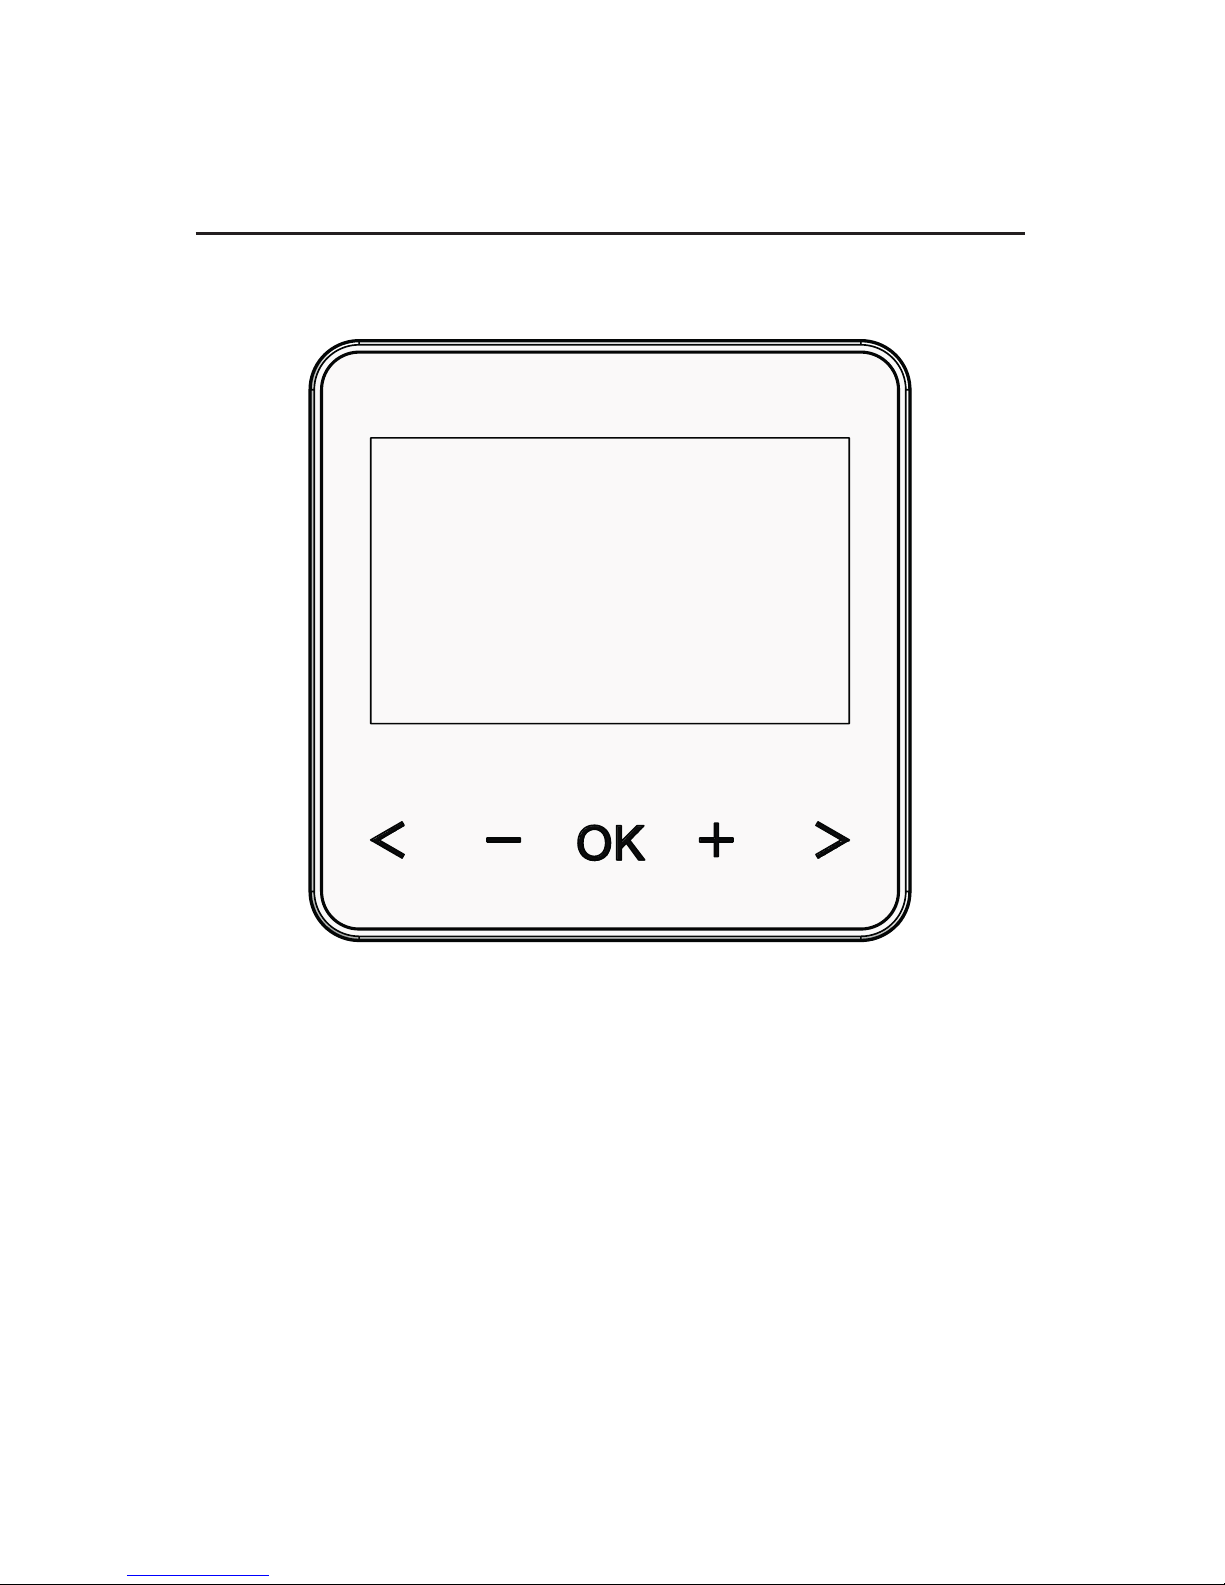
1.1 Keyboard
Page 8
8
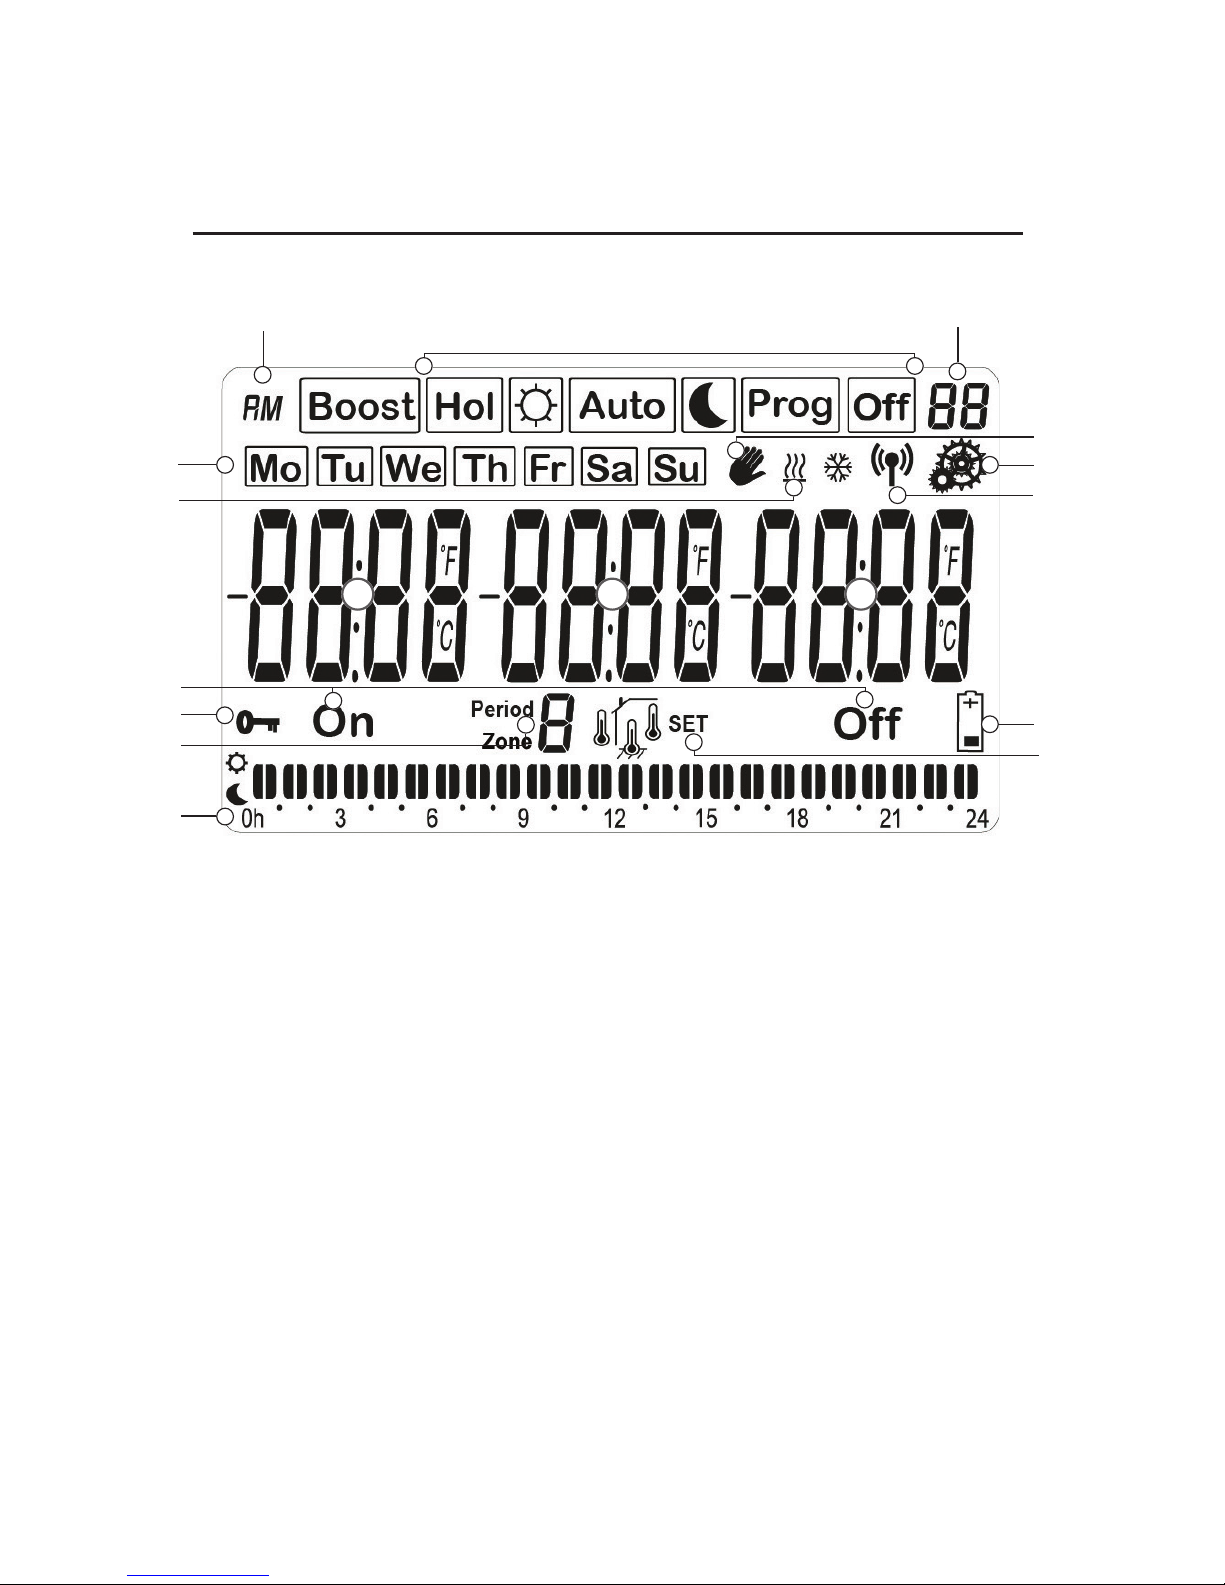
1.2 Display
5
6
7
8
9
10
11
12
13
14
15
16
17
4
1 2 3
Page 9

9
1-3 Setting or measured hour/text/indications
4 Operating mode menu
(active mode is framed)
5 Program number or parameter number
if “7” is displayed
6 Temporary override function activated
7 Installation parameter menu
8 RF transmission logo
9 Low batteries indicator
10 Modification of parameter
11 Program of the current day
12 Zone number or Period number in the
program of the current day or current
zone number
13 Key lock indicator
14 Current zone state: “On” (activated) and
“Off” (disabled)
15 Frost protection is activated
16 Days of the week (current day is framed)
17 AM/PM
NOTE: At any time, when the backlight is switched off, press the (OK)
key to activate the backlight and wake up the product. Press another
time the (OK) key to show the current setting temperature.
Page 10

10
2 First Time Installation
This section will guide you to starting your time
clock for the first time.
2.1 Installing Batteries
- Lift the front panel off and insert the 2 x AAA
alkaline batteries supplied (or remove the small
protection sticker if the batteries are already
installed in the compartment)
- Replace the front panel
- Your time clock will ask you to set the time
- Note: The time and date setting can be set at
any time by pressing the (OK) key for 3 seconds
2.2 Time and Date Adjustment
The valve to be adjusted will blink, and is
adjusted with keys (-) and (+). Once the
adjustment is made, accept it with the (OK)
key.
The time clock will jump automatically to the
next value.
Page 11

11
Progress of the adjustments:
Time and day:
Hours setting
Minutes setting
Day of week setting
Date:
Day setting
Month setting
Year setting
You can access the time and date adjustment
made by pressing (OK) key for 3 seconds
at any time in off mode.
Page 12
12
2.3 Zone Allocation and RF Initiation
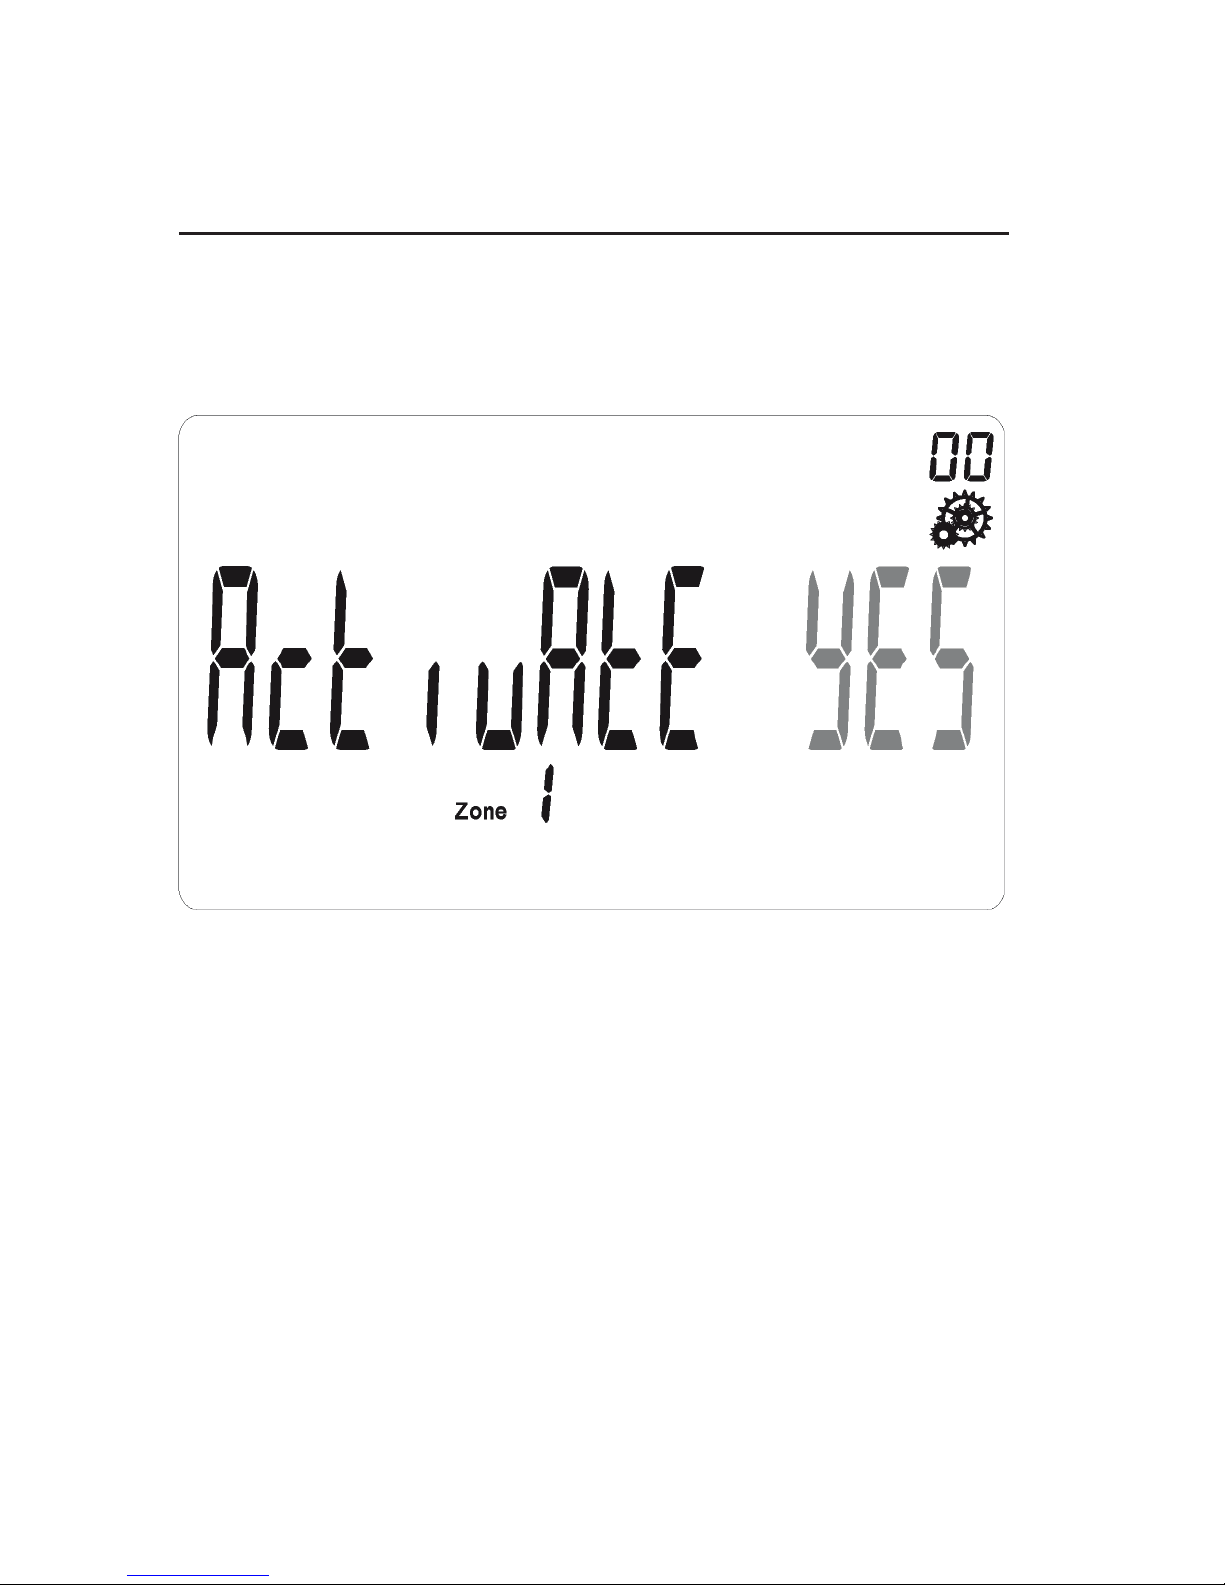
Once the time and date have been entered,
the unit will ask you to activate the required
number of heating zones by displaying:
By displaying a flasing “Yes”, this means that
Zone 1 is active. By displaying a flashing “No”,
this means that Zone 1 isn’t active. Select “Yes”
or “No” with (-) and (+) keys.
Page 13
13
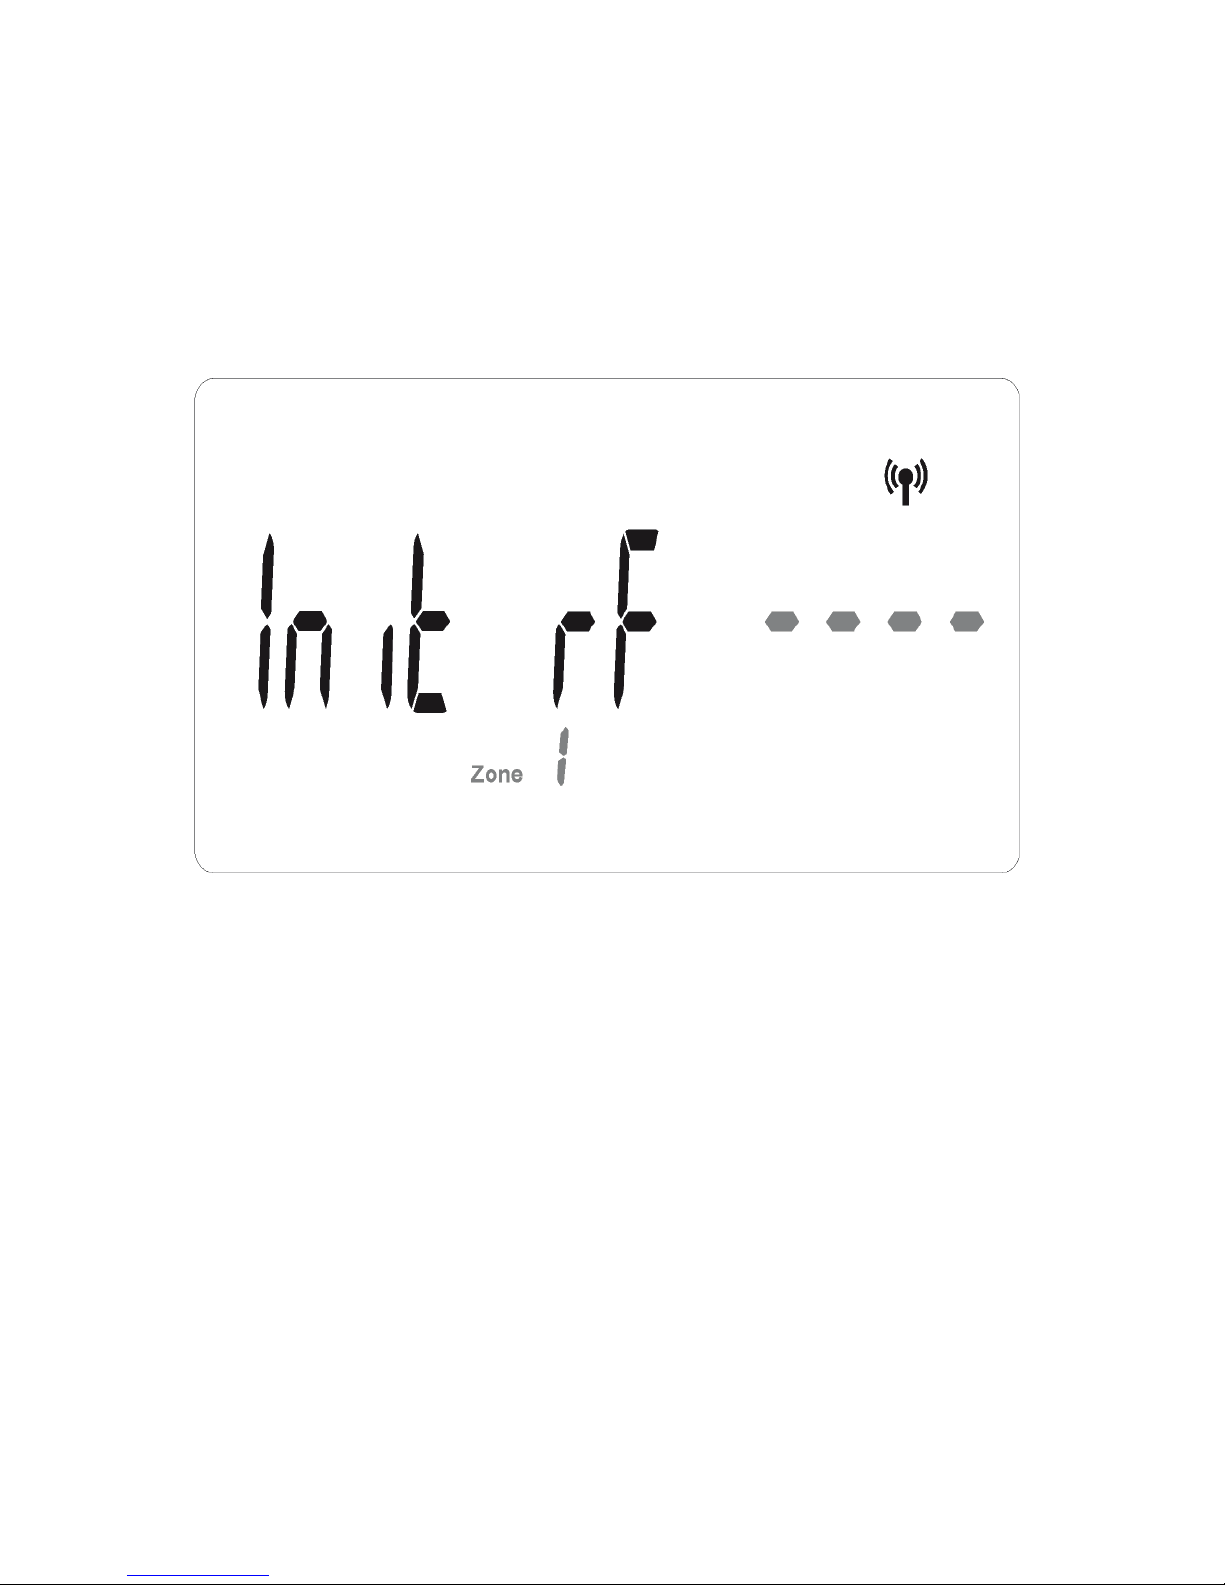
Once “Yes” is entered for a zone, press (OK)
key. The unit will indicate that RF initiation
is taking place for that particular channel by
displaying a series of dashes:
Once the receiver unit or RF master unit has
been accepted the initiation signal, repeat the
Page 14
14
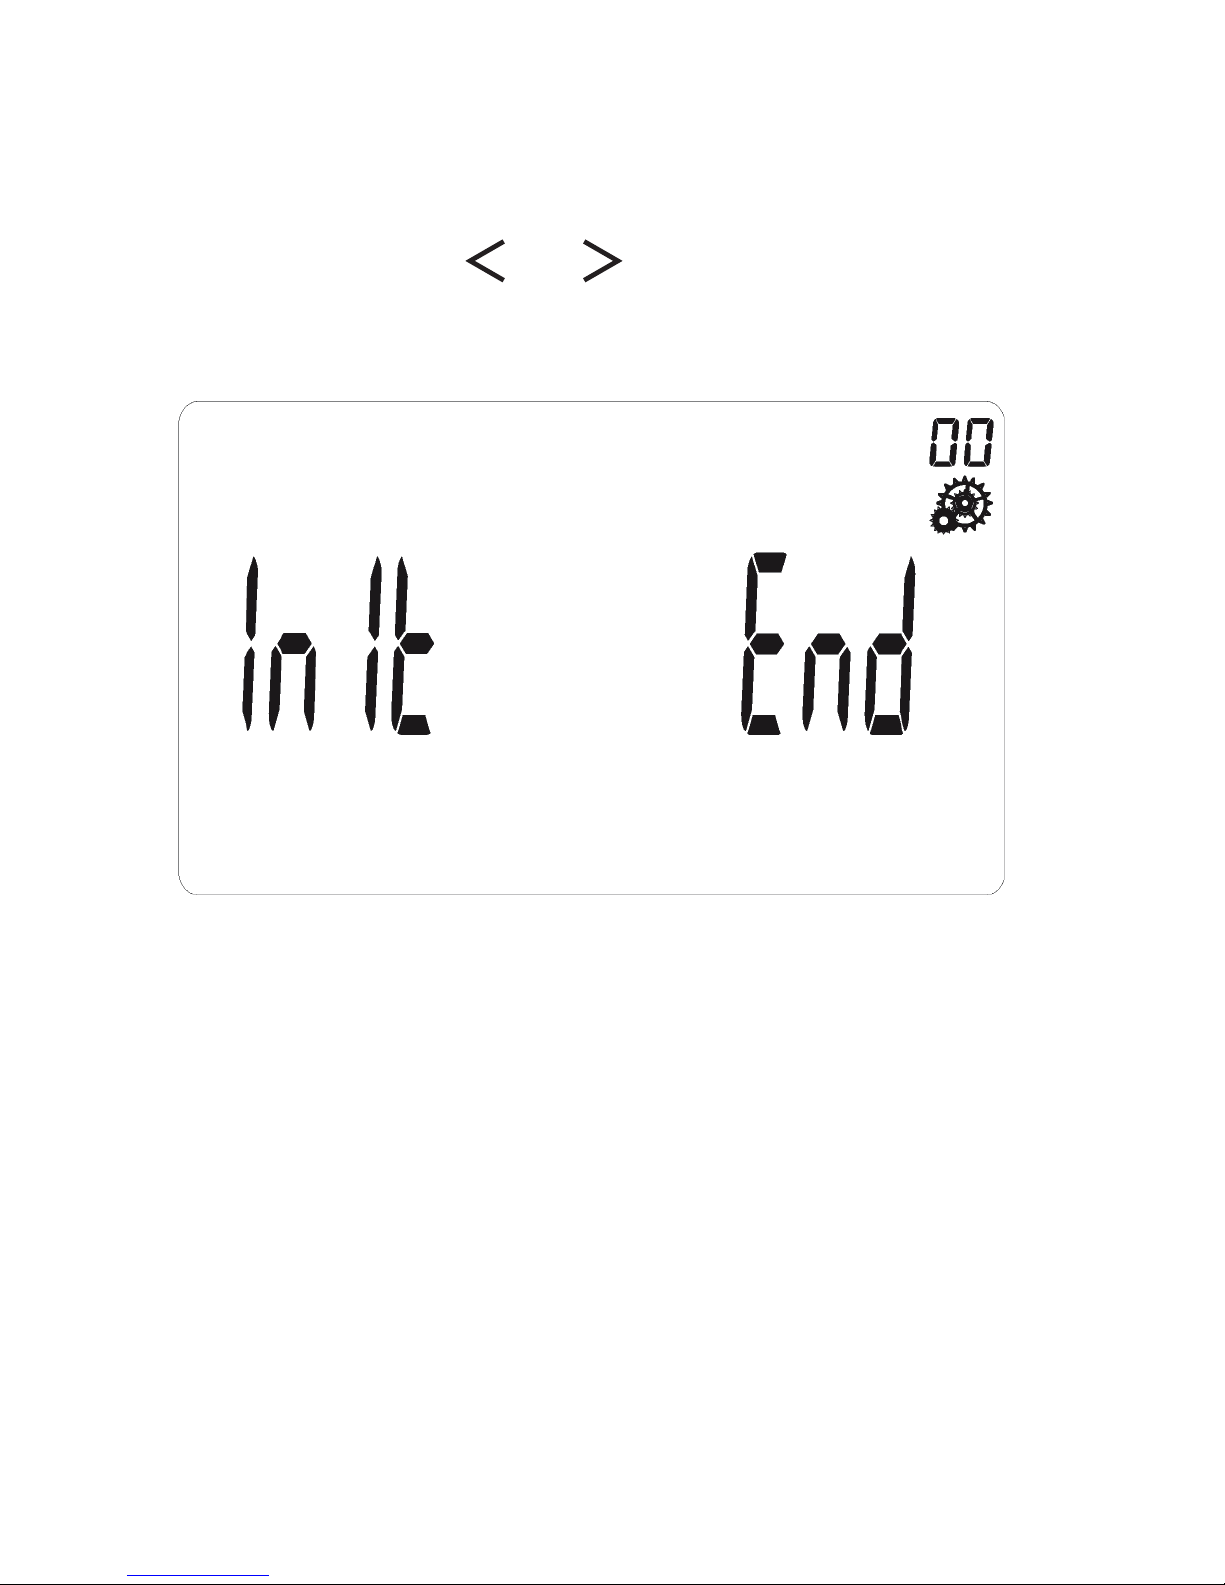
process for the remaining required channels.
By pressing the or keys, select the zone
number and if you want to finish zone initiation
step, press (OK) key when this screen is
displaying:
You will be able to change your configuration
by accessing the zone activation menu
(page 37).
Important: If no zone is activated, all working
modes won’t work.
Page 15
15
3 Selecting a Preset Program
P1 to P9
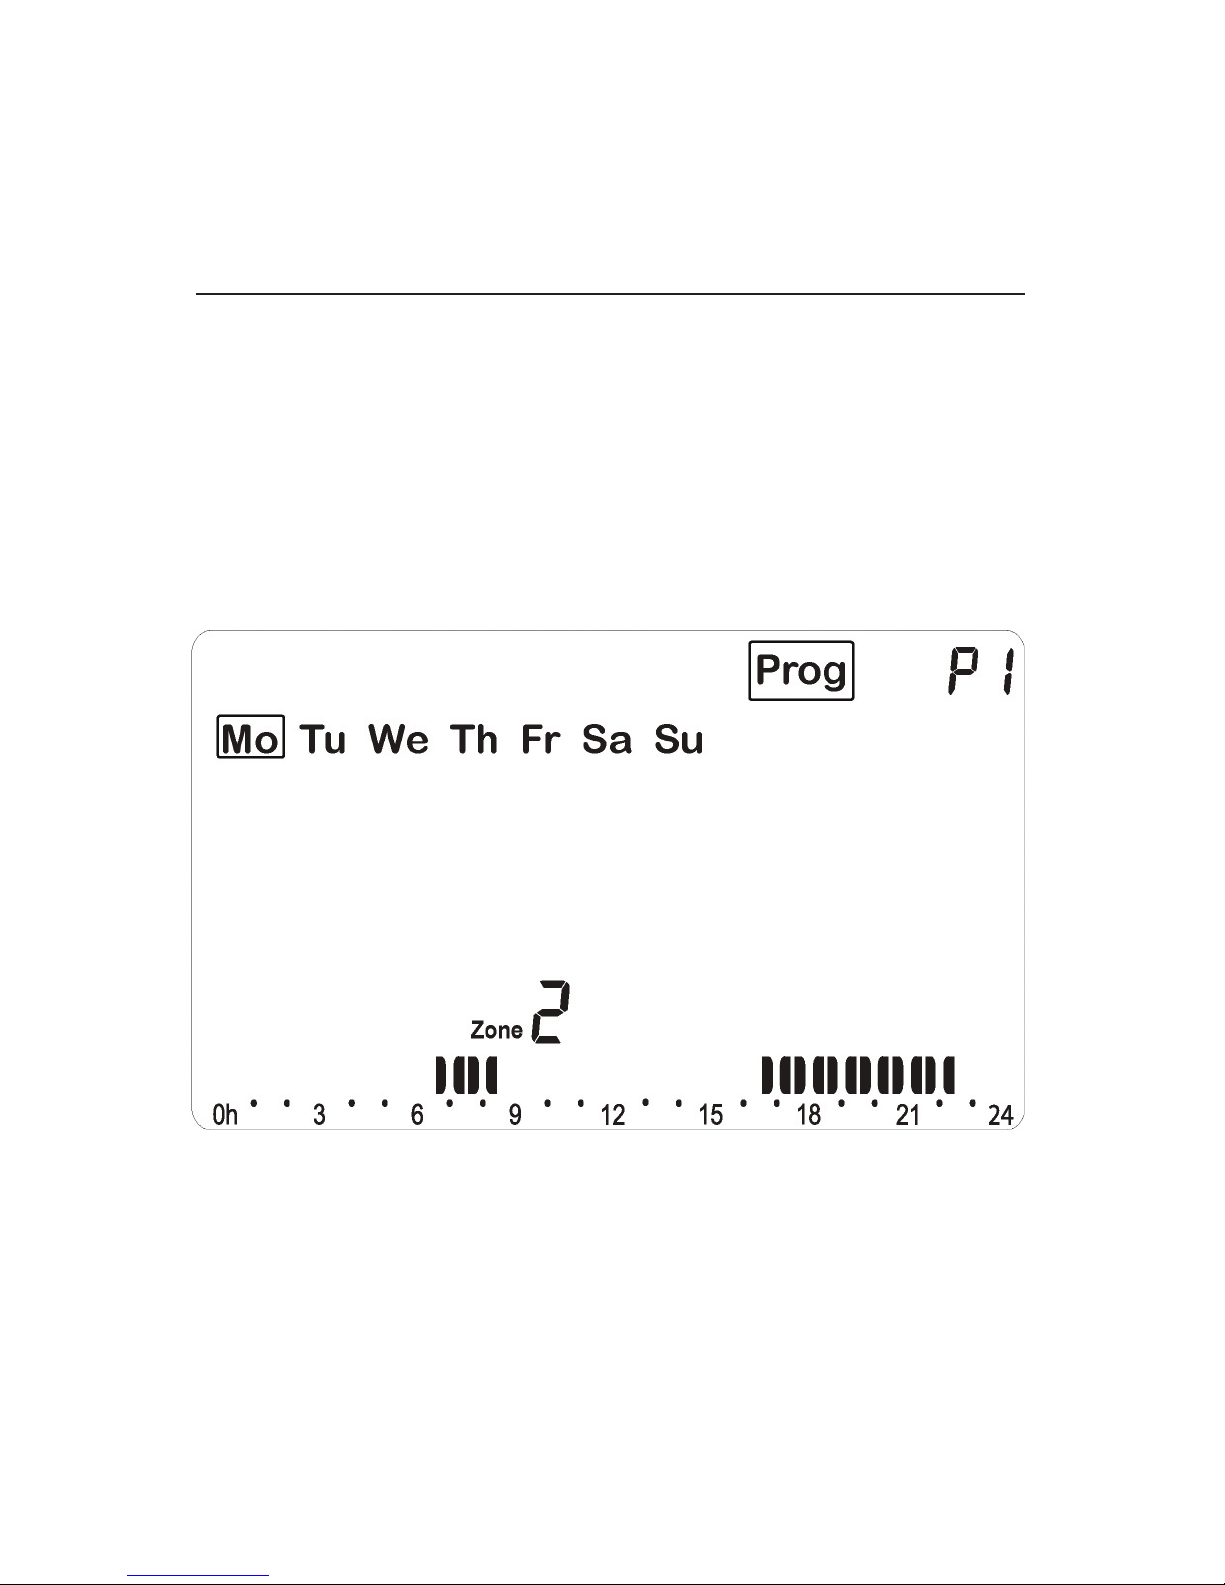
There are 9 preset programs P1-P9.
The time clock will default to P1
(see programs pages 26 to 34).
To select a preset program use the navigation
keys to move the cursor from Auto to Prog.
Press OK to make the P1/P9 adjustable.
Use the (-) or (+) keys to choose P1 to P9,
or U1 to U4 (User Defined Programs).
Select and validate with (OK) to return to Auto.
Page 16

16
4 User Defined Programs U1 to U4
You set “on” and “off” times for each
period, up to 3 periods per day eg. Morning,
afternoon and evening. Between time periods,
temperature will default to “Setback”.
If for example at a weekend you only need your
heating to come “on” and “off” once, you only
need to set period 1 and skip the others.
Page 17

17
4.1 Creating User Defined Programs
Use the navigation keys to move from
Auto to Prog as previous. Press (OK)
to make P1/P9 adjustable.
Use the (-) or (+) keys to choose P1 to P9,
or U1 to U4.
Select any of U1 to U4 as this allows each time
clock to store up to 4 user defined programs in
its memory.
Page 18
18
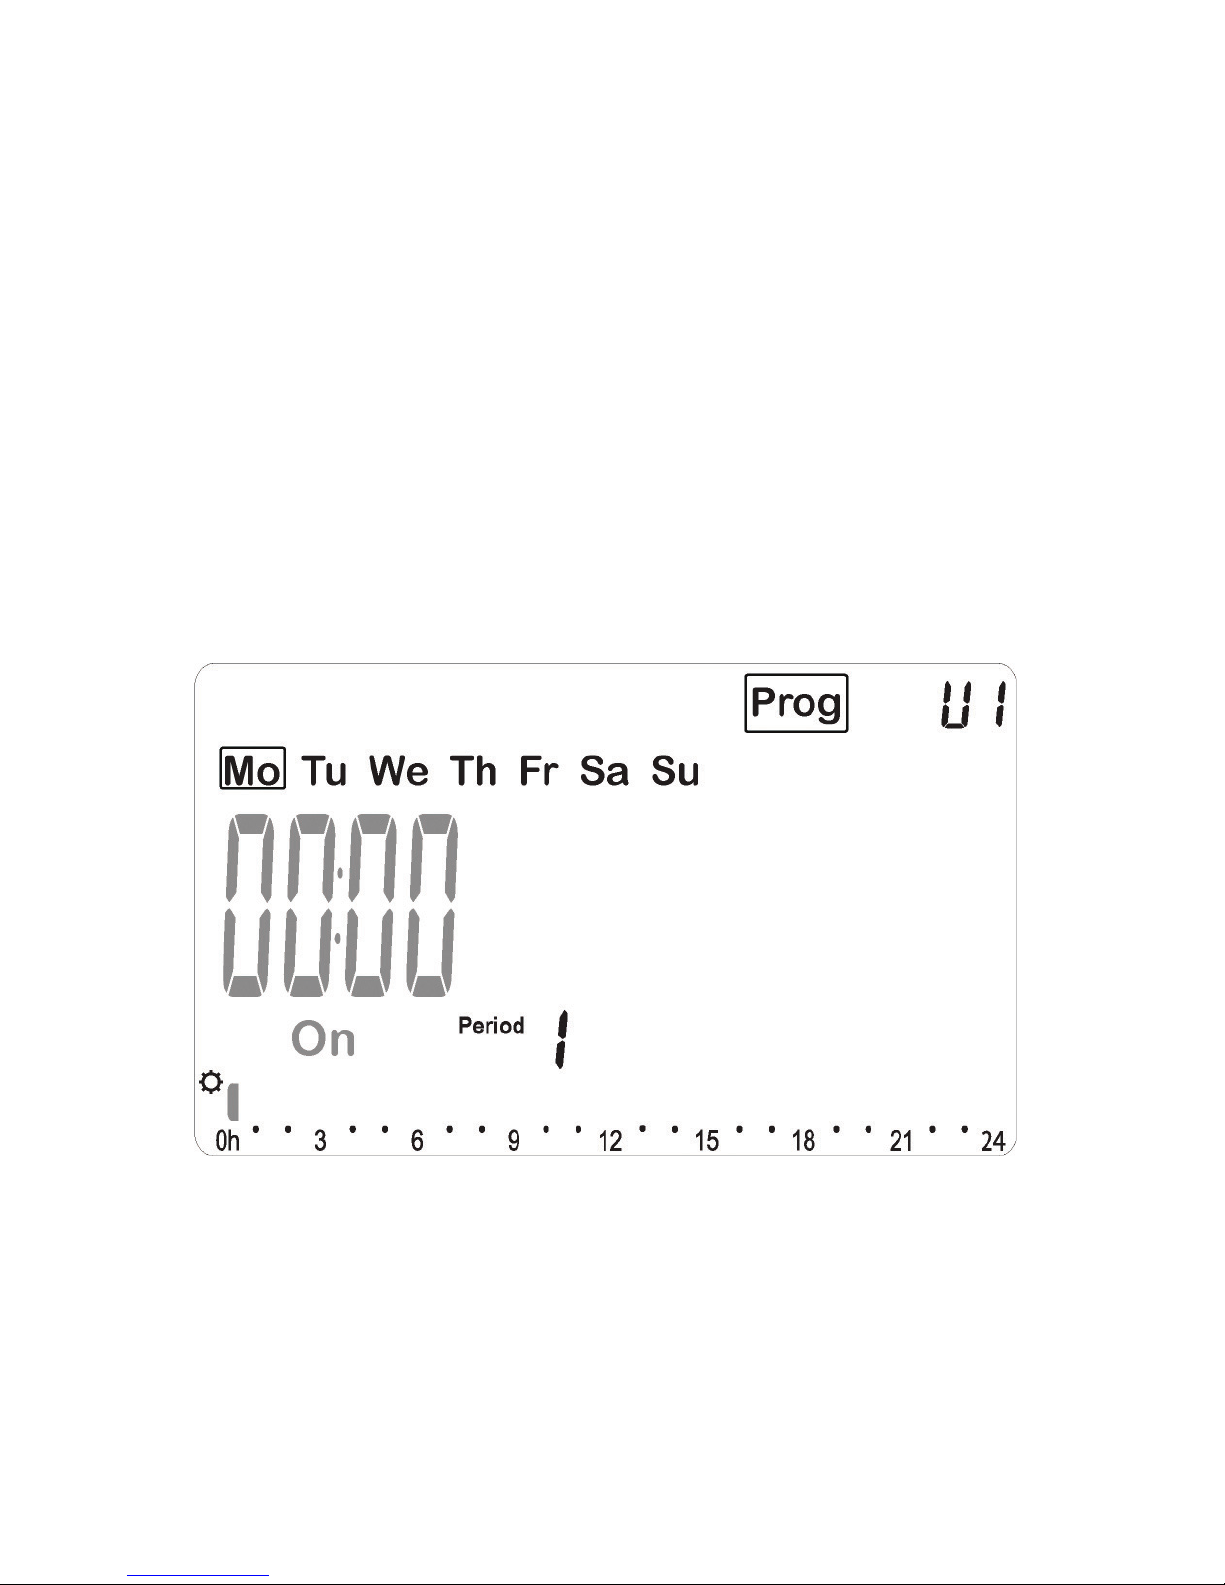
With U1 to U4 blinking press the (OK) key to
access the program settings.
- The program creation will always start with
the Monday.
Once you have pressed the (OK) key, the
following display will appear:
Page 19
19
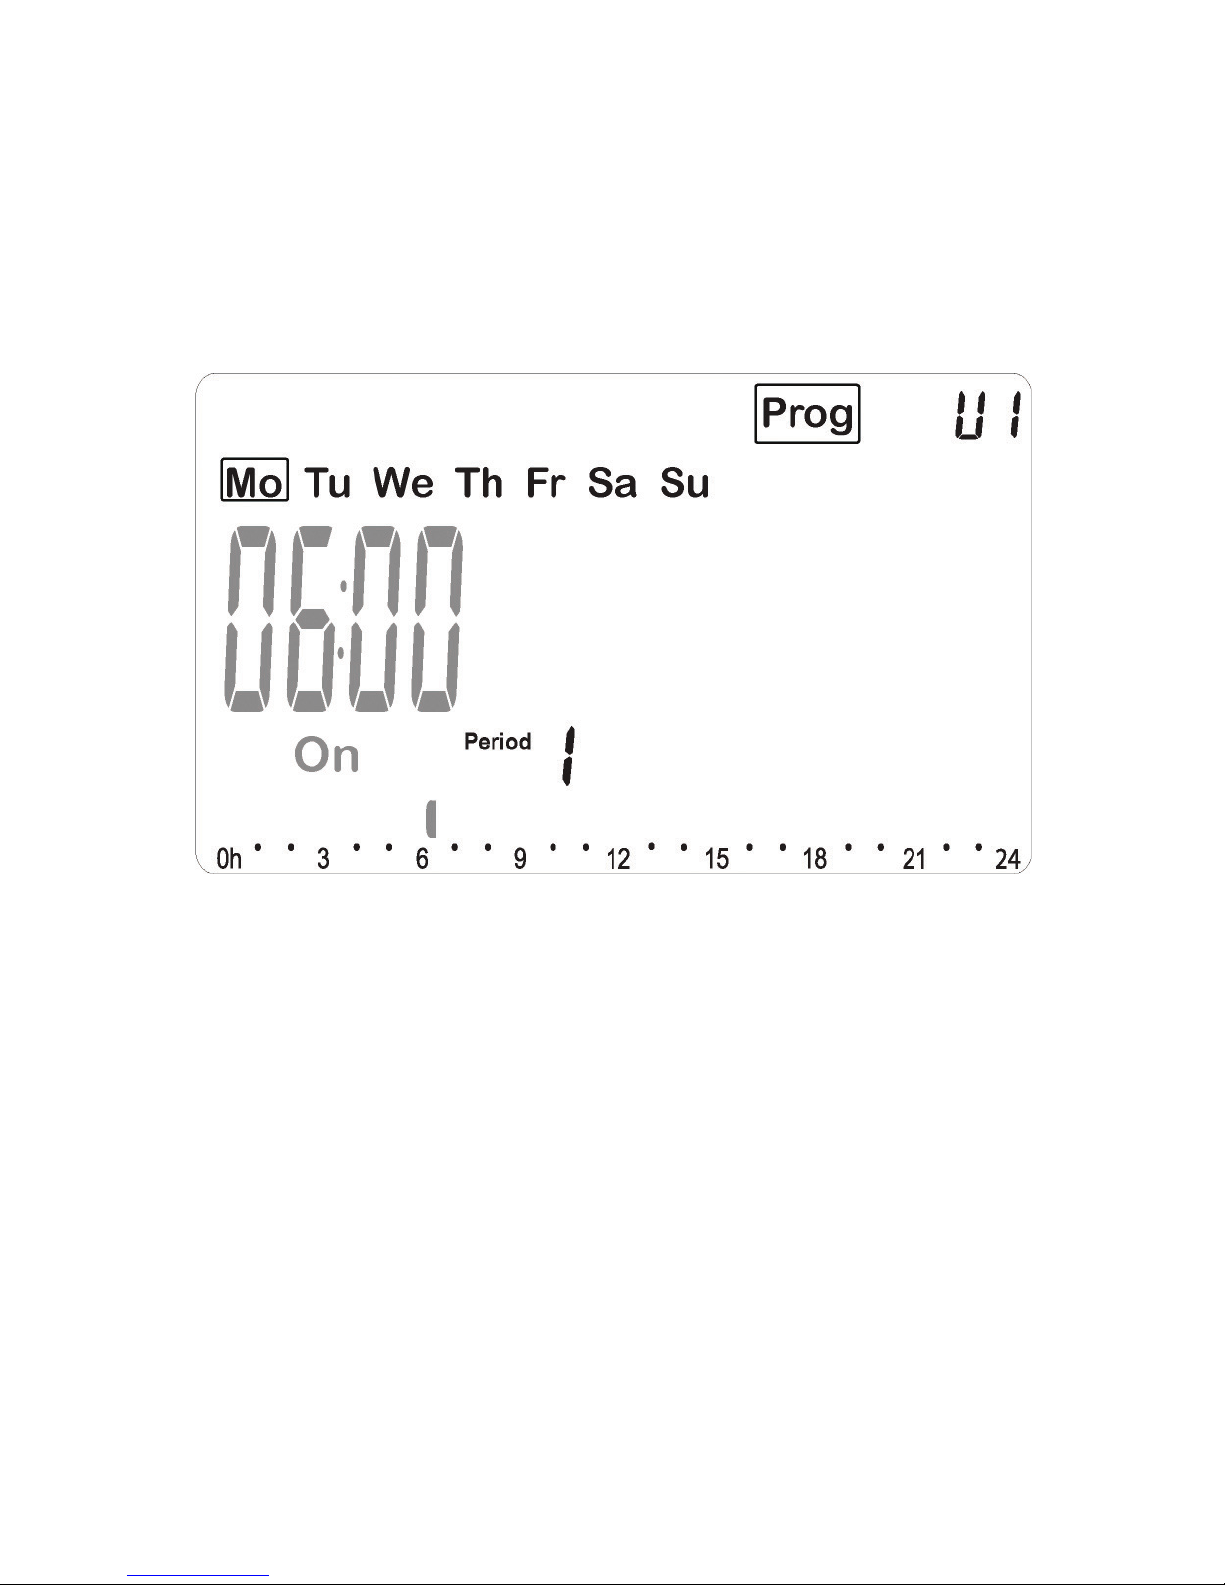
Adjust the hour of the first step of the program
with (-) or (+).
Press (OK) to validate and jump to the
following step.
Page 20
20
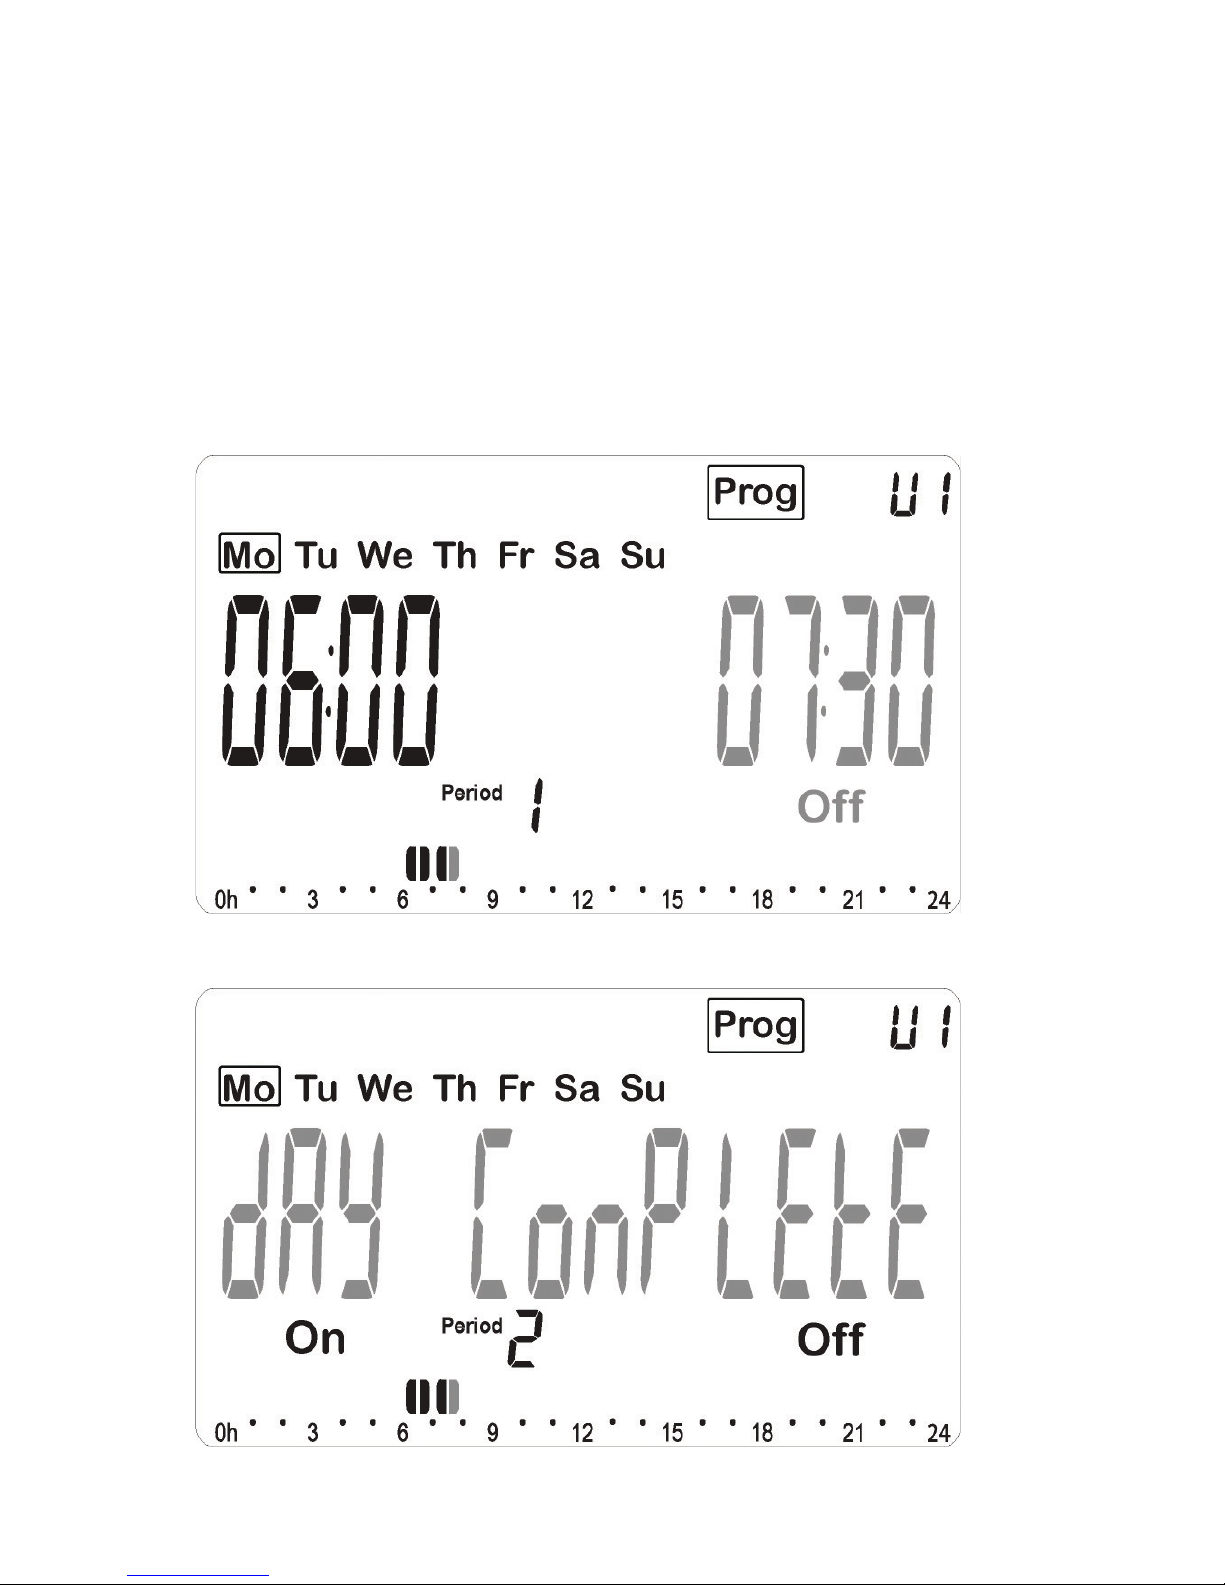
You will then see the below screen
You can set this period to run to the
end of the day (midnight) by pressing (OK)
or, use the (+) button to set the “off” time
for this period.
Page 21
21
If all periods for this day are finished press (OK)
to accept or press (+) button to set the start
time for the next period.
Repeat previous steps until all periods are set
and press (OK) to complete.
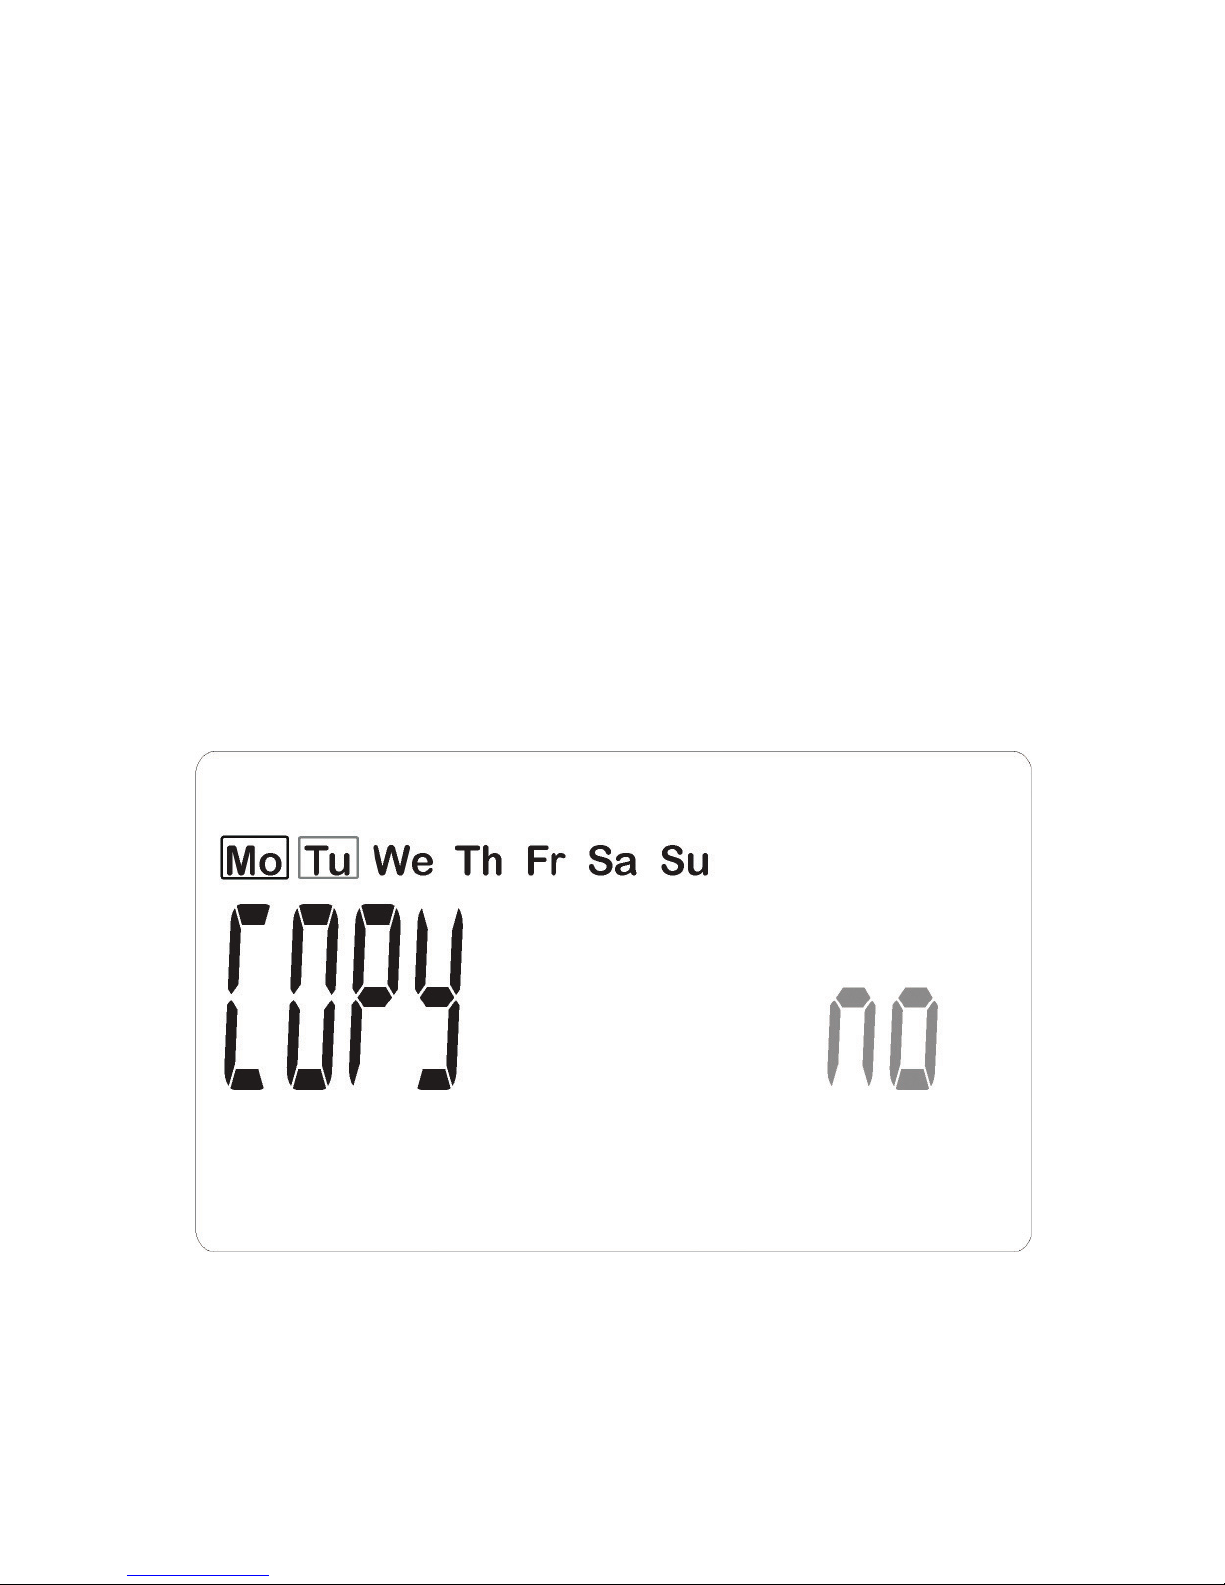
You then have the option to copy this period to
other days, or create new programmes for each
day.
Page 22
22
You can scroll between “Yes” and “No” using
the (+) and (-) keys. Pressing the (OK) button
will accept you selection. You can copy to each
day individually or scroll to “No” and create
new programmes as previously.
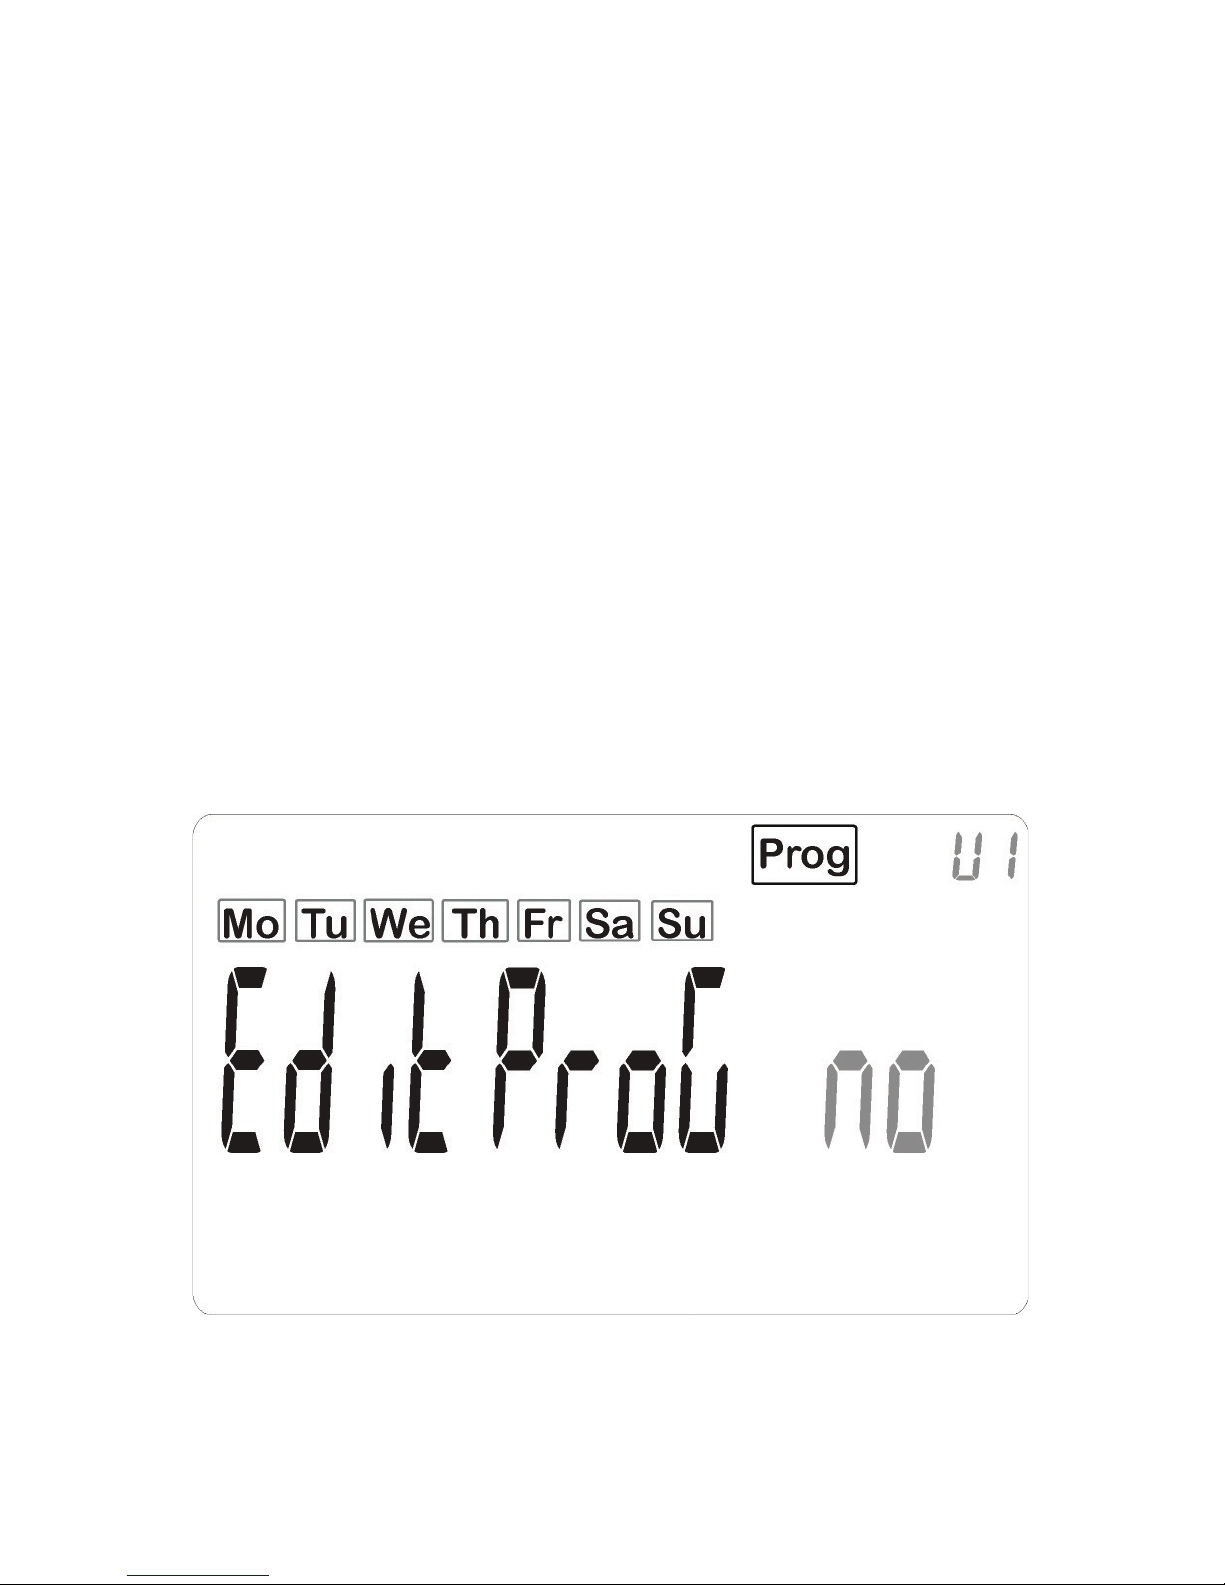
To edit and existing user defined programme,
select the existing programme in the Prog
menu (U1 - U4) and press (OK) button. You will
then be given the option “Edit Prog” “Yes” or
“No”
Press (OK) to validate and jump to finish the
program setting of day 1 (Monday).
Page 23

23
Selecting “No” will take you back to AUTO
mode, selecting “Yes” will give you the option
to erase “Yes” or “No”. Selecting “Yes” will
clear the previous programme and allow you
to start from the begining. Selecting “No”
will allow you to edit the existing programme,
scroll through days with the (-) or (+) key, then
press (OK) on the day you wish to edit. Once
complete, press (OK) to accept the programme
and return to AUTO mode.
Page 24

24
5 Operating Menus
5.1 Automatic Mode (Auto)
In this mode the time clock will follow the
chosen program (Built-in or User defined)
according to the time.
5.2 Off Mode (Off)
Use this mode if you wish to turn off your time
clock.
Frost protection is automatically provided
as a minimum temperature of 5.0ºC will be
maintained.
(This temperature can be changed, contact your
installer or check advanced menu).
Page 25

25
5.3 Holiday Mode (Hol)
The Holiday mode allows you to adjust the time
clock for a period of days:
The display will show “no” press (OK)
- adjust the duration in hours with (-) or (+)
press (OK) to validate.
- adjust the duration in days with (-) or (+) press
(OK) to validate (adjustable 1 to 99 days).
The (On) icon will blink and the number of
days remaining is displayed until the end of the
period.
If you want to stop the holiday function before
the end of the duration you can do so by the
following steps:
- adjust the duration to 0 days
- pressing the or keys will bring up the
cancel screen, select Yes with the (-) or (+)
keys and press (OK) to validate.
Page 26

26
5.4 Keyboard Lock Function
Use this function to prevent changes to the
settings:
- To activate the key lock function, press the
two arrow keys simultaneously.
- The logo will now be displayed
on the screen.
- Repeat with the same procedure to unlock the
keyboard.
Page 27
27
0 1 2 3 4 5 6 7 8 9 10 11 12 13 14 15 16 17 18 19 20 21 22 23
0 1 2 3 4 5 6 7 8 9 10 11 12 13 14 15 16 17 18 19 20 21 22 23
0 1 2 3 4 5 6 7 8 9 10 11 12 13 14 15 16 17 18 19 20 21 22 23
0 1 2 3 4 5 6 7 8 9 10 11 12 13 14 15 16 17 18 19 20 21 22 23
0 1 2 3 4 5 6 7 8 9 10 11 12 13 14 15 16 17 18 19 20 21 22 23
0 1 2 3 4 5 6 7 8 9 10 11 12 13 14 15 16 17 18 19 20 21 22 23
0 1 2 3 4 5 6 7 8 9 10 11 12 13 14 15 16 17 18 19 20 21 22 23
6 Pre-set Programs
P1 Morning, Evening & Weekend
Mo
Tu
We
Th
Fr
Sa
Su
Page 28

28
0 1 2 3 4 5 6 7 8 9 10 11 12 13 14 15 16 17 18 19 20 21 22 23
0 1 2 3 4 5 6 7 8 9 10 11 12 13 14 15 16 17 18 19 20 21 22 23
0 1 2 3 4 5 6 7 8 9 10 11 12 13 14 15 16 17 18 19 20 21 22 23
0 1 2 3 4 5 6 7 8 9 10 11 12 13 14 15 16 17 18 19 20 21 22 23
0 1 2 3 4 5 6 7 8 9 10 11 12 13 14 15 16 17 18 19 20 21 22 23
0 1 2 3 4 5 6 7 8 9 10 11 12 13 14 15 16 17 18 19 20 21 22 23
0 1 2 3 4 5 6 7 8 9 10 11 12 13 14 15 16 17 18 19 20 21 22 23
0 1 2 3 4 5 6 7 8 9 10 11 12 13 14 15 16 17 18 19 20 21 22 23
P2 Morning, Midday, Evening & Weekend
Mo
Tu
We
Th
Fr
Sa
Su
Page 29

29
0 1 2 3 4 5 6 7 8 9 10 11 12 13 14 15 16 17 18 19 20 21 22 23
0 1 2 3 4 5 6 7 8 9 10 11 12 13 14 15 16 17 18 19 20 21 22 23
P3 Day & Weekend
0 1 2 3 4 5 6 7 8 9 10 11 12 13 14 15 16 17 18 19 20 21 22 23
Mo
0 1 2 3 4 5 6 7 8 9 10 11 12 13 14 15 16 17 18 19 20 21 22 23
0 1 2 3 4 5 6 7 8 9 10 11 12 13 14 15 16 17 18 19 20 21 22 23
0 1 2 3 4 5 6 7 8 9 10 11 12 13 14 15 16 17 18 19 20 21 22 23
0 1 2 3 4 5 6 7 8 9 10 11 12 13 14 15 16 17 18 19 20 21 22 23
Tu
We
Th
Fr
Sa
Su
Page 30

30
0 1 2 3 4 5 6 7 8 9 10 11 12 13 14 15 16 17 18 19 20 21 22 23
0 1 2 3 4 5 6 7 8 9 10 11 12 13 14 15 16 17 18 19 20 21 22 23
0 1 2 3 4 5 6 7 8 9 10 11 12 13 14 15 16 17 18 19 20 21 22 23
0 1 2 3 4 5 6 7 8 9 10 11 12 13 14 15 16 17 18 19 20 21 22 23
0 1 2 3 4 5 6 7 8 9 10 11 12 13 14 15 16 17 18 19 20 21 22 23
0 1 2 3 4 5 6 7 8 9 10 11 12 13 14 15 16 17 18 19 20 21 22 23
0 1 2 3 4 5 6 7 8 9 10 11 12 13 14 15 16 17 18 19 20 21 22 23
P4 Evening & Weekend
Mo
Tu
We
Th
Fr
Sa
Su
Page 31
31
0 1 2 3 4 5 6 7 8 9 10 11 12 13 14 15 16 17 18 19 20 21 22 23
0 1 2 3 4 5 6 7 8 9 10 11 12 13 14 15 16 17 18 19 20 21 22 23
0 1 2 3 4 5 6 7 8 9 10 11 12 13 14 15 16 17 18 19 20 21 22 23
0 1 2 3 4 5 6 7 8 9 10 11 12 13 14 15 16 17 18 19 20 21 22 23
0 1 2 3 4 5 6 7 8 9 10 11 12 13 14 15 16 17 18 19 20 21 22 23
0 1 2 3 4 5 6 7 8 9 10 11 12 13 14 15 16 17 18 19 20 21 22 23
0 1 2 3 4 5 6 7 8 9 10 11 12 13 14 15 16 17 18 19 20 21 22 23
Mo
Tu
We
Th
Fr
Sa
Su
P5 Morning, Evening (Bathroom)
Page 32

32
0 1 2 3 4 5 6 7 8 9 10 11 12 13 14 15 16 17 18 19 20 21 22 23
0 1 2 3 4 5 6 7 8 9 10 11 12 13 14 15 16 17 18 19 20 21 22 23
0 1 2 3 4 5 6 7 8 9 10 11 12 13 14 15 16 17 18 19 20 21 22 23
0 1 2 3 4 5 6 7 8 9 10 11 12 13 14 15 16 17 18 19 20 21 22 23
0 1 2 3 4 5 6 7 8 9 10 11 12 13 14 15 16 17 18 19 20 21 22 23
0 1 2 3 4 5 6 7 8 9 10 11 12 13 14 15 16 17 18 19 20 21 22 23
0 1 2 3 4 5 6 7 8 9 10 11 12 13 14 15 16 17 18 19 20 21 22 23
P6 Morning, Afternoon & Weekend
Mo
Tu
We
Th
Fr
Sa
Su
Page 33

33
0 1 2 3 4 5 6 7 8 9 10 11 12 13 14 15 16 17 18 19 20 21 22 23
0 1 2 3 4 5 6 7 8 9 10 11 12 13 14 15 16 17 18 19 20 21 22 23
0 1 2 3 4 5 6 7 8 9 10 11 12 13 14 15 16 17 18 19 20 21 22 23
0 1 2 3 4 5 6 7 8 9 10 11 12 13 14 15 16 17 18 19 20 21 22 23
0 1 2 3 4 5 6 7 8 9 10 11 12 13 14 15 16 17 18 19 20 21 22 23
0 1 2 3 4 5 6 7 8 9 10 11 12 13 14 15 16 17 18 19 20 21 22 23
Mo
Tu
We
Th
Fr
0 1 2 3 4 5 6 7 8 9 10 11 12 13 14 15 16 17 18 19 20 21 22 23
Sa
Su
P7 7H - 19H (Office)
Page 34

34
0 1 2 3 4 5 6 7 8 9 10 11 12 13 14 15 16 17 18 19 20 21 22 23
0 1 2 3 4 5 6 7 8 9 10 11 12 13 14 15 16 17 18 19 20 21 22 23
0 1 2 3 4 5 6 7 8 9 10 11 12 13 14 15 16 17 18 19 20 21 22 23
0 1 2 3 4 5 6 7 8 9 10 11 12 13 14 15 16 17 18 19 20 21 22 23
0 1 2 3 4 5 6 7 8 9 10 11 12 13 14 15 16 17 18 19 20 21 22 23
0 1 2 3 4 5 6 7 8 9 10 11 12 13 14 15 16 17 18 19 20 21 22 23
0 1 2 3 4 5 6 7 8 9 10 11 12 13 14 15 16 17 18 19 20 21 22 23
P8 8H - 19H & Saturday (Shop)
Mo
Tu
We
Th
Fr
Sa
Su
Page 35

35
0 1 2 3 4 5 6 7 8 9 10 11 12 13 14 15 16 17 18 19 20 21 22 23
0 1 2 3 4 5 6 7 8 9 10 11 12 13 14 15 16 17 18 19 20 21 22 23
0 1 2 3 4 5 6 7 8 9 10 11 12 13 14 15 16 17 18 19 20 21 22 23
0 1 2 3 4 5 6 7 8 9 10 11 12 13 14 15 16 17 18 19 20 21 22 23
0 1 2 3 4 5 6 7 8 9 10 11 12 13 14 15 16 17 18 19 20 21 22 23
0 1 2 3 4 5 6 7 8 9 10 11 12 13 14 15 16 17 18 19 20 21 22 23
Mo
Tu
We
Th
Fr
0 1 2 3 4 5 6 7 8 9 10 11 12 13 14 15 16 17 18 19 20 21 22 23
Sa
Su
P9 Weekend (second house)
Page 36

36
7 Hidden Menu:
There is a hidden menu which can be accessed
by pressing and holding a combination of
buttons.
The user menu can be used to set a number of
user preference such as a 12 hour or 24 hour
clock display, temperature readings in either
degC or degF, etc and the installer menu can be
used to adjust various operational settings of
the unit.
The access the User menu set the unit to the
(Off) setting and press and hold the (OK)
button for 5 seconds.
To access the Installer menu set the unit to the
(Off) mode and press and hold the (OK)
button for 5 seconds.
Page 37
37
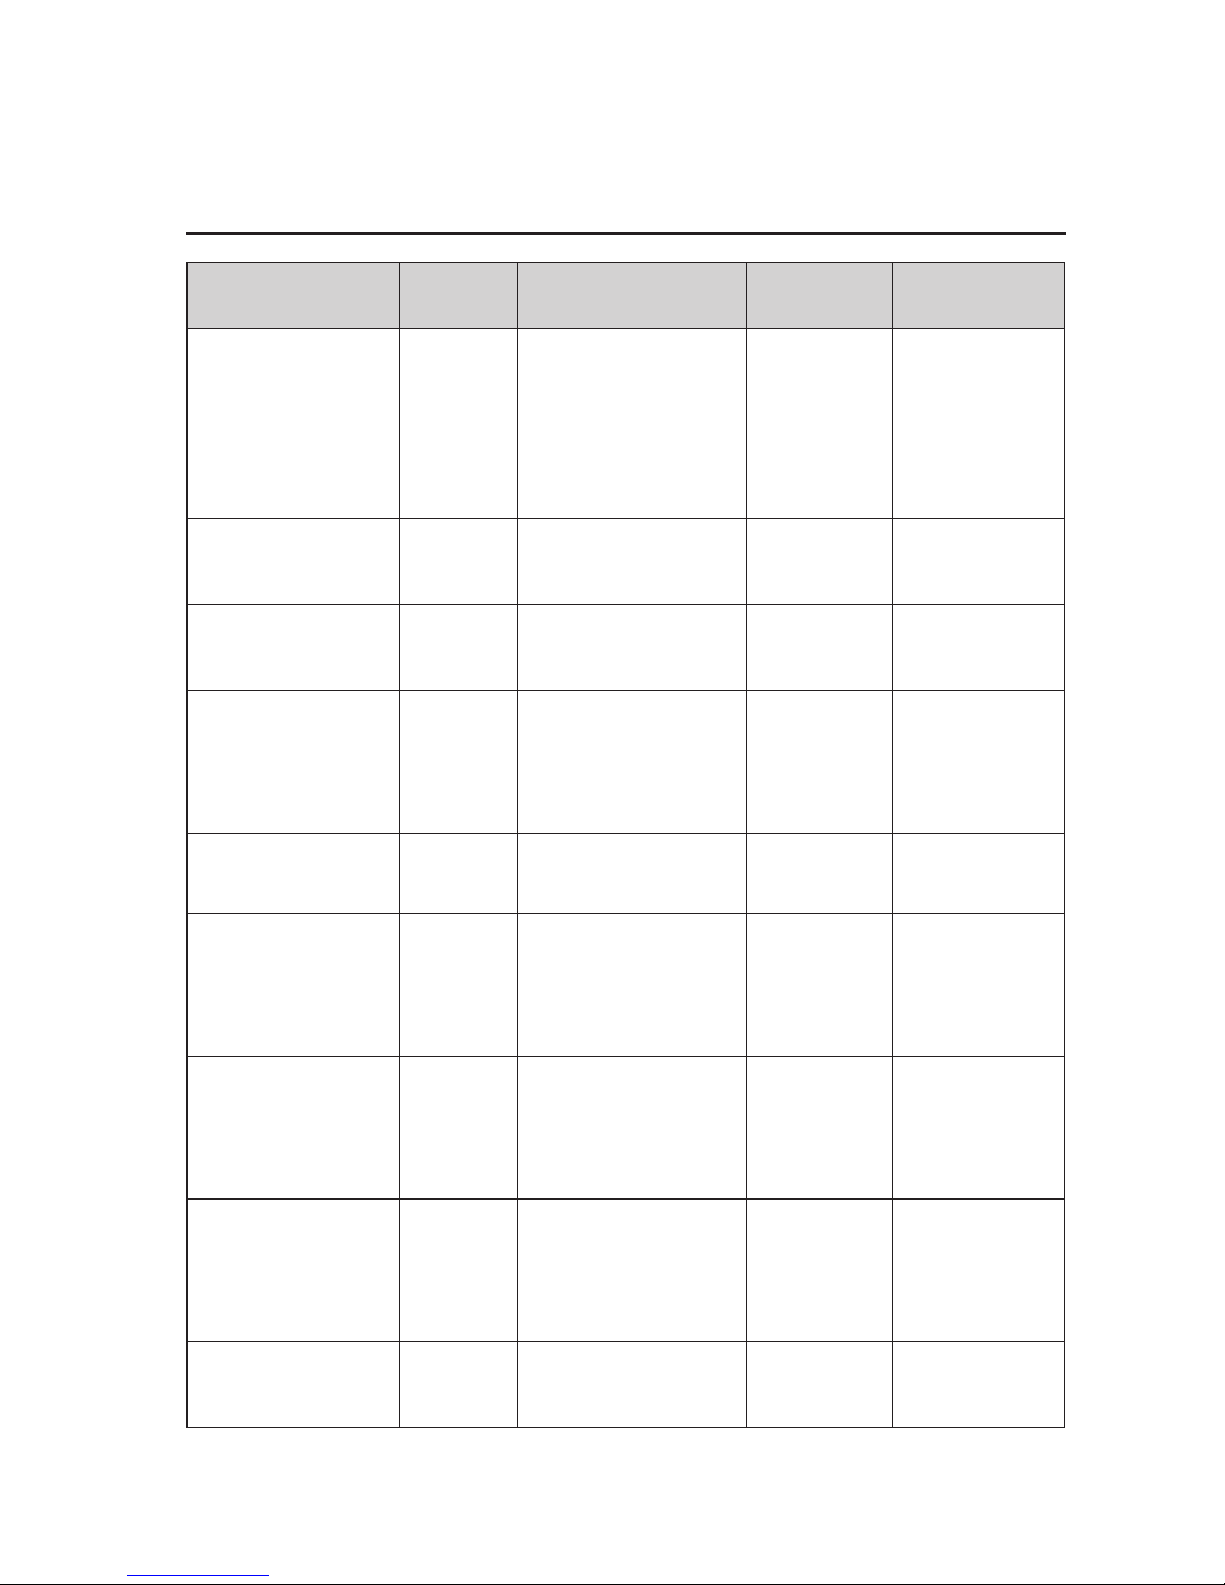
UFHTIME4RFB User Menu
Menu No Display Description Default Option
00 (Available
on RF versions
only)
INIt
ZonE
Sets number
of required
channels and
initiates RF
communication
All zones
are
activated
1 to 4
zones
01 dEG
Temperature
Display
Deg C Deg F
02 Time Clock Display 24H 12H
03 dSt
Automated
clock change
for Daylight
Saving time
Yes No
04 AirS
Current room
temperature
N/A None
05 AirC
Calibration of
temperature
reading
no
Displays
Temp
06 SEnS
Remote room
temperature
(“Err”: sensor
not connected)
N/A None
07 SEnC
Calibration of
remote sensor
temperature
reading
no
Displays
Temp
08 HG
Holiday mode
frost setting
5.0oC
0.5oC to
10.0oC
Page 38
38
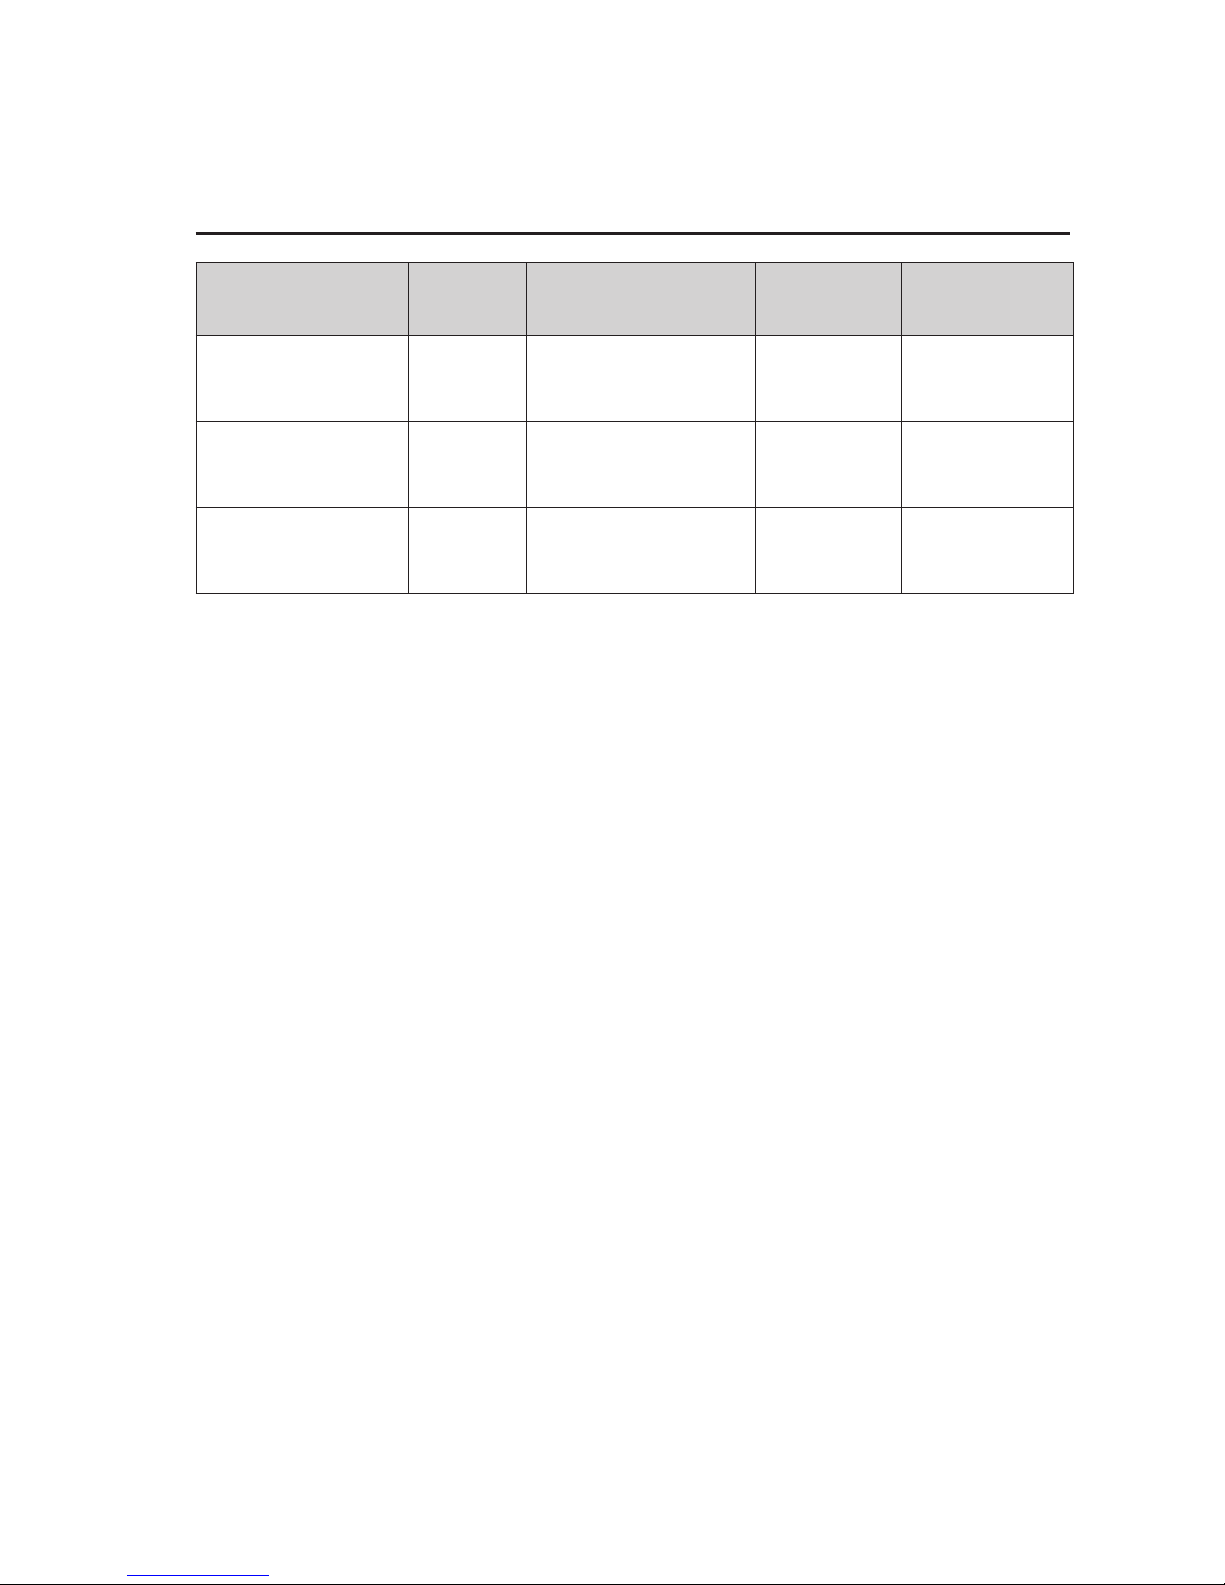
UFHTIME4RFB User Menu
Menu No Display Description Default Option
09
CLr
ALL
Restore factory
Default settings
Press (OK)
during 5s
10
Software
Version
None
11 End
Return to main
screen
Press (OK)
Page 39
39
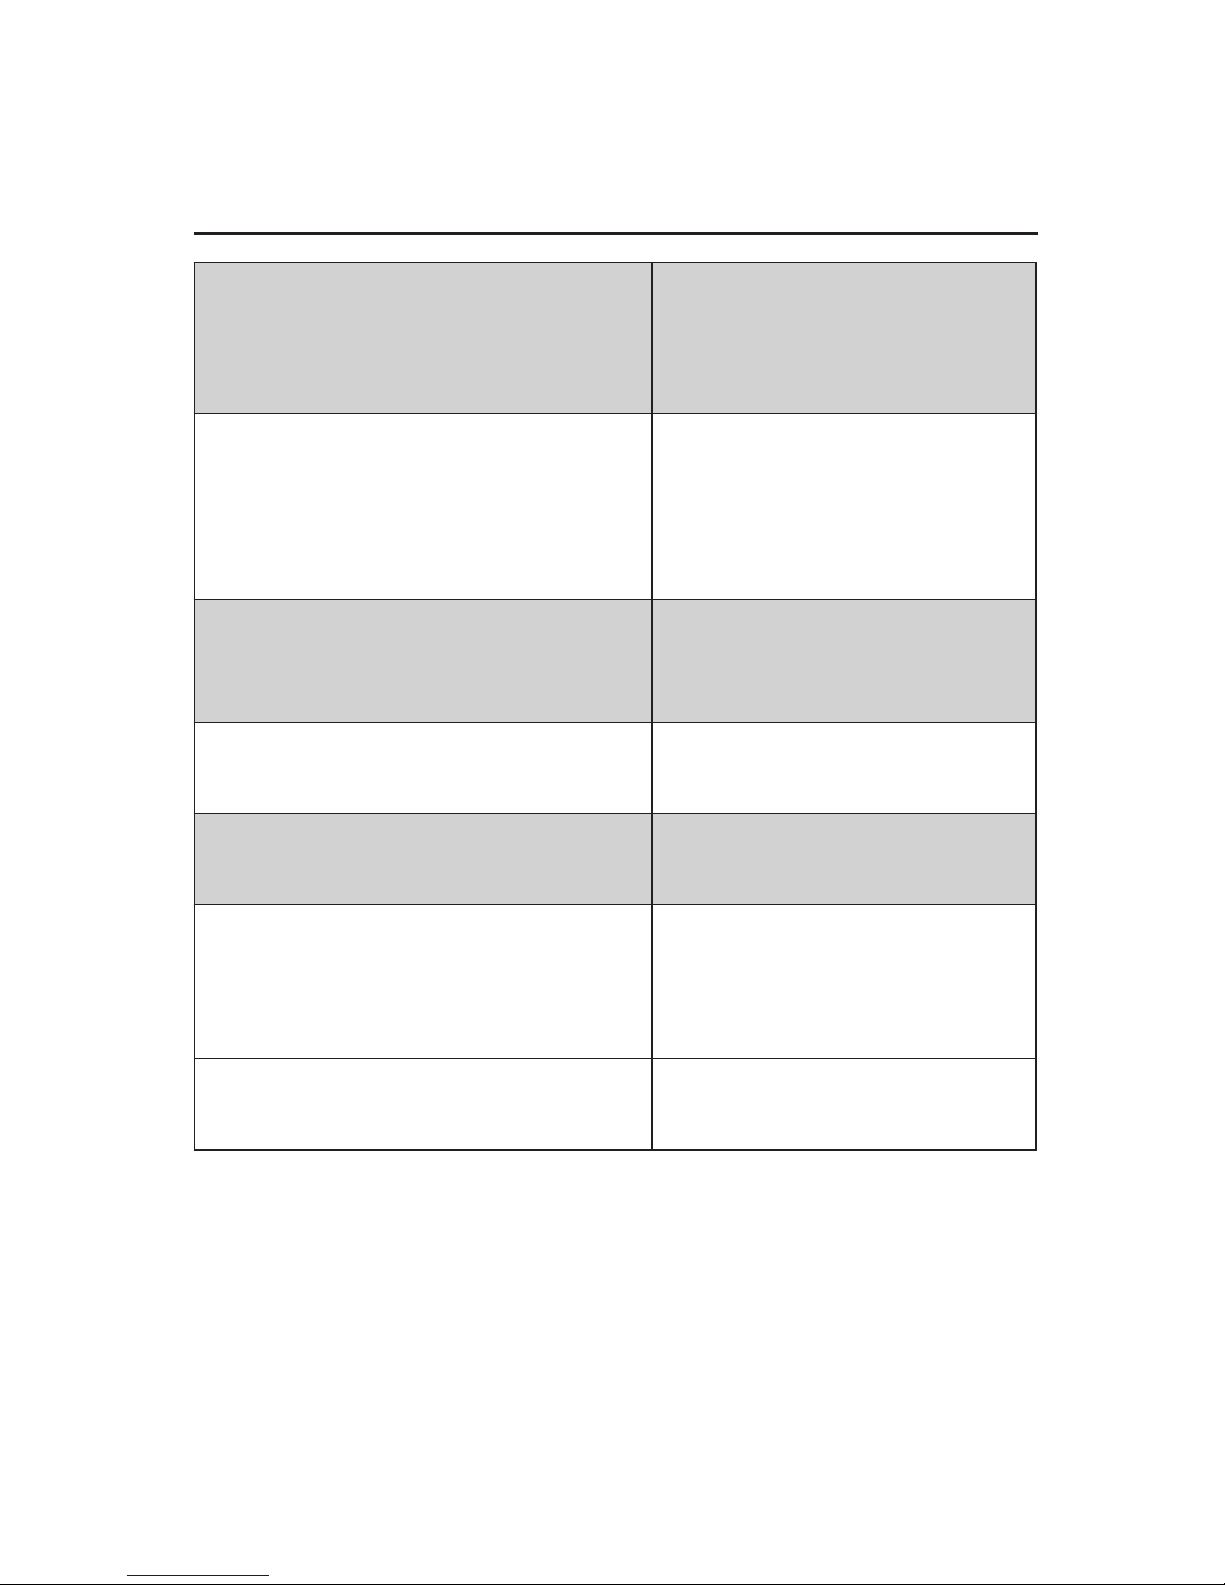
8 Technical Specification
Measured
Temperature
Precision: 0.1ºC
Enviromental
Operating Temperature:
Shipping and Storage
Temperature:
0ºC - 40ºC
-10ºC to +50ºC
Setting Temperature Range
Anti freeze/OFF:
0.5ºC to 10ºC
by 0.5º step
Regulation Characteristics: Hysteresis of 0.5ºC
Electrical Protection: Class II - IP30
Power Supply:
Operarting Life:
2 AAA LR03 1.5V
Alkaline
2 years
Optional External Sensor: 10k ohms at 25ºC
Page 40
40
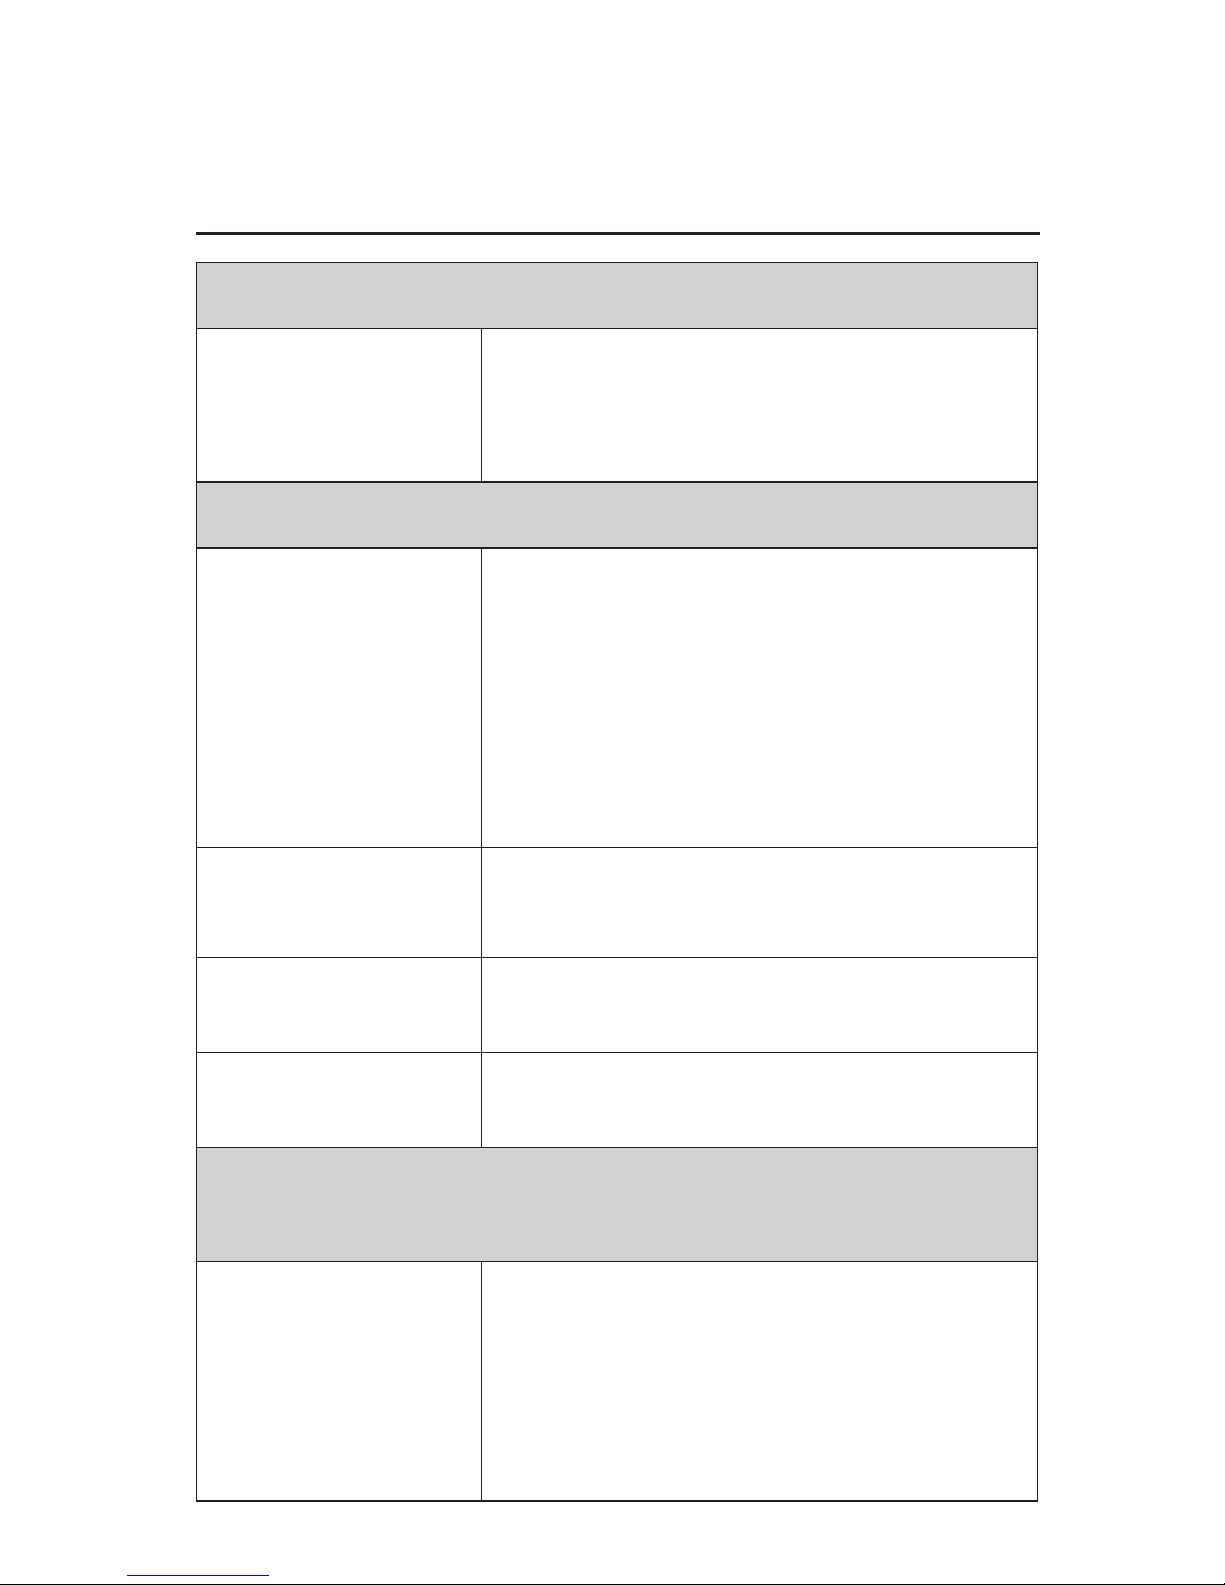
9 Fault Diagnostics
My time clock doesn’t start
Battery Problem:
- Check if the protection sticker on the
batteries is removed.
- Check the orientation of the batteries.
- Check the charge of the batteries
My time clock displays an error when backlight is off
Problem on
sensors
“Err tEmP Air” (ambient sensor) : contact
your installer
“Err tEmP SEn” (remote sensor)
- Check the connection of the sensor
- Disconnect the sensor and check it with
an ohmmeter (the value must be around
10 kohms)
- Remove the batteries to remove the
error
Problem on
keyboard
If the “Err Key” message remains after
the period of displaying “Wait” please
contact your installer
Battery level is low
The logo blinks (batteries) : replace the
batteries
No active zone
“Error Zone” : activate at least one zone
(paragraph 7)
My time clock seems work correctly but the temperature in the
room was never in accordance with the program
Program
- Check the clock.
- Check the difference between
Comfort and Setback temperature is
not too high?
- Contact your installer, to check and
adjust the calibration.
Page 41

41
Page 42

42
Page 43

43
Page 44

Polypipe Building Products
Broomhouse Lane
Edlington
Doncaster DN12 1ES
Tel: 01709 770 000
Fax: 01709 770 001
2410 London Road
Mount Vernon
Glasgow G32 8XZ
Tel: 0141 778 8822
Fax: 0141 778 2703
Dromore Road
Lurgan, Craigavon
Co. Armagh BT66 7HL
Tel: 028 38 881270
Fax: 028 38 882344
www.polypipe.com
For technical advice visit www.polypipeufh.com
www.polypipe.com
Polypipe Building Products is a registered training division of Polypipe Limited
 Loading...