

Page 1

Fingerprint Safe
After-sales Service
0592-5310833
Warranty Period: One Year (from the date of purchase)
POLYSECU-FS2000
Page 2

User Manual—FS2000
【Preface】
Dear users, thank you very much for selecting our product! Our product
has adopted state-of-the-art technologies: ----Fingerprint recognition
technology, computer communication technology and micro-electronics
technology.
It is the product of electronics, optics and computer communication
technologies.
Before using the product, please read this user’s manual carefully,
understand all the relevant functions, master the basics of debugging,
maintenance, application and administration, so as to ensure the proper
usage.
2
Page 3

User Manual—FS2000
【Table of Contents】
PRODUCT INTRODUCTION.................................................. 4
PARTS NAMES AND FUNCTIONS........................................ 5
SYSTEM SETUP .................................................................... 7
"
Fingerprint Registration ........................................................ 7
Delete Fingerprints of All Users............................................... 8
L
Precautions of System Setup..................................................... 8
OPERATION OF THE SAFE.................................................... 9
Open the Door................................................................... 9
Close the Door.................................................................... 9
L
Precautions of System Operation ............................................ 10
È
Disposal of Emergencies......................................................... 10
SYSTEM MAINTENANCE AND TROUBLE SHOOTING......11
APPENDIX........................................................................... 13
Technical Specifications (subject to change without notice).13
Precautions of Fingerprint Capturing................................... 14
1. Selection of Finger.......................................................... 14
2. Registration of Fingerprint................................................ 14
3. Correct Method to Press the Finger............................... 15
FINGERPRINT REGISTRATION FORM........................................... 16
FINGERPRINT REGISTRATION FORM........................................... 18
3
Page 4

User Manual—FS2000
Product Introduction
Basic Features
Easy-to-Use: To unlock with your finger only;
Fingerprint Lock: No need for keys or passwords, which is more
secure;
One-to-Many Verification Mode: Fast capturing (0.5-1.0
second), small size and low cost;
Memory up to 30 fingerprints
Unrivaled high-tech and low-price product;
To be supported with high performance AA batteries, automatic
buzzing alarm at low battery, and guarantees several uses after low battery
alarm;
The bolts of steel door are driven by a highly-reliable,
endurable and energy-efficient micro motor;
The body and door of safe are to be made of high-quality
carbonized steel;
The system has adopted micro power waste and energy-efficient
technology, which hibernates automatically when idle.
Must Read before Use
Copy rights reserved, no unauthorized duplication is permitted;
Damages result from deliberate sabotage or improper use are not
subject to compensation.
Product Warranty
User service and support center;
On-line technical support;
One-year repair & maintenance service and renew within six months;
The warranty period starts from the date of purchase.
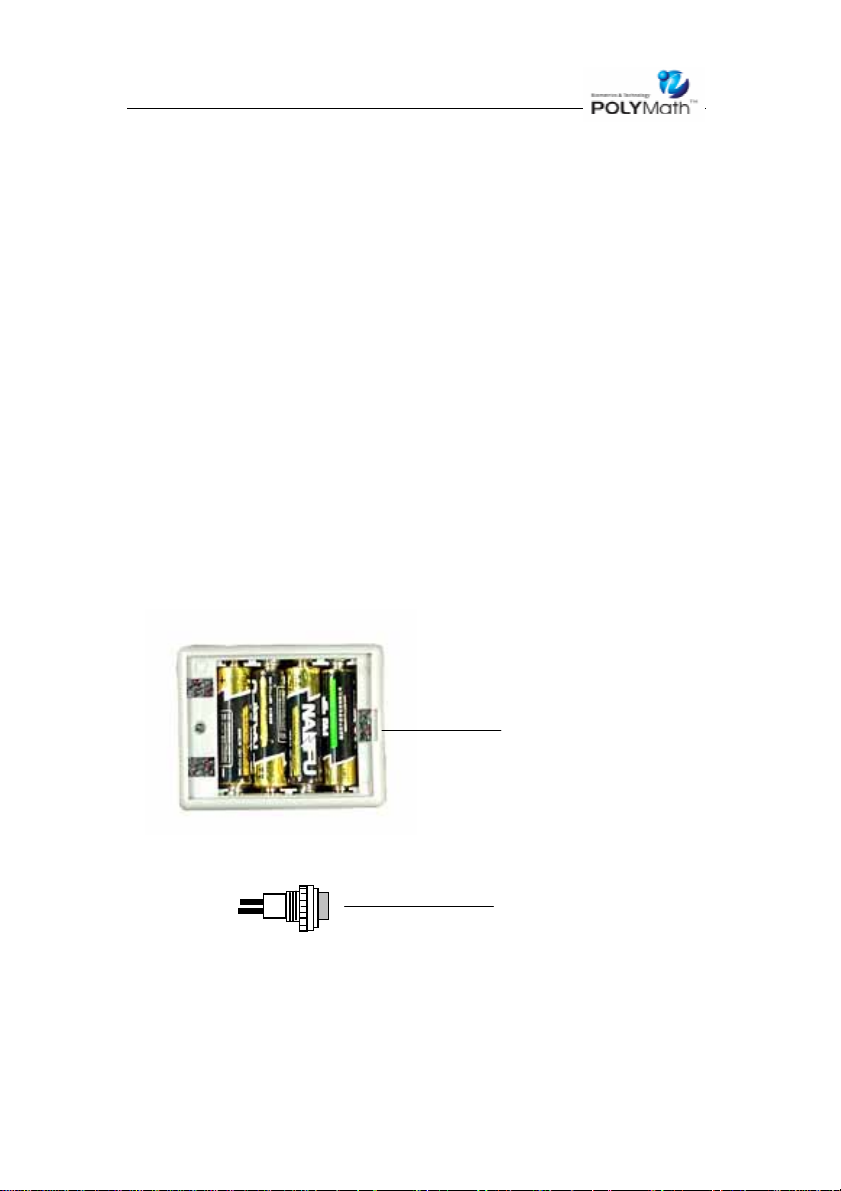
Installation of Batteries
4
Page 5
User Manual—FS2000
Open the battery cover to install the batteries;
4 1.5V high performance AA batteries, the electrodes of battery should be
in strict accordance with the marks;
When the batteries are low, there will be eight consecutive buzzing
sounds to prompt the change of batteries;
Guaranteed several uses after the low battery alarm, but the batteries
should be changed as soon as possible.
Parts Names and Functions
Inner Side of the Door
①Battery Box: Open the cover to change the batteries;
②Green button for registration, and red button for deletion;
①
②
5
Page 6
User Manual—FS2000
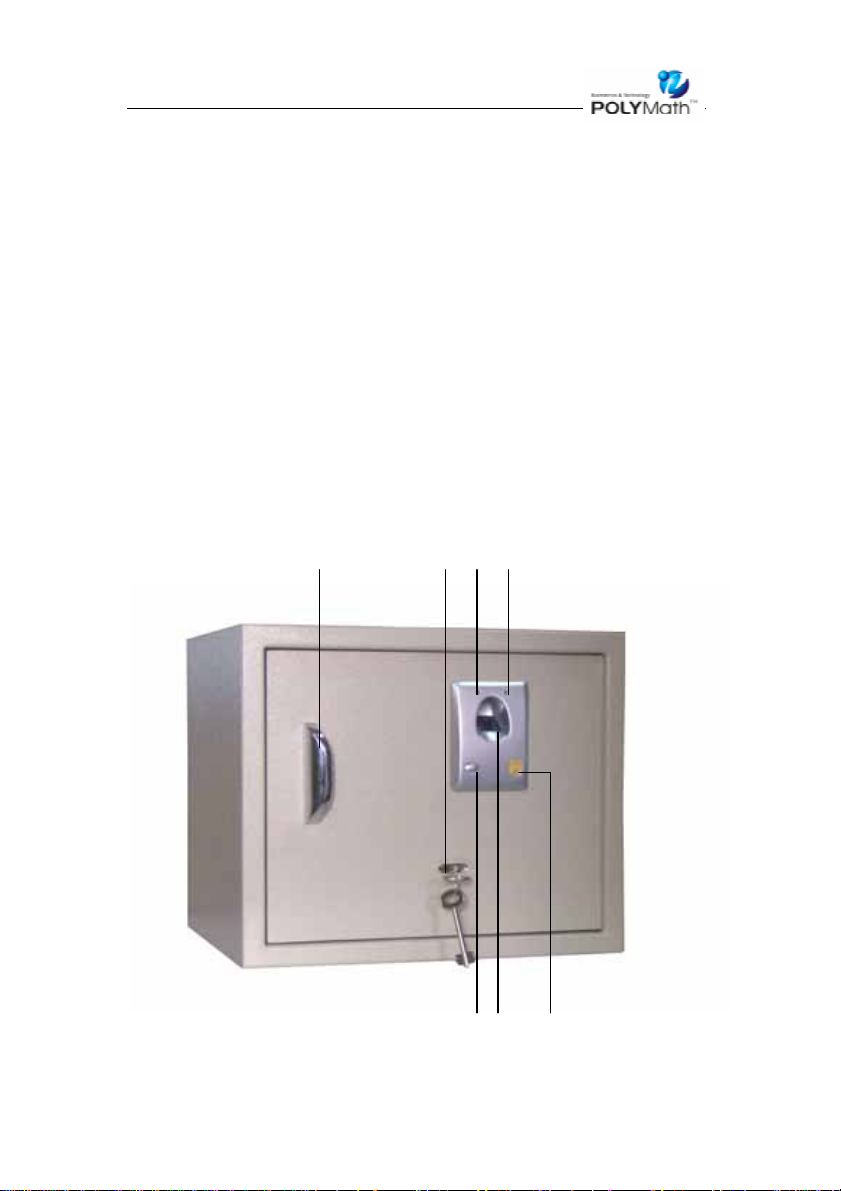
Outer Side of the Door (As illustrated in the following figure)
①Red LED: Unsuccessful user operation;
②Green LED: Successful user operation or the fingerprint lock is
on the “Open” status;
③Fingerprint scanner prism: To capture and verify fingerprints;
④Outer side handle: The user can pull open the door after the fingerprint has
been verified;
⑤Start Button
⑥Emergency Power Supply Socket, POLYSECU mark plate;
⑦Emergency Key Hole
④ ⑦ ① ②
⑤③ ⑥
6
Page 7

User Manual—FS2000
System Setup
"Fingerprint Registration (Unlock the safe door before registration,
then lock it after the door is opened)
A fingerprint should be captured twice
1. Start the Registration Program: Press down the GREEN registration button
and hold it, then press the start button, the green LED indicates that the
system is ready for fingerprint registration;
2. Fingerprint Registration: After one buzzing sound, and the red LED on,
fingerprint scanner light is on, place one of your fingers on the prism
(Please refer to the Precautions of Fingerprint Capturing on P12), take your
finger away after the red LED is off, and the following three blinks of green
LED indicate the first successful capturing of fingerprint;
3. Fingerprint Verification: After two more buzzing sounds, and the red LED
on, fingerprint scanner light is on again, place the same finger on the prism
again, take away your finger away after the red LED is off, the blinking of
green LED indicates the successful verification of fingerprints. The green
LED will be off after a long buzzing sound, and the system returns to
hibernation.
4. The blinking of red LED and four buzzing sounds indicate the failure of
registration. Please repeat the above steps for registration.
7
Page 8

User Manual—FS2000
Important Notice: Take away your finger after first successful capturing,
and press your finger on the prism again for second once. That means
for successful registration, the two places of fingerprint capturing
should not be the same.
Delete Fingerprints of All Users(Unlock the safe door before deletion,
then lock the bolts after the door is opened)
1. Press down the red delete button, and press the start button, the red LED
indicates that the system is ready for fingerprint deletion;
2. After one buzzing sound, the red LED will blink three times in a few
seconds, and the following long buzzing sound indicates the successful
deletion of all fingerprints.
L Note: this operation will delete under all circumstances all fingerprints
stored in the memory, so please be prudent to use this function.
L Precautions of System Setup
If there is no registered fingerprint, the door can be opened by pressing start
button only. So the system should be set up in a timely manner to prevent
the existence of any insecurity.
Please make sure that all the operation buttons have been reset after the
system setup is completed.
Please test the system after fingerprint registration, so as to ensure the
correct setup.
Take out the battery and plug in outer backup power supply, test
8
Page 9

User Manual—FS2000
the system with fingerprint so as to verify the effectiveness of outer power
supply.
Operation of the Safe
Open the Door
1. Press the start button, wait for one buzzing sound and the red scanner light
on.
2. Promptly press the registered finger on the fingerprint scanner prism, and
take the finger away after the red scanner light turns off;
3. If the fingerprint matches, the micro motor will drive the bolts open. The
red and green LEDs will both be on, and the scanner light will be off after a
buzzing sound, then pull the handle to open the door.
Close the Door
After closing the door, press the start button, the red and green LEDs will both
be on, and the motor will drive back the safe bolts, and a buzzing sound
indicates the door has been locked.
9
Page 10

User Manual—FS2000
L Precautions of System Operation
If the fingerprint verification fails, the red LED is on and there are four
buzzing sounds. Please check whether the fingerprint has been registered or
whether the finger has pressed correctly on the prism, then try again.
After the system is started, if there are eight consecutive buzzing sounds,
the batteries are low and should be changed as soon as possible.
If the door is not closed within 30 seconds after it is opened, there will be
an alarming buzzing sound at every 5 seconds interval.
È Disposal of Emergencies
If the inner power supply fails, please plug 6V outer power supply into the
outer power supply socket , and verify the fingerprint to unlock.
10
Page 11

User Manual—FS2000
System Maintenance and Trouble Shooting
A. System Maintenance
Daily maintenance of the lock will help to prolong its life cycle, reduce the
failure rate, and improve the reliability. Hereinafter are some maintenance tips
for your reference:
1) Please change the batteries immediately after the system has given low
battery alarm.
2) Please use the high-performance alkaline batteries.
3) When changing the batteries, please make sure that the electrodes of battery
are in strict accordance with the marks, and avoid the circumstances of
short circuit, grounding or wrong electrode group.
11
Page 12

User Manual—FS2000
B. Trouble Shooting
Improper use or operation will cause failures that may adversely influence the
normal use of lock. The following is a table of common failures and
corresponding solutions for your reference.
No Trouble Root Cause Solution
Change the batteries
Repair the motor
Repair or renew the
electric parts
Change the batteries
Check the plug-in parts
Repair the electric parts
Press the start button to
reset it
Unlock with the key and
change the batteries
Repair the electric parts
Register another
fingerprint
Change the batteries
Try again
Repair the electric parts
Change the batteries
Check the electric parts,
verify the administration
fingerprint, and place the
finger correctly
Change the batteries
1 Do not lock
While unlocking,the
fingerprint scanner
2
light keeps “ON”,
with buzzing sound
System keeps
3
restarting
No response when
4
pressing the start
button
Sometimes the
5
fingerprint does not
work
Cannot delete the
6
fingerprint memory
Unsuccessful
fingerprint
7
registration
Cannot verify the
8
fingerprint
1. Low battery
2.Micromotor damaged
3.Electronics damaged
1. Low battery
2. Bad contacts of the
plug-in parts
3. Electric parts
damaged
The start button is not
reset
1. No battery
2. Electric parts
damaged
The fingerprint is not
clear enough for easy
verification
1.Low battery
2.Error in the
fingerprint registration
and administration
3. Electric parts
damaged
1.Low battery
2.Bad contact of the
setup button
3.Wrong placement of
finger
1. Low battery
2. Batteries worn out
12
Page 13
User Manual—FS2000
Appendix
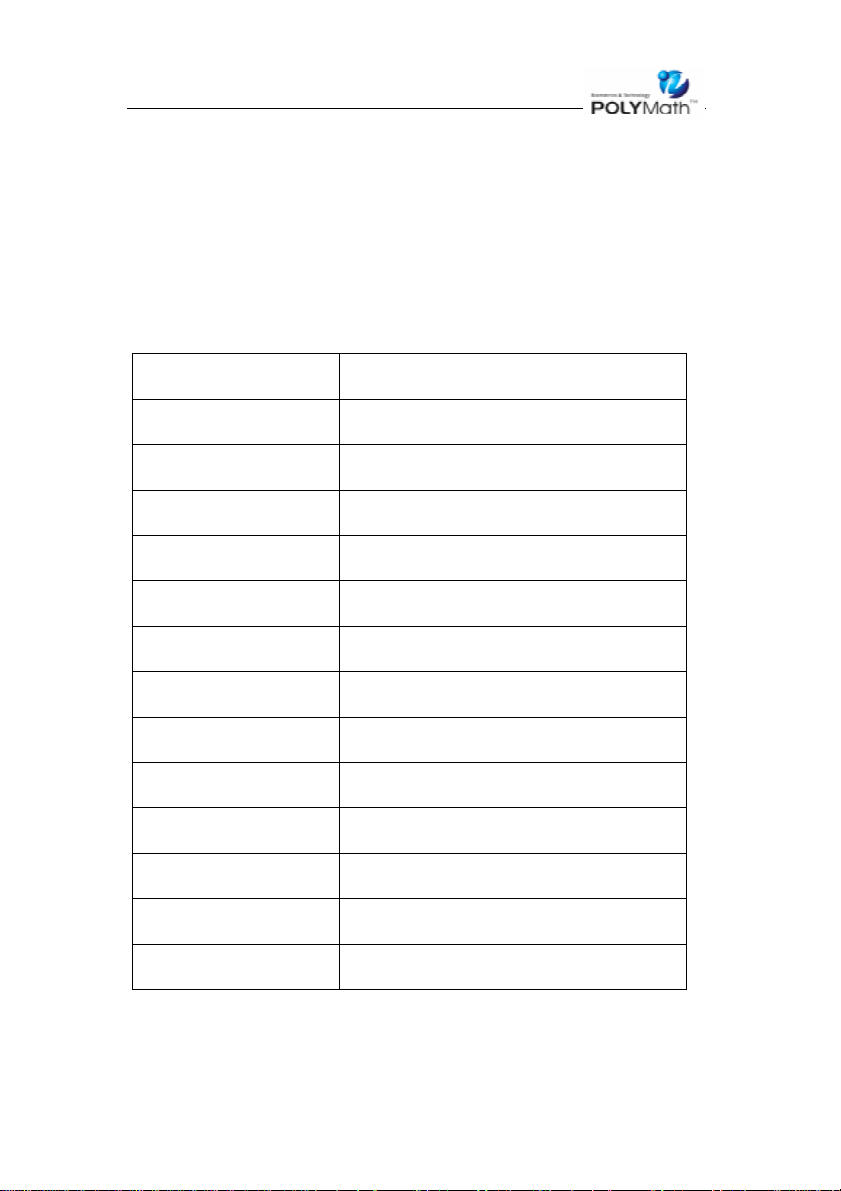
Technical Specifications (subject to change without notice)
Item Content
Registration Memory 30 fingerprints
FRR
(False Rejection Rate
FAR
(False Acceptance Rate)
Response Time 0.5-1 second
Lock Control Mode Electric Micromotor
Dynamic Power
Consumption
Static Power
Consumption
ESD Voltage Resistance
Battery Life 2000 operations
Power Supply 6V battery
Material High-quality carbonized steel
W orking Temperature
Working Humidity 20%--80%
0.01%
0.0001%
60mA—190mA
<30UA
>15000V
-10℃~50℃
13
Page 14

User Manual—FS2000
Precautions of Fingerprint Capturing
1. Select ion of F i nge r
Please select the finger with clear fingerprint and without tearing or
peeling-off skin for registration
Under normal circumstances, it is better to use forefinger, thumb or middle
finger for registration.
If the fingers are all of poor fingerprints, please try all ten fingers and select
the best suitable finger for registration.
2. Registration of Fingerprint
Please press the finger on the central part of the scanner prism;
Press the finger on the prism as if y ou are pressing the doorbell button;
The finger should be moderately humid, breathe upon the finger if it is dry.
Wet or sweating finger will cause the loss of fingerprint information, so
please dry the finger under such circumstances;
If the surface of fingerprint scanner prism is stained, it cannot read the
fingerprint information correctly. So the surface of prism should be cleaned
regularly to ensure the top-performance.
Dirty finger will cause problems in capturing the fingerprint. So please
keep the finger clean while doing the registration.
While registering the fingerprint, press the finger on the prism as soon as
the scanner light turns on; take away the finger after the light is off.
14
Page 15
User Manual—FS2000
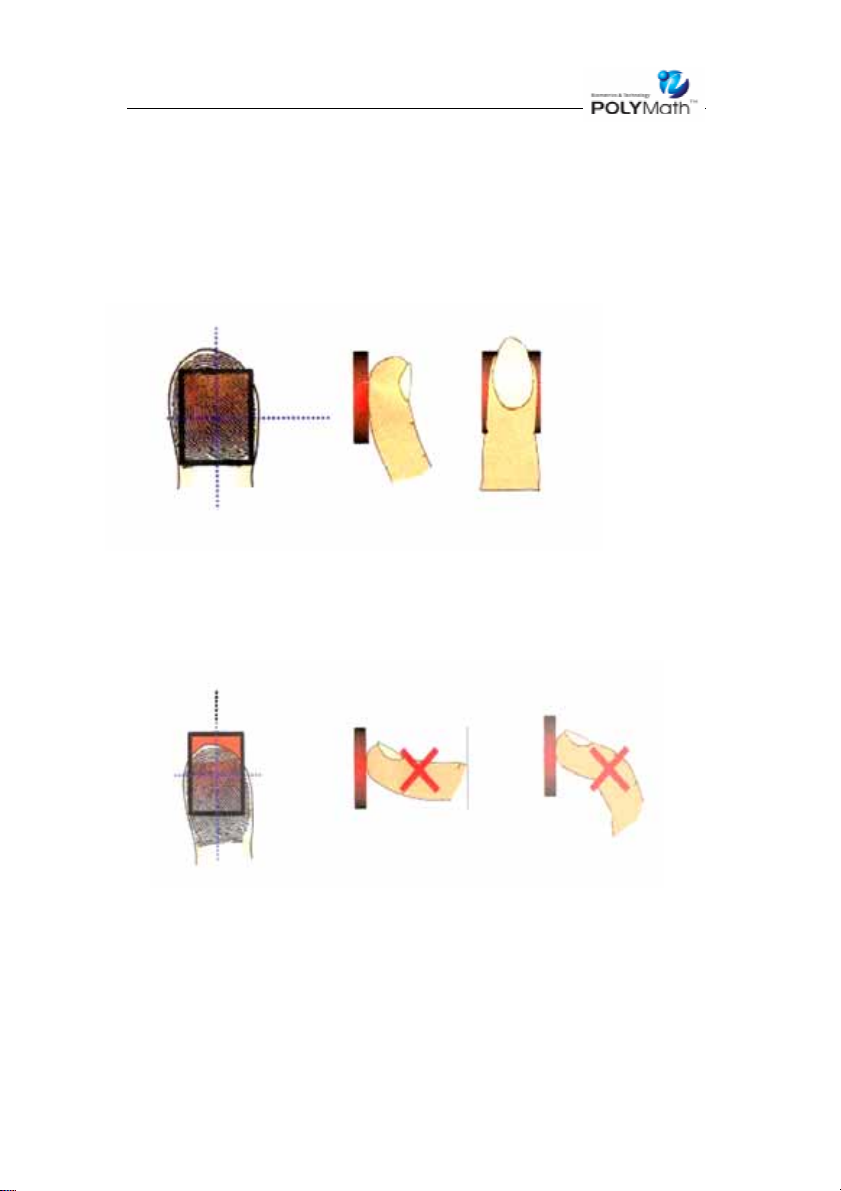
3. Correct Method to Press the Finger
* Correct Method
* Incorrect Method
When pressing on the finger, it should be on the central part of prism,
and press as if you are pressing the doorbell button.
The finger should be moderately humid. Wet or sweating finger will
cause the loss of fingerprint information, so please dry the finger under
such circumstances; and breathe upon the finger if it is dry.
15
Page 16
User Manual—FS2000
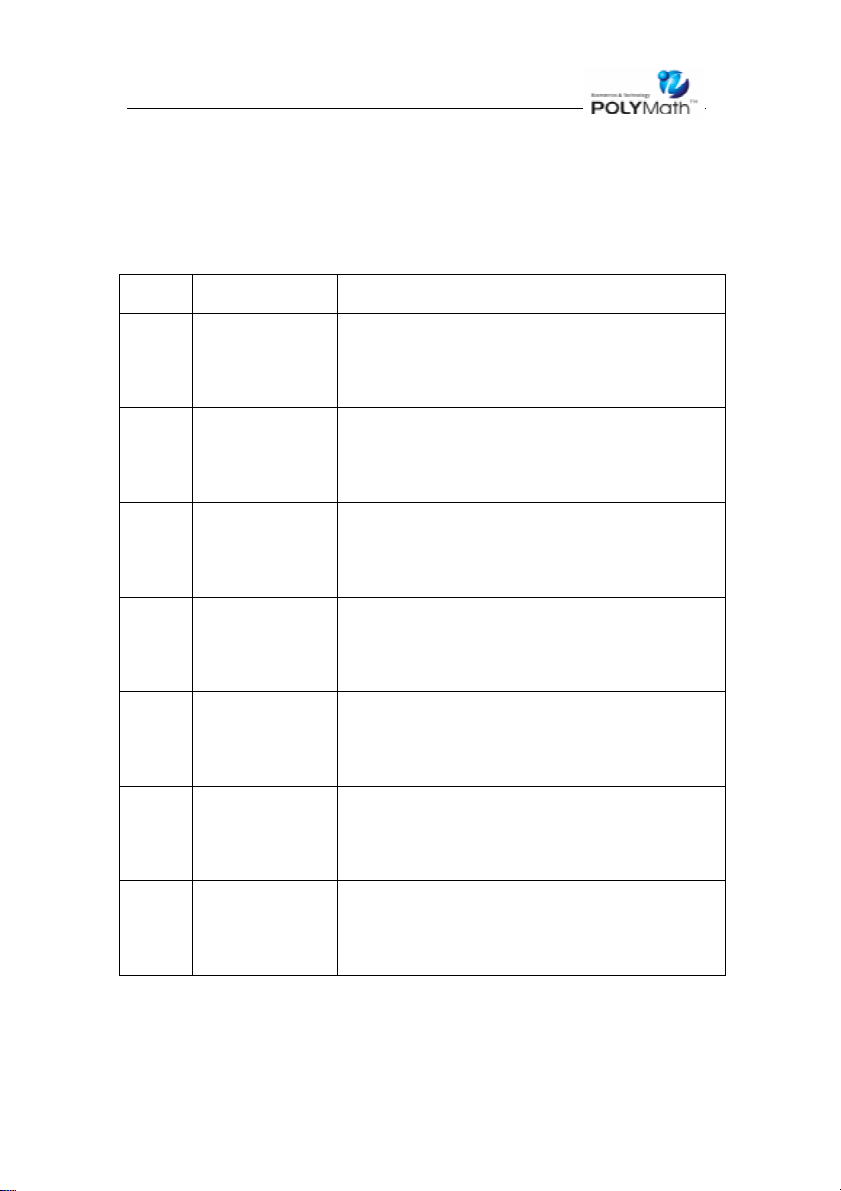
Fingerprint Registration Form
No. Name Fingerprints
Left:□Thumb □Forefinger □Middle Finger
□Third Finger □Little Finger
Right:□Thumb □Forefinger □Middle Finger
□Third Finger □Little Finger
Left:□Thumb □Forefinger □Middle Finger
□Third Finger □Little Finger
Right:□Thumb □Forefinger □Middle Finger
□Third Finger □Little Finger
Left:□Thumb □Forefinger □Middle Finger
□Third Finger □Little Finger
Right:□Thumb □Forefinger □Middle Finger
□Third Finger □Little Finger
Left:□Thumb □Forefinger □Middle Finger
□Third Finger □Little Finger
Right:□Thumb □Forefinger □Middle Finger
□Third Finger □Little Finger
Left:□Thumb □Forefinger □Middle Finger
□Third Finger □Little Finger
Right:□Thumb □Forefinger □Middle Finger
□Third Finger □Little Finger
Left:□Thumb □Forefinger □Middle Finger
□Third Finger □Little Finger
Right:□Thumb □Forefinger □Middle Finger
□Third Finger □Little Finger
Left:□Thumb □Forefinger □Middle Finger
□Third Finger □Little Finger
Right:□Thumb □Forefinger □Middle Finger
□Third Finger □Little Finger
16
Page 17
User Manual—FS2000
Left:□Thumb □Forefinger □Middle Finger
□Third Finger □Little Finger
Right:□Thumb □Forefinger □Middle Finger
□Third Finger □Little Finger
Left:□Thumb □Forefinger □Middle Finger
□Third Finger □Little Finger
Right:□Thumb □Forefinger □Middle Finger
□Third Finger □Little Finger
Left:□Thumb □Forefinger □Middle Finger
□Third Finger □Little Finger
Right:□Thumb □Forefinger □Middle Finger
□Third Finger □Little Finger
Left:□Thumb □Forefinger □Middle Finger
□Third Finger □Little Finger
Right:□Thumb □Forefinger □Middle Finger
□Third Finger □Little Finger
Left:□Thumb □Forefinger □Middle Finger
□Third Finger □Little Finger
Right:□Thumb □Forefinger □Middle Finger
□Third Finger □Little Finger
Left:□Thumb □Forefinger □Middle Finger
□Third Finger □Little Finger
Right:□Thumb □Forefinger □Middle Finger
□Third Finger □Little Finger
Left:□Thumb □Forefinger □Middle Finger
□Third Finger □Little Finger
Right:□Thumb □Forefinger □Middle Finger
□Third Finger □Little Finger
Left:□Thumb □Forefinger □Middle Finger
□Third Finger □Little Finger
Right:□Thumb □Forefinger □Middle Finger
□Third Finger □Little Finger
17
Page 18
User Manual—FS2000
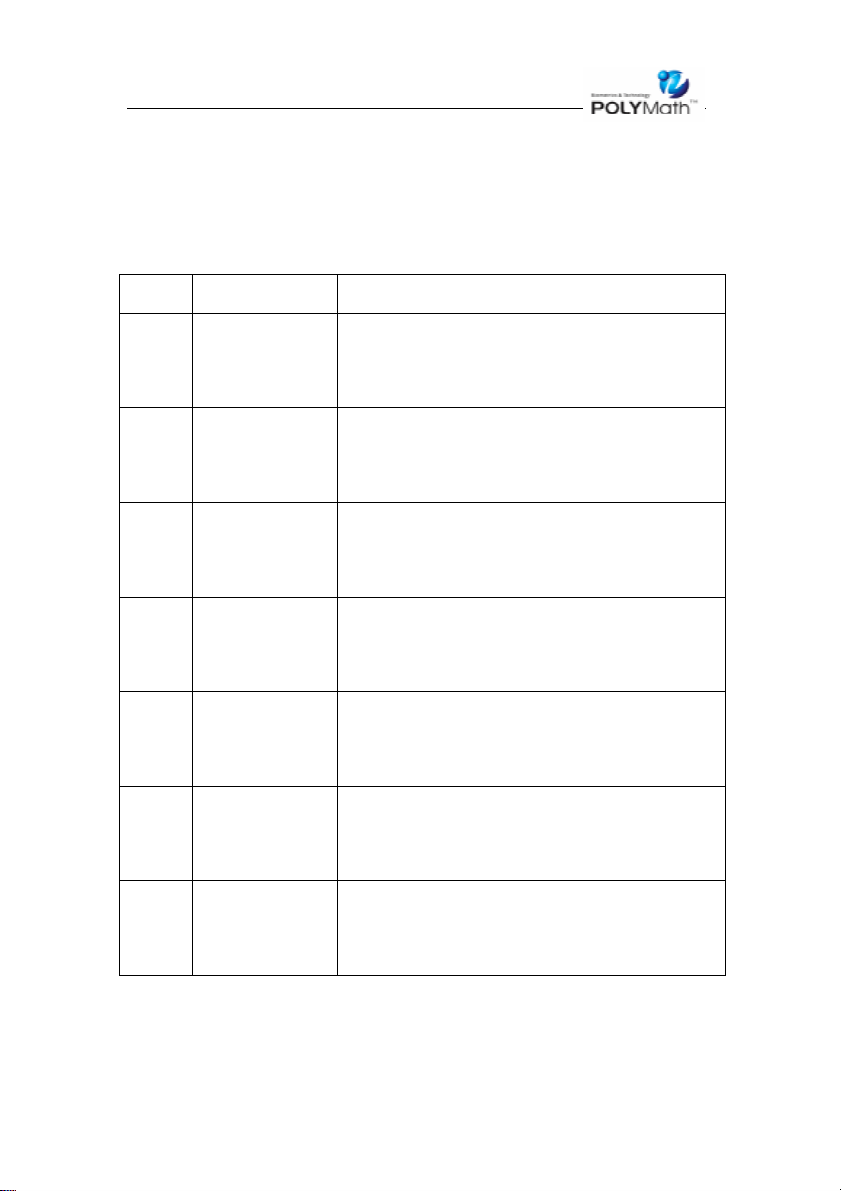
Fingerprint Registration Form
No. Name Fingerprints
Left:□Thumb □Forefinger □Middle Finger
□Third Finger □Little Finger
Right:□Thumb □Forefinger □Middle Finger
□Third Finger □Little Finger
Left:□Thumb □Forefinger □Middle Finger
□Third Finger □Little Finger
Right:□Thumb □Forefinger □Middle Finger
□Third Finger □Little Finger
Left:□Thumb □Forefinger □Middle Finger
□Third Finger □Little Finger
Right:□Thumb □Forefinger □Middle Finger
□Third Finger □Little Finger
Left:□Thumb □Forefinger □Middle Finger
□Third Finger □Little Finger
Right:□Thumb □Forefinger □Middle Finger
□Third Finger □Little Finger
Left:□Thumb □Forefinger □Middle Finger
□Third Finger □Little Finger
Right:□Thumb □Forefinger □Middle Finger
□Third Finger □Little Finger
Left:□Thumb □Forefinger □Middle Finger
□Third Finger □Little Finger
Right:□Thumb □Forefinger □Middle Finger
□Third Finger □Little Finger
Left:□Thumb □Forefinger □Middle Finger
□Third Finger □Little Finger
Right:□Thumb □Forefinger □Middle Finger
□Third Finger □Little Finger
18
Page 19
User Manual—FS2000
Left:□Thumb □Forefinger □Middle Finger
□Third Finger □Little Finger
Right:□Thumb □Forefinger □Middle Finger
□Third Finger □Little Finger
Left:□Thumb □Forefinger □Middle Finger
□Third Finger □Little Finger
Right:□Thumb □Forefinger □Middle Finger
□Third Finger □Little Finger
Left:□Thumb □Forefinger □Middle Finger
□Third Finger □Little Finger
Right:□Thumb □Forefinger □Middle Finger
□Third Finger □Little Finger
Left:□Thumb □Forefinger □Middle Finger
□Third Finger □Little Finger
Right:□Thumb □Forefinger □Middle Finger
□Third Finger □Little Finger
Left:□Thumb □Forefinger □Middle Finger
□Third Finger □Little Finger
Right:□Thumb □Forefinger □Middle Finger
□Third Finger □Little Finger
Left:□Thumb □Forefinger □Middle Finger
□Third Finger □Little Finger
Right:□Thumb □Forefinger □Middle Finger
□Third Finger □Little Finger
Left:□Thumb □Forefinger □Middle Finger
□Third Finger □Little Finger
Right:□Thumb □Forefinger □Middle Finger
□Third Finger □Little Finger
Left:□Thumb □Forefinger □Middle Finger
□Third Finger □Little Finger
Right:□Thumb □Forefinger □Middle Finger
□Third Finger □Little Finger
19
 Loading...