

Page 1
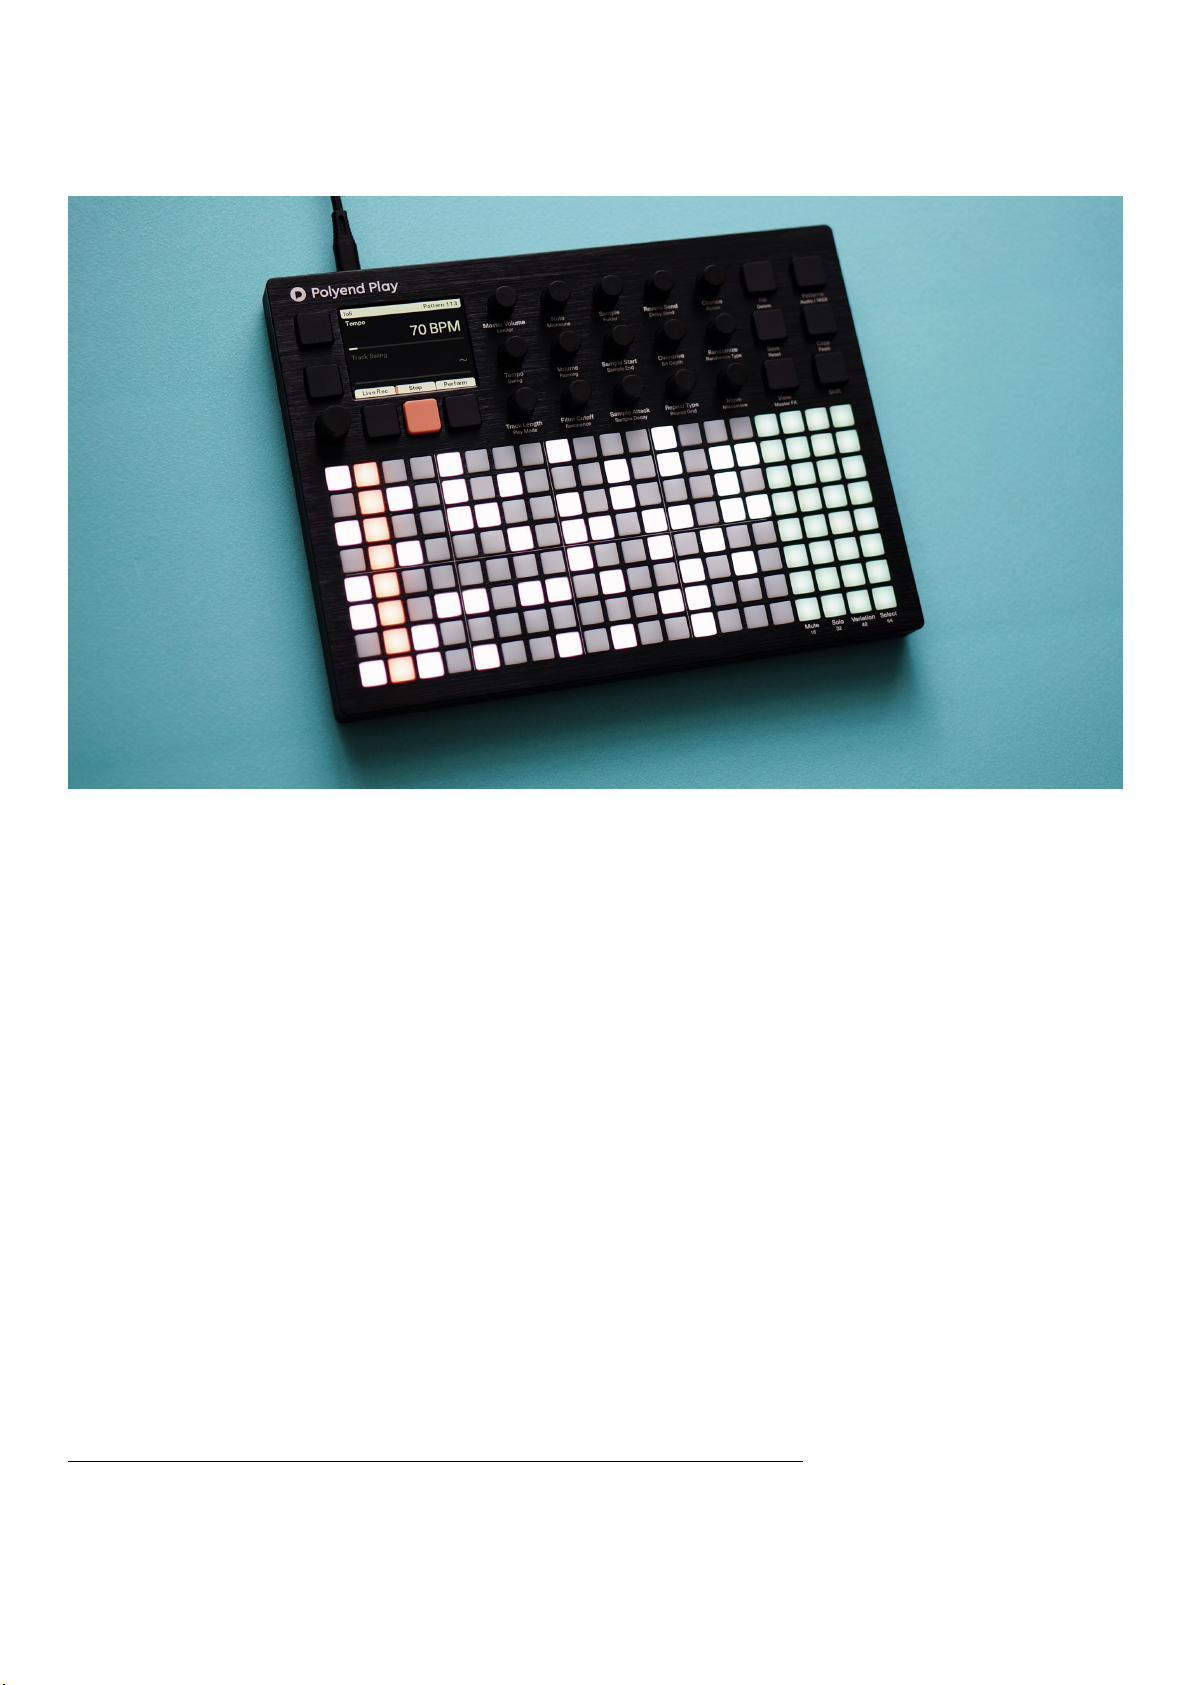
Polyend Play
Play
Version: 1.1
Sample and MIDI-Based Groovebox
Index:
First Steps
Quick Guide
Basics
Enhanced Playability
Tips & Tricks
Introduction
Interface
User Interface
Back Panel Connectors
Audio Port Specifications
Project Management
Project Naming
Sample Pool
Sample Pack
Audio Sequencer
The Grid
View Controller
Variations
Step Edit
Quick Copy
Knobs
Live Recording
Master FX
Fill Tool
Designing Custom Beat Fills
Page 2
Pattern Mode
Perform Mode
MIDI Sequencer
Main Menu
File
Samples
Scales
MIDI
Settings
Firmware
Firmware Updates
In case of trouble
Warranty & Safety
EU regulations
Appendix
Audio Architecture
Predefined MIDI Chords List
Musical Scales List
Randomize Types
What's In The Box?
Device Dimensions
Polyend Play Battery Powering
Credits
Polyend Play Licences
First Steps
Quick Guide
Page 3
Play is a pattern and performance-based Audio and MIDI groovebox, capable of great
complexity while remaining easy to operate. Play offers an inspiring workflow for both
seasoned and novice musicians. It allows music makers to create and interact with musical
patterns in a number of exciting and creative ways. Once patterns are created, they can be
chained together for playback or triggered on the fly. Additionally, each pattern’s tracks can
have its own variations, and each of those tracks may have its own length, playback speed,
and more.
If this sounds like a lot to take in, rest assured that Polyend has made Play’s interface so
user-friendly that you’ll be up and running with barely a glance at this manual. However, we
suggest that you take a look at the following First Steps section to get started, and then
come back when you’re ready to dig a little deeper.
https://www.youtube.com/embed/3s2Lq-sAMNI?feature=oembed
PickandPlace – First, use the knobs to pick the ‘work step’ parameter values, their sample,
note, volume, filter type, send Fx, MIDI properties, etc. When ready, start pressing the grid
pads to place steps on the sequencer tracks.
SelectandAdjust–Select a step by pressing and holding the grid pad, and use the knobs to
modify its parameters. You can select:
One or more steps by pressing and holding the grid pads.
A group of multiple steps by pressing the grid pads while holding the Shift button.
A whole track by pressing the Select pad on the right side of the grid.
A rectangular block of multiple steps across multiple tracks by holding the Shift key and
then pressing pads on opposite diagonal points of a rectangular block of the steps you
wish to include.
Press and quickly release the Shift key to clear any type of selection.
When no track or step is currently selected/held for editing, then by turning the
knobs you will pick/modify the so-called ‘work step’ values. It applies the same way
to both audio and MIDI sequencing modes.
Deselect all the steps and tracks to get back to ‘work step’ editing.
When multiple steps are selected, the parameter change is applied to all of them. When the
parameter values of selected steps are different, then a tilde ~sign together with a number
and +/- is displayed while changing them. Double–clicking a screen button corresponding to
the selected knob parameter (and/or its automation) will restore its default value.
Page 4

Playback – Polyend Play offers various types of playback:
Press the Play screen button to start and stop playing the current pattern. When the
sequencer is active, it will turn orange.
Use Shift + Play while playing a pattern in a loop to continue playing arranged patterns
sequentially.
Use Shift + Play while stopped to start playing arranged patterns sequentially.
Use Shift + Play while playing arranged patterns sequentially to switch to playing the
current pattern in a loop.
Basics
Audio and MIDI sequencer – Use Play as the centerpiece of your studio, controlling external
devices with up to 8 polyphonic MIDI tracks, or use it on the go, making use of its 8 internal
audio tracks. Play is small and lightweight – an entire studio that can rest comfortably on
your lap.
Knobs – Turn the knob to control its active parameter. Each knob has two parameter values.
The operational parameter is highlighted. Toggle between them by double-tapping the knob
or using the two function screen buttons located on the left side of the screen. The currently
selected knob parameter can also be controlled by the screen encoder.
Entering Notes – You can choose a note by holding a step and turning the Note knob.
Alternatively, you can use the View controller function, or even by sending note data from
external MIDI gear.
When using the View controller or external MIDI gear to change selected note (notes in blue)
hold shift and press the desired note to make the change.
Live Rec – Press the Live Rec screen button to use it (it will turn red when active). When the
sequencer is running it will register all the knob automation for existing steps. It will also
record notes inserted from both the View mode and MIDI controllers on the pattern tracks.
Entering the Live Rec mode disables the Perform mode and vice versa.
Perform – Press the Perform screen button to enter this mode. Select one or more tracks
with the Select pads on the right side of the grid, and start pressing the Perform pads. Only
the selected tracks will be affected. Each of the Perform pads holds a punch-in effect that
will influence the sound. Hold the pad for a momentary punch-in effect, press it and let go
Page 5

immediately to latch the effect. In this mode, you can also use the knob modulators. All the
knob value changes will get back to the initial values after leaving the Perform more. Punch-
in effects will be immediately toggled off when you quit the Perform mode, and toggle back
on when you’ll get back to it again.
Pattern chaining /Song mode – Press the Patterns function button to enter the pattern view.
You can store up to 128 patterns in a single project. Place the patterns in a row and use the
Shift + Play keys combo to chain them together for sequential playback. Using this method
makes it possible to create an entire song. Leave at least one blank pattern pad between
pattern chains to create a set of pattern chains. Press grid pads with patterns or pattern
chains to jump between the parts of your composition. Quick Copy patterns by holding a grid
pad with an existing pattern while pressing a blank pad to paste it.
Config Menu – Click down the Encoder to enter the Main menu section.
Enhanced Playability
Sample Packs – Play comes with many sample packs created by top-notch sound designers.
You can load your own too, but the bundled packs are more than enough to create high-
quality music right out of the box. Play’s workflow relies on sample packs that have been
prepared in a specific way, with samples categorized in folders. Some of the instrument’s
algorithms are based on these packs. Most significantly, the Fill and Randomizing tool ideas
rely on them. Of course, you are not obligated to follow this formula, you can do things your
own way, but it helps to make the audio outcome very musical.
Quick Copy – Press and hold a grid pad for about half a second. The pad will blink twice, and
its parameter values will now be copied to the clipboard. While still holding the source pad,
indicate the target pad where it will be copied. This works for steps, step pages, patterns, and
variations. The Quick Copy of an existing step copies its values to a ‘work step’ state.
Work Step – Select audio/MIDI parameters using the knobs before you place the steps on
the grid manually or with the use of the Fill tool.
Fill tool – This can be used to automatically fill the selected area with the fill type of your
choice. You can select a Random placement of steps, euclidean spread, or even an entire
drum beat.
Page 6

Variation – This tool allows you to create alternative versions of your tracks. These variations
can be manually switched during playback. Press one or more of the Variation function pads
to make quick changes to the entire track. Each track has its own corresponding Variation
pad. The active variation is illumined in orange. The available variations are bright yellow and
empty variations are dark yellow.
Step Repeater – A flexible onboard effect, capable of making short stutters, ratcheting, pitch
effects, volume fades, and more. Very usable both on drums and melodic samples.
Randomizer – An advanced system that allows you to choose what and how much you’d like
to randomize. In this scenario, using one knob you can make a lot of changes at once. The
randomization outcome can be temporary or saved to a pattern.
View note inputcontroller – Hit this key to transform Play’s button grid into a keyboard or
grid controller. When using Play in this way, the function pads on the right side of the grid
will change color to orange. The upper row of padsallows you to change the octaves
andindicates if you’re in audio or MIDI mode. To start entering notes via the pads, hold a
step and press the desired note, or enable the Live Rec mode. You can choose from keyboard
and grid layouts in the Main menu.
Per track – Play’s tracks offer options that allow them to act independently from one
another. For example, each Track’s Length can be set from 1 to 64 Steps. Speed allows you to
choose different BPM-related divisions. Swing is provided, and it even works per track!
Additionally, 35 custom Play Modes let the playhead flow in different directions while using
the track content.
Chance and Action – This pair works in conjunction and allows you to set up some
algorithmic actions. Chance is a percentual or algorithmic probability of action. Action is a
specific parameter change happening on a Chance basis. First, determine the chance that an
Action will occur, and then the Action itself.
Master FX– The array of Reverb, Delay, Sound Enhancer, Limiter, and Saturator is very
useful to change the sound of your entire mix. To make it more convenient the effects are
managed with a bunch of curated presets.
Scales – Once the scale filtering is on, the entire sequence will input and output only the
notes that fit the chosen scale. The option to enable musical scales can be found in the Main
menu config.
Page 7

Tips & Tricks
Autosave – Current project’s state is autosaved every time you hit the Stop screen button.
Undo/Redo – Every time you make a mistake (add/delete a step, make changes to
parameters) you can go back (or forth). When the Shift key is pressed, these actions are
available under the bottom screen buttons.
Session Save and Reset– At any given time you can save and recall the current state of your
pattern. It’s especially handy to have a lifebuoy during a live performance. Just hit that Save
button!
Copy/Paste – Select any number of steps (remember to hold the shift button to select
multiple steps) and copy them into the same or another pattern.
Turn Preview – While the sequencer is stopped, turn one of the knobs to hear the change
parameters immediately.
Step Preview – Click down and hold the encoder, then press a step pad containing a note to
hear it.
Easy Selection – Select one step, a block of steps, a single track, or an entire pattern.
Mute and Solo – You can perform these actions to all the audio and MIDI tracks separately
using the dedicated function pads.
Reverse sample – Set the sample endpoint before its start point to reverse its playback.
Swing – This is a per-track function. But you can apply it to all the tracks at the same time
for global swing.
Default Values – Double-clicking a screen button corresponding to the selected knob
parameter (and/or its automation) will restore its default value.
Decaying sample cut – When a long sample sounds through (decaying) after stopping the
sequencer, you can cut it by touching the Master Volume knob.
Portability – Polyend Play runs on 5V/1A and can be powered from a power bank.
Tracker integration – Go to the Main menu > MIDI > CC Mapping -> Channel and select Set
Values for Polyend Tracker to enable integration mode for the Polyend Tracker Standalone
Audio Workstation.
Page 8
Introduction
With a workflow that is both inspiring and simple, Polyend Play is far from your average
sample-based groovebox. Endless possibilities for your beats are at your fingertips with many
sample packs to play with straight out of the box. Polyend Play takes an open sandbox
approach for creating and performing grooves, with the freedom to instantly mix things up
with tons of different playback functions.
Flexible sequencing with 8 audio tracks and 8 polyphonic MIDI tracks for controlling your
outboard gear – Polyend Play really wants to be at the centerpiece of your studio. This is
quite possibly the most fun groovebox ever created.
Polyend Play isn’t really about satisfying your expectations. It is about taking you to new and
different musical places you didn’t even know existed. We made it to allow you to discover
new ways of making music, and to inspire you by having a good time!
https://www.youtube.com/embed/ShwKlOaTyZE?feature=oembed
Interface
Page 9
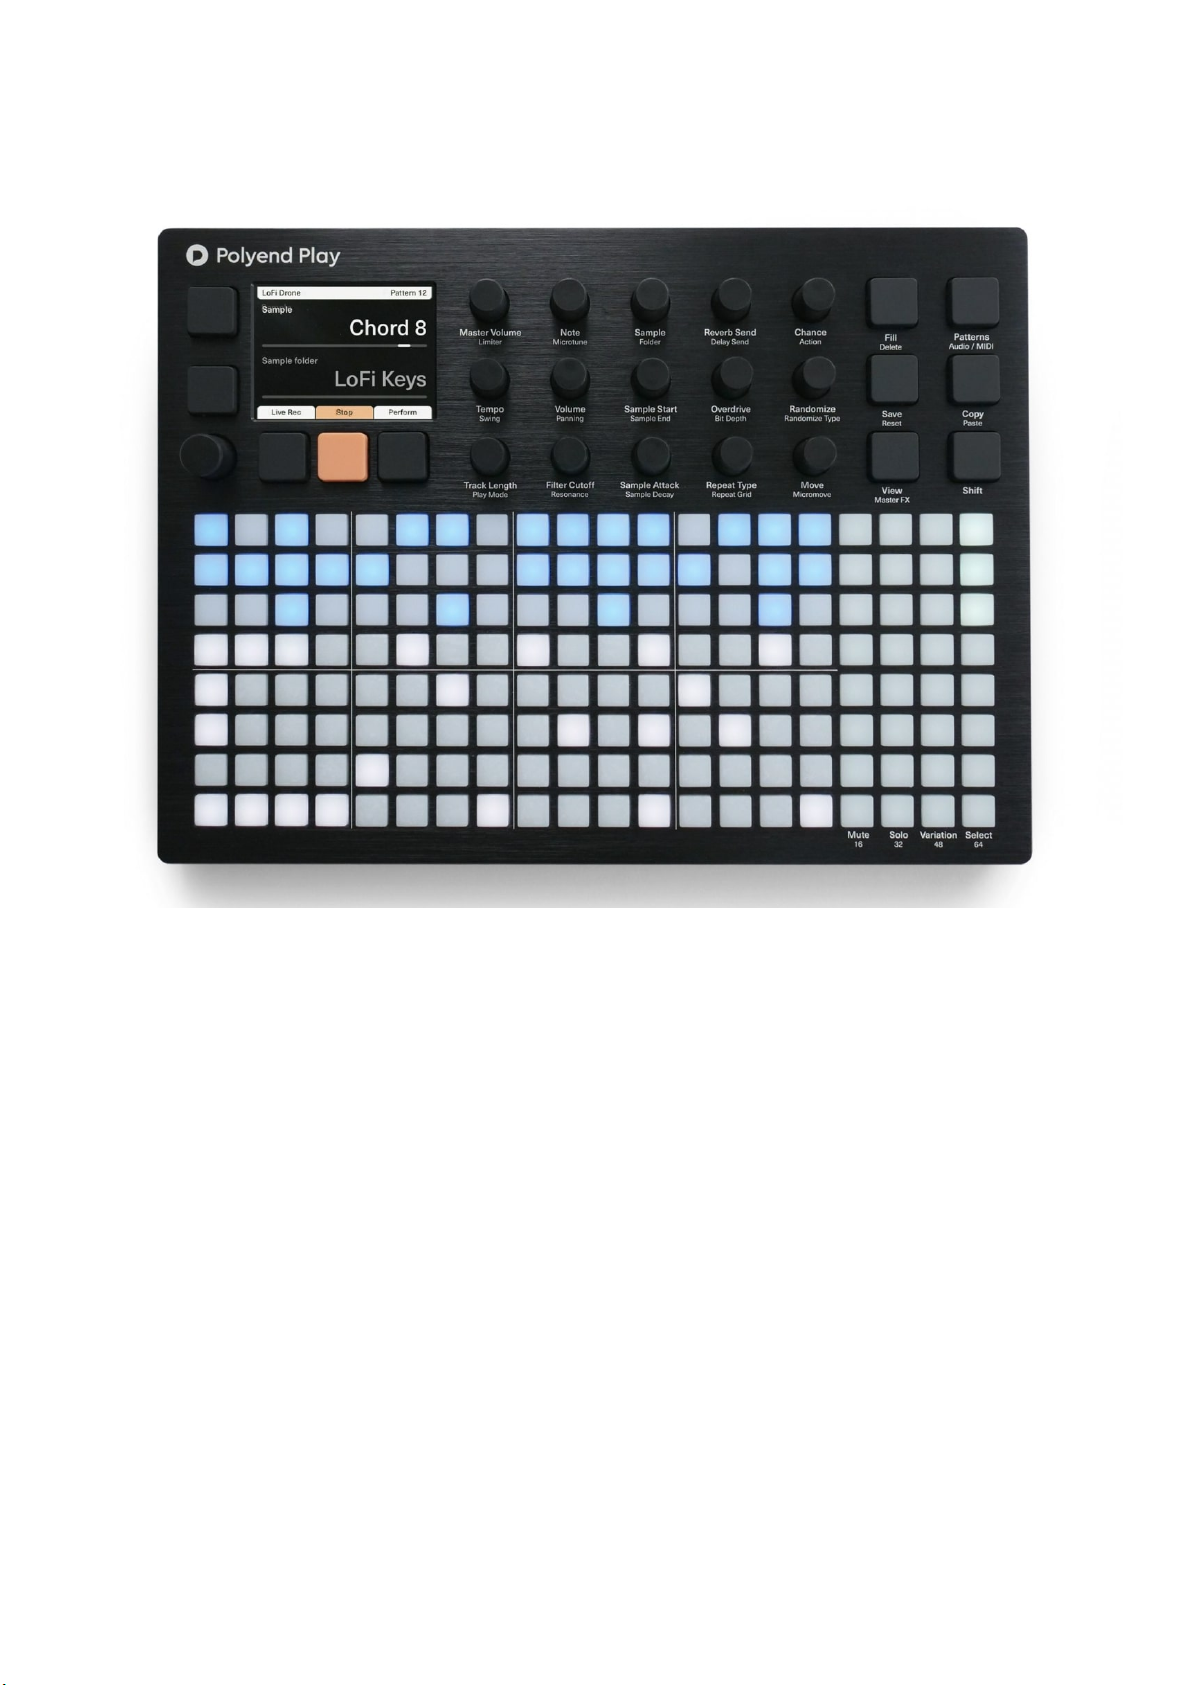
User Interface
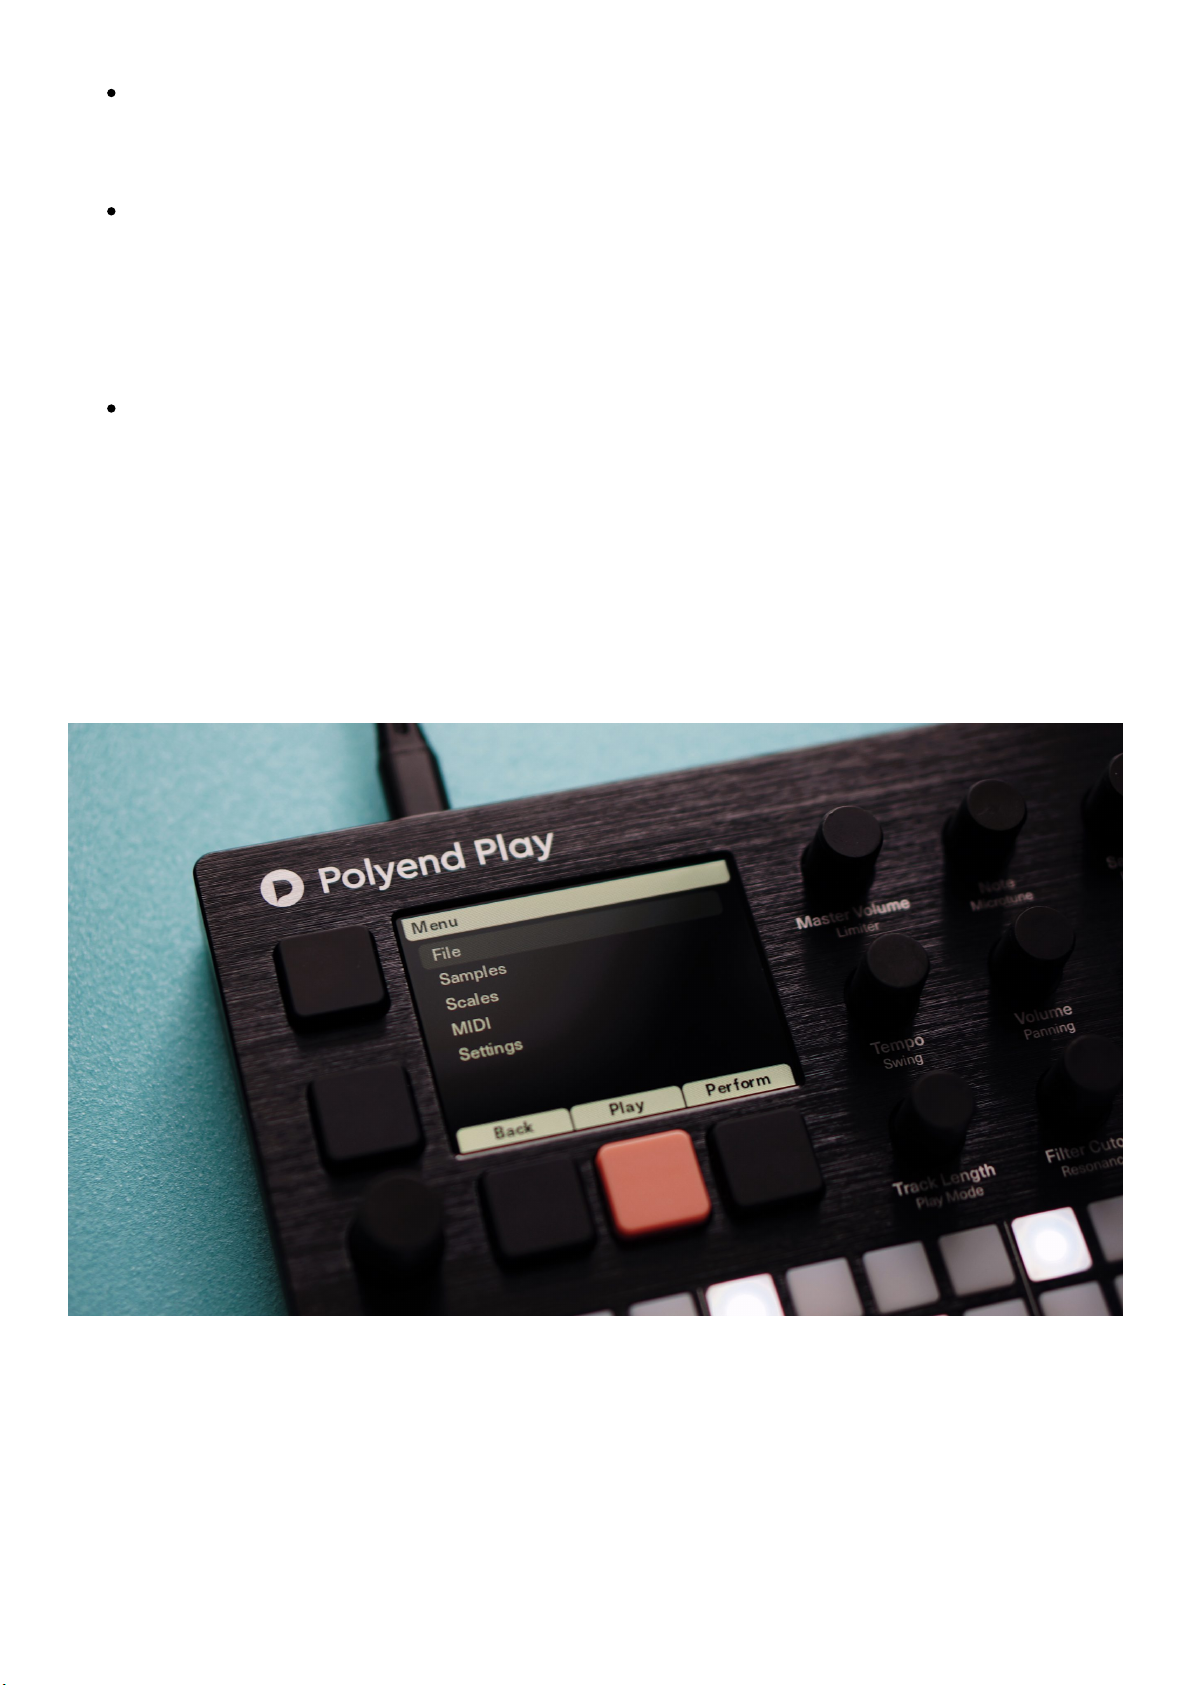
The Polyend Play user interface is divided into four sections. Starting from the left side:
A – High-resolution screen accompanied by five dedicated mechanical screen function
buttons (the current description of each button is displayed on the screen) and a
multifunctional clickable encoder. Press/click on it to enter the Main menu. Thanks to the
encoder’s detents, you can precisely dial in the value of the chosen parameter value while
turning it.
B – Middle section consists of fifteen dedicated touch-sensitive function knobs. You will be
using these knobs to manage the step and track parameters as well as the global project
status. Each knob controls two described parameters. The operational parameter is
highlighted in the display. Double-tap a knob to switch its active parameter.
C – On the right side there are six mechanical function buttons. Besides the Shift key itself,
they offer two actions. Hold the Shift button to access the secondary action for each button.
Page 10

D – The 8 x 20 grid of multifunctional (non-velocity-sensitive) silicone pads covers the lower
half of the device. The grid pad brightness level is user-adjustable. It is vertically split into
two main parts. On the left side, you’ll find 8 x 16 track steps columns. These can also be
used to arrange your songs in Pattern mode or used to trigger the Perform effects. On the
right side, you will find an array of 4 function pads for each track. These perform various
duties, including selecting, muting, soloing tracks, and much more besides. This 4 x 8 array of
pads can also be used as a note entry/keyboard controller in the View mode.
Back Panel Connectors
On the back panel, from left to right, you will find the following ports:
Out – headphones/mainline stereo audio output port – use a 3.5mm stereo plug (adapter to
1/4” jack included in the kit).
MIDIdataoutputport – use the included TRS type-B 3.5mm jack to MIDI DIN adapter to
connect to MIDI Input of an external MIDI device.
MIDIdatainputport – use the included TRS type-B 3.5mm jack to MIDI DIN adapter to
connect to MIDI Out of an external MIDI device.
MicroSD card slot– use the included 16 GB micro SD card as data storage.
The MicroSD card must be formatted to a FAT32 MBR partition. This is the only file
system supported by Play.
The MicroSD card needs to be inserted into the port in order to make the Polyend Play
operational.
Use the included MicroSD card to USB type-A dongle adaptor to access the SD card
from a computer.
The included SD card is 16GB but SD cards with a bigger capacity can be used too.
Reset button – hidden reset button for emergency flashing procedure (use something thin to
reach it if needed).
USB Type-Cport – power input from a USB power source (AC adapter is included in the kit).
Provides bidirectional MIDI class-compliant communication.
Page 11

Polyend Play runs on 5V/1A and can be powered up from a power bank.
Power switch – press once shortly to turn the unit on or press and hold for a couple of
seconds to toggle it off.
Audio Port Specifications
Sharing the same physical port:
Line Output:
Output level: 9 dBu peak (when 10 kΩ Load)
SNR: 97 dB
Headphone Output:
Output level: 17,6 dBm (when 16 Ω Load)
SNR: 98 dB
Project Management
Page 12
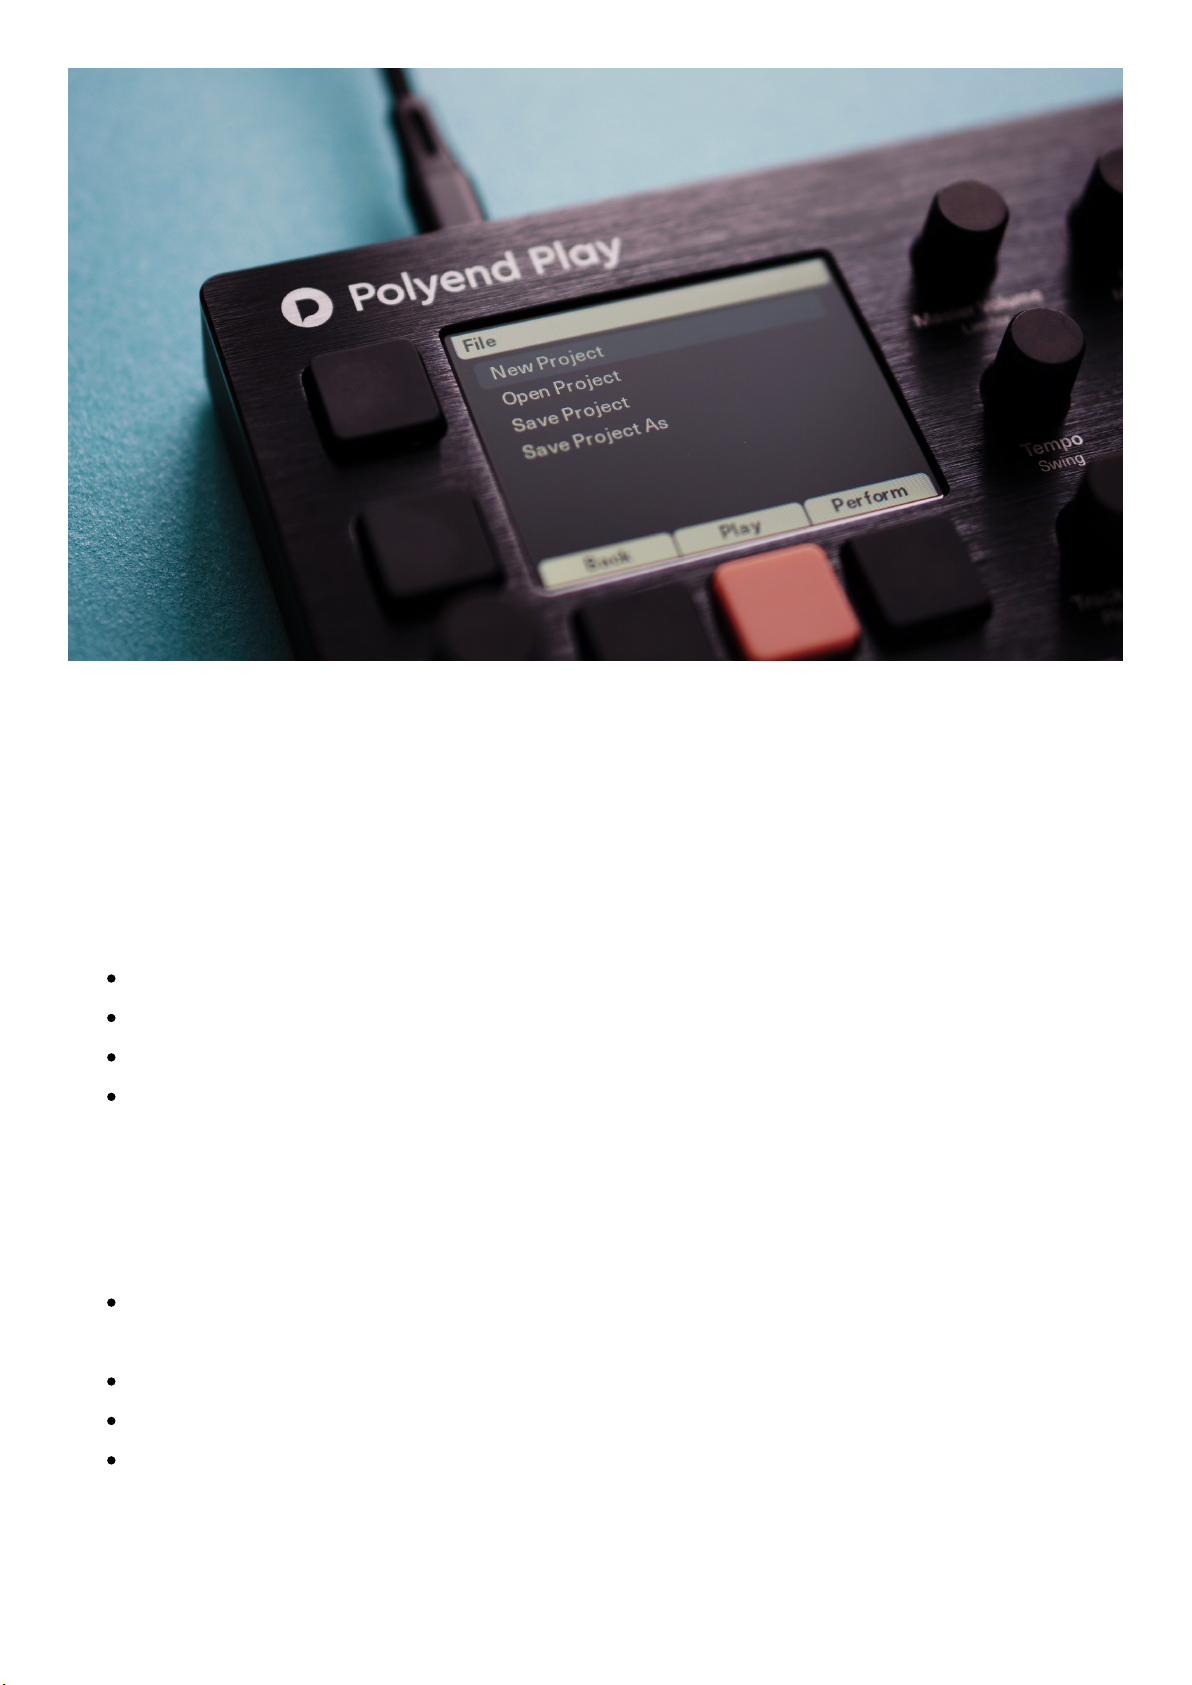
Each time you toggle the device on, Play boots to the last active project. All the currently
active project changes are autosaved with each press of the Stop screen button. Projects
can be loaded, and managed from the File menu level. Click the encoder to enter the file
browser with the following options available:
New Project – initiates a new project.
Open Project – reveals a list of available existing projects which you can open.
Save Project – this gives you an option to save your current project.
Save Project As – same as above but with an option to input an exact name of the
saved project.
A single project can contain up to 128 patterns. The sample pool and sequencer playback
settings are also stored within it. The basic rules and actions that apply to this section are:
To load a project, highlight the desired position and use the Open screen button on the
bottom of the screen. An adequate popup with a progress bar will appear.
In the Main menu file browser, the project folders are displayed in orange.
Both left screen buttons function as an Enter, in the same way as the encoder click.
If Open Project or New Project is selected and the current project isn’t saved, a warning
popup will be displayed.
Page 13
New Project and Save Project actions will be performed immediately, while Open
Project or Save Project As will open the card browser, allowing you to select the project
location.
Open Project action will be performed immediately after selecting the location. After
choosing the location for Save as, enter the name of the project and confirm it.
If a current project wasn’t saved before, the Save Project command will behave like
Save Project As.
If the name entered in Save Project As already exists in the selected location, an
information popup will be displayed.
Project Naming
You can name your projects as you like. The project name field is initially filled with the name
of the current project. If the current project name in the selected location already exists, a
suffix with the first appropriate number will be added.
The Save As action will enable an on-screen QWERTY keyboard allowing you to enter
the exact preferred name for your project by using the grid pads corresponding to
what’s displayed on the screen.
Turn the encoder to change the current character and press enter to add it to the
cursor position.
Hold the Shift key and turn the encoder to change the cursor position on the edited file
name.
Press the Delete key (Shift + Fill key combo) to remove the character before the cursor
position.
If you have writer’s block while naming your project, use the Auto Name function and
see what you’ll get.
Sample Pool
Page 14
The audio engine of the Polyend Play is sample-based. When starting a new project, you need
to load some sounds into the sample pool from the SD card, so you can sequence them.
Play’s workflow is powered by distinctively prepared sample packs. This approach was
chosen to make it as playable and intuitive as possible. Sample packs allow functions like
Randomizer, Chance, or the Fill tool to produce very musical output. Nonetheless, users are
not forced to use sample packs only. In fact, the project’s sample pool is highly customizable.
You can use your own sounds and omit the proposed folder structure if you prefer.
Create your new project and start loading sounds stored on the SD card to the project’s
sample pool. You will do this in the Sample section of the Main menu using the file browser
offering the following choices:
Use the View Sample Pool position to display and preview the current project’s sound
content list.
Here you can create new and rename existing sample folders.
New folders can be created by selecting the <Add New Folder> position at the end
of the folder list. The number of folders per sample pack is limited to twenty. The
folder name editing is analogic to the project naming explained above.
The maximum number of 255 sample files can be loaded to a single project. The
current number of used samples is displayed here.
Select the Load Sample Pack function to load a pack with its entire folder tree into the
project’s sample pool from the SD card.
A sample pack with its folder structure will be recognized by the sample loader
when placed in a Sample Packs folder on the SD card.
Press the Load Pack screen button and Play’s sample loader will load a pack with
its entire folder tree intact.
Sample packs are organized as a folder with their subfolders. Please note that its
subfolders cannot contain any other subfolders, as they will not be loaded to the
sample pool by the Play’s file browser.
If you selected a folder containing only samples, it will be loaded as a new sample
pool folder of the same name and will contain samples from the source folder.
Multiple folders can be loaded simultaneously.
Enter the Load Files or Folders position to load a selection of files and folders into the
project’s sample pool from the SD card.
Page 15
Select Delete all unused samples to delete all samples from the sample pool that have
not been placed on any patterns in the project.
Important:
To preview samples use one of the two function screen buttons located on the left side
of the screen or click the encoder. For a fast preview, hold down one of these
Use the Load Wav/Load Folder screen button to load selected content to the
sample pool.
Select multiple sample files or folders by holding the Shift button.
After loading single files the browser gets back to the SD card content.
In order to load a selected audio file to the sample pool, you have to designate a
target folder.
When selecting a folder, press Load Folder to load all samples in the card folder to
a new sample pool folder of the same name.
buttonsor the encoder, and start changing the highlighted samples.
Delete samples and sample folders from the pool using Delete (Shift + Fill key combo).
This applies only to the project’s sample pool. Deleting files from the SD card from the
instrument level is not possible.
If a particular sample folder in the sample pool is empty, it won’t be displayed while
browsing with the Sample/Folder knob.
You can load sounds to the sample pool even during the instrument playback.
On the bottom of the Main menu Samples screen, you can see a Memory bar that
indicates the remaining sample pool space percentage.
Technical note:
The internal engine is working with uncompressed 16bit mono PCM WAV files with
different sample rates.
Polyend Play will import WAV files in any sample rate, 16/24/32 bit mono/stereo, and
will convert them automatically to the supported format.
The converted sample files contain a mix of both L/R stereo sample channels.
The overall per-project sample pool memory allows for 6 minutes of monophonic 16-bit,
44.1 kHz sample files. However, Play can work with different sample playback rates, so
you can reduce the required memory of a sample by reducing its sample rate. A sample
played back at half the sample rate will use half the Pool memory. Conversely, doubling
the sample’s rate will use twice the Pool memory. Because Play can use multiple
different playback rates, your sample pool capacity may vary.
Page 16
The Main/headphones output is stereophonic.
Sample Pack
As mentioned in the previous manual section, Polyend Play’s workflow is based on an idea of
a Sample Pack. Besides the available factory and extension packs, users can create their
own. Two approaches can be considered here. The first one is arbitrary, up to one’s will, and
can be just one folder full of random samples, as long as it works for the intended effect.
Then the suggested way to approach the topic is arranged and ruled by the following hints,
aiming at giving the most satisfactory way from the as musical output as possible.
The use of sample packs allows the Fill tool to populate tracks with the appropriate
sounds. For example, when using the Beat Fill, kick, snare, and hi-hat samples from the
analogically named pack folders will be used. These particular sample folders must
contain the words kick, snare, and hat in their name’s strings of characters to be
properly recognized by the Fill tool algorithm.
When there are two folders containing the same string of characters required by the
Beat Fill algorithm in the sample pool, samples will be drawn from the top one only.
All melodic samples should be tuned in C,
It’s best to use about 10-20 samples per folder,
The sample amount per pack is limited to 255,
The sample pool is limited to 20 folders,
The overall time depends on the quality of samples and is around 6 minutes in 44.1 kHz
16-bit,
The sample volume should be 0dB,
Audio Sequencer
The Grid
Page 17
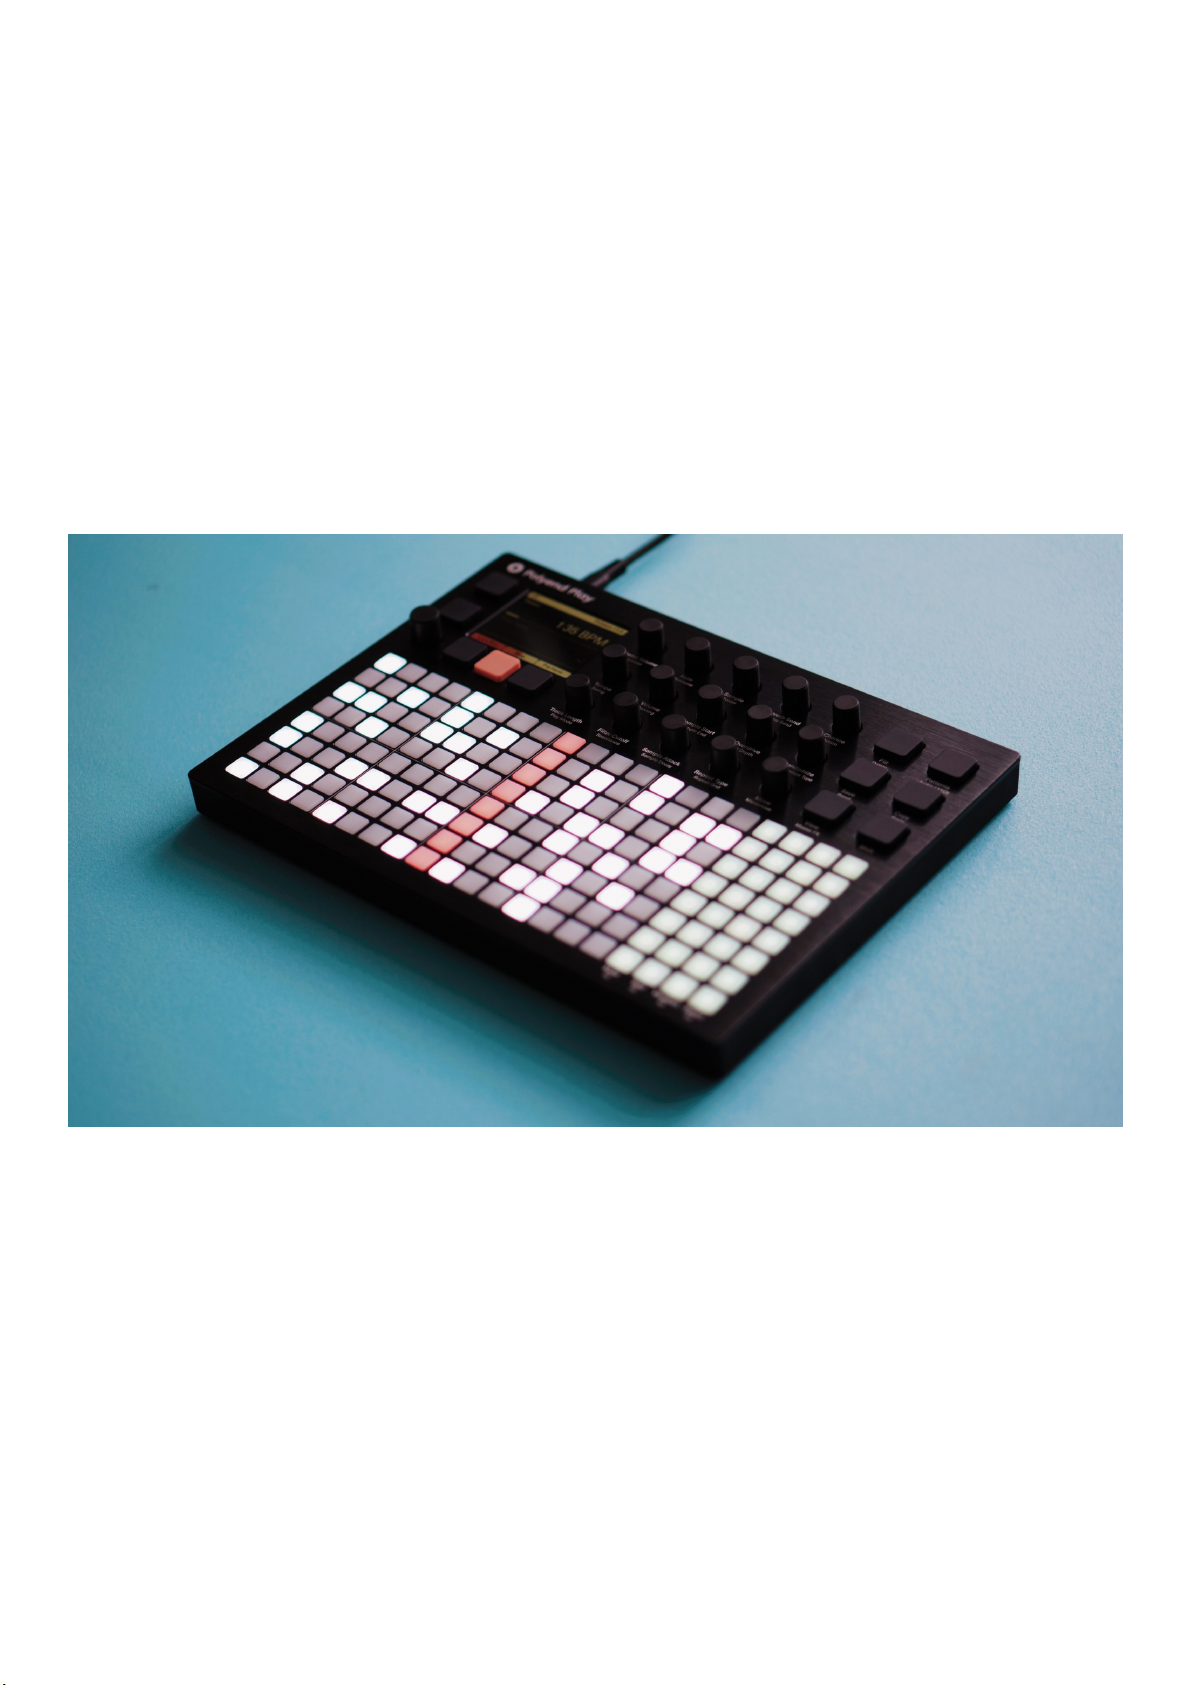
The bottom part of Polyend Play is dominated by the grid of silicone pads. You’ll be using
these pads a lot. That’s why we’ve made sure that these low-profile pads are smooth and as
comfortable as possible.
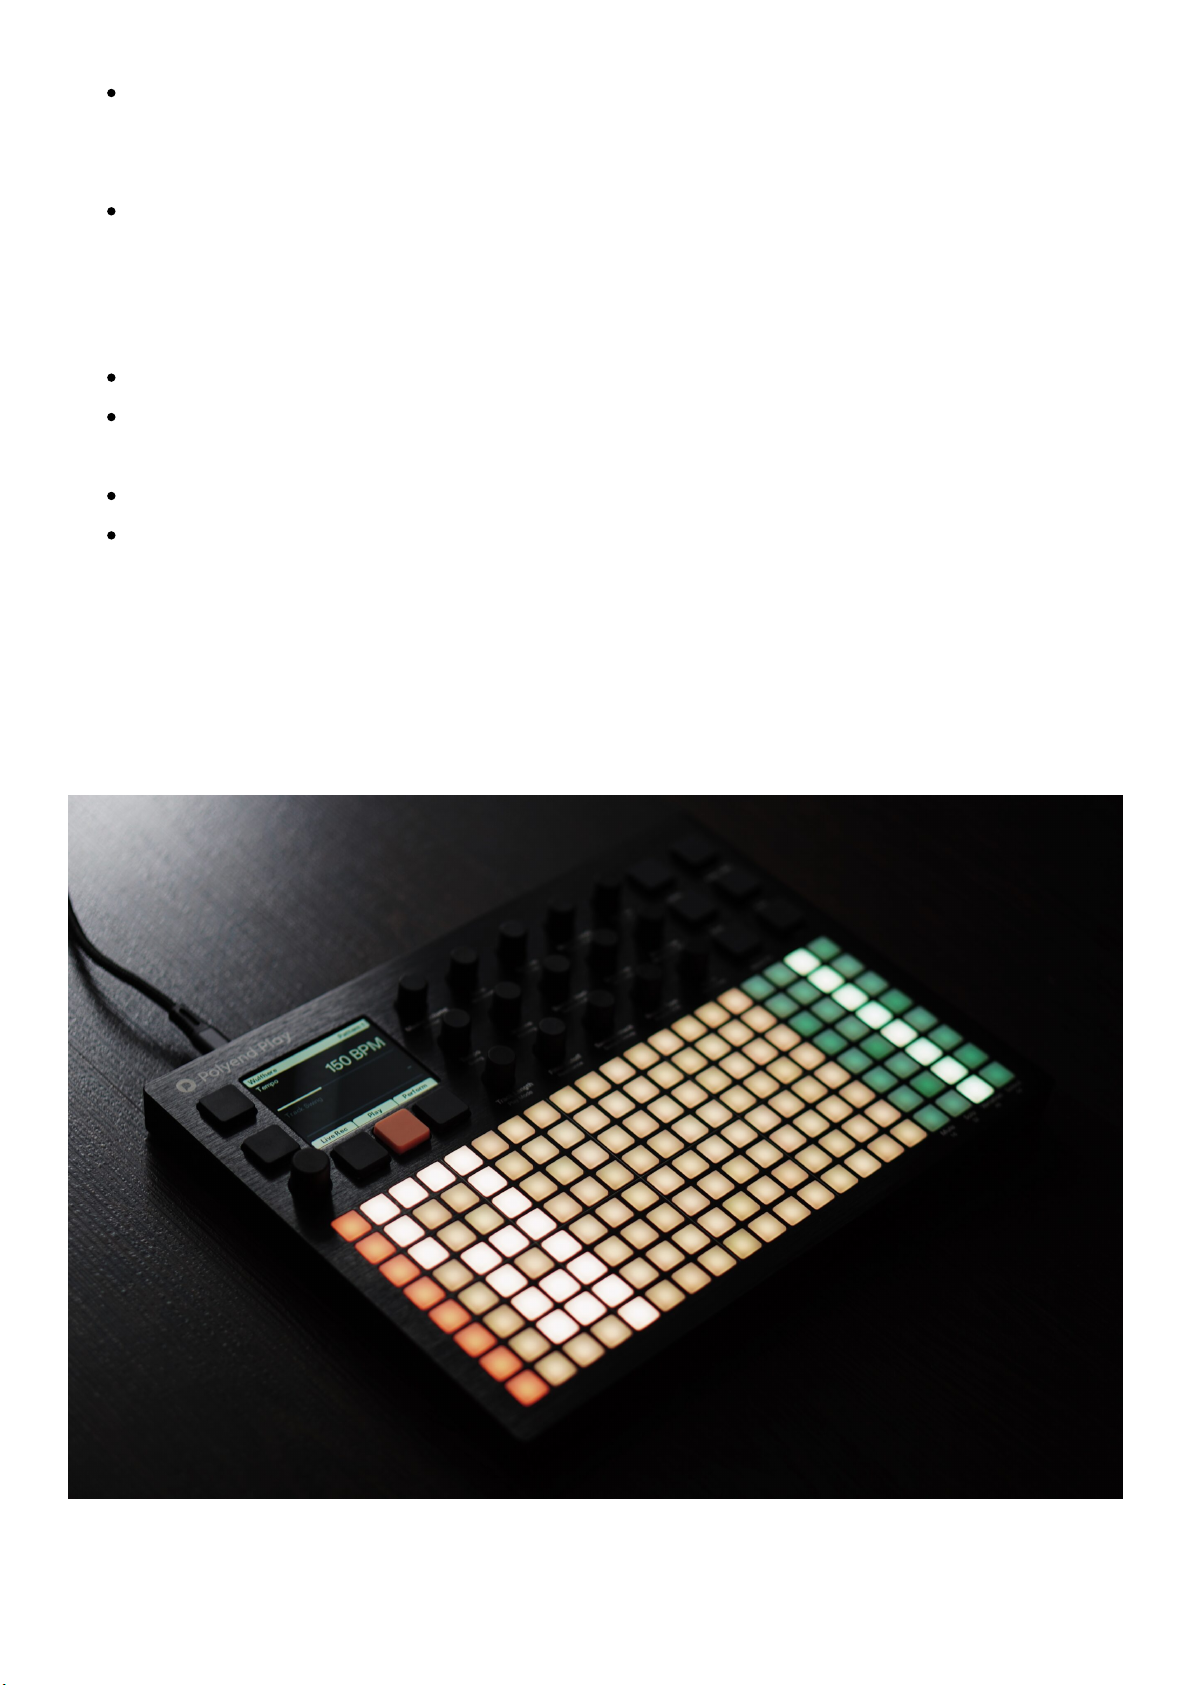
Take a look at your instrument. The grid is vertically split into two parts. The left side is
occupied by 8 x 16 step columns representing the sequencer tracks. These pads serve
different purposes in the Pattern and Perform modes (explained in the next chapters). On the
right side of the grid, you’ll find a section consisting of 8 x 4 function pads, the functions of
which are described below. This grid can also serve as a configurable note input controller
called View (find the description below).
Each track is defined by a single horizontal row of grid pads. Each pad of the 16 leftmost
columns represents a single step. The timeline/playhead advances from left to right and
triggers steps containing data.
A step can be empty or it can hold a note. When a step has a note, it contains a set of sound
parameters associated with that note. Each step has its own complete set of parameter
values determined by the user with the use of the instrument’s set of knobs.
When no step or track is selected for editing, then by turning the knobs you will pick/modify
the ‘work step’ values. Next, by pressing the grid pads, the previously adjusted ‘work step’
Page 18
with all its already existing parameters are placed/copied on the track as ready steps.
Deselect all the steps and tracks to get back to ‘work step’ editing.
The Play will usually greet you with its multi-colored grid of pads. Step colors indicate their
status:
Off – an empty step.
White – a step with a note.
Blue – a selected note.
Dim blue – selected empty step.
Orange – currently played step (track playhead).
Red – currently played step when in Live Rec mode.
Pad blinks twice – “quick-copied” step or function pad. When you momentarily press
and hold a pad, that pad and all of its parameter values will be copied, after which you
can paste it to another location. The quick Copy function works with steps, patterns,
tracks, and Variations.
Grid pads will be illuminated in different color sets when toggling between Play’s various
modes and screens.
Patterns are created by engaging steps, placing them accordingly on the tracks, moving,
copying, deleting, etc. A pattern holds all the sequencer playback data and steps parameters
settings for the 16 available tracks. You can store up to 128 such patterns per project. Each
pattern consists of 8 audio and 8 MIDI tracks. You can easily put these patterns together into
an entire composition using the Pattern mode described later on.
A single track can be from 1 up to 64 steps long. Each track can have an independent length.
If a track is longer than 16 steps it is split into the next page. There are four step pages
available, signed as 16, 32, 48, and 64. Each of them can contain up to 16 steps. This makes it
easy to create polymeters and polyrhythms.
As all tracks can have independent lengths, a pattern’s length is indicated by the longest
track in that pattern. If you want to manipulate the pattern length as a whole, select all the
tracks at the same time and use the Track Length knob.
Press the Shift key while editing the pattern steps to visualize the length of certain
tracks on the four rightmost function pad columns.
Use Shift + one of the four function pads on a corresponding track to expand the next
page of steps.
Page 19
If you want to extend a certain track length in an equal interval, you can press the Shift
key and select an empty page.
Press and hold the source track page pad while holding the Shift key + destination page
to Quick Copy the track steps between the source and target step pages.
You can Quick Copy the entire track pages with all the step parameters among the
tracks. This will also work when selecting the entire track and copying/pasting it.
You can change the default track length of 16 steps by using the Track Length knob or
by Quick Copying its pages.
The 4 x 8 function pad columns are located on the right side of the grid. The use of these will
affect an entire track and all of the steps it contains. While working in the audio sequencer
mode, the function pads are green. You can switch to MIDI sequencer mode using the Shift +
Patterns key combo, whereupon the steps will turn violet.
The function pads offer four default actions:
Mute – allows you to mute each of the sequencer tracks separately by pressing these
pads.
Solo – allows you to solo each of the sequencer tracks separately by pressing these
pads.
Variation – gives you access to track Variation mode (explained in detail in a dedicated
section below).
Select – use these to select all steps on the corresponding track.
https://www.youtube.com/embed/IO_ao55625c?feature=oembed
View Controller
The rightmost 8 x 4 grid section of function pads can also serve as a configurable note input
controller. Hit theView function key and they will change color to yellow. The upper row of
pads allows you to change the octaves and indicates if you’re in audio (green) or MIDI mode
(violet). You can switch their layout between Keyboard and Grid type in the Main menu.
The View controller can be used as an input source in the following scenarios:
When no step or track is selected, the Note controller will use the ‘work step’ with its
previously selected parameter values.
You can press and hold one or more of the steps and input the desired note.
Page 20
In the Live Rec mode, you can record notes by playing them in real-time from pads
while at least one track is selected. If you want to record chords as many tracks as
there are notes in a chord need to be selected.
In the Main menu Settings you can select if the View input controller will record notes
to empty steps only, or will be overdubbing the existing steps.
Important:
The View controller works both with internal and external MIDI instruments.
The View controller can also be influenced by the musical scales filter, which you can
enable and configure in the Main menu.
View note input controller is available in Steps/Patterns/Perform modes.
When changing notes selected in blue, hold shift + the desired note to change the
selected notes.
Variations
Page 21
This tool allows you to create alternative versions of your tracks. These can then be switched
manually during playback. Press one or more of the Variation function pads to make quick
changes to the entire track. Each track has its own corresponding Variation pad.
Use the Quick Copy function to duplicate the corresponding track pattern, including all of its
steps and settings to create a new variation. You can then make desired changes to the new
variation. When you have more than one pattern variation on a track, you can then manually
trigger the variations to add interest to your tracks.
The currently active variation is indicated in an orange colored pad.
Variations with content are indicated with bright yellow colored pads.
Empty variations are indicated with dark yellow colored pads.
Each track has 16 variation pad slots available.
Both audio and MIDI tracks have separate variations available.
Press a pad to change the active variation.
The Variation switches instantly if the pattern is not being played, or sequentially at the
end of the currently playing pattern when the sequencer is running.
During the sequencer playback, you can press a Variation pad while holding the Shift
key to perform an immediate switch (on the next step).
Press and hold a pad to select a variation and then:
Variations actions are accessible from the Perform and Patterns screens too.
Important:
There is a Variation Page setting in the Main menu. It allows you to determine if the use
of a single variation slot will display available only variation slots for Separate tracks, or
for All Tracks at the same time.
Click and hold the encoder and select a variation pad on any of the tracks to trigger the
launch of a vertical column of all the available variations at once.
Press another pad to copy the selected variation to it,
Use the Delete (Shift + Fill key combo) to get rid of the variation.
https://www.youtube.com/embed/H3c0csNwAfc?feature=oembed
Step Edit
Page 22
A comfortable way to start creating your sequences by creating steps on the tracks is to use
the Pick and Place method. Use the knobs to pick the ‘work step’ parameter values, their
sample, note, volume, filter type, send Fx, MIDI properties, etc. When ready, start pressing
the grid pads to place steps on the sequencer tracks.
Deselect all the steps and tracks to get back to ‘work step’ editing.
Once you have entered some steps into the grid, you can Select them and Adjust their
settings. Select a step by pressing and holding the grid pad and use the knobs to modify its
parameters. All the knobs are described in detail in a dedicated section below.
Briefly press a step pad to enable it. Briefly press the same step pad once again to
delete it.
Press and hold the step pad for about half a second to Quick Copy it. This function is
explained in a separate section below
When a note step is selected, its sound parameters can be edited with parameter
knobs.
Most step edit actions can be done on individual steps or multiple selected steps. The steps
can be selected for editing in a few different ways:
You can press and hold one or more pads. The selection is active while the pads are
held.
Add steps to active selection by pressing pads while holding Shift. Edit selection by
pressing the Shift key again.
Select a rectangular block of multiple steps across multiple tracks by holding the Shift
key and then pressing pads on opposite diagonal points of a rectangular block of the
steps you wish to include.
Use the Select function pads to select an entire track or multiple tracks and all of the
steps contained within them, including empty steps, as well as any previously-selected
steps.
Press and quickly release the Shift key to clear any type of selection.
When no track or step is currently selected/held for editing, then by turning the
knobs you will pick/modify the so-called ‘work step’ values. It applies the same way
to both audio and MIDI sequencing modes.
Deselect all the steps and tracks to get back to ‘work step’ editing.
Available step and track operations:
Page 23
Use Delete (Shift + Fill function key combo) to erase the step selection.
Press the Copy function key to copy selected steps to the clipboard buffer.
Use Paste (Shift + Copy function key combo) so the steps in the clipboard buffer will
get copied to the location starting from the first selected step. The distances between
steps as when they were copied are preserved. This is useful for copying and pasting
entire passages, including rests.
The Move/Micromove knob allows you to relocate the step or step selection, or nudge it
back and forth.
Select the track and turn the Move knob to move the steps contained in one or more
tracks left or right.
Select a step or multiple steps and turn the Move Knob to ‘cut’ them and ‘paste’ to the
desired destination. The cut selection of steps will be illuminated in blue and pasted
after you release the knob. This action will overwrite any existing steps.
A Copy/Paste action performed on an entire track will preserve the Track Length,
Swing, Track Speed, and Play Mode values of the source track.
Important:
The Knob Preview function lets you hear any changes you make when you turn the
knob. The default setting is to preview the samples only when the sequencer is
stopped.The settings menu has options to preview samples when the sequencer is
stopped, when it is running or both, or it can be disabled.
Press/click and hold the encoder, then press a step pad containing a note to hear it.
This is called Step Preview.
The project state is autosaved every time you hit the Stop screen button.
Undo and Redo actions are available under the screen buttons, regardless of whether or
not the sequencer is running. There are 16 undo/redo layers.
At any given time you can Save and Reset the current state of your pattern. This is
especially handy during a live performance. Simply press the Save function button to
save the current state, and use the Reset (Shift + Save key combo) function to bring
back the previously saved state of your pattern.
Quick Copy
The Quick Copy function was introduced to manage your actions with Play in a fast and
efficient manner. This works for steps, step pages, patterns, and variations.
Page 24
To perform a Quick Copy, press and hold a grid pad for about half a second. The pad will
flash twice, and its parameter values will be copied to the clipboard. While still holding the
source pad, press the destination pad where it should be pasted.
The Quick Copy of an existing step copies its values to a ‘work step’ editing area.
Copying large amounts of data, like in the case of the Patterns mode, may take a moment.
When Play is processing such operations, complementary information will be displayed on
the screen.
Knobs
You will be using these knobs a lot. It’s crucial to understand that some of their functions
may differ based on scenarios of use and available modes. Some are strictly limited to
project settings, while most of them have a specific influence on both the steps and tracks.
Start tweaking the ‘work step’ or an existing step parameter value by using the available
function knobs. Each knob controls two parameters described on the front panel. The
operational parameter is highlighted. Some of the basic rules applying to knob use are:
Turn the desired knob to change its active parameter value.
The currently selected knob parameter can also be controlled by the screen encoder.
Touch a knob to see its dual parameter values for the selected step.
Double-touch the knob or press one of the function buttons located on the left side of
the screen to switch the active parameter.
When multiple steps are selected, turning a knob will affect all of those steps.
When the parameter values of many selected steps are different, a tilde ~ sign together
with a number and +/– is displayed. In this case, any increase or decrease in parameter
values will be added or subtracted from the current values of the selected steps.
Double-click a screen button corresponding to the selected knob parameter value (and
its automation) will drop its value to default.
Important:
You can disable the knobs’ double-tapping option in the Main menu > Setting section.
Knobs work differently in the sample-based audio and MIDI sequencing scenarios.
These differences are mentioned in the MIDI sequencer section of this manual.
Page 25
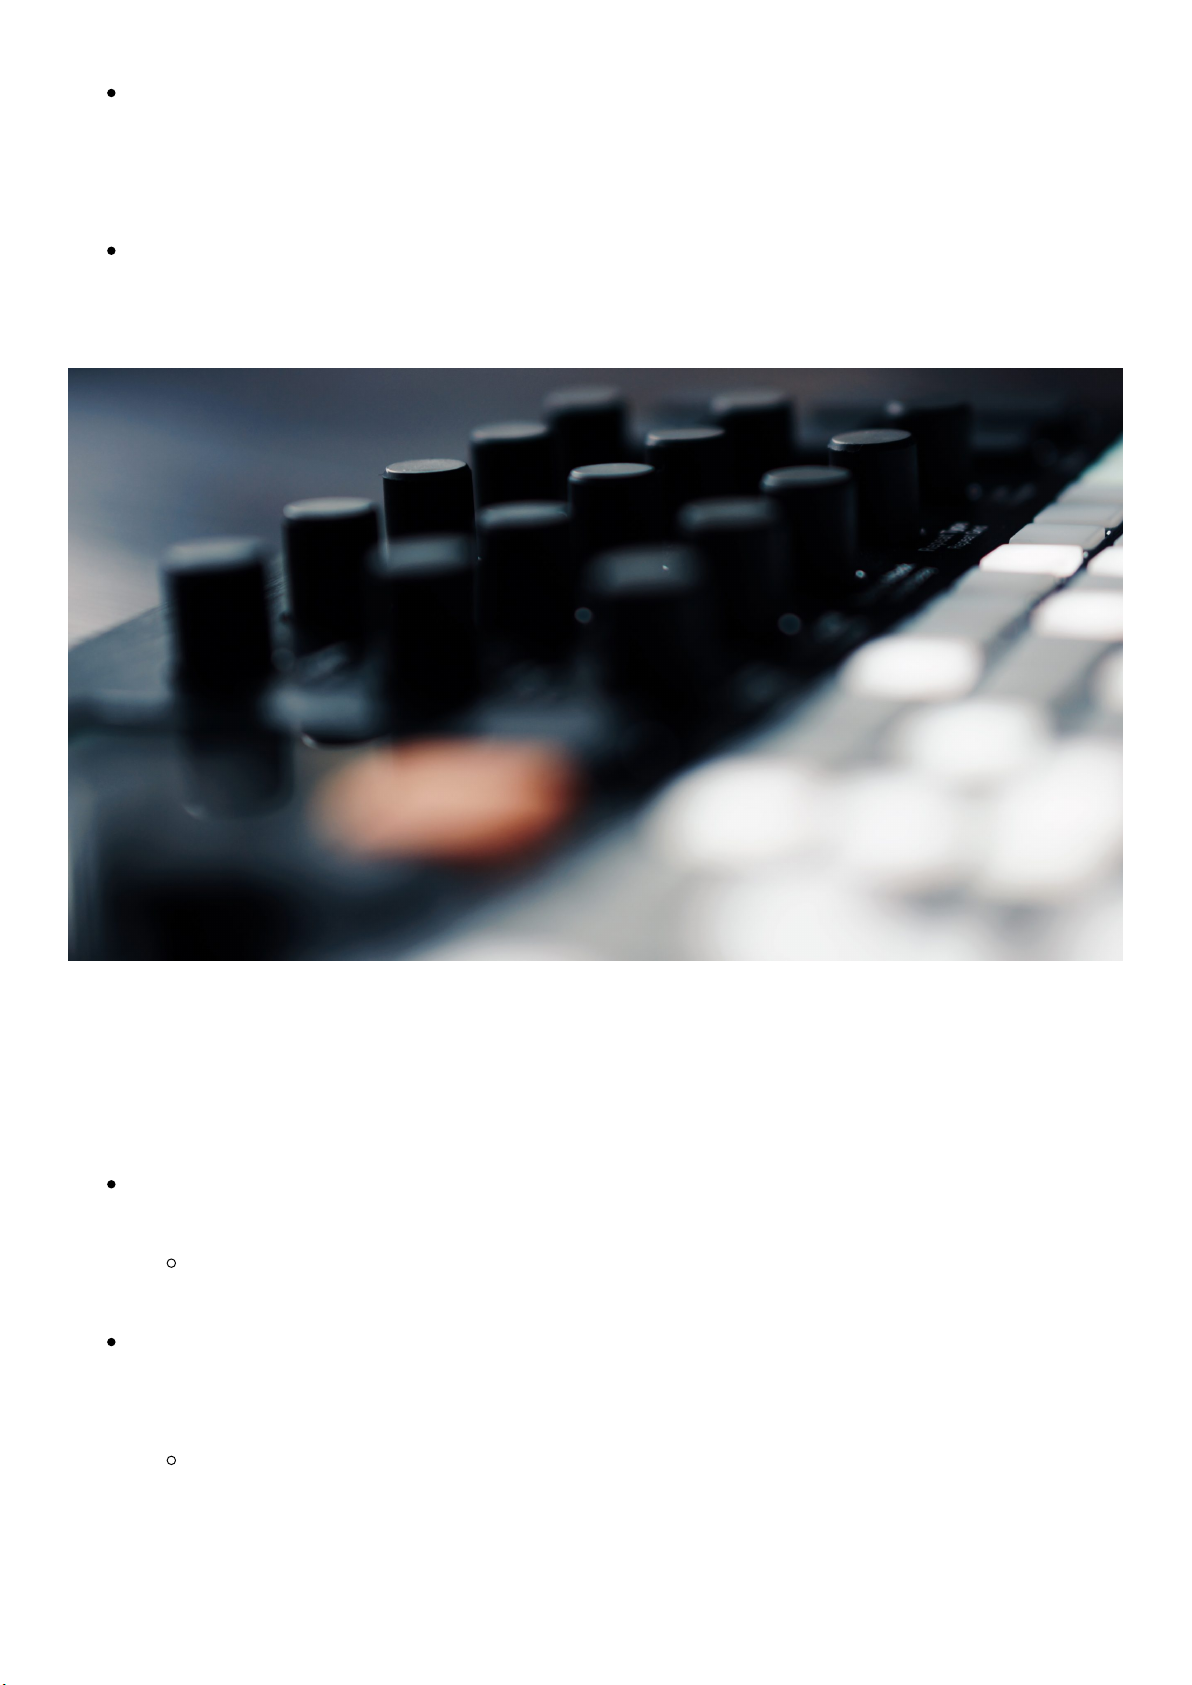
Holding Shift while turning a knob will increase the speed of the knob’s effect. The way
this is performed depends on the knob being used. For example, when used with the
Note knob, the values will jump through entire octaves using the selected note as the
root.
When a long sample still sounds after the sequencer is stopped, you can cut it simply
by touching the Master Volume knob.
The following function knobs are available for your use:
Master Volume – controls the main output amplification in dB. It’s a global setting, not
related to any particular project.
When you want to cut a long sample that plays through (decaying) after stopping
the sequencer, touch this knob.
Limiter – a classic, and often essential, dynamics processor. You can use this to prevent
signals above a specific volume level from clipping. Signals above the threshold will be
reduced in volume, while those below the threshold remain unaffected.
Presets for this effect are available in the Master FX section.
Page 26
Tempo – this knob has different functions. First, it is used to set the global tempo for
your project, with a value between 10 and 400 BPM.
When used per track, the Tempo knob allows you to set a selected track’s speed
(playback) relative to the project’s tempo (also on the external MIDI clock). You
can set divisions and multiples of the tempo rate ranging from 1/16 up to 8/1. The
slowest division is Pause.
When a certain track playback is paused, you can manually trigger its steps
containing notes while holding the encoder clicked down.
Swing – each track can have its own swing value. Select all tracks to apply a global
swing value.
Available for both the internal sample-based engine and MIDI sequencing.
Playhead behavior/movement visually resembles the applied swing.
Track Length – allows you to set the track length from 1 to 64 steps. Its values are
displayed both on the screen and on the grid.
Press and hold the Shift key. The function pads will indicate available track step
pages, with up to four pages indicated, depending on the selected number of
steps. Switch between them to edit the track steps in intervals between the 16, 32,
48, and 64 steps.
You can perform the Quick Copy action on the track pages, and it is possible to
copy and paste between different tracks.
When the track is longer than 16, 32, 48, and up to 64 steps, the function pads will
indicate track pages with green pads. The currently edited page is lit.
Play Mode – gives you access to 35 classic and custom play modes which determine
the order in which track steps are played. This provides an option to shuffle and remix
your existing patterns. Custom play modes determine the order in which track steps are
played.
These play modes are available for both internal sample-based and MIDI
sequencing.
Volume – gives you control over the sample volume. Where 0 dB means the original
volume of the sample.
Pan – allows you to set the stereo panorama. With the settings of > 100L – Center –
100R.
Page 27
Note – relative to the original pitch of the sample. By default, Play assumes a sample’s
root note to be C4.
Microtune – tunes your sample from -100 to +100 cents.
Filter cutoff – Dj style filter. When you turn this knob left, it switches to the Low-Pass
characteristic. When turned right the filter acts as a High-Pass.
Resonance – controls the filter resonance.
Sample – this knob allows you to select samples from within the currently selected
sample pool folder.
If a particular sample folder existing in the sample pool is empty, it won’t be
displayed.
Folder – double-touch knob to select the sample folder.
Some of Play’s advanced functions rely on the sample pack folder structure. This
is very helpful but you’re not obligated to follow this rule. The sample pack’s role
and rules are explained in both the Project Management and Main Menu sections
of the below manual.
Sample Start – trims sample start point.
Sample End – trims sample endpoint.
Set the sample endpoint before its start point to reverse its playback.
Both sample start and endpoints are very useful to chop longer samples and loops
into per-pad slices.
Sample Attack – controls the length of volume fade-in at the start of the sample.
Sample Decay – controls the length of volume fade-out at the end of the sample.
Reverb Send – applies the Reverb effect intensity.
Choose its preset in the Master FX section.
Delay Send – applies the Delay effect intensity.
Choose its preset in the Master FX section.
Overdrive – adds grit and amplification to the sample signal.
Bit Depth – reduces the bit resolution of the sample during playback.
Page 28
Repeat Type – allows you to choose from various step repetition types. It offers a list of
self-explanatory pre-programmed algorithmic ratcheting styles.
Certain repeat types are tune-related and are offering arp-like functionality.
Repeat Grid – use it to choose step repetition density. Put simply, how many times a
note trigger will happen per given amount of steps.
The Repeat tool is filtering notes to the chosen musical scale (if scale filtering is
turned on).
Available for both internal sample-based and MIDI sequencing.
Chance – determines if/when the selected action is executed. If the action is eg.
“Random Note” controls the tuning condition for triggered notes. The algorithmic
Chance/Action couple operates on both internal sample-based and MIDI sequencing
and is never destructive to the existing steps.
Always – probability turned off.
90-10% chance – a random probability percentage.
The Group with last – plays the step only if the previous step with the condition on
the track was played, making it possible to link steps with a random probability.
Either none or all are played.
Play N/Skip M – determines step playback in subsequent loops of the pattern. e.g.
Play 2/Skip 3 will play the step twice. Then ignore the step in the next 3 loops, and
then play twice again, and so on.
Skip N/Play M – same as above but starts with skipping N times.
When working on a single pattern in Play, the Chance/Action Play/Skip
valuesalways trigger steps as it was the first loop iteration. This will work
differently when creating chains in the Pattern mode.
Action– special action/effect to be executed after the step is played:
Play Step – default value, play the step as usual.
Random X – Randomize parameter X of the step (Sample, Note, Octave Up,
Mictotune, Cutoff, Repeat, Sample Start, Sample End).
Humanize – Randomize micromove of the step.
Randomize– The % value represents the strength of the applied randomization. It
defines how big is its range rather than how many events will get a random value. This
means that all selected events will get a random value but only within the selected
range. It can be used to add movement and life to a pattern or to literally transform a
pattern into something else entirely.
Page 29
Each step is affected separately in a random way as long as the Randomize screen
is displayed. If you jump out of it by touching any other knob, modifications will get
discharged immediately.
Press the Save key to print/apply the desired randomization to your track steps.
Use the Shift + Save key combo to Reset if you would like to draw randomization
values over again.
Randomization can be applied to CC messages in the MIDI mode.
Randomize Type– determines which step parameters are affected.
The available randomization types are made to be self-explanatory without
bogging you down in detail. If you’re curious, check the appendix.
Choose from: Sample In the folder, Sample In Pool, Sample Length, Texture, 1
Octave, 2 Octaves, Volume, Space, Nuke, Duke Nuke.
Move – move a step’s placement on the track.
Select a track and turn the Move knob to move steps in the track to the left or
right.
Select a single step or multiple steps and turn the Move Knob to ‘cut’ them and
‘paste’ to the desired destination. Cut selection of steps will be highlighted in blue
and pasted after the knob is released. This action will overwrite any existing steps.
Micromove – Use this to make small adjustments in the timing of a step. A given step
can be triggered earlier or later by up to (but excluding) a half-step length.
Available for both internal sample-based and MIDI sequencing.
Live Recording
In this mode, you can record knob parameter automation and insert notes from both the
onboard View and external MIDI controllers in a real-time manner.
To engage the live recording of your patterns, press the Live Rec screen button (it will turn
red when active) and select one or more tracks that you want to edit. With Live Rec mode
active, and the sequencer running, turn a knob to record its parameter values to existing
steps containing notes as they are played.
Page 30
Important:
Double-clicking a screen button corresponding to a selected knob parameter (and/or its
automation) will restore its default value.
Double-touch a knob during playback in Record mode to change the highlighted
parameter.
The values are recorded and will overwrite any current step data as long as the knob is
moved or even touched.
The new parameter values will be recorded only in steps containing notes.
Touch a knob during playback in Live Rec mode to see if its parameters have been
recorded. If they have, you’ll notice moving/animated values.
Using the Main Menu settings, you can toggle on/off the Live Rec note quantization and
overdubbing.
Polyend Play offers 8 monophonic audio tracks. This means if a triad chord is played
while live recording, it will consume three of its 8 tracks. However, MIDI tracks are
polyphonic and work on a different basis. Additionally, there is a chord function
available.
In the Live Rec mode, the playhead will follow/scroll to the next step page if the track is
longer than 16 steps.
Enabling the Live Rec mode will disable the Perform mode and vice versa.
Master FX
Audio effects processors like Limiter, Reverb, Delay, Sound, and Saturator offer a selection of
presets. These are available under the Master FX function button (Shift + View key combo).
For your convenience, rather than potentially slowing you down with a load of obscure
parameters to edit, all the Master effects offer a selection of curated presetparameter
settings. The preset names are more or less descriptive. The following types of effects are
available:
Reverb.
Delay.
Sound.
Limiter.
Saturation.
Page 31
Important:
The limiter offers a sidechaining function routed from all the separate tracks.
Sound and Saturation effects are the main output sound enhancers.
Note: some Sound options increase the stereo spread and can result in phasing in
certain situations. Choose “Flat” sound if you experience phasing issues.
Fill Tool
The Fill function is a sophisticated sequence editing utility. It allows you to enter multiple-
step values in a selected area with a single click. Access it by pressing the Fill function
button. Use the encoder and the leftmost screen buttons to operate it. The fill tool is offering
a separate set of functions for the audio and MIDI modes.
Select one or more tracks, then choose the desired settings and press the Fill key again to
populate the selected tracks with steps.
Choose from the following Fill algorithms:
Random – with selectable Density from 10 to 100%.
Euclidean – with adjustable Events numbered between 1 to 64.
Beat – gives you access to 128 pre-programmed rhythms in different musical genres
(Acoustic, Breakbeat, Drum&Bass, Electro, Exotic, Garage, HipHop, House, IDM, Techno,
and Trap).
The Beat Fill type requires a selection of one to three tracks. The algorithm will
populate them with the kick, snare, and hi-hat sequences using samples from the
pool. The first selected track is a kick, the second is a snare, third is a hi-hat.
Kick, Snare, and HiHat – same as the Beat Fill, but this one draws upon steps and
samples from the pre-programmed rhythms of the individual instrument, allowing you
to mix and match rhythmic elements from the different musical genres.
Important:
The use of sample packs allows the Fill tool to populate tracks with the appropriate
sounds. For example, when using the Beat Fill, kick, snare, and hi-hat samples from the
analogically named pack folders will be used. These particular sample folders must
The Kick, Snare, and HiHat Fill require the selection of only a single track.
Page 32
contain the words kick, snare, and hat in their name’s strings of characters to be
properly recognized by the Fill tool algorithm.
When there are two folders containing the same string of characters required by the
Beat Fill algorithm in the sample pool, samples will be drawn from the top one only.
While on the previously selected Beat Fill genre preset, press the Fill button again to
draw in a new set of your rhythm section samples.
If you change the Fill genre type on the existing selection, Fill will draw in the new steps
using the same samples.
All Beat Fill patterns are generated with certain genre-related BPMs in mind. You can
use any of them at any tempo, but keep in mind that the Fill tool is not linked to a given
project’s tempo and might produce unexpected results.
The sample packs are organized as a folder and subfolders. Please note that these
subfolders cannot contain any additional subfolders. If they do, they will not be loaded
into the sample pool.
Beat type Fill workflow tip: after generating the sequences, use the Folder knob to set
some tonal sounds, then randomize an octave. This way you can effortlessly achieve
interesting melodic lines.
In both audio and MIDI sequencing modes, the Fill tool willpopulate trackswith steps
based on the previously created ‘work step’ with all its parameter values (this does not
apply to Beat Fill mode), or with the previously selected/quick copied existing step.
When using the Fill tool in MIDI sequencing mode, you may want to create a ‘work step’
by applying all the desired settings with the knobs first. When you’ll do this, the Fill tool
will use these particular settings to draw the step randomizations.
https://www.youtube.com/embed/hKgW0i7M9KA?feature=oembed
Designing Custom Beat Fills
Creating the Beat Fill Pattern
To successfully create a beat fill, these exact steps must be followed. Deviating from the
steps below can result in beat fills that do not populate the grid. The critical step is loading
the folders in the order listed in step 2.
Create a New Project
Select “Load Files or Folders in the sample menu and load folders in the following order.
(Sample folders MUST be loaded in this order):
Page 33
Bass (reserved for future use)
Kick
HiHat
Snare
Create patterns with:
Kicks on Track 1
Snares on Track 2
Hats on Track 3
Save your project.
Note: All parameters will save to a beat fill. Beat fills will only populate 16 steps. Add chance
actions to create beats with more variety.
Move the Pattern to the “Beat Fills” folder.
Every pattern created following the steps above can be imported as a beat fill template by
moving them into the beat fill folder on your SD card.
From a computer, open the project folder. Then open the pattern folder and select the
desired pattern.
Move it to the ‘BeatFills’ folder in the root directory.
Rename it to any name that fits the fill screen. The beat fill should have the .pattern
file name extension, such as “LoFi_1.pattern.”
Restart the Play. The beat should be available on beat, kick, snare, and hihat fill options.
Pattern Mode
Page 34
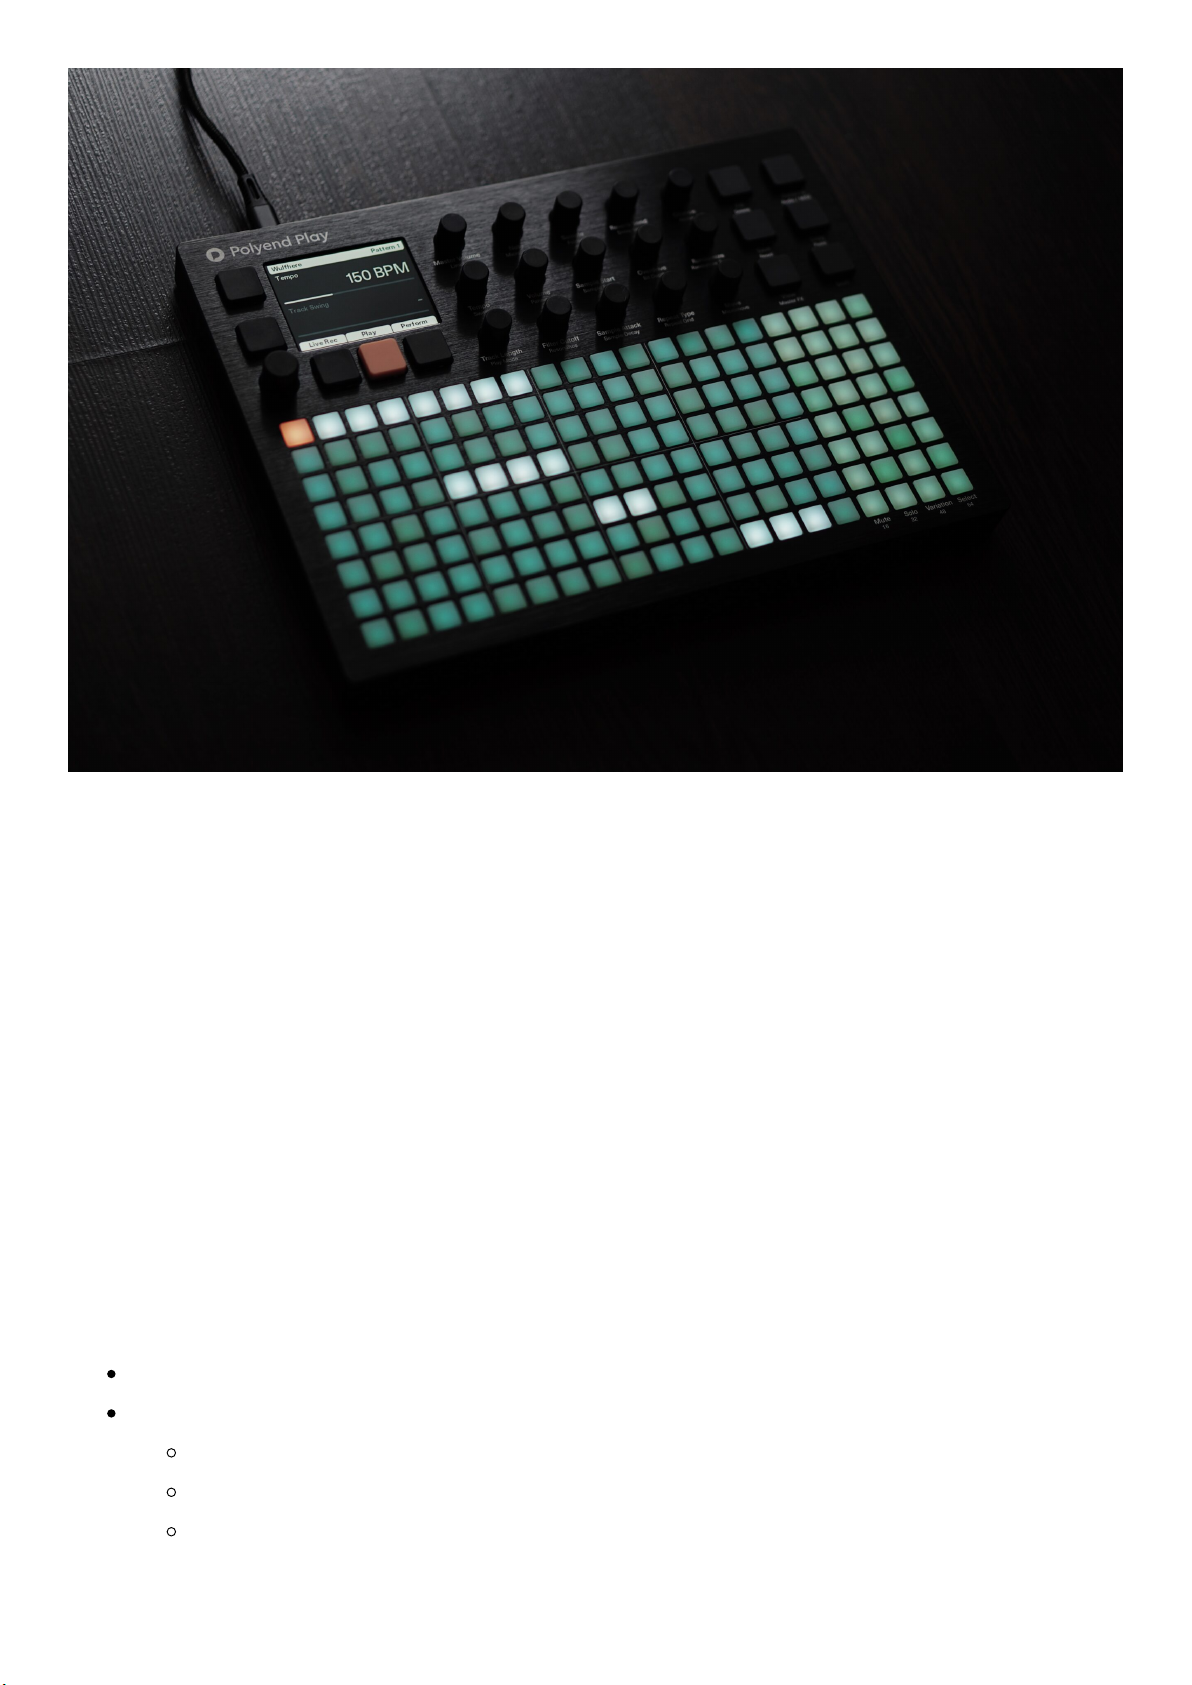
Once you’ve made some patterns, you can use the Pattern mode to chain them together in
the desired order to form complete arrangements. Here you can chain existing patterns in
compositions with the desired order of playback. This is a very flexible approach to what is
often referred to as ‘song mode’. You can define many songs, separate song chapters, or
multiple groups of pre-arranged patterns.
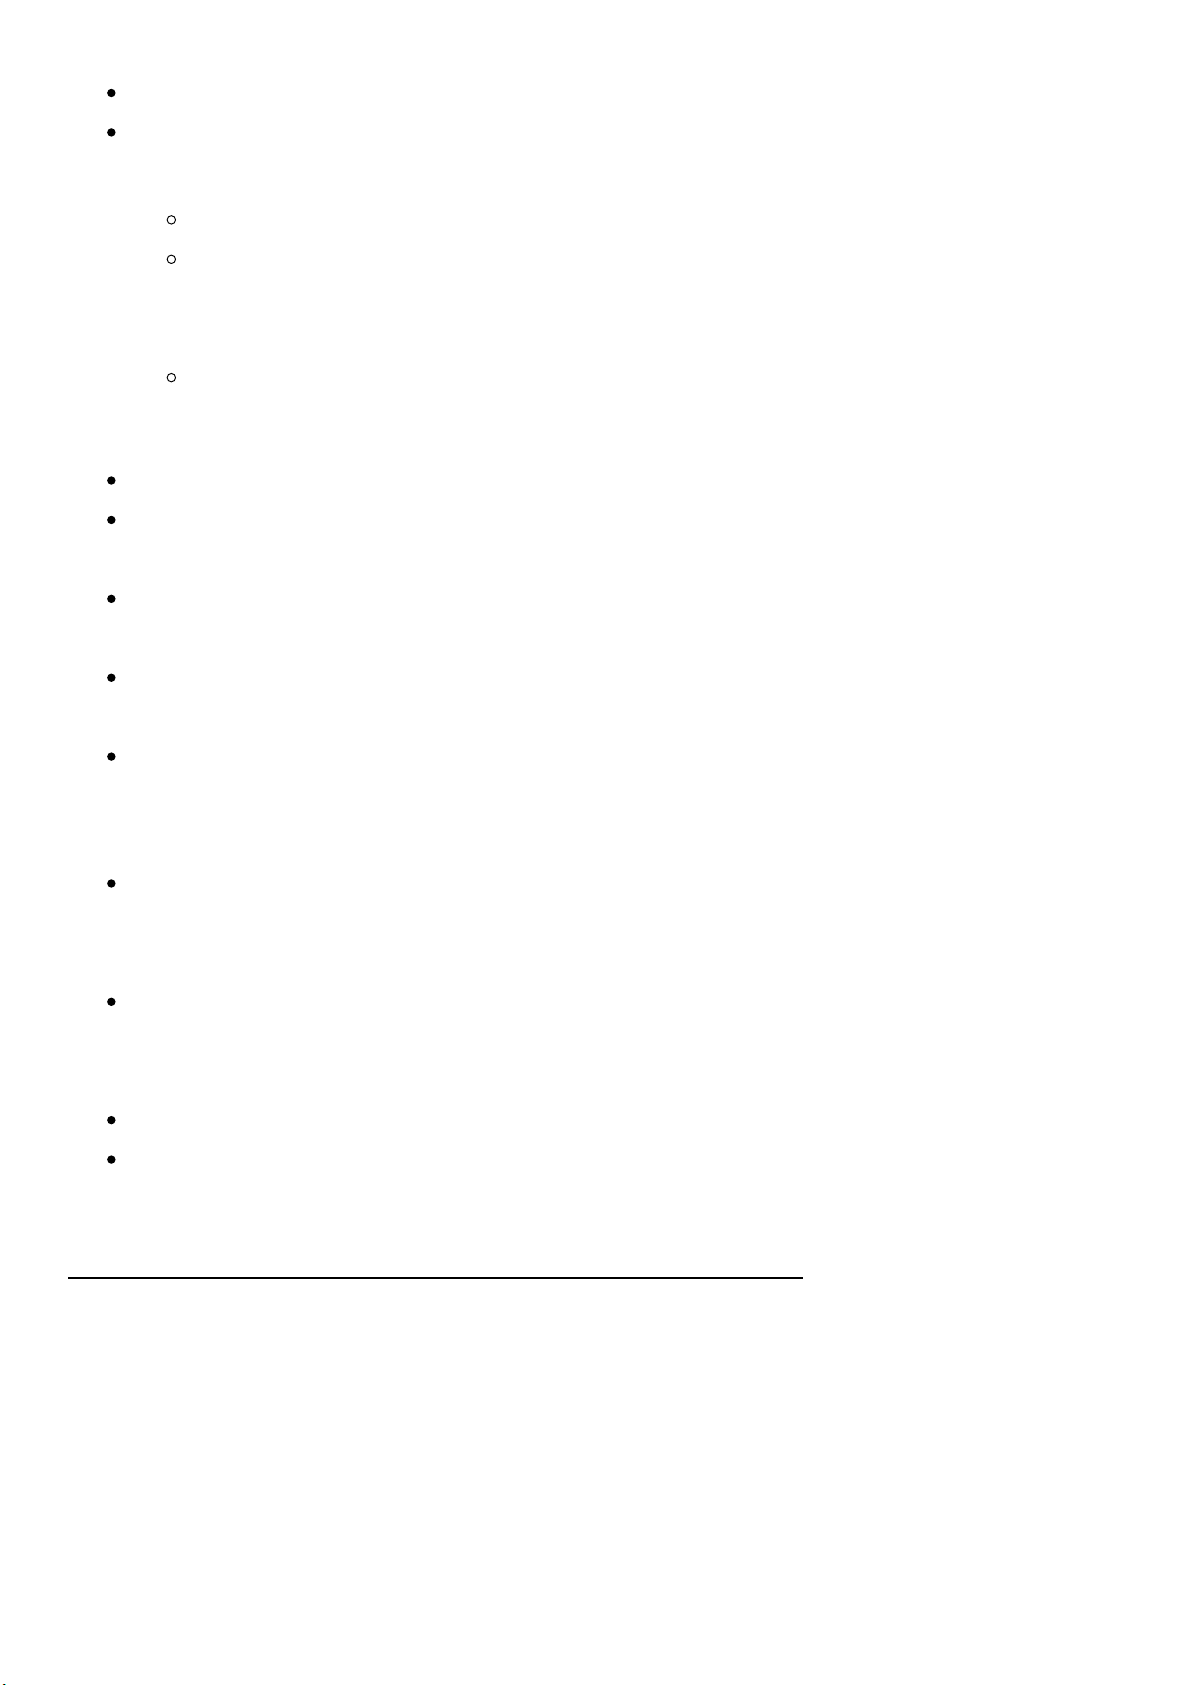
In Pattern mode, patterns occupy a single pad on the grid, and a pattern is chained to any
adjacent pattern. You can make one long sequence and play it as a whole. Or make a few
discrete, separate shorter pattern sequences representing different parts of your
composition. You can then manually switch between them while performing live.
Basic Patterns mode rules and operations:
Press Pattern to switch to pattern selection mode.
Press a pad to load the pattern or to create a new one if the slot is empty.
The currently loaded pattern is lit orange.
Available patterns are light blue.
Empty patterns are dim green.
Page 35
Press Play to start and stop playing the current pattern in loop mode.
Press Shift + Play to start playing patterns sequentially.
The currently loaded pattern will play until the end of that pattern.
If another pattern is programmed into the next adjacent pad, it will play
immediately after the previous pattern ends, and so on, until it reaches an empty
pad, or until the last available pattern slot.
After playing the last pattern in a sequence, playback jumps back to the first
pattern in this particular sequence.
To switch patterns immediately, press the grid pad while holding Pattern or Shift.
To copy a pattern, press and hold the source slot and select the destination target slot
by shortly pressing it.
To delete patterns, press and hold corresponding grid pads and use the Delete
command (Shift + Fill key combo).
The pattern to be played next (triggered by hand or by playing the pattern sequentially)
will flash orange and light blue.
Only one pattern at a time may be copied.
Important:
It is not necessary to leave Pattern mode to use the knob modulators. Just select the
tracks you want to edit and use the knobs to modulate the existing step values while in
the Pattern mode.
When working on a single pattern in Play, the Chance/Action Play/Skip valuesalways
trigger steps as it was the first loop iteration. This will work differently when creating
chains in the Pattern mode.
You can use variations from the Pattern mode level too.
Toggling between Patterns and Perform mode does not disable the Perform effects.
https://www.youtube.com/embed/piPCtVK2mc8?feature=oembed
Perform Mode
Page 36
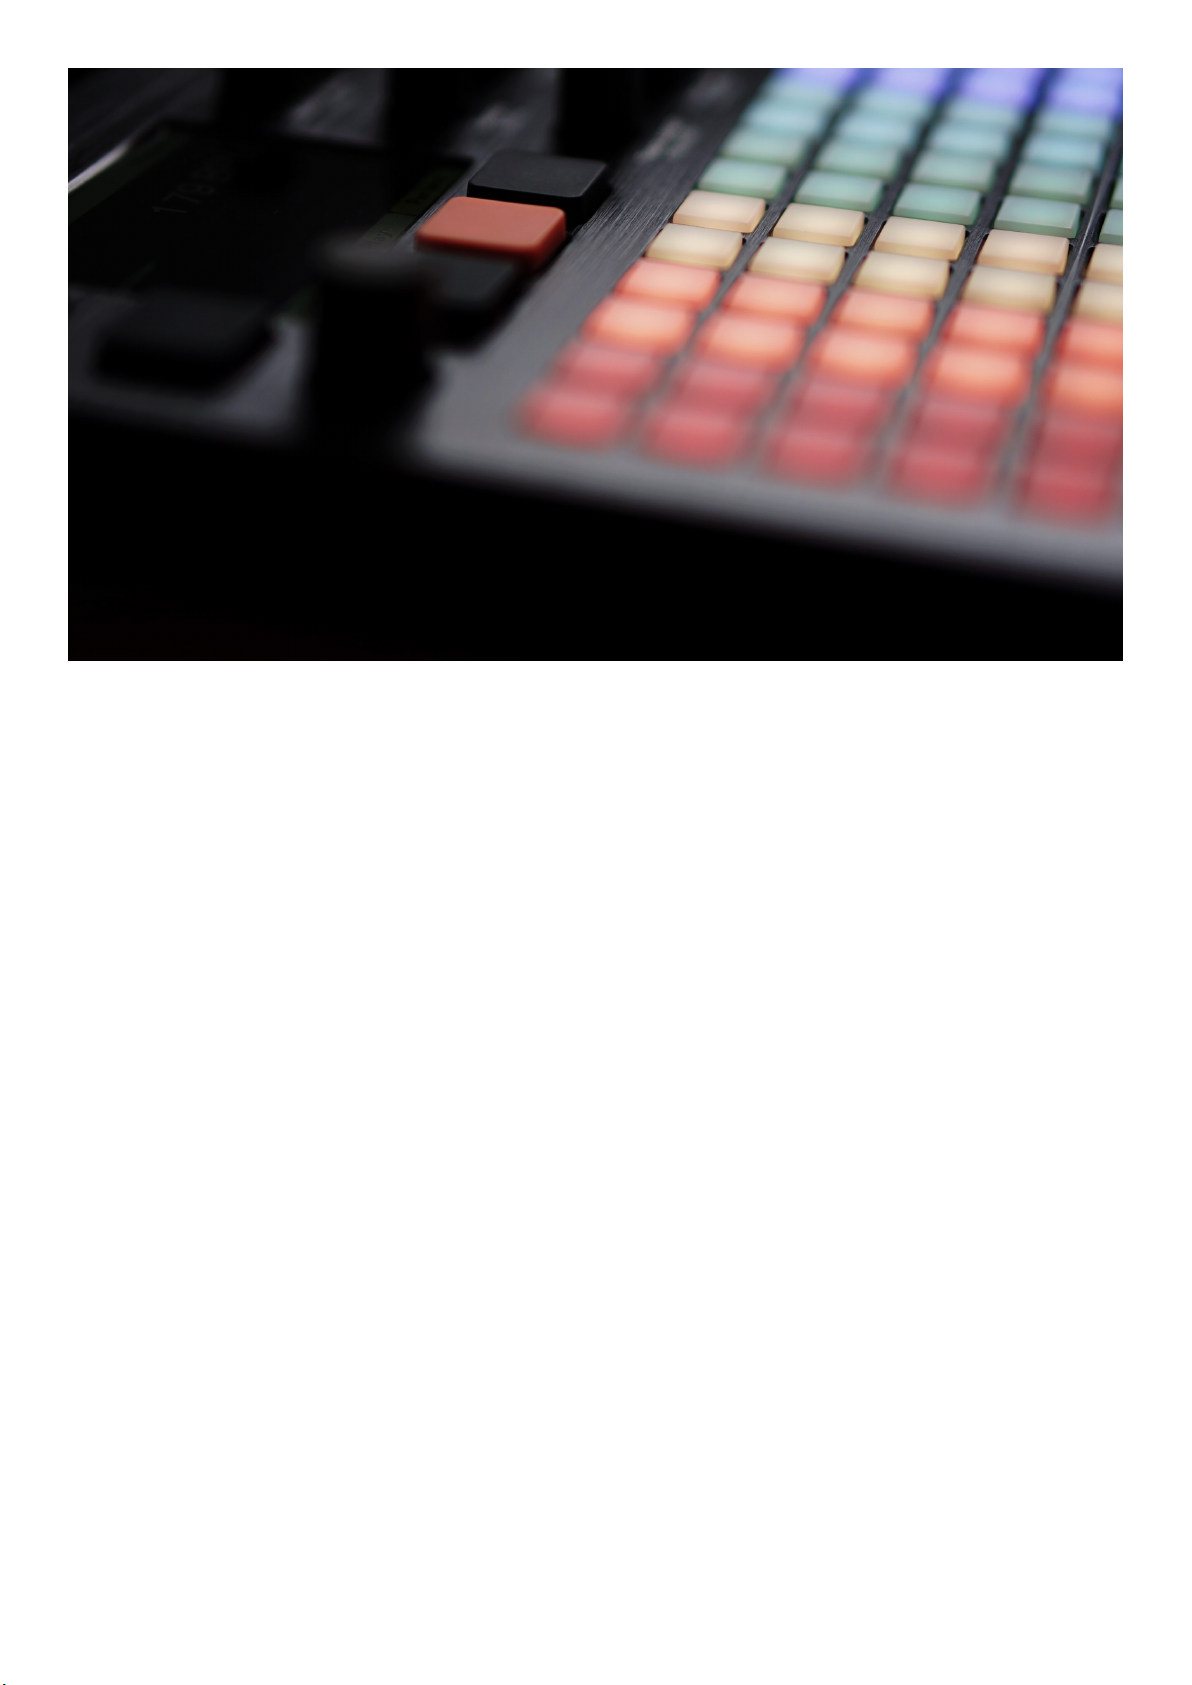
In addition to its inspiring compositional tools, Play introduces an entertaining way to
perform your music. To start, press the Perform screen button during playback, it will turn
yellow when active. In this mode, you can operate most of the function knobs and use the
punch-in effects.
Any changes you make here using knobs and punch-in effect pads will be immediately
turned off when you exit Perform mode. After re-entering the Perform mode, any latched
effect pads will immediately be re-activated. This does not, however, apply to the knob
modulations, which instead revert to their originally-defined values. This offers something of
a safety net while performing live.
Choose one or more tracks using the Select function pads on the right side of the grid, and
start using the grid pads and knobs. In the case of most of the punch-in effects, only the
selected tracks will be affected. If no track is selected, then changes will not be audible.The
exceptions are the Loop effects, Delay and Reverb. Loop effects are master effects and will
be audible even when no tracks are selected. The Delay and Reverb effects change your
master effects even when no track is selected; selecting a track will apply delay or reverb to
the selected track. You can also prepare the set of punch-in effects in advance and then
activate the tracks.
Page 37
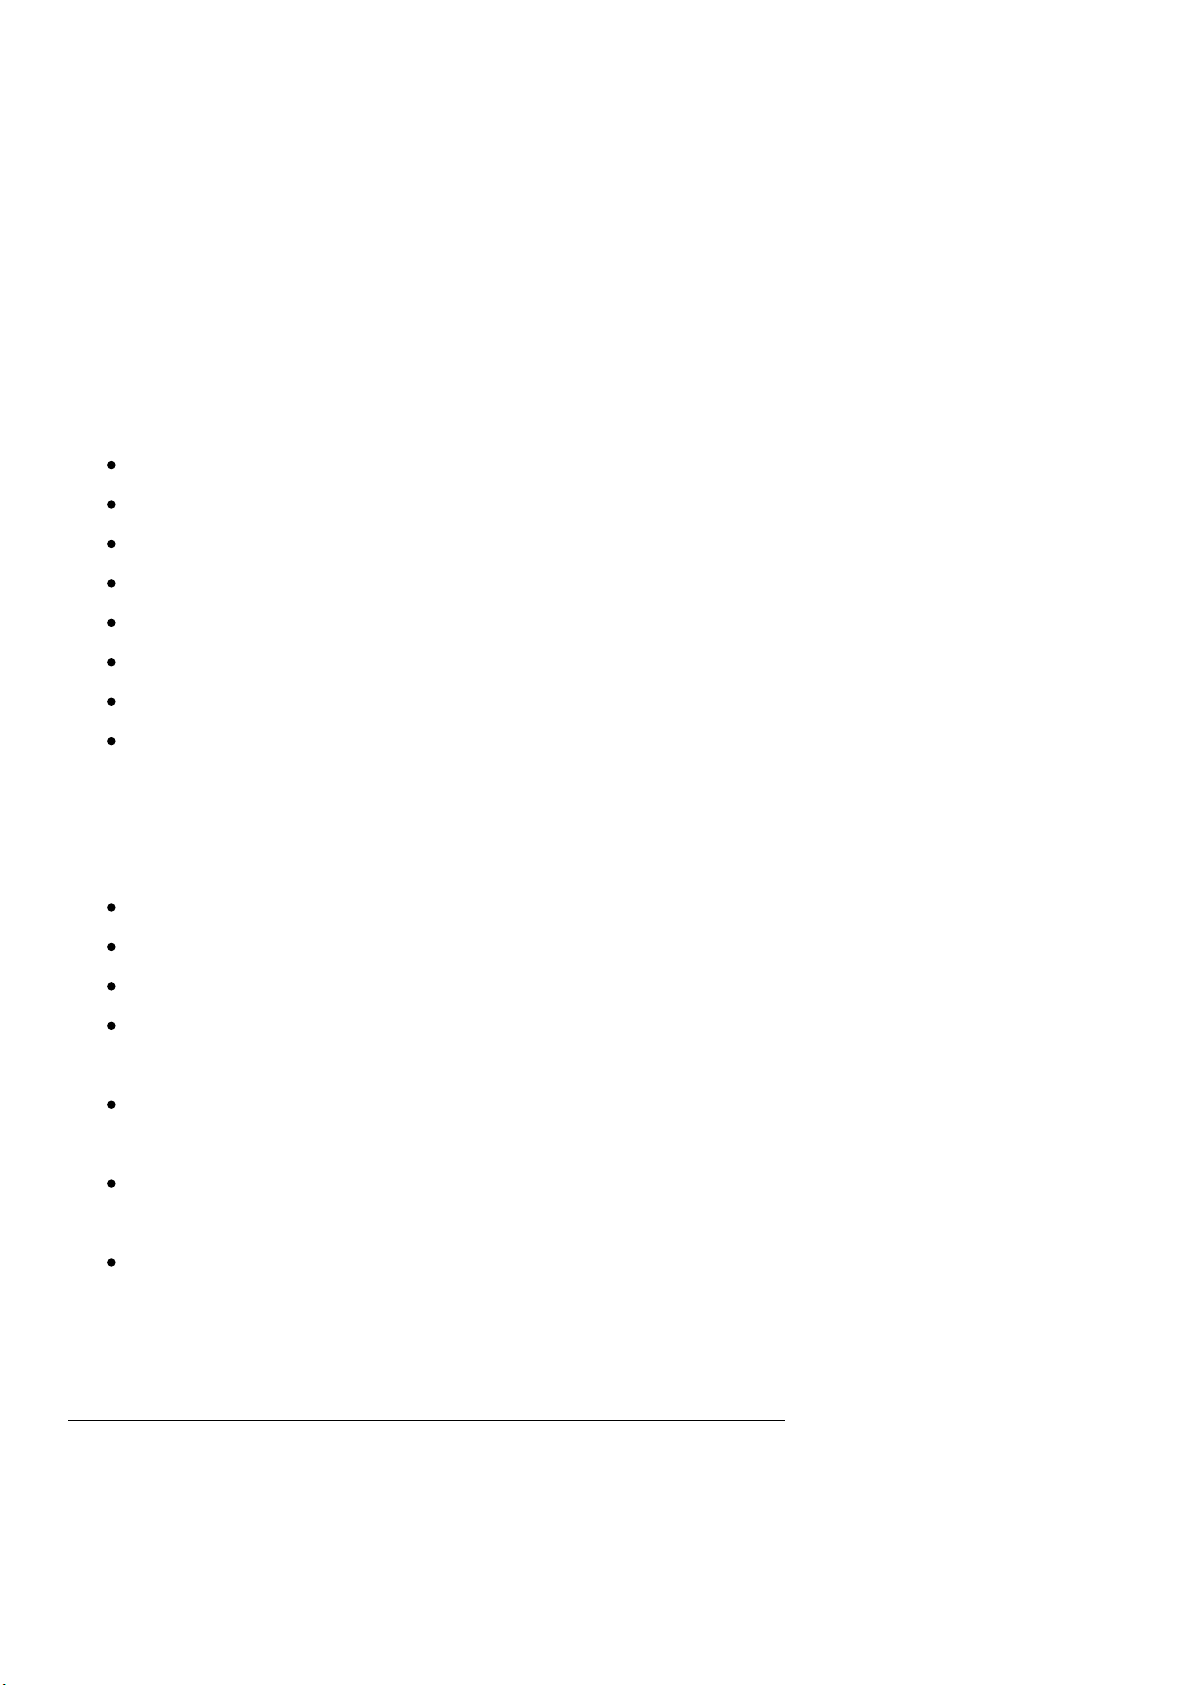
The punch-in effects categories are split into vertical grid columns represented by different
colors. There are sixteen presets available in each category. Press and hold the pad to
momentarily activate a punch-in effect, or press and let go to latch the effect. Press it again
to turn it off. An enabled effect pad is brighter than the others. You can enable only one
effect in a category, but simultaneous effects from multiple categories are possible.
You can see the description of the particular effects and the per-pad preset name displayed
on the screen while using them.
Red – activates Tune with predefined +/- values.
Orange – controls Low-Pass/High-Pass Filter Cutoff.
Yellow – enables Overdrive/Bit Depth effects, controlled with predefined values.
Green – triggers the Rearrange Algorithmic custom playhead shuffler presets.
Cyan – triggers Repeat algorithmic step repeater presets.
Violet – applying Delay punch-in presets.
Purple – applying Reverb punch-in presets.
Pink – gives access to Loop audio buffer-type punch-in effect presets (it’s a master
effect, and does not require selecting tracks to be audible).
Important:
Perform mode is available only for audio tracks.
Entering the Perform mode disables the Live Rec mode and vice versa.
Toggling between Perform and Patterns mode is not disabling the Perform effects.
The Chance/Action, Repeat Type/Repeat Grid, and Move/Micromove knob functions are
not available in the Perform mode.
In the Perform mode, it’s not possible to edit steps. The grid does not respond to input.
Changes are applied “on top” of the step values.
Turn sound parameter knobs to apply immediate changes to the sound on tracks as
they are played. It’s not possible to save these changes.
When the parameter values of selected steps are different, a tilde ~sign together with a
number and +/– is displayed while changing the values of those parameters.
https://www.youtube.com/embed/l1Monds1lhY?feature=oembed
MIDI Sequencer
Page 38
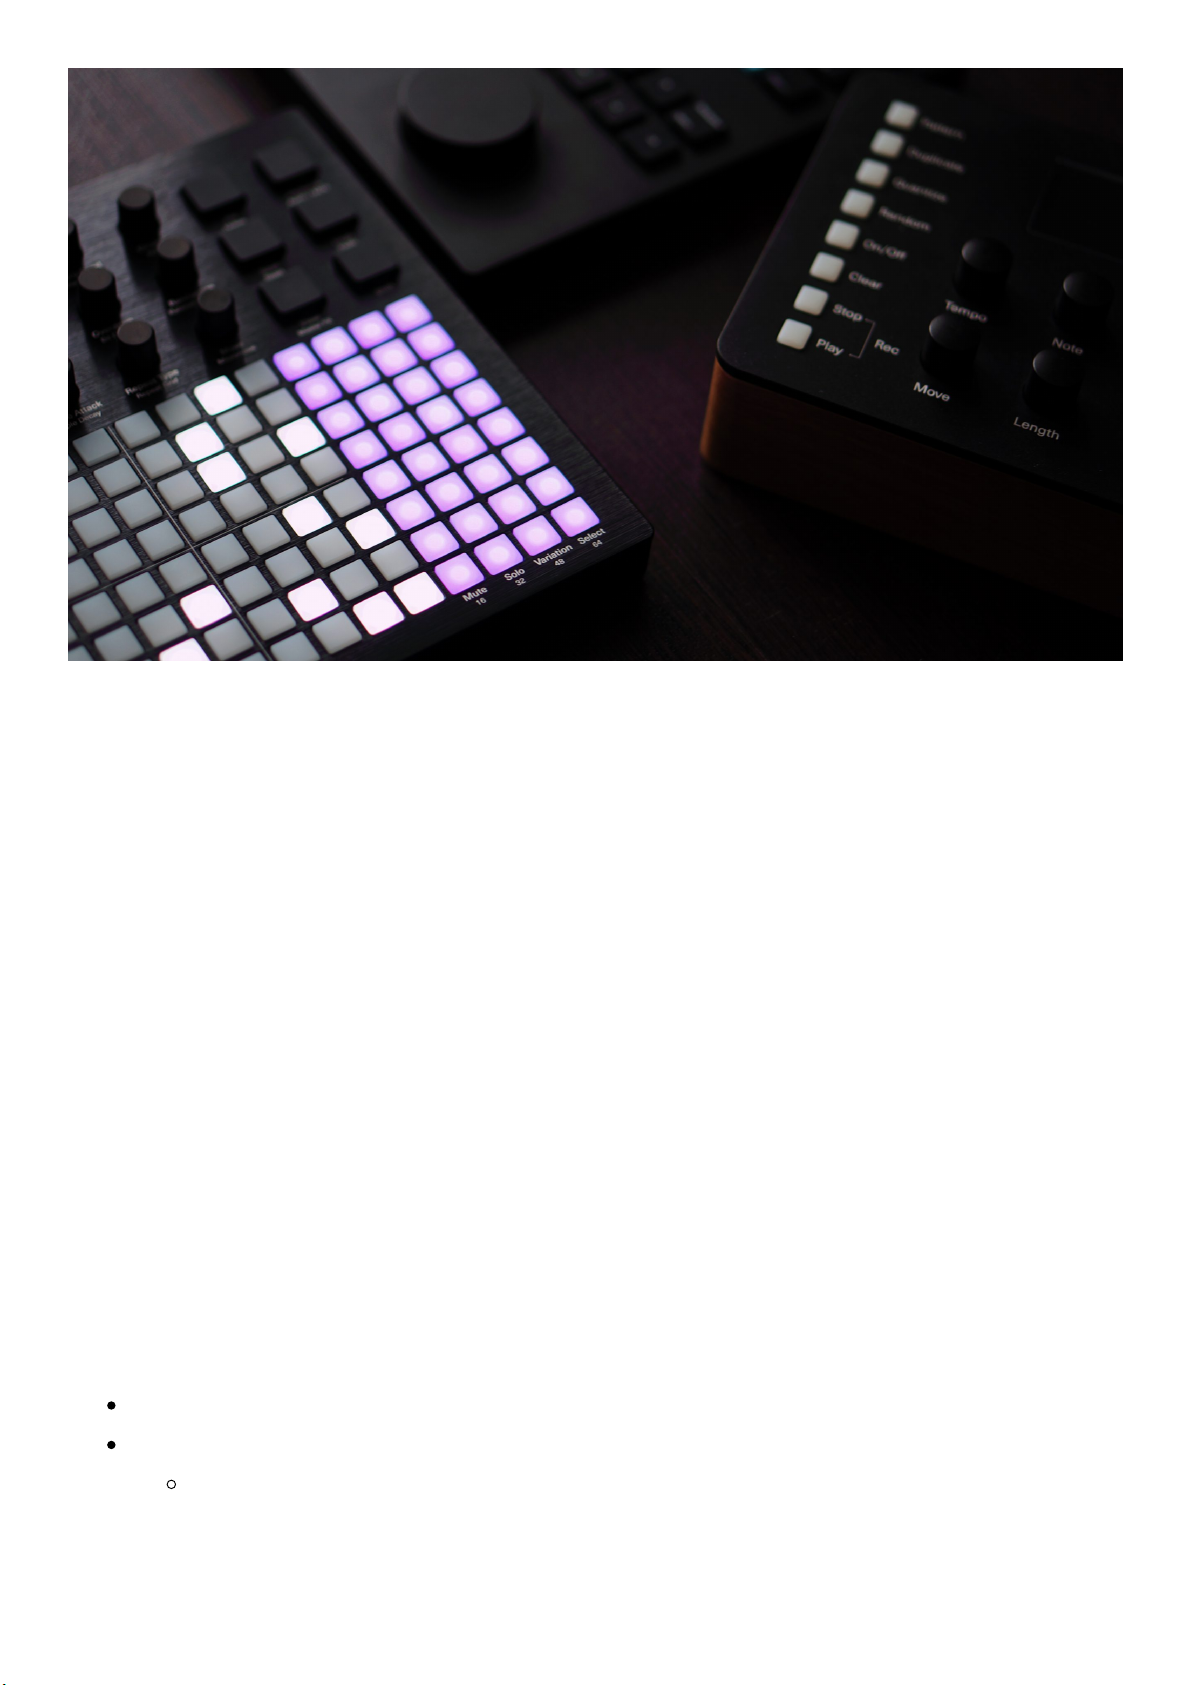
In addition to working with its internal sample-based engine, Polyend Play is designed to be a
powerful and immediate MIDI sequencer. It is designed to be the brain of your hardware and
software-based setups. Each track can have a separate set of MIDI values. For example, one
track can control your drum machine, while another controls a synthesizer.
Use the Shift + Pattern key combo to toggle between audio and MIDI tracks. In this mode,
you’ll notice that the function pads will change color from green to violet. All sequencing
operations of the audio tracks are available in MIDI tracks as well.
You can choose which CCs are mapped to the particular knobs for each MIDI track
independently. Further, you can output chords, program and bank changes, pitch bend, clock,
and other communications. You can also use MIDI input to enter notes to the sequencer, and
even record them polyphonically on the fly.
In the MIDI sequencing mode, the following MIDI value parameters can be mapped to the
steps with the use of the following knobs:
The Note/Microtune knob serves as a controller for Tune/Pitchbend.
Volume/Panning knob controls MIDI Note Velocity/Note length.
Be aware that while MIDI note length equals one step at the global tempo, the
apparent playback speed will be affected by changes made to the individual track
Page 39
tempo.
The Sample/Folder knob allows per-step selection of MIDI Channel (for MIDI DIN jack
and USB connections) and MIDI Program.
Sample Start knob selects the Chord type.
A Pre-programmed MIDI Chords list is available in the appendix.
Chords that do not fit the current musical scale filter are marked with [-].
A single step can hold and play a note or a chord. Notes and chords on successive
steps can overlap, so the one limitation here is the polyphony of the instrument on
the other end of the MIDI cable.
The onboard chords from the pre-programmed list may hold up to seven notes.
The Panning, Filter Cutoff/Resonance, Sample Attack/Decay, Reverb/Delay Send,
Overdrive/Bit Depth knobs are all mapped to MIDI CC (Control Change) values.
Configure their values in the project’s Main > MIDI menu.
General information:
Once set, a CC value can be removed from a step. Double-clicking a screen button
corresponding to the selected knob parameter value (and its automation) will restore its
value to its default setting.
When an external clock is enabled, the displayed tempo value reflects the tempo
provided by the incoming MIDI clock.
Quantization of notes recorded over MIDI works destructively, overwriting any recorded
micromove values.
You can use the Randomize utility in the MIDI mode, for Octave, Velocity, and Filter CC
change.
The Fill tool works differently in the audio and MIDI sequencing modes.
Any enabled musical scale filter will influence all the existing sequences and MIDI note
output.
MIDI mode Turn Preview is not triggered when changing Channel and Length
parameters.
The MIDI PPQN is 24 (while the internal PPQN is 96).
MIDI output clock is transmitted even if the sequencer is stopped.
The Polyend Play’s MIDI tracks are polyphonic and allow the per-step output of pre-
programmed MIDI chords, but when recording MIDI chords as many tracks as there are
notes in it will be occupied.
Polyend Play is not supporting SySex nor MIDI NRPN messages.
Important:
Page 40
Unlike in other instruments, in Polyend Play, you are selecting the MIDI Channel and
output type (MIDI TRS and/or USB) per step, not per track. While in MIDI sequencing
mode, use the Sample/Folder knob to adjust these settings.
When the instrument is playing back information received via its MIDI inputs, and when
no track or step is selected, it will use values from the ‘work step’ (except the note,
because this one is taken from the MIDI input information). In such a scenario, Play
becomes sort of a MIDI hub, and its Smart Soft-thru mechanism redirects notes from
input to any selected output and channel. Length is ignored, Scale and Chord apply.
Track mutes do not mute CCs, Pitchbend and Program Changes, so your unmuted
synths stay consistent. If you want to stop these messages, add a new variation
without the CC, Pitchblend or PC changes instead of mute.
Main Menu
Click the Encoder to enter the Main Menu section.
File
Page 41
Gives you access to the basic project management options. Here, you can create new
projects, load existing projects, and save the projects you’re currently working on. The
following options are available:
New Project – initiates a new project.
Open Project – reveals a list of available existing projects which you can open.
Save Project – this gives you an option to save your current project.
Save Project As – same as above but with an option to input an exact name of the
saved project.
Export
An overview of the available File menu operations and rules:
To load a project, highlight the desired position and use the Open screen button on the
bottom of the screen. An adequate popup with a progress bar will appear.
In the Main menu file browser, the project folders are displayed in orange.
Both left screen buttons function as an Enter, in the same way as the encoder click.
If Open Project or New Project is selected and the current project isn’t saved, a warning
popup will be displayed.
New Project and Save Project actions will be performed immediately, while Open
Project or Save Project As will open the card browser, allowing you to select the project
location.
Open Project action will be performed immediately after selecting the location. After
choosing the location for Save as, enter the name of the project and confirm it.
If a current project wasn’t saved before, the Save Project command will behave like
Save Project As.
If the name entered in Save Project As already exists in the selected location, an
information popup will be displayed.
The Save Project As action will enable an on-screen keyboard allowing you to enter the
exact preferred name for your project. You can use the grid pads for text entry,
corresponding to pad labels displayed on the screen.
The project name field is initially filled with the name of the current project. If the
current project name in the selected location already exists, a suffix with the first
appropriate number will be added.
Turn the encoder to change the current character and press enter to add it to the
cursor position.
Hold the Shift key and turn the encoder to change the cursor position.
Press the Delete key (Shift + Fill key combo) to remove the character before the cursor
position.
Page 42
Use the Auto Name function to generate a random name for your project.
Exporting tracks to the SD card:
Play has four export options:
Current Pattern Master – exports a stereo master file of the current pattern.
Current Pattern Stems – exports eight tracks and delay and reverb sends (10
tracks total) of the currently selected pattern.
Current Chain Master – exports a stereo master file of the pattern chain of the
current pattern.
Current Chain Stems – exports eight tracks and delay and reverb sends (10 tracks
total) of the currently selected pattern chain.
Master export is sourced after Saturation, before sound FX (Sound parameter in Master
FX): see the Audio Architecture section below for more details.
Stems export is sourced after the Mixer stage, before the Limiter.
Mute / Solo behaves just like in normal playback, muted tracks will be exported as
silent.
All exports are created in the Export folder on the SD card with the appropriate folder
name, which includes the project name, pattern sequence number(s), and export
sequence number.
Samples
The Polyend Play workflow is powered by distinctively prepared sample packs. Such an
approach was chosen to make it as playable and intuitive as possible. Nonetheless, users are
not forced to use sample packs only. It’s possible to use your own samples with and without
keeping them sorted in separate folders.
In the Samples menu section, you will browse the SD card memory and manageyour
project’s sample pool.
Use the View Sample Pool position to display and preview the current project’s sound
content list.
Here you can create and rename folders.
Page 43
New folders can be created by selecting the <Add New Folder> position at the end
of the folder list. The number of folders per sample pack is limited to twenty. The
folder name editing is analogic to the project naming explained above.
The maximum number of 255 sample files can be loaded to a single project. The
current number of used samples is displayed here.
Select the Load Sample Pack function to load a pack with its entire folder tree into the
project’s sample pool from the SD card.
A sample pack with its folder structure will be recognized by the sample loader
when placed in a Sample Packs folder on the SD card.
Press the Load Pack screen button and Play’s sample loader will load a pack with
its entire folder tree intact.
Sample packs are organized as a folder with their subfolders. Please note that its
subfolders cannot contain any other subfolders, as they will not be loaded to the
sample pool by the Play’s file browser.
If you selected a folder containing only samples, it will be loaded as a new sample
Enter the Load Files or Folders position to load a selection of files and folders into the
project’s sample pool from the SD card.
Important:
pool folder of the same name and will contain samples from the source folder.
Multiple folders can be loaded simultaneously.
Use the Load Wav/Load Folder screen button to load selected content to the
sample pool.
Select multiple sample files or folders by holding the Shift button.
After loading single files the browser gets back to the SD card content.
In order to load a selected audio file to the sample pool, you have to designate a
target folder.
When selecting a folder, press Load Folder to load all samples in the card folder to
a new sample pool folder of the same name.
To preview samples use one of the two function screen buttons located on the left side
of the screen or click the encoder. For a fast preview, hold down one of these
buttonsor the encoder, and start changing the highlighted samples.
Delete samples and sample folders from the pool using Delete (Shift + Fill key combo).
This applies only to the project’s sample pool. Deleting files from the SD card from the
instrument level is not possible.
If a particular sample folder in the sample pool is empty, it won’t be displayed while
browsing with the Sample/Folder knob.
Page 44
You can load sounds to the sample pool even during the instrument playback.
On the bottom of the Main menu Samples screen, you can see a Memory bar that
indicates the remaining sample pool space percentage.
The use of sample packs allows the Fill tool to populate tracks with the appropriate
sounds. For example, when using the Beat Fill, kick, snare, and hi-hat samples from the
analogically named pack folders will be used. These particular sample folders must
contain the words kick, snare, and hat in their name’s strings of characters to be
properly recognized by the Fill tool algorithm.
When there are two folders containing the same string of characters required by the
Beat Fill algorithm in the sample pool, samples will be drawn from the top one only.
Technical note:
The internal engine is working with uncompressed 16bit mono PCM WAV files with
different sample rates.
Scales
Polyend Play will import WAV files in any sample rate, 16/24/32 bit mono/stereo, and
will convert them automatically to the supported format.
The converted sample files contain a mix of both L/R stereo sample channels.
The overall per-project sample pool memory allows for 6 minutes of monophonic 16-bit,
44.1 kHz sample files. However, Play can work with different sample playback rates, so
you can reduce the required memory of a sample by reducing its sample rate. A sample
played back at half the sample rate will use half the Pool memory. Conversely, doubling
the sample’s rate will use twice the Pool memory. Because Play can use multiple
different playback rates, your sample pool capacity may vary.
The Main/headphones output is stereophonic.
In this menu, you can locate the musical scales filter settings. This filter is per project. It has
an influence on MIDI output and input, but also on the View mode input controller and the
Note knob. It gives you access to:
Enabling the musical scale filter (see a list in the appendix).
Setting the desired musical scale filter.
Selecting the Root note.
Page 45
Important:
When a scale filter is applied, the available notes will be confined to the selected scale.
The musical scales filter function is not limited to the View controller.
A selected musical scale will influence all the existing sequences and the MIDI notes
output, as well.
When changing the track root note or scale, the notes in each step will be adjusted to fit
the new scale – each being transposed up by one or two semitones.
Using a scale on an existing sequence will quantize all of its notes and chords to that
selected musical scale.
If a scale filter is turned on, the Repeat tool filters notes to the chosen musical scale.
MIDI
Available MIDI input/output controls:
CC Mapping > select specific CC settings for particular MIDI channels for both Jack and
USB ports. Allows you to set the following options:
CC numbers for Cutoff/Resonance, Sample Attack/Decay, Reverb/Delay send
Overdrive/Bit Depth knobs.
Set Values for Polyend Tracker – integration mode for Polyend’s Tracker audio
workstation instrument.
Clock In > Internal, MIDI In Jack, MIDI In USB.When an external clock is enabled, the
displayed tempo value reflects the tempo provided by the MIDI source.
Transport In > Off, MIDI In Jack, MIDI In USB.
Clock Out >Off, MIDI In Jack, MIDI In USB.
Transport Out > Off, MIDI In Jack, MIDI In USB.
Notes In > Off, MIDI In Jack, MIDI In USB.
The MIDI Channel for both MIDI TRS and USB outputs is a selectable per-step in the MIDI
sequencing mode with the use of a Sample/Folder knob.
Settings
Page 46
With the following available options:
View Layout – sets the layout of the View controller > Piano Notes, Grid Notes.
Grid Brightness – sets the brightness of the pads > High, Medium, Low.
Double Tap – toggles the knob touch function selection > Off, On.
Variation Page – allows you to set if the use of a single Variation slot will display
available Variation slots for Separate tracks only, or for All Tracks simultaneously.
Quantize Recording – toggles the Live Rec micromoves notation function > Off, On.
Overdub Recording – toggles the Live Rec notation overdub function > Off, On.
Firmware – displays the current firmware version and build numbers. Allows flashing
the firmware files > Update firmware.
Firmware
Firmware Updates
The currently installed firmware version number is displayed on the startup splash screen.
The detailed version and build numbers are visible in the Firmware section of the Main Menu.
To update the firmware > copy the firmware file to the Firmware folder on the SD drive. Go to
Config > Firmware. Choose the desired version of the .ppf (Polyend Play Firmware) file. And
confirm using the screen key.
Firmware files should be stored on the SD card in the “Firmware” folder.
Firmware Update is available from the “Settings/Firmware” submenu.
To flash the firmware select it from the list and confirm the operation by pressing “Yes”.
Use the attached microSD card USB dongle reader to copy the firmware file (or any other
files) to the Play MicroSD card.
Find the latest official firmware release here.
Note: Firmware is not backwards compatible. For example, when loading a project created
on firmware 1.2 a on a device running firmware 1.1 you could experience data corruption
causing playback issues. Loading a project in 1.2 that was created in 1.1 will not cause any
issues.
Page 47
https://www.youtube.com/embed/Z6AlNAaQkqM?feature=oembed
In case of trouble
Start by disconnecting the USB C cable connector from its port located on the back panel.
This will cause a complete shutdown. This usually helps.
The SD file structure might get damaged if your device loses power during a firmware
update. If that happens, or the firmware doesn’t boot up for any other reason, you can
perform one of the two emergency flashing procedures as follows:
First method:
Press the hidden reset button on the back panel of the instrument. It will auto flash with
arandomly picked firmware .ppf file from the SD card Firmware/ folder.
Second method:
Download thePolyend Tool.
Download a known working firmware file either from the Polyend website or one of the
previous beta .ppf files.
Remove the SD card from the Play’s port.
Connect your Play directly to your computer with a USB cable (avoid USB hubs and
dongles).
Power up the Play.
In the Polyend Tool, choose the .ppf file you want to use to flash your device.
Use a pin, needle, or similar object to press the hidden Reset button next to the Play’s
USB C port.
Wait for the firmware update to complete.
If the update reaches 100% but the device doesn’t reboot on its own, restart it
manually.
Re-insert the SD card into the Play slot.
Important: Unit is still crashing? Mount your MicroSD card to your computer and delete the
“Workspace” folder in the root directory.
Page 48

Where possible, Polyend will fix any firmware-related issues considered bugs. Polyend is
always keen on hearing user feedback about possible functionality improvements, however,
we are not obligated to implement such feature requests. Please respect that while we
appreciate our customers’ opinions and wishes, we cannot guarantee or promise to
implement them.
Warranty & Safety
Polyend warrants this product, to the original owner, to be free of defects in materials or
construction for one year from the date of purchase. Proof of purchase is necessary when a
warranty claim is processed. Malfunctions resulting from improper power supply voltages,
abuse of the product, or any other causes determined by Polyend to be the fault of the user
won’t be covered by this warranty (standard services rates will be applied). All defective
products will be replaced or repaired at the discretion of Polyend. Products must be returned
directly to Polyend with the customer paying the shipping cost. Polyend implies and accepts
no responsibility for harm to a person or apparatus through the operation of this product.
Please go topolyend.com/helpin order to start a return to manufacturer authorization, or for
any other related inquiries.
Important Safety and Maintenance instructions:
Avoid exposing the unit to water, rain, and moisture. Avoid placing it in direct sunlight or
high-temperature sources for a long time.
Do not use aggressive cleaners on the casing or on the screen. Get rid of dust, dirt, and
fingerprints using a soft, dry cloth. Disconnect all cables while cleaning. Only reconnect
them when the product is totally dry.
To avoid scratches or damage, never use sharp objects on the body or screen of the
instrument. Do not apply any pressure to the display.
This apparatus, by itself or used with amplifiers, headphones, and speakers are able to
produce high sound levels. Do not operate at levels that are uncomfortable. Protect your
ears.
Unplugyour instrument from the power sourcesduring lightning storms or when it is
not used for long periods of time.
Make sure that the power cord is safe from harm.
Page 49
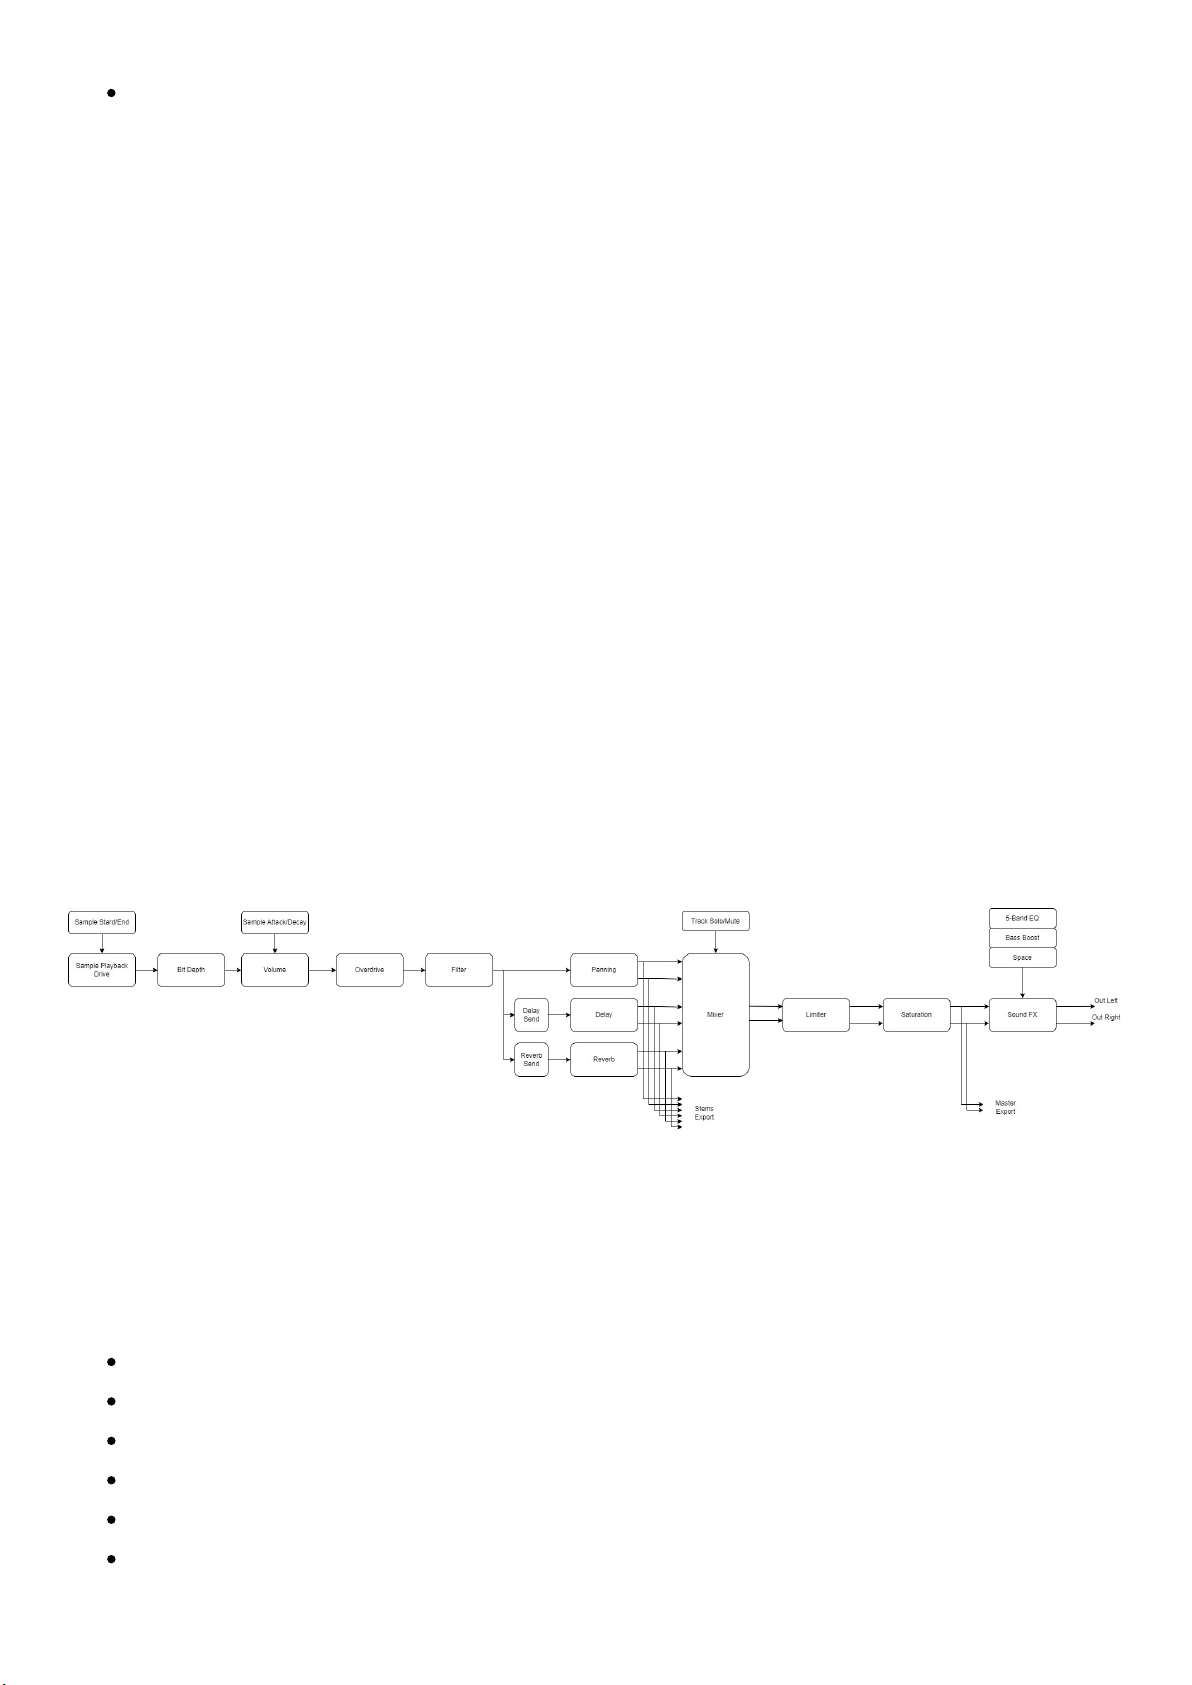
Do not open up the instrument chassis. It is not user-repairable. Leave all servicing to
qualified service technicians. Servicing may be required when the unit has been
damaged in any way, a liquid has been spilled or objects have fallen into the unit, if it
has been dropped, or does not operate normally.
EU regulations
European Union regulation compliance statement. This product has been tested to comply
with the Low Voltage 2014/35/UE and Electromagnetic Compatibility 2014/30/UE directives.
The product meets the requirements of the RoHS 2 Directive 2011/65/UE.
Appendix
Audio Architecture
Predefined MIDI Chords List
Power 4th
Power 5th
Major
Minor
Diminished
Augmented
Page 50
Sustained2
Sustained4
Major 6th
Minor 6th
Major 7th
Minor 7th
Minor Major 7th
Dominant 7th
Major 9th
Minor 9th
Major 11th
Minor 11th
Major 13th
Minor 13th
Musical Scales List
Chromatic
Minor
Major
Dorian
Lydian
Lydian Minor
Locrian
Phrygian
Phrygian Dominant
Mixolydian
Melodic Minor
Harmonic Minor
BeBop Major
BeBop Dorian
BeBop Mixolydian
Blues Minor
Blues Major
Pentatonic Minor
Page 51
Pentatonic Major
Hungarian Minor
Ukrainian
Marva
Todi
Whole Tone
Diminished
Super Locrian
Hirajoshi
In Sen
Yo
Iwato
Whole Half
Kumoi
Overtone
Double Harmonic
Indian
Gypsy
Neapolitan
Neapolitan Minor
Enigmatic
Randomize Types
What values do the certain Polyend Play’s Randomizer tool types influence:
Sample In Folder (Samples in selected folder).
Sample in Pool (Samples from the entire sample pool).
Sample Length (Sample Start, Sample End).
Texture (Filter Cutoff, Resonance, Overdrive).
1 Octave (Plays notes within one octave).
2 Octaves (Plays notes within two octaves).
Space (Panning, Delay Send, Reverb Send).
Nuke (Samples in Folder, Filter Cutoff, Resonance, Overdrive, Panning).
Duke Nuke (Samples in Pool, Filter Cutoff, Filter Resonance, Overdrive, Panning).
Page 52
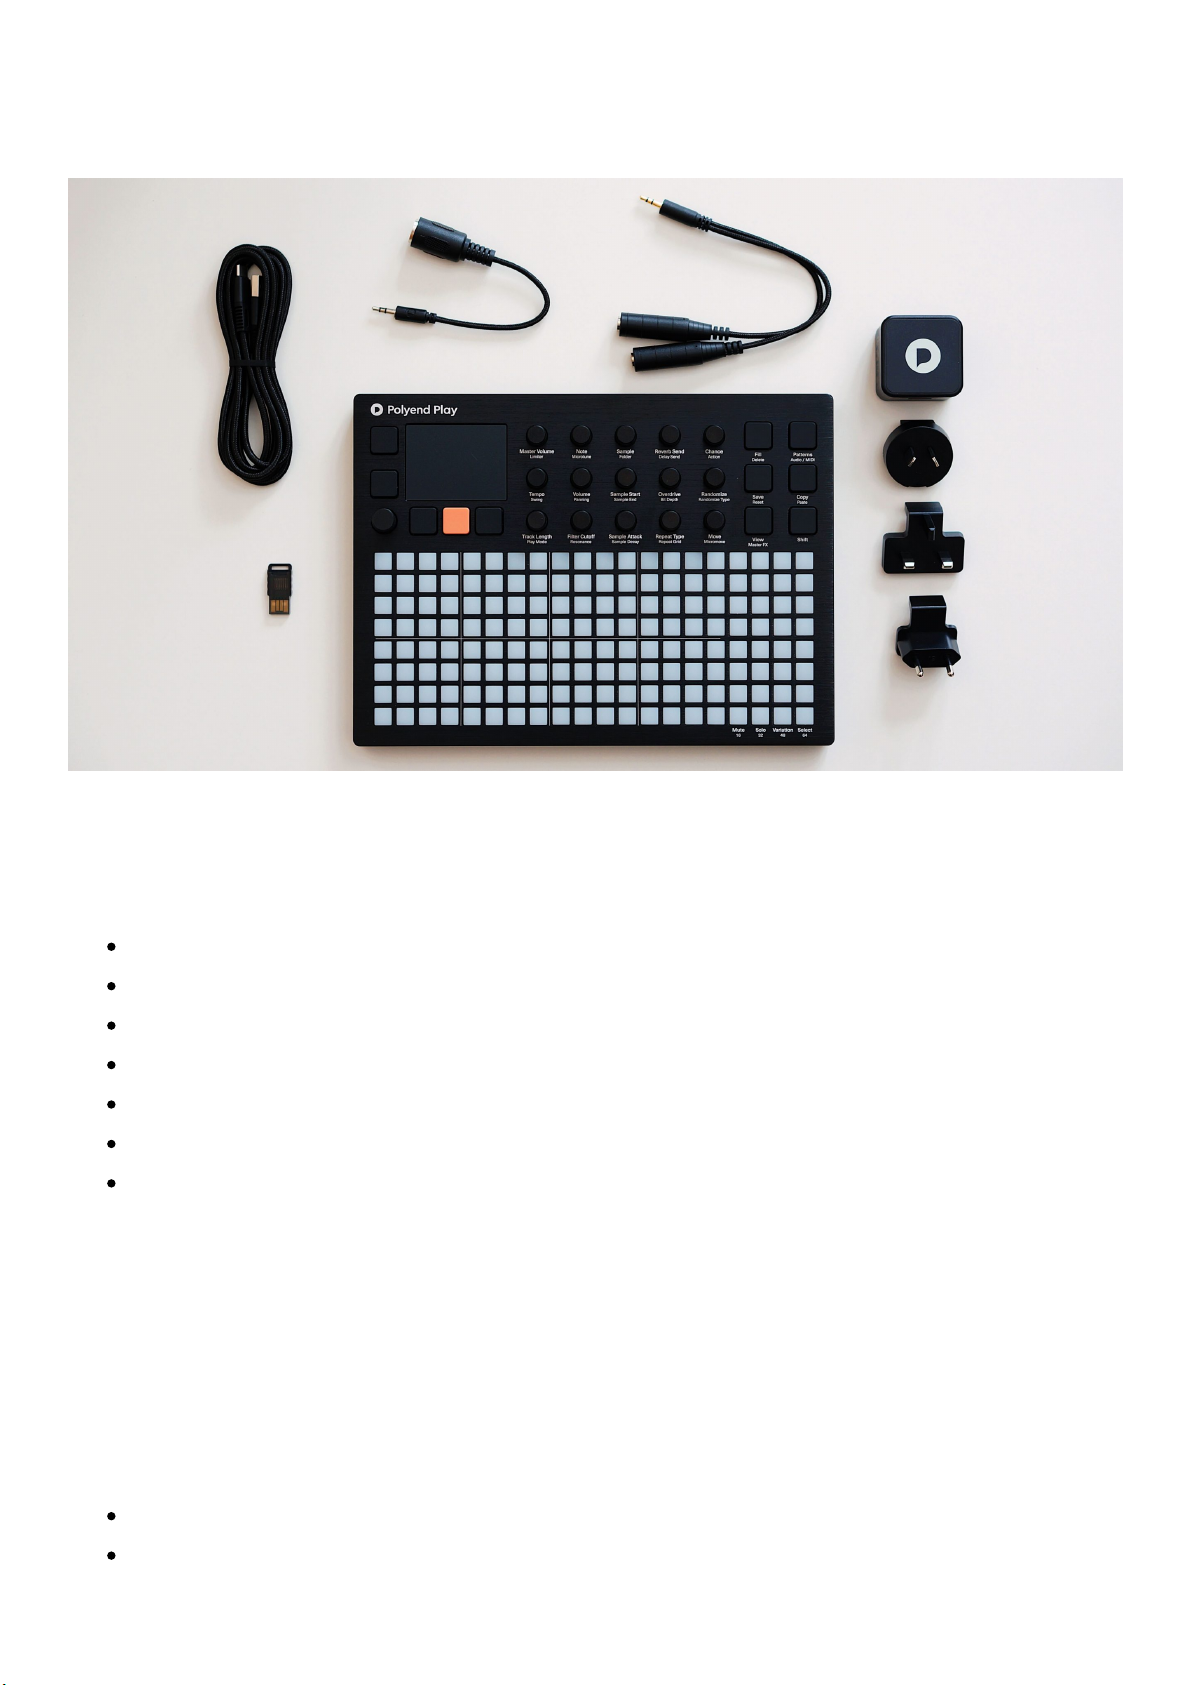
What's In The Box?
Polyend Play onboard original accessories.
Original USB A power adapter (with different standard plugs set).
BrandedUSB-C cable (2 m).
1x Stereo 3.5 mm jack to 2x 6.3 mm jack adapter.
1x MIDI 3.5 mm jack to DIN adapter.
16GB Micro SD Card.
Micro SD to USB-A dongle adapter.
Warranty and Quick Guide information brochure.
Device Dimensions
The Polyend Playsize and Weight are:
Height 8 inches (20.7 cm).
Width 11 inch (28.2 cm).
Page 53

Depth 1.8 inch (4.5 cm) .
Weight: 2.9 lbs / 1.3 kg (with accessories) 2.2 lbs / 1 kg (without accessories).
Polyend Play Battery Powering
Polyend Play runs on 5V/1A and can be powered up from a power bank. The best method to
power up your instrument is to use the original AC adapter or any other stable wall charger.
Notice that an ‘intelligent’ power bank with advanced power management systems or even a
‘smart’ computer USB port used for powering your unit can possibly cause issues that may
cause your Play unit to become unstable.
Credits
Polyend Play was brought to you by the Polyend Team 2022 members ✋
With highest regards to everyone else involved. Thank you for your inestimable help!
Scott Murray, Alex Cummings (ARC Noise), Alex Retsis (Qebo), Petr E.C. Rice, Julien Guillot
(Stazma), Jerome Guiton (Renoizer), Paul Bohnencamp (Arcologies), Benn Jordan, Ziv Eliraz,
Riku Annala (Recue), Martin Krajcir (Isobutane), Orchestral Tools Team.
Polyend Play Licences
Software licenses
Sample sounds license agreement
 Loading...