

Page 1

MGC WebCommander
User’s Guide
Version 8.0
Page 2

Copyright © 2006 Polycom, Inc.
All Rights Reserved
Catalog No. DOC2136B
Vers ion 8 .0
Proprietary and Confidential
The information contained herein is the sole intellectual property of Polycom, Inc. No distribution, reproduction or unauthorized
use of these materials is permitted without the expressed written consent of Polycom, Inc. Information contained herein is subject
to change without notice and does not represent commitment of any type on the part of Polycom, Inc. Polycom and Accord are
registered trademarks of Polycom, Inc.
Notice
While reasonable effort was made to ensure that the information in this document was complete and accurate at the time of
printing, Polycom, Inc., cannot assume responsibility for any errors. Changes and/or corrections to the information contained in
this document may be incorporated into future issues.
Page 3

Table of Contents
Introduction . . . . . . . . . . . . . . . . . . . . . . . . . . . . . . . . . . . . . . 1-1
Prerequisites . . . . . . . . . . . . . . . . . . . . . . . . . . . . . . . . . . . . . . . . . . . . 1-2
About MGC WebCommander User’s Guide . . . . . . . . . . . . . . . . . . .1-2
Conventions . . . . . . . . . . . . . . . . . . . . . . . . . . . . . . . . . . . . . . . . . . . .1-4
System Requirements . . . . . . . . . . . . . . . . . . . . . . . . . . . . . . . . . . . . . . . . 1-4
Cookies . . . . . . . . . . . . . . . . . . . . . . . . . . . . . . . . . . . . . . . . . . . . . . . . . . . 1-5
Enabling Cookies in Microsoft Internet Explorer . . . . . . . . . . . . . . . 1-5
Connecting to WebCommander . . . . . . . . . . . . . . . . . . . . . . . 2-1
Connecting to WebCommander Web Site using Windows Authentication .
.................................................................................................................2-12-1
Connecting to WebCommander Web Site using WebCommander User Name
and Password . . . . . . . . . . . . . . . . . . . . . . . . . . . . . . . . . . . . . . . . . . . . . . . 2-3
Connecting to WebCommander Web Site using a WebPortal . . . . . . . . . 2-6
Main Menu . . . . . . . . . . . . . . . . . . . . . . . . . . . . . . . . . . . . . . . . 3-1
Main Menu Links . . . . . . . . . . . . . . . . . . . . . . . . . . . . . . . . . . . . . . . . . . .3-2
Configuration . . . . . . . . . . . . . . . . . . . . . . . . . . . . . . . . . . . . . . . . . . . . . . .3-5
Database Selection . . . . . . . . . . . . . . . . . . . . . . . . . . . . . . . . . . . . . . . . . . . 3-7
Language Selection . . . . . . . . . . . . . . . . . . . . . . . . . . . . . . . . . . . . . . . . . . 3-8
Resizing the Window Panes . . . . . . . . . . . . . . . . . . . . . . . . . . . . . . . . . . 3-10
New Meeting Window . . . . . . . . . . . . . . . . . . . . . . . . . . . . . . . 4-1
Participants Lists Area . . . . . . . . . . . . . . . . . . . . . . . . . . . . . . . . . . . . . . . . 4-3
Directory Participants List . . . . . . . . . . . . . . . . . . . . . . . . . . . . . . . . . 4-4
Participant Templates List . . . . . . . . . . . . . . . . . . . . . . . . . . . . . 4-4
PathNavigator and Polycom Datastore Templates List . . . . . . . 4-5
Recent Participant List . . . . . . . . . . . . . . . . . . . . . . . . . . . . . . . . . . . .4-6
Favorites Participant List . . . . . . . . . . . . . . . . . . . . . . . . . . . . . . . . . . 4-7
Participant Actions Area . . . . . . . . . . . . . . . . . . . . . . . . . . . . . . . . . . 4-8
Conference Details Area . . . . . . . . . . . . . . . . . . . . . . . . . . . . . . . . . . 4-9
Conference Launch Options Area . . . . . . . . . . . . . . . . . . . . . . . . . .4-10
Starting a New Meeting . . . . . . . . . . . . . . . . . . . . . . . . . . . . . . . . . . . . . . 4-11
Starting a New Meeting Using a Default Conference Template . . . 4-11
Sending an E-mail to Conference Participants . . . . . . . . . . . . . 4-14
i
Page 4

Table of Contents
Duplicate Booking . . . . . . . . . . . . . . . . . . . . . . . . . . . . . . . . . . 4-16
Defining a New Participant from the New Meeting Window . . . . . . . . . 4-19
Scheduling a Conference . . . . . . . . . . . . . . . . . . . . . . . . . . . . . . . . . . . . . 4-24
Creating a Recurrent Reservation . . . . . . . . . . . . . . . . . . . . . . . . . . . . . . 4-30
E-mail Update after Reservation Change . . . . . . . . . . . . . . . . . 4-36
Dialing into the Conference . . . . . . . . . . . . . . . . . . . . . . . . . . . . . . . . . . 4-39
Defined ISDN Participants Dial-in . . . . . . . . . . . . . . . . . . . . . . . . . 4-39
Defined H.323 Participants Dial-in . . . . . . . . . . . . . . . . . . . . . . . . . 4-41
SIP Connections . . . . . . . . . . . . . . . . . . . . . . . . . . . . . . . . . . . . . . . 4-41
Dial-in Scenario—SIP Environment . . . . . . . . . . . . . . . . . . . . 4-42
Direct Dial-in Scenario—SIP Environment . . . . . . . . . . . . . . . 4-43
Dial-out Scenario—SIP Environment . . . . . . . . . . . . . . . . . . . 4-43
Mixed Environments Conference Scenario . . . . . . . . . . . . . . . 4-44
Monitoring an On Going Conference . . . . . . . . . . . . . . . . . . . 5-1
General Monitoring . . . . . . . . . . . . . . . . . . . . . . . . . . . . . . . . . . . . . . . . . . 5-2
Meeting Director Module . . . . . . . . . . . . . . . . . . . . . . . . . . . . . . . . . 5-3
The Meeting Director Pane . . . . . . . . . . . . . . . . . . . . . . . . . . . . . . . . 5-4
Conference Icons and Indications . . . . . . . . . . . . . . . . . . . . . . . . . . . 5-8
Toolbar Buttons and Icons . . . . . . . . . . . . . . . . . . . . . . . . . . . . . 5-8
Participant Icons and Indications . . . . . . . . . . . . . . . . . . . . . . . . . . 5-11
Participant Icons . . . . . . . . . . . . . . . . . . . . . . . . . . . . . . . . . . . . 5-12
Connection Status Icons . . . . . . . . . . . . . . . . . . . . . . . . . . . . . . 5-14
Audio Connection Status Icons . . . . . . . . . . . . . . . . . . . . . . . . 5-16
Video Status Icons . . . . . . . . . . . . . . . . . . . . . . . . . . . . . . . . . . 5-18
Q&A Buttons . . . . . . . . . . . . . . . . . . . . . . . . . . . . . . . . . . . . . . 5-20
Sorting Participant Properties . . . . . . . . . . . . . . . . . . . . . . . . . . 5-23
Secure Conference Mode . . . . . . . . . . . . . . . . . . . . . . . . . . . . . . . . 5-24
ToolTips . . . . . . . . . . . . . . . . . . . . . . . . . . . . . . . . . . . . . . . . . . . . . 5-25
General Conference Information . . . . . . . . . . . . . . . . . . . . . . . . . . . 5-28
The Video Layout Pane . . . . . . . . . . . . . . . . . . . . . . . . . . . . . . . . . . 5-30
Hide/Show Video Layout Pane . . . . . . . . . . . . . . . . . . . . . . . . 5-31
Operations Performed during On Going Conferences . . . . . . . . . . . . . . 5-33
Selecting Options . . . . . . . . . . . . . . . . . . . . . . . . . . . . . . . . . . . . . . 5-36
Viewing Conference Numeric ID . . . . . . . . . . . . . . . . . . . . . . . . . . 5-38
Connecting Dial-out Participants . . . . . . . . . . . . . . . . . . . . . . . . . . 5-39
ii
Page 5

Disconnecting Participants . . . . . . . . . . . . . . . . . . . . . . . . . . . . . . .5-40
Reconnecting Participants . . . . . . . . . . . . . . . . . . . . . . . . . . . . . . . . 5-41
Adding Participants to the Conference . . . . . . . . . . . . . . . . . . . . . . 5-42
Defining a New Participant During an On Going Conference . . . . 5-46
Adding a new T1-CAS participant during an On Going Conference
Viewing the Participant Properties . . . . . . . . . . . . . . . . . . . . . . . . . 5-53
Modifying the Participant Properties . . . . . . . . . . . . . . . . . . . . . . . . 5-54
Viewing and Modifying the Participant’s Properties during an On
Going conference . . . . . . . . . . . . . . . . . . . . . . . . . . . . . . . . . . .5-56
Designating Participant as VIP . . . . . . . . . . . . . . . . . . . . . . . . . 5-57
Designating a Participant as the Chairperson . . . . . . . . . . . . . . 5-59
Deleting a Participant from an On Going Conference . . . . . . . . . . 5-60
Muting/Unmuting a Participant . . . . . . . . . . . . . . . . . . . . . . . . . . . 5-61
Controlling the Participant’s Broadcasting and Listening Volume . 5-63
Locking and Unlocking a Conference for Dial-in Participants . . . . 5-64
Adding or Viewing the Conference’s Additional Information During an
On Going Conference . . . . . . . . . . . . . . . . . . . . . . . . . . . . . . . . . . . 5-66
Changing the Conference Entry Password and Web/Chairperson
Password During an On Going Conference . . . . . . . . . . . . . . . . . . 5-69
Changing the Duration of a Conference . . . . . . . . . . . . . . . . . . . . . 5-70
Terminating a Conference . . . . . . . . . . . . . . . . . . . . . . . . . . . . . . . . 5-73
Selecting the Video Layout . . . . . . . . . . . . . . . . . . . . . . . . . . . . . . . 5-74
Selecting the Conference Layout . . . . . . . . . . . . . . . . . . . . . . . 5-74
Selecting a Personal Layout . . . . . . . . . . . . . . . . . . . . . . . . . . . 5-79
Video Forcing . . . . . . . . . . . . . . . . . . . . . . . . . . . . . . . . . . . . . . . . .5-81
Video Forcing at the Conference Level . . . . . . . . . . . . . . . . . . 5-82
Video Forcing at the Participant Level . . . . . . . . . . . . . . . . . . . 5-84
Endpoint’s Visual Conference Indications . . . . . . . . . . . . . . . . . . . 5-86
Enabling Visual Indications . . . . . . . . . . . . . . . . . . . . . . . . . . . 5-87
Visual Effects . . . . . . . . . . . . . . . . . . . . . . . . . . . . . . . . . . . . . . . . . 5-88
Using Chat Messaging . . . . . . . . . . . . . . . . . . . . . . . . . . . . . . . . . . . 5-91
Controlling the Lecture Mode . . . . . . . . . . . . . . . . . . . . . . . . . . . . . 5-94
Blocking/Unblocking the Audio Transmission . . . . . . . . . . . . . . . . 5-98
Exclusive Speaker . . . . . . . . . . . . . . . . . . . . . . . . . . . . . . . . . . . . . . 5-99
Placing the Conference On Hold . . . . . . . . . . . . . . . . . . . . . . . . . .5-101
iii
Page 6

Table of Contents
Managing a Q&A Session . . . . . . . . . . . . . . . . . . . . . . . . . . . . . . . 5-102
Enabling Q&A Options . . . . . . . . . . . . . . . . . . . . . . . . . . . . . 5-102
Controlling Q&A Queues with the Q&A list buttons . . . . . . 5-102
Viewing the Q&A List . . . . . . . . . . . . . . . . . . . . . . . . . . . . . . 5-103
Managing a Voting/Polling Session . . . . . . . . . . . . . . . . . . . . . . . 5-106
Sending the Voting Results Via E-mail . . . . . . . . . . . . . . . . . 5-110
Mute “Meet Me” Parties . . . . . . . . . . . . . . . . . . . . . . . . . . . . . . . . 5-111
Participant/Chairperson Operations via DTMF Codes . . . . . . . . . . . . . 5-112
Request DTMF Help Menu . . . . . . . . . . . . . . . . . . . . . . . . . . . . . . 5-116
Dialing out to Invite Participants to Join the Conference . . . . . . . 5-117
Changing the Conference Password . . . . . . . . . . . . . . . . . . . . . . . 5-118
Chairperson Initiated Blast Dial-out . . . . . . . . . . . . . . . . . . . . . . . 5-119
Securing the Conference . . . . . . . . . . . . . . . . . . . . . . . . . . . . . . . . 5-120
Roll Call . . . . . . . . . . . . . . . . . . . . . . . . . . . . . . . . . . . . . . . . . . . . 5-121
Reservation Calendar. . . . . . . . . . . . . . . . . . . . . . . . . . . . . . . 6-1
Viewing the Reservation Properties . . . . . . . . . . . . . . . . . . . . . . . . . 6-3
Adding Participants to the Conference Reservation . . . . . . . . . . 6-5
Changing Conference Parameters . . . . . . . . . . . . . . . . . . . . . . . 6-5
E-mail Update after a Reservation Change . . . . . . . . . . . . . . . . 6-5
Viewing the Properties of a Protected Reservation . . . . . . . . . . . . . . 6-9
Viewing a Specific Conference Reservation . . . . . . . . . . . . . . 6-10
Additional Calendar Views . . . . . . . . . . . . . . . . . . . . . . . . . . . . . . . 6-11
Customizing Background View Colors . . . . . . . . . . . . . . . . . . . . . . 6-12
Week Start Day . . . . . . . . . . . . . . . . . . . . . . . . . . . . . . . . . . . . . 6-12
Conference Types . . . . . . . . . . . . . . . . . . . . . . . . . . . . . . . . . . 7-1
Conference Scheduling Methods . . . . . . . . . . . . . . . . . . . . . . . . . . . . . . . 7-2
Scheduled Conferences . . . . . . . . . . . . . . . . . . . . . . . . . . . . . . . . . . . 7-2
On Going Conferences . . . . . . . . . . . . . . . . . . . . . . . . . . . . . . . . 7-2
Reservations . . . . . . . . . . . . . . . . . . . . . . . . . . . . . . . . . . . . . . . . 7-2
On-demand Conferences (Reservation-less Conferencing) . . . . . . . 7-3
Ad Hoc Conferencing . . . . . . . . . . . . . . . . . . . . . . . . . . . . . . . . . 7-3
Meeting Rooms . . . . . . . . . . . . . . . . . . . . . . . . . . . . . . . . . . . . . 7-4
Conference Types . . . . . . . . . . . . . . . . . . . . . . . . . . . . . . . . . . . . . . . . . . . 7-5
Entry Queue . . . . . . . . . . . . . . . . . . . . . . . . . . . . . . . . . . . . . . . . . . . . 7-6
Participant Roles . . . . . . . . . . . . . . . . . . . . . . . . . . . . . . . . . . . . . . . . . . . . 7-7
iv
Page 7

Participant Connection to the Conference . . . . . . . . . . . . . . . . . . . . . . . . . 7-8
Conference Access for Dial-in Participants . . . . . . . . . . . . . . . . . . . . 7-9
Entry Queue Access . . . . . . . . . . . . . . . . . . . . . . . . . . . . . . . . . 7-10
Conference IVR Access . . . . . . . . . . . . . . . . . . . . . . . . . . . . . . 7-13
Direct Dialing and Access . . . . . . . . . . . . . . . . . . . . . . . . . . . . 7-14
Dial-out Participants Access . . . . . . . . . . . . . . . . . . . . . . . . . . . 7-16
Attended/Unattended Conferences . . . . . . . . . . . . . . . . . . . . . . . . . 7-16
Operator Assisted Conference . . . . . . . . . . . . . . . . . . . . . . . . . 7-17
Unattended Conference . . . . . . . . . . . . . . . . . . . . . . . . . . . . . . . 7-18
Conference Media Settings . . . . . . . . . . . . . . . . . . . . . . . . . . . . . . . . . . . 7-19
Audio Only Conference Types . . . . . . . . . . . . . . . . . . . . . . . . . . . . 7-21
Video Conference Types . . . . . . . . . . . . . . . . . . . . . . . . . . . . . . . . .7-22
Highest Common Mechanism . . . . . . . . . . . . . . . . . . . . . . . . .7-23
Additional Video Conference Settings . . . . . . . . . . . . . . . . . . . 7-24
Conference On Port (COP) . . . . . . . . . . . . . . . . . . . . . . . . . . . .7-24
Lecture Mode . . . . . . . . . . . . . . . . . . . . . . . . . . . . . . . . . . . . . . 7-25
Cascading . . . . . . . . . . . . . . . . . . . . . . . . . . . . . . . . . . . . . . . . .7-26
H.243 Chair Control . . . . . . . . . . . . . . . . . . . . . . . . . . . . . . . . .7-27
LSD - FECC (Far End Camera Control) . . . . . . . . . . . . . . . . . 7-27
Large Video Switching Conferences . . . . . . . . . . . . . . . . . . . .7-29
Greet and Guide Conferences . . . . . . . . . . . . . . . . . . . . . . . . . .7-29
T.120 Conferences . . . . . . . . . . . . . . . . . . . . . . . . . . . . . . . . . . 7-30
Dual Stream Modes . . . . . . . . . . . . . . . . . . . . . . . . . . . . . . . . . 7-30
H.239/People+Content (H.239/P+C) Options . . . . . . . . . . . . .7-31
Polycom Visual Concert PC . . . . . . . . . . . . . . . . . . . . . . . . . . . 7-32
Polycom Visual Concert FX . . . . . . . . . . . . . . . . . . . . . . . . . . .7-34
Duo Video . . . . . . . . . . . . . . . . . . . . . . . . . . . . . . . . . . . . . . . . . 7-35
Media Options for Video Session Type . . . . . . . . . . . . . . . . . . 7-35
Conference Types According to the MCU Configuration . . . . . . . . 7-36
Meeting Rooms List . . . . . . . . . . . . . . . . . . . . . . . . . . . . . . . . 8-1
Viewing the Meeting Rooms List . . . . . . . . . . . . . . . . . . . . . . . . . . . . . . . 8-3
Viewing the Properties of a Meeting Room . . . . . . . . . . . . . . . . . . . . . . . 8-5
Viewing the Properties of a Specific Meeting Room . . . . . . . . . . . . 8-6
v
Page 8

Table of Contents
Conference Templates – Partial View Mode . . . . . . . . . . . . . 9-1
Defining a New Video Conference Template . . . . . . . . . . . . . . . . . . . . . . 9-2
Conference Template Menus . . . . . . . . . . . . . . . . . . . . . . . . . . . . . 9-17
Conference Menu . . . . . . . . . . . . . . . . . . . . . . . . . . . . . . . . . . . 9-17
Conference Templates Menu . . . . . . . . . . . . . . . . . . . . . . . . . . 9-19
Participant Template Menu . . . . . . . . . . . . . . . . . . . . . . . . . . . 9-20
Defining an Audio Only Conference Template . . . . . . . . . . . . . . . . . . . 9-22
Conference Templates – Full Parameters View . . . . . . . . . 10-1
Defining a New Conference Template. . . . . . . . . . . . . . . . . . . . . . . . . . 10-1
Defining a New Video Conference . . . . . . . . . . . . . . . . . . . . . . . . . 10-4
Conference Template Menus . . . . . . . . . . . . . . . . . . . . . . . . . 10-52
Defining a New Audio Only Conference . . . . . . . . . . . . . . . . . . . 10-57
Adding Participants to Conference Templates . . . . . . . . . . . . . . . . . . . 10-77
Modifying the Properties of a Linked Participant . . . . . . . . . . . . . 10-81
Defining a New Participant during Conference Template Definition . . 10-82
Deleting a Participant from a Conference Template . . . . . . . . . . . . . . . 10-84
Deleting the Current Conference Template from the Database . . . . . . 10-86
Modifying a Conference Template . . . . . . . . . . . . . . . . . . . . . . . . . . . . 10-88
Managing Participant Templates. . . . . . . . . . . . . . . . . . . . . 11-1
Participant Templates . . . . . . . . . . . . . . . . . . . . . . . . . . . . . . . . . . . . . . . 11-2
Defining a New Participant . . . . . . . . . . . . . . . . . . . . . . . . . . . . . . . 11-4
Defining a Participant Template in the Database . . . . . . . . . . . . . . . . . . 11-5
Defining ISDN, ATM, or MPI Video Participants . . . . . . . . . . . . . 11-8
Defining H.323 Video and SIP Audio Participants . . . . . . . . . . . . 11-18
Quality of Service Parameters . . . . . . . . . . . . . . . . . . . . . . . . 11-25
Saving the Participant Template . . . . . . . . . . . . . . . . . . . . . . . . . . 11-28
Defining Audio Only Participants . . . . . . . . . . . . . . . . . . . . . . . . . 11-28
Advanced T1-CAS Participant Window . . . . . . . . . . . . . . . . 11-32
Deleting a Participant from the Database . . . . . . . . . . . . . . . . . . . . . . . 11-34
Modifying the Participant Template in the Database . . . . . . . . . . . . . . 11-36
Appendix A: Default Templates . . . . . . . . . . . . . . . . . . . . . . . A-1
Default Conference Template Properties - Default_COP . . . . . . . . A-2
Default Conference Template Properties - Default_Video . . . . . . . A-6
Default Conference Template Properties - Default-Audio . . . . . . . A-9
Default Conference Template Properties - Software CP . . . . . . . A-12
vi
Page 9

Default Conference Template Properties - Video-Switch . . . . . . . A-16
vii
Page 10

Table of Contents
viii
Page 11

Introduction
The MGC WebCommander is a browser-based application for monitoring,
managing and scheduling video and audio conferences. WebCommander
users have control over all aspects of setting up and running conferences
using a standard Web browser.
Using MGC WebCommander, users with the appropriate permissions can:
• Create and schedule new meetings
• Send conference details via E-mail to participants
• Monitor On Going conferences (including conferences scheduled in the
Microsoft Outlook application using the MGC Personal Scheduler
plug-in)
• Create and manage conference templates
• Define new participants and add them to the database
• Modify the parameters of a participant assigned to a conference or
stored in the database
• Assign participants from the database to a Conference template
• Add and delete participants to/from an On Going conference
• Delete a Conference template and participants from the database
• View the participants and conference status
• Connect and disconnect participants
• Change video layouts or set the conference to the Automatic layout
selection mode
• Mute and unmute participants audio and video
• Extend the conference duration
• Lock or unlock the conference
• Terminate the conference prior to its scheduled end time
and more
1
1-1
Page 12

Chapter 1 - Introduction
Prerequisites
Users can be assigned different permissions. Depending on your permissions,
you may not be able to perform all of the WebCommander functions.
The windows displayed throughout this guide show the default settings for a
user with full permissions. Your application windows may look differently
according to your site configuration and your permissions, however the
functionality is the same as described in this manual.
For a unique look and feel to the MGC WebCommander windows, the colors
and links of the Web pages displayed can be customized. For more
information on the Configuration Tool, refer to the MGC Web Manager
Installation and Configuration Guide, Chapter 7.
This manual assumes the user has the following knowledge:
• Familiarity with the Internet and the Web browser environment
• Basic knowledge of video and audio conferencing concepts and
terminology
About MGC WebCommander User’s Guide
The MGC WebCommander User’s Guide includes the following topics:
• Chapter 1 - Introduction
Provides a general description of WebCommander and describes the
topics and conventions to be found.
• Chapter 2 - Connecting to WebCommander
Includes information you need to get the WebCommander application
running.
• Chapter 3 - Main Menu
Describes the application's main window, menu, and toolbar.
• Chapter 4 - New Meeting Window
Includes step-by-step instructions for setting up a New Meeting
including participant’s lists, conference details and conference launch
options.
1-2
Page 13

MGC WebCommander User’s Guide
• Chapter 5 - Monitoring On Going Conferences
Describes operations that can be performed during conferences to
accommodate almost any situation which might arise during the
conference.
• Chapter 6 - Reservation Calendar
Enables viewing of scheduled conferences and their modification
before the conference start.
• Chapter 7 - Conference Types
A summary of the Conference Types, together with important Audio
and Video settings.
• Chapter 8 – Meeting Rooms List
Describes the Meeting Room option. Includes step-by-step
instructions for setting up and monitoring Meeting Room
conferences.
• Chapter 9 – Conference Templates - Partial Parameters View
Describes the Partial Parameters View based on the user’s permission
setting, displaying a limited number of fields.
• Chapter 10 – Conference Templates - Full Parameters View
Describes the Full Parameters View based on the user’s permission
setting.
• Chapter 11 – Managing Participant Templates
Describes how to manage and use Participant Templates.
• Appendix A – Default Conference Templates Parameters
Describes the default conference templates that are included in the
WebCommander version.
1-3
Page 14

Chapter 1 - Introduction
Conventions
Before using MGC WebCommander, it is important for you to understand the
terms and conventions used in this manual.
• The term “select” is used when you highlight a part of the window,
dialog box or menu that you want to be changed with your next action.
• The term “click” is used when you click a button or a hyperlink with the
mouse.
• The term “right-click” is used when you press and release the right
mouse button to open a pop-up menu.
• Bold type appearing in the text or a procedure is used to indicate the
command name, button, function or item to be selected/activated.
• Italic type appearing in the text or in a procedure is used to indicate the
menu name, dialog box name or field name.
• Tips and notes appear with the appropriate indication.
For example:
This is an example of a note that you may encounter throughout this User
Guide.
System Requirements
• Microsoft Internet Explorer version 4.0 or higher
• Operating system for the Web Server: Operating System NT Server with
Option Pack 4 or Windows 2000 Server
• Operating system for the server Client: Windows 95/98/ME/NT/2000 or
Windows XP
• Pentium III 400MHz, 128MB RAM, 200MB Disk Space
The Web pages display is optimized to a desktop area of 768 x 1024 pixels. In
Internet Explorer, the View Text Size should be set to Medium.
Non-Latin languages, such as Japanese and Chinese are only supported in
Microsoft Internet Explorer.
1-4
Page 15
MGC WebCommander User’s Guide
Cookies
Cookies must be enabled in the Web browsers, otherwise WebCommander
will not function properly.
Enabling Cookies in Microsoft Internet Explorer
To enable cookies in Internet Explorer:
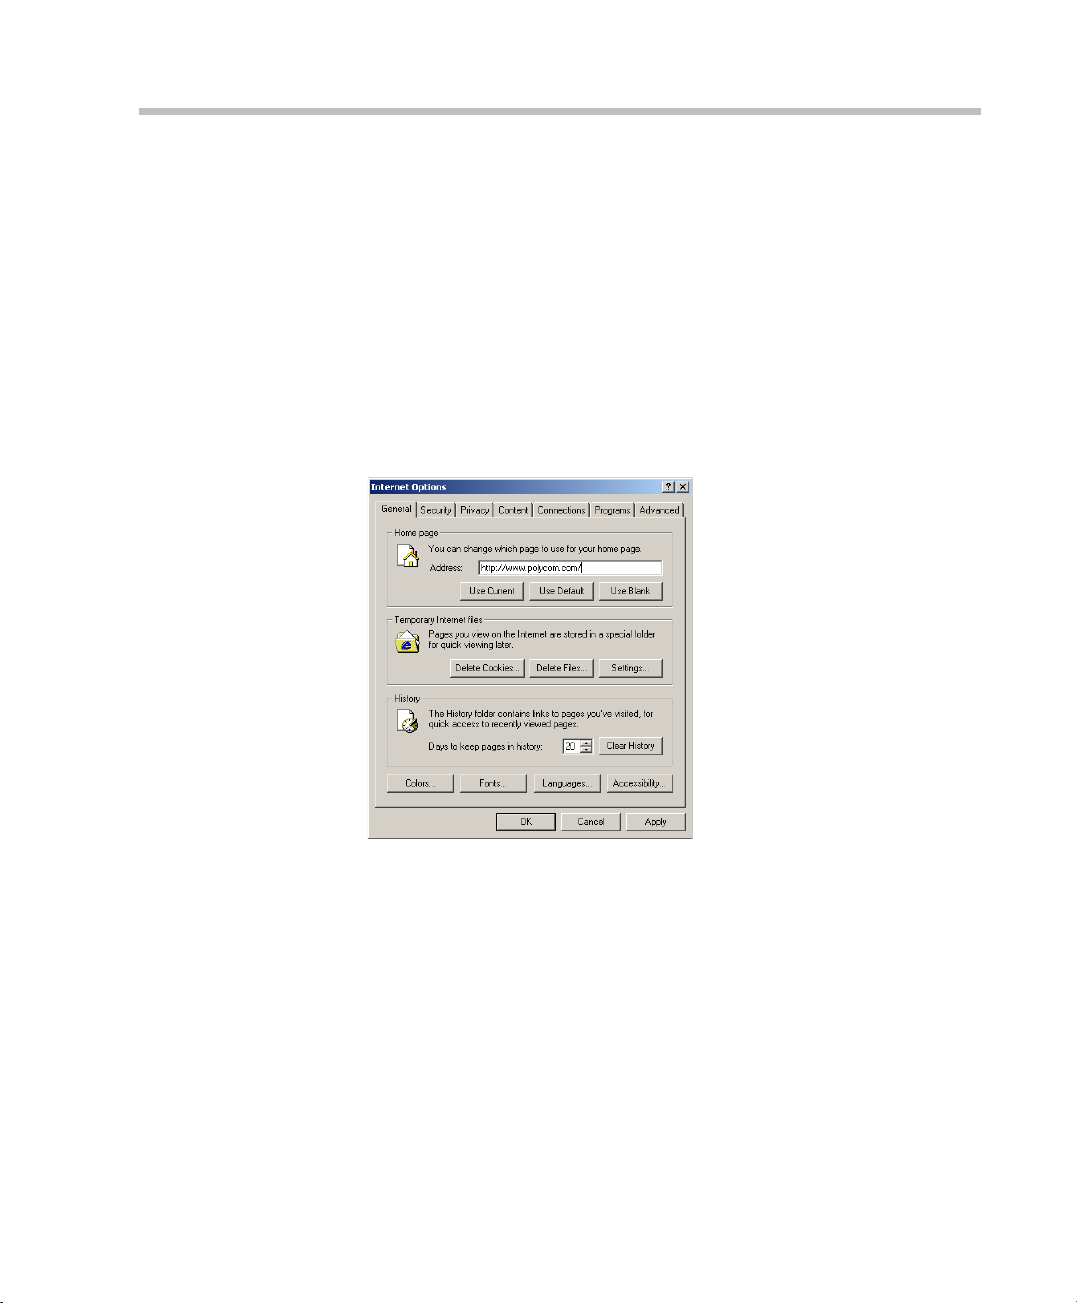
1. In the Microsoft Internet Explorer application, on the Tool s menu, click
Internet Options.
The Internet Options - General window opens.
2. Click the Security tab.
The Security tab opens.
1-5
Page 16
Chapter 1 - Introduction
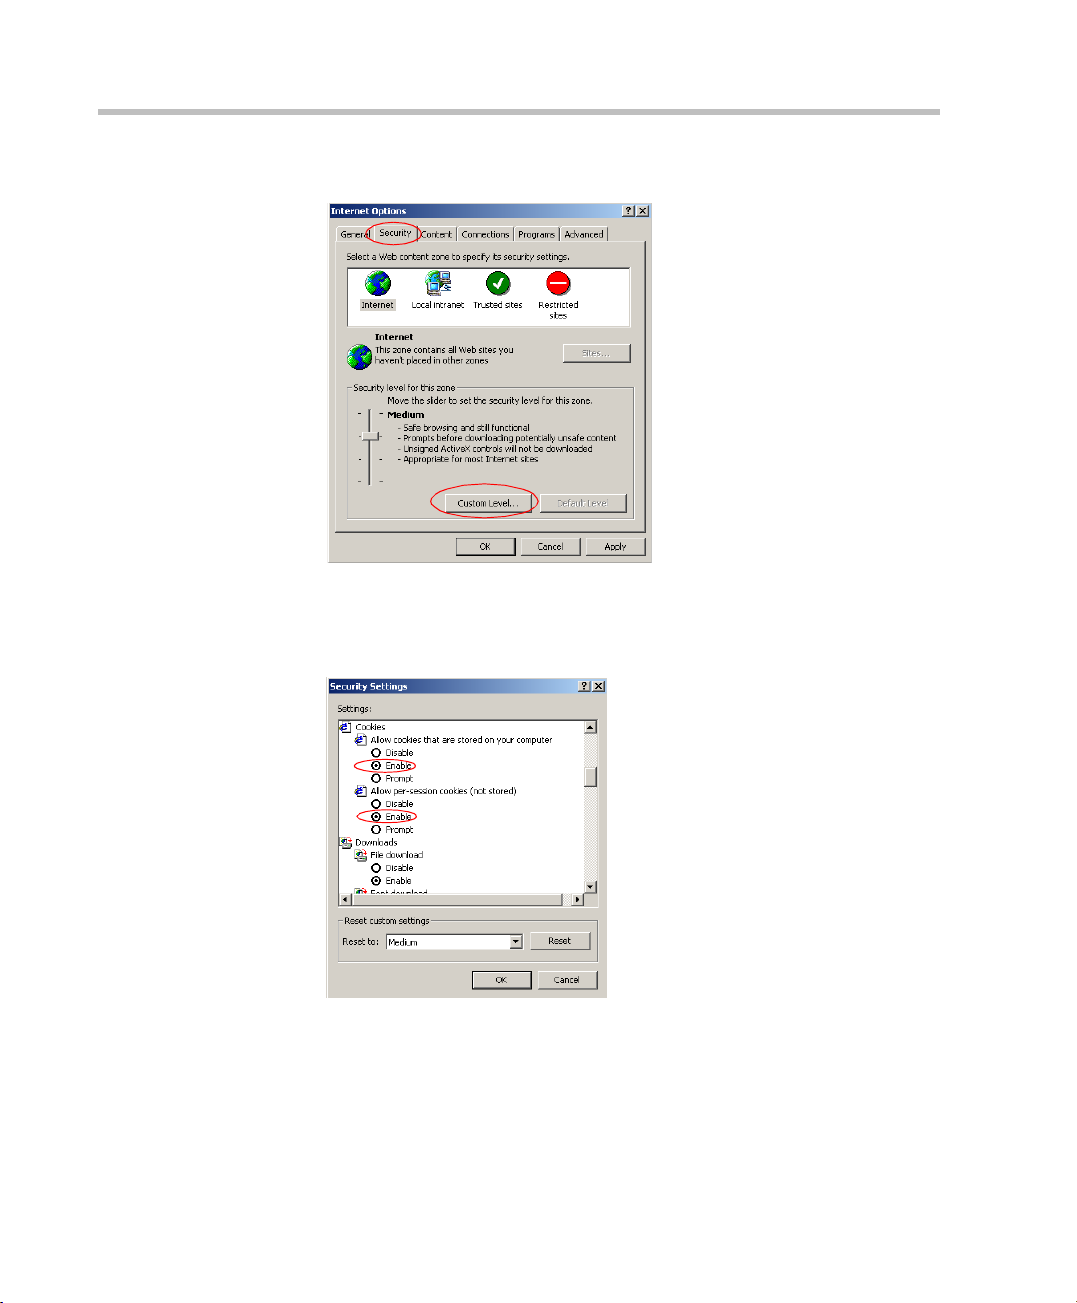
3. Click the Custom Level button.
The Security Settings window opens.
4. Scroll down until the Cookies entry is shown and make sure that both
options are set to Enable.
1-6
5. Click OK.
The system returns to the Internet Options – Security window.
6. Click OK.
Page 17

2
Connecting to WebCommander
You can connect to the WebCommander Web site in one of two ways using:
• Windows Authentication
• WebCommander User Login name and password
Connecting to WebCommander Web Site using Windows Authentication
The Windows Authentication mechanism allows users registered with the
network servers to access the MGC WebCommander Web site using their
Windows login name and password. To enable the Windows Authentication
working mode, the MGC Web Site (ConfSiteV8_0) must be configured
accordingly in the IIS application.
Windows users with access rights to the WebCommander Web site are
defined automatically by importing their name and password from the
Windows domain. Additional parameters are manually added to the User
definition in the Web Server Manager–Users table. For further information
see the MGC Web Manager Installation and Configuration Guide,
Configuring the MGC Web Server Manager.
To log into the WebCommander Web site using Windows
Authentication:
1. In the Web browser, enter its URL address using the following format:
http://[server IP address]/confsiteV8_0
2-1
Page 18
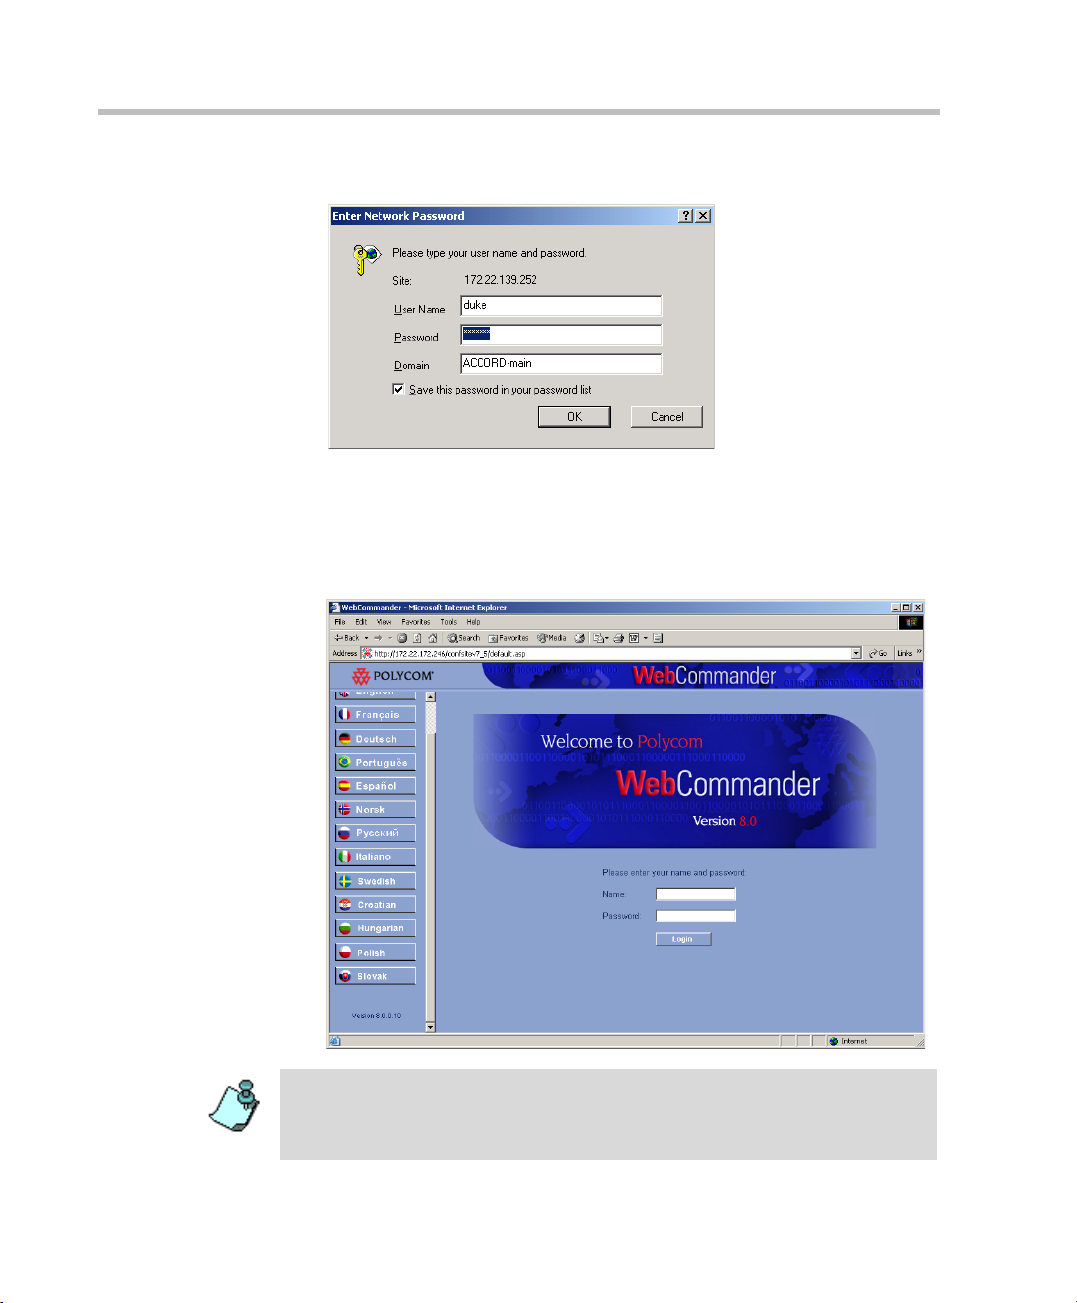
Chapter 2 - Connecting to WebCommander
The Enter Network Password dialog box opens:
2. Enter your User Name, Password and network Domain as defined in
your network.
3. Click OK.
On first entry, the WebCommander Welcome window opens.
2-2
When you access the WebCommander Web site for the first time, and the
default language is other than the required language, select the language in
Welcome window. With any subsequent log-on, the Welcome window does not
appear.
Page 19

MGC WebCommander User’s Guide
4. Select the language, and then click the Enter button.
If the site is already displayed in the required language, click the Enter
button.
From this point on, the system remembers the selected language and will skip
this window when logging into the WebCommander site, displaying the New
Meeting window.
To select another language later, click the Language Selection option in the
Main menu. For more details, see Chapter 3, “Language Selection” on
page 3-8.
Connecting to WebCommander Web Site using WebCommander User Name and Password
When using WebCommander User name and password, only users manually
defined in the Web Server Manager–Users table can log into the
WebCommander Web site.
To Log into the WebCommander Web site using WebCommander User
Name and Password:
1. If your Web browser is not active, open it now. If necessary, connect to
your Internet service provider (ISP).
2. Enter the address of the WebCommander site. The address is provided by
your system administrator or conferencing service provider.
2-3
Page 20
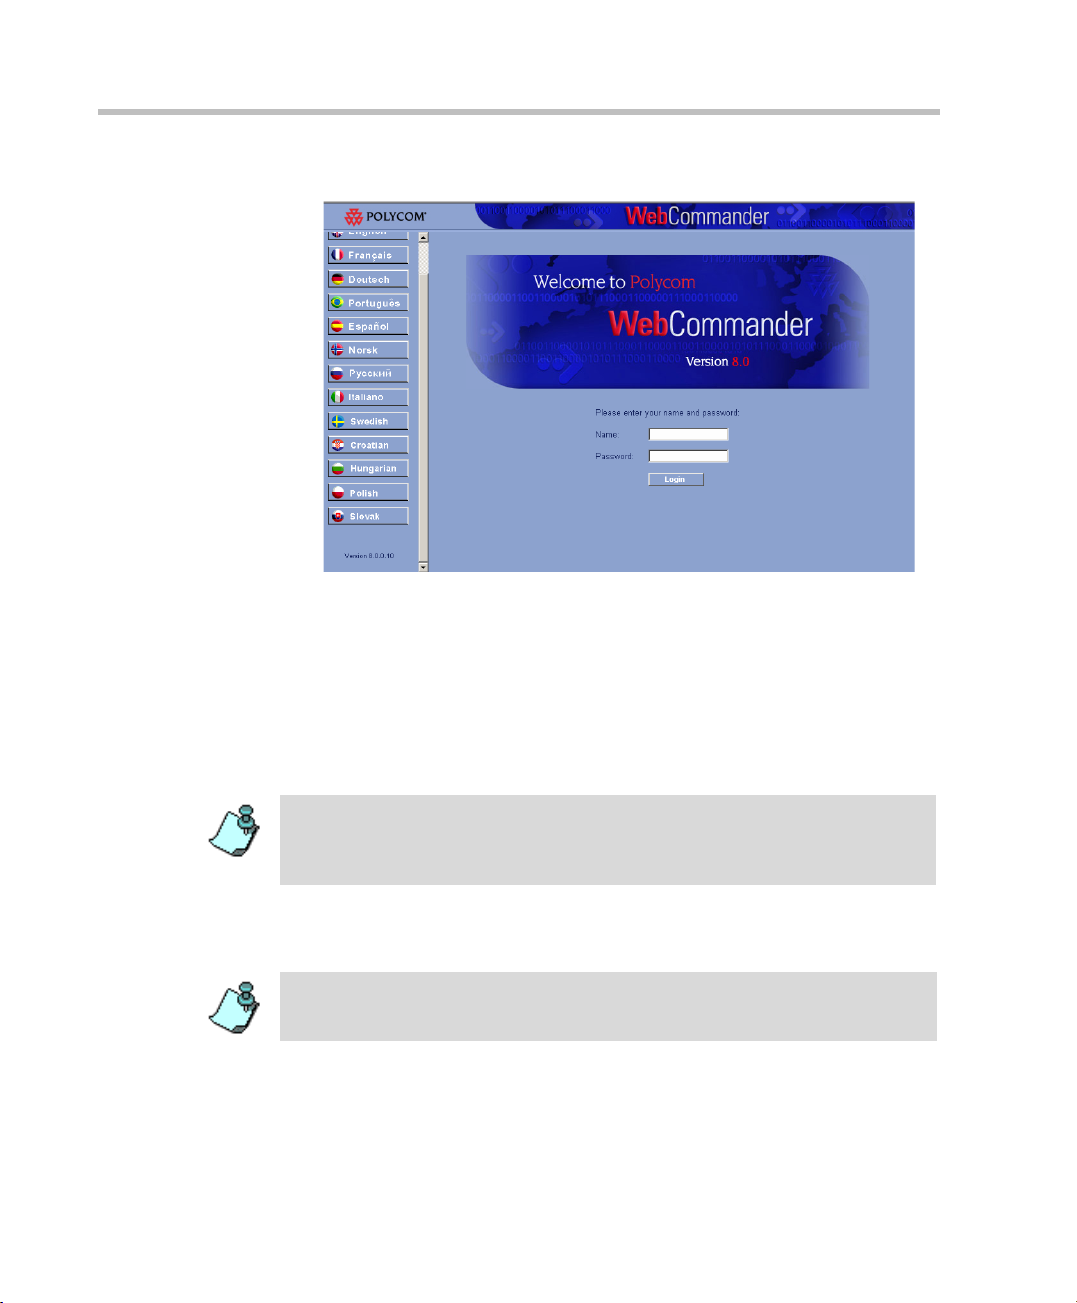
Chapter 2 - Connecting to WebCommander
The WebCommander Login window opens.
3. If the Web site page is not displayed in the desired language, click the
button of the language to be used in the MGC WebCommander to
display the screens, menus, and commands. For example, click the
English button to display the Web site pages in English.
2-4
Languages other than French and English can be enabled from the MGC
Web Commander Configuration tool. For details, see the MGC Web
Server Manager Installation and Configuration Guide, Chapter 7.
If a language other than the default language is selected, a cookie is sent to the
Web browser. The next time the Login window is opened, the language details
are read from the cookie and the user interface is downloaded with the correct
language.
4. Enter your Name and Password, and then click the Login button or press
Enter.
If you enter the wrong password, you may need to restart your Web browser in
order to continue the login process.
5. Depending on the status of the On Going conferences that you have
permission to monitor, one of the following windows opens:
Page 21
MGC WebCommander User’s Guide
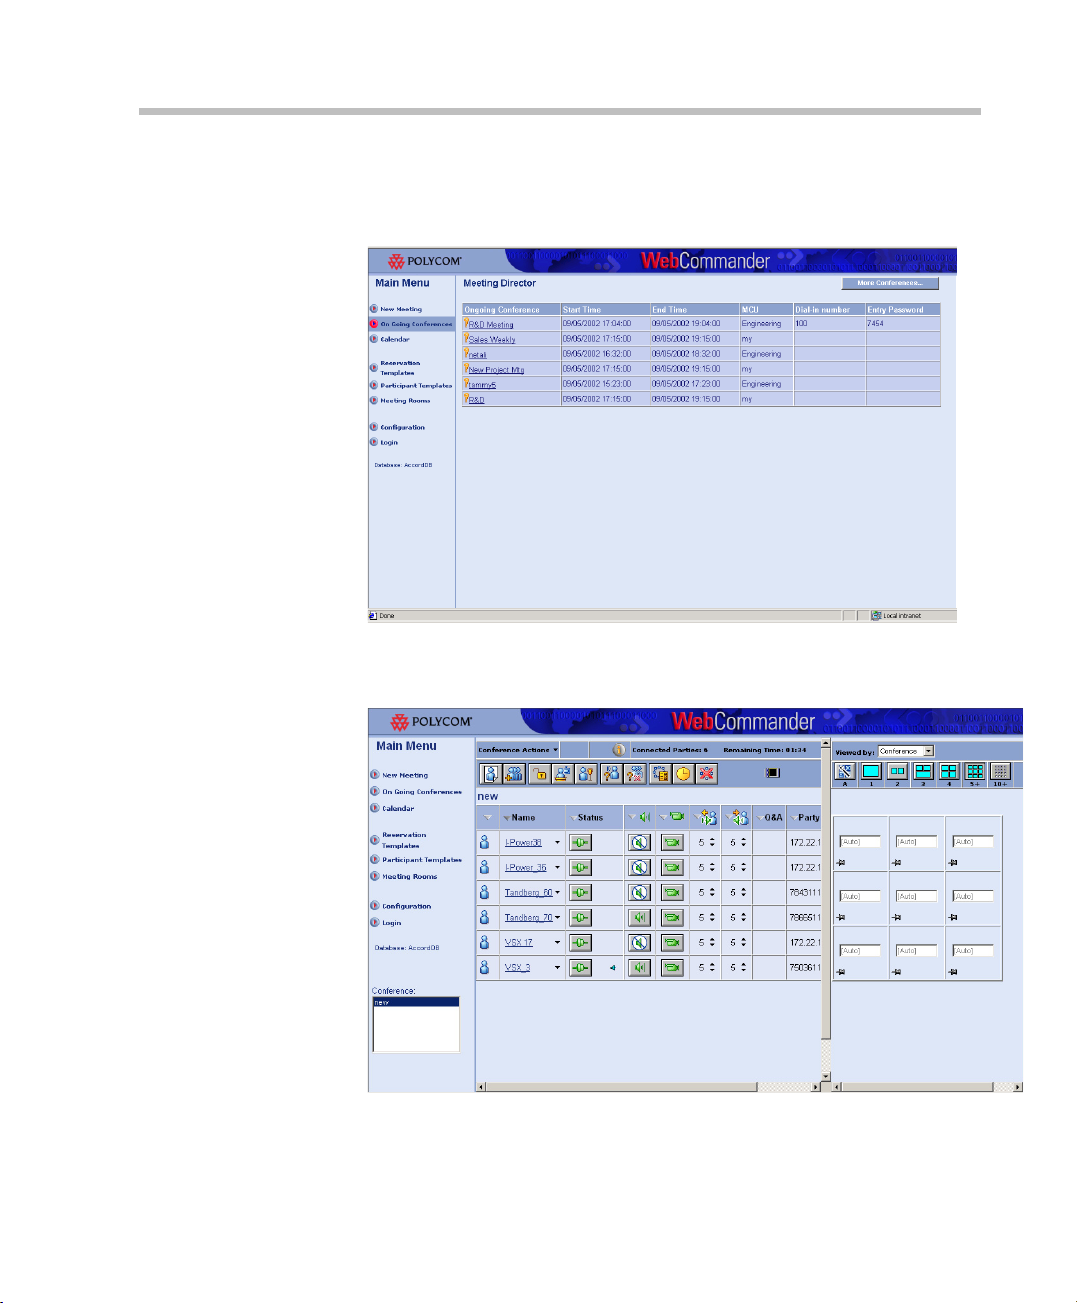
• Several On Going conferences - The Meeting Director window listing the
On Going conference list opens, enabling you to select the conference to
monitor:
• One On Going conference - The Meeting Director window opens, enabling
you to monitor this conference:
2-5
Page 22
Chapter 2 - Connecting to WebCommander
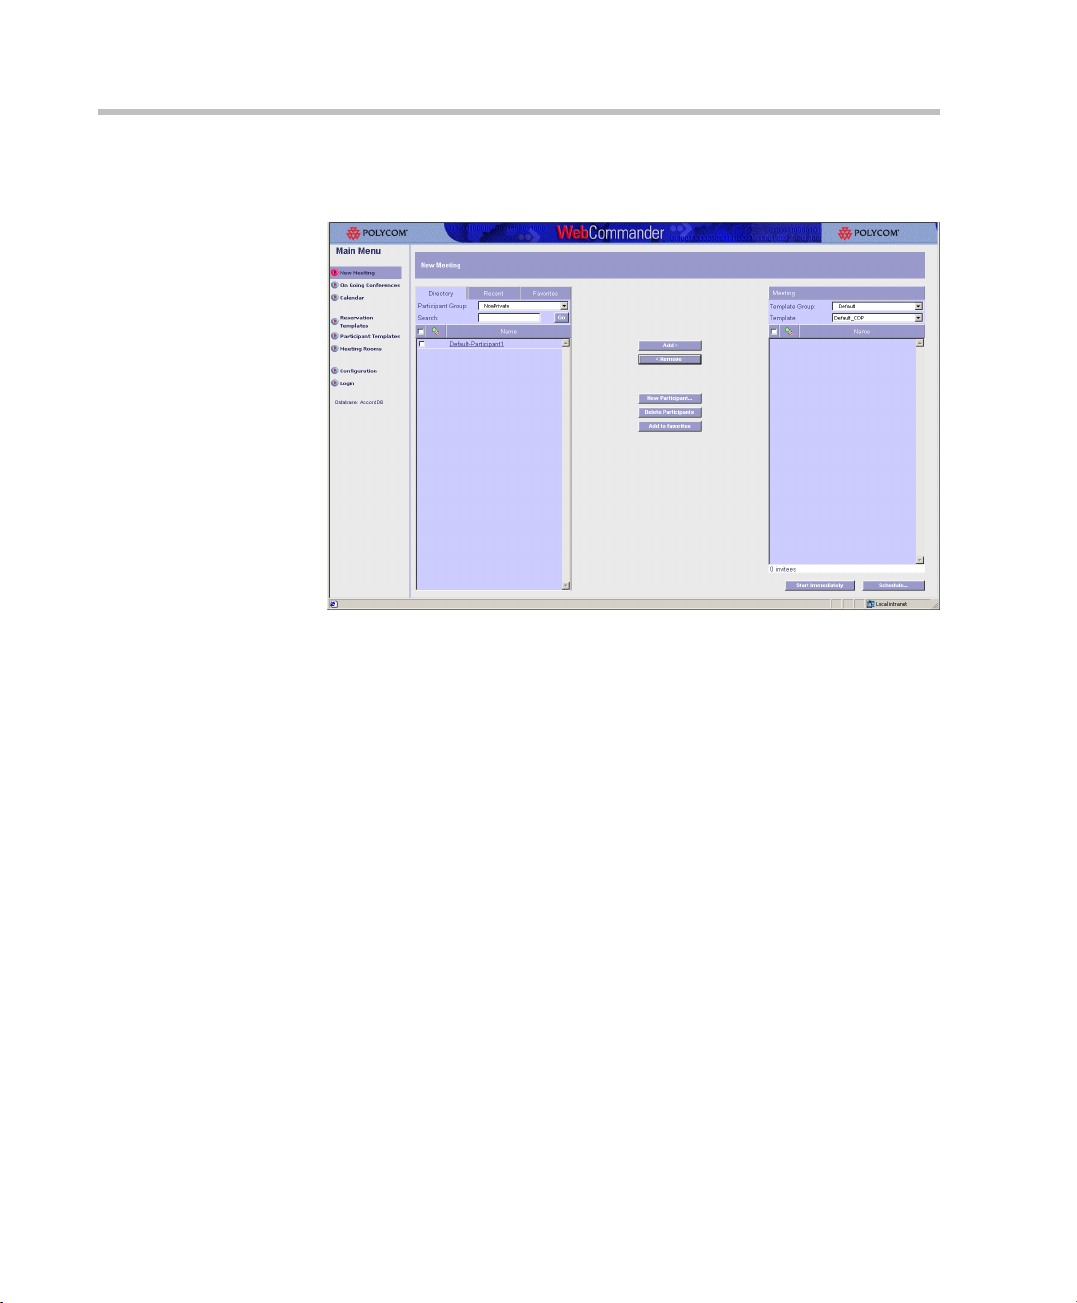
• No On Going conferences - The New Meeting monitor window opens,
enabling you to start a new conference:
Connecting to WebCommander Web Site using a WebPortal
The WebCommander can be accessed using a WebPortal. Depending on the
WebPortal configuration you may be prompted for a user name and password.
Three WebCommander conferencing features can be accessed from a Web
Portal via links that are available in the Web Portal:
• Calendar - for conference reservations
• On Going Conference - for monitoring ongoing conferences
• New Meeting - for starting on going conferences
For more information, see Web Server Manager - User’s Guide, Appendix A.
2-6
Page 23
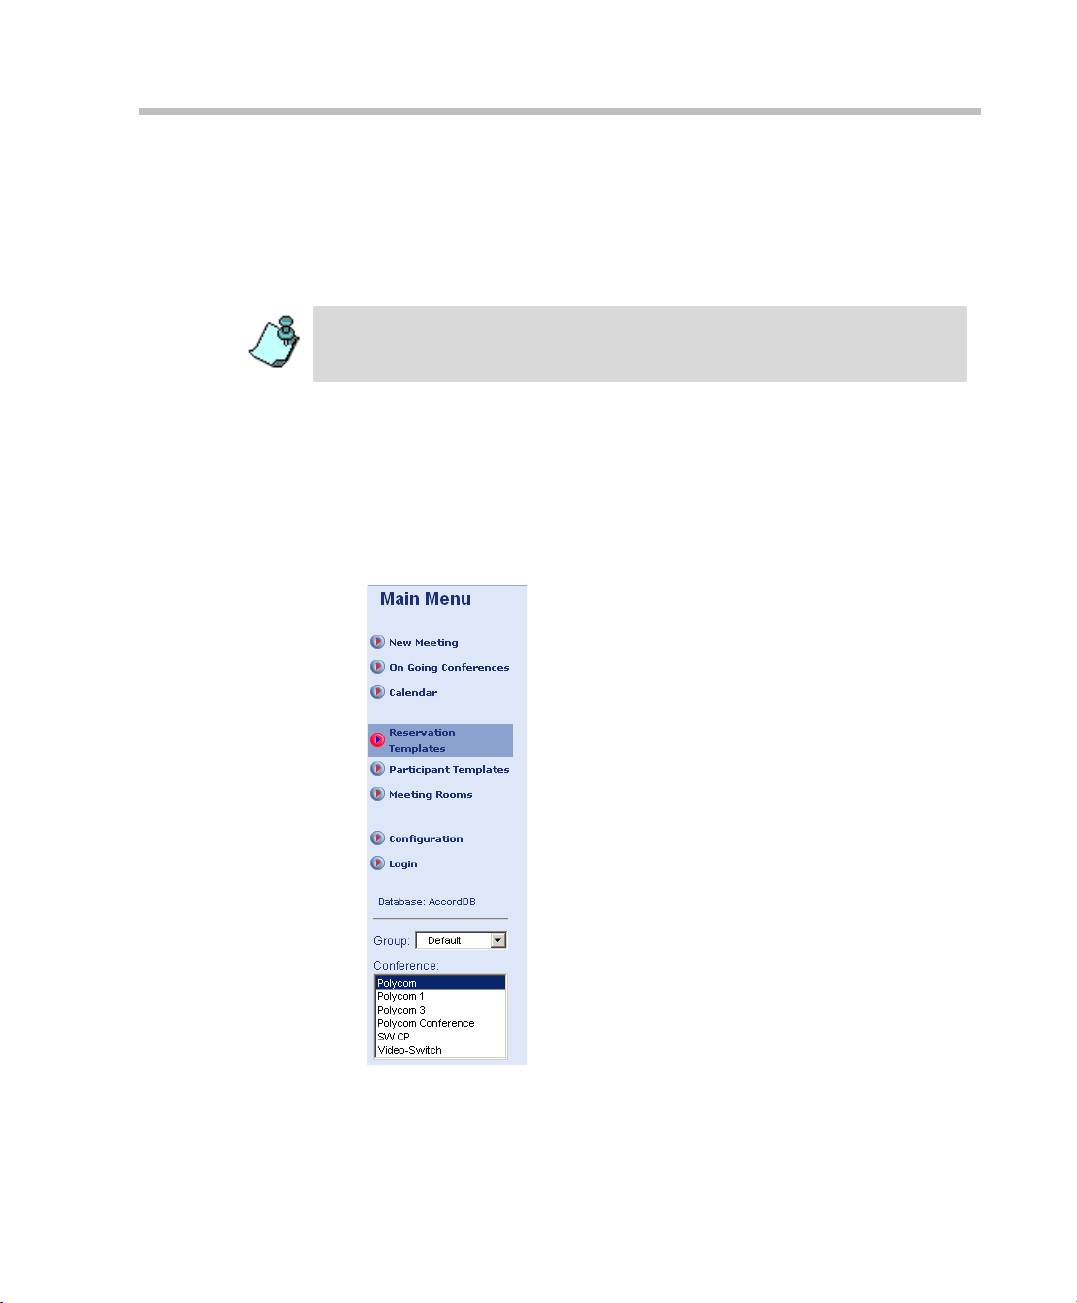
Main Menu
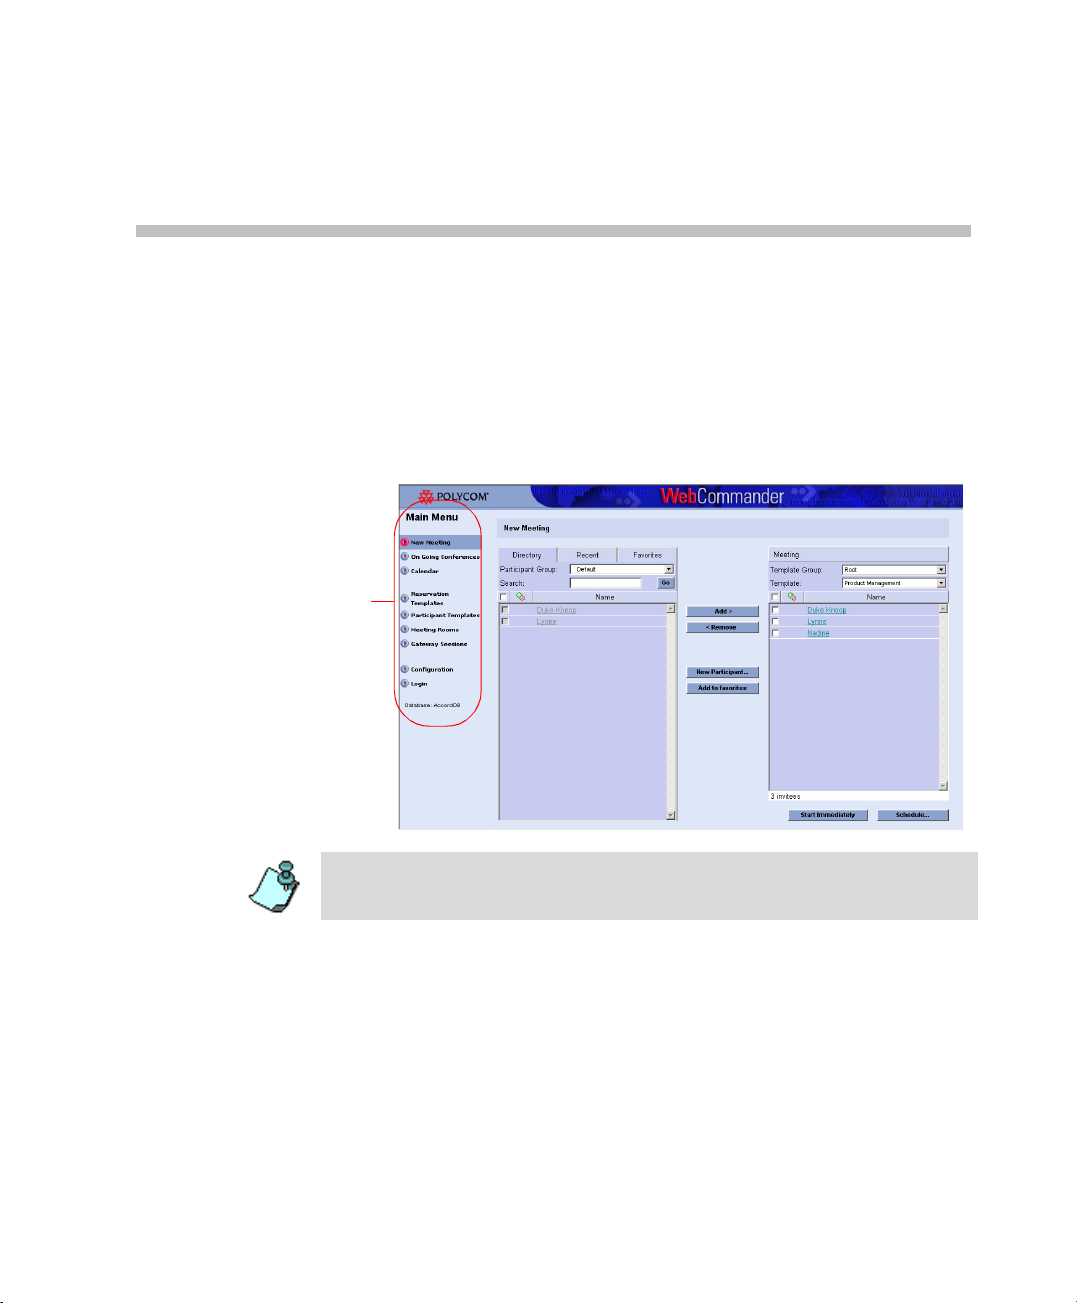
In the WebCommander site, the Main Menu appears in the left pane of all
screens enabling quick and easy access to all system modules. The items that
appear on the menu vary according to your permissions.
Main
Menu
3
The Web page display is optimized to desktop area of 768 x 1024 pixels. In
Netscape Navigator, select Font Size →Small. In Internet Explorer, select
View→Text Size, Medium.
3-1
Page 24

Chapter 3 - Main Menu
Main Menu Links
The following links are available in the Main Menu. Clicking the link opens
the appropriate window, as described below.
• New Meeting – Displays the New Meeting window to create and launch
a new conference quickly. For more information, see Chapter 4, “New
Meeting Window”.
• On Going Conferences – Displays a list of On Going Conferences to
which the user has access rights. For more information, see Chapter 5,
“Monitoring an On Going Conference”.
• Calendar – Opens the Reservation Calendar window which lists
existing reservations. You can view the reservations in a daily, weekly or
monthly calendar. Using the reservation link from the calendar, you can
access the reservation properties. For more information, see Chapter 6,
“Reservation Calendar”.
• Reservation Templates – Displays the Conference Template window,
from where you can create a new Conference template or choose an
existing Conference template to modify. For more information, see
Chapter 9, “Conference Templates – Partial Parameters View” or see
Chapter 10, “Conference Templates – Full Parameters View” on
page 10-1.
• Participant Templates – Opens the Participant templates list, from
where you can create a new Participant template or choose an existing
template to modify. Only the Participant templates assigned to groups to
which you has access rights can been viewed. For more information, see
Chapter 11, “Managing Participant Templates”.
• Meeting Rooms – Opens the list of Meeting Rooms assigned to all the
groups to which you have access rights. A Meeting Room is a
reservation whose default duration is set to 2 hours without resource
allocation. The reservation is saved in the MCU memory and is inactive.
The reservation remains inactive for an unlimited time, until the first
participant connects to it. The Meeting Rooms list, which is saved on the
MCU, is updated every 30 seconds. For more information, see Chapter
8, “Meeting Rooms List”.
• Configuration – Opens the Configuration window. From here you can
change the password to the WebCommander application and add your
3-2
Page 25

MGC WebCommander User’s Guide
personal details (E-mail address and WebOffice URL). For more
information, see “Configuration” on page 3-5.
• Login – Returns you to the Login window to login as a different user and
to select another language. This link is available in the WebCommander
user Log-in.
• Language Selection – Opens the language selection window, enabling
you to select a different language in which the WebCommander is
displayed. This link is displayed when using Windows Authentication to
login to the WebCommander site.
The items available in the Main Menu pane depend on the product type, the
View Mode and the user permissions for the current user. For more details on
View Mode, see the MGC Web Server Manager User’s Manual.
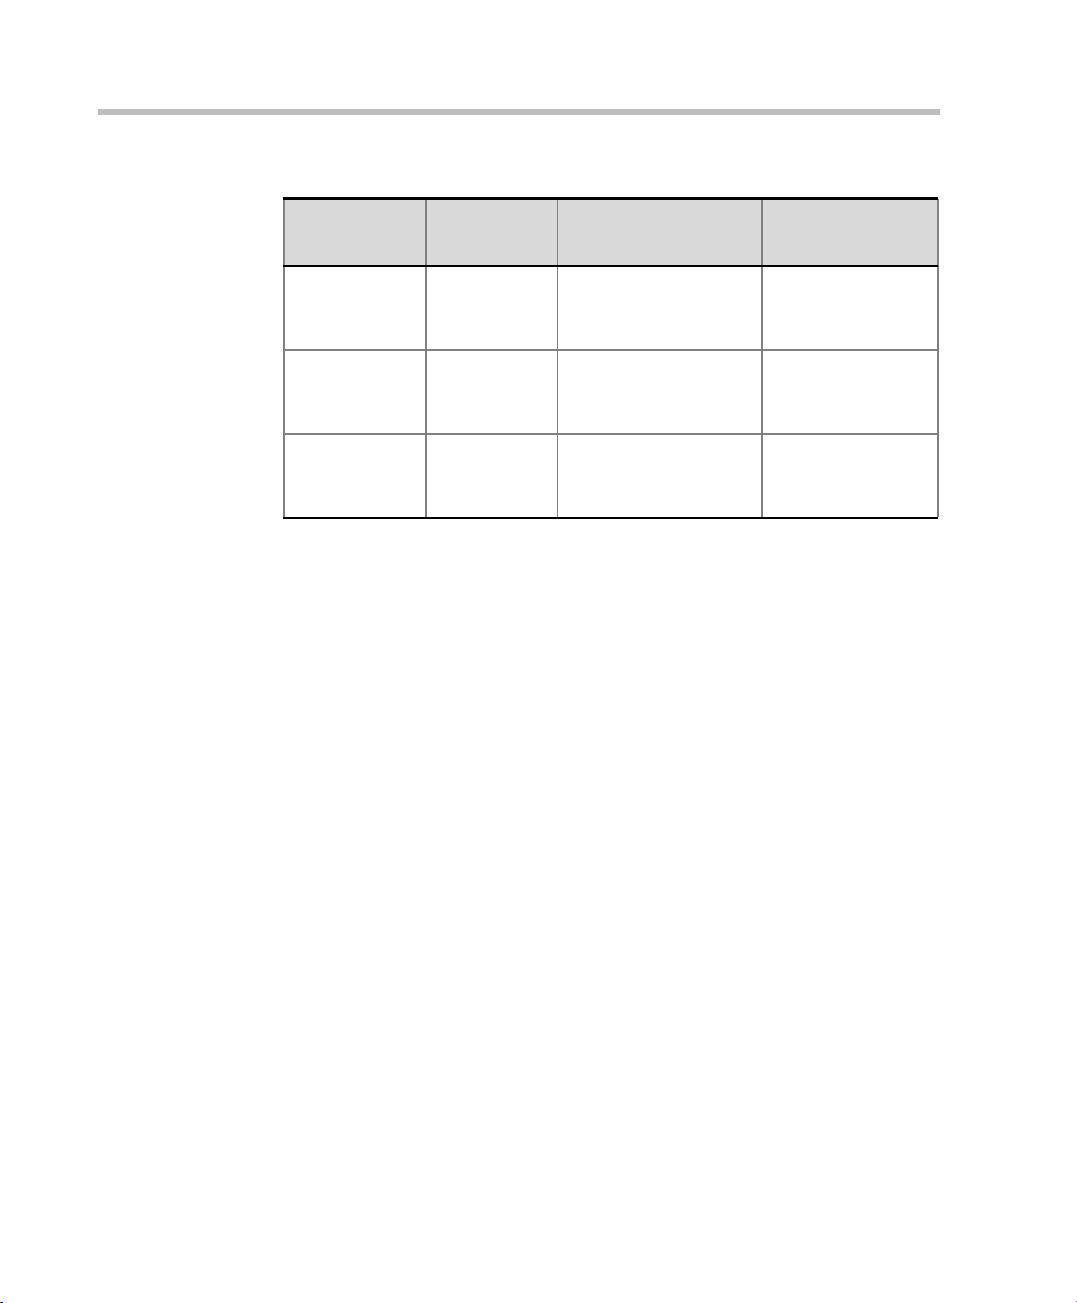
Table 3-1 details the possible items to be displayed in the Main Menu pane
and their required View Mode, permissions and product type.
Table 3-1: Main Menu Items: View Mode, Permission and Product Dependencies
Menu Item
New Meeting Basic or
On Going
Conferences
Calendar Basic or
Reservation
Templates
Participant
Templates
Meeting
Rooms
Required
View Mode
Administrator
Basic or
Administrator
Administrator
Administrator Read (at least) for
Administrator Read (at least) for
Basic or
Administrator
Required Permission
Enable Meeting
Scheduler
Read (at least) rights
for the Reservation
Temp l ate s Gr oup
Enable Meeting
Director
Enable Reservation
Calendar
assigned Reservation
Templates group
assigned Participant
Templates group
Enable Meeting
Rooms List
Required Product
Type
Meeting Scheduler
or Professional
Meeting Director
or Professional
Meeting Scheduler
or Professional
Meeting Scheduler
or Professional
Meeting Scheduler
or Professional
Meeting Director
or Professional
3-3
Page 26
Chapter 3 - Main Menu
Table 3-1: Main Menu Items: View Mode, Permission and Product Dependencies
Menu Item
Required
View Mode
Configuration Basic or
Administrator
Login/
Language
Basic or
Administrator
Selection
Database Basic or
Administrator
Required Permission
Required Product
Type
Change Password Meeting Director,
Meeting Scheduler
or Professional
WebCommander user
login/Windows
authentication
User must be defined
in each of the
databases
Meeting Director,
Meeting Scheduler
or Professional
Meeting Director,
Meeting Scheduler
or Professional
3-4
Page 27
Configuration
From the Configuration window, you can change your WebCommander Web
site password and you can add/change/delete your E-mail address and
Web Office URL.
• This menu/window is not relevant to Windows Authentication users.
• In the Windows Authentication mode, the password can be changed within
Windows.
You can change the password only if the appropriate permission is set in the
Web Server Manager. The password can also be changed directly from the
MGC Web Server Manager. For more information, refer to the MGC Web
Server Manager User’s Guide, Chapter 4.
To change the configuration:
1. In the Main Menu pane, click Configuration.
MGC WebCommander User’s Guide
3-5
Page 28
Chapter 3 - Main Menu
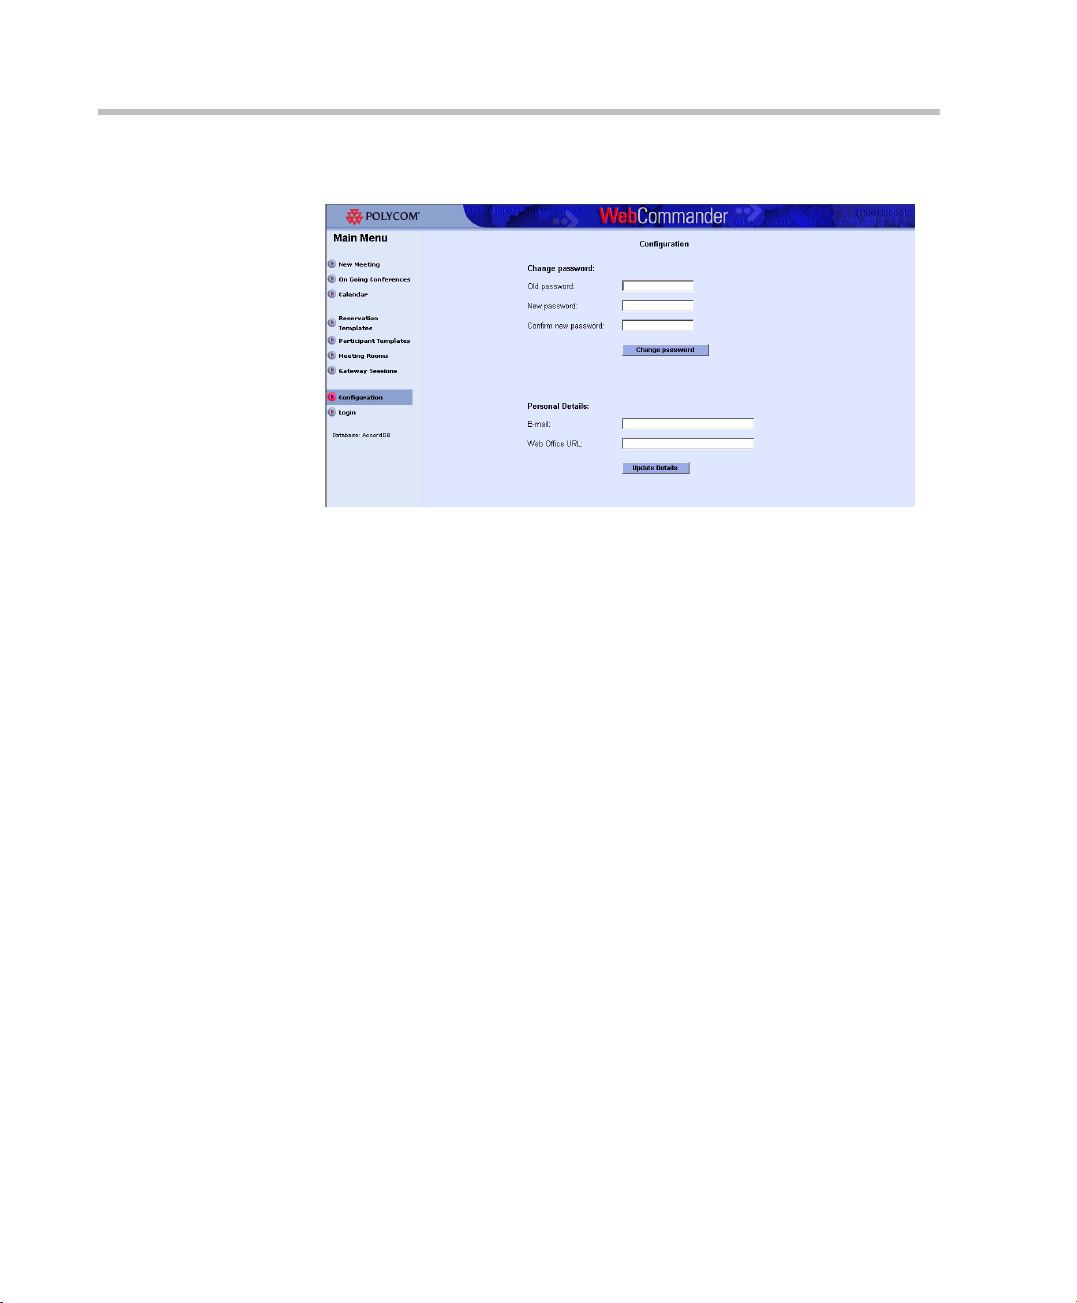
The Configuration window opens.
This window is split into two areas:
Change Password - To change your password to the WebCommander
site.
Personal Details - To add or update your E-mail address and WebOffice
URL.
The E-mail address and WebOffice URL are optional. If an E-mail
address is not specified, you will have to specify your E-mail address
when sending out a meeting notification via E-mail (for more details see
Chapter 4, “Sending an E-mail to Conference Participants” on page 4-
14.) If a WebOffice URL is not specified, you will not have the option to
add a WebOffice invitation to the signature of the meeting notification Email.
2. Fill in the Old Password, New Password and Confirm New Password
fields.
3-6
3. Click the Change Password button.
A confirmation box opens, indication the password was successfully
changed.
4. In the Personal Details area, enter your E-mail address.
5. In the WebOffice URL box, enter your WebOffice URL.
6. Click Update Details to save the information.
A confirmation box opens, indicating that the data was successfully
updated.
Page 29
7. To exit the Configuration window, click one of the options in the Main
Menu pane.
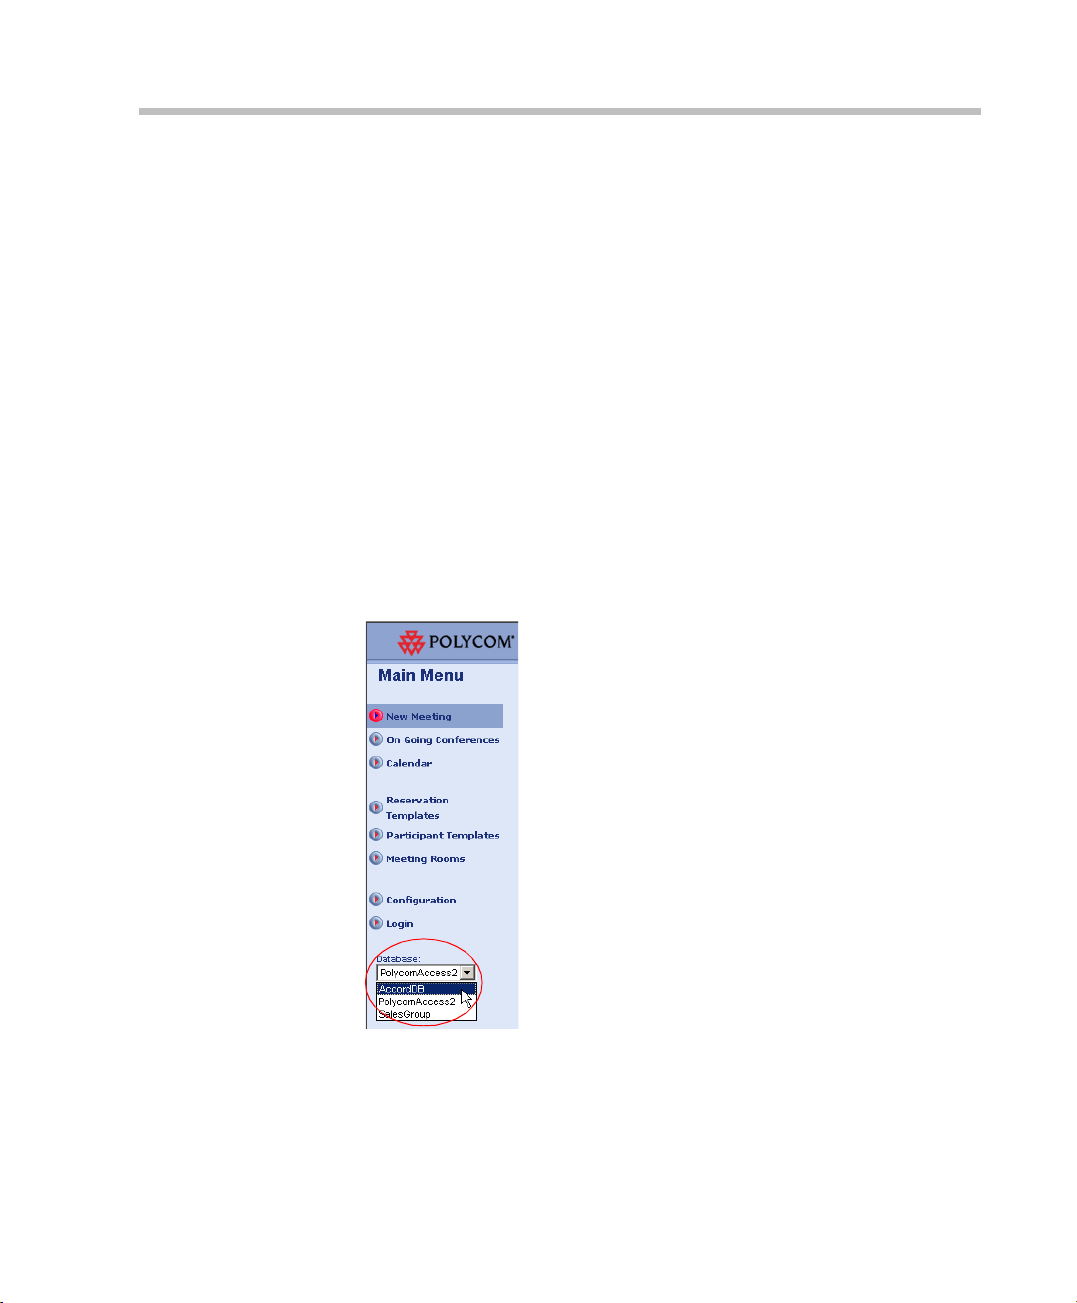
Database Selection
If more than one database is configured in the WebCommander, you can
select the database for the current session. The database box indicates the
name of the database currently selected for retrieval and management.
The Database drop-down list includes all the databases configured in the
ODBC that are accessible from the Web (for more details, see the MGC
WebCommander Web Manager Installation and Configuration Guide,
Chapter 5) and in which the user is registered.
To select the database:
•In the Database drop-down list, in the Main Menu pane, select the name of
the database containing the Participant and Conference templates to be used
to start conferences and monitor On Going conferences.
MGC WebCommander User’s Guide
3-7
Page 30
Chapter 3 - Main Menu
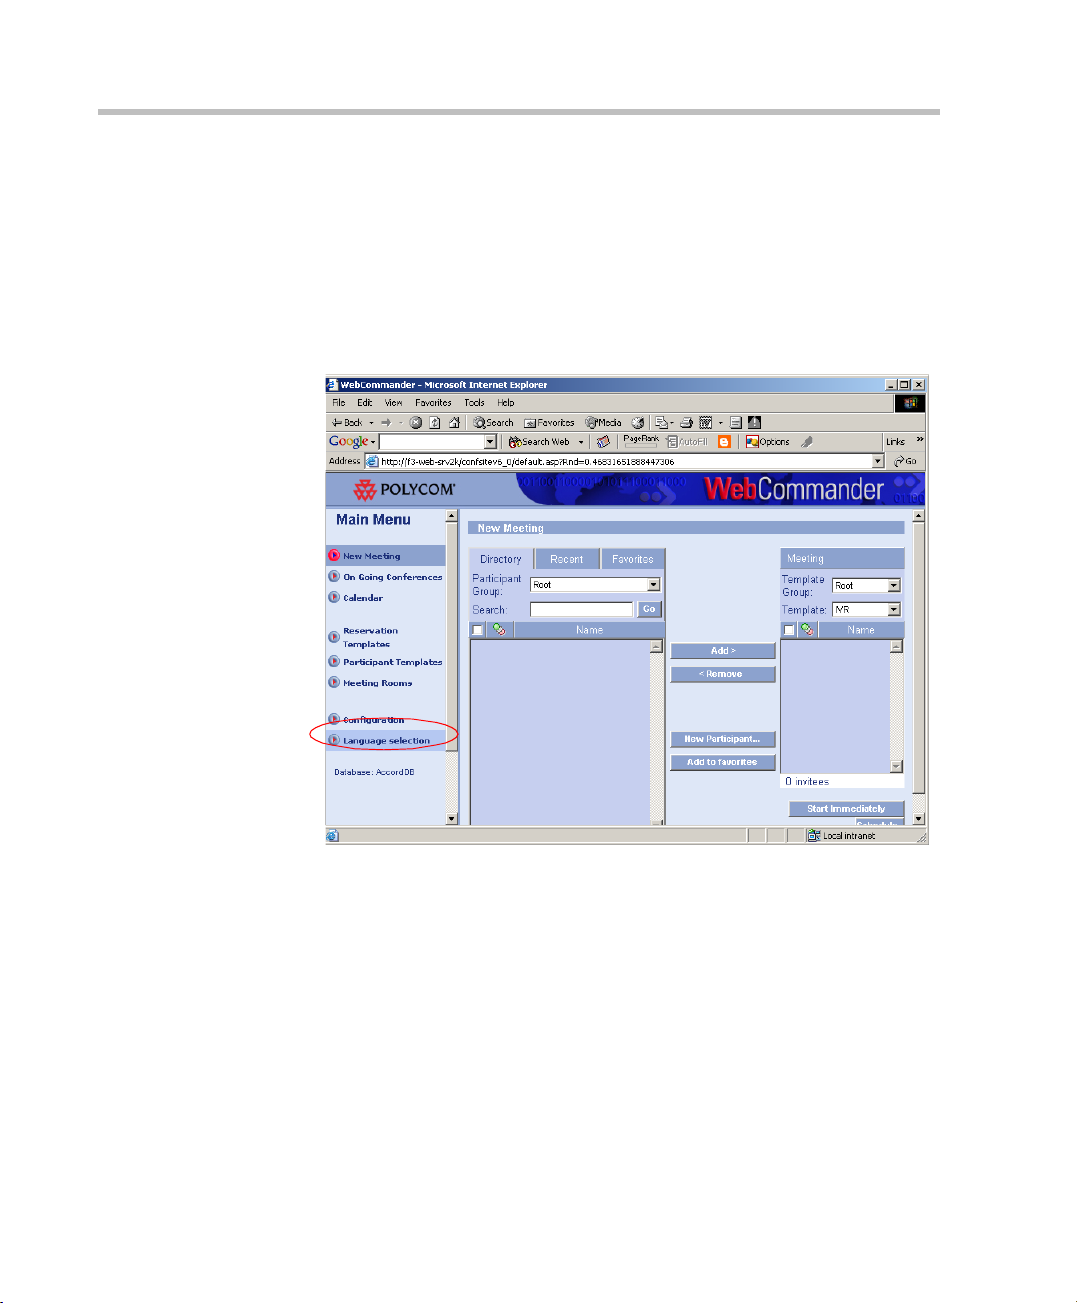
Language Selection
In Windows Authentication mode, after first entry, the Welcome/Language
Selection window is skipped. To change the WebCommander language,
access the Language Selection window from the Main menu.
To change the language of the WebCommander Web site:
1. In the Main Menu, click Language Selection.
3-8
Page 31

MGC WebCommander User’s Guide
The Welcome/Language Selection window opens.
2. Click the required language button.
The Web site pages are refreshed and displayed in the selected language.
3-9
Page 32

Chapter 3 - Main Menu
Resizing the Window Panes
The main window is comprised of two panes. Each pane can be resized by
dragging the edge between the Main Menu pane and the List/parameters pane
(rightpane), which enables you to view additional information. You can also
display additional information in the List or Parameters pane (right pane)
using the arrows and scroll bars.
Dragging the
Browser pane
edge
3-10
Using the
Scroll bars
Page 33

New Meeting Window
The New Meeting window is organized in a manner that enables you to
quickly and easily start/schedule a new meeting.
This window can be viewed only:
• When using WebCommander Professional or Meeting Scheduler. Users
using Meeting Director can only monitor On Going conferences, but cannot
schedule them from the WebCommander.
• With users with Permission to start schedule new Meetings.
The New Meeting window is divided into four general areas:
• Participants Lists – Displays the list of defined participants.
• Participant Actions – Contains command buttons that enable you to
add or remove participants from the meeting, define new participants
and add participants to the Favorites list.
• Conference Details – Displays the name of the selected Conference
template and the names of the participants assigned to that conference.
4
4-1
Page 34

Chapter 4 - New Meeting Window
• Conference Launch Options – Contains command buttons that enable
you to start the conference immediately or to schedule it to start in the
future.
Conference Details
4-2
Participants
Lists
Participants
Actions
Conference Launch Options
Page 35

Participants Lists Area
Various participants lists are used to quickly add participants to the
conference. You can choose to view the list of available Participant templates
by clicking one of the three tabs:
• Directory
• Recent
• Favorites
You can select participants from all the lists for any conference.
The following figure details the actions that are common to all of the tabs in
the Participants List area.
MGC WebCommander User’s Guide
Select the check box next to the
header row to select all available
participants in the list.
Select the check box next to
the participant to be added to
the meeting
Select the desired Participant
Group from the drop-down list
Participants that
cannot be added are
unavailable for
selection
Type the first few letters of the
desired participant name and
click Go to jump to it in the list
4-3
Page 36

Chapter 4 - New Meeting Window
Directory Participants List
The Directory list displays pre-defined participant templates from the
following sources:
• Participant templates stored in the WebCommander database
• PathNavigator registered endpoints
• Polycom Datastore database templates
Participant Templates List
You can add new participants to this list.
To access the Directory List:
• Click the Directory tab and select a group from the list in the Participant
Group.
Select Directory to list all available Participant
templates in the selected group
4-4
You are required to select a database prior to accessing the Directory List.
Page 37

MGC WebCommander User’s Guide
PathNavigator and Polycom Datastore Templates List
The Polycom PathNavigator is an enterprise gatekeeper that enables you to
see when endpoints are online and to connect to them with a single click. In
such a case, you do not need to define the endpoints, as the definition is taken
from the gatekeeper.
Polycom Datastore is a new central database, where all Polycom applications
and endpoints interact and share stored information.
The PathNavigator and/or Polycom Datastore option is available only if your
enterprise uses the PathNavigator and/or Polycom Datastore database and it is
configured in the Web Server Manager. For more details, refer to the MGC Web
Server Manual, Installation and Configuration Guide Chapter 5.
To access the PathNavigator or Polycom Datastore Directory:
• Click the Directory tab, and choose PathNavigator or Polycom
Datastore from the Participant Group.
The presence information of each participant defined in the list is
displayed. A green closed circle indicates the participant is online. A
grey broken circle indicates that the participant is offline.
Select Directory to list all
available Participant templates
in the selected group
Participant presence information
Select PathNavigator or Polycom
Datastore from the drop-down list
4-5
Page 38

Chapter 4 - New Meeting Window
Recent Participant List
The Recent list is automatically created by the system. This list is made of
participants who have recently attended a meeting. The list holds up to 20
names.
You cannot add new participants to this list. If the Recent tab is selected and
you define a new participant, the new participant is added to the Group
currently selected in the Directory tab, even if it is not shown.
To access the Recent List:
• Click the Recent tab to view a list of participants who have recently
attended a meeting.
Click Recent to view
the last 20 participants
attending meetings
Click Clear to remove all
participants from the
Recent list
4-6
Page 39

Favorites Participant List
The Favorites list is used to facilitate the selection of participants to join a
meeting. You can use one of the following methods to add a participant to the
Favorites list:
• During the definition of a new participant, select the Add to Favorites
check box in the Participant Templates window. For more details, see
Chapter 11, “Managing Participant Templates” on page 11-1.
• Select the check box next to a name in the Directory or Recent
Participant List, and then click the Add to Favorites button
To select from a list of favorites:
• Click the Favorites tab.
MGC WebCommander User’s Guide
Click Favorites to list all
Participant templates that have
been added to Favorites
Click the Delete from
Favorites button to remove
selected participants from
the Favorites list
4-7
Page 40

Chapter 4 - New Meeting Window
Participant Actions Area
There are five command buttons that are used to add, remove or delete
participants to the meeting, add participants to the Favorites list and define a
new participant:
• Add – Adds selected participants in Participant Lists area (left pane) to
the Conference Details area (right pane). These participants are not
automatically saved in the Conference template.
• Remove – Removes selected participants from the Conference Details
area (right pane).These participants are not automatically deleted from
the Conference template.
• New Participant – Opens the Participant Dialog Page for defining a
new participant.
• Delete Participant – Deletes any selected participant from the Directory
list.The Delete Participants is performed only if the user has Write (W)
permission to the selected Group. If the user does not have the Write
permission to the Group, the Delete Participant button is displayed but
the delete operation is not performed and an appropriate message is
displayed.
• Add to Favorites – Adds selected participants to the Favorites list.
4-8
Participant action buttons
Page 41

Conference Details Area
The Conference Details area displays the following information:
• Templ ate G rou p – The group in the database where the conference
template is stored.
• Templ at e – The name of the Conference template containing the
conference parameters. If the Conference template includes participants,
they are listed below the template name. You can move one, several or all
of these participants from the meeting without removing them from the
template.
• Participants – Displays the names of the participants invited/added to
the new meeting. Green text indicates a participant defined in the
conference template. Blue text indicates a participant added for this new
meeting only. Any adding of new participants or removing of conference
template participants in the New Meeting window does not edit the
conference template; such changes affect the current meeting only.
MGC WebCommander User’s Guide
Select the Template Group
that holds the required
Conference template
Select the check box next to the name of a
participant to be removed from this meeting
Select the Conference
template on which to base
the new meeting
List of participants invited to
the meeting
Indicates the number of
participants included in this
meeting
4-9
Page 42

Chapter 4 - New Meeting Window
Conference Launch Options Area
There are two Conference Launch Options:
• Start Immediately – Attempts to start the new meeting now, without
changing the conference parameters on an MCU as defined in the
Conference template. If the meeting is scheduled successfully, a message
is displayed indicating the MCU on which the meeting was scheduled. If
there is a problem with the meeting, a message is displayed indicating
the nature of the problem.
• Schedule – Opens the Start window for scheduling the conference to
start at a later date, or modify certain conference parameters. For details,
see page 4-25.
4-10
Conference launch
options
Page 43

MGC WebCommander User’s Guide
Starting a New Meeting
Starting a New Meeting Using a Default Conference Template
The WebCommander is shipped with five default conference templates.
These templates do not include participant templates and all participants must
dial-in to the conference to participate in the Meeting. These participants are
not defined prior to the conference start and are described as undefined
participants. The system administrator can add templates to the Default
group. These templates contain participants. This flow describes how to start
a new meeting based on one of the WebCommander default templates.
To start a new meeting with undefined dial-in participants:
1. From the Template Group drop-down list, select the desired Conference
template resides. To use the Default Group one of the conference
templates shipped with the WebCommander, select the Default -
Template Group.
2. Select the template on which you would like to base the meeting. In the
Default Group, there are a number of default Conference templates:
• Default_COP
• Default_Video
• Default-Audio
4-11
Page 44

Chapter 4 - New Meeting Window
• SW CP (Software Continuous Presence for H.323-only conferences)
• Video-Switch
The administrator can modify the Default templates name and
parameters and can add new templates to the Defaults list. For more
information about the Default Conference template parameters, see
Appendix A.
3. Click the Sta rt Immediatel y button.
4-12
When starting a conference conflicts can occur between participants, for further
information see “Duplicate Booking” on page 4-16.
A default conference name is assigned to the conference, composed of
the name of template on which the conference is based, the user name or
the user’s E-mail address, and a randomly generated number.
When the conference name is based on the user’s name, the format is:
TemplateName_UserName_Random Number.
For example: Sales_Admin1_886.
When the conference name is based on the user’s E-mail address, the
format is: TemplateName_UserEmail_Random Number.
For example: Sales_jen@polycom.com_887.
For more information see the MGC Web server Manager and Installation
and Configuration Guide, Chapter 5, “Configuring the MGC Web Server
Manager”.
The system tries to start the conference on one of the MCUs currently
connected to the MGC Web Server. If several MCUs are connected to the
Page 45

MGC WebCommander User’s Guide
MGC Web Server and the MCU field is set to Auto in the Conference
template, the system selects the MCU to run the conference according to
the order in which they are defined in the MCU table or in the MCU list
assigned to the logged in user. If no MCU is connected to the MGC Web
Server, an appropriate error message is displayed.
If the conference was started successfully on the MCU and the Meet Me
Per Conference option is set for the conference, the system displays the
dial-in number that should be used by the conference participants, for
ISDN/T1-CAS and H.323 participants. Prior to the conference start a
dialog box appears listing the dial-in numbers to be used by ISDN/T1CAS and H.323 participants.
The ISDN phone number is based on the dial-in phone numbers range
defined for the MCU. If the PBX truncates the first digits these digits
have to be added to the number communicated to the conference
participants. The H.323 dialing string is composed of the H.323 Network
Service Prefix and the conference Numeric ID. The conference Numeric
ID is listed separately.
4-13
Page 46

Chapter 4 - New Meeting Window
Sending an E-mail to Conference Participants
Following the successful launch of a reservation or On Going conference, the
system enables you to send an E-mail with a meeting notification to
conference participants.
To send an E-mail:
1. Click OK to send an E-mail or click Cancel to move to the monitoring
window without sending an E-mail.
If you have clicked OK, the Send E-mail window opens.
Conference
invitation
4-14
Conference
password
Conference
dial-in numbers
Conference ID
Check box
Options
2. The To field lists the E-mail addresses that were defined in the
Participant templates assigned to the conference. If no E-mail address
were defined, or if you want to send the meeting notification to dial-in
participants that are not defined in advance, you can manually add their
E-mail addresses.
3. The From field displays the E-mail address of the meeting organizer if it
is defined in the Configuration-Personal Details window. For more
Page 47

MGC WebCommander User’s Guide
information on Personal Details, refer to page 3-5. If no E-mail address
was defined, you can add it manually.
4. The Subject field includes the conference parameters.
5. The E-mail body includes the conference start date and time, dial-in/dialout numbers, IP address or phone numbers, and the Conference Entry
password. You can edit the information displayed and add your own text.
6. Select the Send appointment in vCalendar format check box to enable
vCalendar notification. This sends out the appointment as an attachment
that participants can drag and drop into their calendars in Outlook and
Lotus Notes.
7. Select the Send appointment in iCalendar format check box to enable
iCalendar notification. This sends out the appointment as an attachment
that participants can drag and drop into their calendars in Outlook and
Lotus Notes.
8. Select the Include WebOffice invitation and URL check box to add a
WebOffice invitation and URL to the E-mail signature.
The Include WebOffice invitation and URL check box appears only if a
WebOffice URL is defined in the Configuration-Personal Details window. For
more information on Personal Details, refer to page 3-5.
9. If the meeting organizer has logged into his/her WebOffice and has
created a meeting, conference participants can click the URL link and
enter the meeting. For more information on WebOffice, refer to the
WebOffice User’s Guide.
If the vCalender option is selected, the WebOffice invitation is included with the
attachment.
10. Select the Include ViaVideo Auto Connection check box to add a
ViaVideo file attachment to the E-mail signature. When the meeting
participants click on the ViaVideo link, their ViaVideo endpoint
automatically opens and connects to the On Going conference.
11. Click the Send button.
The E-mail is sent with the conference details.
12. If the vCalendar or iCalender option was selected, the E-mail includes
the attachment.
4-15
Page 48

Chapter 4 - New Meeting Window
When the recipient of the conference invitation clicks the vCalendar
attachment, the user's default appointment calendar opens. The
conference is placed as an appointment in the calendar (or if there is
already an appointment set for that time, the appropriate notification is
given).
If the Include ViaVideo Auto Connection option is selected a [conference
name].plcm file is included as an attachment in the meeting invitation.
When the participant double-clicks this attachment the ViaVideo
endpoint application opens, and the system automatically connects to the
conference using the IP details included in the file.
4-16
13. After the E-mail is sent, the system prompts whether to open the Meeting
Director window for monitoring.
When the MGC WebCommander Meeting Director is installed you can only
monitor conferences without scheduling them.
Duplicate Booking
The system identifies instances in which there are scheduling conflicts for
individual participants. A scheduling conflict for a participant results from
creating two or more conferences to occur at the same or overlapping times
and contain the following:
• Participants with the same name, or
Page 49

MGC WebCommander User’s Guide
• Participants with the same ISDN phone numbers, or
• Participants with the same IP address
Depending on the connection type of a participant, different criteria are used
to determine if indeed the “same” participant is double booked. The following
table lists these criteria:
Table 4-1: Duplicate Bookings Criteria for Duplicate Bookings
Connection type Required criteria for a match
Dial-out H.320
Dial-out IP
• Name or Phone Number(s)
• Name and IP Address or Alias
or
• IP Address and Alias (when both provided)
Dial-in
• Name or Phone Number
Upon completion of scheduling a reservation or On Going conference, the
system checks for conflicts. If any are detected, the Double Booking window
opens after clicking the Start Immediately.
The WebCommander application checks for conflicts on multiple MCUs while
the MGC Manager application checks for conflicts on the MCU on which the
reservation is being scheduled.
4-17
Page 50

Chapter 4 - New Meeting Window
Table 4-2 details the information that is displayed:
Table 4-2: Duplicate Booking options
Field/Option Description
Requested
Participants
Reserved
Participants
Phone/IP Lists the phone numbers or IP addresses of requested and
Alias Lists the aliases of requested and reserved participants.
Connection
Type
Conference
Name
Start Time Date and start time of each conference.
End Time Date and termination time of each conference.
MCU The name of the MCU running the conference.
Lists the names of conflicting participants requested to join
the conference currently being created.
Lists the names of participants already scheduled in
previously created conferences whose criteria match those
of the newly requested participant.
reserved participants.
Indicates the participants connection type: dial-in or dialout.
Lists the names of the conferences in which each
participant is defined.
To resolve participant conflicts:
1. Select the check box(es) of the requested participant(s) you would like to
keep in the conference currently being scheduled.
4-18
2. Clear the check box(es) of the requested participant(s) you would like to
exclude from conference currently being scheduled.
3. Click one of the two buttons to resolve the conflict(s):
• Schedule Selected and non-conflicting -The system ignores the
perceived conflicts for the selected requested participants and
creates the reservation
• Cancel Scheduling - Cancels the current conference definition
Page 51

MGC WebCommander User’s Guide
Defining a New Participant from the New Meeting Window
If you want to add a participant who was not previously defined, you can do
this during the scheduling of the new meeting. You must have the appropriate
permissions to define a new participant.
To define a new participant from the New Meeting window:
1. In the Participant Actions pane, click the New Participant button to
define a new participant.
Click to define a new participant
4-19
Page 52

Chapter 4 - New Meeting Window
The Participant Dialog Page opens.
2. Define the parameters as detailed in Table 4-3.
Table 4-3: Participant Dialog Page parameters
Option Description
4-20
Name The system displays the default name defined in the
currently active Participant Default set.
Type the participant name using numerals and
characters. You may include spaces, dashes and
underscores. Up to 80 characters may be used. Only
one participant by this name may be defined for the
conference.
Connection You can set up conference dialing according to the
following connection types:
• Dial-in - The participant dials into the
conference-MCU at conference time. The
participant is identified by his/her CLI number
(ISDN participant) or IP Address (IP participant).
You inform the participant of the conference or
MCU’s number to be dialed at the conference
start time to connect to the conference. T1-CAS
participants cannot be defined in advanced and
they can only dial into Meet Me Per Conference,
Meeting Room or Entry Queue Access
conferences as undefined dial-in participants.
Page 53

MGC WebCommander User’s Guide
Table 4-3: Participant Dialog Page parameters
Option Description
Connection (con’t)
• Dial-out - The MCU calls the participant at
conference time. You must enter the participant’s
phone number in the Participant Number box, or
IP address/Alias when defining the participant.
If the Manual Dial-Out option is selected for the
conference in the Conference template, the
meeting organizer/operator must initiate the call
to the participant.
• Direct - The participants are connected directly
to the MCU through a leased line. No dialing is
required for direct connections. This option is not
available for IP participants.
This option is relevant to ISDN participants only.
E-mail Enter the E-mail address of the participant if you
want to send him/her an E-mail notification when
scheduling a meeting. The E-mail includes the
conference start date and time, conference entry
password, chairperson password (Audio Only
conferences) and the conference dial-in number (if
required).
Audio only Select this check box if the participant is a Voice
participant (his/her connection device is a telephone)
or no video will be used.
When selecting T1-CAS, the Audio only check box is
automatically selected and greyed out.
H323 Select the H323 option for an H.323 participant. The
IP Address and Alias Name boxes are enabled.
IP Address In a dial-out connection, enter the participant IP
address or alias of the endpoint or the PC to which
the endpoint is connected that is called by the MCU.
In a dial-in connection, enter the participant IP
address and/or alias that is used to identify and
route the participant to the appropriate conference.
Alias Name Enter the endpoint alias in E.164 format (only
numerals).
4-21
Page 54

Chapter 4 - New Meeting Window
Table 4-3: Participant Dialog Page parameters
Option Description
SIP Select the SIP option if the participant is an SIP
participant/SIP phone participant.
SIP Address
sip: [user name]@[domain]. Note that the SIP
URI adheres to URI rules: no spaces or special
characters such as commas, quotation marks,
inverted tags and so forth either in the user name or
in the domain part.
[To compare to H.323, which uses the endpoint location for
identifying the participant, in SI P participants can change
locations but still be addressed as long as they
continuously refresh their registrations with the proxy. The
proxy for wards Invitees to their current location.
ISDN/Phone Select the ISDN/Phone option if the participant is an
ISDN participant or a telephone participant.
T1-CAS Select the T1-CAS option if the Audio Only
participant connects via a T1-CAS line and the MCU
is configured to support T1-CAS lines in Audio Only
and Video conferences.
Participant number Type the participant’s phone number (including
country and area codes when required) to be dialed
by the MCU when connecting the participant to the
conference. For video calls using several channels,
add a semicolon (;) between numbers when several
numbers are to be assigned to a participant (one per
channel). For example, 9251222; 9251223; ….;xxxx
(in aggregation mode).
In order to support Bonding with specific switches
you many need to add the pound key (#) symbol at
the end of the dial-out number sequence. For
example 9251222#.
4-22
VIP Select this check box to assign the VIP status to a
participant. A participant designated as VIP will be
displayed with a special VIP icon to indicate
participants that.
Page 55

MGC WebCommander User’s Guide
Table 4-3: Participant Dialog Page parameters
Option Description
Save Participant in
the Database
Add to Favorites Select this check box to add this participant to the
Select this check box to save the participant in the
current group and database, creating a new
Participant template for future invitations to
conferences.
Favorites List in the New Meeting window.
3. The name of the new participant is added to the new meeting and
displayed in the Conference Details area of the New Meeting window.
4. Click OK.
4-23
Page 56

Chapter 4 - New Meeting Window
Scheduling a Conference
Using the New Meeting window, you can schedule a conference to Start
Immediately (On Going conference) or to start automatically at a predefined
date and time (Calender reservation).
To schedule a conference from the New Meeting window:
• Perform steps 1-5 in the New Meeting window. Each step is explained
below.
4
3
1
1. Select the Template Group where the Conference template resides.
2
5
4-24
2. Select the conference template on which to base the meeting. The New
Meeting parameters are taken from this template. If the selected template
Page 57

MGC WebCommander User’s Guide
contains pre-defined participants, they are listed in the Conference
Details pane.
3. In the Participants List select the check boxes next to the participants to
invite to the meeting. You can select participants from all participants
lists (Directory, Recent and Favorites).
4. Click the Add> button to add the selected participants to the Conference
Details.
5. Click the Schedule button.
The Start window opens.
Displays the default conference name, based
on the format selected in the Web Site
configuration. You may modify this field.
The Start Time and Date is either taken from
the template (if it was defined there), or the
current date and time.
Indicates the conference duration as defined
in the template.
4-25
Page 58

Chapter 4 - New Meeting Window
6. Define the following parameters:.
Table 4-4: Start window parameters
Option Description
Name A default conference name is automatically assigned
to the new conference, composed of the name of
template on which the conference is based, the user
name or the user’s E-mail address, and a randomly
generated number.
When the conference name is based on the user’s
name, the format is:
TemplateName_UserName_Random Number.
For example: Sales_Admin1_886.
When the conference name is based on the user’s
E-mail address, the format is:
TemplateName_UserEmail_Random Number.
For example: Sales_jen@polycom.com_887. For
more information see the MGC Web server Manager
and Installation and Configuration Guide, Chapter 5,
Configuring the MGC Web Server Manager.
If desired, enter a new conference name using up to
80 characters. If the conference name already exists
on the MCU as a Conference Reservation or an On
Going Conference, an error message is displayed
and you are prompted to enter a new name.
4-26
Numeric ID A Numeric ID is a unique number assigned to a
conference identifying it to the system. It is used by
the participants to access the conference directly
from an IP endpoint or from the Entry Queue.
The Numeric ID can be assigned in automatically or
manually.
Leave this box blank to let the MCU automatically
assign the Numeric ID to the conference when it is
saved on the MCU.
To manually assign the Numeric ID, enter a number
using the number of digits defined in the appropriate
flag in the System.cfg file.
If the Numeric ID is already in use in another
conference, an error message will be displayed.
If left blank and the MCU is configured to assign one
once the conference is saved to the MCU.
Page 59

MGC WebCommander User’s Guide
Table 4-4: Start window parameters
Option Description
Numeric ID (cont.) Note: If the MCU is configured to support only
automatic assignment of Numeric Conference IDs,
then this field is disabled and the system will
automatically assign a Numeric Conference ID after
you save the conference on the MCU.
Conf. Entry
Password
Web/Chairperson
Password
Min Parties In the Min Participant box, define the total number of
The password used by the participants to access a
conference when an IVR Service is assigned to the
conference. If left blank and the MCU is configured
to assign a password, it is automatically assigned to
the conference when it is saved on the MCU.
This password must be numeric.
The password used by the participant to identify
himself/herself as the conference chairperson. This
password is also used to access the conference
properties and to monitor the conference in
WebCommander.
In Audio Only conferences, this password must be
numeric.
participants for which the system reserves
resources. This number includes both defined and
undefined participants. If you enter five as the
minimum number of participants and you define
three participants, the system will reserve resources
for only two more participants. However, additional
undefined participants may be connected if there are
available resources.
If you enter 0, no resources are reserved for the
conference, but participants are able to connect to
the conference if there are available resources on
the MCU.
Billing Enter the conference billing code as assigned to the
conference by your reservation system or allocated
to the conference chairperson or contact person.
From The conference start date and time.
4-27
Page 60

Chapter 4 - New Meeting Window
Table 4-4: Start window parameters
Option Description
Duration The duration, in hours and minutes, of the
Repeat Meeting Sets a recurring reservation. A reservation can be
7. Click OK.
The system tries to start the conference on one of the MCUs currently
connected to the MGC Web Server. If several MCUs are connected to the
Web Server and the MCU field is set to Auto in the Conference template,
the system selects the MCU to run the conference according to the order
in which they are defined in the MCU table or in the MCU list assigned
to the logged in user. If no MCU is connected to the MGC Web Server,
an appropriate error message is displayed.
conference.
repeated on a regular basis. To create a recurring
reservation, you must define how often the
conference should occur. The WebCommander
automatically creates duplicates of the original
reservation, scheduling them according to the
selected recurrence frequency. Clicking this button
opens the Reservation Recurrence window. For
details, see “Creating a Recurrent Reservation” on
page 4-30.
4-28
When starting a conference, conflicts can occur between participants. For more
details, see “Duplicate Booking” on page 4-16.
Page 61

MGC WebCommander User’s Guide
If the conference is started successfully on the MCU and the Meet Me
Per Conference option is set for the conference, the system displays the
dial-in number that should be used by the conference participants, for
ISDN/T1-CAS and H.323 participants.
The ISDN phone number is based on the dial-in phone numbers range
defined for the MCU. If the PBX truncates the first digits, these digits
have to be added to the number communicated to the conference
participants. The H.323 dialing string is composed of the H.323 Network
Service Prefix and the conference Numeric ID.
The conference Numeric ID is listed separately, for routing purposes
when the conference is accessed from the Entry Queue.
You can send an E-mail to conference participants with the conference
details. For more details, see “Sending an E-mail to a participant” on
page 4-14.
8. Based on the settings selected in the Start window the conference is
scheduled based on the starting date and time and can be viewed from the
Calender reservations window. If no starting date and time is selected the
scheduled conference starts immediately and becomes an On Going
conference.
4-29
Page 62

Chapter 4 - New Meeting Window
Creating a Recurrent Reservation
Recurrent reservations (reservations that occur repeatedly) are created from
the Start window. You must define the start date and time of the first
reservation, and specify the recurrence pattern. For example, if you plan a
weekly reservation to occur every Monday, you need to select the date and
time of the first Monday on which the conference occurs and specify the
number of occurrences or the ending date.
To create a recurrent reservation:
1. Schedule the initial conference by performing steps 1-6 in “Scheduling a
Conference” on page 4-24.
2. Click the Repeat Meeting button from the Start window.
4-30
Page 63

The Reservation Recurrence pane opens.
3. Define the following parameters:
MGC WebCommander User’s Guide
Table 4-5: Recurring Reservations parameters
Field Description
Repeat Select the frequency (Daily, Weekly or Monthly) at which the
reservation occurs.
If Daily is selected, the system automatically highlights all
the days of the week. To disregard a certain day of the
week, for example, the weekend, click the desired days to
clear its check box.
If Weekly is selected, the system automatically checks the
day of the week according to the current day set in the
Scheduler dialog box. You can also define the recurrence
interval in weeks. For example, if you want the reservation
to occur bi-weekly, enter the value 2 in the Recurs Every x
Week(s) box. To define a twice a week recurring
reservation, select the check box of the additional day of the
week at which the conference is to be repeated and set the
recurrence interval to 1.
4-31
Page 64

Chapter 4 - New Meeting Window
Table 4-5: Recurring Reservations parameters
Field Description
Repeat
(cont.)
If Monthly is selected, the system automatically sets the
current day as defined in the Scheduler dialog box.
With Monthly you are required to choose either the “day”
(default) of a month or a schedule sequence, the “first”,
“thursday” of the x month.
• Day x of every x month(s) - Repeats a conference on a
specified day of the month at a specified monthly
interval. For example, if the first reservation is scheduled
for the 6th of the current month and the monthly interval
is set to 1, the monthly reservation will occur on the 6th
of each of the following months.
• The 1st/last day of x month(s) - Repeats a conference
on a particular week, on a specified day of the week at a
specified monthly interval. For example, a recurrent
meeting on the third Monday every two months.
Range of
Recurrences
End after x occurrences - Ends a repeating reservation
after a specific number x of occurrences.
End by date - Specify a date for the last occurrence of the
recurring reservation. The MGC Manager calculates the
number of occurrences according to the selected frequency
and the date range.
4. Click OK.
If no MCU is connected to the MGC Web Server, an appropriate error
message is displayed.
4-32
When starting a conference, conflicts can occur between participants. For further
information, see “Duplicate Booking” on page 4-16.
Page 65

MGC WebCommander User’s Guide
If the conference was started successfully on the MCU and the Meet Me
Per Conference option is set for the conference, the system displays the
dial-in number that should be used by the conference participants, for
ISDN/T1-CAS and H.323 participants.
The ISDN phone number is based on the dial-in phone number’s range
defined for the MCU. If the PBX truncates the first digits these digits
have to be added to the number communicated to the conference
participants. The H.323 dialing string is composed of the H.323 Network
Service Prefix and the conference Numeric ID. The conference Numeric
ID is listed separately, and it is used for routing to conferences accessed
from the Entry Queue.
Once the reservation has been defined, the system automatically creates
the recurring reservations in the calendar. The name of each of the
recurring reservations is derived from the name of the first reservation
(Conference template), followed by sequential numbers, using the format
“name_X”, where X is its sequential number. For example, if the first
reservation is named “Polycom 1_admin1_43946”, and the number of
occurrences is three, the system creates three reservations, naming the
first “Polycom 1_admin1_43946_1”, the second “Polycom
1_admin1_43946_2” and the third “Polycom 1_admin1_43946_3”.
4-33
Page 66

Chapter 4 - New Meeting Window
a. If not all the reservations are successfully scheduled on the MCU, a
b. Click OK to view the Recurrence Status List dialog box or click
dialog box appears requesting whether to list the unscheduled
conferences.
Cancel to continue without listing the unscheduled conferences. A
list of unscheduled conferences is shown.
4-34
c. Click OK to exit the Recurrence Status List dialog box.
When reservations are successfully scheduled on the MCU and the
E-mail option is enabled in your permission, you will be prompted to
send an E-mail to the conference participants. For details, see “Sending
an E-mail to conference participants” on page 4-14.
5. Click OK to send an E-mail or Cancel to avoid sending the E-mail.
Page 67

MGC WebCommander User’s Guide
When an E-mail is sent to participants, you can include a ViaVideo and
vCalender/iCalender format attachments (for more information, see
“Sending an E-mail to Conference Participants” on page 4-14) by
selecting the appropriate check boxes. With recurrent reservations the email states the number of recurrent reservations and the recurrence
pattern (monthly, weekly, daily).
4-35
Page 68

Chapter 4 - New Meeting Window
The name of each of the recurrent reservations cannot be modified.
However, the parameters of an individual recurrent conference can be
modified by double-clicking the specific reservation.
E-mail Update after Reservation Change
4-36
Based on the user permission, Partial Parameters View or Full Parameters
View when you change the properties of an existing reservation and recurring
reservation you can update participants by sending them an e-mail.
Sending an e-mail after you change the Properties of an Existing
Reservation:
1. Access the WebCommander and click Calendar.
The Reservation Calendar window opens.
2. Double-click any existing reservation link.
You may be prompted to enter the conference web/chairperson password.
Page 69

MGC WebCommander User’s Guide
The Conference Reservation window opens.
3. Click the Send E-mail link.
a. For users with the View mode: Basic permission, click the Send
Email button.
4-37
Page 70

Chapter 4 - New Meeting Window
4. When you do not select the Send E-mail link/button, the system prompts
the organizer if he/she requires the sending of an E-mail.
5. Click OK, to send the E-mail
When you click Cancel, conference participants do not receive the e-mail.
.
4-38
Page 71

Dialing into the Conference
Defined ISDN Participants Dial-in
ISDN participants can dial-in to a conference directly or via an Entry Queue.
Alternatively, if the conference is defined as Meet Me Per Conference or
Meeting Room, participants can simply dial-in to the number assigned to the
conference.
For more information about defining Entry Queue and accessing a conference
via an Entry Queue, see the MGC Manager User’s Guide Volume I, Chapter 8.
The dial-in number that should be used by participants to connect to the
conference is displayed when the conference is saved on the MCU and is also
sent to participants in the E-mail (if you have selected to send one).
When the conference is defined as Entry Queue access, the dial-in number of
the first Entry Queue in the list of Entry Queues is indicated as the dial-in
number. In addition, the conference properties detailed in the E-mail include
the conference Numeric ID which is required to route the participant from the
Entry Queue to his/her target conference.
MGC WebCommander User’s Guide
T1-CAS participants are only able to dial-in to a conference defined as a Meet
Me Per Conference or Meeting Room or to an Entry Queue used for routing
participants to their target conferences.
If required, you can view the dial-in number assigned to a conference in the
Meeting Director window or the Meeting Rooms list window.
4-39
Page 72

Chapter 4 - New Meeting Window
To display the list of On Going conferences:
• In the Main Menu pane, click the On Going Conferences link.
The ISDN phone number is based on the dial-in phone numbers range
defined for the MCU. If the PBX truncates the first digits these digits
have to be added to the number communicated to the conference
participants.
If the conference is assigned an IVR service that prompts for conference
and chairperson passwords, the appropriate passwords are also
displayed. The participant has to enter these passwords to join the
meeting.
4-40
Page 73

Defined H.323 Participants Dial-in
The dialing string that should be used by participants to connect to the
conference is displayed when the conference is saved on the MCU and is also
sent to participants in the E-mail (if you have selected to send one).
When the conference is defined as Entry Queue access, the dialing string of
the first Entry Queue in the list of Entry Queues is indicated as the IP address
or alias. In addition, the conference properties detailed in the E-mail include
the conference Numeric ID which is required to route the participant from the
Entry Queue to his/her target conference.
The H.323 dialing string is composed of the H.323 Network Service Prefix
and the conference Numeric ID. The conference Numeric ID is listed
separately.
For more information on H.323 Participants Dial-in, see the MGC Manager
User’s Guide Volume I, Chapter 4.
SIP Connections
MGC WebCommander User’s Guide
DNS server
SIP UA
SIP server
MCU
SIP UA
4-41
Page 74

Chapter 4 - New Meeting Window
Figure 4-1: Typical SIP Conferencing Layout
Dial-in Scenario—SIP Environment
Participants can dial in to an Entry Queue, or directly to a conference or to a
Meeting Room. Using an Entry Queue minimizes the number of conferences
that require registration with the SIP server, as it can use a single URI address
or a limited number of addresses for all the dial-in connections.
A new conference reservation or Entry Queue is defined. The conference or
the Entry Queue registers with the SIP proxy. The SIP participant registers
with the registrar, and provides authentication if required (non-trusted mode).
Usually, for SIP conferencing, an Ad Hoc Entry Queue is used. In this
scenario, the first participant dials the Entry Queue and creates a new
conference, while the other conference participants dial directly to the
conference using the conference name or numeric ID. The SIP participant
uses the Entry Queue URI to access the Entry Queue.
The Entry Queue URI is dialed in the format:
Entry Queue name@domain name.
For example,
When dialing from a Microsoft Windows Messenger endpoint (which does not
have DTMF capabilities), the first participant (who, in Ad Hoc conferencing,
creates the new conference) enters the Entry Queue name followed by the
target conference name and the numeric ID in the format:
EQ name(target conference name)(target conference numeric ID).
For example,
In this example, the Entry Queue name is EQ1, and a new On Going
Conference by the name sales with the numeric ID 12345 will be created on
the MCU.
EQ1@polycom.com - where the Entry Queue name is EQ1.
EQ1(sales)(12345).
4-42
You do not need to add the domain name to the conference name as it is
automatically added by Microsoft Windows Messenger when sending the
request to the SIP server.
The other conference participants can connect to the conference directly by
entering either sales or 12345.
Participants can connect to an Entry Queue, and then they are routed to the
destination conference using the conference password or the conference
numeric ID (depending on the MCU configuration).
Page 75

MGC WebCommander User’s Guide
Direct Dial-in Scenario—SIP Environment
If the IP address of the MCU IP card is known, a direct endpoint to MCU
connection is possible, but not recommended. This direct connection uses the
Redirect mode only.
The SIP endpoint dials the IP address of the IP card or its host name.
SIP UA
conf1@polycom.com
conf1@polycom.com
MCU
endpoint1@polycom.com
SIP UA
Figure 4-2: SIP Environment - Dial-in and Dial-out
SIP UA
Dial-out Scenario—SIP Environment
The dial-out scenario is identical to the dial-in scenario, except for the
initiating party, that is the MCU. In dial-out conferences, the endpoint clients
need to be registered, so the registrar can provide location details when the
MCU invites them to join the conference.
For example, the MCU dials:
endpoint1@polycom.com.
4-43
Page 76

Chapter 4 - New Meeting Window
Mixed Environments Conference Scenario
In mixed environments, participants can connect to the same conference on
the MCU either over ISDN or over IP.
SIP Proxy
SIP UA
Gatekeeper
MCU
(media
mixer)
IP participant
4-44
PBX switch
ISDN participant
Figure 4-3: SIP Mixed Environment
After establishing a connection to the conference (each over its corresponding
network), the signaling and media channels reach the MCU.
The processed media is sent back by the MCU to H.323 and SIP participants
via the IP+ card and to ISDN participants via the Net card.
Page 77

5
Monitoring an On Going Conference
The Meeting Director module is available only if you have purchased and
installed the MGC WebCommander Professional or MGC WebCommander
Meeting Director software and if you have access rights to Meeting Director
module. The access rights are defined in the MGC Web Server Manager Permissions. For more details, see the MGC Web Server Manager User’s
Guide, Chapter 4.
An On Going conference is a conference that is started immediately or when
the Calender’s scheduled reservation date and time is reached. An On Going
conference can be invoked in one of the following ways:
• Started immediately from New Meeting definition
• Started immediately from the Reservation Templates
• The scheduled starting date and time of a Calender Reservation is set to
the current date and time (for more details, see Chapter 6, “Reservation
Calendar” )
You can monitor conferences and perform various operations while
conferences are running.
Monitoring may be done at the conference level or at the participant level.
Monitoring involves viewing the status of On Going conferences and the
status of their participants. For example, you can terminate a conference
before its scheduled ending or you can extend its duration. Alternatively,
you can disconnect an individual participant while the conference is in
progress, or temporarily mute transmission to and from a site so that the
other participants can hold a private discussion. You can connect dial-out
participants during the conference and add a new participant while the
conference is in session.
Operations may also be performed during the conference. Different
operations may be performed when managing an IVR-enabled conference
(Audio Only and video) or a standard conference. Additional operations are
available for conferences running on Video+ cards.
5-1
Page 78

Chapter 5 - Monitoring an On Going Conference
In all conferences, you may connect and disconnect participants, mute and
unmute the participant’s audio channel, change the participant’s audio
volume, add new participants to the conference, extend the conference
duration, terminate the conference before its scheduled time and lock the
conference to dial-in participants.
General Monitoring
You can monitor a conference to keep track of its participants and its
progress. When monitoring a conference, you can check whether all its
participants are correctly connected and whether errors and faults have
occurred.
Participants in attended conferences (conferences in which the IVR Service is
enabled) can be in one of the following stages: Greeting (Welcome),
Attended, On Hold and conferencing. However, these conferences can only
be monitored by the WebCommander. Control of Attended conferences is
only possible from the MGC Manager application.
In an IVR-enabled conference, the participant is guided to the conference
using voice prompts menu and DTMF input from the participant endpoint.
The connection is automated, but an Operator can be at hand to assist the
participants. In Greet and Guide or IVR-enabled conferences set as attended
with Operator assistance, the operator controls the participant connection to
the endpoint and can only do so from the MGC Manager application.
In IVR enabled conferences (unattended) the participant can be in one of the
following stages:
• The Greeting stage - The participant connects to the Entry Queue or
conference and views a video slide and hears a welcome message.
Participants are guided through the connection process and connect
automatically to the conference.
• On Hold stage - The participant is placed on hold where he or she hears
music. In video conferences, the participant may view a slide (identical
to the slide shown in the welcome queue) if one is configured in the IVR/
Entry Queue Service. The operator or chairperson cancels the On Hold
state, to that the participants can hear and see conference participants.
• Conferencing stage - the participant is connected to the On Going
conference.
5-2
Page 79

Special icons are used to indicate the participant status in an On Going
conference.
Dial-out participants are usually connected directly to the conference. Dialout participants are called by the MCU and are connected to the conference
when the connection between the MCU and the endpoint is established.
Dial-in participants can also connect directly to the conference depending on
the conference settings. Dial-in participants who are defined prior to the
conference start, call the MCU number and are routed to the appropriate
conference according to their CLI number (as defined in the system). If no
CLI number was defined for a participant, the caller will not be able to
connect to the conference.
Undefined dial-in participants (in a “Meet Me” conference or in a Meeting
Room) or conferences accessed from an Entry Queue dial the Entry Queue,
conference or Meeting Room dial-in number and are connected to the
conference once their endpoint’s capabilities are established. The first
participant that connects to a passive Meeting Room activates the Meeting
Room.
Meeting Director Module
MGC WebCommander User’s Guide
When starting the conference from the New Meeting window or from a
database template, the system enables you to switch automatically to the
monitoring mode and check the On Going conference status. You can also
monitor On Going conferences in the following instances:
• The conference was started earlier but was not continuously monitored
• The conference was started by another user on the Web and you have the
permission to monitor it
• The conference was started using the MGC Personal Scheduler
application (for more details refer to the MGC Personal Scheduler User’s
Guide)
• The conference was started in the MGC Manager application and you
have the permission to monitor it
• Only one On Going conference can be monitored at any given time
• Only users with the appropriate permission can monitor On Going
conferences
5-3
Page 80

Chapter 5 - Monitoring an On Going Conference
The Meeting Director Pane
The Meeting Director pane lists the On Going conferences running on all
connected MCUs.
To access the Meeting Director from the WebCommander site:
1. In the Main Menu pane, click the On Going Conferences link.
5-4
• If there are no On Going conferences running that you have
permission to monitor, the Meeting Director On Going Conferences
List opens with no conferences in the list.
•If there is one On Going conference running that you have permission
to monitor, the Meeting Director monitoring window opens for that
conference, enabling you to view the conference details and perform
operations.
Page 81

MGC WebCommander User’s Guide
• If there are more than two On Going conferences running that you
have permission to monitor, the list of these conferences opens in the
Meeting Director window:
Click the hyperlink to monitor the
conference. A “key” icon indicates
that a password is required to
monitor this conference
The Start Date and Time and
End Date and Time of each
listed conference
The Dial-In number appears
for each conference defined
as Meet Me Per Conference
The Conference Entry Password
defined for IVR - enabled
conferences (configured to prompt
for an Entry Password)
Use the Scroll bar to view the H.323 Service Prefix. The H.323 Service Prefix
together with the conference numeric ID compose the dialing string for H.323
endpoints.
The list may include On Going conferences that were started by other
users from templates assigned to Groups to which you have access.
A key appears next to a conference name if you have limited access
rights to the Groups. You can monitor such conferences only if you enter
the appropriate password when accessing the conference properties.
5-5
Page 82

Chapter 5 - Monitoring an On Going Conference
If you have administrator rights to view all On Going conferences, the
list can include all the On Going conferences started by all the users on
all the connected MCUs. A” key” icon next to the conference name
indicates that the conference can be monitored only if you enter the
appropriate password.
2. To monitor a conference, click the conference name.
— If the conference is marked with a key, the following window
opens:
— In the Web/Chairperson Password field, enter the appropriate
password (as it was defined during the Conference Template
definition). Note that the system is case sensitive.
— Click OK.
The Meeting Director monitoring window opens, displaying the various
status properties of the selected conference. The Meeting Director
window contents change for IVR-enabled audio and video conferences,
standard video conferences and Audio Only conferences.
5-6
Page 83

MGC WebCommander User’s Guide
Following is the Meeting Director monitoring window for a video
conference:
Conference
name
Participant Status Display
Pane
Conference menu
Scroll Bars
Toolbar
Video Layout Toolbar
Video Layout Pane
Following is the Meeting Director monitoring window for an Audio
Only conference:
Toolbar Number of connected participants
Participant Status Display Pane
Remaining Conference Time
5-7
Page 84

Chapter 5 - Monitoring an On Going Conference
Conference Icons and Indications
Various icons and ToolTips are used to indicate the conference and participant
status, enabling you to concentrate on those participants that require your help
in connecting or disconnecting to/from the conference.
Toolbar Buttons and Icons
The toolbar at the top of the Meeting Director window for a video conference
contains the following buttons and icons:
Table 5-1 describes the buttons and icons.
When an option is active the relevant button appears selected.
Table 5-1: IVR-enabled conference toolbar options
5-8
Button/
Indication
(conference
locked)
Description
New Participant - Define a new participant and add the
participant to the conference.
Add Participant - Add participants to the conference
from the Participant templates database.
Lock/Unlock Conference - Indicates whether the
conference is locked or unlocked. When locked, dial-in
participants cannot connect to the conference.
When this button is clicked, the conference status toggles
between Lock and Unlock and the icon changes
accordingly.
On Hold - Places the conference on hold. Clicking this
button again reinstates the conference. When the icon is
displayed pressed indicates that the conference is On
Hold.
This is applicable only to conferences running on an
Audio+ card.
Page 85

MGC WebCommander User’s Guide
Table 5-1: IVR-enabled conference toolbar options
Button/
Indication
Description
Lecture Mode - To select the Lecture mode for the
conference starts a lecture in the conference. Clicking
this button opens the Lecture Mode window. You are able
to select the Presentation Mode or None.
For more details see the MGC Manager User’s Guide,
Volume I, Chapter 10.
Exclusive Speaker - Designates a participant as the
exclusive speaker while all the other participants are
automatically muted by the MCU. When selected, the
icon is displayed pressed, indicating that the Exclusive
Speaker mode is active. Clicking this button again
cancels the Exclusive Speaker mode.
This is applicable only to conferences running on an
Audio+ card.
Voting (IVR-enabled conferences only) - Start/stop a
Voting Session. When a Voting session is active, the
button appears selected. Clicking this button again opens
the Voting window, letting you select the Voting option.
When stopping the Voting session or cancelling it, the
button is returned to its initial state.
Q&A Queue (IVR-enabled conferences only) - Lets the
first participant in the Q&A queue or the selected
participant ask a question.
Clear Q&A Queue (IVR-enabled conferences only) Ends the current question session and clears the Q&A
queue.
Modify Conference General Information - Opens the
Conference General Information dialog box letting you
add or modify the conference billing code, information in
the user 1-3 defined fields and remarks. All these
parameters are also written to the CDR file. For more
details see the MGC Manager User’s Guide, Volume II,
Chapter 11.
5-9
Page 86

Chapter 5 - Monitoring an On Going Conference
Table 5-1: IVR-enabled conference toolbar options
Button/
Indication
Description
Extend Conference Time - Manually extends the
conference duration.
Terminate Conference - Manually terminates the
conference.
Secure Conference (IVR-enabled conferences only) Indicates that the conference is in Secure Mode. For
details, see page 5-24.
Export to Participants List to Excel File - Export the
participants list from on going conferences to an .xls
(Excel) formatted file.
Print Participants List - Prints the participants list from an
on going conference.
Information - Point to the icon to view the conference
general parameters. For more information, see “General
Conference Information” on page 5-28.
Connected Parties - The number of participants
connected to the conference.
5-10
Remaining Time - tHe time remaining until the end of the
conference.
Force Black Screen - In Continuous Presence
conferences, enables you to assign a black screen to the
selected video window in the video layout array.
Page 87

Participant Icons and Indications
Conference participants can have different roles: a standard participant, a
chairperson, or an operator.
• Standard participants take part in the conference. They perform
operations via their telephone using the touch-tone signals (DTMF
codes). They can control their broadcasting and listening volume, mute
or unmute their line, request operator’s assistance, invite new
participants to the conference, vote and ask questions. The operations
that they can perform are defined in the DTMF table. In some cases, they
can have the same privileges as the chairperson.
• The chairperson takes part in the conference. He/she is usually the
meeting organizer. The chairperson interacts with other participants in
the same conference, and can control the conference in which he/she
participates via a Web browser or using the DTMF codes. The
chairperson can perform all the functions that a standard participant can
but has additional privileges. He/she can start a voting session, grant the
floor to participants who wish to ask questions, mute and unmute
participants, connect and disconnect participants, define a participant as
the conference speaker while muting all other participants and place
participants on hold. Some of these functions can be performed only via
the Web browser. The operations that can be performed by the
chairperson using the DTMF codes are determined in the IVR Service.
• The operator can perform all chairperson functions plus additional
operator-specific functions. He/she can control and monitor all On Going
conferences simultaneously as well as perform general configuration and
maintenance operations. The operator does not have to be part of a
conference in order to control it. During On Going conferences, the
operator can move participants from one conference to another, assist
participants who need help and terminate the conference before its
scheduled time and join the conference. In addition, he/she can identify
participants as VIP, thus enabling to move them up or down in the Q&A
queue, and to give them special attention. The operator performs all
operations and activities via the MGC Manager or the MGC
WebCommander.
MGC WebCommander User’s Guide
5-11
Page 88

Chapter 5 - Monitoring an On Going Conference
Participant Icons
Participant icons are used to indicate the status and the type of the participant.
Participant icons
Table 5-2 describes the icons that are used to indicate the type of conference
participant.
Table 5-2: Participant icons
Icon Description
5-12
Standard Connected Participant (blue) - Dial-in or dial-
out participant that is connected to the conference.
Conference Chairperson - The participant is defined as
the conference Chairperson. The Chairperson can
perform various operations during the conference using
touch-tone signals (DTMF codes), such as lock or unlock
the conference to dial-in participants, initiate a voting
session, become the conference exclusive speaker while
muting all other participants and more. The Chairperson
can also control the conference from the WebCommander
Web Site if he/she has access to it.
Operator - The participant is defined as the MGC
Manager Operator. The Operator can connect and
disconnect participants, assist participants, and perform
various operations during an On Going Conference from
the MGC Manager. The operator can also participate in a
conference for a while and ensure that the conference is
running smoothly.
Page 89

Table 5-2: Participant icons
Icon Description
VIP (Very Important Person) - A participant designated as
VIP will be displayed with a special VIP icon. You can
designate a VIP participant from the Participant
Properties dialog box during the conference definition or
during the On Going conference.
Exclusive Speaker - This participant is the conference’s
Exclusive Speaker. In this mode, all other participants are
automatically muted by the system.
Lecturer (in Lecture Mode) - Video Conferences.
The participant is defined as the conference Lecturer.
Connection/Assistance - When there is a problem with
the participant connection or the participant requires the
Operator’s assistance, an exclamation point appears next
to the participant icon.
Disconnected (gray) - When a participant, Chairperson,
Lecturer or Operator is disconnected from the conference,
the participant role icon is grayed out.
MGC WebCommander User’s Guide
Recording Port (blue) - Audio Only conferences.
This port (telephone) is connected to an external device
used for recording the conference. For example, this Icon
appears when a conference recorder is recording the
conference.
Recording Port Disconnected (grey) - Audio Only
conferences.
This port (telephone) is disconnected from the
conference.
5-13
Page 90

Chapter 5 - Monitoring an On Going Conference
Connection Status Icons
ToolTips are used to indicate statuses and the functionality of buttons. To
Display the ToolTips, point to the status button or the icon. For more information
on the ToolTips, see page 5-25.
Connection status icons
Table 5-3 describes the icons that are used to indicate the status of the
participant connection to the conference.
Table 5-3: Connection status icons
5-14
Status Icon/
Button
Description
The participant is connected to the conference.
Clicking the button disconnects the participant from the
conference.
The participant is disconnected from the conference. This
status may occur when the participant is waiting to be
connected to the conference, or the system is waiting for
the participant to dial-in to the conference. This icon is
also shown when the participant is disconnected from the
conference either by the operator or from the participant
side.
Clicking the button showing the status reconnects the
participant to the conference.
Page 91

Table 5-3: Connection status icons
MGC WebCommander User’s Guide
Status Icon/
Button
Description
The connection is problematic.
In video conferences it may be caused when the
synchronization is lost or when the participant is
connected as secondary (the video channel could not be
connected so the participant is connected via is audio
channel only).
Clicking the button while this status is shown disconnects
the participant from the conference.
Connected Noisy Line. The participant is connected to the
conference but his or her line is noisy.
Clicking the button while this status is shown disconnects
the participant from the conference.
Faulty connected Noisy Line. The participant is connected
to the conference but there is a problem with the
connection and in addition the line is noisy. Try
disconnecting and reconnecting this participant.
Clicking the button while this status is shown disconnects
the participant from the conference.
This icon is displayed for the participant who is the current
speaker.
5-15
Page 92

Chapter 5 - Monitoring an On Going Conference
Audio Connection Status Icons
Audio status icons
Table 5-4 describes the icons that are used to indicate the status of the audio
channel connection of the participant to the conference. These icons are
relevant to video conferences. Most of the icons are relevant to Audio Only
conferences.
5-16
Table 5-4: Audio status icons
Status Icon/
Button
(green)
(gray)
Description
The audio channel of the participant is connected.
The audio channel is disconnected.
The audio transmission from the conference to the
participant is blocked. (Applicable to video conference
only.)
Clicking the Audio button showing this icon unblocks the
audio transmission.
The audio channel of the participant is muted by the
participant.
Page 93

Table 5-4: Audio status icons
MGC WebCommander User’s Guide
Status Icon/
Button
Description
The audio channel of the participant is muted by the
participant and the MCU.
The audio channel of the participant is muted by the
operator and the transmission of audio to the participant
site is blocked. (Applicable to video conference only.)
The audio channel of the participant is muted by the
operator. Click this button to unmute the participant.
The audio channel of the participant is muted by the
participant and the transmission of audio to the participant
site is blocked. (Applicable to video conference only.)
The audio channel of the participant is muted by the
participant and the operator.
The audio is muted by the participant and operator, and
the audio transmission to the participant site is blocked.
(Applicable to video conference only.)
Click this button to unmute this participant.
The audio channel of the participant is muted by the
operator and the MCU.
Click this button to unmute this participant from the MCU
side (the participant is still muted at the endpoint).
The audio channel of the participant is automatically
muted by the MCU. This usually occurs during Lecture
Show, and exclusive speaker mode.
The audio channel of the participant is automatically
muted by the MCU and the audio transmission from the
conference to the participant is blocked. (Applicable to
video conference only.)
The audio channel of the participant is muted by the
participant and MCU and the transmission of audio to the
participant is blocked. (Applicable to video conference
only.)
5-17
Page 94

Chapter 5 - Monitoring an On Going Conference
Table 5-4: Audio status icons
Status Icon/
Button
Video Status Icons
Description
The audio channel of the participant is muted by the
operator and MCU and the transmission of audio to the
participant is blocked. (Applicable to video conference
only.)
The audio channel of the participant is muted by the
participant, operator and the MCU.
The audio channel of the participant is muted by the
participant, operator and MCU and the transmission of
audio to the participant is blocked. (Applicable to video
conference only.)
5-18
Video connection status icons
Table 5-5 describes the icons that are used to indicate the status of video
connection of the participant to the conference. These icons are relevant to
video conferences only.
Audio Only participants in video conferences do not display the video icon.
Page 95

Table 5-5: Video connection status icons
MGC WebCommander User’s Guide
Status Icon/
Button
(green)
(gray)
Description
The video channel of the participant is connected.
The video channel is disconnected, and therefore the icon
is grayed-out and does not appear as a button.
The video channel is connected as secondary, meaning
the video channel could not be connected correctly and
the participant is connected using audio only. This icon is
not a button and you cannot select it to change the status.
The video channel is muted by the participant. No
transmission of video from the participants endpoint to the
conference.
The video channel is muted by the operator. No
transmission of video from the participants endpoint to the
conference.
The video channel is muted by the participant and the
operator.
The video channel is muted by the MCU. This icon may
appear during the Lecture Show, or Exclusive Speaker
mode.
The video channel is muted by the participant and the
MCU. This icon may appear during the Lecture Show or
Exclusive Speaker mode.
The video channel is muted by the operator and the MCU.
This icon may appear during the Lecture Show or
Exclusive Speaker mode.
The video channel is muted by the participant, operator
and the MCU. This icon may appear during the Lecture
Show or Exclusive Speaker mode.
5-19
Page 96

Chapter 5 - Monitoring an On Going Conference
Q&A Buttons
The Q&A buttons are enabled during an On Going Conference in the Q&A
list. These buttons must be activated in the MGC Web Server Manager
Permission Properties - Setting2 tab.
The following Q&A buttons are available:The following Q&A buttons are
available:
Table 5-6: Q&A Buttons & Functions
Button Menu Function Description
Clear Q&A Removes all participants from the
Add participant to Q&A Adds a participant to the Q&A
Q&A queue.
queue.
5-20
Remove participant from Q&A Removes a participant from the
Q&A queue.
Move Participant Position up in
Q&A
Move Participant Position
Down in Q&A
Move Participant to First
Position in Q&A
Move Participant to Last
Position in Q&A
Stop questioner session Stops the questioner session.
Moves the participant up one place
in the Q&A queue.
Moves the participant down one
place in the Q&A queue.
Moves the participant to the first
place in the Q&A queue.
Moves the participant to the last
place of the Q&A queue.
Page 97

MGC WebCommander User’s Guide
Table 5-6: Q&A Buttons & Functions
Button Menu Function Description
Next questioner Sets the participant as the next
questioner in the queue.
Connection Type Icons
Connection type
icons
Table 5-7 describes the icons that are used to indicate the participant
connection to the conference; dial-in, dial-out or direct.
Table 5-7: Connection type icons
Status Icon Description
Broadcasting volume - Indicates the level of the
broadcasting volume of the participant. For more
information see “Controlling the Participant’s
Broadcasting and Listening Volume” on page 63.
Listening volume - Indicates the level of the listening
volume of the participant. For more information see
“Controlling the Participant’s Broadcasting and Listening
Volume” on page 63.
5-21
Page 98

Chapter 5 - Monitoring an On Going Conference
Table 5-7: Connection type icons
Status Icon Description
Q&A The Q&A session organizes participant's questions or
Party Phones Displays the participant and MCU phone numbers or IP
comments during an On Going conference.
The conference moderator can see who is currently
asking a question, who is in the queue to ask a question,
the order of the participants in the queue, what number a
participant is in the queue, and how much time a
participant has been in the queue waiting to ask a
question.
For more information see “Managing a Q&A Session” on
page 102.
address/Alias depending on the network and connection
type.
In dial-in connection displays the CLI number (ISDN) or IP
address/Alias of the participant calling the MCU (marked
by the letter P) and the MCU number or IP address/Alias
dialed by the participant (marked by the letter M).
In dial-out connection displays the dialed number (ISDN)
or IP address/Alias (H.323) of the participant.
5-22
Dial-in participant. (The participant dials into the
conference.)
Dial-out participant. (The MCU dials the participant’s dial
numbers.)
Direct Connection participant, no dialing is required.
(applicable only to ISDN participants using leased lines.)
Page 99

MGC WebCommander User’s Guide
Sorting Participant Properties
When monitoring an On Going conference, particularly conferences with a
long participant list, the participant properties - Name, Status, Mute/Un-mute,
Volume, Party Phone, Connection Type and Q&A - can be sorted in
ascending or descending order.
To sort the Participant Properties:
• In the participants Status pane, click the arrow next to the property
according to which the participants are sorted. Clicking the arrow once
sorts the columns in descending order. Clicking on the same arrow again
sorts the column in ascending order.
Click the arrow to sort
By default the participant properties are sorted according to the participant
name, in descending order.
5-23
Page 100

Chapter 5 - Monitoring an On Going Conference
Secure Conference Mode
Secure Conference Mode completely locks a conference and denies outside
parties from monitoring and controlling the conference including system
administrator and MGC Manager operator. The Secure Conference Status is
indicated by a yellow shield in the top row of the Meeting Director toolbar.
The conference can only be secured by the conference chairperson using the
appropriate DTMF code from his/her endpoint. For more details see the MGC
Manager User’s Guide, Volume I, Chapter 6.
Indicates the conference is in
Secure Conference Mode
5-24
The participant list is not displayed, as
participant monitoring is disabled in a
Secure Conference Mode
The only Conference Action available to the user is to Ter mi nat e the
conference and the only enabled button on the toolbar is the Terminate button.
All other buttons are disabled.
Terminate button
 Loading...