

Polycom SoundStation2 2490, SoundStation 2Avaya2490, SoundStation2 Avaya User Manual And Administrator Manual
Page 1

SoundStation2
AVAYA 2490
User Guide and
Administrator Guide
USER GUIDE / ADMINISTRAT O R G U I D E
Page 2

SAVE THESE INSTRUCTIONS
When using your telephone equipment, the following safety precautions should
always be followed to reduce the risk of fire, electric shock, and injury to people.
• Read and understand all instructions.
• Follow all warnings and instructions marked
on the equipment.
• Installation must be performed in accordance
with all national wiring rules.
• The outlet to which this equipment is connected must be installed near the equipment,
and must always be readily accessible.
• This equipment can be hazardous if immersed in water. To avoid the possibility of
electrical shock, do not use this equipment
while you are in the bathtub or shower, or
when you are wet. If you accidentally drop
the equipment into water, do not retrieve
it until you have first unplugged all cords.
Do not reconnect this equipment until it has
dried thoroughly.
• Avoid using this equipment during electrical
storms in your immediate area. There is a
remote risk of electric shock from lightning.
Urgent calls should be brief. Even though
protective measures may have been installed
to limit electrical surges from entering your
home or business, absolute protection from
lightning is impossible.
• If you suspect a natural gas leak, report it
immediately, but use a telephone away from
the area in question. The SoundStation2
Avaya’s electrical contacts could generate a
tiny spark. While unlikely, it is possible that
this spark could ignite heavy concentrations
of gas.
• Never push objects of any kind into the
SoundStation2 Avaya through housing slots
as they may touch hazardous voltage points
or short out parts that could result in a risk
of electric shock. Never spill liquid of any
kind on the telephone. If liquid is spilled,
contact service personnel.
• To reduce the risk of electric shock, do not
disassemble SoundStation2 Avaya. Opening
or removing covers may expose you to
hazardous voltages. Using incorrectly reassembled equipment can cause electric shock.
If your telephone equipment does not work
properly, refer to the section describing how
to connect service. The support telephone
number can be found on the back cover of
this booklet.
• Never install telephone wiring during a
lightning storm.
• Never install telephone jacks in wet locations
unless the jack is specifically designed for
wet locations.
• Never touch uninsulated telephone wires or
terminals unless the telephone line has been
disconnected from the network interface.
• Always use caution when installing or
modifying telephone lines.
IMPORTANT SAFETY
INSTRUCTIONS
Page 3

Thank You ............................................. 5
Overview ..............................................
5
Parts List ...............................................
6
System Compatibility ............................... 7
Setting up SoundStation2 Avaya ...............
7
Features ................................................ 9
LED Indicators ......................................................................................... 9
Buttons ..................................................................................................9
Understanding the Display ....................................................................... 9
Using SoundStation2 Avaya ................... 10
Placing a Call ........................................................................................ 10
Answering a Call ................................................................................... 10
Answering a Second Call ........................................................................10
Ending a Call ......................................................................................... 10
Call Hold ............................................................................................... 11
Call Mute .............................................................................................. 11
Call Timer .............................................................................................11
Redial ...................................................................................................11
Ringer Volume Adjustment ..................................................................... 12
Dial Tone and Volume Adjustment ........................................................... 12
Speaker Volume Adjustment .................................................................. 12
Display Contrast ...................................................................................12
Ring Type .............................................................................................13
Back Light ............................................................................................. 13
Language ..............................................................................................14
Special Audio Mode ............................................................................... 15
Conferencing - using the button .....................................................15
Bridge Soft Key ..................................................................................... 16
Phone Book ..........................................................................................17
View System Information ......................................................................19
Auxiliary Audio Port .............................................................................. 20
Using the DEFINITY Phone .....................................................................20
Troubleshooting ................................... 22
No Dial Tone ......................................................................................... 22
Does Not Ring ....................................................................................... 22
Flickering LCD .......................................................................................22
Keypad Input Doesn’t Register ...............................................................22
Muffled or “in a well” Reception ...........................................................22
Table of Contents
Page 4

Short Silences, Echoes, or Clipped Speech ................................................ 23
Physical Damage ................................................................................... 23
For Best Performance ............................................................................23
LCD Messages ....................................................................................... 24
Administrative Setup - Overview ............ 26
Passcode .............................................................................................. 27
Location Information .............................................................................. 28
Diagnostics .......................................... 30
Mic (Microphone) Test ...........................................................................30
Console SPKR (Speaker) Test ................................................................. 30
Restore Defaults ................................................................................... 31
Specifications and Warranty Information .. 32
Limited Warranty and Limitation of Liability ............................................ 33
FCC Rules .............................................................................................35
Canadian Department of Communications Notice ...................................... 35
Table of Contents
Page 5

SoundStation2 Avaya User Guide - 5
Thank You
Thank you for choosing the Polycom
SoundStation2 Avaya. This conference phone can be connected directly
to DEFINITY and System 75/85 digital ECS telephone systems. There is
no need for analog terminal adapters,
analog lines or analog line cords to
support your conferencing system. In
this User Guide, you will find everything you need to quickly set up your
new conference telephone.
Be sure to verify with your System
Administrator that your network
is prepared for configuring your
SoundStation2 Avaya telephone.
Lastly, it is important that you read
the Parts List, and the Safety Notices
section in this guide before you begin
using the SoundStation2 Avaya.
Overview
SoundStation2 Avaya is a perfect entry level conference telephone for your business, suitable for use in small to medium-sized conference rooms and offices.
SoundStation2 Avaya features:
Acoustic Clarity Technology
Polycom’s legendary technology that
automatically allows people on both
sides of the call to speak at the same
time.
Enhanced User Interface
A backlit LCD display and three soft
keys make the phone very easy to
use. Caller related information such
as CallerID is easy to read and the
built-in phonebook and speed dial list
can hold up to 25 entries.
Multi-language Support
Set the phone up to display the language that you are most comfortable
with. Choose from English, French,
German, Italian, Norwegian, Spanish,
and Brazilian Portuguese.
Enhanced Connectivity Options
Simply connect a pair of extension
microphones to the telephone to extend the microphone pickup range.
Page 6

SoundStation2 Avaya User Guide - 6
Parts List
The following items are included in
your SoundStation2 Avaya package.
Check this list before installation to
ensure that you have received each
item.
If you are missing any items, please
contact your SoundStation2 Avaya
reseller.
SoundStation2 Avaya Console
Console to Interface Module Cable
Interface Module
Extension microphones
(Sold as an accessory.)
Documentation/CD
Network Cable
RJ11 to RJ45 Adapter Cables
(Additional adapters supplied in some
countries.)
Power Adapter (Varies by country.)
Page 7

SoundStation2 Avaya User Guide - 7
SoundStation2 Avaya is compatible
with any DEFINITY digital voice port
that supports the 6400, 7400 or 8400
series phones (with the exception of
the CallMaster series.)
Connection Requirement: Requires
standard DEFINITY wall jack. RJ45/
RJ11 adapter cables are included for
your convenience.
System Compatibility
1. Insert the short Network Cable into
the SoundStation2 Avaya Interface
Module jack marked with the Network icon ( ). Plug the other
end into the digital voice jack, as
shown.
► If the connector does not fit, you
will need one of the optional RJ11
to RJ45 Network Cables for connection to the wall jack, and for
your phone should you choose that
option. This cable has a smaller
connector on one end, so try it both
ways.
You have the option to install a
DEFINITY series telephone along with
your SoundStation2 Avaya:
1. P
lug the DEFINITY Telephone
cable into the jack on the Interface
Module indicated by the telephone
icon .
► If the connector does not fit you
will need one of the optional
cables as a replacement for your
phone cable. This cable has a
smaller connector on one end, so
try it both ways.
2. Plug the long ‘Console to Interface
Module’
cable into the jack on the
Interface Module labeled with the
icon as shown.
Setting up SoundStation2 Avaya
Any digital phone supported by your
telephone network can be connected to
the phone jack on the Interface Module.
Page 8

SoundStation2 Avaya User Guide - 8
Ready State
SoundStation2 Avaya will display a
Ready message upon power up and
completion of initialization.
The Ready message is also shown after a
call is completed and the phone is available for the next call.
READY
REDIAL
PH BOOKSP DIAL
5551212
3. Plug the other end into the slot
under the SoundStation
2 Console
as illustrated.
Then thread the
cable through the channels on the
underside of the console as shown
at right.
4. Plug the Power Adapter Cable
into the Interface Module jack
marked then plug the Power
Adapter into the electrical outlet.
► The first time the SoundStation2
Avaya
is powered up and connected to the network through the
Interface Module, it will run a brief
self-test and synchronize itself
with your telephone network. During this time the LEDs will blink.
When the process is complete you
will hear a tone and the LEDs will
switch off. This process can take
20 seconds.
The SoundStation2 Avaya is designed
for greater room coverage with ex
-
tended microphones.
► If using the optional extension
microphones, connect to
SoundStation2 as shown at right.
Place the SoundStation2 Avaya on a
flat, stable surface in the center of the
room.
► If using the extended hypercar-
diod microphones, for the best
coverage, position as shown in
the example to the right.
MIC 1
MIC 3MIC 2
MIC 4 MIC 5
Page 9

SoundStation2 Avaya User Guide - 9
READY
REDIAL
PH BOOKSP DIAL
5551212
Features
LED Indicators
Buttons
Understanding the Display
The LEDs located on the top
of your SoundStation2 Avaya
indicate the current status of your
conference phone:
Green - your call is in progress.
Blinking green - a call is incoming.
Red - your call is muted.
Blinking Red - your call is on hold.
Menu
Displays a menu
of settings and
options.
Exit
Exits from current screen
to previous menu.
Soft Keys
The screen will display
labels for these keys to
identify their context-sensitive functions.
Phone
Answers incoming calls,
dials a call, ends a call,
and provides dial tone.
Conference
Call or join call participants
during a conference call.
Dial Pad
These 12 keys provide the 10 digits, the 26
alphabetic characters, and special characters
available in context sensitive applications.
Mute
Toggle on or off during a conversation.
Volume
Use these to adjust the
volume of the speaker, ringer
and dial tone.
Select
Choose a menu item.
Scroll
Navigate up or down
through displayed lists.
Information Area
This Phone’s Number
Soft Key Functions
The screen will display labels for these
keys, to identify their context-sensitive
functions.
Page 10
SoundStation2 Avaya User Guide - 10
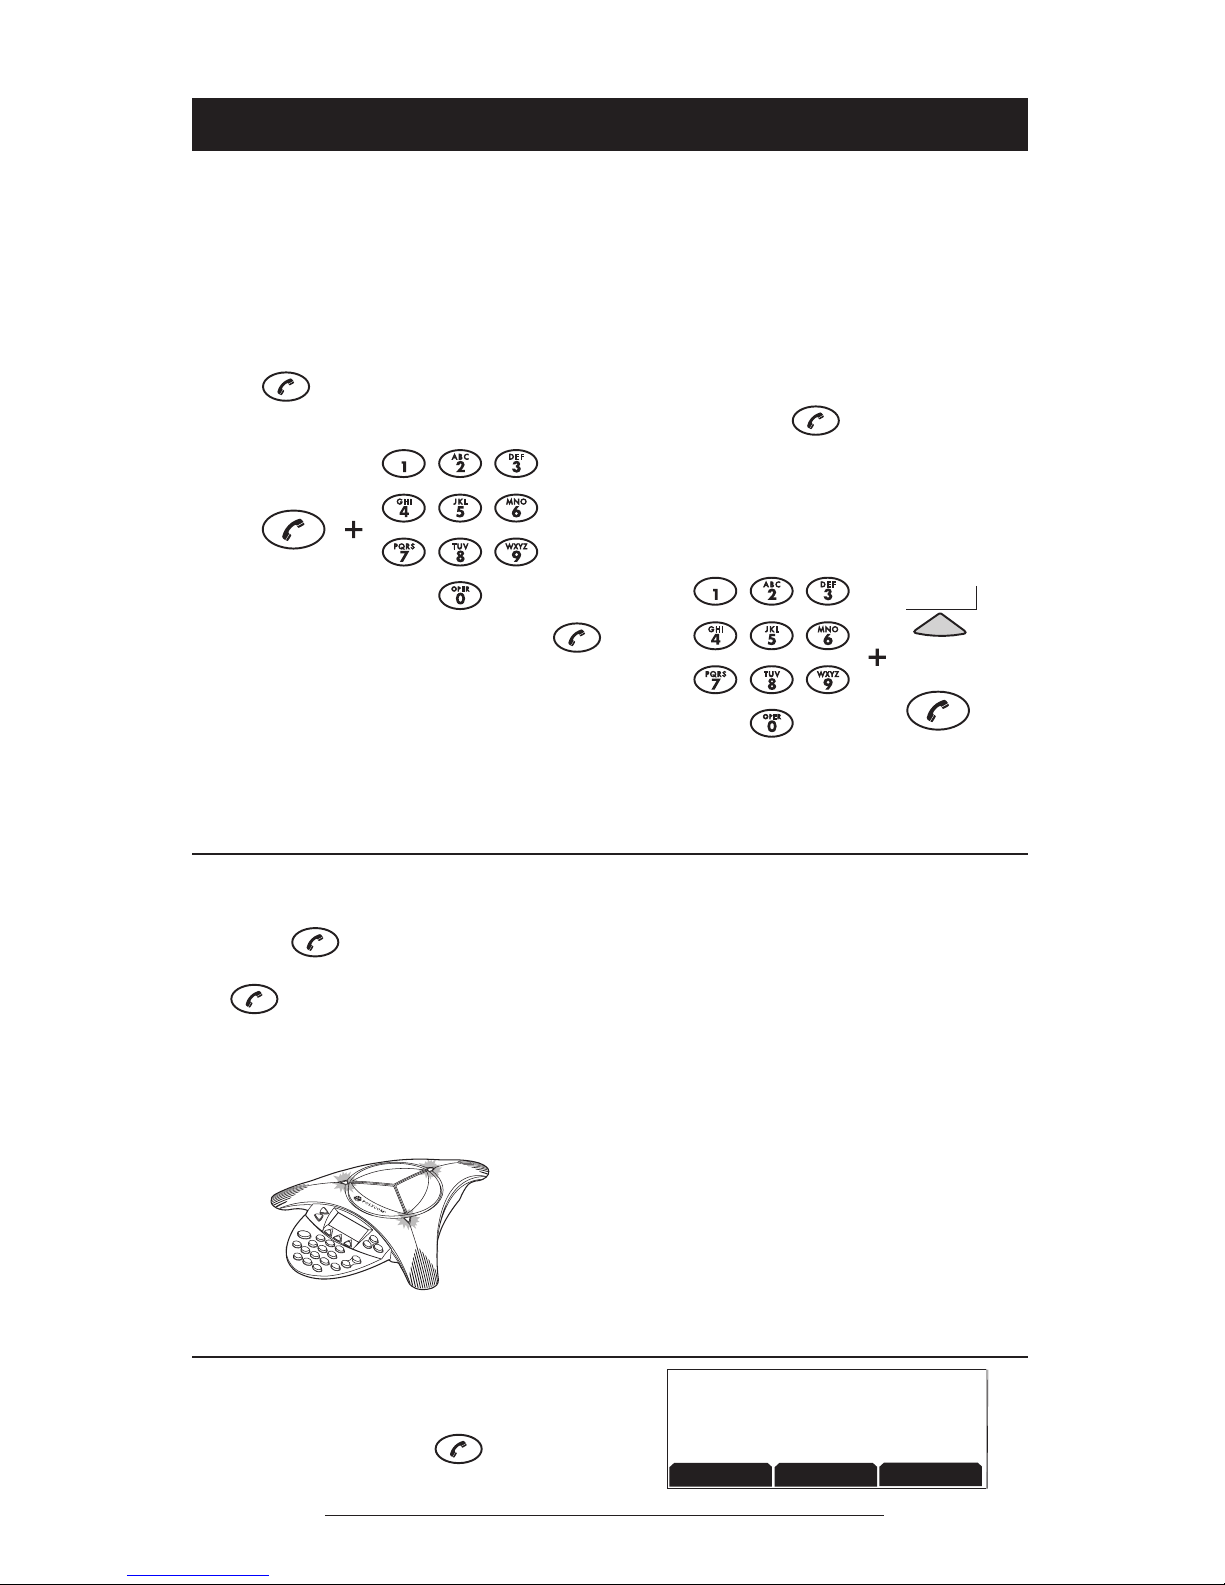
Using SoundStation2 Avaya
Direct Dial
1. To obtain dial tone, press the
key.
2. Dial the desired number.
Indirect Dial
1. From the Ready screen, dial the
desired number.
2. Press the
key or the SEND
soft key to make the call.
► If you make a mistake entering
the telephone number, press the
<DEL soft key.
Answering a Call
Press the key or any number key
to answer an incoming call. Pressing
the key will override all other
telephone activity.
The three LEDs will
blink green when the phone rings, and
the display will show “Incoming Call”.
OR
SEND
Ending a Call
To end a call, press the
key.
Placing a Call
SoundStation2 Avaya allows you to place a call over a digital
line. Several methods are available to initiate a call.
00:05:23
REDIAL
PH BOOKSP DIAL
5551212
CALL ENDED
► To cancel the call, press the
key.
► Press the CANCEL soft key to
cancel the call or wait for 20
seconds.
Page 11

SoundStation2 Avaya User Guide - 11
Call Mute
► To mute a call, press the mute but-
ton . The LEDs on the top
of your SoundStation2 Avaya will
glow red when your call is muted.
► To release mute, press the mute
button again.
Call Hold
►To place a call on hold, press the
HOLD soft key. The LEDs on the
top of your SoundStation2 Avaya
will blink red.
►To resume a call, press the RESUME
soft key.
Call Timer
Call progress on an active call is monitored through a local call timer. This is
visible within the active call window on
the display.
Redial
SoundStation2 Avaya stores the number
that was last dialed. This number can be
recalled using the REDIAL soft key.
► Press the REDIAL soft key. The last
number called will be displayed
and dialed.
OR
► Press the key and then the
REDIAL soft key. The last num-
ber called will be displayed and
dialed.
00:01:15
HOLD
5551212
15555552222
RESUME
5551212
HOLD
00:01:15
HOLD
5551212
15555552222
HOLD
5551212
MUTE
00:01:15
HOLD
5551212
15555552222
READY
REDIAL
PH BOOKSP DIAL
5551212
Page 12

SoundStation2 Avaya User Guide - 12
Ringer Volume Adjustment
When the SoundStation2 Avaya is in Ready
state or on hook, press the Volume buttons to
adjust the ringer volume.
Dial Tone Volume Adjustment
When the SoundStation2 Avaya is off
hook, press the Volume buttons to adjust
the dial tone volume.
Speaker Volume Adjustment
During an active call, press the Volume
buttons to adjust the speaker volume.
Display Contrast
1. Press the Menu button and
choose Settings.
2. Cycle through the options using
the Scrolling buttons and
choose Contrast, and then press
the Select button .
3. Press the Scrolling buttons
or the + and - soft keys to adjust
the display contrast.
4. Press the SAVE soft key or Select button to apply the
selected contrast setting or the
Exit button to cancel this
change.
SETTINGS
PHONE BOOK
THIS PHONE
BRIDGE SETUP
CONTRAST
SAVE
+-
Page 13

SoundStation2 Avaya User Guide - 13
Ring Type
1. Press the Menu button and
choose Settings.
2. Cycle through the options using
the Scrolling buttons
and
choose Ringer Type, and then
press the Select button .
3. Sample the ring types by pressing the Scrolling buttons or
the ← and → soft keys.
4. Press the SAVE soft key or
Select button to apply the
selected ringer setting or the
Exit button to cancel this
change.
Backlight
The SoundStation2 Avaya’s display
lights up when any button on the keypad
is pressed, or on an incoming call.
To turn the back light on or off:
1. Press the Menu button
and
choose Settings.
2. Cycle through the options using
the Scrolling buttons
and
choose Backlight, and then press
the Select button .
► The current status of the back
light will be displayed.
3. Press the ON or OFF soft key or
cycle through OFF and ON by
pressing the Scrolling buttons
.
4. Press the SAVE soft key or Select
button to apply the selected
backlight setting or the Exit button to cancel this change.
SETTINGS
PHONE BOOK
THIS PHONE
BRIDGE SETUP
RINGER TYPE
Classic
SAVE
SETTINGS
PHONE BOOK
THIS PHONE
BRIDGE SETUP
BACKLIGHT
LANGUAGE
RINGER TYPE
SETTINGS
BACKLIGHT
On
OFF
ON
SAVE
Page 14

SoundStation2 Avaya User Guide - 14
Language
SoundStation2 Avaya allows you to select your
preferred language for the phone to use when displaying information.
To change the language setting:
1. Press the Menu button
and
choose Settings.
2. Cycle through the options using
the Scrolling buttons
and
choose Language, and then press
the Select button .
3. Cycle through the available languages by pressing the Scrolling
buttons
or the ← and → soft
keys.
4. Press the SAVE soft key or Select
button to apply the selected
language setting or the Exit button
to cancel this change.
SETTINGS
PHONE BOOK
THIS PHONE
BRIDGE SETUP
BACKLIGHT
LANGUAGE
RINGER TYPE
SETTINGS
Page 15

SoundStation2 Avaya User Guide - 15
Special Audio Mode
This feature allows you to take advantage
of the SoundStation2 Avaya’s speaker
and microphones. For example, if you
were in a call on your mobile phone, you
could connect your mobile phone to the
SoundStation2 Avaya and use its speaker
and microphones to continue your conversation and include everyone in the room in
the conversation.
► A 2.5 mm jack marked is
used to connect together audio
devices like mobile phones.
► Cables and/or adaptors are not in-
cluded with SoundStation2 Avaya.
►The Phone Book can be viewed during a call with a mobile phone. Calls
may not be placed via the Phone Book
while connected.
►A mobile phone cannot join a call in
progress on SoundStation2 Avaya.
Conferencing - using the button
You can establish multi-party calls with
your SoundStation2 Avaya as follows:
Adding a call:
1. While on an active call, press the
Conference button . The first
call is automatically placed on
hold.
2. Dial the number you wish to call.
You may use the Redial or Direct
Dial method.
3. Press the Conference button
or JOIN soft key to join the second
call.
Once added to the conference, calls
cannot be selectively dropped without
terminating the conference call.
►Take care to terminate unwanted
calls - busy tone, voicemail, a person
otherwise occupied - by pressing the
CANCEL soft key before pressing CONF
to begin the next attempt. Far end par-
ticipants may hang up at any time.
Page 16

SoundStation2 Avaya User Guide - 16
OR
1. Press the HOLD soft key to place
the first call on hold.
2. Press the Conference button
and enter the number you
wish to call. You may use the
Redial or Direct Dial method.
Programming the Bridge number:
Bridge Soft Key
You may program the telephone number of
your preferred audio conferencing bridge
or service into the SoundStation2 Avaya so
that it is immediately available.
1. Press the Menu button
,
choose Bridge Setup using the
Scrolling buttons, and press
the Select button .
2. Choose Enter Phone Number and
press the Select button and
then enter the bridge number using
the dial pad. Enter any necessary
prefix such as 9 and/or 1.
► If you make a mistake entering the
number, use the <DEL soft key to
correct the error.
3. Press the
SAVE soft key or CANCEL
soft key
if you wish to cancel the
procedure.
The SPEED DIAL soft key will not
display when the bridge number
is configured.
SETTINGS
PHONE BOOK
THIS PHONE
BRIDGE SETUP
ENTER PHONE NUMBER
EDIT SOFT KEY
BRIDGE SETUP
Conferencing features, including the
number of parties that can be conferenced
vary by ECS/Definity system.
Check with your System Administrator
if you are unsure about the conferencing
services provided.
Page 17

SoundStation2 Avaya User Guide - 17
Editing the Bridge soft key:
1. Press the Menu button ,
choose Bridge Setup using the
Scrolling buttons , and press
the Select button .
2. Choose Edit Soft Key, press the
Select button and enter the
new soft key label using the dial
pad. The first six characters will
display.
► If you make a mistake entering
the soft key label, use the <DEL
soft key to correct the error.
3. Press the
SAVE soft key or CANCEL
soft key
if you wish to cancel the
procedure.
1. Press the
BRIDGE soft key.
2. The programmed number is
automatically dialed and a call is
placed to your preferred bridge
vendor.
Placing a call using the Bridge soft key:
Phone Book
You can use the Phone Book to store a
local directory of 25 contacts. You can
add, edit, delete, dial, or search any
contact in this list using just a few key
strokes.
Selecting the PH BOOK soft key displays
the Phone Book list sorted by names.
This list may be sorted by Name,
Company, or Speed Dial.
SETTINGS
PHONE BOOK
THIS PHONE
BRIDGE SETUP
READY
REDIAL
PH BOOKSP DIAL
5551212
READY
REDIAL
PH BOOKBRIDGE
5551212
Page 18

SoundStation2 Avaya User Guide - 18
CANCEL
SPACE<DEL
Name:
PH#:
CO:
Charles_
CANCEL
Name:
PH#:
CO:
_
Quick selection in a list:
Adding an entry:
1. Press the PH BOOK soft key and
then the NEW soft key.
2. Enter information in the Name,
Phone# (telephone number
including any prefixes, such as 9
and/or 1), and company field using the alphanumeric keys on the
dial pad. You can move between
fields using the Scrolling buttons
.
3. Press the SAVE soft key. You can
accept the next available speed
dial number assigned to your
new entry or you can choose
your own speed dial number by
using the Scrolling buttons
or the dial pad.
4. Press the OK soft key to save
or the BACK soft key to edit the
phone book entry.
Name or Company list. Press a numeric
key that corresponds with the letter that the name or company name
begins with. For example, pressing
3 repeatedly will provide you with
names that begin with D, E, F, and 3.
Speed Dial list. Press a numeric key to
select the corresponding entry. For
example, pressing 2 would select entry
02, and pressing 23 would select entry
23.
Dennis Gray
Derek Brown
Donald Wilson
SORT
NEW
DIAL
Earl Edwards
Elizabeth Grason
Elliot Ray
SORT
NEW
DIAL
Felix Mason
Fiona Ferguson
Frank James
SORT
NEW
DIAL
02 Chris R
03 Matt Smithe
04 Andrew Adams
SORT
NEW
DIAL
23 George William
24 Harold Smit
h
25 Jim Shoe
SORT
NEW
DIAL
SAVE
SPACE<DEL
Name:
PH#:
CO:
Charles White
5555559876
OK
BACK
Charles White
Speed Dial #:24
Page 19

SoundStation2 Avaya User Guide - 19
Editing an entry:
1. Choose the entry you wish to edit
and press the Select button .
2. Press the CHANGE soft key. Using
the Scrolling buttons
, select
the field you wish to edit.
3. Using the alphanumeric keys on
the dial pad, make changes.
4. Press the SAVE soft key. You can
accept the current speed dial
number assigned to the entry or
you can choose another speed dial
number by using the Scrolling
buttons
or the dial pad.
5. Press the OK soft key to save or
the BACK soft key to edit the phone
book entry.
Deleting an entry:
1. Choose the entry you wish to
delete and press the Select button
.
2. Press the REMOVE soft key. Press
the OK soft key to remove or
the CANCEL soft key to leave the
menu without removing.
View System Information
This feature displays the following information about the SoundStation2
Avaya: Location and Number and System Information.
Location and Number
1. Press the Menu button and
choose This Phone.
2. Cycle through the options using
the Scrolling buttons
and
choose Location and Number,
and then press the Select button
.
System Information
1. Press the Menu button and
choose This Phone.
2. Cycle through the options using
the Scrolling buttons
and
choose System Information,
and then press the Select button
.
DIAL
REMOVE
CHANGE
23 Charles White
5555559876
DIAL
REMOVE
CHANGE
23 Charles White
5555559876
OK
CANCEL
23 Charles White
REMOVE FROM PH BOOK?
Page 20

SoundStation2 Avaya User Guide - 20
1. Connect an external recording
device, such as a cassette tape recorder, via the auxiliary jack on the
interface module. The auxiliary
jack is marked AUX I/O.
2. Press the Menu button and
choose Settings.
3. Choose Aux Audio and press
the Select button . Cycle
through the options using the
Scrolling button .
4. Press the SAVE soft key or Select
button to save the setting.
The setting for auxiliary audio needs to
match the kind of device that is being
connected to the phone.
► Wireless Mic = audio will be re-
ceived from a wireless microphone
device.
► Record Out = all audio will be sent
to an audio recording device.
► Ext Speaker = audio will be sent to
a connected external speaker.
Auxiliary Audio Port
SoundStation2 Avaya offers an auxiliary audio port that
allows external devices to connect to the conference
phone.
A typical example is to record conference call audio by
connecting an external recording device.
AUX I/O
Using the DEFINITY Phone
When the SoundStation2 Avaya is not in
use you may use the DEFINITY phone
(connected to the Interface Module) and it
will function as usual.
Answering a call on the DEFINITY Phone:
Incoming calls will ring on both
the DEFINITY phone and the
SoundStation2 Avaya
. If you answer
the call on the DEFINITY phone and
want to transfer it to the conference
phone, simply press ON/OFF on the
conference phone and hang up the
handset. The LED's will blink red to
Page 21

SoundStation2 Avaya User Guide - 21
indicate the hold state and the display
will show “Line in Use” until the
handset is returned to the cradle, then
return to the green steady state.
The call will be active on the
conference phone and all functions
will be as defined for calls initiated on
the conference phone.
Conferencing - using the DEFINITY phone:
Conference calls already established
on the DEFINITY phone can be easily
transferred to the SoundStation2 Avaya.
► Press the ON/OFF button on the
conference phone then replace the
DEFINITY handset. The LEDs
will blink red to indicate the hold
state and the display will show
“Line in Use” until the handset is
returned to the cradle, then return
to the green steady state.
The SoundStation2 Avaya will function
as if the conference call had originated
on the conference phone. If the ECS
limit has not been reached, new parties
may be added as described earlier.
Transferring conferences before
the cycle is complete, such as
before the call is established, and
included or dropped, will result
in dropping all callers if you
subsequently push the ON/OFF
button on the conference phone.
Call Mute - using the DEFINITY Phone:
If you have a DEFINITY phone
connected to the Interface Module,
and your SoundStation2 Avaya is in
use, you may use your phone to break
away from the public conference call
to speak privately to the far end(s)
without disconnecting the conference
call.
► When you lift the handset, all
microphones and the speaker
on the console are muted. The
red LEDs will blink to indicate
the hold state and the display
will show “Line in Use”
. When
the handset is returned to the
cradle, the conference call is
resumed and the LEDs return to
a steady state.
Page 22

SoundStation2 Avaya User Guide - 22
Troubleshooting
No Dial Tone
The telephone cable must be plugged into a digital
telephone jack. If the dial tone is not heard, verify the
following:
► Check that the console is opera-
tional.
► Check that the telephone cable
from the interface module is
connected to the digital PBX
line.
Does Not Ring
Check that the ringer is not turned off.
See “Ring Type”, page 12.
► If the volume is turned all the
way down, increase the volume
with the Volume buttons.
Flickering LCD
If your screen appears to flicker, it
may be because you are using a certain type of florescent lighting in your
building. Move the SoundStation2
Avaya away from the lights or replace
the florescent bulbs.
Keypad Input Doesn’t Register
This could happen if you enter information too quickly. Press the alphanumeric buttons slowly.
Some buttons may not be recognized
if you press them too quickly.
Muffled or “in a well” Reception
This is caused by highly reverberant rooms and people
speaking too far from the microphone.
► Speak closer to the console so
that the microphones pick up
your speech more accurately.
► Add more sound absorbency to
the room.
Page 23

SoundStation2 Avaya User Guide - 23
Short Silences, Echoes, or Clipped Speech
► Do not move the SoundStation2
Avaya console while it is in use.
► Keep your hands away from the
console during calls.
► To avoid excessive noise around
SoundStation2 Avaya, keep papers, cups, and other noise-producers away from the console.
► At the beginning of each call,
let someone at each location
speak in turn for a few moments
to enable SoundStation2 Avaya
to adapt to its environment.
► The other parties may be using
non-Polycom equipment which
may cause audio performance
issues.
► Try calling again; a different
line may provide a better connection.
Physical Damage
► If physical damage is severe
enough that the internal parts
become visible, disconnect the
SoundStation2 Avaya immediately.
► Do not reconnect to the
telephone network until the
SoundStation2 Avaya has been
repaired.
For Best Performance
Your SoundStation2 Avaya performs optimally when you
follow these guidelines:
► Position the SoundStation2
Avaya in the center of the conference table or desk.
► Do not move the SoundStation2
Avaya during a call.
► Do not shuffle papers near the
SoundStation2 Avaya.
►Position extended microphones
7’ from the SoundStation2
Avaya console.
► Speak at a normal conversa-
tion level, and direct your voice
towards the SoundStation2
Avaya, or towards the extended
microphone.
► Unplug all cords before clean-
ing the SoundStation2 Avaya.
Do not use liquid cleaners or
aerosol cleaners. Use a damp,
soft cloth for cleaning.
Page 24

SoundStation2 Avaya User Guide - 24
LCD Message What it means: What you will see:
Ready
Phone is in idle state and ready to make calls. Idle screen.
Call Ended
The call has been dropped. “Call Ended” with elapsed time
indicated.
Mobile Phone In
A mobile phone is plugged in to the mobile phone
jack OR a mobile phone call has been initiated.
“Mobile Phone In”
Enter Number
Enter the number you wish to dial. Digits of the number you are dialing.
LCD Messages
The following messages are displayed on the LCD.
Page 25

SoundStation2 Avaya Administrator Guide - 25
Administrator Guide
Page 26

SoundStation2 Avaya Administrator Guide - 26
Location:
1 Location Name Enter a name for the SoundStation2 Avaya’s location,
such as “Conf Room B”.
2 This Phone # Enter the SoundStation2 Avaya’s telephone number.
Passcode:
1 Set an optional passcode. (Default: no passcode is set.)
Diagnostics:
1 Mic Test View the sample level received by each microphone.
2 Console Speaker
Test
Select acoustic test signals to drive through the
SoundStation2 Avaya’s speakers.
3 Restore Defaults Reset all custom settings and data entries. Restores
original default settings.
The Administrative Setup menu consists of the following options. The Admin
istrative Setup menu can be passcode protected by setting an optional passcode.
Subsequent access to this menu will require passcode entry.
Administrative Setup - Overview
Page 27

SoundStation2 Avaya Administrator Guide - 27
Assign a passcode:
1. Press the Menu button ,
choose Admin Setup using the
Scrolling buttons , and press
the Select button . Choose
Passcode using the Scrolling but-
tons , and press the Select
button .
2. Press the ASSIGN soft key and enter
a three-digit passcode. If you
make an error, press the <DEL soft
key to erase the error.
3. Press the SAVE soft key. You may
press the CANCEL soft key or the
Exit button if you choose not
to save the passcode.
When you select Passcode from the Admin Setup menu,
the screen will display whether or not a passcode is currently assigned.
Passcode
►Record the passcode. If the passcode is forgotten,
contact Polycom Support at www.polycom.com/support
and click on “How to Contact Support and Service” for
your local support contact information.
Remove a passcode:
Removing the passcode removes the requirement for an
access passcode for the Admin Setup menu.
1. From the Admin Setup menu,
choose Passcode using the Scrolling
buttons and press the Select button .
2. Press the REMOVE soft key, enter
the current passcode, and press the
ENTER soft key. If you decide not to
remove the passcode, press the CAN-
CEL soft key or the Exit button .
►If you enter an incorrect passcode,
you will be notified to try again.
►If you make an error, press the
<DEL soft key to erase the error.
Passcode:_
CANCEL
<DEL
ENTER
INCORRECT PASSCODE
LOCATION
PHONE SYSTE
M
PASSCODE
ADMIN SETUP
PASSCODE
NOT ASSIGNED
ASSIGN
ENTER NEW
Passcode:_
CANCEL
<DEL
SAV
E
PASSCODE
ASSIGNED
CHANGE
REMOV
E
ENTER CURRENT
Passcode:_
CANCEL
<DEL
ENTER
Page 28

SoundStation2 Avaya Administrator Guide - 28
ENTER NEW
Passcode:_
CANCEL
<DEL
SAV
E
ENTER CURRENT
Passcode:_
CANCEL
<DEL
ENTE
R
Change the passcode:
1. From the Admin Setup menu, choose
Passcode using the Scrolling buttons
and press the Select button
.
2. Press the CHANGE soft key, enter the
current passcode, and press the ENTER
soft key. If you decide not to change
the passcode, press the CANCEL soft
key or the Exit button .
►If you enter an incorrect passcode,
you will be notified to try again.
►If you make an error, press the
<DEL soft key to erase the error.
3. You will be prompted to enter a new
passcode. Enter a new passcode and
press the SAVE soft key. You may
press the CANCEL soft key or the Exit
button if you choose not to
save the passcode.
You can assign a location name, such as “Conference
Room B” and the telephone number associated with your
SoundStation2 Avaya.
Assigning a location name:
1. Press the Menu button ,
choose Admin Setup and press
the Select button , enter
passcode (if required) and press
the ENTER soft key. Choose Location using the Scrolling buttons
, and press the Select button
.
► Record the passcode. If the passcode is forgotten,
contact Polycom Support at www.polycom.com/
support and click on “How to Contact Support and
Service” for your local support contact information.
Location Information
PASSCODE
ASSIGNED
CHANGE
REMOVE
LOCATION NAME
THIS PHONE #
LOCATION
Page 29

SoundStation2 Avaya Administrator Guide - 29
2. Choose Location Name using the
Scrolling buttons
, and press
the Select button . Enter a
location name using the dial pad.
This name will be displayed when
“Location Name and Number”
submenu of “This Phone” menu is
selected from the main menu.
►If you make an error, press the
<DEL soft key to erase the error.
3. Press the SAVE soft key or the
Select button to save your
entry. You may press the Exit button to cancel your entry.
Assigning a telephone number:
1. Press the Menu button ,
choose Admin Setup and press the
Select button , enter passcode
(if required) and press the ENTER
soft key. Choose Location using
the Scrolling buttons
, and
press the Select button .
2. Choose This Phone # using the
Scrolling buttons , and press
the Select button . Enter the
SoundStation2 Avaya’s telephone
number.
►If you make an error, press the
<DEL soft key to erase the error.
3. Press the SAVE soft key or the
Select button to save your
entry. You may press the Exit button to cancel your entry.
LOCATION NAME
Conference Room B
SAVE
SPACE<DEL
LOCATION NAME
THIS PHONE #
LOCATION
THIS PHONE#
5554321
<DEL
SAV
E
Page 30

SoundStation2 Avaya Administrator Guide - 30
MIC 1
MIC 3MIC 2
Mic (Microphone) Test
You may test the SoundStation2 Avaya’s
microphones to ensure that they are
working optimally.
Console Speaker Test
You can select an acoustic test signal to drive through the
SoundStation2 Avaya’s speaker for speaker testing and to
sample the room acoustics.
Diagnostics
1. Press the Menu button ,
choose Admin Setup and press
the Select button , enter
passcode (if required) and press
the ENTER soft key. Choose
Diagnostics using the Scrolling buttons , and press the
Select button .
2. Choose Mic Test using the
Scrolling buttons , and press
the Select button . The
microphones are numbered according to the diagram.
3. Choose any microphone using
the Scrolling buttons , and
press the Select button .
►The testing microphone will
begin sampling at a 1 Hertz rate,
50% duty cycle.
►The display will show a meter
that modulates according to the
relative sample received by the
testing microphone.
1. Press the Menu button ,
choose Admin Setup and press the
Select button , enter passcode
(if required) and press the ENTER
soft key. Choose Diagnostics using
the Scrolling buttons , and press
the Select button .
2. Choose Console Speaker Test
using the Scrolling buttons
and press the Select button .
Choose the desired signal using the
Scrolling buttons
►Sine Sweep is a test signal
consisting of a 100 Hertz to
3,500 Hertz sine wave whose
frequency is swept according to
a linear progression of frequency as a function of time, or
(t)=A*sin(kt).
►One kiloHertz Tone is a con-
stant tone generated at exactly
1,000 Hertz.
►White Noise is a signal whose
energy is distributed uniformly
MIC 3 LEVEL METER
CANCEL
If a testing microphone’s meter indicates that it is receiving an atypically
low or high sample, despite appropriately controlled input, contact Polycom
Technical Support.
Page 31

SoundStation2 Avaya Administrator Guide - 31
among all frequencies within
a band of interest, which for
the SoundStation2 Avaya is approximately from 300 to 3,400
Hertz.
3. Press the Select button to activate the signal.
Restore Defaults
Restoring the defaults will irretrievably
remove all settings and data that have been
entered since the SoundStation2 Avaya was
first installed.
1. Press the Menu button ,
choose Admin Setup and press
the Select button , enter
passcode (if required) and press
the ENTER soft key. Choose
Diagnostics using the Scrolling buttons , and press the
Select button .
2. Choose Restore Defaults using
the Scrolling buttons
, and
press the Select button .
Press the OK soft key if you wish
to restore defaults or the CANCEL
soft key or the Exit button
to return to the Diagnostics
submenu.
Phone Book entries and Speed Dial
numbers are lost when restoring all
defaults.
Page 32

Specifications and
Warranty Information
Page 33

SoundStation2 Avaya Administrator Guide - 33
Limited Warranty
Limited Warranty and Limitation of Liability
Polycom warrants to the end user (“Customer”) that this product will be free from
defects in workmanship and materials,
under normal use and service, for one year
from the date of purchase from Polycom or
its authorized reseller.
Polycom’s sole obligation under this
express warranty shall be, at Polycom’s
option and expense, to repair the defec
tive product or part, deliver to Customer
an equivalent product or part to replace
the defective item, or if neither of the two
foregoing options is reasonably available,
Polycom may, in its sole discretion, refund
to Customer the purchase price paid for
the defective product. All products that
are replaced will become the property of
Polycom. Replacement products or parts
may be new or reconditioned. Polycom
warrants any replaced or repaired product
or part for ninety (90) days from shipment,
or the remainder of the initial warranty
period, whichever is longer.
Products returned to Polycom must be
sent prepaid and packaged appropriately
for safe shipment, and it is recommended
that they be insured or sent by a method
that provides for tracking of the package.
Responsibility for loss or damage does not
transfer to Polycom until the returned item
is received by Polycom. The repaired or
replaced item will be shipped to Customer,
at Polycom’s expense, not later than thirty
(30) days after Polycom receives the
defective product, and Polycom will retain
risk of loss or damage until the item is
delivered to Customer.
LIMITATION OF LIABILITY. TO THE
FULL EXTENT ALLOWED BY LAW,
POLYCOM EXCLUDES FOR ITSELF
AND ITS SUPPLIERS ANY LIABILITY,
WHETHER BASED IN CONTRACT OR
TORT (INCLUDING NEGLIGENCE),
FOR INCIDENTAL, CONSEQUENTIAL,
INDIRECT, SPECIAL, OR PUNITIVE
DAMAGES OF ANY KIND, OR FOR
LOSS OF REVENUE OR PROFITS,
LOSS OF BUSINESS, LOSS OF INFORMATION OR DATA, OR OTHER FINANCIAL LOSS ARISING OUT OF OR
IN CONNECTION WITH THE SALE,
INSTALLATION, MAINTENANCE,
USE, PERFORMANCE, FAILURE, OR
INTERRUPTION OF ITS PRODUCTS,
EVEN IF POLYCOM OR ITS AUTHORIZED RESELLER HAS BEEN ADVISED OF THE POSSIBILITY OF SUCH
DAMAGES, AND LIMITS ITS LIABILITY TO REPAIR, REPLACEMENT, OR
REFUND OF THE PURCHASE PRICE
PAID, AT POLYCOM’S OPTION. THIS
DISCLAIMER OF LIABILITY FOR
DAMAGES WILL NOT BE AFFECTED
IF ANY REMEDY PROVIDED HEREIN
SHALL FAIL
OF ITS ESSENTIAL
PURPOSE.
Exclusions
Polycom will not be liable under this
limited warranty if its testing and
examination disclose that the alleged
defect or malfunction in the product
does not exist or results from:
►Failure to follow Polycom’s installation, operation, or maintenance
instructions;
►Unauthorized product modification
or alteration;
►Unauthorized use of common carrier communication services accessed
through the product;
►Abuse, misuse, negligent acts or
omissions of Customer and persons
under Customer’s control; or
►Acts of third parties, acts of God,
accident, fire, lightning, power surges
or outages, or other hazards.
Page 34

SoundStation2 Avaya Administrator Guide - 34
WARRANTY EXCLUSIVE. IF
A POLYCOM PRODUCT DOES
NOT OPERATE AS WARRANTED
ABOVE, CUSTOMER’S SOLE
REMEDY FOR BREACH OF THAT
WARRANTY SHALL BE REPAIR,
REPLACEMENT, OR REFUND OF
THE PURCHASE PRICES PAID,
AT POLYCOM’S OPTION. TO
THE FULL EXTENT ALLOWED
BY LAW, THE FOREGOING
WARRANTIES AND REMEDIES
ARE EXCLUSIVE AND ARE IN
LIEU OF ALL OTHER WARRANTIES, TERMS OR CONDITIONS,
EXPRESS OR IMPLIED, EITHER
IN FACT OR BY OPERATION OF
LAW, STATUTORY OR OTHERWISE, INCLUDING WARRANTIES, TERMS OR CONDITIONS
OF MERCHANTABILITY, FITNESS
FOR A PARTICULAR PURPOSE,
SATISFACTORY QUALITY, CORRESPONDENCE WITH DESCRIPTION, AND NON-INFRINGEMENT,
ALL OF WHICH ARE EXPRESSLY
DISCLAIMED. POLYCOM NEITHER ASSUMES NOR AUTHORIZES ANY OTHER PERSON TO
ASSUME FOR IT ANY OTHER
LIABILITY IN CONNECTION
WITH THE SALE, INSTALLATION,
MAINTENANCE OR USE OF ITS
PRODUCTS.
Service Agreements
If you purchased your product from a
Polycom Authorized Reseller, contact
the Authorized Reseller for information about service agreements applicable to your product. For technical
assistance or information on service
programs, please visit Polycom’s website at www.polycom.com and select
the Support menu.
Disclaimer
Some countries, states, or provinces do
not allow the exclusion or limitation of
implied warranties or the limitation of
incidental or consequential damages
for certain products supplied to consumers, or the limitation of liability
for personal injury, so the above limitations and exclusions may be limited
in their application to you. When the
implied warranties are not allowed to
be excluded in their entirety, they will
be limited to the duration of the applicable written warranty. This warranty
gives you specific legal rights which
may very depending on local law.
Governing Laws
This Limited Warranty and Limitation
of Liability shall be governed by the
laws of the State of California, USA,
and by the laws of the United States,
excluding their conflicts of laws principles. The United Nations Conven-
tion on Contracts for the International
Sale of Goods is hereby excluded in
its entirety from application to this
Limited Warranty and Limitation of
Liability.
Page 35

SoundStation2 Avaya Administrator Guide - 35
This device complies with part 15 of the
FCC Rules. Operation is subject to the
following two conditions:
(1) This device may not cause harmful
interference, and
(2) This device must accept any inter
-
ference received, including interfer
ence that may cause undesired
operation.
NOTE: This equipment has been tested
and found to comply with the limits for
a Class A digital device, pursuant to
part 15 of the FCC Rules. These limits
are designed to provide reasonable
protection against harmful interference in
a residential installation. This equipment
generates, uses and can radiate radio
frequency energy and, if not installed and
used in accordance with the instructions,
may cause harmful interference to radio
communications. However, there is
no guarantee that interference will not
occur in a particular installation. If this
equipment does cause harmful interference
to radio or television reception, which can
be determined by turning the equipment
off and on, the user is encouraged to try to
correct the interference by one or more of
the following measures:
▼ Reorient or relocate the receiving
antenna.
▼ Increase the separation between the
equipment and receiver.
▼ Connect the equipment into an outlet
on a circuit different from that to
which the receiver is connected.
▼ Consult the dealer or an experienced
radio/TV technician for help.
In accordance with part 15 of the FCC
rules, the user is cautioned that any
changes or modifications not expressly
approved by Polycom Inc. could void the
user’s authority to operate the equipment.
This Class [A] digital apparatus complies
with Canadian ICES-003.
Cet appareil numérique de la classe [A]
est conforme à la norme N M B-003 du
Canada.
FCC Rules
Canadian Department of Communications Notice
Page 36

Technical Support in the United States
Internet http://www.polycom.com/support
Polycom WW Headquarters:
Polycom, Inc. Corporate Headquarters
4750 Willow Road
Pleasanton, CA 94588
© 2005 Polycom, Inc. All rights reserved.
Polycom, the Polycom logo design, and SoundStation are registered trademarks and SoundStation2 Avaya is
a trademark of Polycom, Inc. in the U.S. and various countries. All other trademarks are the property of their
respective companies. Specifications are subject to change without notice.
3810-17090-001 Rev. A
 Loading...