

Page 1
Polycom® CMA™ System Web Scheduling Guide
5.3 | April 2011 | 3725-77603-001D1
Page 2
Trademark Information
Polycom®, the Polycom “Triangles” logo, and the names and marks associated with Polycom’s products are
trademarks and/or service marks of Polycom, Inc., and are registered and/or common-law marks in the United
States and various other countries.
All other trademarks are the property of their respective owners.
Java is a registered trademark of Oracle and/or its affiliates.
Patent Information
The accompanying product is protected by one or more U.S. and foreign patents and/or pending patent
applications held by Polycom, Inc.
End User License Agreement
Use of this software constitutes acceptance of the terms and conditions of the Polycom CMA system end-user
license agreement (EULA).
The EULA is included in the release notes document for your version, which is available on the Polycom Support
page for the Polycom CMA system.
© 2010 Polycom, Inc. All rights reserved.
Polycom, Inc.
4750 Willow Road
Pleasanton, CA 94588-2708
USA
No part of this document may be reproduced or transmitted in any form or by any means, electronic or
mechanical, for any purpose, without the express written permission of Polycom, Inc. Under the law, reproducing
includes translating into another language or format.
As between the parties, Polycom, Inc., retains title to and ownership of all proprietary rights with respect to the
software contained within its products. The software is protected by United States copyright laws and international
treaty provision. Therefore, you must treat the software like any other copyrighted material (e.g., a book or sound
recording).
Every effort has been made to ensure that the information in this manual is accurate. Polycom, Inc., is not
responsible for printing or clerical errors. Information in this document is subject to change without notice.
ii
Page 3

Contents
Contents
1 Polycom® CMA™ System Overview . . . . . . . . . . . . . . . . . . . 1
Scheduling Overview . . . . . . . . . . . . . . . . . . . . . . . . . . . . . . . . . . . . . . . . . . . . . 1
Log Into the Polycom CMA System . . . . . . . . . . . . . . . . . . . . . . . . . . . . . . . . . 2
General Scheduling Information . . . . . . . . . . . . . . . . . . . . . . . . . . . . . . . . . . . . 2
Scheduling Participants and Endpoints . . . . . . . . . . . . . . . . . . . . . . . . . . 3
Bridge Selection and Cascading . . . . . . . . . . . . . . . . . . . . . . . . . . . . . . . . . 3
Bridge Scheduling and Reassignment . . . . . . . . . . . . . . . . . . . . . . . . . . . . 4
Field Input Requirements . . . . . . . . . . . . . . . . . . . . . . . . . . . . . . . . . . . . . . 5
Filter and Search a List . . . . . . . . . . . . . . . . . . . . . . . . . . . . . . . . . . . . . . . . . 5
Change Password . . . . . . . . . . . . . . . . . . . . . . . . . . . . . . . . . . . . . . . . . . . . . . . . 7
Log Out of the Polycom CMA System . . . . . . . . . . . . . . . . . . . . . . . . . . . . . . . 7
2 Conference Scheduling Overview . . . . . . . . . . . . . . . . . . . . . 9
Conference Menu and Views . . . . . . . . . . . . . . . . . . . . . . . . . . . . . . . . . . . . . . . 9
Conference Views—Future and Ongoing . . . . . . . . . . . . . . . . . . . . . . . . 11
Conference States . . . . . . . . . . . . . . . . . . . . . . . . . . . . . . . . . . . . . . . . . . . . 12
Context-Sensitive Conference Commands . . . . . . . . . . . . . . . . . . . . . . . 13
User Menu and Guest Book . . . . . . . . . . . . . . . . . . . . . . . . . . . . . . . . . . . . . . . 13
Context-Sensitive Guest Book Commands . . . . . . . . . . . . . . . . . . . . . . . 14
Add a Guest to the System Guest Book . . . . . . . . . . . . . . . . . . . . . . . . . 14
Edit a Guest in the System Guest Book . . . . . . . . . . . . . . . . . . . . . . . . . . 17
Delete a Guest from the System Guest Book . . . . . . . . . . . . . . . . . . . . . 17
3 Conference Management Operations . . . . . . . . . . . . . . . . . 19
Add/Schedule a Conference . . . . . . . . . . . . . . . . . . . . . . . . . . . . . . . . . . . . . . 19
Edit a Conference . . . . . . . . . . . . . . . . . . . . . . . . . . . . . . . . . . . . . . . . . . . . . . . . 23
Copy a Conference . . . . . . . . . . . . . . . . . . . . . . . . . . . . . . . . . . . . . . . . . . . . . . 25
Edit a Participant’s Settings . . . . . . . . . . . . . . . . . . . . . . . . . . . . . . . . . . . . . . . 25
Edit a Room’s Settings . . . . . . . . . . . . . . . . . . . . . . . . . . . . . . . . . . . . . . . . . . . 27
View Scheduling Information for a Conference . . . . . . . . . . . . . . . . . . . . . . 28
Manage an Active Conference . . . . . . . . . . . . . . . . . . . . . . . . . . . . . . . . . . . . . 29
Add Additional Participants to an Active Conference . . . . . . . . . . . . . . . . 31
Add a Room to an Active Conference . . . . . . . . . . . . . . . . . . . . . . . . . . . . . . 33
View the Video of a Participant in an Active Conference . . . . . . . . . . . . . . 33
Polycom, Inc. iii
Page 4

Polycom CMA System Web Scheduling Guide
Manage a Participant’s Endpoint During a Conference . . . . . . . . . . . . . . . 34
View a Participant’s Details During a Conference . . . . . . . . . . . . . . . . . . . . 35
Terminate an Active Conference . . . . . . . . . . . . . . . . . . . . . . . . . . . . . . . . . . . 37
Delete a Conference . . . . . . . . . . . . . . . . . . . . . . . . . . . . . . . . . . . . . . . . . . . . . . 37
4 Advanced Scheduling Operations . . . . . . . . . . . . . . . . . . . 39
Edit Conference Settings . . . . . . . . . . . . . . . . . . . . . . . . . . . . . . . . . . . . . . . . . . 39
Select a Bridge for a Conference . . . . . . . . . . . . . . . . . . . . . . . . . . . . . . . . . . . 44
Create a Cascaded Conference Across Multiple Bridges . . . . . . . . . . . . . . . 45
5 Conference and Participant Details . . . . . . . . . . . . . . . . . . 47
Conference Image . . . . . . . . . . . . . . . . . . . . . . . . . . . . . . . . . . . . . . . . . . . . . . . 47
Conference Details . . . . . . . . . . . . . . . . . . . . . . . . . . . . . . . . . . . . . . . . . . . . . . . 47
Conference Features . . . . . . . . . . . . . . . . . . . . . . . . . . . . . . . . . . . . . . . . . . . . . 49
Bridge (MCU) Features . . . . . . . . . . . . . . . . . . . . . . . . . . . . . . . . . . . . . . . . . . . 50
Participants List . . . . . . . . . . . . . . . . . . . . . . . . . . . . . . . . . . . . . . . . . . . . . . . . . 51
Participant Details . . . . . . . . . . . . . . . . . . . . . . . . . . . . . . . . . . . . . . . . . . . . . . . 52
Participant Settings . . . . . . . . . . . . . . . . . . . . . . . . . . . . . . . . . . . . . . . . . . . . . . 54
Index . . . . . . . . . . . . . . . . . . . . . . . . . . . . . . . . . . . . . . . . 57
iv Polycom, Inc.
Page 5

Polycom® CMA™ System Overview
This chapter provides an overview of the Polycom® Converged Management
Application™ (CMA™) system and includes these topics:
• Scheduling Overview
• Log Into the Polycom CMA System
• General Scheduling Information
1
— Scheduling Participants and Endpoints
— Bridge Selection and Cascading
— Bridge Scheduling and Reassignment
• Field Input Requirements
— Field Input Requirements
— Filter and Search a List
• Change Password
• Log Out of the Polycom CMA System
Scheduling Overview
The Polycom CMA system allows users with basic of advanced Scheduler
Permissions to schedule conferences from their desktops.
Using the simple Polycom CMA system Web Scheduler interface, schedulers
can create one-time or recurring conferences in a manner similar to their
favorite calendar application. Or schedulers with the Microsoft Outlook® or
IBM® Lotus Notes® can use the Polycom Scheduling Plugins to schedule
conferences.
Polycom, Inc. 1
Page 6

Polycom CMA System Web Scheduling Guide
Log Into the Polycom CMA System
To log into the Polycom CMA system web interface, you need:
• Microsoft Internet Explorer® 6.0, 7.0 or 8.0, Mozilla FireFox® 3.5 or 3.6, or
Apple Safari 3.2 or 4.0
• Adobe
• The IP address or host name of the Polycom CMA system server and your
You get three opportunities to enter the correct password. After three failed
attempts, the system returns an error message.
To log into a Polycom CMA system
1 Open a browser window and in the Address field enter the Polycom
®
Flash® Player 9.x or 10.0.x
username, password, and domain.
CMA system server IP address or host name.
— If prompted to install the Adobe Flash Player, click OK.
— If you receive an HTTPS Security Alert, click Yes.
To eliminate these HTTPS certificate security alerts in the future,
contact your system administrator.
2 When the Polycom CMA system Log In screen appears, enter your
Username and Password.
3 If necessary, select a different Language or Domain.
4 Click Login.
Because the Polycom CMA system is a role-based system, you see only the
pages and functions available to your roles.
General Scheduling Information
You may find the following general topics useful when you are scheduling
conferences.
• Scheduling Participants and Endpoints
• Bridge Selection and Cascading
• Bridge Scheduling and Reassignment
• Field Input Requirements
• Filter and Search a List
2 Polycom, Inc.
Page 7

Polycom® CMA™ System Overview
Scheduling Participants and Endpoints
When you schedule conferences, you select the participants you wish to join
the conference from your endpoint directory. Depending on your system
configuration, your endpoint directory may be the enterprise LDAP directory
or the Global Address Book. It may also include Guest Book entries.
For participants that have multiple endpoints registered with the Polycom
CMA system, the system selects the participant’s default endpoint. You can
change to another endpoint by selecting it from the Call Info list or by editing
the participant.
You can schedule participants without endpoints into conferences. You cannot
schedule endpoints without owners into conferences. The Polycom CMA
system can be configured to allow you to overbook dial-in participants. In this
case, dial-in participants can be scheduled to dial into multiple conferences
during the same time period, but the system reserves resources for the
participant for only the first scheduled conference. Dial-out participants
cannot be scheduled into multiple conferences.
For the same reason, if you schedule participants with endpoints such as
Polycom CMA Desktop, HDX, VVX, or VSX systems into conference as Dial
In endpoints, the conference will require external MCU resources.
Bridge Selection and Cascading
When a conference is scheduled with one of the Polycom CMA system
scheduling applications (Web Scheduler or Scheduling Plug-in for Microsoft
Outlook or IBM Lotus Notes) and the conference requires external MCU
resources (such as a Polycom RMX or MGC system), then by default the
Polycom CMA system automatically assigns the conference to a bridge.
However, the system allows users with advanced scheduler permissions to
select a bridge for their conferences. It also allows them to create multibridge,
cascaded conferences.
Bridge Selection
When scheduling a conference, users with advanced scheduler permissions
can select a bridge to host their conference by selecting the Single Bridge
option. When they select this option, the system presents a list of bridges that
have the capabilities and resources required to host their conference.
Because this bridge list depends on the template selection and conference
settings, users should make their template selection and conference settings
before selecting a bridge. Otherwise, they may select a bridge that cannot meet
their conferencing requirements. In this case, the conference will fail to
schedule.
Bridge Selection and Cascading Conferences
When scheduling a conference, users with advanced scheduler permissions
can select the Multi Bridge option to create cascading conferences.
Polycom, Inc. 3
Page 8

Polycom CMA System Web Scheduling Guide
In some respects, a cascaded conference looks like a single conference, but it is
actually two or more conferences on different bridges that are linked together.
The link is created by a dial-out from one conference to a second conference
via a special cascaded entry queue.
Some reasons you may wish to create cascading conferences include:
• To invite more conference participants than any single bridge can host
• To connect different bridges at different sites into a single conference
• To use the different capabilities of different bridges (for example, different
communication protocols, such as, serial connections, ISDN, etc.)
When you create a multibridge, cascaded conference, you must manually
select bridges and create the cascaded links between bridges by identifying the
originating bridge, the terminating bridge, and the network type (IP or ISDN).
The system displays an interconnection diagram that illustrates the cascaded
links. Once scheduled, each cascaded link appears as a participant in the
conference.
By default, the system automatically assign participants to the “best bridge”
for them based on available capacity, location, and least cost routing rules.
However, you may also choose to manually assign participants to bridges.
Bridge Scheduling and Reassignment
When a conference is scheduled with one of the Polycom CMA system
scheduling applications (Web Scheduler or Scheduling Plug-in for Microsoft
Outlook or IBM Lotus Notes), by default the system automatically assigns the
conference to a bridge unless a user with advanced scheduler permissions
intercedes. If that bridge is down at the time the system starts the conference,
the Polycom CMA system attempts to dynamically reassign the conference to
another bridge with sufficient capabilities and resources.
• If the system can successfully reassign the conference to another bridge,
the conference starts on the newly selected bridge, and the system sends
an updated conference email to all scheduled participants. This updated
email includes a new dial-in number that dial-in participants must use to
join the conference.
• If the system cannot successfully reassign the conference to another
bridge, the conference fails to start. The system sends an email to notify the
conference organizer of the failure.
Some notes about bridge reassignment:
• The bridge reassignment process only occurs when the system detects that
a bridge is down. It does not occur if the system determines that a bridge
does not have sufficient resources required to host the conference.
4 Polycom, Inc.
Page 9

Polycom® CMA™ System Overview
• If the Polycom CMA system cannot find another bridge with the features
and capacity needed to support a conference, the conference fails to start.
The system does not attempt to modify the conference settings in any way.
Instead, the system sends an email to notify the conference organizer of
the failure.
• The system will chain bridge reassignments. This means that if the next
bridge to which the system assigns a conference is down at the time the
system tries to start the conference, the system will try to reassign the
conference again.
• If the bridge to which the system reassigns a conference has ad hoc
conferences on it, the Polycom CMA system is unaware of those
conferences. The reassigned conference may fail to start if ad hoc
conferences are consuming resources the Polycom CMA system expected
to schedule. This is known behavior and is avoided by applying the best
practice of not using bridges for both scheduled and ad hoc conferences.
Field Input Requirements
While every effort was made to internationalize the Polycom CMA system, not
all system fields accept Unicode entries. If you work in a language other than
English, be aware that the Polycom CMA system fields that accept only ASCII
characters are shaded a light yellow.
For information about specific field requirements, see “System Field Input
Requirements” on page 549.
Filter and Search a List
In the Polycom CMA system interface, information is often summarized in
lists or grids.
Lists that include many items may have filters or searchable fields, which
allow you to view a subset of items or search for a specific entry. The available
filtering options depend on the type of information in the list. For example in
the conference list:
• If you select Custom Date as the filter, a calendar filter field appears
• If you select Ongoing Plus as the filter, an attribute option appears. You
In general, most text filter fields are ASCII only and the Polycom CMA system
search function is a case-insensitive, substring search. That means when you
enter a search string, the Polycom CMA system looks for that string whereever
it occurs (beginning, middle, or end) in the word or number.
can select the attribute Conference Name and enter all or part of the
conference name into the associated text field.
Polycom, Inc. 5
Page 10

Polycom CMA System Web Scheduling Guide
However, if the Polycom CMA system is integrated with an Active Directory,
the Polycom CMA system uses the LDAP search function for searches of the
directory. LDAP searches are prefix-searches that include an appended
wildcard. In this case, when you enter a search string, the system looks for that
search string only at the beginning of the indexed fields.
For example, all of the following searches for a participant will find Barbara
Smithe:
Barbara
Smithe
Bar
Smi
To optimize LDAP searches, the Polycom CMA system (and its
dynamically-managed endpoints) searches only indexed LDAP fields and a
limited set of attributes. The attributes include:
ObjectCategory
memberOf
DisplayName
GivenName
Sn
Cn
Samaccountname
groupType
distinguishedName
objectGuid
These are the requested attributes to be returned by the search:
Sn
Givenname
Mail
Ou
Objectguid
Telephonenumber
Cn
Samaccountname
Memberof
Displayname
Objectclass
Title
localityName
department
6 Polycom, Inc.
Page 11

Polycom® CMA™ System Overview
Change Password
Local users of the Polycom CMA system must change their passwords every
90 days. Access rules for enterprise users is managed by Microsoft Active
Directory.
To change your system password
1 Click Settings in the top-right corner of the page.
2 Click Change Password.
3 Enter your Old Password.
4 Enter a New Password. This password must be at least 8 characters long.
5 Confirm the new password and click OK.
Log Out of the Polycom CMA System
To log out of the Polycom CMA system
Click Log Out in the top-right corner of the page.
Polycom, Inc. 7
Page 12

Polycom CMA System Web Scheduling Guide
8 Polycom, Inc.
Page 13

Conference Scheduling Overview
This chapter describes the scheduling and conference views, navigation, and
commands of the Polycom CMA system. It includes these topics:
• Conference Menu and Views
— Conference Views—Future and Ongoing
— Conference States
2
— Context-Sensitive Conference Commands
• User Menu and Guest Book
— Context-Sensitive Guest Book Commands
— Add a Guest to the System Guest Book
— Edit a Guest in the System Guest Book
— Delete a Guest from the System Guest Book
Conference Menu and Views
The Polycom CMA system Conference menu provides these views of the
Conference list:
•Future—Displays the list of future conferences in the main window.
Use this view to view and edit future conferences.
• Ongoing—Displays the list of active conferences in the main window.
Use this view to manage ongoing conferences.
Note that with Scheduler Permissions, you only see and manage the
conferences you created.
Polycom, Inc. 9
Page 14
Polycom CMA System Web Scheduling Guide
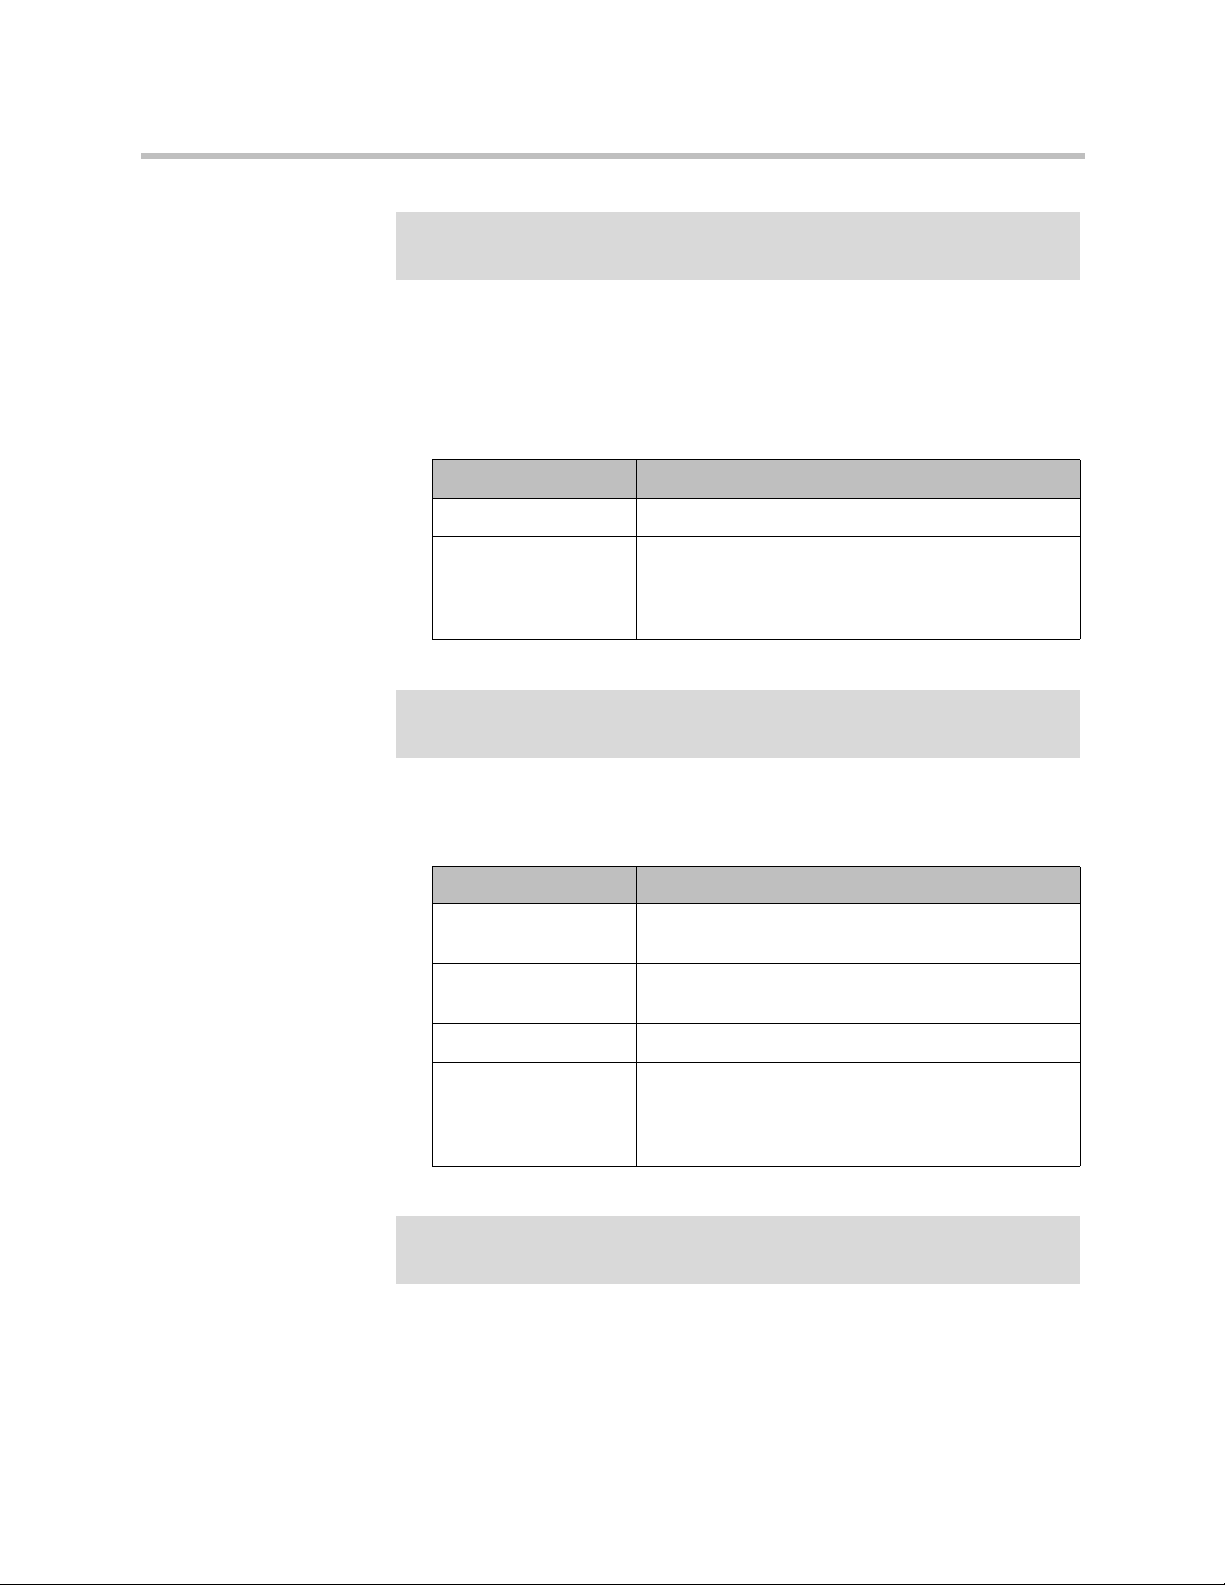
The Conference views have these sections.
Section Description
Views The views you can access from the page.
Conference Actions The set of available commands. The constant commands in
Conference List The context-sensitive Conference list for the selected view.
Conference Details Displays information about the selected conference. For
the Conference views are:
• Refresh —Use this command to update the display
with current information.
•Add —Use this command to create a new video
and/or audio conference.
more information, see “Conference Details” on page 47.
Conference
Features
Bridge (MCU)
Features
Participants Displays the list of participants for the selected conference.
Participant Details Displays information about the participant selected in the
Displays the status of system features for the selected
conference. For more information, see “Conference
Features” on page 49.
Displays the status of MCU features for the selected
conference. For more information, see “Bridge (MCU)
Features” on page 50.
For more information, see “Participants List” on page 51.
Participants list. For more information, see “Participant
Details” on page 52.
10 Polycom, Inc.
Page 15
Conference Scheduling Overview
Conference Views—Future and Ongoing
When you log into the Polycom CMA system with Scheduler Permissions,
you see the Conference and User menus and the Future view is displayed.
You can also select the Ongoing view.
The Conference list in both the Future and Ongoing view has these fields.
Field Description
Filter Use the filter to display other views of the conference list,
which include:
• Future Only - Displays scheduled conferences that
have not yet started
• Today Only - Displays scheduled conferences
(completed, active, or future) for the current day and
active ad hoc conferences
•Custom Date - Displays scheduled conferences
(completed, active, or future) for a selected day. Select
the day from the calendar.
• Ongoing Plus - Displays active and future scheduled
conferences for the day. You can further filter this
request by Owner, Conference Name, Endpoint
Name, and Bridge.
• Today Plus - Displays scheduled conferences
(completed, active, or future) for the current day , current
ad hoc conferences, and all future conferences. You can
further filter this request by Owner, Conference Name,
Endpoint Name, and Bridge.
• Yesterday Plus - Displays completed scheduled
conferences for yesterday and earlier. You can further
filter this request by Owner and Conference Name.
For information on filters, see “Filter and Search a List”.
Export as Excel file Use this button to download the Conference list as currently
displayed to a Microsoft Excel spreadsheet.
Status The state of the conference. For more information, see
“Conference States” on page 12.
Type The type of scheduled conference. Possible values include:
• Video Conference —All conference participants
have video endpoints.
• Audio Only Conference —All conference
participants have audio endpoints. Audio only
conferences require an MCU.
• Recurring Conference —The conference is one in
a recurring series.
• Multi-Bridge Conference —The scheduler assigned
the conference to multiple bridges and created bridge
links.
Polycom, Inc. 11
Page 16
Polycom CMA System Web Scheduling Guide
Field Description
Conference Name The system- or scheduler-assigned name of the
Start Time The user-assigned start time for the conference. The
Bridge If applicable, the user-assigned bridge for the conference.
Owner The conference creator.
conference. By default, the system assigns a conference
name and appends the day and date to that name. The
scheduler can change the system-assigned name.
system appends the time difference between the local time
and the standard time.
Possible values are:
•N/A—A bridge is not required for the conference.
•<Bridge Name>—The user assigned the conference to
a single bridge. In this case, the bridge name is
displayed.
• Multi bridge —The user assigned the conference
to multiple bridges and created bridge links.
Conference States
Conferences may be in the following states.
State Description
Future
Conference
Completed
Conference
Active
Conference
Active Alerts
Conference
Scheduled conference that has not yet started. This
conference state is possible in all views except the
Yesterday Plus view.
A scheduled conference that occurred in the past. This
conference state is possible in all views except the Future
and Ongoing Plus view.
A conference that is still active/ongoing. This conference
state is possible in all views except the Future and
Yesterday Plus view.
The bridge on which the active/ongoing conference is being
hosted has sent an alert. Examples of events that will
trigger a bridge alert are:
• A participant is connected in secondary mode (audio
only).
• A conference is not yet full (i.e., not all scheduled
participants have joined the conference).
12 Polycom, Inc.
Page 17
Conference Scheduling Overview
State Description
Declined
Conference
Conference End
Warning
Applies only to conferences scheduled through the Polycom
Scheduling Plugin for Microsoft Outlook. This state
indicates that most participants did not accept the
conference invitation.
The conference is ending, i.e., it is in its last five minutes
unless someone extends it.
Context-Sensitive Conference Commands
Besides the constant Refresh and Add commands, the Actions section
may include these context-sensitive commands depending on the type of
conference selected.
Command Description
Available for future conferences only
Edit Use this command to edit the selected conference. For
more information, see “Edit a Conference” on page 23.
Available for future and past conferences
Delete Use this command to delete the selected conference.
Available for future, past, and active conferences
Copy Use this command to copy the selected conference.
Available for active conferences only
Manage Use this command to display the Manage Conference
Terminate Ends the selected conference.
User Menu and Guest Book
The Polycom CMA system User menu provides access to the system Guest
Book. The Guest Book is a system-wide directory that includes guest
participants who were added explicitly or saved during scheduling to the
Guest Book. They are referred to as static entries because they are not
imported through the dynamically updated enterprise directory or included
in the system Global Address Book. The Guest Book is limited to 500 entries.
page for the conference selected in the Conference List.
Use this command to manage participants and endpoints in
the selected active conference. For more information, see
“Manage an Active Conference” on page 29.
Polycom, Inc. 13
Page 18
Polycom CMA System Web Scheduling Guide
The Guest Book has these fields.
Field Description
Name The guest’s first and last name.
Email The guest’s email address. The system validates the email
Location The location of the guest’s endpoint system. This is a
Number (Optional) The ISDN phone number for the user. This
Join Mode Indicates whether the guest will use an audio endpoint or
Dial Options Indicates whether the guest will dial into conferences, or
structure only.
free-form entry field that the system does not validate.
number is constructed from the Country code + Area/City
code + phone number or entered as the modified dial
number.
video endpoint to join conferences.
that the system should dial out to the guest.
Dial Type Indicates whether the guest has an IP (H.323) or ISDN
(H.320) endpoint.
Context-Sensitive Guest Book Commands
The Actions section of the Guest Book page may include these
context-sensitive commands depending on the type of conference selected.
Command Description
Add Guest Use this command to add a new guest user.
Edit Guest Use this command to change information for a guest user.
Delete Guest Use this command to delete a guest from the Guest Book.
Deleting a guest is a permanent operation.
Add a Guest to the System Guest Book
To add a guest to the system Guest Book
1 Go to User > Guest Book and click Add Guest.
2 Configure the Guest Information section of the Add New Guest dialog
box.
14 Polycom, Inc.
Page 19
Conference Scheduling Overview
Field Description
First Name The guest’s first name
Last Name The guest’s last name
Email The guest’s email address. The system validates the
email structure only.
Location The guest’s location of the guest’s endpoint system.
This is a free-form entry field that the system does
not validate.
Dial Type Specify the protocol that the guest’s endpoint
supports; either IP (H.323) or ISDN (H.320).
Join Mode Specify whether the guest will use an audio endpoint
or video endpoint to join conferences.
Note
A guest may have multiple endpoints. To create ,
create a separate guestbook entry for each endpoint.
Dial Options Specify whether the guest will dial into conferences,
or that the system should dial out to the guest.
Note
To support both options, create a separate
guestbook entry for each.
3 If the guest has an IP (H.32.3) endpoint, configure:
Field Description
IP Address The IP address of the guest’s video or audio
endpoint.
Extension The specific dial string for the guest. For Annex-O
dialing, enter the H.323.alias@IP here, for example:
• 1001@11.12.13.14
• 1001@
•
•
domain
.com
username@domain
username
@1 1.12.13.14
.com
Note
Polycom endpoints must register with a gatekeeper
before they'll attempt an Annex-O call.
MCU Service Choose from the list of MCU services defined on the
MCUs that the Polycom CMA system has registered.
Leave this at Any Available Service unless you
have specific knowledge of MCU services.
Polycom, Inc. 15
Page 20
Polycom CMA System Web Scheduling Guide
Note
The Extension field in this dialog box cannot be configured.
4 If the guest has an ISDN (H.320) endpoint and a modified dialing number
(with a prefix or postfix):
a Click Use Modified Dial Number.
b Configure these settings:
Field Description
Number The participant’s phone number.
MCU Service Choose from the list of MCU services defined on the
MCUs that the Polycom CMA system has registered.
Leave this at Any Available Service unless you
have specific knowledge of MCU services.
Note
The Extension field in this dialog box cannot be configured.
5 If the guest has an ISDN (H.320) endpoint but no modified dialing
number, configure these settings:
Field Description
Country The country to which the system will dial out to the
guest.
Area/City Code The area code to which the system will dial out to the
guest.
Number The participant’s phone number.
MCU Service Choose from the list of MCU services defined on the
MCUs that the Polycom CMA system has registered.
Leave this at Any Available Service unless you
have specific knowledge of MCU services.
Note
The Extension field in this dialog box cannot be configured.
6 Click OK.
16 Polycom, Inc.
Page 21

Conference Scheduling Overview
Edit a Guest in the System Guest Book
To edit a guest in the system Guest Book
1 Go to User > Guest Book and select the guest of interest.
2 Click Edit Guest.
3 Change the Guest Information section and endpoint information
sections of the Add New Guest dialog box, as needed. For more
information about these fields, see “Add a Guest to the System Guest
Book” on page 14.
4 Click OK.
Delete a Guest from the System Guest Book
To delte a guest from the system Guest Book
1 Go to User > Guest Book and select the guest of interest.
2 Click Delete Guest.
3 Click Yes to confirm the deletion.
Polycom, Inc. 17
Page 22

Polycom CMA System Web Scheduling Guide
18 Polycom, Inc.
Page 23

3
Conference Management Operations
This chapter describes the Polycom® Converged Management Application™
(CMA™) system conference management operations. It includes these topics:
• Add/Schedule a Conference
• Edit a Conference
• Copy a Conference
• Edit a Participant’s Settings
• Edit a Room’s Settings
• View Scheduling Information for a Conference
• Manage an Active Conference
• Add Additional Participants to an Active Conference
• Add a Room to an Active Conference
• View the Video of a Participant in an Active Conference
• Manage a Participant’s Endpoint During a Conference
• View a Participant’s Details During a Conference
• Terminate an Active Conference
• Delete a Conference
Add/Schedule a Conference
To add or schedule a new conference
1 Go to Conference > Future and click Add .
2 In the conference scheduling page, enter a Conference Name and set a
conference Start Date, Start Time, and either an End Time or Duration.
Polycom, Inc. 19
Page 24

Polycom CMA System Web Scheduling Guide
3 To make the conference recurring:
a Click Recurrence and in the Appointment Recurrence dialog box, set:
b Click OK.
4 For a Video conference, you can change the template by clicking Default
Template and selecting a different template.
• Conference templates provide default conference settings. When you select a
• The Default T emplate and Default Audio T emplates are stored in the system
» Recurrence frequency (Daily, Weekly, or Monthly)
» Recurrence day (Sunday through Saturday)
» Recurrence range (Start date and End After occurrences or End
by date)
The maximum number of recurrences is 365.
different template, you are changing the default conference settings for your
conference.
database and their names are not localized.
5 For an Audio Only conference:
a Change the Conference Type to Audio Only.
b To change the template, click Default Au dio Template and select a
different template.
6 To add conference participants from the local directory or enterprise
directory:
a Enter all or part of a participant’s Last Name or First Name into one
of the name fields and click Add Participants.
The Add Participants dialog box appears with the list of participant
names that meet your search criteria.
• Depending on the search domain, the search function may return different
results. See “Filter and Search a List” on page 5.
• The search results only include participants associated with endpoints.
b Select the participant’s name from the list.
The participant’s name appears in the underlying Selected
Participants and Rooms list.
c Repeat steps a and b to add all domain participants and then click
Close.
7 To add a guest from the Guest Book:
a Click Add From Guest Book.
20 Polycom, Inc.
Page 25

Conference Management Operations
b In the Add From Guest Book dialog box, select the guest’s name from
the list.
The guest’s name appears in the underlying Selected Participants
and Rooms list.
c Repeat step b to add all participants from the Guest Book and then
click Close.
8 To add new guest participants (participants not available from the local
directory, enterprise directory, or Guest Book):
a Click Add Guest.
b In the Add Guest dialog box, enter the following required participant
information: First Name, Last Name, Email address, and Location.
Note that the system allows duplicates in guest book entries. Also, the
Email address field is ASCII only. For more information, see “Field
Input Requirements” on page 5.
c Specify how the participant will join the conference.
Setting Description
In Person The participant will attend the conference by
going to a room that is included in the
conference or joining another participant who
is attending the conference.
Audio Only The participant will attend the conference by
telephone. The system will either call out to
the participant or the participant will dial in.
Use Video The participant will attend the conference
using a video endpoint system. The system
will either call out to the participant or the
participant will dial in.
d For a guest with an audio endpoint, set Dial Type to IP or ISDN as
needed.
e For a guest with a video endpoint system:
» Set the Bit Rate, Dial Options, and Dial Type as required. You
can change the connection speed for an endpoint up to the
maximum speed specified by the conference template.
» If you select Dial Out and a Dial Type of IP, enter the guest’s
phone Number.
» If you select Dial Out and a Dial Type of ISDN and the system
must use a specific dialing prefix to call the guest, select Use
Modified Dial Number and enter the guest’s complete phone
number including prefix, country code, area or city code, and
phone number.
Polycom, Inc. 21
Page 26

Polycom CMA System Web Scheduling Guide
f Select Save to Guest Book to have this guest participant added to the
g Click OK.
9 Adjust the conference date and time as needed to match participant and
endpoint availability.
a Review their availability and adjust the conference date and time as
• For participants who are associated with endpoints, the Polycom CMA system
• For participants with multiple endpoints, you must check the availability for each
• Dial-in participants can be scheduled to dial into multiple conferences during the
» If you select Dial Out and a Dial Type of ISDN and the system
does not need to use a specific dialing prefix to call the guest,
select the appropriate Country and enter the guest’s Area/City
Code and phone Number.
system Guest Book.
The guest’s name appears in the Selected Participants and Rooms
list.
needed.
schedules their availability according to the endpoint’s availability.
endpoint. Click Call Info to change the participant’s endpoint.
same time period; dial-out participants cannot.
b To edit a participant’s dial settings, select the participant from the
Selected Participants and Rooms list and click Edit. For more
information on editing participants settings, see “Edit a Participant’s
Settings” on page 25.
10 To add conference rooms to the Selected Participants and Rooms list:
a Click Select Site.
b Select the site of interest from the site list
The conference room list for the selected site appears.
c Select the conference room of interest from the list.
The conference room name appears in the underlying Selected
Participants and Rooms list.
d Repeat steps b and c to add all required conference rooms and then
click OK.
11 Once you’ve added your participants, you can assign them leadership
roles:
a To assign a participant the lecturer role, in the Lecturer field select the
participant’s name from the list.
b To assign a participant the video chairperson role, in the Video
Chairperson field select the participant’s name from the list.
22 Polycom, Inc.
Page 27

Conference Management Operations
• If the Lecturer or Video Chairperson features are not available, then either you
do not have permission to implement these features or the selected template
does not support these features.
• T o be assigned Lecturer, a p articipant must have a manageable video endpoint.
12 If you have advanced scheduler permissions, now is the time to edit
conference settings and make bridge selections. For more information,
see “Advanced Scheduling Operations” on page 39.
13 To edit a participant’s dial settings, select the participant from the
Selected Participants and Rooms list and click Edit. For more
information on editing participants settings, see step 5 on page 25.
14 When finished, click Schedule.
The system verifies that it has a bridge with the capabilities an d resources
required for your conference. If it does, the conference notification email
appears with a message indicating Conference Successfully Scheduled.
15 To exit without sending an email to your participants, click Skip Email.
16 To send an email notification to your participants:
Edit a Conference
Only future conferences can be edited. Active or past conferences cannot be
edited.
a Copy additional people on the notification and/or add notes about
the conference.
Note that the To, CC, and BCC fields are ASCII only. For more
information, see “Field Input Requirements” on page 5.
b As needed, add information in the Enter additional notes to include
in the email section.
c Click Send.
The system sends the conference notification email. The Future view
appears. Your conference appears in the conference list.
The email that the Polycom CMA system sends can be read by email
systems that accept plain text emails, iCal attachements, or vCal
attachments.
To edit a future conference
1 Go to Conference > Future.
2 Select the conference of interest and click Edit .
Polycom, Inc. 23
Page 28

Polycom CMA System Web Scheduling Guide
3 If you select a recurring conference, a dialog box appears asking if you
want to edit all conferences in the series or just the selected one. Make the
appropriate choice and click Edit.
The conference scheduling page appears.
4 For a Video conference, you can change the template by clicking Default
Template and selecting a different template.
• Conference templates provide default conference settings. When you select a
• The Default T emplate and Default Audio T emplates are stored in the system
5 For an Audio Only conference:
a Change the Conference Type to Audio Only.
b To change the template, click Default Au dio Template and select a
different template, you are changing the default conference settings for your
conference.
database and their names are not localized.
different template.
6 Make the required changes to the conference date, participants, rooms, or
other settings. For information on performing these tasks, see
“Add/Schedule a Conference” on page 19.
7 When finished, click Schedule.
The system verifies that it has a bridge with the capabilities an d resources
required for your conference. If it does, the conference notification email
appears with a message indicating Conference Successfully Scheduled.
8 To exit without sending an updated email to your participants, click Skip
Email.
9 To send an updated email to your participants:
a Copy additional people on the notification and/or add notes about
the conference.
Note that the To, CC, and BCC fields are ASCII only. For more
information, see “Field Input Requirements” on page 5.
b Click Send.
The system sends the updated conference notification email. The
Future view appears. Your conference appears in the conference list.
24 Polycom, Inc.
Page 29

Conference Management Operations
Copy a Conference
Future, ongoing, or past conferences can be copied as a template for a future
conference.
To copy a conference
1 Go to the appropriate conference view.
2 Select the conference of interest and click Copy .
3 If you used a template other than the default when you created the
conference, reselect the template.
4 Make the required changes to the conference date, participants, rooms, or
other settings. For information on performing these tasks, see
“Add/Schedule a Conference” on page 19.
5 When finished, click Schedule.
The system verifies that it has a bridge with the capabilities an d resources
required for your conference. If it does, the conference notification email
appears with a message indicating Conference Successfully Scheduled.
6 To exit without sending an updated email to your participants, click Skip
Email.
Edit a Participant’s Settings
Participant’s settings for future scheduled conferences may be edited. You
cannot edit a participant’s settings for an active or past conference.
To edit a participant’s settings
1 Go to Conference > Future.
2 Select the conference of interest and click Edit .
3 If you select a recurring conference, a dialog box appears asking if you
want to edit all conferences in the series or just the selected one. Make the
appropriate choice and click Edit.
4 In the conference scheduling page, select the participant of interest from
the Selected Participants and Rooms list and click Edit.
5 In the Edit Participant Settings dialog box, edit the participant settings as
required.
a Select the participant’s endpoint, if the participant has more than one
available.
Polycom, Inc. 25
Page 30

Polycom CMA System Web Scheduling Guide
b Specify how the participant will join the conference.
c For a participant with an audio-only endpoint, set Dial Type to IP or
d For a participant with a video endpoint:
Setting Description
In Person The participant will attend the conference by
physically joining another participant who is
attending the conference.
Audio Only The participant will attend the conference by
telephone. The system will either call out to
the participant or the participant will dial in.
Use Video The participant will attend the conference
using a video endpoint system. The system
will either call out to the participant or the
participant will dial in.
ISDN as required.
Not all of these settings are applicable to all endpoint types, so some selections
may be grayed out. See your endpoint documentation to understand supported
settings.
» Set the Bit Rate, Dial Options, and Dial Type as required. You
can change the connection speed for an endpoint up to the
maximum speed specified by the conference template.
» If you select Dial Out and a Dial Type of IP, enter the guest’s
phone Number.
» If you select Dial Out and a Dial Type of ISDN and the system
must use a specific dialing prefix to call the guest, select Use
Modified Dial Number and enter the guest’s complete phone
number including prefix, country code, area or city code, and
phone number.
» If you select Dial Out and a Dial Type of ISDN and the system
does not need to use a specific dialing prefix to call the guest,
select the appropriate Country and enter the guest’s Area/City
Code and phone Number.
6 Click OK.
26 Polycom, Inc.
Page 31

Conference Management Operations
Edit a Room’s Settings
You can edit a room’s call settings for future scheduled conferences. The
changes apply only to the selected conference.
To edit a room’s settings
1 Go to Conference > Future.
2 To delete a past conference, select the appropriate filter (such as
Yesterday Plus).
3 Select the conference of interest and click Edit .
4 If you select a recurring conference, a dialog box appears asking if you
want to edit all conferences in the series or just the selected one. Make the
appropriate choice and click Edit.
5 In the conference scheduling page, select the room of interest from the
Selected Participants and Rooms list and click Edit.
6 In the Edit Room Settings dialog box, edit the room settings as required.
a Select the room’s endpoint, if the room has more than one available.
b For a room with an audio endpoint, set Dial Type to IP or ISDN as
required.
c For a room with a video endpoint:
Not all of these settings are applicable to all endpoint types, so some selections
may be grayed out. See your endpoint documentation to understand supported
settings.
» Set the Bit Rate, Dial Options, and Dial Type as required. You
can change the connection speed for an endpoint up to the
maximum speed specified by the conference template.
» If you select Dial Out and a Dial Type of IP, enter the room’s
phone Number.
» If you select Dial Out and a Dial Type of ISDN and the system
must use a specific dialing prefix to call the room, select Use
Modified Dial Number and enter the room’s complete phone
number including prefix, country code, area or city code, and
phone number.
» If you select Dial Out and a Dial Type of ISDN and the system
does not need to use a specific dialing prefix to call the room,
select the appropriate Country and enter the room’s Area/City
Code and phone Number.
7
Click OK.
Polycom, Inc. 27
Page 32

Polycom CMA System Web Scheduling Guide
View Scheduling Information for a Conference
To view the scheduling information for a conference
1 To see the scheduling information for a future conference, go to
Conference > Future. To see the scheduling information for an active
conference, go to Conference > Ongoing.
2 From the list of All Conferences, select the conference of interest and
click View.
The View conference page appears displaying the following details about
the conference:
Section Description
Start Date The date on which the conference started or will start.
End Date The date on which the conference is scheduled to end.
Duration The scheduled duration of the conference in hours and
minutes.
Recurrence The recurrence information for the conference.
Owner The person who scheduled the conference.
Type The type of conference. Possible values include:
• Audio Only
• Audio Video
Conference
Password
Chairperson Whether or not the conference has a chairperson. This field
Participants
List
The conference password assigned by the system to the
conference.
For future conferences, users with Advanced Scheduler
permissions can change this conference password. See
“Edit Conference Settings” on page 39.
will include a participant’s name or N/A.
For future conferences, users with Advanced Scheduler
permissions can assign a conference chairperson. See “Edit
Conference Settings” on page 39.
Information for the participant, including
• Name
• Dial Mode
• Participant Type
• Access
• Endpoint
28 Polycom, Inc.
Page 33

Conference Management Operations
Manage an Active Conference
The Manage Conference page provides a detailed view of a single active
conference and allows you to make some changes to your active conference.
To manage an active conference
1 Go to Conference > Ongoing.
2 From the list of All Conferences, select the conference of interest and
click Manage .
The conference page appears in a new tab displaying the Participants list.
The Participants list displays these settings:
Section Description
Status The state of the participant’s connection. Possible states
include:
• Idle
• Connecting/Updating
• Connected
• Connected with error
• Not muted
• Admin muted
• Self muted
• Help request
• Audio unavailable
• Video unblocked
• Video blocked
• Video unavailable
Type The type of conference. Possible values include:
• Audio Only
• Audio Video
• Bridge Link
• VIP
Name The participant’s name.
Endpoint The name assigned to the participant’s endpoint when it
registered or was added to the system.
Access The endpoint’s network interface type. Possible values
include:
• H323
• ISDN
Polycom, Inc. 29
Page 34

Polycom CMA System Web Scheduling Guide
Use these conference actions as needed:
Section Description
Address The IP address or ISDN number of the participant’s endpoint
(if a dial-out).
Bit Rate The sum of the audio and video data transfer rate (in kbps)
of the participant’s endpoint.
Dial Mode How the participant joined the call. Possible values include:
• Audio or Video Dial-In
• Audio or Video Dial-Out
Bridge The MCU on which the participants call resides.
Command Use this command to...
Copy
View View information for the selected conference.
Terminate End an active conference.
Extend Duration Extend the duration of an active conference.
Change Layout For applicable endpoints.
Add Participant Add one or more participants to the selected
Add Guest Add a guest to the selected conference.
Add Room Add one or more rooms to the selected conference.
. Schedule a new conference that duplicates the
selected conference settings.
Change the default video layout for the conference
display.
conference.
3 Use these participant actions as needed:
Command Use this command to...
Remove Remove the selected participant from the Participants
list at which time the participant can be scheduled for
another conference.
Send Message Send a message to the selected participant’s
registered Polycom endpoint. The message appears
briefly on the monitor for the selected video endpoint.
30 Polycom, Inc.
Page 35

Conference Management Operations
Command Use this command to...
Save as Favorite Function available to users with Operator permissions
only and only when the selected participant has an
associated endpoint to which the system can dial out.
Save the selected participant to an existing Favorites
List.
Connect All New Function available only when the system is displaying
the New Conference Participants list.
Initiates the system dial out to new participants.
Add Additional Participants to an Active Conference
You can add additional participants to an active conference. These participants
can come from your local directory, enterprise directory, or guest book.
Dial Out is the only Dial Option the system allows for adding participants to an
active conferences.
To add additional conference participants to an active conference
1 Go to Conference > Ongoing.
2 From the list of All Conferences, select the conference of interest and
click Manage .
3 To add participants from your local directory or enterprise directory:
a Click Add Participant .
b Enter all or part of a participant’s Last Name or First Name into the
appropriate field and click Search.
A list appears of participant’s names that meet your search criteria.
• Depending on the search domain, the search function may return different
results. See “Filter and Search a List” on page 5.
• The search results only include users associated with endpoints.
c Select the participant’s name from the list.
The participant’s name appears in the underlying New Conference
Participants list.
d Repeat steps a and b to add all domain participants and then click
Close.
Polycom, Inc. 31
Page 36

Polycom CMA System Web Scheduling Guide
e If necessary, edit the new participants’ settings. See “Edit a
4 To add participants from the Guest Book:
a Click Add Guest.
b From the Guest Book dialog box, select the guest’s name from the list.
c Repeat step b to add all guest participants and then click Close.
5 To add new guest participants (participants not available from the local
directory, enterprise directory, or Guest Book):
a Click Add Participant and then click Add Guest.
b In the Add Guest dialog box, enter the participant’s Name, Email
c Specify how the participant will join the conference.
Participant’s Settings” on page25.
The guest’s name appears in the underlying New Conference
Participants list.
address, and Location. Note that the Email address field is ASCII
only.
Setting Description
In person The participant will attend the conference by
physically joining another participant who is
attending the conference.
Use Video The participant will attend the conference
using a video endpoint system.
d For a guest with a video endpoint:
» Set the Bit Rate and Dial Type as required. You can change the
connection speed for an endpoint up to the maximum speed
specified by the conference template.
» If you select a Dial Type of IP, enter the guest’s phone Number.
» If you select a Dial Type of ISDN and the system must use a
specific dialing prefix to call the guest, select Use Modified Dial
Number and enter the guest’s complete phone number including
prefix, country code, area or city code, and phone number.
» If you select a Dial Type of ISDN and the system does not need
to use a specific dialing prefix to call the guest, select the
appropriate Country and enter the guest’s Area/City Code and
phone Number.
e Select
Save to Guest Book to have this guest participant added to the
system Guest Book.
32 Polycom, Inc.
Page 37

Conference Management Operations
f Click OK.
The participant’s name appears in the underlying New Conference
Participants list.
6 To initiate the system dial out to new participants, select the participants
of interest from the New Conference Participants list and click Connect
New Participants.
The system dials out to the participants and adds them to the conference.
Add a Room to an Active Conference
To add a room to an active conference
1 Go to Conference > Ongoing.
2 From the list of All Conferences, select the conference of interest and
click Manage .
3 From the Conference Actions list, click Add Room.
4 From the Add Room dialog box, select the site location of the room.
The list of conference rooms at the site appears.
5 Select the conference room of interest.
The conference room name appears in the underlying New Conference
Participants list.
6 Click Close.
7 To initiate the system dial out to the room, select the room from the New
Conference Participants list and click Connect New Participants.
The system dials out to the room endpoint system and adds the room to
the conference.
View the Video of a Participant in an Active Conference
To view the video of a participant in an active conference
1 Go to Conference > Ongoing.
2 From the list of All Conferences, select the conference of interest and
click Manage .
Polycom, Inc. 33
Page 38

Polycom CMA System Web Scheduling Guide
3 Select a participant from the Participants list.
The selected participant’s video appears in the Conference Image section
of the interface.
4 Click Shuffle to shuffle to the next participant’s video.
Manage a Participant’s Endpoint During a Conference
The Manage page also allows you to manage conference participant’s
endpoints. Essentially, you become the conference moderator.
• These context-sensitive commands only appear when the participant’s endpoint
supports the action.
• These commands work for rooms on the participant list as well.
To manage a participant’s endpoint
1 Go to Conference > Ongoing.
2 Select the conference of interest and click Manage .
The Participants list appears.
3 To view participants geographically, click .
4 Double-click on the participant of interest.
5 Use these participant actions as needed. These actions are also available
from the View Participants Details dialog box.
Command Use this command to...
Remove Remove the selected participant from the Participants
list at which time the participant can be scheduled for
another conference.
Send Message Send a message to the selected participant’s
registered Polycom endpoint. The message appears
briefly on the monitor for the selected video endpoint.
34 Polycom, Inc.
Page 39

Conference Management Operations
View a Participant’s Details During a Conference
You can view details for a participant’s endpoint while it is in conference.
To view a participant’s endpoint details
1 Go to Conference > Ongoing.
2 Select the conference of interest and click Manage .
The Participants list appears.
3 To view participants geographically, click .
4 Double-click on the participant of interest.
The View Participant Details dialog box appears with the Call Properties
displayed. It includes the Near End and Far End video, the Participant’s
name, Status, Errors, Warnings, Endpoint Type, Address, Access, and Bit
Rate.
It also includes a list of Participant Actions. For more information about
these actions, see “Manage a Participant’s Endpoint During a Conference”
on page 34.
5 To view additional participant details, change the selection in the Call
Properties drop-down menu.
— If you select Device, you’ll see these participant details:
Setting Description
Endpoint Type Usually the endpoint model, such as Polycom HDX
system.
IP Address The IP address for the endpoint.
Site The location of the endpoint as identified by its IP
address and the subnet of the site.
Gatekeeper The gatekeeper with which the endpoint is registered.
GDS The Global Directory Service for the endpoint. Usually
the Polycom Global Address Book.
Presence Whether or not the endpoint is registered with a Presence
service, so that its availability can be reported.
Device Managed Whether or not the endpoint is registered with a
Provisioning service, so that it can be configured
automatically.
Polycom, Inc. 35
Page 40

Polycom CMA System Web Scheduling Guide
— If you select Call Details, you’ll see these participant details:
Setting Description
ISDN Line Status The status of the ISDN line. Possible values include:
• Operational
• Non-operations
This field is blank for the following device types: PVX,
MGC, RMX, GW/MCU, Other, and TANDBERG.
Alias Type If the endpoint has an alias designation, the type of alias.
Possible types include E.164, H.323 ID, URL, Transport
Address, E-mail, Party Number, and Unknown.
Alias Value Value for the alias type shown.
Setting Description
Video Protocol The video connection protocol, both transmission (Tx)
and reception (Rx), the endpoint is using. Possible values
include:
• H.261
H.261 is an ITU standard designed for two-way
communication over ISDN lines and supports data
rates which are multiples of 64Kbit/s. H.261 supports
CIF and QCIF resolutions.
• H.263
H.263 is based on H.261 with enhancements that
improve video quality over modems. It supports CIF,
QCIF, SQCIF, 4CIF and 16CIF resolutions.
• H.264
Video Format The video format, both transmission (Tx) and reception
(Rx), the endpoint is using.
Video Rate The video bandwidth negotiated with the far site.
Video Rate Used The actual video bandwidth used in the call to the far site.
Video Frame Rate Specifies the frame rate to use.
Audio Rate The audio bandwidth negotiated with the far site
Audio Protocol The audio connection protocol, both transmission (Tx)
and reception (Rx), the endpoint is using.
— If you select Call Quality of Service, you’ll see these standard service
measurements: Total Packet Loss, % Packet Loss, Audio Packet Loss,
Video Packet Loss, Audio Jitter, and Video Jitter.
36 Polycom, Inc.
Page 41

Conference Management Operations
Terminate an Active Conference
To terminate an active conference
1 Go to Conference > Ongoing.
2 Select the conference of interest and click Terminate .
3 Click Terminate to confirm the termination.
Delete a Conference
You can delete future or past conferences. You cannot delete active
conferences.
To delete a conference
1 Go to Conference > Future.
2 To delete a past conference, select the appropriate filter (such as
Yesterday Plus).
3 Select the conference of interest and click Delete .
4 If you select a recurring conference, a dialog box appears asking you if
you want to delete just the conference you selected or all conferences in
the series. Make the appropriate choice. Active conferences in the series
cannot be deleted.
5 Click Delete to confirm the deletion.
The conference is deleted. For future conferences, the system emails the
change to the conference owner and participants and releases the
participant and room resources.
Polycom, Inc. 37
Page 42

Polycom CMA System Web Scheduling Guide
38 Polycom, Inc.
Page 43

Advanced Scheduling Operations
4
This chapter describes how users with advanced scheduler permissions have
more options when scheduling conferences using the Polycom
Management Application™ (CMA™) system.
When scheduling conferences, users with advanced scheduler permissions
can:
• Edit Conference Settings
• Select a Bridge for a Conference
• Create a Cascaded Conference Across Multiple Bridges
Edit Conference Settings
If you have Scheduler Permissions and an Advanced Scheduling level, you
can overwrite certain conference template settings as described here.
However, be careful when doing so. If you have an environment with mixed
MCU types (e.g., with both Polycom MGC and RMX systems), and the
conference you schedule is hosted on a Polycom RMX system, some of the
settings you specify here may be overridden by the RMX profile.
• A profile is a collection of advanced conference settings that reside on the MCU
(Polycom MGC or RMX system). Only an RMX profile can override conference
template settings. For more information about conference templates, profiles,
and your conferencing configuration, contact your Polycom CMA system
administrator.
• Two conferences scheduled with the same template may have different settings
and behavior if they land on different types of MCUs.
®
Converged
You can edit conference settings only for scheduled conferences. You cannot
edit conference settings for active conferences.
Polycom, Inc. 39
Page 44

Polycom CMA System Web Scheduling Guide
To edit the conference settings
1 On the conference scheduling page, as you are adding or editing a
conference, click Edit Conference Settings.
2 As needed, configure these settings on the Conference Settings dialog
box. The settings that you can edit may depend on the template selected.
Setting Description
Conference
Password
Enable
Chairperson
By default, the system assigns an eight-digit
Conference Password and provides this password to
participants within the content of the conference
notification email.
You can change this password to another four- through
eight-digit number.
You can select a video chairperson to control the
conference from his or her video endpoint system. The
video chairperson must have a video endpoint system
and Chairperson conferences require an MCU.
Notes
• If the conference template has the Conference
Requires Chairperson parameter enabled, then
Enable Chairperson is automatically selected and
cannot be changed.
• If a conference is scheduled on a Polycom RMX
2000/4000 system and the RMX profile has
Conference Requires Chairperson selected but
the template does not, and the conference is
scheduled without a chairperson, then all users will
remain in the waiting room and will not be able to join
the conference.
• Polycom RMX 1000 systems do not support the
Chairperson feature.
Chairperson
Password
40 Polycom, Inc.
If Enable Chairperson is selected, the system assigns
an eight-digit Chairperson Password and provides this
password to the video chairperson in a separate email.
If Enable Chairperson is selected, the chairperson
must enter this eight-digit password at his or her video
endpoint to assume control of the conference.
You can change this password to another four- through
eight-digit number.
Page 45

Advanced Scheduling Operations
Setting Description
Dial Options You have three options:
• To create a conference for which the same dial-in
information and a PIN code are assigned to all
conference particip ants, use the Dial-In setting. This
setting allows participants to dial in from an audio or
video endpoint and connect to the same conference
on the MCU.
• To dial out to all participants in the conference, use
the Dial-Out setting.
• To allow participants both options, select
Dial-In+Dial-Out.
Note
When you change a conference from Dial-In to Dial
In+Dial Out, the selected resources remain set to
Dial-In. You must change them manually.
Always Use MCU This setting forces the confere nce to an MCU and
prevents video endpoints from connecting to each other
directly. This setting is automatically selected and
cannot be changed when Audio Only is the conference
type or when Enable Chairperson is selected.
Video Mode De termines the initial layout on a video endpoint's
monitor for a multipoint conference that requires an
MCU. The options are:
•Switching. Indicates th at the display changes
each time the speaker changes, and everyone sees
the current speaker.
• Continuous Presence. Displays several panels on
the monitor, each showing a different participant,
and allows you to see all conference participants at
once. Y ou can select a specific layout, with a certain
number of windows open.
• Automatic Layout is a continuous presence layout,
in which the number of participants determines the
number of panels.
Bit Rate Specifies the maximum connection speed for endpoints
in the conference. Individual endpoints that specify a
lower connection speed connect at that lower speed.
Endpoints that specify a higher connection speed
connect at the speed identified in the conference
template.
If you select a higher speed than an endpoint can
support, the system reduces the speed that endpoint;
however, the conference uses the default connection
speed for endpoints that can match it. If you place the
calls through an endpoint with an embedded MCU, the
behavior depends on the capabilities of that endpoint.
Polycom, Inc. 41
Page 46

Polycom CMA System Web Scheduling Guide
Setting Description
Bit Rate
(continued)
When the dial speed is higher than the number of
channels defined in the H.320 service for the endpoint,
you receive a warning. T o continue, lower the dial speed
to less than or equal to the ISDN capability of the
endpoint.
Higher speed is important for high-quality video in a
conference. Because higher speeds use greater
bandwidth, scheduling a high-bandwidth conference
may limit the number of conferences that you can
reserve at one time.
Note
The bit rate can be set at the network level, the endpoint
level, and the conference level. If there is a discrepancy
between these bit rate settings, the system implements
the lowest bit rate setting. The only exception, is that the
bit rate in the RMX profile takes precedence over the bit
rate in the conference settings.
42 Polycom, Inc.
Page 47

Advanced Scheduling Operations
Setting Description
People + Content Controls the ability for one endpoint to send two types of
data—a data stream and a video stream—over the same
bandwidth to display people and content. The receiving
endpoint handles the two video streams differently and
may display them on separate screens or through video
switching mode.
Endpoints that do not support the selected method
connect with either video through IP or audio only
through ISDN.
Select from these available settings:
•None. Select this option when dual data streams are
not required.
• People +Content. This enables the industry
standard H.239 dual streams for endpoints that
support H.239 or the Polycom proprietary
People+Content dual streams for older Polycom
endpoints without H.239 capabilities. The MCU
requires that conferences with People + Content use
a minimum speed of 192 K.
• People and Content VO. This Polycom proprietary
technology works with PictureTel endpoints. Select
this option for older endpoints.
•Visual Concert PC. Select this option for use with
Polycom ViewStation MP/512/SP/323 endpoints.
• Visual Concert FX. Select this option for use with
Polycom ViewStation FX/EX and VS4000 endpoints.
• Duo Video. This setting supports IP and ISDN and
is available with TANDBERG endpoints, in which
one part of the conference is set as the video
conference and the other as the presentation
conference.
Polycom, Inc. 43
Page 48

Polycom CMA System Web Scheduling Guide
Setting Description
T.120 Mode For MGC-hosted conferences only , selects the protocols
and specifications for multipoint data communicatio n.
In the T.120 menu, select the speed for the T.120
connection. See your IT department to determine the
best combinations for your conferences. To disable the
T.120 mode, select None.
If you select T.120, these options may be available,
according to the participant’s endpoint and software:
• Application Sharing. Allows two or more
participants to work on the same document or
application, even when only one participant has the
application. In application sharing, one participant
launches the application, and it runs simultaneously
on all other computers.
• File Transfer. Enables participants to send files to
each other.
• Chat or Whiteboard. Allows participants to
communicate with each other by writing.
In all of these modes, participants can view and hear
each other.
3 Continue adding or editing the conference, as described in “Conference
Management Operations” on page 19.
Select a Bridge for a Conference
By default when you add a conference, the Polycom CMA system will
automatically select a bridge for the conference. However, if you have
advanced scheduler permissions, you can select a specific bridge for your
conferences.
To select a single bridge for a conference
1 When you’re adding or editing a conference, after you’ve made all of
your other conference configuration choices, click Bridge Selection and
select Single Bridge.
A bridge selection drop down list appears based on the template selection
and conference settings.
2 From the MCU list, select a specific MCU to host the conference.
3 Continue adding or editing the conference, as described in “Conference
Management Operations” on page 19.
44 Polycom, Inc.
Page 49

Advanced Scheduling Operations
Create a Cascaded Conference Across Multiple Bridges
To create a cascaded conference across multiple bridges
1 When you’re adding or editing a conference, after you’ve made all of
your other conference configuration choices, click Bridge Selection and
select Multi Bridge.
The Schedule button changes to a Manual Cascade button and the
Recurrence button is grayed out.
2 Click Manual Cascade.
The People To Bridges dialog box appears displaying the selected
conference participants and their bridge assignments. Bridge assignments
default to Auto. These system assignments are based on bridge capacity
and/or least cost routing principles.
In the Selected Bridge Availability section, the system shows a count of
the available ports on the available bridges for the specified time period.
If the port count is within 5% of the maximum ports available, it is
displayed in red.
3 To change a bridge assignment for a selected participant, click Auto and
select a bridge from the pull-down menu.
A Polycom CMA system can only show port counts for conferences scheduled via
the system. Ad hoc conferences are not included in the port count.
4 When you’ve completed all bridge assignments, click Next.
The Bridge To Bridge Links dialog box displays a graphical view of the
selected bridges.
If an MCU does not show up in the Bridge To Bri dg e Li nk s dialog box, then the
MCU software does not support cascading.
5 To add a hub bridge (a bridge used to connect one bridge to another),
from the Available Bridges window, select a bridge and click Add
Bridge.
6 Specify bridge-to-bridge connections by selecting the bridges of interest
and clicking Add Link.
The link is graphically represented by an arrow. The bridge at the base of
the arrow dials to the bridge at the point of the arrow.
Polycom, Inc. 45
Page 50

Polycom CMA System Web Scheduling Guide
A Polycom RMX system cannot dial a Polycom MGC, so do not link from an RMX to
an MGC.
7 In the Add Link dialog box, select the Link Type.
• You can add links from a Polycom MGC MCU to a Polycom RMX MCU
• There is no support for ISDN cascaded links on RMX MCUs.
The lag time required to update cascaded links may cause more than one
participant to hear the prompt about being the first person to join the conference.
8 When finished, click Schedule.
The system verifies that it has a bridge with the capabilities an d resources
required for your conference. If it does, the Conference Email
Notification page appears with a message indicating Conference
Successfully Scheduled.
9 To exit without sending an email to your participants, click Skip Email.
10 To send an email notification to your participants, in the Conference
Email Notification page:
a Copy additional people on the notification and/or add notes about
the conference.
b Click Send.
Note that the To, CC, and BCC fields are ASCII only.
The system sends the conference notification email. The Conference
List - Schedule View appears. Your conference appears in the
Conference List.
• Recurring cascaded conferences are not allowed.
• You cannot change the conference layout of a cascaded conference.
46 Polycom, Inc.
Page 51

Conference and Participant Details
This chapter lists the conference and participant detail fields for reference. It
includes these sections:
• Conference Details
• Conference Features
• Bridge (MCU) Features
5
• Participants List
• Participant Details
• Participant Settings
Conference Image
The Conference Image section displays the selected participant’s video.
Shuffle to shuffle to the next participant’s video
Conference Details
The Conference Details section has these fields.
Section Description
Owner The name of the person who created the conference .
Schedulers only see the conferences they own.
Not applicable for ad hoc conferences.
Start Date/Time For a scheduled conference, the start date and time of the
conference and the time difference between the local time and
the standard time.
For an unscheduled conference, the date and time the
conference started.
Polycom, Inc. 47
Page 52

Polycom CMA System Web Scheduling Guide
Section Description
Duration For a scheduled conference, how long the conference is
End Date/Time The date and time the conference ended
Type The type of conference. Possible values include:
Status The state of the conference. Possible valu es include:
scheduled to last.
For a completed conference, how long the conference actually
lasted.
• Audio
• Audio-Video
• Active
• Declined
Recurring Whether or not the conference was scheduled as a recurring
conference
Connection Connection information about the conference. Possible values
include:
• Multipoint
• Point To Point
• Gateway
Bit Rate The rate (in kbps) at which to transfer the conference audio or
video data
Schedule ID System-assigned ID used for troubleshooting
Conf Monitoring
ID
Video Layout The video layout for the conference: Continuous Presence or
Video Format For a conference hosted on an MCU, the video format of the
System-assigned ID used for troubleshooting
video Switching.
conference data stream. Possible values include:
• Auto
• CIF
• QCIF
• 4CIF
• 16CIF
• Finished
• Future
• VGA
• SVGA
• XGA
• NTSC
Video Protocol For a conference hosted on an MCU, the video protocol of the
conference data stream. Possible values include:
• Auto
• H.261
48 Polycom, Inc.
• H.263
• H.264
Page 53

Conference and Participant Details
Section Description
Audio Algorithm For a conference hosted on an MCU, the audio compression
ratio of the conference data stream. Possible values are:
Conference Features
The Conference Features section has these fields.
Section Description
Conference
Password
Chairperson
Required
Chairperson
Password
Chairperson The name of the chairperson. Not applicable when no
• AUTO
• G.711
The conference password, which is assigned either by the
system or the scheduler.
Indicates whether or not the conference requires a
chairperson.
• G.722
• Siren 7 (16 kbps)
Note
The RMX 1000 system does not support the Chairperson
feature.
The password the chairperson must enter to take control of
the conference. Not applicable when no chairperson is
designated.
chairperson is designated.
Lecture Mode The type of Lecture Mode, if any, that was selected when
the conference was created. Possible values are None and
Presentation.
Note
The RMX 1000 system does not support Lecture Mode.
Lecturer The name of the lecturer. Not applicable when Lecture
Mode is None.
Lecture View
Switching
Dual Stream Mode Possible values are:
Polycom, Inc. 49
Indicates whether or not automatic switching between
participants is enabled.
• None
• People+Content
• Duo Video
• Visual Concert PC
• Visual Concert FX
• Unknown
Page 54

Polycom CMA System Web Scheduling Guide
Section Description
T120 Rate Possible values are:
End Time Alert Whether or not the system alerts participants to the end of
• None
• HMLP - Var
• HMLP - 384
• HMLP - 320
• HMLP - 256
• HMLP - 192
• HMLP - 128
• HMLP - 6.4
• HMLP - 62.4
• HMLP - 14.4
• MLP - Var
• MLP - 64.4
the conference by playing an end tone
• MLP - 62.4
• MLP - 46.4
• MLP - 40
• MLP - 38.4
• MLP - 32
• MLP - 30.4
• MLP - 24
• MLP - 22.4
• MLP - 16
• MLP - 14.4
• MLP - 6.4
• MLP - 4
Entry Tone Whether or not an entry tone is played to all connected
Exit Tone Whether or not an exit tone is played to all connected
Bridge (MCU) Features
The Bridge (MCU) Features section, which applies only for conferences that
use an MCU, has these fields.
Section Description
MCU Name The MCU device name hosting the conference. Not
Numeric ID The unique conference identifier assigned by the MCU
Entry Queue
Access
participants when a participant joins the conference
participants when a participant disconnects from the
conference
applicable when the conference is not being hosted on an
MCU.
Whether or not the conference has an entry queue enabled
Note
The Polycom CMA system enables entry queues on a per
MGC basis and all conferences on an entry queue enabled
MGC will be scheduled with entry queue access.
50 Polycom, Inc.
Page 55

Conference and Participant Details
Section Description
Meet Me per Conf Whether or not the a conference is a Meet Me conference,
for which a dial-in number is assigned, so that undefined
participants can connect to the conference
Conference on Port (MGC only) Indicates whether or not the MGC is set to
Conference on Port, which conserves bandwidth and ports.
In this case, all participants are on a single video port and
use the same connection speed and video format.
Participants List
Message Service
Type
Message Service
Name
Displays the type of messages participants joining the
conference hear. Possible values are:
• None
• Welcome (No wait)
• Attended (Wait)
• IVR
Name on the MCU of the Message Service. So, for
example, a service name IVR70 which provides the IVR
service
The Participants section has these fields.
Section Description
Name The participant’s name
Call Info How the participant joined the call. Possible values include:
• Video Dial-Out
• Audio Dial-In@
• Video Dial-In@
• In Person
• Room Only
<Address>
<Address>
Polycom, Inc. 51
Page 56

Polycom CMA System Web Scheduling Guide
Participant Details
The Participant Details section has these fields.
Section Description
Call Info How the participant joined the call. Possible values include:
• Video Dial-Out
• Audio Dial-In@
• Video Dial-In@
Video Protocol For a conference hosted on an MCU, the video protocol of
the conference data stream. Possible values include:
• Auto
• H.261
Video Format For a conference hosted on an MCU, the video format of the
conference data stream. Possible values include:
• Auto
• CIF
• QCIF
• 4CIF
• 16CIF
Audio Algorithm For a conference hosted on an MCU, th e audio
compression ratio of the conference data stream. Possible
values are:
• Siren 7 (16 kbps)
• Siren 14 (24 kbps)
• Siren 14 (32 kbps)
• Siren 14 (48 kbps)
<Address>
<Address>
• In Person
• Room Only
• H.263
• H.264
• VGA
• SVGA
• XGA
• NTSC
• AUTO
• G.711
• G.722
Local Date/Time The date and time the conference started in local time.
Call ID System-assigned ID used for troubleshooting.
Callee Name Th e names of the participants called
Callee Endpoint The names of the endpoints for the called participants
Callee Site The names of the sites for the called participants
52 Polycom, Inc.
Page 57

Conference and Participant Details
Section Description
Callee Endpoint
Status
Caller Name The name of the participant who placed the call
Caller Endpoint The name of the endpoint from which the participant placed
Caller Site The name of the site from which the participant placed the
Caller Endpoint
Status
The state of the participant’s connection. Possible states
include:
• Connected
• Disconnected
• Help request
• Updating
• New dial-in participant
• New dial-out participant
the call
call
The state of the participant’s connection. Possible states
include:
• Connected
• Disconnected
• Help request
• Updating
• New dial-in participant
• New dial-out participant
Content None
T120 Rate Possible values incl ude:
• None
• HMLP - Var
• HMLP - 384
• HMLP - 320
• HMLP - 256
• HMLP - 192
• HMLP - 128
• HMLP - 6.4
• HMLP - 62.4
• HMLP - 14.4
• MLP - Var
• MLP - 64.4
Polycom, Inc. 53
• MLP - 62.4
• MLP - 46.4
• MLP - 40
• MLP - 38.4
• MLP - 32
• MLP - 30.4
• MLP - 24
• MLP - 22.4
• MLP - 16
• MLP - 14.4
• MLP - 6.4
• MLP - 4
Page 58

Polycom CMA System Web Scheduling Guide
Participant Settings
The Participant Settings dialog box has these fields.
Section Description
Name The participant’s name.
Devices The participant’s managed endpoint(s) if available.
Email The participant’s email address (ASCII only) for particip ants
Type The type of participant. Possible values include:
or guests without managed endpoints.
• Domain User
• Local User
• Domain Resource (a room)
• Local Resource (a room)
• Guest
How will this
participant join the
conference?
Bit Rate The audio or video data transfer rate (in kbps) of the
Dial Options Available only if the participant is joining via a video
Dial Type The protocol the audio or video endpoint system uses.
How the participant will join the conference. Possible values
include:
• In Person (requires no dial settings)
• Room Only
• Audio Only (Dial in)
• Use Video
participant’s endpoint.
endpoint system. Possible values include:
• Dial-In
• Dial-Out
If you select a Dial Option of Dial-Out for a participant without a managed
endpoint, the Participant Settings dialog box has these additional fields.
Section Description
Country (H.320 dial type only) The country to which the system will
dial out to the participant
Area/City Code (H.320 dial type only)
will dial out to the participant
54 Polycom, Inc.
The area code to which the system
Page 59

Conference and Participant Details
Section Description
Number (H.323 and H.320 dial types) The participant’s phone
number
Use Modified Dial
Number
Number (H.320 dial type only)
(H.320 dial type only) Click this check box to add a specific
prefix to the participant’s phone number. The Number field
becomes active
as required to include PBX exit codes, dialing prefixes, or
other installation-specific dial string requirements.
The complete modified dial number
Polycom, Inc. 55
Page 60

Polycom CMA System Web Scheduling Guide
56 Polycom, Inc.
Page 61

Index
Index
A
active conference. See conference
adding
conferences 19
Adobe Flash Player 2
advanced conference settings
editing 39
assigning
a lecturer 22
a video chairperson 22
audio-only conference 20, 24
available commands, list of 10
B
bandwidth. See bit rate
bit rate
setting for guest participants 21, 26, 27, 32
setting for internal participants 41
bridge (MCU)
features field names 50
features, list of 10
forcing use of 41
C
canceling
conferences 37
chairperson
assigning 22
enabling 40
password for 40
changing
advanced conference settings 39
conference information 23
participant dial options 25
participant endpoint settings 25
room dial options 27
room endpoint settings 27
closing the CMA system 7
commands
conference 13
Delete Conference 13
Edit Conference 13
list of 10
Manage Conference 13
Remove Participant 30, 34
Send Message 30, 34
Terminate Conference 13
conference commands 13
conference details
conference details field names 47
displaying 10
conference features field names 49
conference rooms
adding 22
setting dial options for 27
setting endpoints for 27
conference settings
editing 39
conference settings. See settings
conferences
assigning password for 40
deleting 37
features, list of 10
list of conferences 10
managing 29
scheduling 19
sending email notification for 23, 24, 46
setting to audio only 20, 24
setting to recurring 20
connection speed
setting for guest participants 21, 26, 27, 32
setting for internal participants 41
continuous presence mode
creating
conferences 19
Custom Date filter 11
D
data plus video stream 43
Delete Conference command 13
deleting
conferences 37
deleting a conference 13
details of conference, displaying 10
devices, managing for participants 34
dial options
editing 25
setting 41
setting for guest participants 21, 26, 27
41
Polycom, Inc. 57
Page 62

Polycom CMA System Web Scheduling Guide
dial type
setting for guest participants 21, 26, 27
dial-in option 41
dial-out option 41
E
Edit Conference command 13
editing
advanced conference settings 39
conference information 23
participant dial options 25
participant endpoint settings 25
room dial options 27
room endpoint settings 27
email notifications 23, 24, 46
enabling a chairperson 40
endpoints
editing settings for 25
sending messages to 30, 34
F
features
bridge (MCU) 10
list of conference 10
field names
bridge (MCU) features 50
conference details 47
conference features 49
participant details 52
participant settings 54
participants 51
fields
input requirements for 5
filtering
overview of 5
filters
Custom Date 11
Future Only 11
Ongoing Plus 11
Today Only 11
Today Plus 11
Yesterday Plus 11
forcing MCU usage 41
future conference view 9
Future Only filter 11
G
guest participants
adding 21
setting bit rate for 21, 26, 27, 32
setting dial options for 21, 26, 27
setting dial type for 21, 26, 27
I
input requirements for fields
requirements
for field inputs
ASCII-only fields 5
L
lecturer, assigning 22
lists
filtering, overview of 5
of bridge (MCU) features 10
of commands 10
of conference features 10
of conferences 10
of participant details 10
of participants 10
logging into the CMA system 2
logging out of the CMA system 7
M
Manage Conference command 13
managing
active conferences 29
participant devices 34
MCU
features field names 50
forcing use of 41
list of features 10
messages, sending 30, 34
mode, T.120 44
modes, video
continuous presence mode 41
setting 41
switching mode 41
modifying
advanced conference settings 39
conference information 23
participant dial options 25
participant endpoint settings 25
room dial options 27
room endpoint settings 27
O
Ongoing Plus filter 11
P
participant field names
participant details field names 52
participant settings field names 54
58 Polycom, Inc.
Page 63

Index
participants
adding guest 21
list of 10
list of, details 10
managing devices for 34
removing 30, 34
setting endpoints for 25
participants field names 51
passwords
for chairperson 40
for conference 40
People + Content 43
R
recurring conferences 20
Remove Participant command 30, 34
removing
conferences 37
removing a conference 13
requirements, system 2
rooms
adding 22
setting dial options for 27
setting endpoints for 27
S
schedule conference view 9
scheduling a conference 19
Send Message command 30, 34
settings
advanced conference settings 39
chairperson password 40
conference password 40
connection speed 41
dial options 41
enable chairperson 40
forced MCU usage 41
People + Content 43
T.120 mode
44
video mode 41
starting the CMA system 2
switching mode 41
system login 2
system requirements 2
T
T.120 mode 44
Terminate Conference command 13
Today Only filter 11
Today Plus filter 11
V
video chairperson, assigning 22
video modes
continuous presence mode 41
setting 41
switching mode 41
video plus data stream 43
views
future conference view 9
schedule conference view 9
Y
Yesterday Plus filter 11
Polycom, Inc. 59
Page 64

Polycom CMA System Web Scheduling Guide
60 Polycom, Inc.
 Loading...