

Polk Mono SR1 Quick Start Manual

Quick Start Guide

2
Thank you for your Polk purchase. If you have a question or comment,
please feel free to call or email us.
Technical Assistance
In North America, call Polk Customer Service at
800-377-POLK(7655) (M–F, 9 a.m.–5:30 p.m. EST)
Outside the US, call +1-410-358-3600
email polkcs@polkaudio.com
Polk Audio
1 Viper Way, Vista, CA 92081
U.S.A.
The complete owner’s manual can be found online at
www.polkaudio.com/products/SR1
Polk Audio is a DEI Holdings, Inc. Company. Polk Audio and Polk, are registered trademarks of Polk Audio, LLC.
Chromecast Built-in is a trademark of Google Inc.
All other trademarks, product names, logos, and brands referenced herein are the property of their respective owners.
3
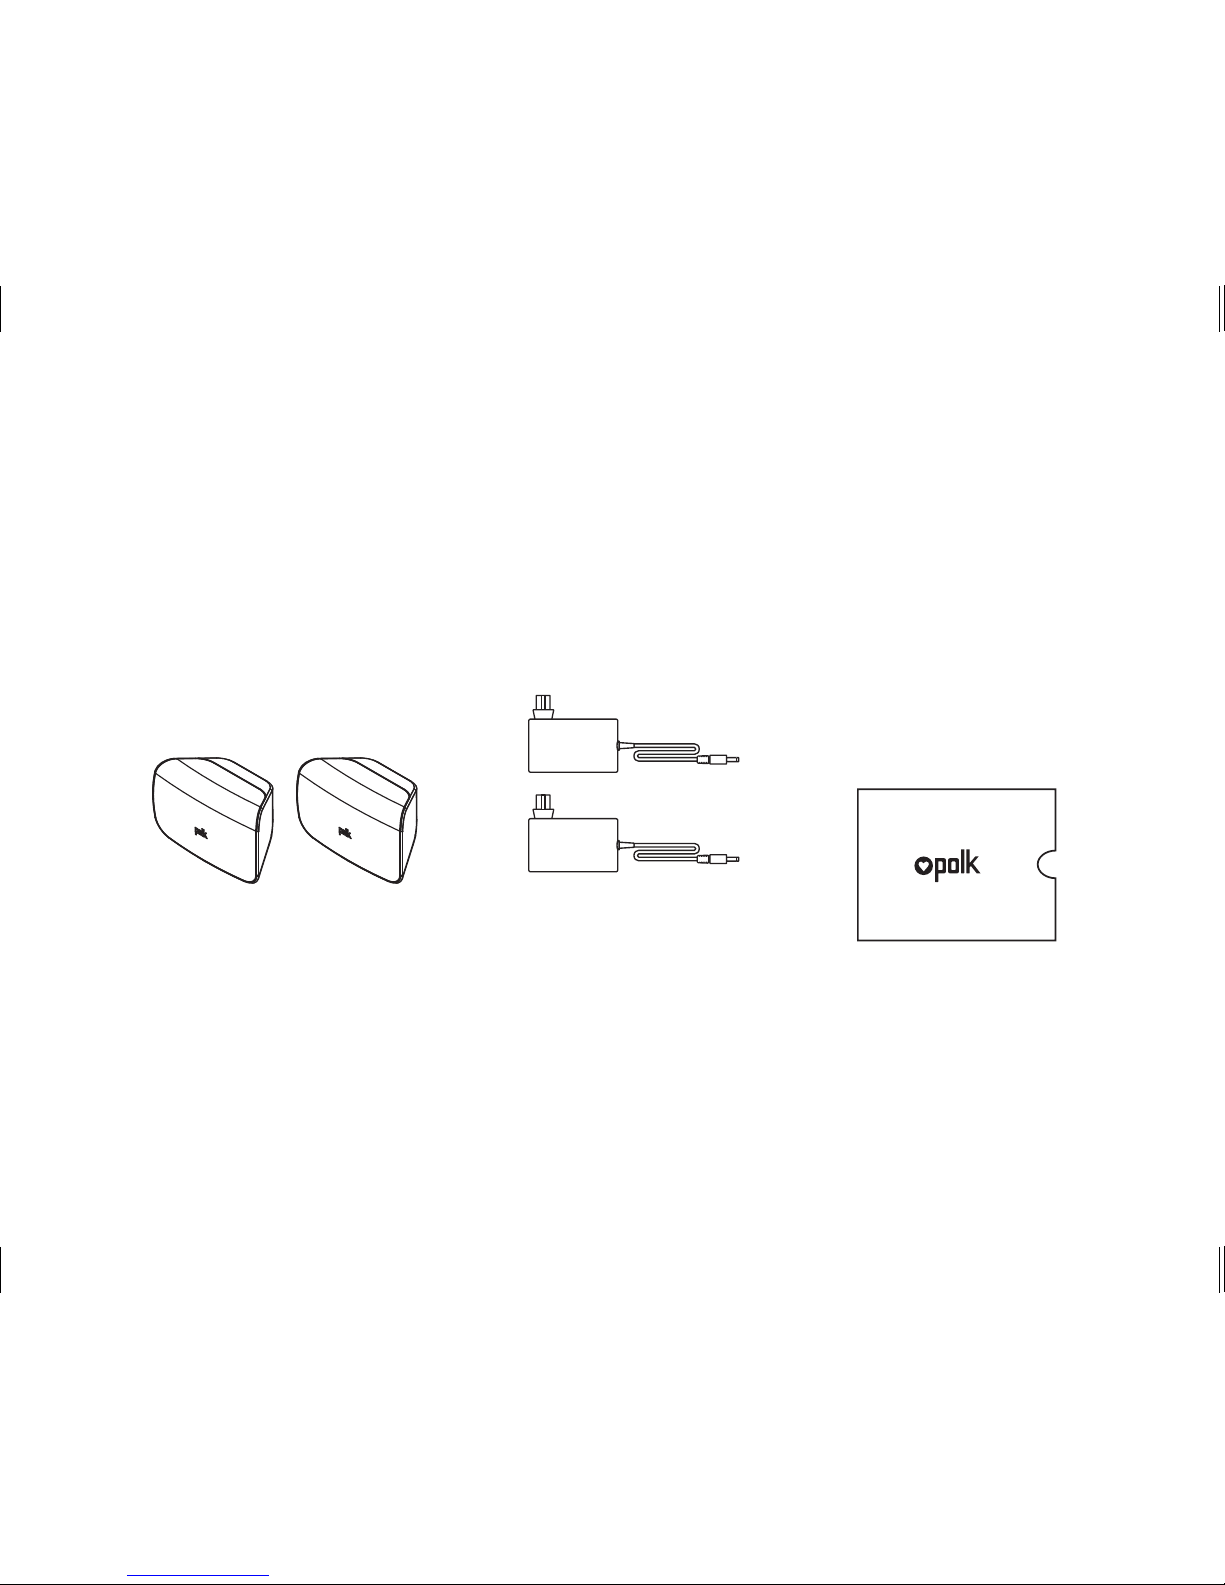
What’s in the Box
(2) SR1 Wireless Surrounds
(2) Surrounds
Power Supply
Product Literature
4
15V 1.2A
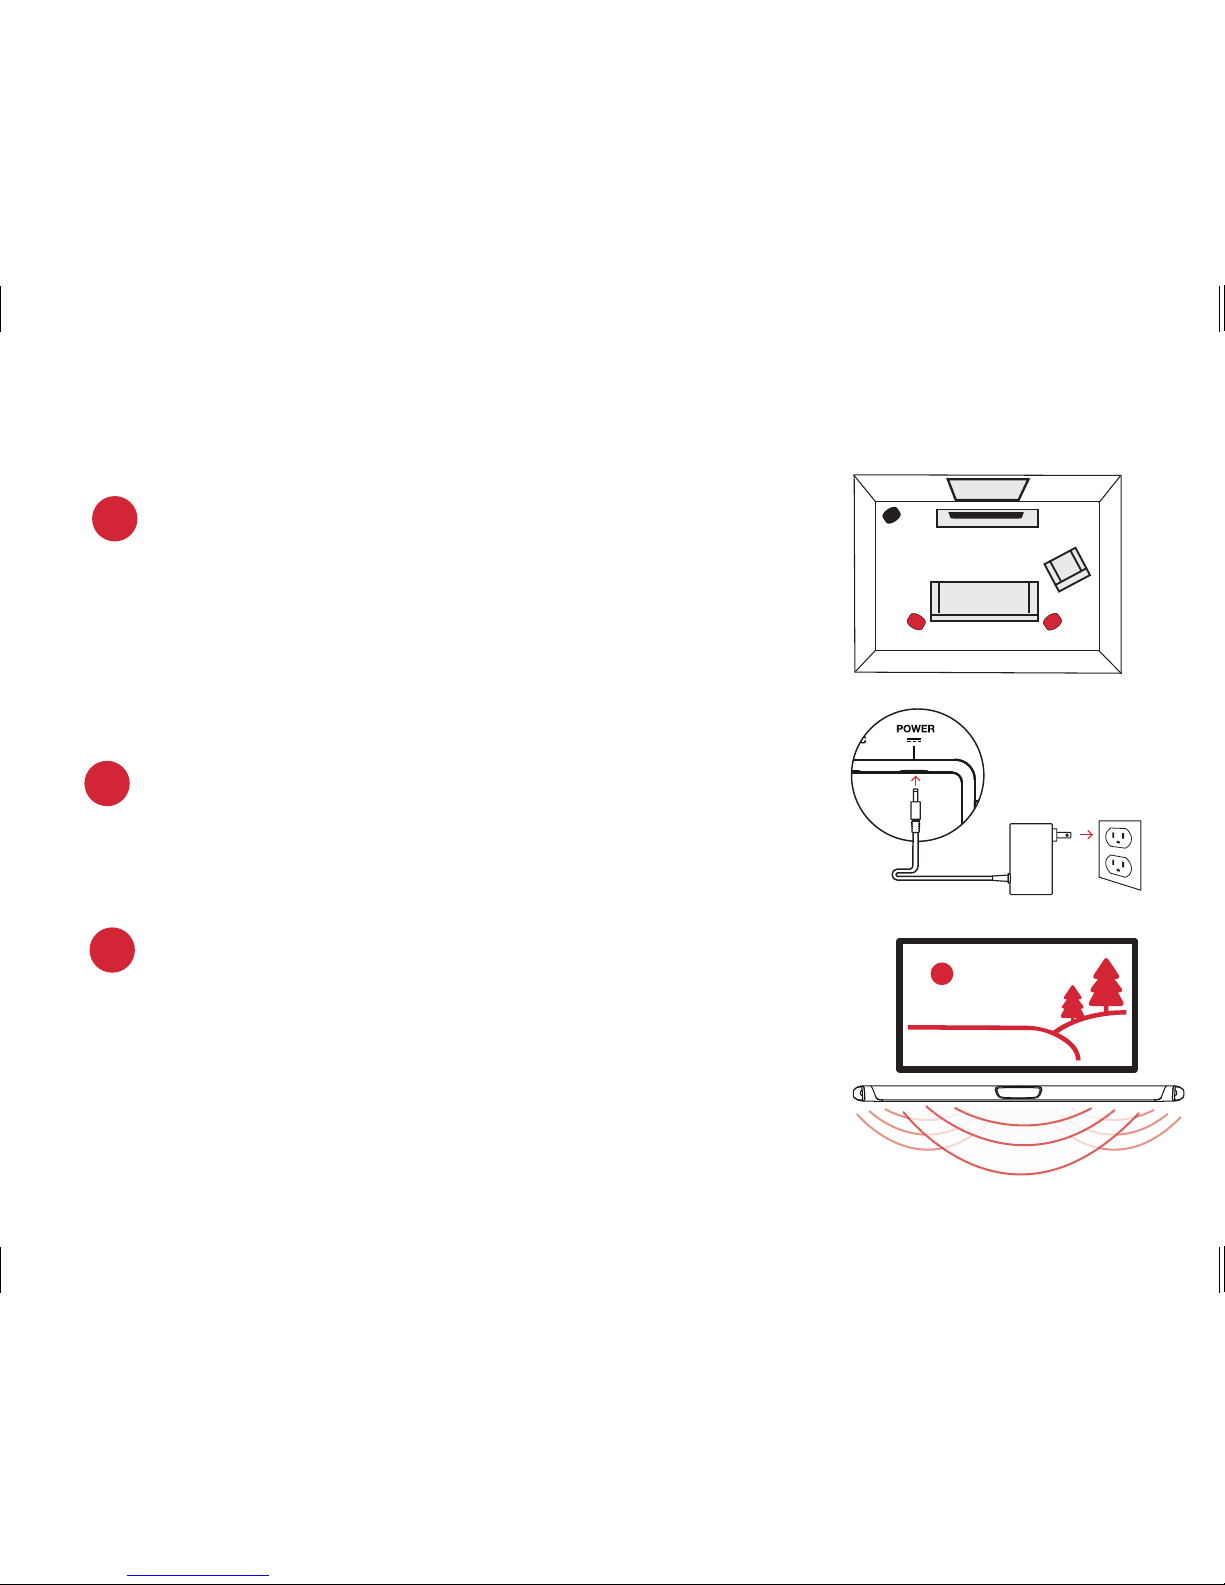
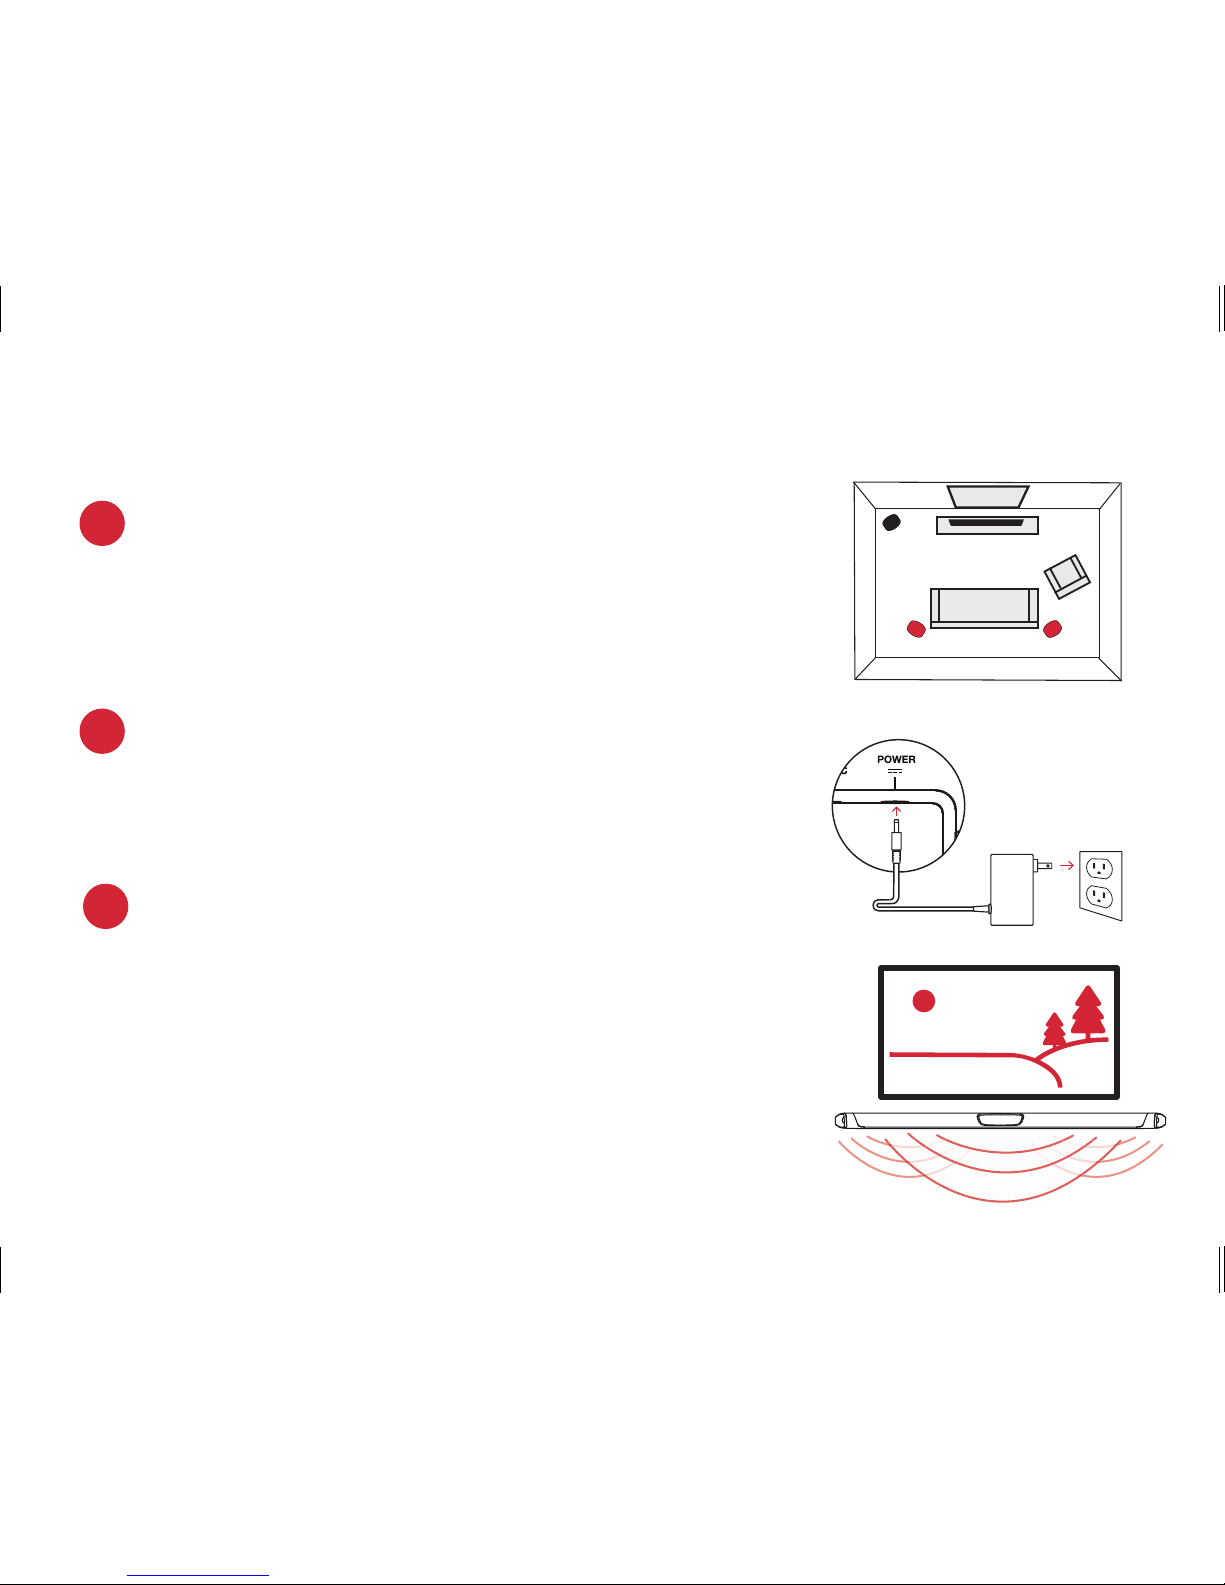
Placing or mounting the surrounds
Place the surround speakers on the left and right
sides and equidistant from the main listening
position. Make sure you place the speaker marked
“L” on the left and the speaker marked “R” on
the right. If you decide to mount the surrounds,
Please refer to the wall mounting template for
instructions.
1.
2.
Connecting the surrounds to an AC outlet
A fl ashing green light will be visible on the back of the
surrounds until you have manually synced the bar, sub,
and surrounds.
Surrounds
TV
L R
Verifying your connections
Turn on your TV and verify that you are seeing video and
hearing sound from the sound bar.
If you do not hear sound and do not see any lights on the
front of your sound bar, press the power button on the
sound bar to turn it on.
Note: If you are hearing sound from both your TV and your sound bar, you
must manually turn o your TV speakers using the Settings Menu on your TV.
Please refer to your TV’s owner’s manual for instructions.
3.
Setup
Connecting to Your Surround Speakers

5
4. Syncing the Surround Speakers to the Soundbar
Note: You must sync BOTH surround speakers AND the subwoofer.
Sync the Subwoofer
1) Press the power button on the soundbar to turn it on.
2) On the back of the SOUNDBAR, press and hold the SYNC button until you hear a
tone (about 3-4 seconds) and then release the button. The SUB and SURR lights
above the SYNC button will flash green
3) On the back of the SUBWOOFER, press and hold the SYNC button until you hear
a tone (about 10 seconds) and the light on the back of the subwoofer turns solid
green.
Sync the Surround Speakers
4) On the back of EACH of the SURROUND SPEAKERS, press and hold the SYNC
button until the light on the bottom of the speaker turns solid green (about 10 seconds).
5) When BOTH LEFT and RIGHT surround speakers are paired to the bar you will hear
a tone from the bar.
NOTE: If you hear a two note descending tone from the bar syncing failed. Please try
again.

6
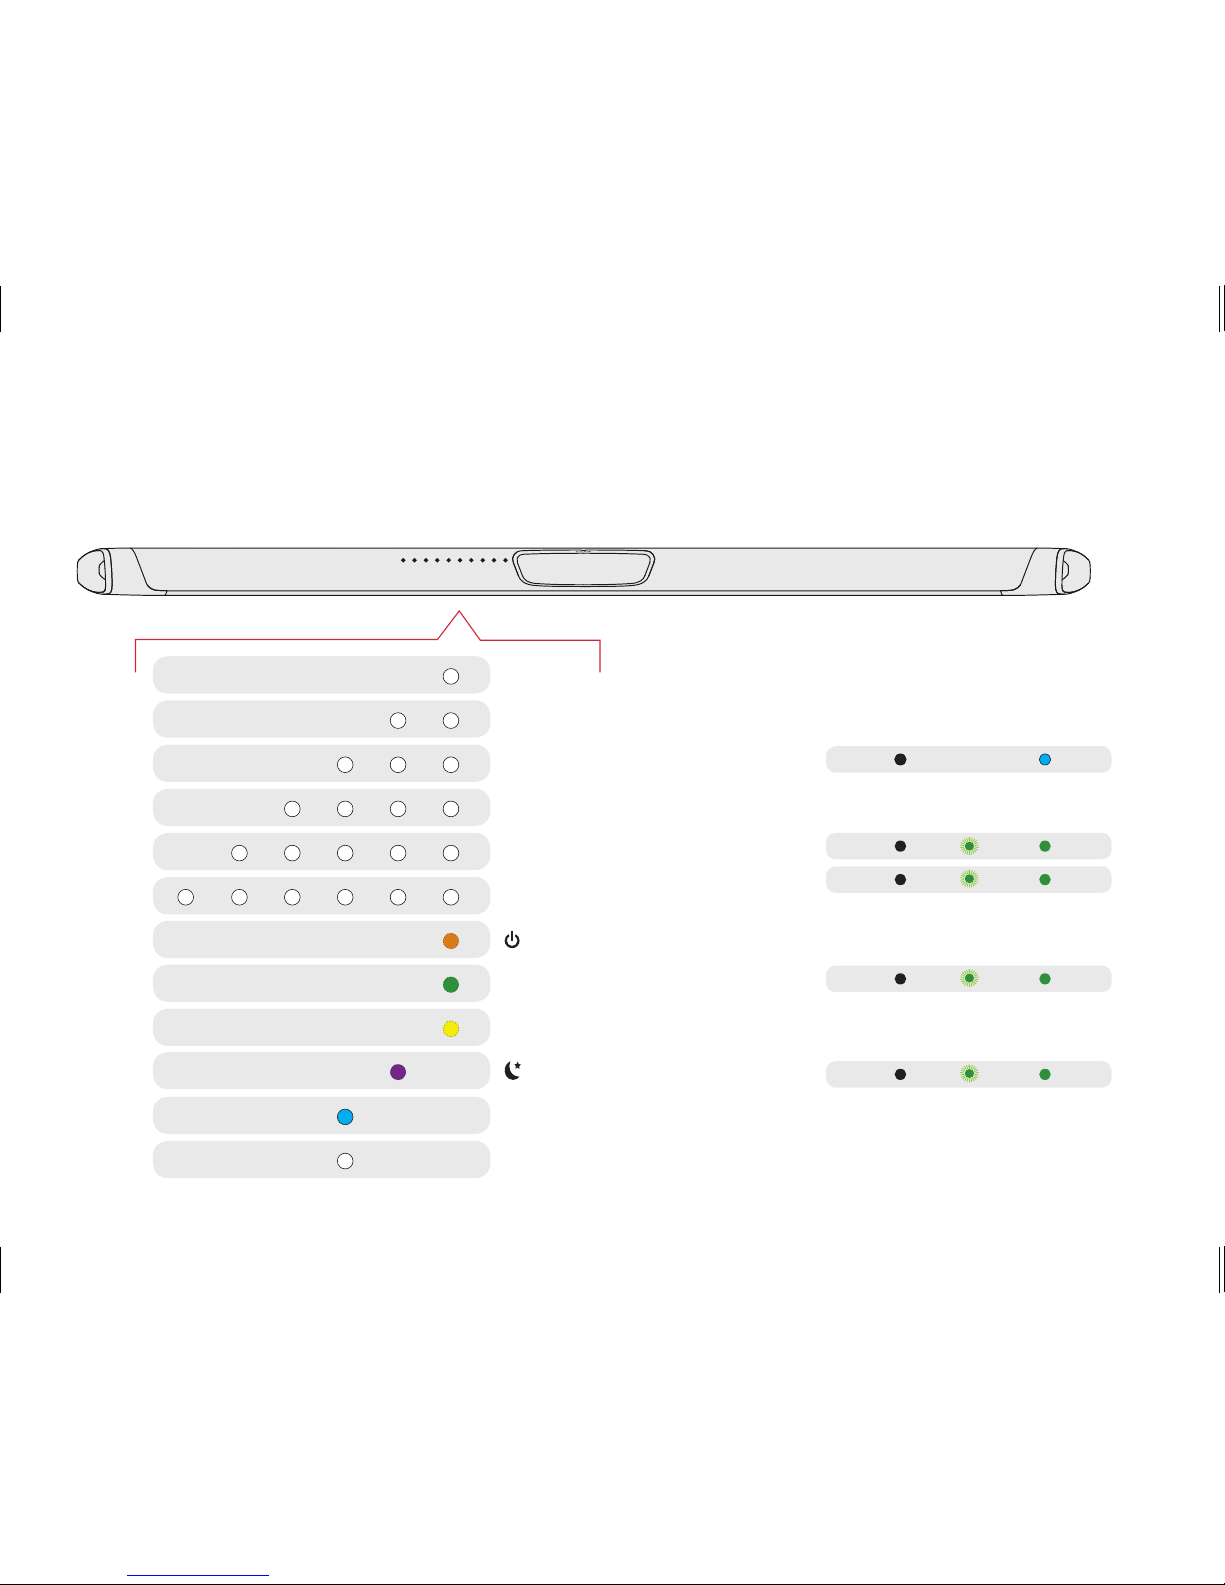
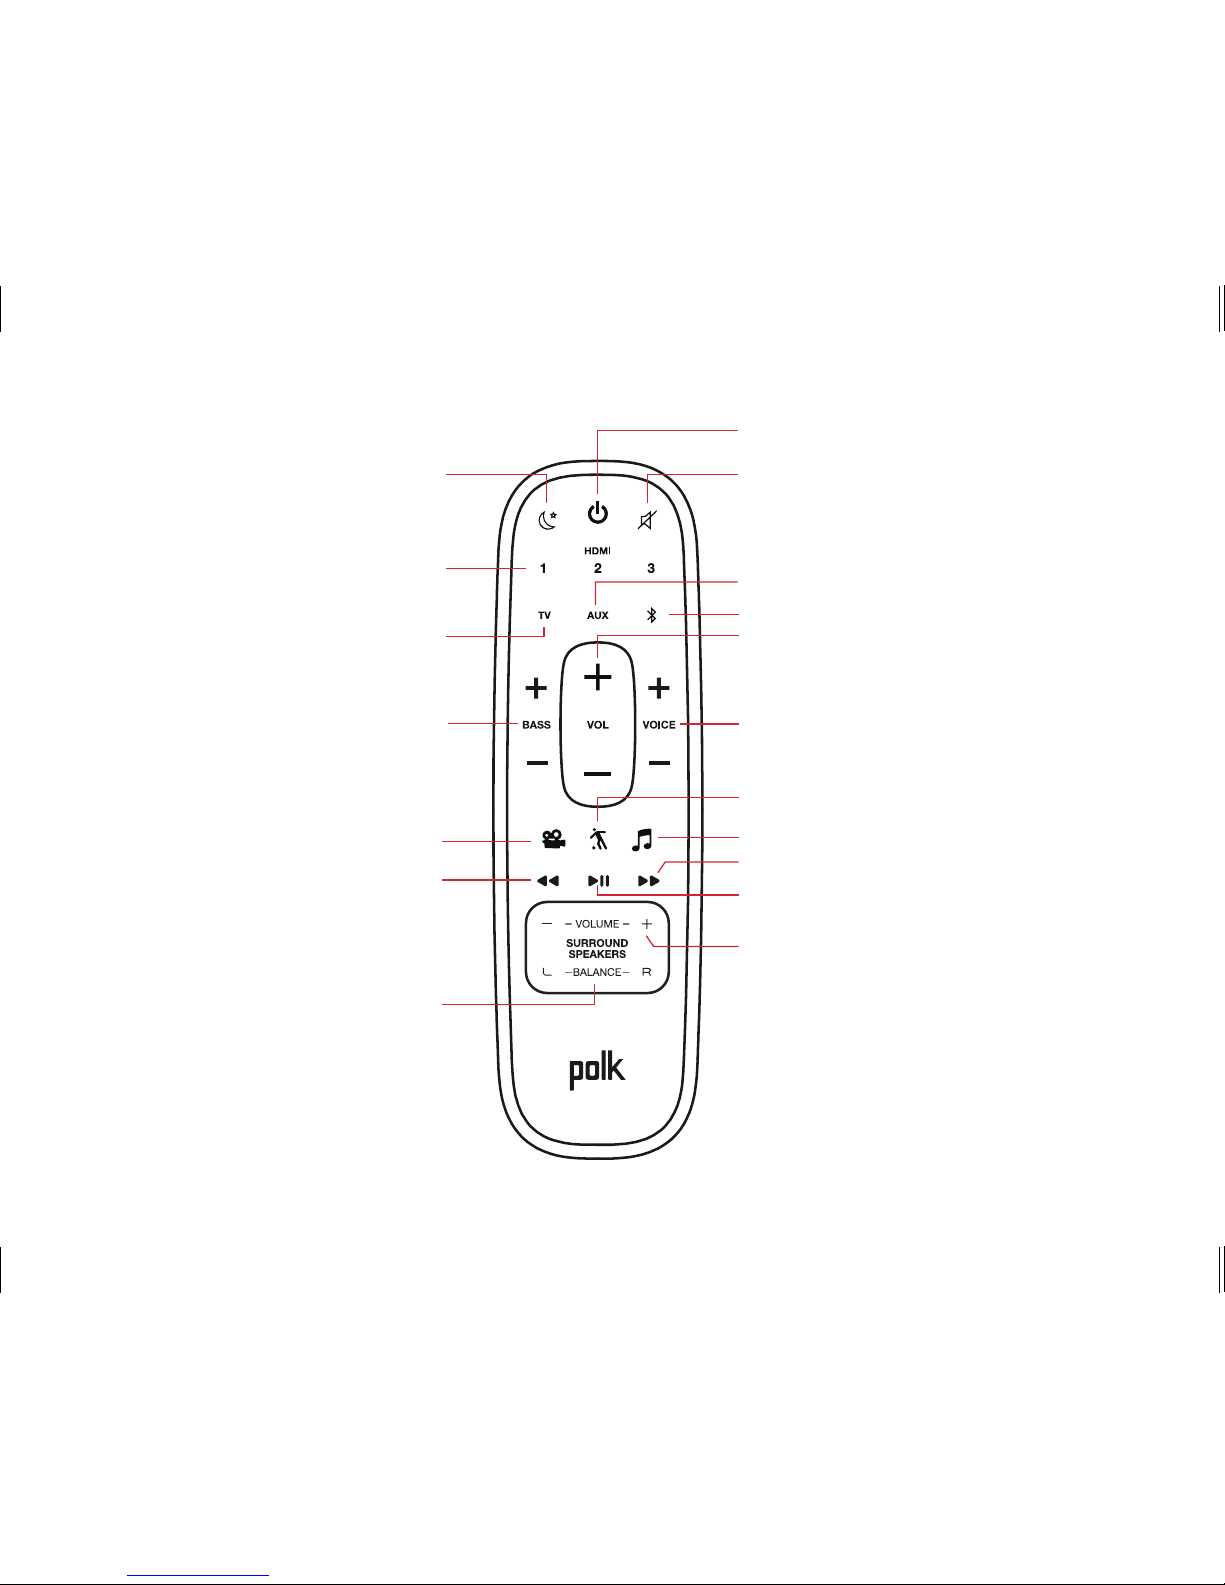
Remote Control
Power On/O
Mute
Play/Pause
Sport Mode
Surround Volume
Up/Down
(available when wireless surrounds
are used)
Surround Balance
Left/Right
(available when wireless
surrounds are used)
AUX Input
Bluetooth®
VoiceAdjust
Up/Down
TV Input
Night Mode
HDMI Inputs
Back
Bass
Up/Down
Movie Mode
Forward
Master Volume
Up/Down
Music Mode
7
Visual Indicators
The front of the sound bar contains a horizontal row of lights that provide status indications,
such as source, volume and listening modes.
HDMI 1
WI-FI
OFF
NOT CONNECTED
FLASHING
PAIRING MODE
SOLID
CONNECTED
SUB
SUB
SURROUNDS
SURROUNDS
HDMI 2
HDMI 3
HDMI (ARC)
OPTICAL
AUX
ON
NIGHT MODE
DOLBY CONTENT
DTS CONTENT
CHROMECAST BUILT-IN
BLUETOOTH
Back of Bar
Back of Subwoofer
Back of Surround Speakers
8
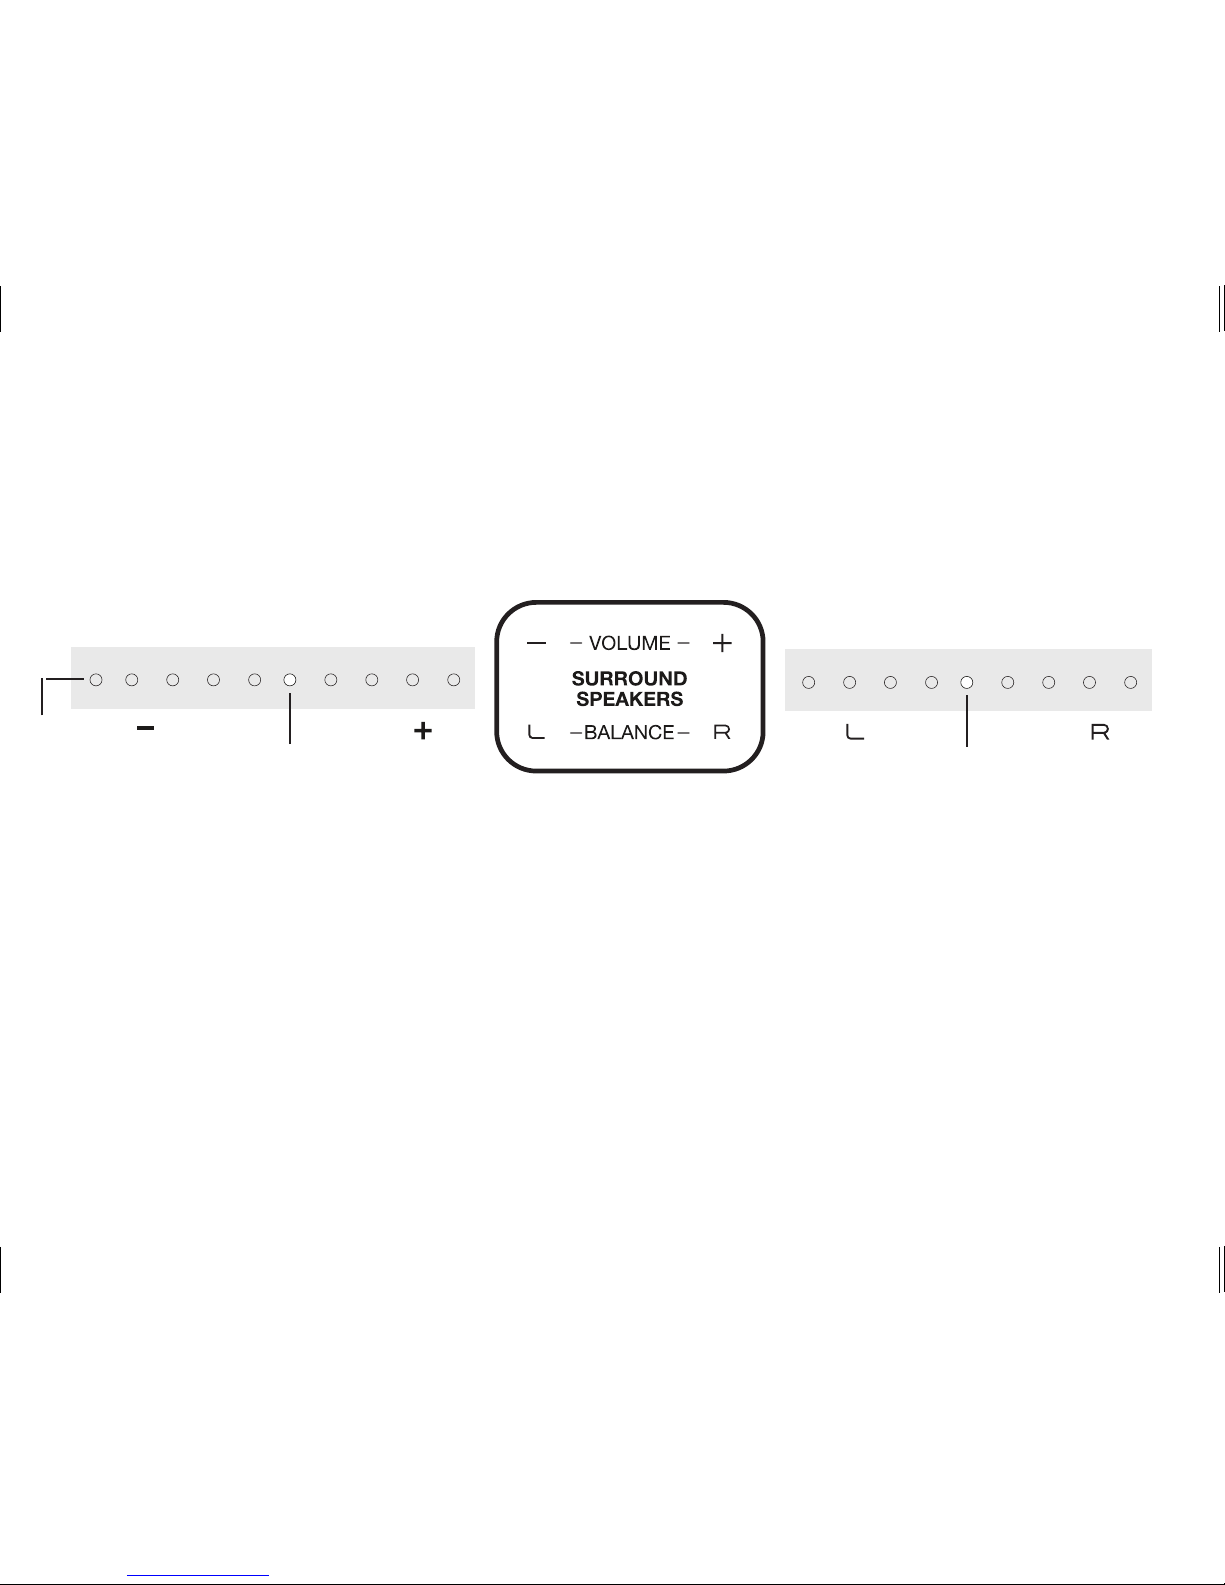
Optimizing Your Surround Speakers
Volume Control
Easily adjust volume of the
surround speakers for more or less
impact.
Balance Control
Easily adjust the balance of the
surround speakers based on your
listening position.
DEFAULT
LEVEL
DEFAULT
LEVEL
Sound Bar lights
Sound Bar lights
Surround
mute
9
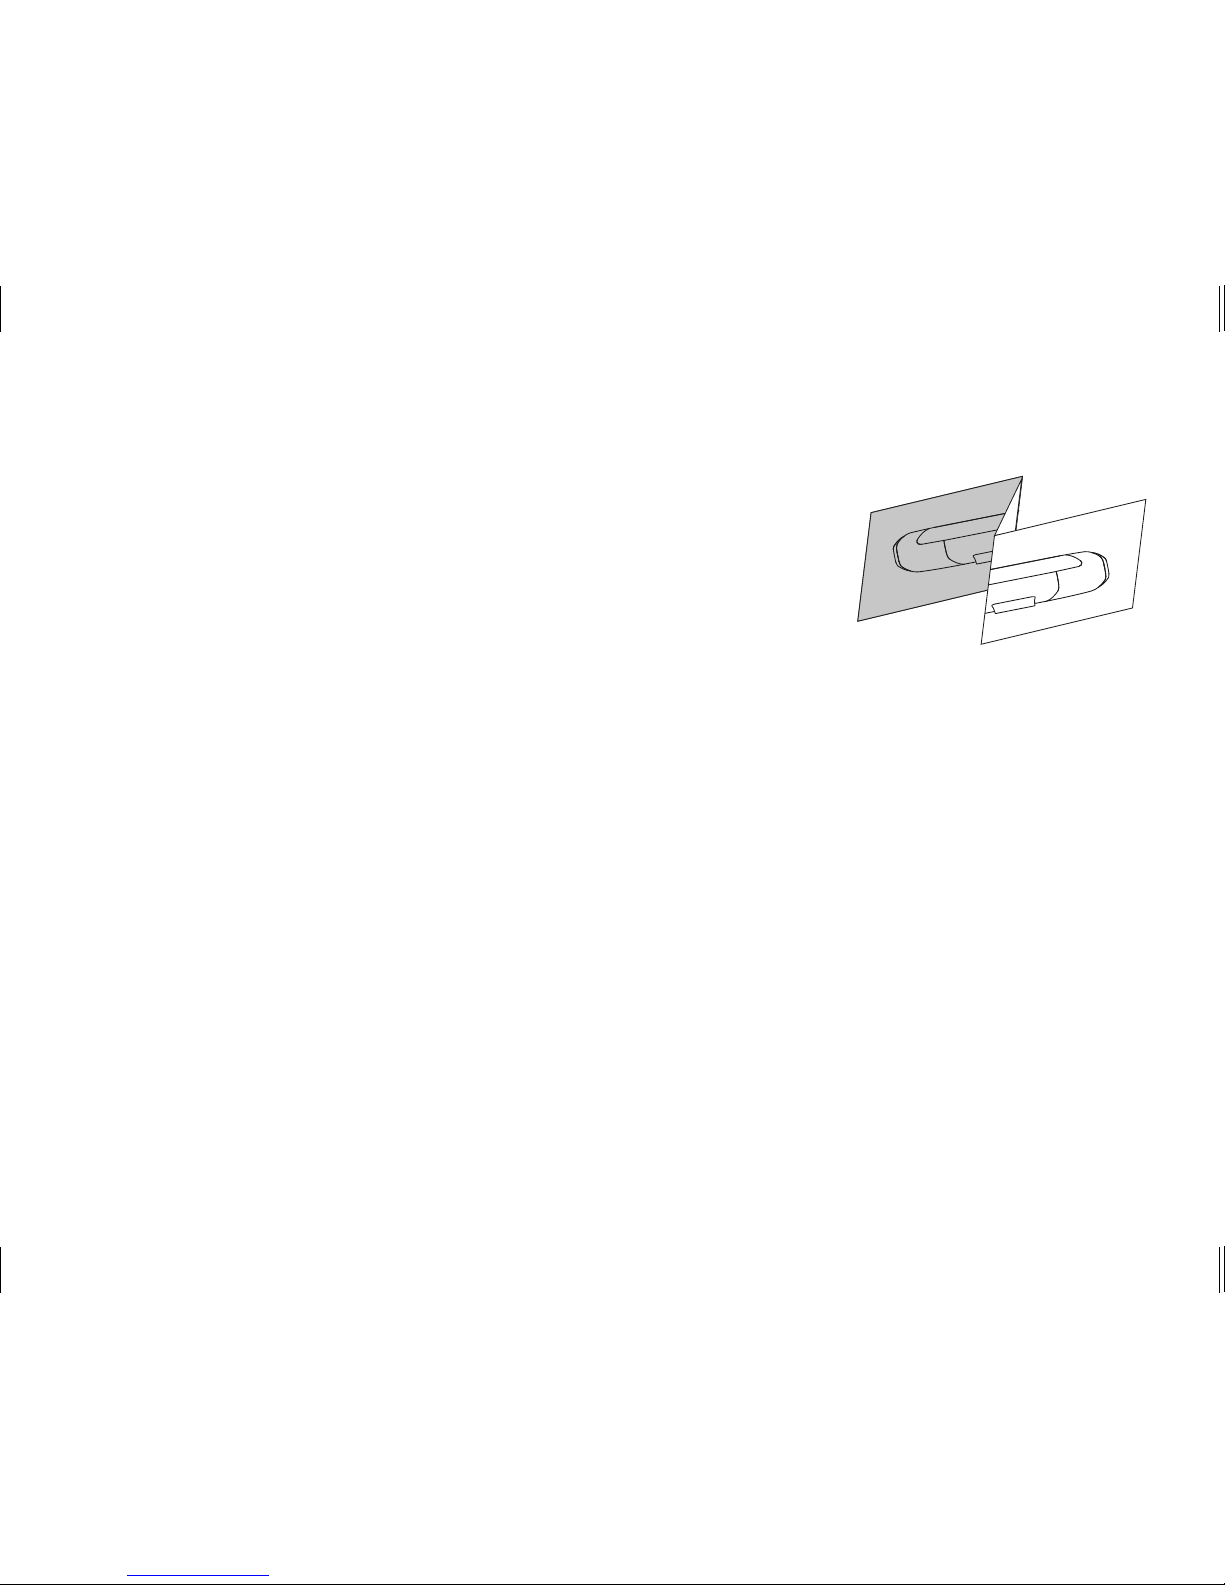
Wall mounting your SR1 Wireless Surround Speakers
A wall mounting template is provided for wall mounting the
surround speakers. For proper installation, please refer to the
instructions printed on the template. Screws for attaching the
surrounds to the wall are not included. Choose the screw type
and length appropriate to your home’s construction. If in doubt,
consult a professional.
I Don’t Hear Sound from my Surround Speakers
1) Verify that the left and right surrounds speakers are plugged in to a power source.
2) Check the green light on the back of each speaker.
• If it is solid green, turn up the Surround Volume using the remote control.
• If it is flashing green you need to sync the surround speaker to the soundbar using the
following instructions

10
Merci pour votre achat d’un produit Polk. Si vous avez des questions ou des commentaires,
n’hésitez pas à nous appeler ou à nous envoyer un courriel.
Assistance technique
En Amérique du Nord, contactez le service à la clientèle de Polk au
800-377-POLK(7655) (L–V, 9 h –17 h 30 HNE)
À l’extérieur des États-Unis, composez le +1-410-358-3600
Courriel polkcs@polkaudio.com
Polk Audio
1 Viper Way, Vista, CA 92081
U.S.A.
Vous trouverez le manuel du propriétaire complet au
www.polkaudio.com/products/SR1
Polk Audio est une entreprise DEI Holdings, Inc. Polk Audio et Polk sont des marques déposées de Polk Audio, LLC.
Chromecast Built-in est une marque déposée de Google Inc.
Toutes les autres marques déposées, nom de produits, marques et logos qui sont mentionnés dans ce document sont la
propriété de leurs détenteurs respectifs .
FR

11
Contenu de la boîte
(2) haut-parleurs
ambiophoniques
sans fil SR1
(2) blocs d’alimentation pour
haut-parleurs ambiophoniques
Documentation sur le produit
12
15V 1.2A
Positionnement de la barre audio
Pour profi ter au maximum de votre expérience
d’écoute, centrez la barre audio sous le téléviseur.
Remarque : Pour des instructions de montage mural,
consultez la section Installation avancée à la page 15
et le diagramme d’installation compris.
1.
2.
Branchement des haut-parleurs à une sortie AC
Un feu vert fi xe apparaîtra à l’arrière des hautparleurs ambiophoniques afi n d’indiquer qu’ils sont
correctement branchés à la barre audio.
haut-parleurs
ambiophoniques
TV
L
R
Vérifi cation de vos connexions
Allumez votre télé et vérifi ez si vous voyez la vidéo et si
vous entendez le son à partir de votre barre de son.
Si vous n’entendez pas le son et vous ne voyez pas les
lumières sur le devant de votre barre de son, appuyez sur le
bouton d’alimentation sur la barre de son pour l’allumer.
Remarque : Si vous entendez des sons en provenance de votre téléviseur et de la barre
audio, vous devez manuellement désactiver les haut-parleurs du téléviseur à partir du
menu des réglages du téléviseur. Veuillez consulter le manuel du propriétaire de votre
téléviseur pour des instructions.
3.
Installation
Couvrant vos environs à la barre de son

13
4. Synchroniser les haut-parleurs ambiophoniques à la barre de son
Note : Vous devez synchroniser les DEUX haut-parleurs ambiophoniques ET le caisson
de graves.
Synchroniser le caisson de graves avec la barre de son
1) Appuyez sur le bouton d’alimentation sur la barre de son pour l’allumer.
2) À l’arrière de la BARRE DE SON, appuyez et maintenez le bouton SYNC (environ 3 à
4 secondes) jusqu’à ce que vous entendiez une tonalité puis relâchez le bouton. Les
lumières SUN et SURR au-dessus du bouton SYNC clignoteront en vert.
3) À l’arrière du CAISSON DE GRAVES, appuyez sur le bouton SYNC (environ 10
secondes) jusqu’à ce que vous entendiez une tonalité et la lumière à l’arrière du
caisson de graves s’illumine en vert de façon continue.
Synchroniser des haut-parleurs ambiophoniques
1) À l’arrière de CHACUN des HAUT-PARLEURS AMBIOPHONIQUES, appuyez et
maintenez le bouton SYNC (environ 10 secondes) jusqu’à ce que la lumière au bas du
haut-parleur soit verte en continu.
2) Lorsque les deux haut-parleurs ambiophoniques, GAUCHE et DROITE, sont
synchronisés avec la barre, vous entendrez une tonalité provenant de la barre de son.
NOTE : Si vous entendez un son à deux tonalités descendantes provenant de la barre de
son, cela signifie que la synchronisation a échoué. Veuillez essayer à nouveau.
14
Télécommande
Marche/Arrêt
Muet
Lecture/Pause
Mode sport
Volume ambiophonique
En haut/Vers le bas
(disponible pour les systèmes
ambiophoniques sans fil)
Équilibre ambiophonique
Gauche/Droite
(disponible pour les systèmes
ambiophoniques sans fil)
Entrée AUX
Bluetooth®
VoiceAdjust
En haut/Vers le bas
Entrée TV
Mode nocturne
Entrées HDMI
Retour
Basse
En haut/Vers le bas
Mode cinéma
Avance rapide
Volume principal
En haut/Vers le bas
Mode musique
 Loading...