

Page 1

50
Owner’s
ATRIUM
Manual
Multi-Application
Weatherproof
Indoor/Outdoor
Loudspeakers
Page 2
A
TRIUM
2
Get more information and exclusive accessories, visit www.polkaudio.com
Page 3

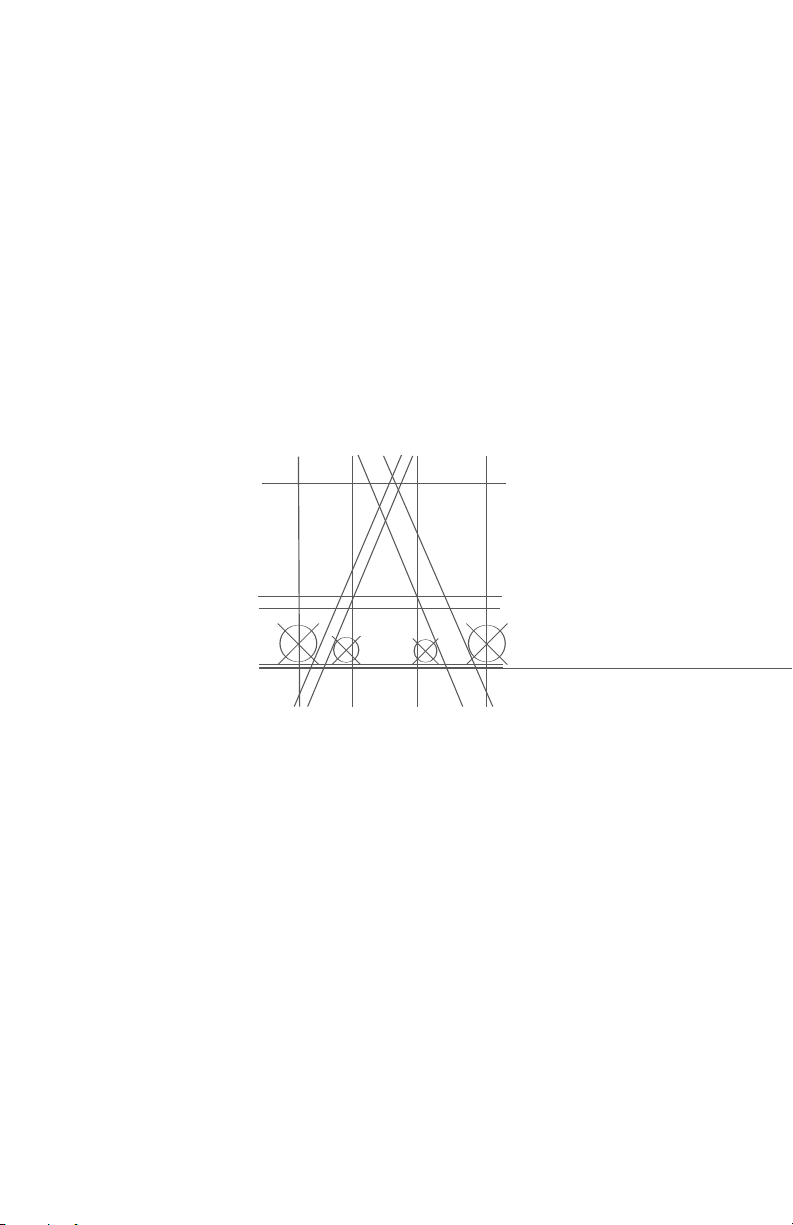
PLACEMENT OPTIONS
The Atrium has a wide dispersion pattern,
and is very efficient. Your Atrium Series
speakers will deliver good sound quality
throughout a large listening area, but if you
really want high sound levels in an outdoor
setting, which has acoustic characteristics
that differ from those of indoor conditions,
we recommend multiple-pair setups.
You will maximize the useful life of your
Atrium speakers by placing them where they
will receive less exposure to the elements.
Look for the best overall compromise
between sound quality, convenience
and exposure.
Place the speaker in a corner for more bass output. Bracket
Coloque el altavoz en una esquina para obtener mayor
rendimiento de bajos. Soporte adosado a la pared lateral.
Platzieren Sie den Lautsprecher zur Gewährleistung stärkerer
Tiefen in einer Ecke an. Die Halterung wird an einer Seitenwand
Installez l'enceinte dans un coin pour
optimiser les graves. Fixez le support
FIGURE 1
attached to side wall.
au mur latéral.
befestigt.
Place the speaker close under an eave for more bass output.
Installez l'enceinte directement sous l'avant-toit pour opti
Bei Platzierung des Lautsprechers direkt unter einer Kante
oder einem Vorsprung werden die Tiefen weiter verstärkt.
Coloque el altavoz debajo y cerca
FIGURE 2
de un alero para obtener mayor
rendimiento de bajos.
miser les graves.
Place the speaker away from eaves and corners for less
Coloque el altavoz lejos de aleros y esquinas para obtener
-
Dégagez l'enceinte de l'avant-toit ou des coins pour dimin-
Schwächere Tiefen erhalten Sie, wenn Sie den Lautsprecher
von Kanten und Vorsprüngen entfernt aufstellen.
menor rendimiento de bajos.
For Customer Service, call 800-377-7655.
FIGURE 3
bass output.
uer les graves.
3
Page 4
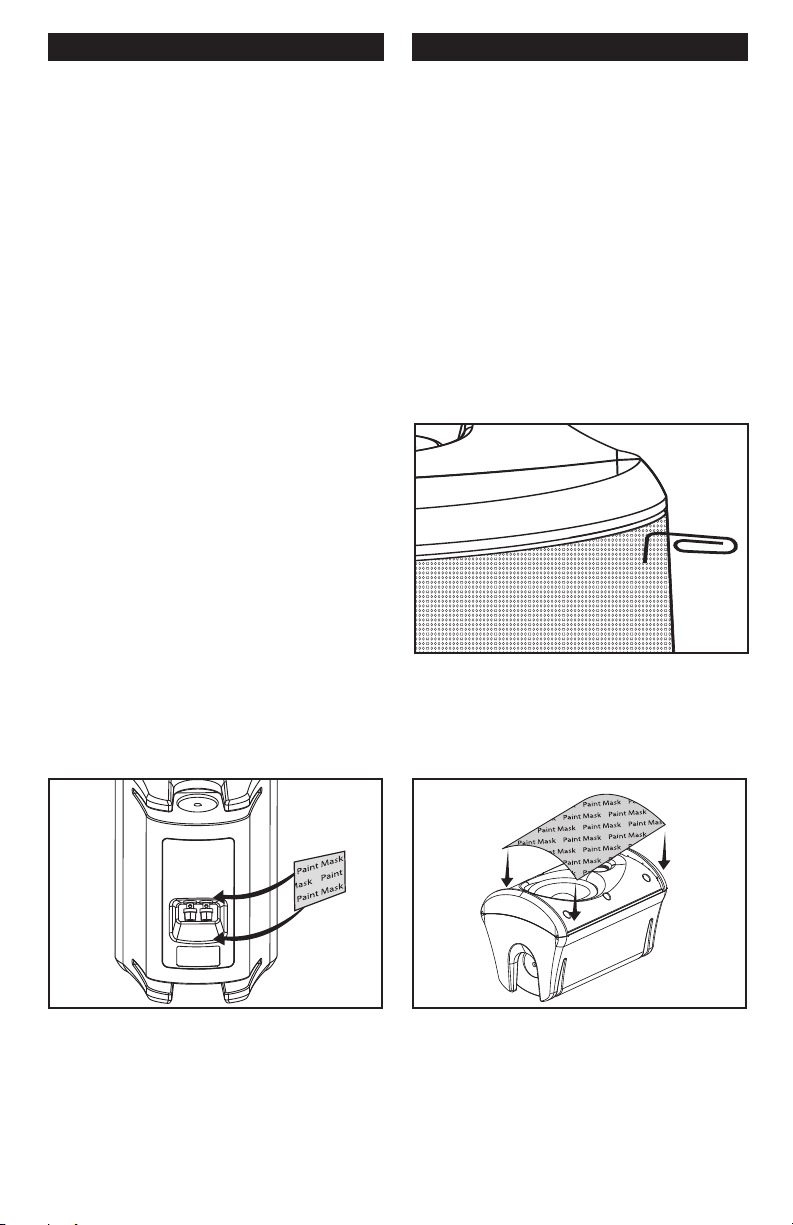
AINTING YOUR ATRIUM AW
P
LOUDSPEAKERS
You will need:
• A spray can of primer paint (Krylon
Sandable Spray Primer #1318)
• A spray can of the paint of your choice.
Choose exterior grade paint if you
plan to use the speakers outdoors
• A paperclip or corkscrew (for removing
the paintable grille)
• Masking tape
• Paint mask (to cover unpaintable parts—
not included. To make an easy paint mask,
use the grille as a template and cut a mask
from heavy, nonporous Kraft paper.)
ARING TO PAINT:
PREP
1. Separate the parts of the speaker. Remove
the brackets and bracket knobs. Remove
the grille by carefully hooking it with a
bent paper clip and pulling it gently away
from the cabinet [figure 4].
2. Mask off the binding posts on the back
of the speaker [figure 5], the end panels
and bracket knobs, and carefully mask off
the front of the speakers to protect the drivers and baffles while painting [figure 6].
The grille features an engraved logo pod.
You can mask this off or paint right over it.
Cubra con cinta de enmascarar los tornillos de presión ubicados en la parte de atrás del altavoz.
Decken Sie die Anschlussklemmen auf der Rückseite des Lautsprechers ab.
4
Get more information and exclusive accessories, visit www.polkaudio.com
Mask the binding posts on the rear of the speaker.
Masquez les bornes à l'arrière de l'enceinte.
FIGURE 5
Remove the grille using a paper clip.
FIGURE 4
Quite la rejilla con un sujetapapeles.
Retirez la grille en utilisant un trombone.
Entfernen Sie den Gitteraufsatz mit einer Büroklammer.
FIGURE 6
Mask the drivers and baffles.
Cubra con cinta de enmascarar los excitadores y los bafles.
Masquez les haut-parleurs et les écrans acoustiques.
Decken Sie die Treiber und Resonanzwände ab.
Page 5

AINTING THE CABINET, BRACKET
P
KNOBS AND BRACKET
:
1. Apply two thin coats of primer to the
cabinet and knobs. The bracket does not
require a primer.
2. When the primer is completely dry, apply
the finish color [figure 7].
3. When the paint is completely dry, remove
the masking material.
4. Do not reattach the speaker to the bracket
until the bracket is mounted. Try to keep
all handling of freshly painted parts to
a minimum.
AINTING THE GRILLE:
P
1. The grille of the Atrium speaker features
an even, protective powder coating.
This powder coating is an ideal primer.
The grille features an engraved logo pod.
You can mask this off or paint right over it.
2. Using spray paint, spray two thin coats of
finish color with no primer [figure 8]. If
you’re using a compressor and spray gun,
use the finest, most diffuse setting. Be
careful not to fill the holes in the grille
with paint.
3. When the paint is completely dry, carefully
fit the grille into its recess so that it is just
resting on the cabinet. Starting with one
corner, go around the speaker and push
the grille into the grille notch a little bit at
a time. Be gentle; the grille may be easily
bent out of shape by rough handling.
After priming, apply thin coats of finish color
Después de aplicar la capa de imprimación (primer),
aplique capas delgadas del color del acabado.
Suite à la couche d'apprêt, appliquez la
peinture de finition en couches minces.
Nach der Grundierung tragen Sie eine
dünne Schicht des Farbanstrichs auf.
FIGURE 7
Paint the grille. Use thin coats of spray paint.
Pinte la rejilla. Use capas delgadas de pintura aerosol.
Peinturez la grille. Appliquez des couches minces de peinture aérosol. N'obstruez pas les trous
Streichen Sie den Gitteraufsatz. Verwenden Sie dazu dünne Spritzlackschichten. Die Öffnungen
des Gitteraufsatzes dürfen nicht mit Farbe blockiert werden.
For Customer Service, call 800-377-7655.
Do not block grille holes with paint.
No tape los agujeros de la rejilla con pintura.
FIGURE 8
de la grille de peinture.
5
Page 6

MOUNTING
The Atrium’s bracket allows it to be mounted
either horizontally or vertically and aimed to
deliver the best possible sound in a variety
of situations. Follow the steps below to safely
secure the brackets and speakers.
Installation of Atrium Series Loudspeakers
requires basic skills in using tools such as a
drill and screwdriver. If you are in doubt that
you possess the necessary skills or tools,
consult your Polk Audio dealer, or a
professional installer.
1) Make sure the material on which you
plan to mount the speakers (plaster,
drywall, paneling, stone, etc.) can
support the weight of the speakers
(Atrium50=approx 5lbs/2.3kg ea,).
2) Make sure the locations you select do not
conceal electrical wiring or plumbing.
3) Prior to installation, hold the speaker in
the chosen location to make sure it safely
clears obstacles such as ceiling, adjacent
walls, corners, beams, lighting fixtures
and door/window frames.
4) Using the keyhole slots in the bracket as a
template, mark the installation location of
the two keyhole slots with a pencil. You
can do this by removing the bracket knobs
on the top and bottom of the speaker and
removing the bracket, or by leaving the
bracket connected to the speaker [figure
9]. Orient the bracket so that the small
ends of the keyhole slots are facing “up”
according to the direction of installation.
Reattach the bracket to the speakers, if
you have removed it, by reinserting it into
the bracket gap and then tightening the
bracket knobs.
5) If you are certain that there is a stud
behind the wall surface, drive #10 screws
(not included) through the wall and into
the stud [figure 10a].
6) If there is no stud behind the wall at the
chosen location, install #10 wall anchors
(not supplied) into the wall by following
the wall-anchor-manufacturer’s instructions. Always use two wall anchors and
two screws per speaker [figure 10b].
7) Drive screws into stud or wall anchors,
leaving screw heads protruding 1/16"
(1/6mm).
Turn the bracket knobs to remove the bracket assembly
Gire las perillas de los soportes para quitar la unidad de soporte.
Tournez les boutons du support pour retirer le bloc-support.
Drehen Sie die Halterungsknöpfe, um die gesamte
6
Get more information and exclusive accessories, visit www.polkaudio.com
FIGURE 9
Halterung abzunehmen.
figure 10a
Wall Stud
figure 10b
No Wall Stud
.
Use tornillos n° 10 si la pared tiene parales internos, use anclas de pared y tornillos n° 10 si la
Verwenden Sie eine Schraube Nr. 10 für Wände mit Holzstielverstärkung bzw. Dübel und
use #10 wall anchors + screw for no wall stud.
Utilisez une vis no10 pour fixer le support dans un montant.
Schrauben (Nr. 10) für Wände ohne Holzstielverstärkung.
FIGURES 10a & b
Use #10 screw for wall stud,
pared no tiene parales internos.
Utilisez une cheville d'ancrage et une vis
no10 s'il n'y a pas de montant.
Page 7

8) If speaker wire is being fed from a hole
in the wall behind the bracket, pull this
speaker wire through the hole in the
bracket before mounting the bracket
[figure 11].
9) Line up the bracket, attached to the
speaker, so that the screw heads pass
through the large center hole of the
bracket’s keyhole slots.
10) Let the speaker and bracket slide straight
down, allowing the screw head to slip
behind the smaller end of the keyhole
slot [figure 12].
11) Tug gently on the speaker to make certain
that the screws and bracket are properly
aligned and that the wall anchors
are secure.
12) If the bracket is not held snug against
the wall by the screw heads, remove the
speaker from the wall, drive the screws
in a little further and then remount
the speaker.
13) Once the speaker is mounted, the bracket
knobs can be loosened to “aim” the speaker, and then hand-tightened to keep the
speaker angled correctly [figure 13].
4)
1
Follow the hookup directions included
with your receiver. Strip 1/2 inch of insulation from each of the two conductors
of the wire to expose the bare metal and
twist each of the conductors into a single
unfrayed strand (so you have two
unfrayed strands). Note that one of the
terminals on the rear of each speaker is
red (+) and the other is black (-). Make
certain that you connect the wire from
the red terminal of your amplifier or
receiver to the red terminal on your
speaker and the wire from the black
terminal of your amplifier or receiver
to the black terminal on your speaker
[figure 14]. Most wire has some
indicator (such as color-coding, ribbing
or writing) on one of the two conductors
to help you maintain consistency.
Feed speaker wire from wall through
Para montar el altavoz con facilidad, pase el cable de altavoz que sale de la pared por el agujero
Verlegen Sie das Lautsprecherkabel einfach von der W
bracket wire hole for easy mounting.
Passez le fil de haut-parleur à travers le trou du
durch die entsprechende Öffnung in der Halterung.
FIGURE 11
para cable del soporte.
support pour faciliter l'installation.
Slide the bracket down on the screw heads
Deslice el soporte hacia abajo sobre las cabezas de los tornillos para que encajen en las ranuras
Glissez le support sur la tête de la vis jusqu'à ce qu'elle s'enclenche dans la fente.
Schieben Sie die Halterung auf die Schraubköpfe herunter, so dass sie in den Ritzen einrastet.
and
For Customer Service, call 800-377-7655.
FIGURE 12
to catch the keyhole slots.
en forma de ojo de cerradura.
7
Page 8

TERNATE SECURE MOUNTING
AL
For more solid mounting, screw the bracket
directly into a weight-bearing stud on the
mounting surface.
Place the screws securely in the smaller
end of the keyhole slot. Do not leave
screwheads protruding.
Attach and remove the speaker from the
permanently secured bracket by tightening
and loosening the bracket knobs [as shown
in figure 13].
SAFETY FIRST
When installing Atrium speakers be aware
of the weight of your particular model
(Atrium50=approx 5lbs/2.3kg ea,) and the
weight bearing tolerance of the material to
which you are mounting the speaker. If you
are not sure of a safe way of mounting your
speakers please consult a professional
installer, your authorized Polk Audio
dealer, or a building contractor.
You will maximize the useful life of your
Atrium speakers by placing them where they
will receive less exposure to the elements. If
extreme weather conditions are expected, we
recommend storing your speakers indoors.
Look for the best overall compromise
between sound quality, convenience and
exposure. Do not compromise safety.
FIGURE 13
Adjust the bracket knobs to aim the speaker
Ajuste las perillas del soporte para orientar el altavoz.
Stellen Sie die Position des Lautsprechers über die Knöpfe an der Halterung ein.
8
Get more information and exclusive accessories, visit www.polkaudio.com
Ajustez les boutons du support pour diriger l'enceinte.
.
Make speaker connections using binding posts.
FIGURE 14
Haga las conexiones del altavoz con los tornillos de presión.
Branchez les fils de haut-parleur aux bornes des enceintes.
Nehmen Sie die Lautsprecheranschlüsse über die Klemmen vor
.
Page 9

FIGURE 15
USING 5-WAY BINDING POSTS
EL USO DE POSTES DE CONEXIÓN DE CINCO
GEBRAUCH VON FUNFER-VERBINDUNGS
Loosen hex nut
Desenrosque parcialmente la tuerca
hexagonal
Desserrer l’écrou
Sechskantmutter lösen
POSICIONES
UTILISATION DES BORNIERS
“CINQ FAÇONS”
BOLZEN
-
Insert speaker wire
through hole
Inserte el alambre para la bocina en el
orificio
Insérer le fil du haut-parleur dans le trou
Lautsprecher-Draht durch das Loch
schieben
ighten hex nut
T
Enrosque la tuerca de nuevo
Serrer l’écrou
Sechskantmutter festschrauben
Do not insert insulated
section of speaker wire
No inserte alambre con material aislante
Ne pas insérer la partie isolée du fil du
haut-parleur
Isolation des Lautsprecher-Drahtes nicht
in das Loch schieben
For Customer Service, call 800-377-7655.
9
Page 10

SPECIFICA
TIONS
ATRIUM50
Frequency Response
75Hz-20Khz
Recommended Power
10-80W Continuous
Impedance
Compatible with 8 Ohm outputs
Efficiency (dB 1w/1m)
89db
A
vailable Finishes
Black & White
Environmental Standards
ASTM D5894-UV Salt Fog, Mil Standar
Immersion, Mil-Std 883 Method 1009.8
for salt and corr
Cabinet material
Mineral filled polypropylene
Grille & Bracket material
powder coated aluminum
Hardware
Brass or stainless steel
Terminals
Gold 5-way binding posts
Drive Unit Complement
mid-bass
1 41⁄2" mineral filled polypropylene cone,
rubber surround
Tweeter
3
⁄4" (19mm) metalized dome
neodymium motor structure
Height x Width x Depth with bracket & knobs
91⁄2"H x 61⁄4"W x 73⁄4"D
(24.1cmH x 15.9cmW x 19.7cmD)
Shipping Weight Pair
12LBS- 5.45 Kg
osion
d 810
10
Get more information and exclusive accessories, visit www.polkaudio.com
Page 11

POLK AUDIO LIMITED WARRANTY
Polk Audio, Inc. warrants to the original purchaser only that this Polk Audio Loudspeaker
Product (the “Product”) will be free from
defects in materials and workmanship for
a period of two (2) years from the date of
original retail purchase from a Polk Audio
Authorized Dealer. However, this Warranty
will automatically terminate prior to the
expiration of the two (2) years if the original
retail purchaser sells or otherwise transfers
the Product to any other party. The original
retail purchaser shall hereinafter be referred
to as “you.” To allow Polk Audio to offer the
best possible warranty service, please fill out
the Product Registration Card(s) and send it
to the Factory, at the address provided on the
Product Cards(s) within ten (10) days of the
date of purchase.
Defective Products must be shipped, together
with proof of purchase, prepaid insured to the
Polk Audio Authorized Dealer from whom you
purchased the Product, or to the Factory at
2550 Britannia Boulevard, Suite D, San Diego,
California 92154. Products must be shipped in
the original shipping container or its equivalent; in any case the risk of loss or damage in
transit is to be borne by you. If upon examination at the Factory or Polk Audio Authorized
Dealer it is determined that the unit was
defective in materials or workmanship at any
time during this Warranty period, Polk Audio
or the Polk Audio Authorized Dealer will, at
its option, repair or replace this Product at
no additional charge, except as set forth
below. All replaced parts and Products
become the property of Polk Audio. Products
replaced or repaired under this warranty will
be returned to you, within a reasonable time,
freight prepaid.
This warranty does not include service or
parts to repair damage caused by accident,
disaster, misuse, abuse, negligence,
inadequate packing or shipping procedures,
commercial use, voltage inputs in excess of
the rated maximum of the unit, cosmetic
appearance of cabinetry not directly attributable to defect in materials or workmanship, or
service, repair, or modification of the Product
which has not been authorized or approved
by Polk Audio. This warranty shall terminate
if the Serial number on the Product has
been removed, tampered with or defaced.
This warranty is in lieu of all other expressed
Warranties. If this Product is defective in
materials or workmanship as warranted
above, your sole remedy shall be repair or
replacement as provided above. In no event
will Polk Audio, Inc. be liable to you for any
incidental or consequential damages arising
out of the use or inability to use the Product,
even if Polk Audio, Inc. or a Polk Audio
Authorized Dealer has been advised of the
possibility of such damages, or for any claim
by any other party. Some states do not allow
the exclusion or limitation of consequential
damages, so the above limitation and exclusion
may not apply to you.
All implied warranties on this Product are
limited to the duration of this expressed
Warranty. Some states do not allow limitation
on how long an implied Warranty lasts, so the
above limitations may not apply to you. This
Warranty gives you specific legal rights, and
you also may have other rights which vary
from state to state.
This Warranty applies only to Products
purchased in the United States of America,
its possessions, and U.S. and NATO armed
forces exchanges and audio clubs. The
Warranty terms and conditions applicable
to Products purchased in other countries
are available from the Polk Audio Authorized
Distributors in such countries.
“Polk Audio,” “Polk,” “The Speaker Specialists,” “Power Port” and “Dynamic Balance” are trademarks of Britannia
Investment Corporation used under license by Polk Audio Incorporated.
Dolby, Pro Logic, Dolby Digital and AC-3 are trademarks of Dolby Laboratories Licensing Corp.
For Customer Service, call 800-377-7655.
11
Page 12

HBP893
5601 METRO DRIVE,
TIMORE, MAR
BAL
800-377-7655, F
www.polkaudio.com
YLAND 21215, USA,
AX: 410-764-5266
 Loading...