

Page 1
Important Safyguards
Important Safety Precautions
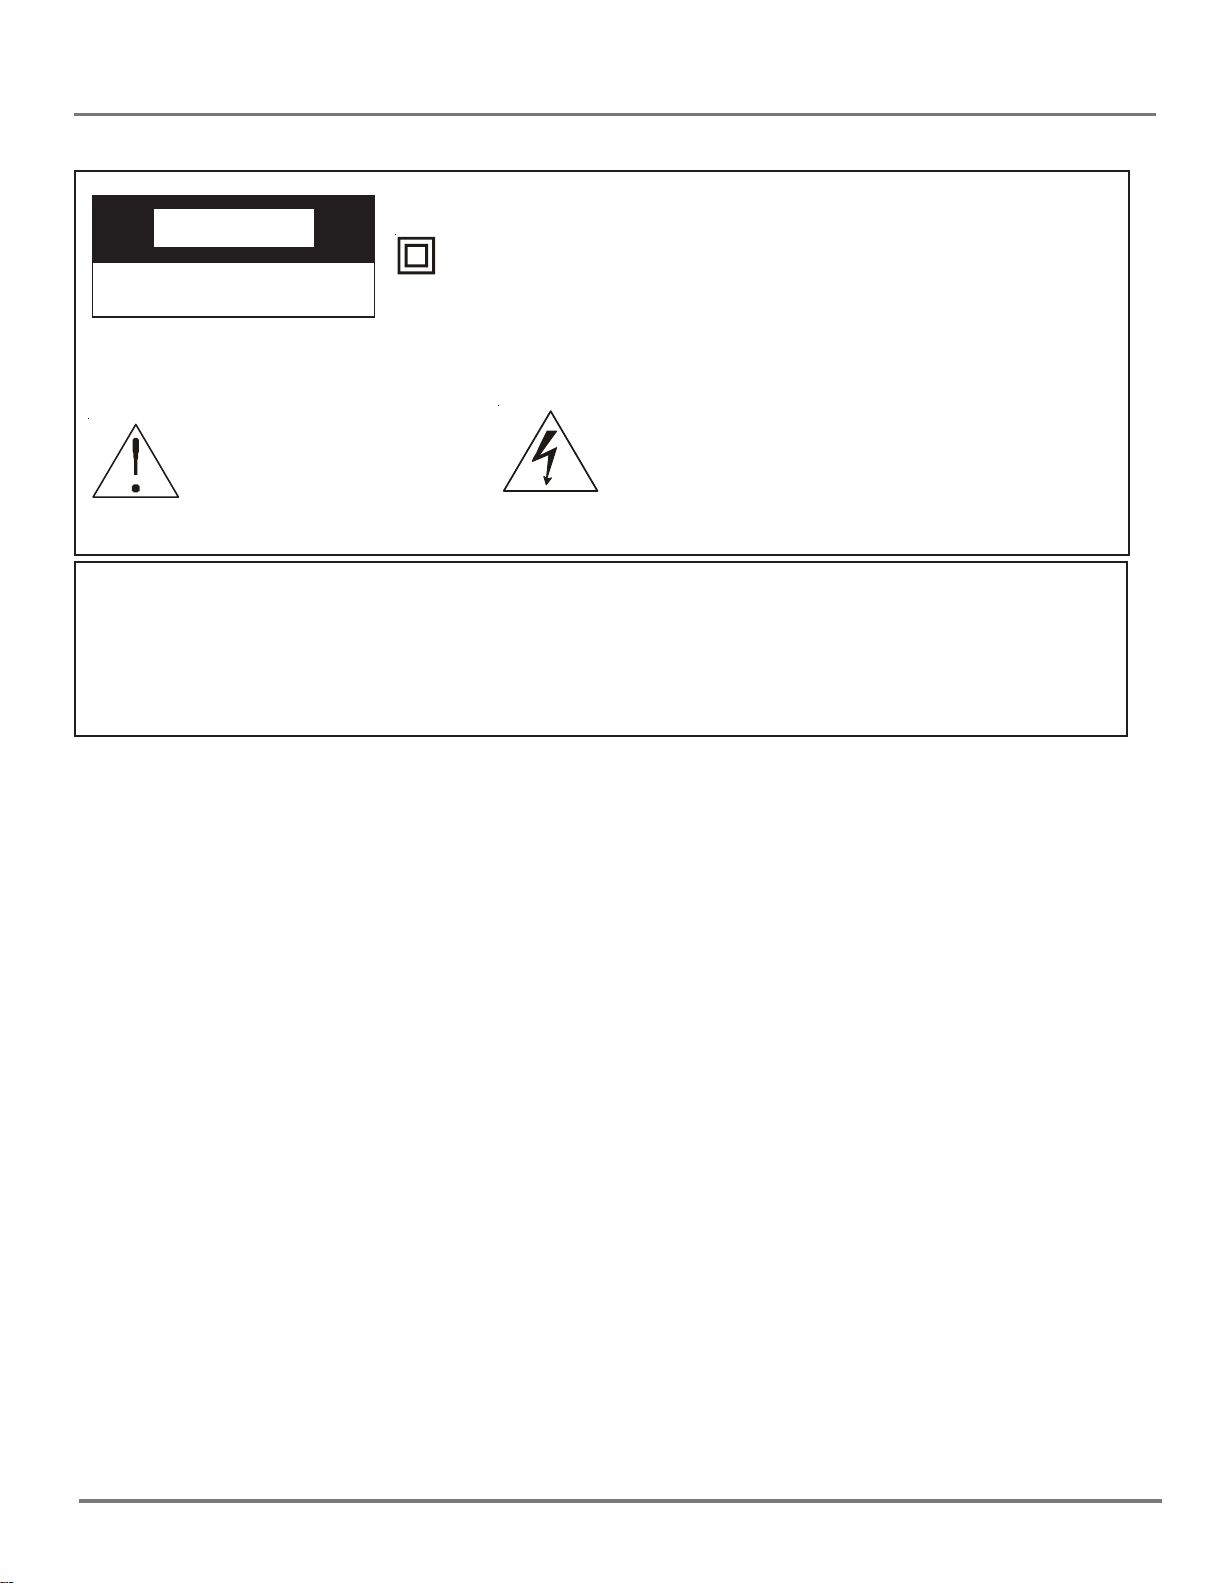
This symbol indicates that this product incorporates
CACA
UTIONUTION
CA
UTION
CACA
UTIONUTION
RISK OF ELECTRIC SHOCK
DO NOT OPEN
Caution: To reduce the risk of electric shock, do not remove cover (or back). No
user serviceable parts inside. Refer servicing to qualified service personnel.
double insulation between hazardous mains voltage
and user accessible parts. When servicing use only
identical replacement parts.
This symbol indicates
important instructions
accompanying the
This symbol indicates “dangerous voltage” inside the product that presents a
risk of electric shock or personal injury.
product.
WARNING
To reduce the risk of fire or electric shock, do not expose this product to rain or
moisture.
The apparatus must not be exposed to dripping or splashing. Objects filled with
liquids, such vases or drinking glasses, must never be placed on the apparatus.
IMPORTANT SAFETY INSTRUCTIONS
1. Read these instructions.
2. Keep these instructions.
3. Heed all warnings.
4. Follow all instructions.
5. Do not use this apparatus near water.
6. Clean only with dry cloth.
7. Do not block any ventilation openings. Install in accordance with the manufacturer’s
instructions.
8. Do not install near any heat sources such as radiators, heat registers, stoves, or
other apparatus (including amplifiers) that produce heat.
9.Do not defeat the safety purpose of the polarized or grounding-type plug. A
polarized plug has two blades with one wider than the other. A grounding type
plug has two blades and a third grounding prong. The wide blade or the third
prong is provided for your safety. If the provided plug does not fit into your
outlet, consult an electrician for replacement of the obsolete outlet.
10. Protect the power cord from being walked on or pinched particularly at plugs,
convenience receptacles, and the point where they exit from the apparatus.
11. Only use attachments/accessories specified by the manufacturer.
1
Page 2
Important Safeguards
Important Safety Precautions
12. Use only with the cart, stand, tripod, bracket, or table specified
by the manufacturer, or sold with the apparatus. When a cart is
used, use caution when moving the carts/apparatus combination
to avoid injury from tip-over.
13. Unplug this apparatus during lightning storms or when unused
for long periods of time.
14. Refer all servicing to qualified service personnel.
Servicing is required when the apparatus has been damaged in any way, such as
power-supply cord or plug is damaged, liquid has been spilled or objects have
fallen into the apparatus, the apparatus has been exposed to rain or moisture, do
not operate normally, or has been dropped.
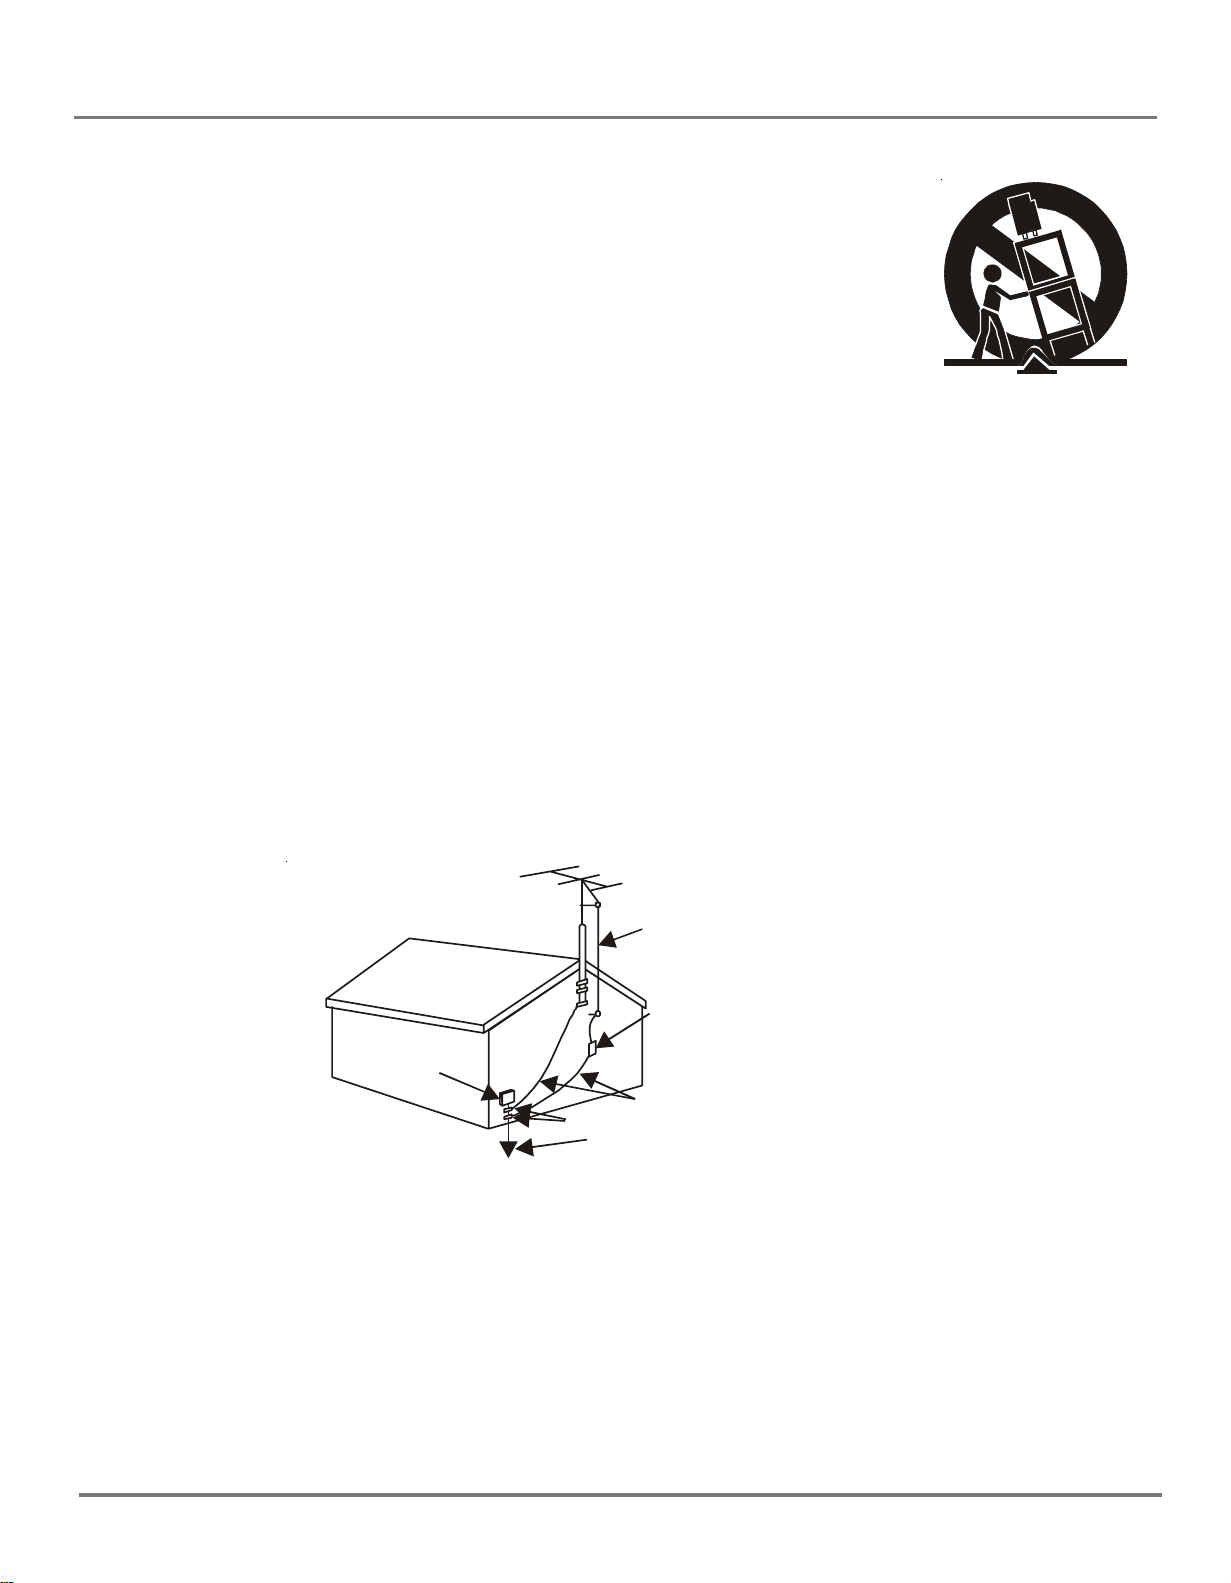
15. If an outside antenna or cable system is connected to the product, be sure the
antenna or cable system is grounded so as to provide some protection against
voltage surges and built-up static charges. Section 810 of the National Electrical
Code, ANSI/NFPA No. 70-1984 (Section 54 of Canadian Electrical Code, Part 1)
provides information with respect to proper grounding of the mast and supporting
structure, grounding of the lead-in wire to an antenna-discharge unit, size of grounding conductors, location of antenna-discharge unit, connection to grounding electrode. See following example.
ELECTRIC
SERVICE
EQUIPMENT
NEC-NATIONAL ELECTRICALCODE
ANTENNA
LEAD IN
WIRE
ANTENNA
DISCHARGE UNINT
(NEC SECTION 810-21)
GROU NDI NG CO NDUC TORS
GROUND CLAMPS
(NEC SECTION 810-21)
POWE R SERVICE GROUNDING
ELECTRODE SYSTEM
(NEC ART 250 PART H)
2
Page 3

Content
Table of Contents
Contents
Overview 4
Remote control 5
Basic operation 7
External connection 8
DVD Player Basics 9
Using the Menu System 10
TV Function Menu 10
Menu basic operation 10
Using the PICTURE menu 10
Using the SOUND menu 10
Using the TIMER menu 11
Using the FUNCTION menu 11
Important safeguards
Using the TUNING menu 12
DVD Menu System 13
DVD Menu Basic Operation 13
LANGUAGE SETUP 13
SCREEN SETUP 15
CUSTOM SETUP 17
DVD Operations 19
Picture defects and countermeasures (AIR reception) 20
Troubleshooting 21
For TV 21
For DVD Player 22
DISC PROTECTION 22
Specifications and accessories 23
3
Page 4
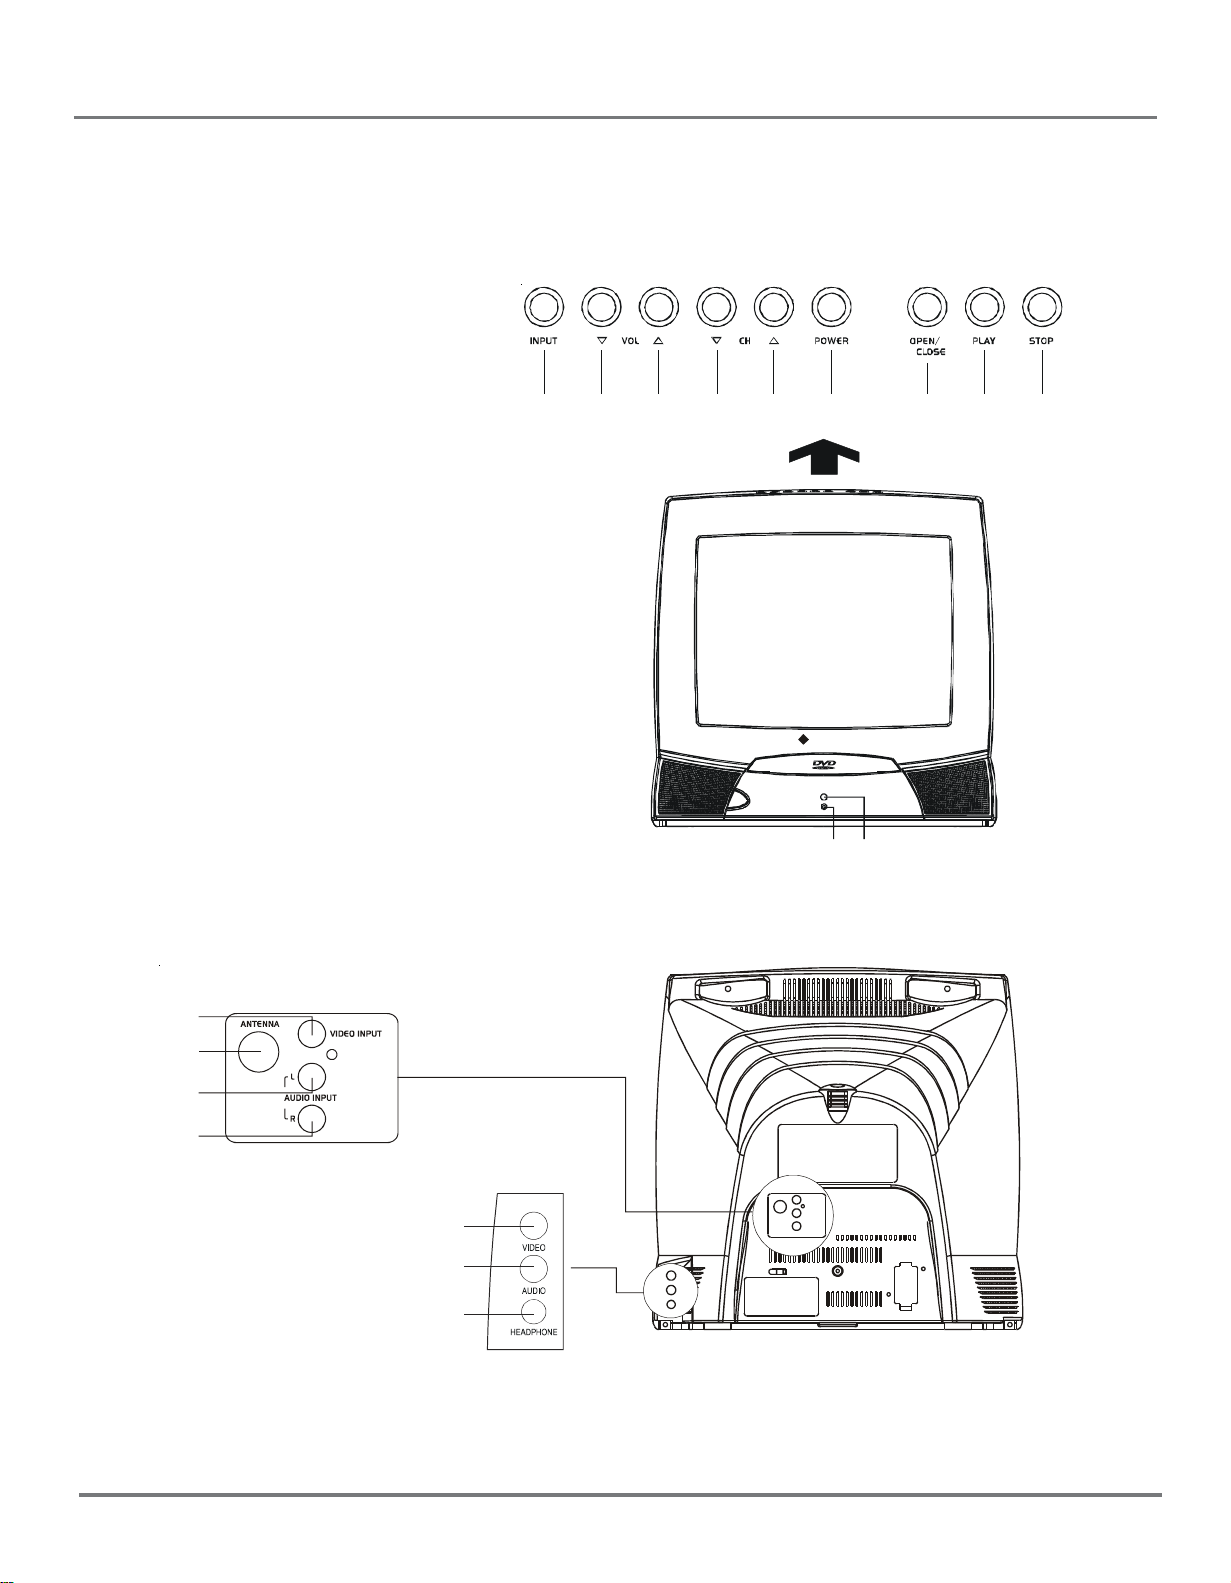
Overview
1. Power Indicator
2. Remote Sensor
3. Input Button
4. Volume Down Button
5. Volume Up Button
6. Channel Down Button
7. Channel Up Button
8. Power Button
9. Open/Close Button
10. Play/Pause Button
11. Stop Button
12. Front Video Input Jack
13. Front Audio Input Jack
14. Headphone Jack
15. VID1 Video Input Jack
16. Antenna Jack
17. VID1 Audio Input (L) Jack
18. VID1 Audio Input (R) Jack
3
4
56
8910
7
Polariod
11
12
15
16
17
18
12
13
14
4
Page 5
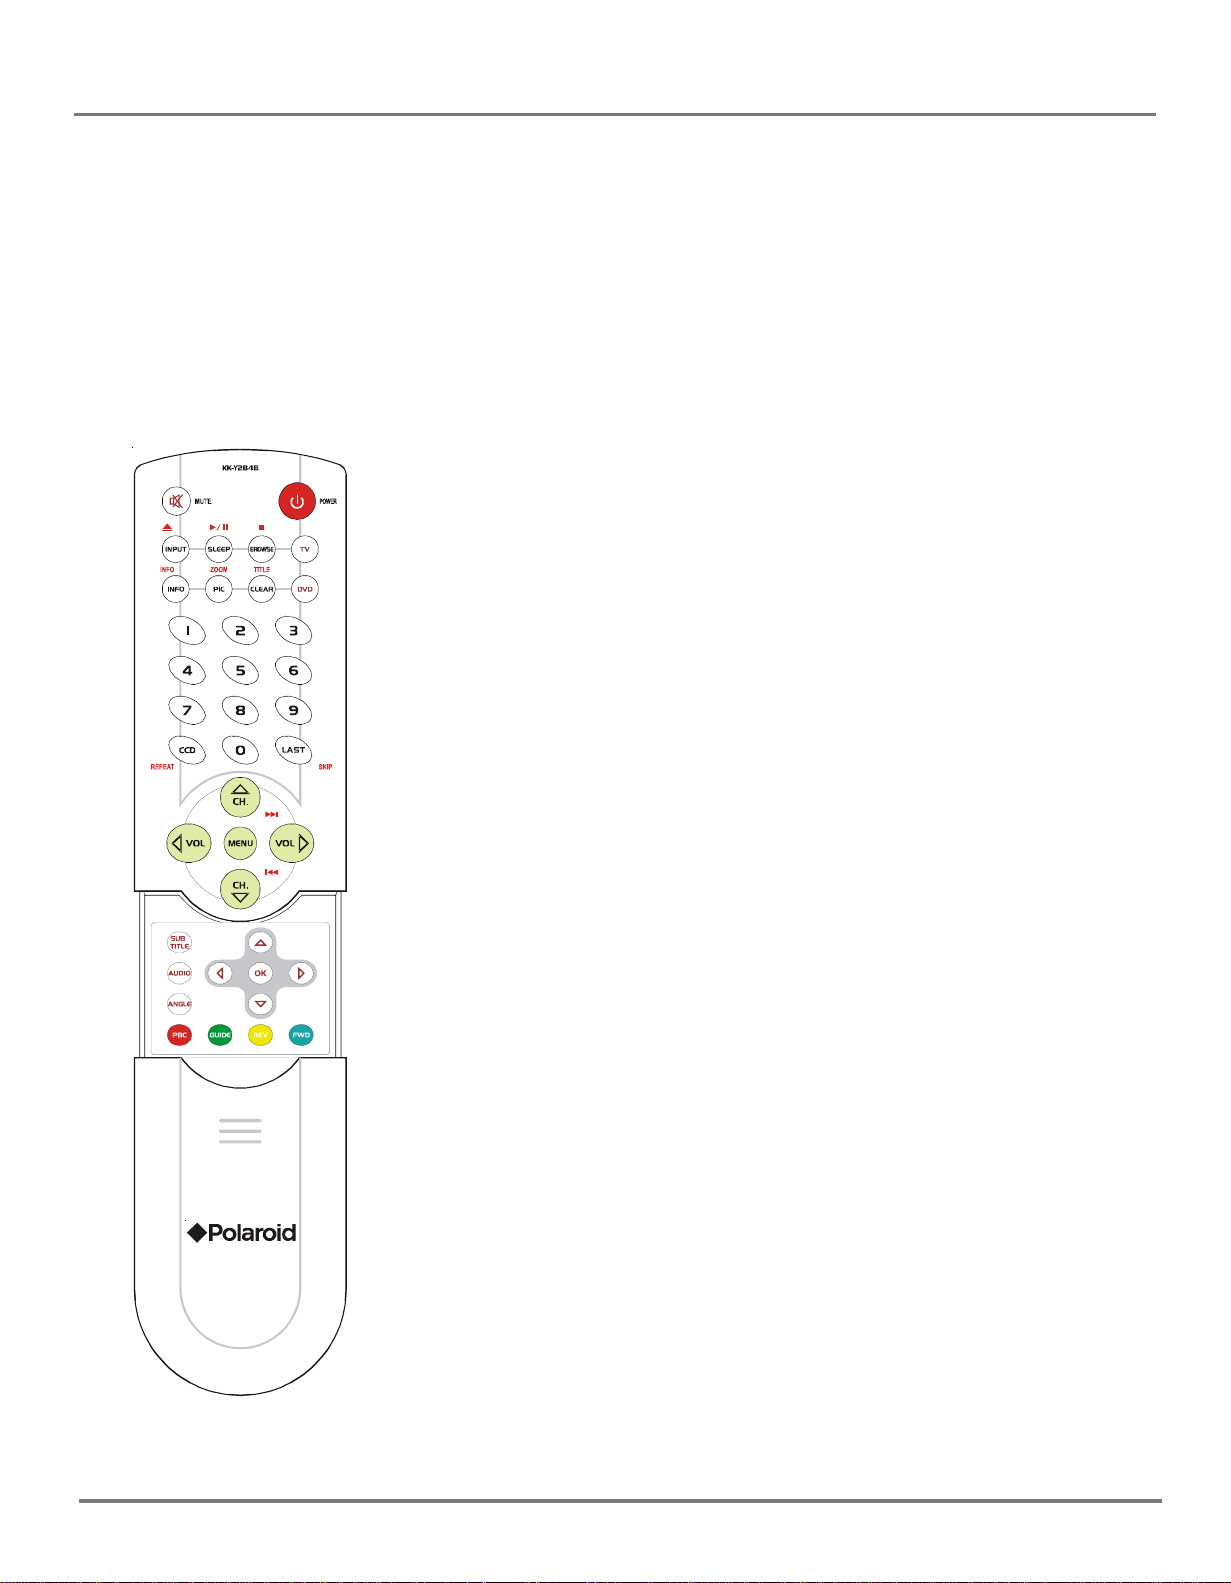
Using the Remote Control
Inserting batteries: Remove the cover, insert 2 AAA size batteries with the polarities as marked inside
the battery compartment and then replace the lid.
Note:
1. One set of batteries will last for approximately one year under normal use.
2. If the remote control is not to be used for a long period of time, remove the batteres or it may result in
battery acid leakage.
The Buttons On the Remote control
TV Function Buttons
INPUT Press the button to switch between AV input and RF (antenna)
input.
TV Press the button to select the remote control in the TV mode.
Mute Press the button to minimize the volume level. Press again to
restore the original volume level.
BROWSE "Browse" feature. Press the button twice to start the channel
scanning. Press again to stop at the current scanned channel.
INFO Press the button to display the channel information
PIC Press the button to display the picture preset.
SLEEP Press the button to set the sleep timer.
CCD Press the button to turn on and off the closed caption.
Go Back Press the button to return the previous channel. If the unit is in
menu mode, press the Go Back button to return previous menu screen.
POWER Press the button to turn on and turn off the TV.
VOL (left and right) buttons Press the button to increase or decrease
the TV volume.
CH. (up and down) buttons Press the button to scan up or down
the current channel list. Press once to select the channel up or down, press
and hold to select your desired channel.
MENU Displays the TV’s Main menu.(See page 10 for details.)
CLEAR Press the button to hide menu or display from the screen and
then returns to original TV screen. For the menu with digit input, press the
CLEAR button to clear the last number entered.
0-9 (Number buttons) Press the buttons to select directly the channel
numbers and the time setting by using the remote control.
To enter a two-digit channel, press the two digit buttons. To enter a threedigit channel, press and hold the first digit for two seconds until "--" appears to the first digit and then enter the other two digits.
Example:To tune in channel 123.
Please and hold No 1, press No 2, then No 3.
Other buttons: The buttons on the remote control other than listed above
are not available for TV function.
5
Page 6

Using the Remote Control
DVD Function Buttons
DVD Press the DVD button to select DVD mode.
POWER Press the button to switch on and switch off the power.
VOL (left and right) buttons Press the buttons to increase or decrease the TV volume.
MUTE Press the button to minimize the volume level. Press again to restore the original volume level.
OPEN/CLOSE Press the button to open or close the DVD disc tray.
PLAY/PAUSE Press the button to start or pause the disc playback. Press the button again to
resume playback.
STOP Press the button to stop the disc playback.
INFO Press the button to display the title, chapter and elapsed time information during disc playback.
Press again to hide the display information.
ZOOM Press the button to zoom in or zoom out the picture during DVD disc playback.
TITLE Press the TITLE button to display TITLE menu during DVD disc playback.
REPEA T Press the button to repeat a chapter or title on DVD or a track on Audio CDs.
SKIP Press the button to skip to the specified chapter/track or time. See page 16 for details.
Advance to the next chapter or track.
Reverses to the preceding chapter or track.
MENU Press the button to display the menu and other options on the current disc.
(only if the information is available on the loaded disc)
SUBTITLE Press the button to select a subtitle language.(only if the loaded disc is encoded with
multiple Subtitle languages)
AUDIO Press the button to select audio soundtrack language. (only if the loaded disc is encoded with
multiple languages)
ANGLE Press the button to select the camera angle of multiple screen shot. (only if the loaded disc is
encoded with multiple camera angle)
PBC Press the button to turn the navigation OFF and the disc playback starts directly without entering
the menu. Press again to turn the navigation ON.
GUIDE Press the button to display the DVD setup menu when the DVD player is in stop mode.
REV Press the button to search backward through the disc during disc playback. Press repeatedly to
increase the searching speed.
FWD Press the button to search forward through the disc during disc playback. Press and hold the button
to increase the searching speed.
Arrow buttons(up, down, left, right) Press the buttons to move through the on-screen menu system.
OK button Press the button to select and highlight the desired item on the screen display .
Other buttons: The buttons on the remote control other than listed above are not available for DVD function.
6
Page 7

Basic Operation
Connect to power
Connect the power supply cord to a 120V AC convenience outlet. Disconnect the power if the unit is not to
be used for a long period of time.
Power on/off
Turn on the unit by pressing the POWER button on the main unit (or the POWER button on the remote
control).
Energy saving feature
The TV will automatically switch to standby mode if no any signal received after 15 minutes. Press the
POWER button on the main unit (or on the remote control) to turn on the power.
Change channels
Change the TV channel by pressing the CH/ button on the main unit (or the PROG/ button on the remote
control). When the ANTENNA is in "AIR" mode, enter two digits by using the remote control to select the
desired TV channel.
For example,press No 0 and No 2 to select channel 2. When the ANTENNA is in "CABLE" mode, enter
three digits to select the desired TV channel. For example, press and hold No 1 for 2 seconds to display "1-
-", then enter the other two digits.
7
Page 8

External Connection
The unit can be simultaneously connected to VCR, LD player, VCD player, video camera and other audiovideo equipments for the better quality picture.
For the monaural devices, connect audio lead to Audio (L) jack.
External connection
1. Under AV1 connection, connect the external equipment to the back panel of the unit as shown in the
figure below:
2. Under AV3 mode, connect the external equipment to the side panel of the unit as shown in the figure
below:
8
Page 9

General Description
DVD Player Basics
If you turn on the DVD player for the first time, press the GUIDE button to set up the DVD menu system when
the unit is in the stop mode.
Regional coding
Both the DVD player and the discs are coded by region. These regional codes must be matched accordingly for the loaded disc or it may fail to play back. The regional code for this unit is Region 1.
Loading and Playing Discs
DVD disc, audio CD disc and recorded CD-R/CD-RW discs are playable for this DVD player.
Before the playback, make sure the discs are compatible with this DVD player. To load and play a disc:
1. Press the DVD button on the remote control or INPUT button on the main unit(or on the remote control)
to turn on the DVD player.
2. Press the OPEN/CLOSE button on the main unit (or on the remote control) to open the disc tray.
3. Place a disc gently into the tray with the disc’s label facing up.
4. Press the OPEN/CLOSE button on the main unit (or on the remote control) to close the disc tray.
5. Press the PLAY button on the main unit (or on the remote control) to start the disc playback and display
the disc menu. When the disc menu appears, select your desired option and press the OK button on
the remote control to start playback.
The DVD player reads the disc’s table of contents, and then one of two things happens depending on
how the disc was programmed:
. The disc starts playing.
. The disc menu appears on the screen. One of the options will start disc play. Highlight that option
and press OK on the remote control.
9
Page 10

Using the Menu System
TV Function Menu
Menu basic operation
1. Press the MENU button on the main unit (or on the remote control) to enter menu mode. Press the VOL
/ button on the main unit ( or / button on the remote control) to select the icon.
2. Press CH
mode.
3. Press the VOL / button on the main unit (or / button on the remote control) to change the setting.
4. Press MENU button on the main unit (or OK button on the remote control to return the original screen. To
exit directly the menu operation, press the MENU button on the remote control.
Note: Make sure that the remote control is in the TV mode.
Using the PICTURE menu
The PICTURE menu is used to make an adjustment to the picture settings and customize the picture
mode based on the current channel type.
/ button on the main unit (or / button on the remote control to select your desired
PICTURE
CONTRAST 1
BRIGHTNESS 18
COLOR 50
SHARPNESS 50
TINT 0
COLOR TEMP NORMAL
CONTRAST To adjust the CONTRAST of the picture
BRIGHTNESS To adjust the BRIGHTNESS of the picture.
COLOR To adjust the COLOR intensity or saturation of the picture.
SHARPNESS To adjust the SHARPNESS of the picture.
TINT To adjust the TINT balance of the picture.
COLOR TEMP Three default color adjustment: Cold(more on blue picture color);Normal;Warm (more
on red picture color).
Using the SOUND menu
The SOUND menu offers enhance audio options such as listening to second audio program(SAP).
SOUND
PRESET USER
BASS 50
TREBLE 50
BALANCE 0
SURROUND OFF
10
Page 11

Using the Menu System
PRESET Four preset audio setting.(USER/ SPEECH/THEATER/MUSIC)
BASS To adjust the BASS effect of the sound.
TREBLE To adjust the TREBLE effect of the sound.
BALANCE To adjust the sound balance of the speaker sound.
SURROUND To turn on or turn off the surround effect of the sound.
Using the TIMER menu
The TIMER menu is used to set the sleep timer.
TIMER
SLEEP TIMER 120
SLEEP TIMER To turn off the unit automatically on your desired time.
Press the right arrow to add 10 minutes to the clock(up to two hours).
Using the FUNCTION menu
The FUNCTION menu is used to set up the TV function.
FUNCTION
LANGUAGE ENGLISH
BACKGROUND ON
BLACK STRETCH OFF
NOISE REDUCE OFF
CLOSE
CC ON MUTE
LANGUAGE To select the menu display language. (Three languages available:English, French
and Spanish)
BACK GROUND To turn on or turn off the background function when no any signal received.
BLACK STRETCH To turn on or turn off the black stretch function.
NOISE REDUCE To turn on or turn off the noise reduce function.
CLOSE CAPION Eight closed caption modes, including four text modes.
CC ON MUTE To display close caption automatically when the MUTE button is pressed with the unit
turned on.
Note: The BACK GROUND function is not available when the unit is in RF input mode.
CAPTION CC1
11
Page 12
Using the Menu System
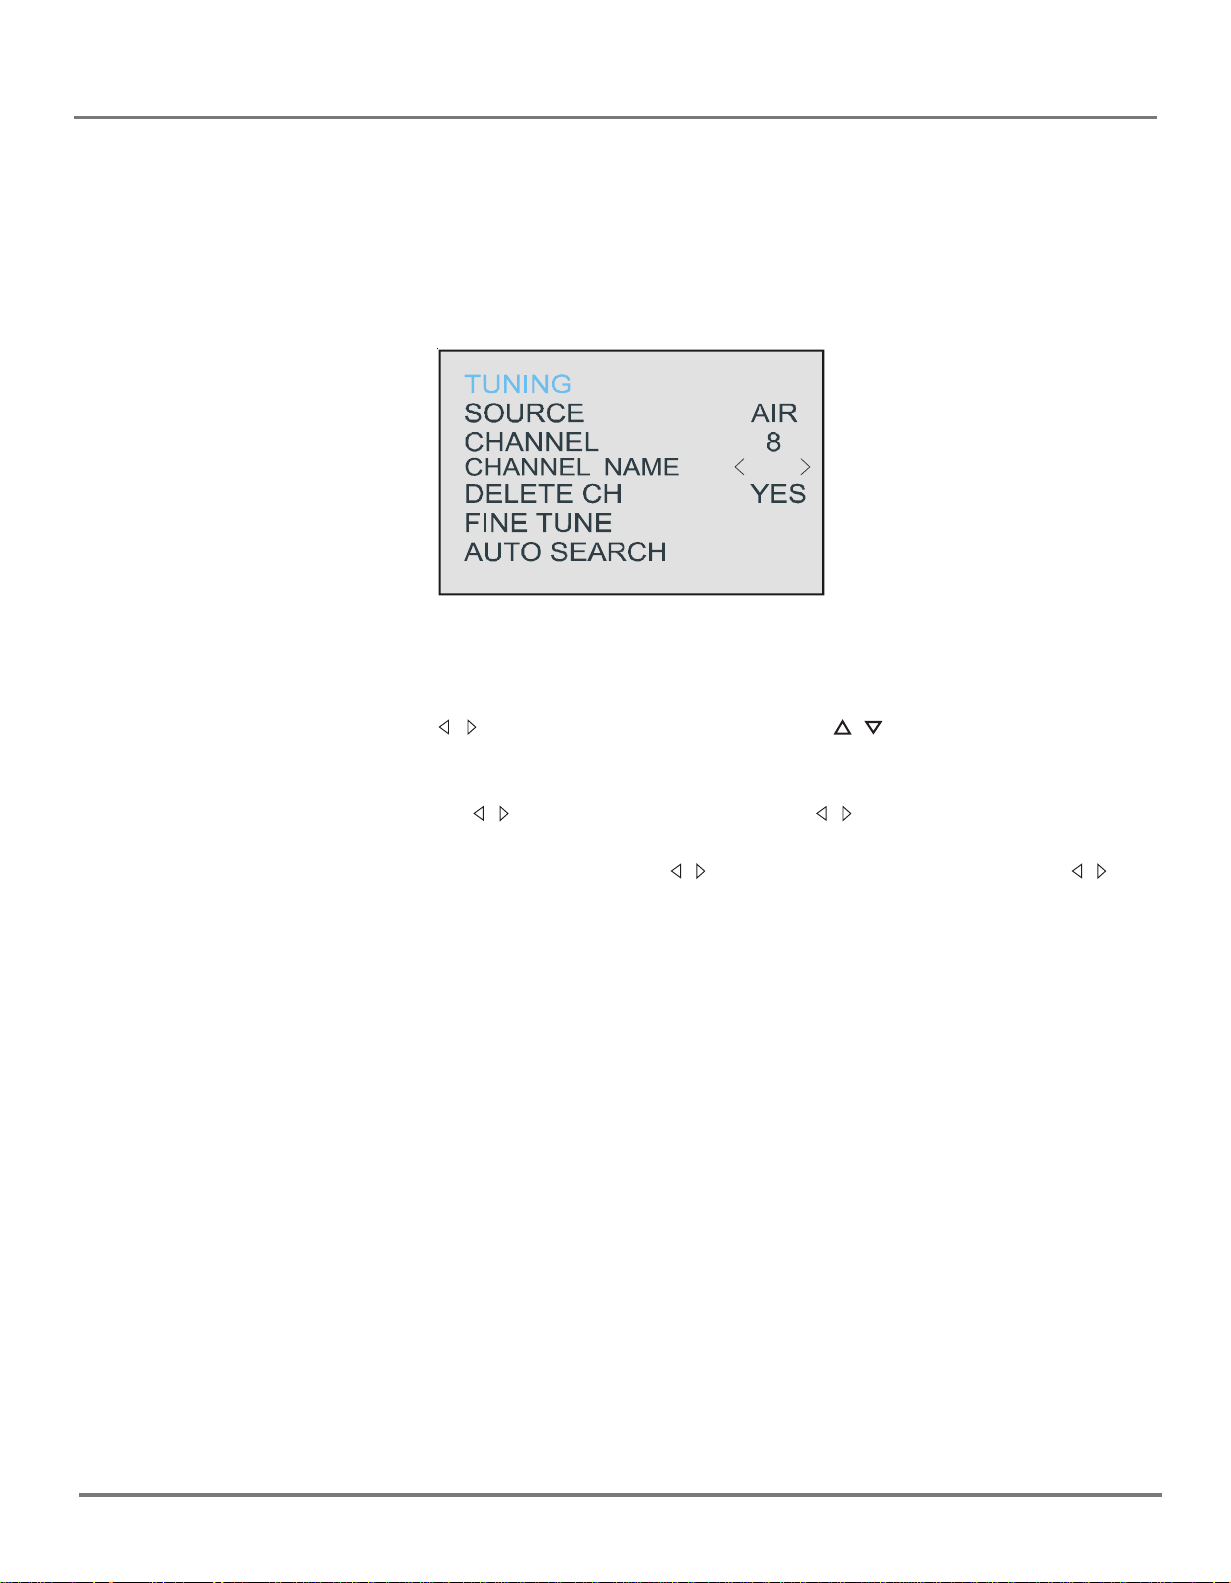
Using the TUNING menu
The TUNING menu is used to tune the channel.
SOURCE To select AIR source to receive radio broadcast frequency. To select CABLE source to
receive CATV channel.
CHANNEL Use the VOL / button on the remote (or the VOL
the TV) to scroll through the channels available. You can enter the channel number
directly using the number buttons.
CHANNEL NAME To press the VOL / button on the main unit (or the / button on the remote control) to
select the TV channel.Allows you to name a channel. The channels you can name are
only from 2 to 11 in AIR. Use the VOL / button on the front of the TV (or VOL / button
on the remote control) to enter a five-character label for each channel.
DELETE CH To select YES to skip the channel above. To select NO to enter the channel above.
FINE TUNE To fine tune the scanned channel.
AUTO SEARCH To search the TV channel automatically and the scanned channels are stored.
/
button on the front of
12
Page 13
DVD Menu System
DVD Menu System
The DVD player setup system sets up the features of the DVD player in stop mode.
DVD Menu Basic Operation
1. Press the button to stop the DVD playback and make sure that the remote control is in the DVD
mode.
2. Press the GUIDE button on the remote control, the SETUP MENU (main) displays.
3. Press the / button to highlight your desired item, select the OK button to enter submenu.
4. Press the / button to move the pointer. Select the / button to your desired option and press the OK
button to complete the setup.
5. Press the SKIP button to locate a specific chapter/ track or time during DVD playback.
Press the
button to start the disc playback.
Press the SKIP button twice, the playback time displays. Take note your desired playback time setting
cannot exceed the total playback time of the chapter. During VCD/AUDIO CD playback, press the SKIP
button to select a specific time. (Only the PBC is off during VCD playback.)
6. To end the setup, press the GUIDE button.
In the SETUP MENU, you may choose any of the following options :
/ buttons (or digit buttons) to select your desired chapter or track and then press the OK
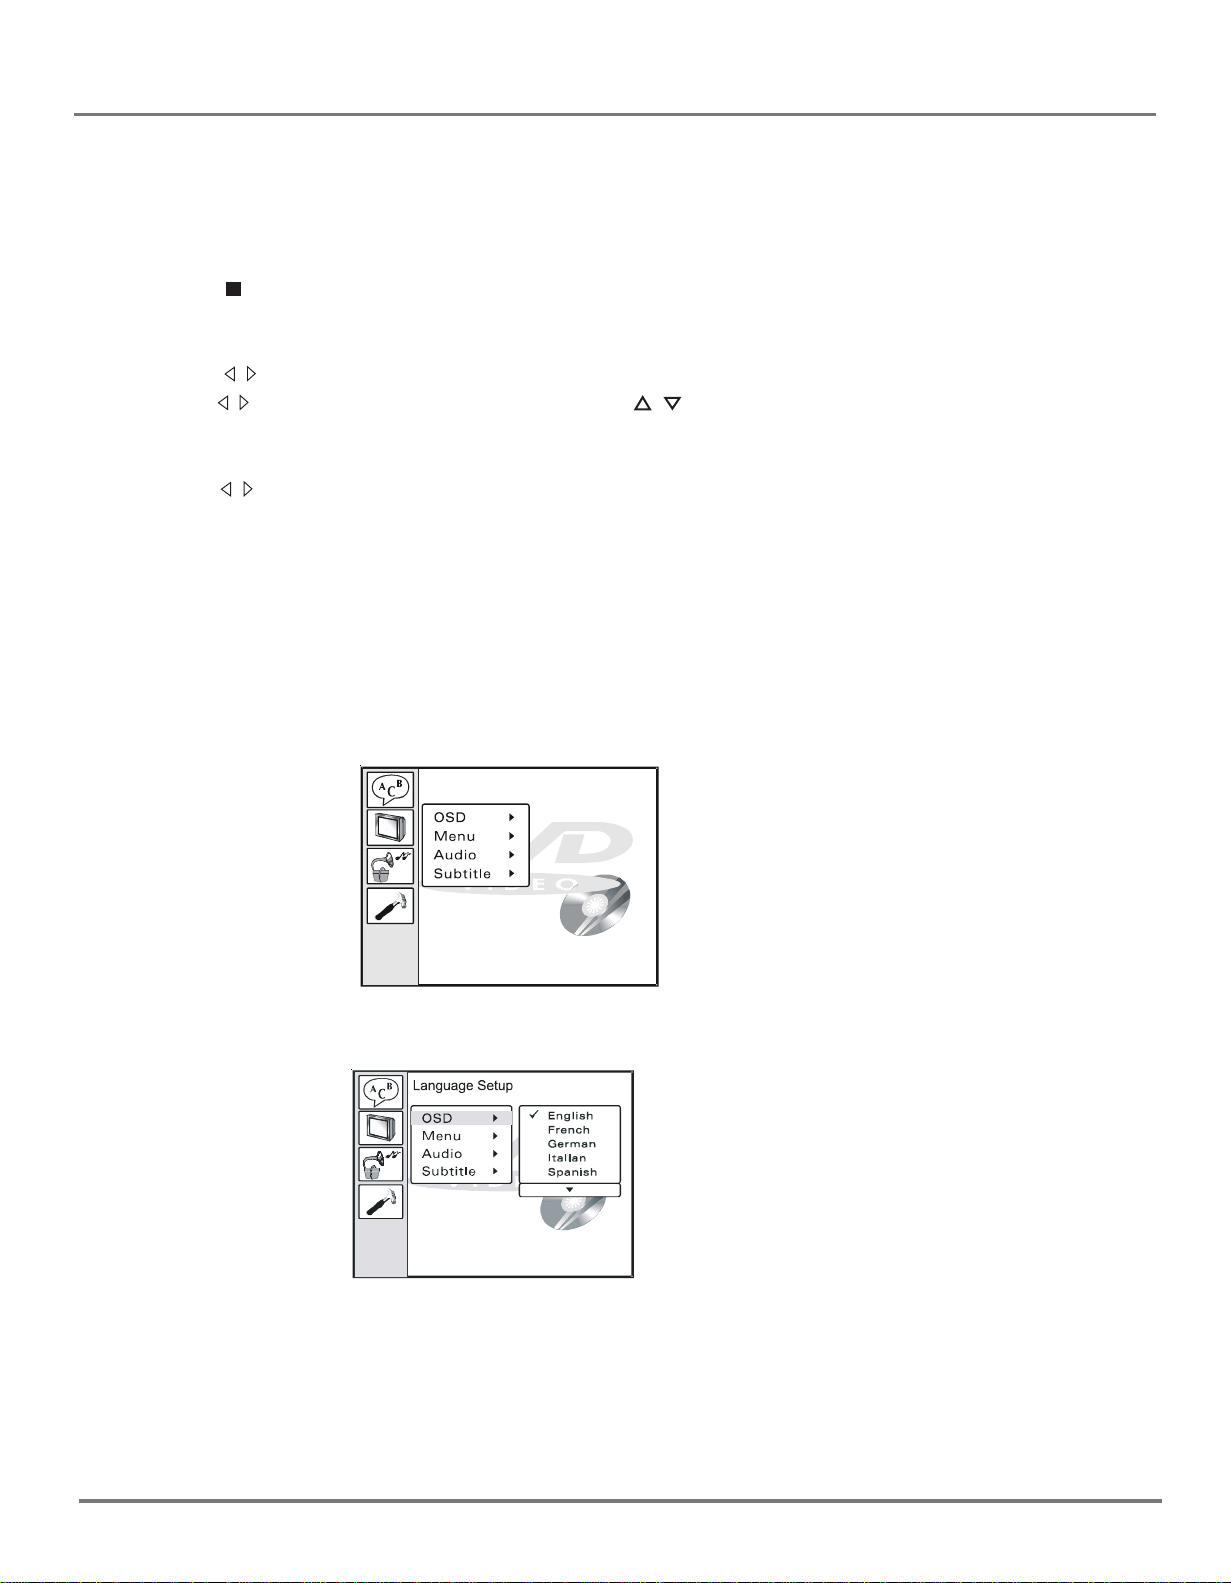
LANGUAGE SETUP
The LANGUAGE SETUP is used to set the DVD language for OSD, MENU, AUDIO AND SUBTITLE.
Language Setup
1 OSD(On Screen Display)
Select to display the language for OSD.
ENGLISH: On-screen display (OSD) text appears in English.
SPANISH: OSD text appears in SPANISH.
FRENCH: OSD text appears in FRENCH.
13
Page 14

DVD Menu System
2 MENU
Select to display the language for DVD menu.This DVD player provides ENGLISH, FRENCH, SPANISH
etc. as the film’s menu language options. For example, if you normally want to see
disc menus in English, select English.
LanguageSet up
3 AUDIO
To select the language for audio. If multiple languages are programed on the disc, the setting you choose
here determines the language you hear.
This DVD provides ENGLISH, FRENCH, SPANISH etc. as the built-in disc dubbing language options.
LanguageSet up
4 SUBTITLE
To select the subtitling language.This DVD player provides ENGLISH, FRENCH, SPANISH etc. as the
built-in subtitle language. When a DVD is played, the user may hide the subtitle or choose any of them as
the preset subtitle language.
LanguageSet up
14
Page 15

DVD Menu System
SCREEN SETUP
This option is used to setup the DVD video output function.
Sc r eenSet up
1 TV TYPE
To select the playback picture size to the TV aspect ratio.
Sc r ee nSe t u p
4:3 PS: To display 16:9 source on normal 4:3 aspect ratio TV display as pan and scan (PS). The edges
are cut off in this mode.
4:3 LB: To display 16:9 source on normal 4:3 TV display as letter box (LB). When a DVD providing
multiple angles is used, the user may select a particular angle.
WIDE: To display 16:9 source on special 16:9 wide screen TV.
15
Page 16

DVD Menu System
2 SCREEN SAVER
The screen saver appears after the DVD player is turned on or in the stop mode.
Sc r e e nSe t u p
ON:screen saver is on.
OFF:screen saver is off.
3 BRIGHTNESS
To select the BRIGHTNESS setting for DVD video output.
Sc r e e nSe t u p
4 CONTRAST
To select the CONTRAST setting for DVD video output.
16
Page 17

DVD Menu System
CUSTOM SETUP
Custom setup include angle mark and default. Preset values are essential to a DVD player. The user may
change these items as desired.
1 ANGLE MARK
Select to setup the angle mark function.
ON: Angle mark appears on the screen.
OFF:Angle mark disappears on the screen.
17
Page 18

DVD Menu System
2 DEFAULTS
Defaults set all the selectable options in all the menus to factory settings and should only be used as a last
resort.
CAUTION: If you choose Defaults option, all selections you have made in the Setup menus must be reset.
Before you use this option, ensure this is the only way you can get the DVD to operate again. You may wish
to review and record your present settings before choosing to reset all your options back to factory settings.
EXIT
Press to exit the setup menu. You can press the guide button to exit the setup menu directly.
18
Page 19

DVD Operations
Playing Discs
Note: Before disc playback, select the remote control in DVD mode.
Playing DVDs
For basic information about disc playback, see page 9 for details on DVD disc menu.
Using a Disc Menu
Some discs have an on-screen menu that is separate from the DVD player’s menus. The disc menu might
only contain a list of the titles and chapters or it may allow you to change features such as language and
playback settings. The content and the operation of disc menu varies from disc to disc.
1. While the disc is playing, press MENU button on the remote control. The disc menu appears.
2. Press the / and the / button to highlight the desired section or item. Select the OK button on the
remote control to confirm the selection.
3. Press MENU button on the remote control to resume playback.
Tip and Note: Many discs skip the disc menu and start playing automatically. Press the MENU button on
the remote control during the disc playback to access the disc menu. Any settings you change on the disc
menu only override the settings in the DVD player’s menu temporarily. Default settings are set up in the
DVD player’s menu system. To change the default settings, go to DVD MENU System.
Playing Audio CDs
This DVD player can be used as an audio CD player.This section explains how to play audio CDs in your
DVD player and how to use the player’s features.
Scan Disc
To scan through the disc during disc playback.
1. Press the REVERSE or the FORWARD button on the remote control during disc playback.
2. Press the button again to scan at a faster speed.
3. Press the PLAY button to return normal playback.
Track Advance or Reverse
1. Press the or buttons on the remote control during disc playback.
2. Each time you press the button, the CD advances (or reverses) one track.
Pause
1. Press the PAUSE button to pause the disc playback.
2. Press the PLAY button to resume playback.
19
Page 20

Picture defects and countermeasures(VHF/UHF reception)
The most common types of television interference are as follows:
SNOWY PICTURE
Snowy picture is usually due to weak signal. Adjust antenna or install an antenna amplifier.
DOUBLE IMAGE OR GHOSTS
Double images are usually caused by reflections from tall buildings. Adjust the direction of the antenna or
raise it.
RADIO WAVE INTERFERENCE
Wavy patterns are moving on the screen, which are usually caused by nearby radio transmitters or shortwave receiving equipment.
HIGH TEMPERATURE ELECTROTHERMAL INTERFERENCE
Diagonal or herringbone patterns appear on the screen or part of picture is missing. This is probably caused
by high temperature electrothermal equipment in a nearby hospital.
NOTE:If one of these symptoms appears on the screen when the cable from a company is connected, this
may be due to the local cable company broadcast.
20
Page 21

Troubleshooting
Most problems you encounter with your TV you can correct by consulting the Troubleshooting list that
follows.
If the trouble still persists, contact the service center.
For TV
Troubleshooting
Problems Check
No picture or sound. Check if the power supply is plugged in.
C h eck if t h e pow er sw itch is in "o n '" pos ition .
P ict ur e is O K, no s o und. Che c k if the volume c ont r o l is s e t t o t he minimum o r mute pos itio n.
C h eck if t h e pow er sw itch is in "o n " p osit ion .
Remote c ontr ol do e sn' t
work.
No TV signal.
Check if the batteries are out of use or not connected well.
To make sure that there is no strong light strikes the se nsor window o f remote
cont r o l unit.
Check there are no obstacles before the sensor window of remote control unit.
Chec k if the TV/AV button is not se t to TV status.
Check if the antenna is we ll connected.
Check if you operated in right way.
No external video signal.
Picture lacks color or picture
too d ark .
All channe ls lose co lor
intermittently.
Poor reception, loss of color
with certain channels.
Diagonal stripes appear on
picture.
Picture has "snow".
Ghost images appear.
Check if you operated in right way.
Chec k if the TV/AV button is se t to AV p os ition.
Check color, bright and contrast controls are correctly adjusted.
Check if the antenna is broken.
Check if the antenna is disconnected.
Check if the antenna is damaged.
Check if channels are correctly tuned (see "Fine tuning") .
The receiver may be affected by interference (e.g. from nearby radio
broadcasting transmitter or from another TV receiver).
Check if the antenna is broken.
Check if the antenna is disconnected.
Check if the antenna is damaged.
Check if the antenna direction has been changed by storm or strong wind, etc.
(because ghost images are caused by the arrival at the antenna of b oth the
signal which has traveled directly from the transmitter and the signal which has
been reflected from a hill or a large building. So that the direction of the
ante nna should be chosen for minimized ghost.)
21
Page 22

Troubleshooting
For DVD Player
Disc does not play
Check to make sure the disc is loaded correctly (label side is face up on the disc tray).
Check that disc is clean from dirt, dust, finger prints, smudges.
Check to ensure disc is within the guides on the tray.
Make sure disc is for use in region 1.
Picture dividing
Make sure the disc is clean and no any scratch on it.
For the player is controlled by micro-computer, if encountering problem, switch off the power first, and
switch on again in a few second, by then if no mistake notice is displayed, the player could work well.
DISC PROTECTION
Protection
When loading or removing the discs, always hold them by the center and edge.
Do not stick or write anything on the surface. Protect discs against any fingerprint.
Cleaning
Wipe the discs from time to time using a soft cloth. Always wipe from the center toward the edge.
Storage
Never warp the discs. During non- use periods, store them in their case, which should be kept vertically.
Do not expose discs to high temperature, dampness or extremely low temperature, or else it may cause
damage to the discs.
Do not expose discs to direct sunlight.
22
Page 23

Specification and accessories
"Polaroid" and “Polaroid and Pixel” are trademarks of Polaroid Corporation, Waltham, MA, USA.
For service, support and warranty information, visit www.polaroid.com or in the US call 1-866-289-5168,
in Canada call 1-866-301-7922 and in Mexico call 01-800-400-2443.
15.05"H x 33"W x 17.33" D
Specifications
Model
TDM-1311
Color System
Power Supply
Power Consumption
Chassis Construction
Picture Tu be
Audio Output
Loudspeaker
Tuner Type
Remote Control
Channel Coverage
NTSC
~120V 60Hz
85W
IC Solid State
13"
2 ×1.5 W
16Ω/3W
181 Channels, Quarts PLL
Frequency synthesized
Infrared, Direct Access
39 Keys, 2 size AAA Batteries
VHF 2-13
UHF14-69
CATV 1-125
Antenna Input
Impedance
Dimensions
Weight
75Ω (VHF/UHF/CATV) Coaxial Input
15.05″Η×17.32”
28.6 lbs
Accessories
1. User’s Manual
2. Remote control
3. Warranty Card
4. Safety Card
5. 2 size AAA Batteries
23
Page 24

Page 25

13" Stereo TV/DVD Player
20060105
TDM-1311
 Loading...