

Page 1

a544
Digital
Camera
U S E R ' S M A N U A L
Page 2

FCC STATEMENT
Note
This equipment has been tested and found to comply with the limits for Class B digital devices,
pursuant to Part 15 of the FCC rules. These limits are designed to provide reasonable protection
against harmful interference in a reside ntial installation. This equipment generates uses and can
radiate radio frequency energy and, if not installed and used in accordance with the instructions,
may cause harmful interference to radio communications. However, there is no guarantee that
interference will not occur in a particular installation. If this equipment does cause harmful
interference to radio or television rece ption, which can be determined by turning the equipment off
and on, the user is encouraged to try to correct the interference by one or more of the following
measures:
■ Reorient o r relocate the rece iving antenna.
■ Increase t he separation bet ween the equipmen t and receiver.
■ Connect th e equipment into an o utlet on a circuit di fferent from tha t to which the receiv er is connected.
■ Consult th e dealer or an experi enced radio/TV te chnician for help.
Use of shiel ded cable is requir ed to comply with Cla ss B limits in Subpart B of Pa rt
15 of the FCC ru les.
Do not make an y changes or modifi cations to the equi pment unless otherwi se specified
in the manua l. If such changes or m odifications sh ould be made, you could be
required t o stop operation of t he equipment.
Notice
If static electricity or electromagnetism causes data transfer to discontinue midway (fail), restart
the application or disconnect and connect the communication cable (USB, etc.) Again.
This device complies with Part 15 of the FCC Rules. Op eration is subject to the following two
conditions:
(1) This device may not cause harmful inter ference.
(2) This device must accept any interference received, including interference that may cause
undesired operation.
EN-1
Polaroid a544 Digital Camera User Gu ide
www.polaroid.com
Page 3

Notice
If static electricity or electromagnetism causes data transfer to discontinue midway (fail), restart
the application or disconnect and connect the communication cable (USB, etc.) Again.
This product contains electrical or electronic materials. The presence of
these materials may, if not disposed of properly, have potential adverse
effects on the environment and human health.
Presence of this label on the product means it should not be disposed of as
unsorted waste and must be collected separately. As a consumer, you are
responsible for ensuring that this product is disposed of properly. To find out
how to properly dispose of this product, please go to www.polaroid.com and
click on "Company" or call the customer service number for your country
listed in the instruction manual.
EN-2
Polaroid a544 Digital Camera User Gu ide
www.polaroid.com
Page 4

EN-3
READ THIS FIRST
Trademark Information
® ®
Microsoft and Windows are U.S. registered trademarks of Microsoft Corporation.
®
Pentium is a registered trademark of Intel Corporation.
Macintosh is a trademark of Apple Inc.
SD™ is a trade mark.
Other names and products may be trademarks or registered trademarks of their respective
owners.
Product Information
Product design and specifications are subject to change without notice. This includes primary
product specifications, software, software drivers, and user's manual. This User Manual is a
general reference guide for the product.
The product and accessories that come with your camera may be different from those described
in this manual. This is due to the fact that different retailers often specify slightly different
inclusions and accessories to suit their market requirements, customer demographics, product
and geographical preferences.
Products very often vary between retailers especially with accessories such as batteries,
chargers,
memory cards, cables, pouches, and language support. Occasionally a retailer will
unique product color, appearance, and internal memory capacity. Contact your dealer specify a
product definition and included accessories. for precise
The illustrations in this manual are for th e purpose of explanation and may differ from the actual
design of your camera.
The manufacturer assumes no liability for any errors or discrepancies in this user manual.
Polaroid a544 Digital Camera User Gu ide
www.polaroid.com
Page 5

EN-4
SAFETY INSTRUCTIONS
Read and understand all Warnings and Cautions before using this product. Warnings
If foreign objects or water have entered the camera, turn the power off and
remove the batteries.
Continued use may cause an injury. Please call our friendly customer service for
assistance.
If the camera has been dropped or its case has been damaged, turn the power
off and remove the batteries.
Continued use may cause an injury. Please call our friendly customer service
for assistance.
There is no user serviceable parts; DO NOT DISSASSEMBLE!
For repair, please call our friendly custom er service for assistance.
Do not use the camera in areas near water.
Take special care during rain, snow, on the beach, or near the shore.
Exposing the camera to these conditions may cause damage to it.
Do not place the camera on unstable surfaces.
This may cause the camera to fall or tilt over, causing d amage.
Keep the batteries out of the reach of children.
Batteries should only be replaced by an adult. Children must be supervised by
an adult when they are replacing the batteries.
Do not use the camera while you are walking, driving or riding a motorcycle.
This may cause personal injury or result in tr affic accident.
Polaroid a544 Digital Camera User Gu ide
www.polaroid.com
Page 6

EN-5
Cautions
Load the batteries paying careful attention to the polarity (+ or -) of the terminals.
Loading the batteries with their polarities inverted may cause personal injury, or damage
to the surrounding areas due to the battery rupturing or leaking.
Do not fire the flash close to anyones’ eyes.
This may cause damage to the person's eyesig ht.
Do not subject the LCD display to impact.
This may damage the glass on the screen or cause the internal fluid to leak. If the
internal fluid contacts your eyes, rinse with fresh water.
If the fluid contacts you clothing rinse with wate r and seek medical attention immediately.
A camera is a precision instrument. Do not drop, strike, or use excessive force
when handling the camera.
This may cause damage to the camera.
Do not use the camera in humid, steamy, smoky, or dusty places.
This may cause fire or electric shock.
Do not remove the batteries immediately after a long period of continuous use.
The batteries may become warm and possibly cause an injury.
Do not wrap the camera or place it in cloth or blankets.
This may cause heat to build up and deform the case. Use the camera in a
well-ventilated place.
Do not leave the camera in places where the temperature may rise significantly,
such as inside a car.
This may adversely affect the case or the parts inside.
Before you move the camera, disconnect cords and cables.
Failure to do this may damage cords and cables .
Polaroid a544 Digital Camera User Gu ide
www.polaroid.com
Page 7

EN-6
Using Your Batteries
Our laboratory testing has shown that our digital camera models comply with industry standard
battery consumption levels (Camera & Imaging Products Association commonly known as CIPA).
All digital cameras are high drain products. For the best performance and prolonged battery life,
we recommend the use of high capacity batteries designed for such applications.
Here are some helpful hints to extend battery life considerably by limiting the following activities:
Reviewing the pictures on the LCD Screen
Using the optical viewfinder (if your camera has one) to frame the subject when taking pictures
Excessive use of the flash
Remove batteries from your camera when not in use.
WARNING!
Batteries should be replaced by an adu lt.
Use recommended or equivalent type of batteries only.
Insert the batteries in the correct orientation.
Remove exhausted batteries from the camera immediately.
Do not short the supply terminals.
Please dispose of the batteries properly.
Questions?
Call ou r tol l-free customer s ervice number. Loo k for the insert with this i con:
Or visit www. polaroid.com.
These instructions should be retained fo r future reference.
Polaroid a544 Digital Camera User Gu ide
www.polaroid.com
Page 8

EN-7
CONTENTS
23 PLAYBACK MODE
23 Playing Back Still Images
24 Thumbnail Display
24 Slideshow Disp lay
25 Protecting Images
26 Erasing Images
27 MENU OPTIONS
27 Capture Menu
29 Video Menu
30 Playback Menu
31 Setup Menu
33 TRANSFERRING FILES TO
YOUR COMPUTER
33 Downloading Your Files
34 EDITING SOFTWARE
INSTALLATION
35 DEFAULT SETTING
36 SPECIFICATIONS
37 APPENDIX
37 Possible Number of Shots
38 Troubleshooting
39 Connecting to a PictBridge
Compliant Printer
INTRODUCTION
8 Overview
8 Package Contents
9 GETTING TO KNOW YOUR
CAMERA
9 Front View
10 Rear View
11 LCD Monitor Display
13 GETTING STARTED
13 Preparation
14 Turning the Power On/Off
14 LED Indicators
15 Choosing the Language
15 Formatting the Memory Card or
Internal Memory
16 CAPTURE MODE
16 Capturing Images
16 Using the Flash
17 Using the Zoom Function
18 Setting Focus
19 Setting the Scene Mode
20 Adjusting the Exposure (EV
Compensation)
21 VIDEO MODE
21 Recording Video Clips
22 Playing Back Video Clips
8
Polaroid a544 Digital Camera User Gu ide
www.polaroid.com
Page 9

EN-8
INTRODUCTION
Overview
Congratulations on your purchase o f your new Polaroid digital camera.
Capturing high-quality digital images is fast and easy with this state-of-the-art smart camera.
Equipped with a 5.0-megapixel sensor, this camera is capable of capturing images with a resolution
of up to 2560 x 1920 pixels.
Package Contents
Common (Optional) Accessories:
Carefully unpack your camera and ensure that you have the following items:
Digital Camera
Software CD-ROM
USB cable
2 x AAA size batteries
SD/SDHC memory card (We recommend the use of a Polaroid memory card up to 2 GB and up to
8GB for SDHC.)
Accessor ies and component s may vary by retaile r.
Polaroid a544 Digital Camera User Gu ide
www.polaroid.com
Page 10

EN-9
GETTING TO KNOW YOUR CAMERA
Front View
1. Shutter button
2. Power button
3. Self-timer indicator
4. Flash
5. Taking lens
6. Focus switch
Normal mode
Macro mode
7. USB interface
8. TV out
1 2 3 4 5
6
7
8
Polaroid a544 Digital Camera User Gu ide
www.polaroid.com
Page 11

EN-10
Rear View
9. LCD display
10. LED indicator
11. Hand strap retainer
12. Tripod socket
13. SD card slot
14. Battery door
15. Menu button
16. Mode button
17. Up & zoom in button
18. Left & Display button
19. Down & zoom out button
20. Delete
21. OK button
22. Right / flash light button
23. Playback button
9 10 11
12 13 14
15
16
17
18
19
20
21
22
23
MEN U
MOD E
OK
Polaroid a544 Digital Camera User Gu ide
www.polaroid.com
Page 12

5
6
2
9
3
7
1
8
10
4
11
12 13 14 15 16
A
5M
00017
1.6
2009/03/26
+
-
- 1 / 3
2S
EN-11
10. Burst mode
[Blank] Off
[ ] On
11. Flash mode
[ ] Auto Flash
[ ] Always On
[ ] Off
12. Self-timer icon
[ 10s] 10 sec.
[ 2s] 2 sec.
13. Main focus area
14. Zoom indicator
15. Image quality
[ ] Fine
[ ] Standard
[ ] Economy
16. Photo / Video counter
1. Battery Power Level
[ ] Full power
[ ] Medium power
[ ] Low power
[ ] No power
2. Brightness Alert
3. Date stamp
4. Mode indicator
[ ] Auto
[ ] Sport
[ ] Night Screen
[ ] Portrait
[ ] Landscape
[ ] Backlight
5. Focus setting
[ ] Normal
[ ] Macro
6. White Balance
[Blank] Auto
[ ] Daylight
[ ] Cloudy
[ ] Tungsten
[ ] Fluorescent
7. Image size resolution
[ 5m ] 2560 x 1920
] 2048 x 1536[ 3m
[1.3m] 1280 x 960
[ VGA ] 640 x 480
8. Storage media
[ ] Internal memory (no card)
[ ] SD/SDHC memory card
9.
[ ] Exposure compensation
LCD Display Icons
SD
+
-
Polaroid a544 Digital Camera User Gu ide
www.polaroid.com
Page 13

2
7
8 9
EN-12
Video mode [ ]
1. Battery level
2. Main focus area
3. Video indicator icon
4. Focus setting
5. White Balance
6. Video resolution
7. Zoom indicator
8. Available recording time
9. Storage media
Playback mode [ ] -Still image playback
1. Battery level
2. Playback indicator
3. Counting indicator
4. SIZE
5. EV
6. Storage media
7. Photo / Video counter
Playback mode [ ] -Video playback
1. Battery level
2. Total recorded time
3. Playback indicator
4. Video playback indicator
5. Video resolution
6. Storage media
7. Playback indicator
8. Recorded time
9. Photo / Video counter
9
8
7
2 3
4
6
5
7
8 9
VGA
00:0 0: 13
1.6
M
VGA
00:00 :1 3
/
00:00 :1 0
M
OK
0004
1
1 3
4
5
6
3
4
5
7
0003
SIZ E 5M
100-0 00 3
M
EV
6
1 2
Polaroid a544 Digital Camera User Gu ide
www.polaroid.com
Page 14

EN-13
Wri te p rotec t ta b W rit e pr ot ect sta te
GETTING STARTED
Preparation
1. Open the battery door as shown in the illustratio n..
2. Load the batteries in the correct orientation as shown.
3. Close the battery door and make sure it is locked
securely.
■ To prevent va luable data from being a ccidentally era sed from an SD/SDHC m emory card, you can slid e the
write prot ect tab (on the side of t he SD/ SDHC memory card) t o “LOCK”.
■ To save, edit , or erase data on an SD/SDH C memory card, you mu st unlock the card.
■ To prevent da maging of an SD/SDHC mem ory card, be sure to tu rn off the
power when i nserting or remov ing the SD/SDHC mem ory card.If insertin g
or removin g the SD/SDHC memor y card with the power o n, th e camera will
automati cally turn off.
■ Be careful n ot to drop the batter ies when opening or c losing the battery doo r.
Insert an SD/SDHC memory card (Optional).
■ The camera has 16MB internal memory, but you
can use an SD/SDHC memory card (you may use
up to an 8 GB SDHC or 2 GB SD card. ) to expand the
camera's memory capacity(We recommend the
use of a Polaroid SD - not included)..
■ Be sure to format the memory card with this camera
before its initial usage.
Polaroid a544 Digital Camera User Gu ide
www.polaroid.com
Page 15

EN-14
Turning the Power On/Off
LED Indicators
Indicators
State Description/Activity
LED indicator
LED indicator
Self-timer indicator
Blinking red
Reading/Writing files.
Charging the flash.
The self-timer function is
activated.
Blinking red
Blinking red
Questions?
Call ou r tol l-free customer s ervice number. Loo k for the insert with this i con:
Or visit www. polaroid.com.
Pressing the POWER button once turns the camera on.
To turn the power off, press the POWER
button until the camera turns off.
To extend batt ery life, the power i s turned off au tomatically when the c amera has not been op erated for a
fixed peri od of time. To resu me , turn the power on ag ain. Refer to section in t his
manual tit led “Auto Off ” in the Setup Menu for f urther details.
Polaroid a544 Digital Camera User Gu ide
www.polaroid.com
Page 16

EN-15
Choosing your Language
Specify which language the menus and messages are to be displayed on the LCD display.
1. Press the MENU button.
2. Select [Setup] menu with the button.
3. Select [Language] with the ▼ buttons, and press the OK
button.
■ The Language setting screen will be displayed.
4. Select the display language with the ▲ / ▼buttons, and press
the OK button.
■ The setting will be stored.
■ To exit from any menu selection, press the button.
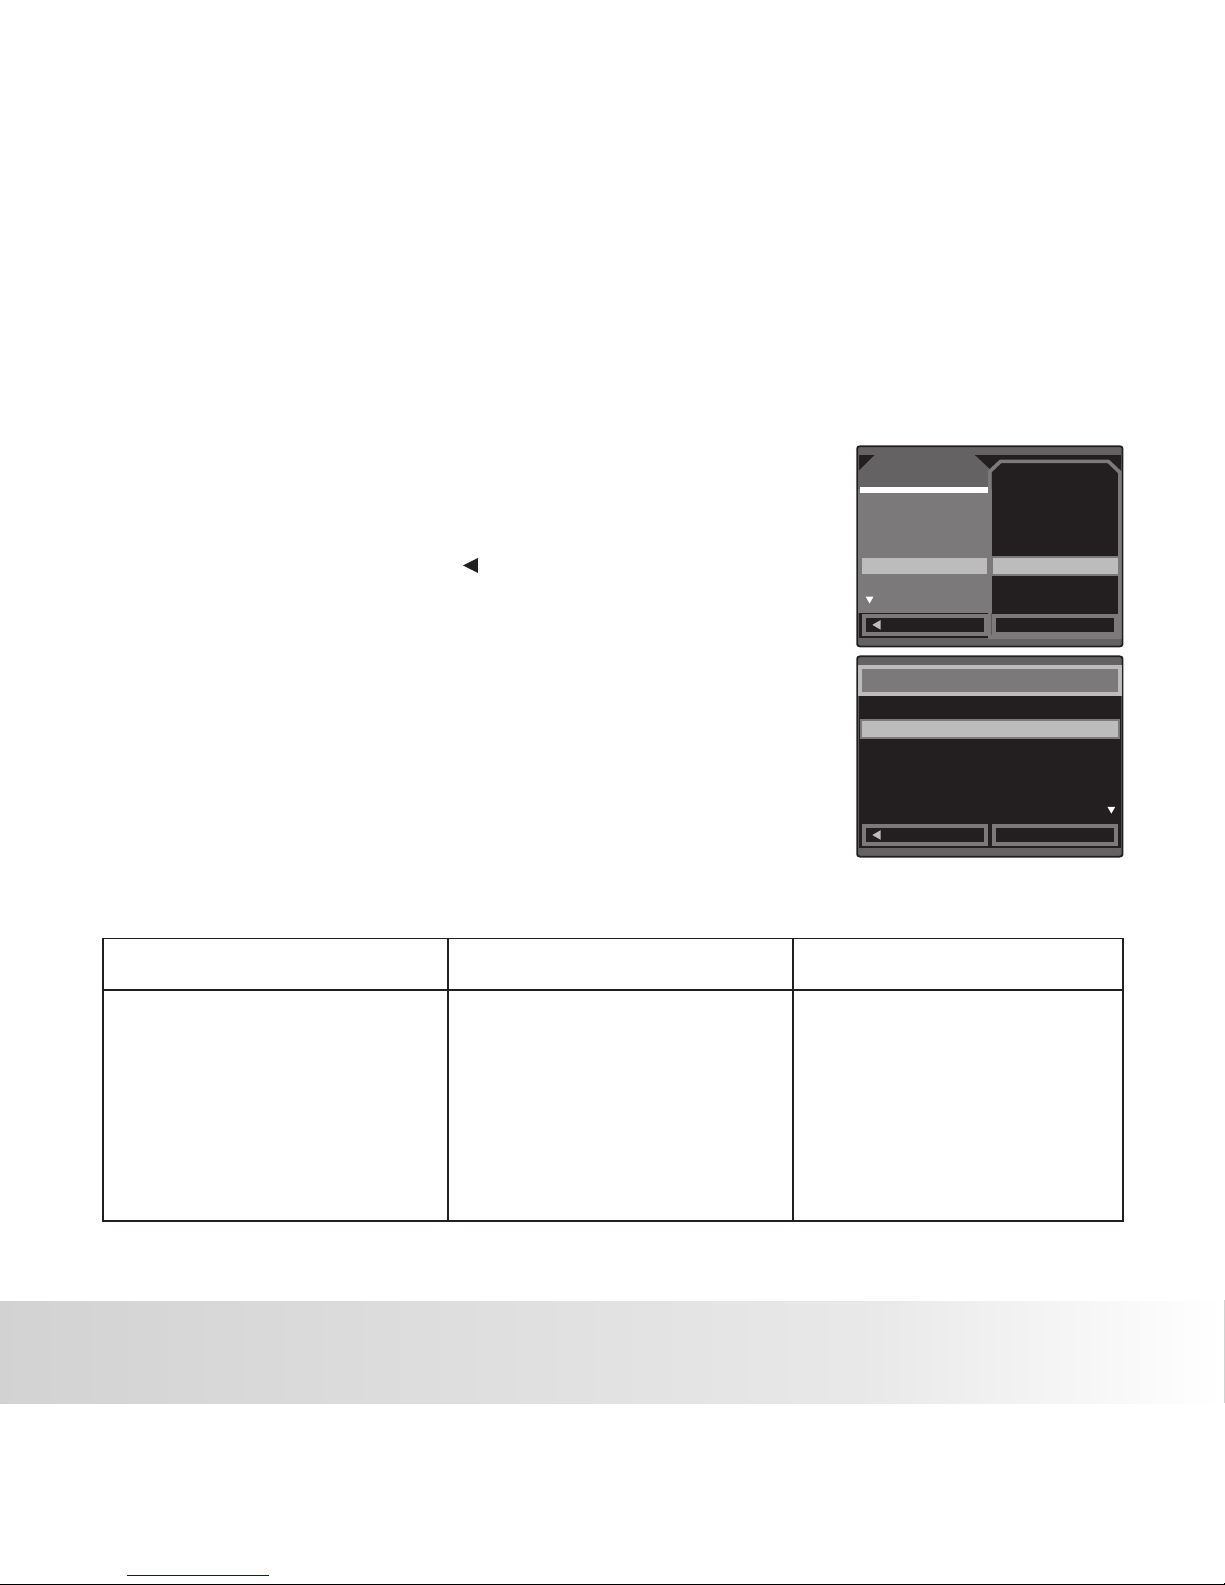
Formatting the Memory Card or Internal Memory
This utility formats the internal memory (or memory card) and erases all stored images and data.
1. Press the MENU button.
2. Select [Setup] menu with the button.
3. Select [Format] , and press the
OK button.
4. Select [ Execute] with the ▼ button,
and press the OK button to confirm.
■ To cancel formatting, select [Cancel] and
press the OK button.
Capt ure Setu p
Next M en u
Engl is h
Off
Next M en u
60Hz
Exit
OK Set
Form at
Lang ua ge
Auto O ff
Sys. R es et
Ligh t Fr eq .
Capt ure Setu p
Next M en u
Engl is h
Off
Next M en u
60Hz
Exit
OK Set
Form at
Lang ua ge
Auto O ff
Sys. R es et
Ligh t Fr eq .
Capt ure Setu p
Next M en u
Engl is h
Off
Next M en u
60Hz
Exit
OK Set
Form at
Lang ua ge
Auto O ff
Sys. R es et
Ligh t Fr eq .
Cancel
Execute
Polaroid a544 Digital Camera User Gu ide
www.polaroid.com
Page 17

EN-16
Flash mode Description
Flash Off
Auto
Always On
Use this mode in the environment where flash use is prohibited or
should the subject be too far away for the flash to have any effect.
The flash fires automatically according tothe surrounding brightness
of the photographic conditions.
The flash will always fire regardless of the surrounding brightness.
Select this mode for recording images with h igh contrast
(subject backlit) and heavy shadows.
CAPTURE MODE
Capturing Images
Your camera is equipped with a 2.4" full color LTPS-TFT LCD display to help you compose images,
playback recorded images/video clips or adjust menu settings.
1. Press the Power button to turn the power on.
2. Frame your image on the LCD display so that the main
subject is within the focus frame.
■ Pressing the ▲ button zooms in on the subject, and
enlarges the subject on the LCD display.
3. Press the SHUTTER button to capture your image.
Using the Flash
The flash is designed to function automatically when lighting conditions permit the use of flash.
The camera has 3 flash modes: Off, Auto , and Always On. You can take an image using
a desired flash mode to suit your circumstances. The flash's effective range is
35.4” ~ 59.1”(0.9m~1.5m) (in Normal mode).
The flash is disabled if the camera is set to Macro mode.
1. Press the button to turn the camera on.Power
2. Toggle until your desired flash mode appears on the LCD display.
3. Compose your scene and press the button SHUTTER
to capture your image.
The table below will help you to choose the appropriate flash mode:
MOD E
OK
Polaroid a544 Digital Camera User Gu ide
www.polaroid.com
Page 18

EN-17
Using the Zoom Function
This camera is equipped with 8x digital zoom. You can enlarge the subjects by pressing the ▲ / ▼
button.It is a useful feature, however, the more the image is magnified, the grainer the image may
become.
To capture a zoomed image, perform the following steps:
1. Press the Power button to turn the power on.
2. To activate the digital zoom, press the▲ / ▼ button.
■ The status of digital magnification is shown on the LCD display.
3. Compose your scene and press the SHUTTER button to capture
the image.
■ The digital magnifica tion ranges from 1. 0x to 8.0x.
■ Image nois e (grain) may occur i n the recorded imag e when using the digital z oom feature.
MOD E
OK
Polaroid a544 Digital Camera User Gu ide
www.polaroid.com
Page 19

EN-18
The table below will help you choose the a ppropriate focus mode:
Focus mode Description
This mode is suitable for scenery and portrait shooting.
Setting the Focus
Images can be captured by sliding the focus switch to set the focus modes: [ ] macro or [ ]
normal mode. The focus range of macro mode is 4 .3”to 7.0”(11cm to 18cm); normal mode is
20” to Infin ity (0.5m to Infini ty).
1. Press the Power button to turn the camera on.
2. Slide the focus switch to your desired focus mode.
3. Compose your scene and press the SHUTTER button.
Warning! : Your image(s) will be unsharp if you are not within the
macro focus range.
Select macro to capture close-up images. When the lens is zoomed
to its widest position you may focus objects as close as 11cm(4.3”).
■ If the camer a is set to Macro mode, t he flash function is dis abled.
Polaroid a544 Digital Camera User Gu ide
www.polaroid.com
Page 20

Capt ure Setu p
5M
Fine
Auto
+0.0
Fluo re sc en t
Exit
OK Set
Size
Qual it y
Scen e Mo de
EV
Whit e Ba la nc e
Auto
Sport
Night
Capt ure Setu p
5M
Fine
Auto
+0.0
Fluo re sc en t
Exit
OK Set
Size
Qual it y
Scen e Mo de
EV
Whit e Ba la nc e
EN-19
Setting the Scene Mode
You can select the scene mode according to the image your wish to capture. There are 6 available
modes .
Auto: Select this mode for most picture taking situations.
Sports: Select this mode when you want to photograph fast-moving subjects.
Night: Select this mode when you want to capture dark scenes such as night views.
Portrait: Select this mode when you want to capture an image that makes the person
stand out against a de focused (blurred) background.
Landscape: Select this mode to capture an image with infinity focus, hard sharpness and
high saturation.
Backlight: Select this mode when you want to capture images as the light comes from
behind the object.
1. Press the MENU button.
2. Select [Scene Mode] with the ▼ button, then press the
OK button.
3.Select the desired scene mode with the▲ / ▼buttons,
then press the OK button.
4.To exit from the menu, press the button.
Polaroid a544 Digital Camera User Gu ide
www.polaroid.com
Page 21
Exit
OK Set
EV
+
+0.0
-1/3
-2/3
-1.0
1/3
Capt ure Setu p
5M
Fine
Auto
+0.0
Fluo re sc en t
Exit
OK Set
Size
Qual it y
Scen e Mo de
EV
Whit e Ba la nc e
EN-20
Helpful Hints on How to Use EV Settings
+ (positive) compensation -(negative) compensation
Backlight correction
(+0.3 EV, fixed)
* Printed ma tter with black tex t on
white pape r.
* Back lit sce ne.
* Bright sce nes or strong refle cted
light such a s ski slopes or beach
scenes.
* When the sky a ccounts for a
large area o n the screen.
* Peopl e illuminated by a spotl ight,
in particu lar, against dark
backgrou nd.
* Printed ma tter with white tex t on
black pape r.
* Weak reflecting bodie s such as
trees or dar k leaves
* When the bac kground is bright
and the subj ect is dark.
* When subje cts (people) have a
light sour ce such as the sun to
their back s.
Adjusting the Exposure (EV Compensation)
You can manually adjust the exposure determined by the digital camera. Use this mode when the
proper exposure cannot be obtained, for example, when the contrast (difference between light and
dark) between the subject and the background is extremely large.
The EV compensation value can be set in the rang e from-2.0EV to +2.0EV.
1. Press the MENU button.
2. Select [EV] with the ▲ / ▼ buttons,then press the
OK button.
3. Use ▲ or ▼ to set the range of EV compensation value from
-2.0EV to +2.0EV, then press the OK button.
4. To exit from the menu, press the button.
Polaroid a544 Digital Camera User Gu ide
www.polaroid.com
Page 22

EN-21
VIDEO MODE
Recording Video Clips
This mode allows you to record video clips at a resolution of VGA (640 x 480) /
QVGA (320 x 240) pixels.
1. Press the MODE button to set the camera mode to [ ].
2. Compose the image.
3. Press the SHUTTER button.
■ The recording of the video clip will start.
■ Pressing the shutter button one more time will end the
recording of the video clip.
■ The recording time depends on the storage size and the
subject of the image to be recorded.
■ When recording a video clip, the flash cannot be used.
■ If the write speed of your SD/SDHC memory card is not fast enough for recording video clips in
selected size, the video recording will stop. In this case, select a video size lower
than the current one.
the currently
■ The maximum recordable time for one continuous video clip is 00:59:59.
VGA
00:00 :1 0
M
1.6
Polaroid a544 Digital Camera User Gu ide
www.polaroid.com
Page 23

VGA
00:00 :1 3
/
00:00 :1 0
M
OK
0004
FW 1X
EN-22
Playing Back Video Clips
You can play back recorded video clips on the camera.
1. Press the [ ] button
The last image appears on the screen.
2. Select the desired video clip with the / buttons.
3. Press the OK button to start video playback.
Press the / buttons during playback allows fast
forward play / fast reverse play.
To stop video playback, press the button.
This stops playback and returns to the start of the video clip.
To pause video playback, press the OK button.
This pauses video playback.
To cancel pause, press the OK button again.
Questions?
Call ou r tol l-free customer s ervice number. Loo k for the insert with this i con:
Or visit www. polaroid.com.
■ Video clips cannot be dis played rotated or e nlarged.
■ This camera does not have a b uilt-in speaker s o that you can not play back s ound with the
camera. The sound recor ded with video clip s can only be played ba ck on computers.
■ QuickTime basic p layer is availabl e free of charge, compat ible with Mac and Win dows-computer s
and can be dow nloaded from the App le web site at www.app le.com. For help using Q uickTime
Player usa ge, please refer to t he QuickTime on-line help for m ore information .
Polaroid a544 Digital Camera User Gu ide
www.polaroid.com
Page 24

EN-23
PLAYBACK MODE
Playing Back Still Images
You can play back the still images on the LCD display.
1. Press the [ ] button.
■ The last image appears on t he screen.
2. The images can be displayed in reverse or forward
sequence with the / buttons.
3. Press the / button to adjust the zoom ratio.
The magnification factor is displayed on the LCD display.
4. To view different portion of the images, Press OK
once and press the / / / button to adjust the display area.
5. Press the OK button again to return the normal
playback view of the last image.
An [ ] icon is dis played with the vid eo data.■
■ To view the previous image, press the button.
■ To view the next image, press the button.
■ The magnif ication factors r ange from 1x to 4x (within 4 s tages: 1.0x, 2.0x , 3.0x, and 4.0x).
MOD E
OK
Polaroid a544 Digital Camera User Gu ide
www.polaroid.com
Page 25

Play Setu p
Next M en u
3 Sec.
Next M en u
Exit
OK Set
Dele te
Copy To Card
Slid e Sh ow
DPOF
Prot ec t
3 Sec.
5 Sec.
10 Sec.
Play Setu p
Next M en u
3 Sec.
Next M en u
Exit
OK Set
Dele te
Copy To Card
Slid e Sh ow
DPOF
Prot ec t
100-0 00 8
1 2 3
4 5 6
7 8 9
EN-24
Thumbnail Display
This function allows you to view 9 thumbnail images on the LCD display simultaneously so you may
search for a particular image.
1. Press the[ ] button.
The last recorded image appears on the LCD monitor.
Slideshow Display
The slideshow function enables you to playback your still images
automatically in order one image at a time.
1. Press the[ ] button.
2. Press the button.MENU
The playback menu is displayed.
3. Select [Slide Show] with the buttons, then press the
OK button.
4. Select the desired interval time with the / buttons,
and press the OK button.
The slideshow starts.
5. To stop the slide show during playback, press the
OK button.
The image is displayed on screen when you press the
OK button.
■ The Auto Off functio n does not operate du ring slide show.
■ All still ima ges in the folder are a utomatically pl ayed back.
■ Video files are display ed first frame imag e, and they are not played b ack.
2. Press the MENU button. Select [thumbnail] with the bu tton,
press the OK button.
■ Nine thumbnail images are displayed simultaneously.
■ For recorded video clips, the video playback mode icon [ ]
will be displayed.
3. Use the / / / button to move the cursor to select the
image to be size.
4. Press the OK button to display the selected image on full
screen.
displayed at normal
Polaroid a544 Digital Camera User Gu ide
www.polaroid.com
Page 26

Exit
OK Set
Sing le
Set
cancel
Exit
OK Set
Prot ect
Single
All
Select
Play Setu p
Next M en u
3 Sec.
Next M en u
Exit
OK Set
Dele te
Copy To Card
Slid e Sh ow
DPOF
Prot ec t
EN-25
Protecting Images
Questions?
Call ou r tol l-free customer s ervice number. Loo k for the insert with this i con:
Or visit www. polaroid.com.
■ Formatti ng an SD/SDHC memor y card or internal me mory overrides prote ction, and erases a ll
images reg ardless of their pr otected status.
Set the data to read-only to prevent images from being erased by mistake.
1. Press the [ ] button.
2. Press the MENUbutton.
3. Select [Protect] with the button, and press the OK button.
4. Select [Single ] / [All ] /[Select ] with the / buttons, and press
the OK button.
■ [ Single ]: Protects the selected image.
■ [ All ]: Protects all of the images.
■ [Select]: Select the image in the nine thumbnail.
5. Select [set], Press OK button. then press the button.
6. The protect icon [ ] is displayed with protected images.
■ When [All] has been selected, [ ] is displayed with all the images.
Canceling the Protection
To cancel protection for only one image, display the image on which
you want to remove the image protection.
1. Select [Protect] with the buttons from the playback menu,
and press the OK button.
2. Select [Single] / [All ] / [Select ]with the / buttons, and press the
OK button.
3. Select [cancel], Press the OK button, then press the
button.
Polaroid a544 Digital Camera User Gu ide
www.polaroid.com
Page 27

Exit
OK Set
Dele te
Single
All
Select
Play Setu p
Next M en u
Next M en u
Exit
OK Set
Dele te
Copy To Card
Slid e Sh ow
DPOF
Prot ec t
EN-26
Erasing Images
Erasing a single image / Erasing all images
Deleting a n image will not affect sequenti al image numberin g. For example, if you del ete image number
240, the nex t captured image wi ll be numbered 241 ev en though 240 no longer ex ists. In other word s,
an image-n umber is retired wh en an image is delete d and will not be reused or re assigned to anoth er
subseque ntly captured ima ge.
1. Press the [ ] button.
■ The last image will be displayed on the scree n.
2. Select the image you want to erase with the / buttons.
3. Press the button.
4. Select [ Single ] /[All] / [ Select] with the / buttons and press
the OK button.
■ [Single]: Erases the current image only.
■ [ All ]: Select EXECUTE and press the OK button,
All images will be erased except for the protected images.
■ [Select ]: Thumbnail display shows 9 images in th e screen,
Select the image to be delete by the ▲ / ▼ / / buttons
and confirm by pressing OK button.
5. Press the MODE button to exit.
Polaroid a544 Digital Camera User Gu ide
www.polaroid.com
Page 28

Capt ure Setu p
Next M en u
Off
Off
Exit
OK Set
Date I np ut
Tim e St am p
Burs t Mo de
Capt ure Setu p
Auto
Stan da rd
Norm al
Norm al
Off
Exit
OK Set
ISO
Colo r
Self Timer
Saturation
Sharpness
Capt ure Setu p
5M
Fine
Auto
+0.0
Fluo re sc en t
Exit
OK Set
Size
Qual it y
Scen e Mo de
EV
Whit e Ba la nc e
EN-27
MENU OPTIONS
Capture Menu
This menu is for the basic camera settings to be used wh en capturing still images.
1. Press the MODE button to set the camera mode to STILL CAMERA .
2. Press the MENU button.
3. Select the desired option item with the / buttons, and press the OK button to enter its
respective menu.
4. Select the desired setting with the / buttons, and press the OK button.
5. To exit from the menu, press the button.
Resolution
This sets the size of the image that will be captured.
* [ 5m ] 5M (2560 x 1920 pixels)
* [ 3m ] 3M (2048 x 1536 pixels)
* [1.3m] 1.3M (1280 x 960 pixels)
* [VGA ] VGA (640 x 480 pixels)
Quality
This sets the quality (compression) at whi ch the image is captured.
* [ ] Super Fine
* [ ] Fine
* [ ] Normal
Scene
Refer to section in this manual titled
Polaroid a544 Digital Camera User Gu ide
www.polaroid.com
Page 29

EN-28
EV
Refer to section in this manual titled “Adju sting the Exposure (EV Compensation)” for further details.
White Balance
This sets the white balance for a variety of lightin g conditions and permits images to be captured
that approach the conditions that are observed in your scene.
* [ Blank ] Auto Use this setting for most photographic picture taking conditions.
* [ ] Daylight Use this setting when there is full sun in your scene
* [ ] Cloudy Use this se tting in cloudy overcast condit ions.
* [ ] Tungsten Use this settings when incandescent/tungsten lights are in your scene.
* [ ] Fluorescent Use this settings when flourescent lig hts are in your scene.
ISO
This sets the sensitivity for capturing images. When the sensitivity is raised (and the ISO figure is
increased), photography will become possible even in dark locations, but the more pixelated
(grainier) the image may appear.
* Auto /100 / 200
Color
This sets the color of the image that will be captured.
* Standard / Vivid/ Sepia / Monochrome
Saturation
This sets the saturation of the image that will be captured.
* High / Normal / Low
Sharpness
This sets the sharpness of the image that will be captured.
* Hard / Normal / Soft
Polaroid a544 Digital Camera User Gu ide
www.polaroid.com
Page 30

Video Ou tput Setu p
VGA
+0.0
Fluo re sc en t
Exit
OK Set
Size
EV
Whit e Ba la nc e
EN-29
Video Menu
This menu is for the basic camera settings to be used wh en recording video clips.
1. Press the MODE button to set the camera mode to [ ].
2. Press the MENU button.
3. Select the desired option item with the / buttons, and press the OK button to enter its
4. Select the desired setting with the / buttons, and press the OK button.
5. To exit from the menu, press the button.
SIZE
This sets the size of the video clip that will be captured.
* [VGA] 640 x 480
* [QVGA] 320 x 240
EV
Refer to section in this manual titled.
respective menu.
White Balance
Refer to section in this manual titled “White Balance” in Capture
Menu for further details.
Polaroid a544 Digital Camera User Gu ide
www.polaroid.com
Page 31

EN-30
Playback Menu
In the [ ] mode, choose which settings are to be used for playba ck.
1. Press the [ ] button.
2. Press the MENU button.
3. Select the desired option item with the / buttons, and press the OK button to enter its
respective menu.
4. Select the desired setting with the / buttons, and press the OK button.
5. To exit from the menu, press the button.
Delete
Refer to section in this manual titled.
Copy to Card
Allows you to copy your files from the camera's inte rnal memory to an SD/SDHC memory card.
Of course, you can only do this if you have a memory card in stalled and some files in internal
memory.
* This Image / All Image
Slide Show
Refer to section in this manual titled.
Protect
Refer to section in this manual titled.
Play Setu p
Next M en u
Next M en u
Exit
OK Set
Dele te
Copy To Card
Slid e Sh ow
DPOF
Prot ec t
Polaroid a544 Digital Camera User Gu ide
www.polaroid.com
Page 32

Capt ure Setu p
NTSC
Exit
OK Set
TV Outpu t
EN-31
Setup Menu
Choose how you want your camera to work:
1. Press the MENU button.
2. Select the [Setup] menu with the button.
3. Select the desired option item with the / buttons, and press th e OK button to enter its
respective menu.
4. Select the desired setting with the / buttons, and press the OK button.
5. To exit from the menu, press the button.
Format
Refer to sec tion in this manual t itled “Formatting th e Memory Card or Inte rnal Memory” for furth er details.
Language
Refer to sec tion in this manual t itled “Choosing t he Language” for furth er details.
Auto Power O ff
When the camera is not used for a spe cific period of tim e, th e power to the camera i s automatically turn ed
off. This feature i s useful for extending battery life.
* 1 Minute / 3Mi nutes / 5Minutes / Off
Capt ure Setu p
Next M en u
Engl is h
Off
Next M en u
60Hz
Exit
OK Set
Form at
Lang ua ge
Auto Off
Sys. R es et
Ligh t Fr eq .
Polaroid a544 Digital Camera User Gu ide
www.polaroid.com
Page 33

EN-32
Sys. Reset
This returns all basic settings to the camera's default settings.
* Cancel / Execute
Light Freq.
The function allows to change the light frequency of environment to 60Hz or 50Hz.
* [60Hz]: The light frequency of environment is 60Hz like the US.
* [50Hz]: The light frequency of environment is 50Hz like the UK.
TV Output
* [NTSC]: American and Japanese video format.
* [PAL ]: European video format.
Questions?
Call ou r tol l-free customer s ervice number. Loo k for the insert with this i con:
Or visit www. polaroid.com.
Polaroid a544 Digital Camera User Gu ide
www.polaroid.com
Page 34

EN-33
TRANSFERRING FILES TO YOUR COMPUTER
Minimum System Requirements
Downloading Your Files
1. Connect one end of the USB cable t o an
available USB port on your comp uter.
2. Connect the other end of the USB c able to the USB terminal
on the camera.
3. Select [PC Mode] using the / buttons, and press the
OK button.
4. From the Windows desktop, do uble click on
6. Double click on the removabl e disk and locate the DCIM folder.
7. Double click on the DCIM folde r to open it to find more folders .
Your recorded image s and video clips will be inside these f olders.
8. Copy & Paste or Drag-N-Drop im age and video files to a folder o n your computer.
■
■ Mac OS X 10.3-10.5
■ Memory: 256MB or above
■ HDD space: 500 MB or above
■ USB port and CD-ROM drive
Power Mac G3 or later
5. Look for a new “removable disk” icon.
■ This “removable disk” is actually the memory (or memory
card) in your camera.
Typically, the camera will be assigned drive letter “e” or
higher.
Mac users: Double-click the “untitled” or “unlabeled” disk drive icon on your desktop.
IPhoto may automatically launch.
Polaroid a544 Digital Camera User Gu ide
www.polaroid.com
■
■ Processor: Pentium III 1G or above
■ Memory: 512MB or above
■ HDD space: 500 MB or above
■ 16 bit color display
■ Microsoft DirectX 9.0C
■ USB port and CD-ROM drive
OS: Windows 98se/Me/2000/XP/Vista
Page 35

EN-34
EDITING SOFTWARE INSTALLATION
ArcSoft MediaImpression™:
Manages your media for you, and gives you tons of fun and exciting ways to create and share
projects featuring your photo, video, and music files. Edit, enhance and add creative effects to your
photos.
Create your own movies or photo slide shows, complete with soundtrack. Upload your files easily to
YouTube™! Or share them through simple email attachments or popular photo printing.
■ For Window s 2000/XP/Vista users, pleas e make sure to install and u se the software in “A dministrator”
mode.
■ ArcSoft Med iaImpression do n’t support Windo ws 98se/Me
Polaroid a544 Digital Camera User Gu ide
www.polaroid.com
Page 36

EN-35
DEFAULT SETTINGS
SIZE
5M
Quality
Fine
Scene
Auto
Exposure
+0.0
White Balance Auto
ISO
Auto
Color
Standard
Saturation
High
Sharpness
Normal
Questions?
Call ou r tol l-free customer s ervice number. Loo k for the insert with this i con:
Or visit www. polaroid.com.
Shelf Timer
Date Input
Time Stamp
Burst Mode
Off
Off
Off
Off
Polaroid a544 Digital Camera User Gu ide
www.polaroid.com
Page 37

EN-36
SPECIFICATIONS
Item Description
Image sensor
Effective pixels
Image resolution
Recording media
File format
Lens
Focus range
Shutter speed
LCD monitor
Self-timer
Exposure
compensation
White balance
Interface
Power
Dimensions
Weight
5.0 Mega pixels
Still image
5M: 2560 x 1920,
3M:2048x 1536,
1.3M: 1280 x960,
VGA: 640x480
Video clip
VGA: 640 x 480 (24 fps),
QVGA: 320 x 240 (30 fps)
16MB internal memory
Supports SD/SDHC memory card (up to 2GB for S D and up to
8GB for SDHC ) (optional)
Image format: JPEG; video format: AVI
F-no.: f 3.0
Focus Length: 6.47 mm (equivalent to 39mm on a 35mm camera)
1 - 1/1000 sec.
10 sec delay, 2 sec delay
-2.0EV~ +2.0EV (in 0.3EV increments)
Auto, Daylight, Cloudy, Tungsten, Fluoresce nt
Auto, 100, 200
USB connector
2 x AAA size batteries
Approx. 90 x 55 x 18 mm (without protruding parts)
Approx. 82g (without batteries and memory card)
* Design and specifications are subject to change without notice.
Macro: 4.3”~7.0”(11cm ~ 18cm)
Normal:20” ~ infinity (0.5m ~ infinity)
2.4” full color LTPS-TFT LCD (153.6K pixels)
Polaroid a544 Digital Camera User Gu ide
www.polaroid.com
Page 38

QVGA
VGA
640x480
64M 128 M 256M 512M
1GB 2GB
4GB
SDHC
01:26
01:42
02:55
03:28
05:53
07:01
23:44
28:16
47:33
56:36
95:12
113:19
11:51
14:06
640x480
Norm al
Norm al
Norm al
Norm al
5M
256 0x192 0
3M
204 8x153 6
1.3M
128 0x960
QVGA
640 x480
SD/S DH C memory card c ap acity
64M 1 28M 25 6M 512M
1GB 2GB
4GB
SDHC
33
68
88
47
87
107
94
145
177
190
261
301
69
140
180
98
179
219
194
297
361
389
533
614
141
283
364
199
362
443
392
601
730
786
1077
1240
284
570
734
401
730
892
790
1210
1469
1582
2166
2494
572
1145
1473
805
1464
1790
1586
2426
2947
3173
4343
5001
1146
2294
2950
1613
2933
3586
3177
4860
5902
6356
8698
1001 6
2296
4594
5907
3230
5874
7180
6362
9731
11816
1272 6
1741 4
2005 3
EN-37
APPENDIX
Possible Number of Shots
Fine
Supe r Fi ne
Fine
Supe r Fi ne
Fine
Supe r Fi ne
Fine
Supe r Fi ne
( )FW inte rp ola ti on
( )FW inte rp ola ti on
( )FW inte rp ola ti on
( )FW inte rp ola ti on
Size
Quality
SD/S DH C memory card c ap acity
Size
■ Possible number of shots (still image)
The table shows the approximate shots that you can capture at each setting based on the capacity
of the internal memory and the SD/SDHC memory card .
■ Possible r ecording time / sec ( video clip)
■ The above data shows the st andard testing re sults. The actua l capacity varies a ccording to the sho oting
conditio ns and settings.
■ The maximum recordabl e time for one contin uous video clip is 00 :59 :59.
Polaroid a544 Digital Camera User Gu ide
www.polaroid.com
Page 39

EN-38
Troubleshooting
Refer to the symptoms and solutions listed below before sending the camera for repairs.
If the problem persists, contact Polaroid customer service.
Symptom Cause Solu tions / Corrective Acti ons
The power d oes not come o n.
1. The batter ies are not lo ade d.
2. The batter ies are weak o r dea d.
1. Load the b atteries c orrectly.
2. Replac e with a new set o f
batteri es.
Please us e only Alkali ne or Ni-MH
recharg eable batt eries.
The batte ries or came ra feels
warm.
Long peri ods of conti nuous use of t he
camera or t he flash.
The start -up screen b links afte r
powerin g up.
The recha rgeable ba tteries ha ve
reached t he end of thei r useful lif e.
Replace w ith a new set of r echargea ble
batteri es.
Even if I pre ss the shutt er button,
the camer a does not tak e a
picture .
The shutt er button is n ot pressed a ll
the way dow n.
Press the s hutter but ton all the wa y down.
The inter nal memory o r memory car d
does not ha ve any free ca pacity.
The flash i s charging .
The memor y card is writ e-protec ted.
Wai t unt il the statu s LED turns off.
Remove th e write-pr otection .
Insert a ne w memory car d, or delete f iles.
The camer a cannot foc us or
images ar e fuzzy.
The lens is d irty.
The dista nce to the sub ject is less
than the effe ctive rang e.
Wipe clea n with a soft, d ry cloth or le ns
paper.
Get your su bject with in the effecti ve fo cus
range. Ma ke sure the le ns setting i s in the
proper po sition.
Files can not be delet ed.
The file is p rotected
The memor y card is writ e-protec ted
Cancel pr otection .
Remove th e write-pr otection .
Cannot do wnload ima ges. The free sp ace on the har d disk in
your comp uter may be in suffi cient.
Check whe ther the har d disk has a spa ce
for runni ng Windows , and if the dri ve for
loading i mage files h as a capacit y at least
that of the m emory card i nserted in t he
camera.
Polaroid a544 Digital Camera User Gu ide
www.polaroid.com
Page 40

Imag es
Next M en u
Next M en u
Exit
OK Set
Sele ct
All
Pict bridge
Next M en u
Defa ul t
Defa ul t
Exit
OK Set
Imag es
Size
layo ut
prin t
USB
Exec ut e
Exec ut e
Exit
OK Set
Disk D ri ve
Prin te r
EN-39
Connecting to a PictBridge Compliant Printer
Read this section if the model you purchased is included with the PictBridge functions.
If a printer that supports PictBridge is available, images can be printed by connecting the digital still
camera directly to the PictBridge-compatible printer without using a computer.
Connecting the camera to the printer
1. Connect one end of the USB cable to your camera.
2. Connect the other end of the USB cable to the USB port on
the printer.
3. Select [Printer] with the buttons, and press the
OK button.
Printing images
When the camera is properly connected to a Pict-Bridge compliant
printer and set to [ ], the Pict-Bridge menu is displayed on Printer
the monitor.
1. Select the item you want to configure with the / buttons,
and press the OK button.
■ [Images]: Select whether you want to print specific image
or all images. You may also select printing
number for specific image.
■ [Size]: Select the desired paper size according to the
printer type.
■ [Layout]: Select the desired printing layout according to
the printer type.
■ [Print]: After all settings are configured, select this item to
start printing.
2. After you select [Images] in the previous step, and press
the OK button to enter its respective menu. Select
[Select ], [All ] with the / buttons, and
press the OK button.
■ [Select ]: Select to print one specific image.
■ [All ]: Select to print all images.
Polaroid a544 Digital Camera User Gu ide
www.polaroid.com
Page 41

Pict bridge
Next M en u
Defa ul t
Defa ul t
Exit
OK Set
Imag es
Size
layo ut
prin t
EN-40
3. If you select [Select ] in the previous step, and press
the OK button ,the last image appears on the screen .
■ Select the image that you want to print with the / buttons.
■ Select the [Print Num] (up to 99) with the / buttons.
■ After selecting the desired image and printing number,
press the OK button to confirm.
■ To exit from the menu, press the button.
4. Select [Print] with the buttons, and press the OK
button to start printing.
5. The printing starts.
■ The [PRINTING] will be displayed temporarily, reminding
you that the printing procedure is finished.
■ If a print error is detected, the [PRINTERROR] will be
displayed.
■ The image printing may be f ailed if the power to t he camera is cut off.
■ For servic e, support and warr anty information vis it www.polaroid. com.
■ "Polaroi d" and “Polaroid an d Pixel” are tradem arks of Polaroid Corpo ration, Waltham, MA, USA .
PRIN TI NG
Sele ct
00
Prin t Nu m
OK Set
Polaroid a544 Digital Camera User Gu ide
www.polaroid.com
Page 42

EN-41
"Polaroid" , "Polaroid and Pixel" and “iZone” are trademarks of PLR IP Holdings, LLC, used under license.
Polaroid a544 Digital Camera User Gu ide
www.polaroid.com
Page 43

Part No. :U MA544US0 01
 Loading...