

Page 1

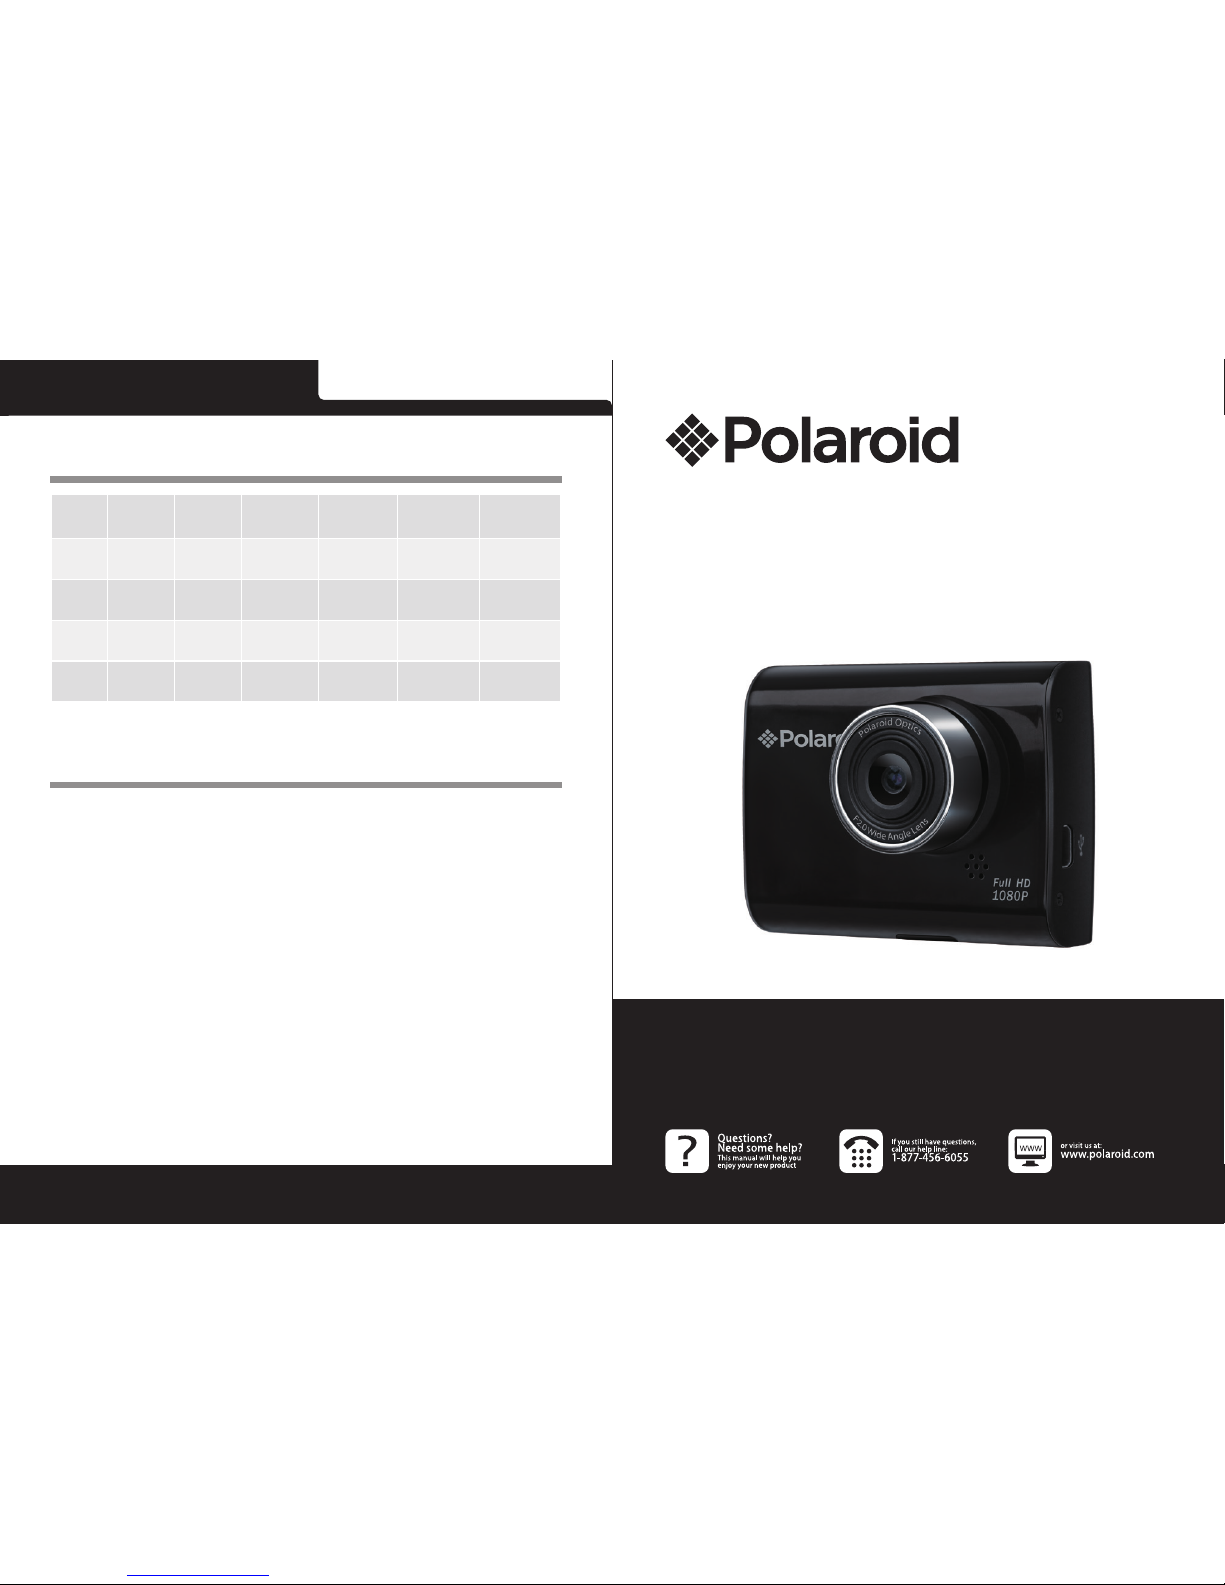
FHD Driving Recorder
C201
Quick Start Guide
Page 2

Polaroid ● C201
1. Packing List
1. Polaroid Driving Recorder 4. USB cable 7. Warranty card
2. Suction mount 5. 3M mount
3. Car power adaptor 6. Quick start guide
2. Device Overview
LED light Record/Menu button
Lens Power/Mode Button
SD card slot MIC
USB port Up button
Reset button Down button
LCD display Speaker
1 7
2 8
3 9
4 10
5 11
6 12
EN-1
Page 3
Polaroid ● C201 Polaroid ● C201
Getting started
3. Power on/Power off
● Position the device in the vehicle using the suction mount
or 3M mount and press the Power button to turn it on. To
power off the device press the button with 3 seconds.
● You can also connect the device to the car power adapter.
It will automatically turn on and start recording when the
car engine starts. When the engine stops, the device will
automatically save the last le and turn off.
4. Charging
● Using the car changer: Connect the device to the car
charger. The device will start charging after the car engine
is turned on. The device will automatically turn on and
start recording. When the engine stops, the device will
automatically save the last le and turn off.
● Normally it takes approximately 2-3 hours to fully charge
the device. Operating the device while charging with the AC
adapter may extend the time of full charge.
5. Inserting the SD-card
● Before starting video recording, please insert a SD card (not
included) into the SD card slot in the device.
● To extract the SD card slightly push it inside the device, and
remove.
Note:
After inserting the SD card the device will automatically recognize
it as default storage and all the data will be saved on this card.
6. Recording
● To start recording make sure the Video Mode is selected.
Press theRecord button to start recording. The recorded
files are saved on SD Card. To stop recording, press
Record button again or stop the car engine if the device is
connected to the car charger.
● With car charger connected the device will automatically
turn on and start recording.
Note:
Press MODE button to lock current le during recording and the
locked le won’t be replace until a manual unlock.
7. Taking pictures
● To take a picture make sure the Picture Mode is selected.
Press the Record button to take a photo. Taken photos are
saved on SD Card.
● To zoom in/out press the navigation button up/down.
Settings
8. Video Menu Settings
● Turn on the device and make sure the Video mode is
selected.
Note:
To select Video or Picture Mode press the Mode button. The
appropriate symbol will be displayed in the top right corner of the
screen.
● Press Menu button with 3 seconds to enter Settings. Press
the navigational button up/down to select the option and
press Record button to enter, and then press up/down to
set the value, and then press Record button to conrm the
setting.
EN-2 EN-3
Page 4

Polaroid ● C201 Polaroid ● C201
● Press Menu button with 3 seconds to enter Settings. Press
the navigational button up/down to select which menu you
want to set.
● Press Menu button with 3 seconds again to exit from menu
setting.
The following options list is available in the Video menu:
● Movie Mode: Select the video image size from 1920x1080
(30 fps), 1280x720 (60 fps), 1280x720 (30 fps), 640x480 (30
fps).
● Movie Quality: Select the video quality.
● Movie Clip Time: Select one of the values to set the video
duration.
● Sound Record: Select to turn the microphone on or off.
● MIC Sensitivity: Select the sensitive of the Mic.
● Scene: Select the video mode (such as auto, sports,
portrait, landscape or beach etc).
● Exposure: Select the exposure compensation (when the
device fails to identify the correct exposure automatically).
● White Balance: Select the correct white balance according
to the lighting conditions.
● ISO Sensitivity: Set the ISO.
9. Picture Menu settings
Turn on the device and make sure the Picture mode is selected.
● Still Image Size: Select the image size from 14M, 12M, 8M,
5M, 3M, 2M, 1.2M and VGA.
● Still Quality: Select the picture quality.
● Scene: Select the video mode (such as auto, sports,
portrait, landscape or beach etc).
● Exposure: Select the exposure compensation (when the
device fails to identify the correct exposure automatically).
● White Balance: Select the correct white balance according
to the lighting conditions.
● ISO Sensitivity: Set the ISO.
● Color: Select the special color to apply to the image.
● Effect: Select the special effect to apply to the image.
10. Playback settings
The following settings are available:
● Volume: Select the playback volume and tone volume on
key press.
● Delete: To select the le you want to delete.
● Protect: To protect or unprotect les.
11. Media Tool
The following settings are available:
● Format SD-card: Select to format the SD card.
Important note:
Once you select YES and press the Record button the card will
be formatted without warning. All data on it will be erased.
● SD-Card INFO: SD-Card storage status.
12. General settings
● Beep: Select the Beep Sound on or off.
● Power Off: Select the time of automatic power off when the
device is not in use.
● Clock Settings: Install the current time.
● Date Format: Install the date format.
● Stamp: Install the information show on the recordings or
pictures.
● Language: Select the desired language from the list.
● Flicker: Change frequency to remove the blinking effect
when recording under articial lighting.
● LCD Rotate: The device can record video in 2 different
positions – when the camera is on the top (like on the
scheme in section 2) and when it is in upside down
position. To make sure the video le is not played upside
down, select LCD Rotate – On.
EN-4 EN-5
Page 5

Polaroid ● C201 Polaroid ● C201
● LCD Power Save: Select the time for LCD turn off
automatically during recording to save power.
● Protect Level: Select to set the sensitive of G-sensor.
● Motion Detection: Select to set the sensitive of Motion
Detection.
● Reset Setup: Select to restore default system settings.
● Night mode: Select the mode to be night or not.
● FW Version: Displays the current system version.
13. USB connection
To download registered files on your PC/notebook, please,
connect the device to the PC or notebook via USB-cable
provided. After connecting the device to the PC, the device will
appear in “My computer” as the removable disk. All registered
les are stored in DCIM folder, videos are stored in AVI format,
and the pictures are stored in JPG format. You can now
download the les from the device.
Notes:
● Please insert the SD card before recording. SD card is not
included in the package.
● When the SD card is out of memory, it will automatically
erase the oldest les and start recording from the beginning
(only if the Recycle option is activated).
Safety precautions
Please observe all safety precautions before using Polaroid
C201. Please follow all procedures outlined in this manual to
correctly operate the device.
● Do not attempt to disassemble or alter any part of the device
that is not described in this guide.
● Do not place the device in contact with water or any other
liquids. The device is NOT designed to be liquid proof of
any sort.
● In the event of liquid entry into interior of device, immediately
disconnect the device from the computer. Continuing use
of the device may result in re or electrical shock. Please
consult your product distributor or the closest support
center.
● To avoid risk of electrical shock, do not connect or
disconnect the device with wet hands.
● Do not place the device near a heat source or directly
expose it to ame or heat.
● Never place the device in vicinity of equipments generating
strong electromagnetic elds. Exposure to strong magnetic
elds may cause malfunctions or data corruption and loss.
Technical Specications
Recording
resolution
1920x1080 (30 fps), 1280x720(60 fps),
1280x720(30 fps), 640x480 pixels(30 fps)
Video format AVI
Picture format JPG
Power source Rechargeable battery(inside) and car
charger
Interfaces USB, SD card (Supports max 32GB, high-
speed SD card recommended.)
Microphone Built-in
Operating
temperature
0~ 45°C
EN-6 EN-7
Page 6
Polaroid ● C201
Video Storage Capacity
Storage
card(G)
H.264
1080P
H.264
720P
640X480P
(VGA)
2560X1920
(5M)
3264X2448
(8M)
4000X3000
(12M)
8G 100min 100min 350min 4600
photos
2800
photos
1850
photos
4G 50min 50min 160min 2200
photos
1380
photos
900
photos
2G 25min 25min 80min 1100
photos
700 photos 450
photos
1G 13min 13min 40min 550
photos
350 photos 230
photos
Disclaimer
If device has been damaged by liquid (for example, water, coffee
or a soft drink, etc.), the service for such liquid damage is not
covered by the Polaroid one (1) year limited warranty.
We are NOT responsible for any damages or consequences
damages by charging the product other than our original charger.
As the Polaroid products are constantly updated and improved,
your device may have a slightly different appearance or modied
functionality than presented in this Quick Start Guide.
フル HD ドライブレコーダー
C201
クイックスタートガイド
EN-8
Page 7

Polaroid ● C201
1. 内容物
1. Polaroid ドライブレコーダー 4. USB ケーブル 7. 保証カード
2. サクションマウント 5. 3M ステッカーマウント
3. カーチャージャー 6. クイックスタートガイド
LED ライト 録画 / メニューボタン
レンズ 電源 / モードボタン
SD カードスロット マイク
USB ポート アップボタン
リセットボタン ダウンボタン
LCD ディスプレイ スピーカー
1 7
2 8
3 9
4 10
5 11
6 12
2. デバイス概要
JP-1
Page 8

Polaroid ● C201 Polaroid ● C201
はじめに
3. 電源 ON/OFF
●
サクションマウントあるいは 3M ステッカーマウントを使
って車内に設置し、電源ボタンを押して電源を ON にして
ください。電源を OFF にするには、電源ボタンを 3 秒間押
してください。
●
カーチャージャーに接続した場合、車のエンジンがかかる
と、自動的に電源が ON になって録画が開始されます。エ
ンジンが停止すると、自動的に最後のファイルが保存され、
電源が切れます。
4. 充電
●
カーチャージャーを使う : 本機をカーチャージャーに接続し
ます。車のエンジンがスタートすると、自動的に充電を開
始します。自動的に電源が入り、録画が開始されます。エ
ンジンが停止すると、自動的に最後のファイルが保存され、
電源が切れます。
●
完全に充電するには、通常約 2-3 時間かかります。AC アダ
プターを使って充電している時にデバイスを操作すると、
完全な充電に更に時間が必要になる可能性があります。
5. SD カードの挿入
●
ビデオ録画を開始する前に、SD カード ( 別売 ) をデバイス
の SD カードスロットに挿入してください。
●
SD カードを取り出すには、カードを軽くデバイスの中へ押
してください。取り出すことができます。
注意 :
SD カードを挿入すると、自動的に SD カードがデフォルトのス
トレージとして認識され、すべてのデータが SD カードに保存さ
れることになります。
6. 録画
●
録画を開始する際は、ビデオモードが選択されていること
を確認してください。録画を開始するには、録画ボタンを
押してください。録画されたファイルは、SD カードに保
存されます。録画を停止するには、録画ボタンを再度押す
か、本機がカーチャージャーに接続されている場合は車の
エンジンを停止してください。
● カーチャージャーが接続されると、自動的に電源が ON に
なり、録画を開始します。
注意 :
モードボタンを押すと、録画中現在のファイルをロックします。
ロックされたファイルは、手動でロック解除されない限り置換
されません。
7. 写真撮影
● 写真を撮影する際は、写真モードが選択されていることを
確認してください。写真を撮影するには、録画ボタンを押
してください。撮影された写真は、SD カードに保存され
ます。
JP-2 JP-3
Page 9

Polaroid ● C201 Polaroid ● C201
● ズームイン / アウトするには、ナビゲーションボタンを上
下させてください。
設定
8. ビデオメニュー設定
電源を ON にして、ビデオモードが選択されていることを確認
してください。
注意 :
ビデオ / 写真モードを選択するには、モードボタンを押してく
ださい。画面の右上に適切なマークが表示されます。
●
メニューボタンを 3 秒間押して、設定に入ります。ナビゲ
ーションボタンのアップ / ダウンを押して、オプションを
選択します。録画ボタンを押して入り、アップ / ダウンを
押して値を設定します。設定後、録画ボタンを押して設定
を確定します。
●
メニューボタンを 3 秒間押して、設定に入ります。ナビゲ
ーションボタンのアップ / ダウンを押して、設定するメニ
ューを選択します。
●
メニュー設定を終了には、メニューボタンを再び 3 秒間押
してください。
ビデオメニューでは、以下のオプションを設定することができ
ます :
●
動画モード :
動画 の画 像サイ ズ を 1920x1080 (30 fps)、
1280x720 (60 fps)、1280x720 (30 fps)、640x480 (30 fps) か
ら選択します。
●
動画画質 :
動画の画質を選択します。
●
動画クリップ時間 :
動画の持続時間を設定する値を一つ選
択します。
●
録音 :
マイクを ON にするか OFF にするかを選択します。
●
マイク感度 :
マイクの感度を選択します。
●
シーン :
ビデオ―モードを選択します ( オート、スポーツ、
ポートレート、風景、ビーチなど )。
●
露出 :
露出補正を選択します ( カメラが自動的に正しい露出
を認識するのに失敗する場合 )。
●
ホワイトバランス :
光の状態に応じて、正しいホワイトバ
ランスを選択します。
●
ISO 感度 :
ISO を設定します。
9. 写真メニュー 設定
電源を ON にして、写真モードが選択されていることを確認し
てください。
●
静止画像サイズ :
画像 サ イズ を 14M、12M、8M、5M、
3M、2M、1.2M、VGA から選択します。
●
静止画像画質 :
写真の画質を選択します。
●
シーン :
ビデオモードを選択します ( オート、スポーツ、ポ
ートレート、風景、ビーチなど )。
●
露出 :
露出補正を選択します ( カメラが自動的に正しい露出
を認識するのに失敗する場合 )。
●
ホワイトバランス :
光の状態に応じて、正しいホワイトバ
JP-4 JP-5
Page 10

Polaroid ● C201 Polaroid ● C201
ランスを選択します。
●
ISO 感度 :
ISO を設定します。
●
色 :
その画像に適用する特別な色を選択します。
●
効果 :
その画像に適用する特別な効果を選択します。
10. 再生設定
以下の設定が利用可能です :
●
音量 :
再生音量を選択します。キーを押して音量を調整し
ます。
●
削除 :
削除するファイルを選択します。
●
保護 :
保護されていないファイルを保護します。
11. メディアツール
以下の設定が利用可能です :
●
SD カードフォーマット :
SD カードのフォーマットを選択
します。
重要 :
「はい」を選んで録画ボタンを押すと、カードは警告なくフォ
ーマットされ、全データが消去されます。
●
SD カード情報 :
SD カードのストレージステータスを表示
します。
12.
一般設定
●
ビープ :
ビープ音の ON/OFF を選択します。
●
電源 OFF:
デバイスが使用されていない時に自動で電源が切
れる時間を選択します。
●
時計設定 :
現在の時刻を設定します。
●
日付フォーマット :
日付のフォーマットを設定します。
●
スタンプ :
録画や写真に表示される情報を設定します。
●
言語 :
リストから希望する言語を選択します。
●
フリッカー :
人工光の下での録画中のちらつきを低減する
ために、周波数を変更します。
●
LCD 回転 :
本機はビデオを 2 つの異なるポジションで録画
できます。カメラが上にある状態 ( セクション 2 の図参照 )
と、上下逆のポジションです。ビデオファイルが上下逆に
再生されないようにするには、LCD 回転で ON を選択して
ください。
●
LCD 省電力 :
節電のため録画中に自動的に LCD が OFF にな
る時間を選択します。
●
保護レベル :
G センサーの感度設定を選択します。
●
モーション検知 :
モーション検知の感度設定を選択します。
●
リセット設定 :
デフォルトシステム設定を回復するための
設定を行います。
●
夜間モード :
夜間かどうかのモードを選択します。
●
FW バージョン :
現在のシステムのバージョンを表示しま
す。
13. USB 接続
記録されたファイルを PC/ ノートブックにダウンロードするに
は、本機を付属の USB ケーブルで PC あるいはノートブックに
接続してください。PC に接続すると、「マイコンピューター」
にリムーバルディスクとして表示されます。記録された全ファ
JP-6 JP-7
Page 11

Polaroid ● C201 Polaroid ● C201
イルは DCIM フォルダに保存され、動画は AVI フォーマットで
保存されます。写真は JPG フォーマットで保存されます。これで、
本機からファイルをダウンロードできます。
注意 :
●
録画前に、SD カードを挿入してください。SD カードは別
売です。
●
SD カードがいっぱいになると、自動的にもっとも古いファ
イルが消去され、最初から録画が開始されます ( リサイク
ルオプションが有効になっている場合のみ )。
安全上の注意
Polaroid C201 をご使用になる前に、安全上の注意をすべてご確
認ください。本マニュアルに記載のすべての手順に従い正しく
お使いください。
●
このガイドに記載されていないような分解や部品の変更を
行わないでください。
●
水などの液体に接触するような場所に本機を置かないでく
ださい。本機は防水などの機能は備えていません。
●
本機内部に液体が入った場合、すぐにコンピューターから
取り外してください。使用を継続すると、発火や感電を生
じる可能性があります。お使いの製品の販売店あるいは最
寄りのサポートセンターにご相談ください。
●
感電のリスクを避けるため、濡れた手で本機を接続したり
取り外したりしないでください。
●
熱源の近くに本機を置かないようにしてください。また、
直接炎や熱にさらさないようにしてください。
●
本機を強力な電磁場を発生させる装置の近くに決して置か
ないようにしてください。強力な電磁場にさらすと、故障
やデータ破損・喪失の原因となる可能性があります。
技術的仕様
録画解像度
1920x1080 (30 fps), 1280x720(60 fps),
1280x720(30 fps), 640x480 pixels(30 fps)
動画フォーマット
AVI
写真フォーマット
JPG
電源
内蔵充電池およびカーチャージャー
インターフェース
USB、SD カ ード ( 最大 32GB サ ポ ート。
高速 SD カード推奨。)
マイク
内蔵
動作温度
0~ 45°C
JP-8 JP-9
Page 12

Polaroid ● C201
풀 HD 차량용 블랙박스
C201
퀵 스타트 가이드
ビデオストレージ容量
ストレ
ージカ
ード
(G)
H.264
1080P
H.264
720P
640X480P
(VGA)
2560X1920
(5M)
3264X2448
(8M)
4000X3000
(12M)
8G 100 分 100 分 350 分
4600
画像
2800
画像
1850
画像
4G 50 分 50 分 160 分
2200
画像
1380
画像
900
画像
2G 25 分 25 分 80 分
1100
画像
700
画像
450
画像
1G 13 分 13 分 40 分 550 画像 350 画像 230 画像
免責条項
本機が液体 ( 水、コーヒー、ソフトドリンクなど ) によって損傷
を受けた場合、そのような液体による損傷に対するサポートサ
ービスは Polaroid の 1 年限定保証の対象とはなりません。
私たちは、元の充電器以外の製品を充電することによって損害
または結果損害については責任を負いません。
Polaroid 製品は常に更新や改善が行われているため、お使いの
製品が、このクイックスタートガイドに示されているのとは少
し異なる外観あるいは修正された機能を備えている場合があり
ます。
JP-10
Page 13

Polaroid ● C201
1. 패킹 리스트
1. Polaroid 차량용 블랙박스 4. USB 케이블 7. 보증서
2. 흡착식 거치대 5. 3M 접착식 거치대
3. 차량용 충전기 6. 퀵 스타트 가이드
LED 조명 녹화 / 메뉴 선택 버튼
렌즈 전원 / 모드 선택 버튼
SD 카드 슬롯 마이크
USB 포트 업 버튼
재설정 버튼 다운 버튼
LCD 디스플레이 스피커
1 7
2 8
3 9
4 10
5 11
6 12
2. 장치 개요
KR-1
Page 14

Polaroid ● C201 Polaroid ● C201
시작
3. 전원 공급 / 차단
●
흡착식 거치대 또는 3M 접착식 거치대를 사용하여 장치를 차량
에 고정하고 전원 버튼을 누르면 장치가 켜집니다 . 장치의 전원
을 차단하려면 3 초 동안 전원 버튼을 누르고 있으십시오 .
●
장치를 차량용 충전기에도 연결할 수 있습니다 . 차량 엔진이 시
동할 때 장치에 전원이 자동 공급되어 녹화를 시작합니다 . 엔진
이 정지할 경우 , 장치가 최종 파일을 자동으로 저장하고 전원을
차단합니다 .
4. 충전
●
차량용 충전기 사용 : 장치를 차량용 충전기에 연결합니다 . 차량
이 시동이 켜진후 장치가 충전을 시작합니다 . 장치가 자동으로
켜지고 녹화를 시작합니다 . 엔진이 정지할 경우 , 장치가 최종
파일을 자동으로 저장하고 전원을 차단합니다 .
●
일반적으로 장치를 완전히 충전하는 데 대략 2-3 시간이 소요됩
니다 . AC 어댑터를 사용하여 충전하는 동안 장치를 작동하면
충전 시간이 더 늘어날 수 있습니다 .
5. SD 카드 삽입
●
비디오 녹화를 시작하기 전에 SD 카드 ( 미불포함 ) 를 장치의
SD 카드 슬롯에 삽입하십시오 .
●
SD 카드를 약간 빼내 장치 내부로 밀어 넣은 다음 , 분리합니다 .
참고 :
SD 카드를 삽입한 후 장치가 이를 기본 저장 값으로 자동 인식하고
모든 데이터가 이 카드에 저장됩니다 .
6. 녹화
●
녹화를 시작하려면 비디오 모드를 선택해야 합니다 . 녹화 버튼
을 누르면 녹화가 시작됩니다 . 녹화된 파일이 SD 카드에 저장
됩니다 . 녹화를 중지하려면 기록 버튼을 다시 누르거나 장치가
차량용 충전기에 연결되어 있는 경우 차량 엔진을 정지시킵니
다 .
●
차량용 충전기와 연결되면 장치가 자동으로 켜지고 녹화를 시작
합니다 .
참고 :
녹화하는 동안 현재 파일을 잠금 설정하려면 모드 선택 버튼을 누르
십시오 . 수동 잠금 해제 기능을 설정할 때까지 잠금 설정 파일이 교체
되지 않습니다 .
7. 사진 촬영
●
사진을 촬영하려면 촬영 모드를 선택해야 합니다 . 사진을 촬영
하려면 녹화 버튼을 누르십시오 . 촬영된 사진이 SD 카드에 저
장됩니다 .
●
사진을 확대 / 축소하려면 검색 버튼을 위 / 아래로 누르십시오 .
KR-2 KR-3
Page 15

Polaroid ● C201 Polaroid ● C201
설정
8. 비디오 메뉴 설정
장치를 켜고 비디오 모드를 선택합니다 .
참고 :
비디오 또는 촬영 모드를 선택하려면
모드 선택
버튼을 누르십시오 .
화면 오른쪽 상단 모서리 부분에 해당 기호가 표시됩니다 .
●
설정을 입력하려면
메뉴 선택
버튼을 누르십시오 . 옵션을 선택
하려면 검색 버튼을 위 / 아래로 누르고 녹화 버튼을 눌러 해당
옵션에 들어간 다음 , 왼쪽 / 오른쪽 버튼을 눌러 값을 설정하고
녹화 버튼을 눌러 설정을 확인합니다 .
●
설정을 입력하려면
메뉴 선택
버튼을 누르십시오 . 설정하고자
하는 메뉴를 선택하려면 검색 버튼을 왼쪽 / 오른쪽으로 누르십
시오 .
다음 옵션 목록은 비디오 메뉴에 제공되어 있습니다 .
●
영화 모드 :
1920x1080(30 fps), 1280x720(60 fps),
1280x720(30 fps), 640x480(30 fps) 에서 비디오 이미지 크
기를 선택합니다 .
●
영화 품질 :
비디오 품질을 선택합니다 .
●
영화 클립 시간 :
값 중 하나를 선택하여 비디오 재생 기간을 설
정합니다 .
●
음향 녹음 :
마이크를 온 / 오프하기 위해 선택합니다 .
●
마이크 감도 :
마이크 감도를 선택합니다 .
●
장면 :
비디오 모드 ( 예 : 자동 , 스포츠 , 초상 , 풍경 또는 해안
등 ) 를 선택합니다 .
●
노출 :
( 장치가 적절한 노출 값을 자동으로 식별하지 못할 경우 )
노출 보정 값을 선택합니다 .
●
화이트 밸런스 :
조명 조건에 따라 적절한 화이트 밸런스를 선
택합니다 .
●
ISO 감도 :
ISO 를 설정합니다 .
9. 촬영 메뉴 설정
장치를 켜고 촬영 모드를 선택합니다 .
●
정지 이미지 크기 :
14M, 12M, 8M, 5M, 3M, 2M, 1.2M 및
VGA 에서 이미지 크기를 선택합니다 .
●
정지 이미지 품질 :
사진 품질을 선택합니다 .
●
장면 :
비디오 모드 ( 예 : 자동 , 스포츠 , 초상 , 풍경 또는 해안
등 ) 를 선택합니다 .
●
노출 :
( 장치가 적절한 노출 값을 자동으로 식별하지 못할 경우 )
노출 보정 값을 선택합니다 .
●
화이트 밸런스 :
조명 조건에 따라 적절한 화이트 밸런스를 선
택합니다 .
●
ISO 감도 :
ISO 를 설정합니다 .
●
색상 :
이미지에 적용할 특수한 색상을 선택합니다 .
●
효과 :
이미지에 적용할 특수 효과를 선택합니다 .
KR-4 KR-5
Page 16

Polaroid ● C201 Polaroid ● C201
10. 재생 설정
다음과 같은 설정 기능이 제공되어 있습니다 .
●
볼륨 :
재생 볼륨과 키를 누를 때의 음조 볼륨을 선택합니다 .
●
삭제 :
삭제할 파일을 선택합니다 .
●
보호 :
파일을 보호하거나 보호 해제합니다 .
11. 미디어 도구
다음과 같은 설정 기능이 제공되어 있습니다 .
●
포맷 SD 카드 :
선택하여 SD 카드를 포맷합니다 .
중요 사항 :
‘예’를 선택하고 녹화 버튼을 누르면 경고 표시 없이 카드가 포맷됩니
다 . 카드 내의 데이터가 모두 삭제됩니다 .
●
SD 카드 정보 :
SD 카드 저장 상태 .
12. 일반 설정
●
버저음 :
버저음 사용 또는 해제 기능을 선택합니다 .
●
전원 차단 :
장치가 사용 중이지 않을 때 자동 전원 차단 시간을
선택합니다 .
●
클록 설정 :
현재 시간을 설정합니다 .
●
데이터 포맷 :
데이터 포맷을 설정합니다 .
●
스탬프 :
녹화 기록 또는 사진에 표시할 정보를 설정합니다 .
●
언어 :
목록에서 원하는 목록을 선택합니다 .
●
플리커 :
주파수를 변경하여 인공 조명 아래에서 녹화할 때 깜박
임 효과를 없앱니다 .
●
LCD 회전 :
이 장치는 카메라가 상단에 위치 ( 섹션 2 구조와 유
사 ) 할 때 그리고 상향 아래 위치에 있을 때 2 개의 다른 위치에
서 비디오를 기록할 수 있습니다 . 비디오 파일이 상향 아래에서
재생되지 않도록 하려면 LED 회전 – 온을 선택하십시오 .
●
LCD 절전 :
절전을 위해 녹화하는 동안 LCD 전원 차단 시간을
자동으로 선택합니다 .
●
LED 조명 :
전원 버튼을 통해 제어하는 LED 조명 켜짐 / 꺼짐 기
능을 설정할 때 선택합니다 . 선택하고 전원 버튼을 누르면 LED
가 켜지고 전원 버튼을 다시 누르면 LED 가 꺼집니다 .
●
보호 수준 :
G 센서의 감도를 설정할 때 선택합니다 .
●
모션 감지 :
모션 감지 감도를 설정할 때 선택합니다 .
●
재설정 셋업 :
기본 시스템 설정으로 복원할 때 선택합니다 .
●
야간 모드 :
이 모드를 선택하여 야간 설정 또는 주간 설정 기능
을 선택합니다 .
●
FW 버전 :
현재 시스템 버전을 표시합니다 .
13. USD 연결부
등록한 파일을 PC/ 노트북으로 다운로드하려면 제공된 USB 케이블
을 통해 장치를 PC 또는 노트북에 연결하십시오 . 장치를 PC 에 연결
한 후 , 장치가 분리 가능 디스크로 “내 컴퓨터”에 표시됩니다 . 등록
한 모든 파일은 DCIM 폴더에 저장되고 비디오는 AVI 형식으로 저장
되며 사진은 JPG 형식으로 저장됩니다 . 이제 장치에서 파일을 다운
로드할 수 있습니다 .
KR-6 KR-7
Page 17

Polaroid ● C201 Polaroid ● C201
참고 :
●
녹화하기 전에 SD 카드를 삽입하십시오 . 패키지에는 SD 카드가
포함되어 있지 않습니다 .
●
SD 카드의 메모리가 소모된 경우 , 카드가 가장 오래된 파일을
자동으로 삭제하고 시작 부분부터 녹화를 시작 ( 리사이클 옵션
을 활성화한 경우에만 해당 ) 합니다 .
안전 조치
Polaroid C201 을 사용하기 전에 모든 안전 조치를 준수하십시오 .
장치를 적절히 사용하려면 본 설명서에 개괄적으로 설명되어 있는 모
든 절차를 따르십시오 .
●
본 설명서에 설명되지 않은 장치 부품 분해 또는 개조 작업은 수
행하지 않아야 합니다 .
● 장치를 물이나 다른 액체와 접촉하지 않도록 하십시오 . 장치는
어떠한 종류의 액체에 대해 방수되도록 설계되지 않았습니다 .
●
장치 내부로 액체가 유입될 경우 , 컴퓨터에서 장치를 즉시 분리
하십시오 . 장치를 연속해서 사용하면 화재 또는 전기 쇼크가 발
생할 수 있습니다 . 제품 판매업체나 가장 가까운 지원 센터에
문의하십시오 .
●
전기 쇼크 위험을 방지하려면 젖은 손으로 장치를 연결하거나
분리하지 마십시오 .
●
장치를 열 제원 근처에 두거나 화염 또는 열에 직접 노출시키지
않아야 합니다 .
●
장치를 강력한 전자기장을 발생시키는 장비 부근에 위치시키지
마십시오 . 강력한 자기장에 노출되면 고장 또는 데이터 파손 및
손실이 야기될 수 있습니다 .
기술 사양
녹화 해상도
1920x1080 (30 fps), 1280x720(60 fps),
1280x720(30 fps), 640x480 픽셀 (30 fps)
비디오 형식
AVI
사진 형식
JPG
전원 공급장치
충전용 배터리 ( 내부 ) 및 차량용 충전기
인터페이스장치
USB, SD 카드 ( 최대 32GB 지원 , 고속 SD
카드 사용 권장 .
마이크
내장형
작동 온도
0~ 45° C
비디오 저장 용량
저장 카
드 (G)
H.264
1080P
H.264
720P
640X480P
(VGA)
2560X1920
(5M)
3264X2448
(8M)
4000X3000
(12M)
8G 100 분 100 분 350 분
4600
분
2800
분
1850
분
4G 50 분 50 분 160 분
2200
분
1380
분
900
분
2G 25 분 25 분 80 분
1100
분
700
분
450
분
1G 13 분 13 분 40 분 550 분 350 분 230 분
KR-8 KR-9
Page 18

Polaroid ● C201
면책 조항
액체 ( 예 : 물 , 커피 또는 청량 음료 등 ) 에 의해 장치가 손상된 경우 ,
이러한 액체 손상에 대한 서비스 범위는 Polaroid 의 1 제한 보증에
포함되지 않습니다 .
우리는 우리의 본래 충전기 이외의 다른 제품을 충전하여 손해 또는
결과의 손해에 대해 책임을지지 않습니다 .
Polaroid 제품이 지속적으로 업데이트 및 개선되므로 장치가 퀵 스타
트 가이드에 제시된 장치 또는 변경된 기능과 약간 다를 수 있습니다 .
Perakam Memandu Full HD
C201
Panduan Ringkas
KR-10
Page 19

Polaroid ● C201
1. Senarai Pembungkusan
1. Perakam Memandu Polaroid 4. Kabel USB 7. Kad jaminan
2. Lekap sedutan 5. Lekap pelekat 3M
3. Pengecas kereta 6. Panduan Mula Cepat
2. Gambaran Keseluruhan Peranti
Cahaya LED Butang Rakam / Menu
Lensa Butang Kuasa /Mod
Slot kad SD Mikrofon
Port USB Butang Atas
Butang Set Semula Butang Bawah
Paparan LCD penceramah
1 7
2 8
3 9
4 10
5 11
6 12
MY-1
Page 20

Polaroid ● C201 Polaroid ● C201
Bermula
3. Kuasa hidup/Kuasa mati
● Letakkan peranti dalam kenderaan menggunakan lekap
sedutan atau lekap pelekat 3M dan tekan butang Kuasa
untuk menghidupkannya. Untuk mematikan peranti, tekan
butang selama 3 saat.
● Anda juga boleh menyambungkan peranti ke pengecas
kereta. Ia akan hidup secara automatik dan mula merakam
apabila enjin kereta dihidupkan. Apabila enjin berhenti,
peranti akan menyimpan fail terakhir secara automatik dan
mati.
4. Mengecas
● Menggunakan pengecas kereta: Sambungkan peranti ke
pengecas kereta. Peranti akan mula mengecas selepas
enjin kereta dihidupkan. Peranti akan hidup secara
automatik dan mula merakam. Apabila enjin berhenti,
peranti akan menyimpan fail terakhir secara automatik dan
mati.
● Biasanya ia mengambil masa kira-kira 2-3 jam untuk
mengecas peranti sehingga penuh. Mengendalikan peranti
sambil mengecas dengan penyesuai AC boleh melanjutkan
masa cas penuh.
5. Memasukkan kad SD
● Sebelum memulakan rakaman video, sila masukkan kad SD
(tidak disertakan) ke dalam slot kad SD pada peranti.
● Untuk mengekstrak kad SD, tolaknya sedikit ke dalam
peranti dan keluarkan.
Nota:
Selepas memasukkan kad SD, peranti akan mengenal pastinya
secara automatik sebagai storan lalai dan semua data akan
disimpan pada kad ini.
6. Merakam
● Untuk memulakan rakaman, pastikan Mod Video dipilih.
Tekan butang Rakam untuk memulakan rakaman. Fail-
fail yang telah dirakam disimpan pada kad SD. Untuk
menghentikan rakaman, tekan butang Rakam sekali lagi
atau hentikan enjin kereta jika peranti bersambung dengan
pengecas kereta.
● Dengan pengecas kereta bersambung, peranti akan hidup
secara automatik dan mula merakam.
Nota:
Tekan butang MOD untuk mengunci fail semasa ketika rakaman
dan fail yang dikunci tidak akan digantikan sehingga buka kunci
manual.
7. Mengambil gambar
● Untuk mengambil gambar, pastikan Mod Gambar dipilih.
Tekan butang Rakam untuk mengambil foto. Foto-foto
yang diambil disimpan pada Kad SD.
● Untuk zum masuk/keluar, tekan butang navigasi ke atas/
bawah
Tetapan
8. Tetapan Menu Video
Hidupkan peranti dan pastikan mod Video dipilih.
Nota:
Untuk memilih Mod Video atau Gambar, tekan butang Mod.
Simbol yang sesuai akan dipaparkan pada sudut atas kanan
skrin.
● Tekan butang Menu untuk memasuki Tetapan. Tekan
butang navigasi ke atas/bawah untuk memilih pilihan dan
tekan butang Rakam untuk masuk dan kemudian, tekan
MY-2 MY-3
Page 21

Polaroid ● C201 Polaroid ● C201
kiri/kanan untuk menetapkan nilai dan kemudian, tekan
butang Rakam untuk mengesahkan tetapan.
● Tekan butang Menu untuk memasuki Tetapan. Tekan butang
navigasi ke kiri/kanan untuk memilih menu yang anda ingin
tetapkan.
Senarai pilihan berikut tersedia dalam menu Video:
● Mod Filem: Pilih saiz imej video daripada 1920x1080 (30
fps), 1280x720 (60 fps), 1280x720 (30 fps), 640x480 (30
fps).
● Kualiti Filem: Pilih kualiti video.
● Masa Klip Filem: Pilih satu daripada nilai-nilai untuk
menetapkan tempoh video.
● Rakam Bunyi: Pilih untuk menghidupkan atau mematikan
mikrofon.
● Kepekaan Mikrofon: Pilih kepekaan Mikrofon.
● Pemandangan: Pilih mod video (seperti auto, sukan, potret,
landskap atau pantai dll).
● Pendedahan: Pilih pemampasan pendedahan (apabila
peranti gagal untuk mengenal pasti pendedahan betul
secara automatik).
● Keseimbangan Putih: Pilih keseimbangan putih yang betul
berdasarkan kepada keadaan pencahayaan.
● Kepekaan ISO: Tetapkan ISO.
9. Tetapan Menu Gambar
Hidupkan peranti dan pastikan mod Gambar dipilih.
● Saiz Imej Pegun: Pilih saiz imej daripada 14M, 12M, 8M,
5M, 3M, 2M, 1.2M dan VGA.
● Kualiti Pegun: Pilih kualiti gambar.
● Pemandangan: Pilih mod video (seperti auto, sukan, potret,
landskap atau pantai dll).
● Pendedahan: Pilih pemampasan pendedahan (apabila
peranti gagal untuk mengenal pasti pendedahan betul
secara automatik).
● Keseimbangan Putih: Pilih keseimbangan putih yang betul
berdasarkan kepada keadaan pencahayaan.
● Kepekaan ISO: Tetapkan ISO.
● Warna: Pilih warna istimewa untuk digunakan pada imej.
● Kesan: Pilih kesan istimewa untuk digunakan pada imej.
10. Tetapan main semula
Tetapan berikut tersedia:
● Kelantangan: Pilih kelantangan main semula dan
kelantangan nada dengan menekan kekunci.
● Padam: Untuk memilih fail yang anda ingin padam.
● Lindung: Untuk melindung atau menyahlindung fail-fail.
11. Alat Media
Tetapan berikut tersedia:
● Format Kad SD: Pilih untuk memformat kad SD.
Nota Penting:
Sebaik sahaja anda memilih YA dan menekan butang rakam,
kad akan diformat tanpa amaran. Semua data di dalamnya akan
terpadam.
● INFO Kad SD: Status storan Kad SD.
12. Tetapan umum
● Bip: Pilih Bunyi Bip hidup atau mati.
● Kuasa Mati: Pilih masa kuasa mati automatik apabila
peranti tidak digunakan.
● Tetapan Jam: Pasang masa semasa.
● Format Tarikh: Pasang format tarikh.
● Cap: Pasang maklumat yang dipaparkan pada rakaman
atau gambar.
● Bahasa: Pilih bahasa yang dikehendaki daripada senarai.
● Kelipan: Ubah kekerapan untuk membuang kesan kelipan
ketika rakaman di bawah pencahayaan buatan.
● LCD Putar: Peranti boleh merakam video dalam 2
MY-4 MY-5
Page 22

Polaroid ● C201 Polaroid ● C201
kedudukan berbeza – semasa kamera di bahagian atas
(seperti pada skim dalam seksyen 2) dan semasa ia dalam
kedudukan terbalik. Untuk memastikan fail video tidak
dimainkan terbalik, pilih LCD Putar – Hidup.
● LCD Jimat Kuasa: Pilih masa untuk LCD mati secara
automatik ketika rakaman bagi menjimatkan kuasa.
● Cahaya LED: Pilih untuk menetapkan cahaya LED hidup
atau mati yang dikawal oleh butang kuasa. Sila pilih hidup,
kemudian tekan butang kuasa untuk menghidupkan LED,
tekan butang kuasa sekali lagi untuk mematikan LED.
● Tahap Perlindungan: Pilih untuk menetapkan kepekaan
G-sensor.
● Pengesanan Gerakan: Pilih untuk menetapkan kepekaan
Pengesanan Gerakan.
● Penyediaan Set Semula: Pilih untuk memulihkan tetapan
sistem lalai.
● Mod Malam: Pilih mod menjadi malam atau sebaliknya.
● Versi FW: Memaparkan versi sistem semasa.
13. Sambungan USB
Untuk memuat turun fail-fail berdaftar pada PC/buku nota anda,
sila sambungkan peranti ke PC atau buku nota melalui kabel
USB yang disediakan. Selepas menyambungkan peranti ke PC,
peranti akan muncul dalam “Komputer Saya” sebagai cakera
boleh dialih keluar. Semua fail berdaftar disimpan dalam folder
DCIM, video-video disimpan dalam format AVI dan gambargambar disimpan dalam format JPG. Anda kini boleh memuat
turun fail dari peranti.
Nota:
● Sila masukkan kad SD sebelum merakam. Kad SD tidak
disertakan dalam pakej.
● Apabila kad SD kehabisan memori, ia akan memadam fail-
fail paling lama secara automatik dan mula merakam sejak
mula (hanya sekiranya pilihan Kitar Semula diaktifkan).
Langkah-langkah Keselamatan
Sila perhatikan semua langkah keselamatan sebelum
menggunakan Polaroid C201. Sila ikut semua prosedur yang
telah digariskan dalam manual ini untuk mengendalikan peranti
dengan betul.
● Jangan cuba untuk menanggalkan atau mengubah
sebarang bahagian peranti yang tidak dihuraikan dalam
panduan ini.
● Jangan letakkan peranti bersentuhan dengan air atau
sebarang cecair lain. Peranti TIDAK direka bentuk untuk
menjadi kalis terhadap sebarang jenis cecair.
● Dalam keadaan cecair memasuki ruang dalaman peranti,
putuskan segera sambungan peranti dengan komputer.
Meneruskan penggunaan peranti boleh mengakibatkan
kebakaran atau renjatan elektrik. Sila rujuk pengedar
produk anda atau pusat sokongan terdekat.
● Untuk mengelak risiko renjatan elektrik, jangan sambungkan
atau putuskan sambungan peranti menggunakan tangan
yang basah.
● Jangan letakkan peranti berdekatan sumber haba atau
mendedahkannya secara langsung kepada bara atau haba.
● Jangan sekali-kali meletakkan peranti di sekitar peralatan
yang menghasilkan medan elektromagnetik kuat.
Pendedahan kepada medan magnetik yang kuat boleh
mengakibatkan peranti tidak berfungsi atau kerosakan dan
kehilangan data.
MY-6 MY-7
Page 23

Polaroid ● C201 Polaroid ● C201
Spesikasi Teknikal
Resolusi
rakaman
1920x1080 (30 fps), 1280x720(60 fps),
1280x720(30 fps), 640x480 piksel(30 fps)
Format video AVI
Format gambar JPG
Sumber kuasa
Bateri boleh dicas semula(di dalam) dan
pengecas kereta
Antara muka
USB, kad SD (Menyokong maksimum
32GB, kad SD berkelajuan tinggi
disyorkan.
Mikrofon Terbina dalam
Suhu operasi 0~ 45°C
Kapasiti Storan Video
Kad
Storan(G)
H.264
1080P
H.264
720P
640X480P
(VGA)
2560X1920
(5M)
3264X2448
(8M)
4000X3000
(12M)
8G 100min 100min 350min 4600
foto
2800
foto
1850
foto
4G 50min 50min 160min 2200 foto 1380 foto 900 foto
2G 25min 25min 80min 1100 foto 700 foto 450 foto
1G 13min 13min 40min 550 foto 350 foto 230 foto
Penaan
Jika peranti telah rosak akibat cecair (sebagai contoh, air, kopi
atau minuman ringan, dll.), perkhidmatan untuk kerosakan cecair
sedemikian tidak dilindungi oleh jaminan terhad dua (1) tahun
Polaroid.
Kami TIDAK bertanggungjawab atas sebarang kerosakan atau
akibat kerosakan dengan mengenakan produk-produk lain
daripada pengecas asal kami.
Oleh kerana produk-produk Polaroid sentiasa dikemas kini dan
dipertingkatkan, peranti anda mungkin mempunyai penampilan
yang sedikit berbeza atau kefungsian yang diubah suai
berbanding apa yang dipersembahkan dalam Panduan Mula
Cepat ini.
MY-8 MY-9
Page 24

全高清行車記錄儀
C201
快速使用指南
Page 25

Polaroid ● C201 Polaroid ● C201
1. 産品和配件清單
1. Polaroid 行車記錄儀 4. USB 線 7. 保修卡
2. 吸盤支架 5. 3M 膠支架
3. 車載充電器 6. 快速使用指南
2. 産品線框圖
LED 燈 錄像 / 菜單鍵
鏡頭 電池 / 模式鍵
SD 卡槽 麥克風
USB 接口 向上鍵
複位鍵 向下鍵
顯示屏 喇叭
1 7
2 8
3 9
4 10
5 11
6 12
MY-12 TC-1
Page 26

Polaroid ● C201 Polaroid ● C201
入門指南
3. 開 / 關機
●
用吸盤支架或 3M 膠支架將設備裝於車內,按電源鍵開機。
長按電源鍵 3 秒關機。
●
還可以將設備連接車載充電器,汽車發動後自動開機並開始
錄影。汽車引擎停止運作時,設備會自動保存最後錄制的文
檔並自動關機。
4. 充電
●
使用車載充電器:連接車載充電器,汽車引擎發動後,設備
即開始充電,設備同時自動開啓並錄像。引擎停止運作時,
停止充電,設備會自動保存最後的文檔,並自動關機。
●
設備充電通常需要約 2-3 個小時,一邊使用設備一邊通過電
源適配器充電可能會延長充電時間。
5. 插入 SD
卡
●
開始錄像前,請先插入 SD 卡(未配備)。
●
取出 SD 卡時,請輕輕將其往設備內部方向推入,然後取出。
備注:
插入 SD 卡後,設備會自動將其識別為默認存儲,所有的數據將會
存儲在這張卡上。
6. 錄像
●
開始錄像前,請確保已選擇錄像模式。按下錄像按鈕,開始
錄像。錄像文件保存在 SD 卡上。若需停止錄像,再次按下
錄像按鈕;默認設置如果設備連接到車載充電器的話,汽車
引擎停止後會自動停止錄像。
●
若設備連接到車載充電器,汽車引擎開始時會自動開機,並
開始錄像。
備注:
錄像過程中,可按模式鍵鎖定當前文件。手動解鎖前,被鎖定的
文件不會被替換。
7. 拍照
●
拍照前,請確保已選擇拍照模式,再按錄像按鈕進行拍照。
照片會保存在 SD 卡上。
●
若需放大 / 縮小圖片,可按向上 / 向下鍵調節。
設置
8. 視頻菜單設置
開機選擇錄像模式。
備注 :
如要選擇或切換錄像、拍照模式,請按模式鍵切換,屏幕右上解
會顯示相應的圖標。
●
長按菜單鍵 3 秒進入菜單設置,按向上 / 向下鍵可進行子菜
單選擇,按 OK 鍵進入設置或確認。
TC-2 TC-3
Page 27

Polaroid ● C201 Polaroid ● C201
●
按模式鍵可進行主菜單(錄影模式 / 拍照 / 播放 / 媒體工具
/ 一般設定)切換,按向上 / 向下鍵可進行子菜單選擇,按
OK 鍵進入設置。
●
長按菜單鍵 3 秒可退出菜單設置。
視頻菜單選項如下:
●
錄影模式 : 選擇視頻大小,如全高清 30fps(1920x1080)、
高 清 60fps(1280x720)、 高 清 30fps(1280x720)、
VGA 30fpa(640x480)。
●
錄影品質 : 選擇設置錄像爲超高品質或高品質。
●
單段影片時間 : 選擇設置影片分段時間。
●
錄音 : 選擇設置錄像時開啓或關閉麥克風。
●
MIC 靈敏度 : 選擇設置麥克風的靈敏度爲標準或爲低。
●
場景選擇 : 選擇設置錄像場景如自動、運動、人像、風景、黃昏、
雪景或沙灘等。
●
曝光調整 : 選擇設置錄像時曝光補償(用於設備無法辨別進
行自動正確曝光時)。
●
白平衡 : 根據光照條件選擇錄像時適當的白平衡。
●
感光度 : 選擇設置感光度。
9. 拍照菜單設置
開機長按菜單鍵進入菜單設置後,按模式鍵切換到拍照菜單設置。
視頻菜單選項如下:
●
照片解析度 : 選擇設置照片大小,如 14M, 12M, 8M, 5M,
3M, 2M, 1.2M、VGA。
●
照片品質 : 選擇設置照片品質。
●
場景選擇 : 場景拍照場景如自動、運動、人像、風景、黃昏、
雪景或沙灘等。
●
曝光調整 : 選擇設置拍照曝光補償(用於設備無法辨別進行
自動正確曝光時)。
●
白平衡 : 根據光照條件選擇拍照時適當的白平衡。
●
感光度 : 選擇設置感光度。
●
顔色 : 選擇設置照片顔色。
●
效果 : 選擇設置拍照效果。
10. 播放菜單設置
播放菜單選項如下:
●
音量 : 選擇設置播放時的音量。
●
刪除 : 選擇刪除單個檔案或是全部檔案。
●
保護 : 選擇保護或解除保護單個檔案或全部檔案。
11. 媒體工具
媒體工具菜單選項如下:
●
格式化 SD 卡 : 選擇格式化 SD 卡。
重要提醒 :
進入格式化 SD 卡選擇並選擇 “ 是 ” 之後,SD 卡會即刻被格式化,
所有的文件都會被刪除。
●
SD 卡資訊:了解 SD 卡存儲狀態。
12. 一般設定
TC-4 TC-5
Page 28

Polaroid ● C201 Polaroid ● C201
●
按鍵音 : 選擇開啓或關閉按鍵音。
●
自動關機 : 選擇設置在待機狀態下,自動關機的時間。
●
時鐘設置 : 設置時間。
●
日期格式 : 選擇日期顯示格式。
●
戳記格式 : 選擇設置錄像或照片上顯示日期、型號信息。
●
語言 : 選擇設置語言。
●
閃爍頻率 : 選擇設置感光器件的掃描頻率,適應市電照明的
頻率。
●
影像翻轉 : 選擇設置圖像是否翻轉倒置。
●
螢幕省電 : 選擇設置在錄像過程中,自動關屏的時間。
●
移動偵測 : 選擇設計移動偵測的靈敏度。
●
系統重設 : 選擇恢複系統默認設置。
●
夜景模式 : 選擇開啓或關閉夜間模式。
●
軟體版本 : 查看目前系統版本號。
13. USB 連接
若需将您的文件拷貝到個人電腦 / 筆記本電腦,則用配備的 USB
線將設備連接到個人電腦或筆記本電腦。將設備連接到電腦後,
設備將在 “ 我的電腦 ” 中出現可移動磁盤。所有寄存文件都存儲在
DCIM 文件夾中,視頻存儲為 AVI 格式,圖片存儲為 JPG 格式,現
在您可以從設備中拷貝文件了。
注意:
錄像前請先插入 SD 卡,包裝內不包含 SD 卡。
SD 卡內存滿後,將會繼續錄像並自動複蓋掉最早的錄影文件(循
環錄影設置爲開啓,即單段影片時間設置不是 “O” 時)。
安全措施
使用 Polaroid C201 前,請仔細閱讀所有的安全措施並遵守本手冊
規定的所有程序,正確操作設備。
●
如本指南未說明,請勿拆卸或改動本産品的任何設備或部件。
●
該産品爲非防水設計,請勿使設備接觸水及其他液體。
●
若有液體進入設備內部,應立即斷掉設備電源,繼續使用設
備會可能會導致起火或漏電,屆時請向您購買本產品的經銷
商或離您最近的服務中心諮詢處理。
●
爲避免觸電危險,請勿用濕手操作連接或斷開設備。
●
請勿將設備靠近熱源或與火焰或高溫接觸。
●
請勿將設備靠近產生強大電磁場的設備。與強磁場接觸可能
會導致發生故障或數據損壞和丟失。
技術規格
錄影像素
1920x1080 (30 幀 ), 1280x720(60 幀 ),
1280x720( 幀 ), 640x480 픽셀(30 幀 )
錄像格式
AVI
圖片格式
JPG
電源
內置可充電電池、車載充電器
接口
USB 接口、SD 卡槽(最大支持 32GB,
建議用高速卡)
麥克風
內置
工作溫度
0~ 45° C
TC-6 TC-7
Page 29

Polaroid ● C201
錄像、拍照存儲容量參照表
儲存卡
(G)
H.264
1080P
H.264
720P
640X480P
(VGA)
2560X1920
(5M)
3264X2448
(8M)
4000X3000
(12M)
8G
100 分
鐘
100 分鐘 350 分鐘
4600
張
2800
張
1850
張
4G 50 分鐘 50 分鐘 160 分鐘
2200
張
1380
張
900
張
2G 25 分鐘 25 分鐘 80 分鐘
1100
張
700
張
450
張
1G 13 分鐘 13 分鐘 40 分鐘 550
張
350
張
230
張
免責聲明
●
若設備因為接觸液體(如水、咖啡、飲料等)而損壞,其維
修不包含在 Polaroid 一(1)年有限質保範圍內。
●
如果使用其他車載充電器導致設備損壞或其他損失,我司概
不負責。
●
由於 Polaroid 產品會不斷更新和改善,您所購買的産品可能
與本快速使用指南所述外觀或功能上稍有不同
全高清行车记录仪
C201
快速使用指南
TC-8
Page 30

Polaroid ● C201 Polaroid ● C201
1. 产品和配件清单
1. Polaroid 行车记录仪 4. USB 线 7. 保修卡
2. 吸盘支架 5. 3M 胶支架
3. 车载充电器 6. 快速使用指南
2. 产品线框图
LED 灯 录影 / 拍照 / 菜单键 /OK 键
镜头 电源 / 模式键
SD 卡槽 麦克风
USB 接口 向上键
复位键 向下键
显示屏 喇叭
1 7
2 8
3 9
4 10
5 11
6 12
TC-10 SC-1
Page 31

Polaroid ● C201 Polaroid ● C201
入门指南
3. 开 / 关机
●
用吸盘支架或 3M 胶支架将设备装于车内,按电源键开机。
长按电源键 3 秒关机。
●
还可以将设备连接车载充电器,汽车发动后自动开机并开始
录影。汽车引擎停止运作时,设备会自动保存最后录制的文
档并自动关机。
4. 充电
●
使用车载充电器:连接车载充电器,汽车引擎发动手,设计
即开始充电同时自动录影。引擎停止动作后,停止充电,设
计会自动保存最后的文档,并自动关机。
●
设计充电通常需要约 2-3 个小时,边使用设备边充电可能会
延长充电时间。
5. 插入 SD 卡
●
开始录影前,请先插入 SD 卡(未备配)。
●
取出 SD 卡时,请将 SD 卡轻轻往设备内部推入,然后取出。
备注:
插入 SD 卡后,设备会自动将其识别为默认存储,所有的数据将会
存储知这张卡上。
6. 录影
●
开始录影前,请确保已选择录影模式。按录影键开始录影;
录影文件保存在 SD 卡上;若需停止录影,请再按录影键。
●
如设备在车内连接车载充电器,默认设置为汽车引擎开始时
自动开机并开始录影;汽车引擎停止后停止录影。
备注:
●
录影过程中,可按模式键开始保护文件,这时开始录制的文
件会被保护起来,被保护的文件不会被替换;再按模式键则
停止保护,这时开始录制的文件不会被保护并在 SD 卡满时
被自动删除替换;
●
如果所有的文件都被保护,则 SD 卡录满后录影自动停止;
如需继续录影,侧需换 SD 卡或把 SD 卡内文件手动解锁。
7. 拍照
●
拍照前,请确保已选择拍照模式,再按拍照键进行拍照,照
片会保存在 SD 卡上。
●
若需放大 / 缩小图片,可按向上 / 向下键调节。
设置
8. 视频菜单设置
开机,
选择录
像模式。
备注:
●
如要选择或切换录像、拍照模式,请按模式键切换,屏幕右
上角会显示相应的模式图标。
SC-2 SC-3
Page 32

Polaroid ● C201 Polaroid ● C201
●
长按菜单键 3 秒进入菜单设置,按向上 / 向下键可进行子菜
单选择,按 OK 键进入设置或确认。
●
按模式键可进行主菜单(录影模式 / 图像拍摄 / 回放 / 媒体工
具 / 常规设置)切換,按向上 / 向下键可进行子菜单选择,
按 OK 键进入设置或确认。
●
长按菜单键 3 秒可退出菜单设置。
视频菜单选项如下:
●
录影模式 : 选择视频大小,如全高清 30fps(1920x1080)、
高 清 60fps(1280x720)、 高 清 30fps(1280x720)、
VGA30fps(640x480)。
●
录影品质 : 选择设置超高品质或高品质录像。
●
单段影片时间 : 选择设置影片分段时间。
●
录音 : 选择设置录像时开启或关闭麦克风录音。
●
MIC 灵敏度 : 选择设置麦克风的灵敏度为标准或低。
●
场景选择:选择设置录像场景,如自动、运动、人像、风景、
黄昏、雪景或沙滩等。
●
曝光调整:选择设置录像时曝光补偿(用于设备无法自动辨
别进行正确曝光时)。
●
白平衡 : 根据光照条件选择录像时适当的白平衡。
●
感光度 : 选择设置感光度。
9. 拍照菜单设置
开机后长按菜
单键进入菜单设
置后,按模式键切换到图像拍摄菜
单设
置,菜
单选项
如下:
●
图像尺寸 : 选择设置照片大小,如 14M, 12M, 8M, 5M, 3M,
2M, 1.2M、VGA。
●
图像质量 : 选择设置照片品质。
●
场景选择:拍照场景如自动、运动、人像、风景、黃昏、雪
景或沙滩等。
●
曝光调整 : 选择设置拍照曝补偿(用于设备无法自动辨别正
确曝光时)。
●
白平衡 : 根据光照条件选择拍照时适当的白平衡。
●
感光度 : 选择设置感光度。
●
顔色 : 选择设置照片色调。
●
效果 : 选择设置拍照效果。
10. 回放菜单设置
回放菜
单选项
如下:
●
音量 : 选择设置播放时的音量。
●
刪除 : 选择刪除单个档案或全部档案。
●
保护 : 选择保护或解除保护单个档案或全部档案。
11. 媒体工具
媒体工具菜
单选项
如下:
●
格式化 SD 卡 : 选择格式化 SD 卡。
SC-4 SC-5
Page 33

Polaroid ● C201 Polaroid ● C201
重要提醒 :
进
入格式化 SD 卡并
选择
“ 是 ” 之后,SD 卡会即刻被格式化,所
有的文件都会删除。
●
SD 卡信息:了解 SD 卡存储状态。
12. 常规设置
●
按键音 : 选择开启或关闭按键声音。
●
自动关机 : 选择设置在待机状态下,自动关机的时间。
●
时钟设置:设置设备系统时间。
●
日期格式 : 选择日期显示格式。
●
戳記 : 选择设置录像或照片上显示日期、型号信息。
●
语言:选择设置语言。
●
闪烁频率 : 选择设置感光器件的扫描频率,以适应市电照明
的频率。
●
影像翻转 : 选择设置图像是否翻转倒置。
●
自动关屏 : 选择设置在录像过程中,省电自动关屏的时间。
●
移动侦测:选择设置移动侦侧的灵敏度。
●
系统重设 : 选择恢复系统出厂默认设置。
●
夜景模式 : 选择开启或关闭夜间模式。
●
固件版本:查看目前系统版本号。
13. USB 连接
若需将您的文件拷贝到个人电脑或笔记本电脑,则用配备的 USB
线將设备连接电脑或笔记本电脑,连
接后,“ 我的
电脑
” 中会出
现
可移动磁盘,所有寄存的文件都存储在 DCIM 文件夹中,视频文
件存储格式为AVI 格式,照片文件存
储为
JPG 格式。现在您可以
从设备中拷贝文件到电脑里了。
注意:
录影前请
先插入 SD 卡,包装内不包含 SD 卡。
系统默认,SD 卡存储满后,将会
继续录
影并自动覆盖掉最早的
录
影文件进行循环录影(循环录影设置为开启,即影片剪
辑时间设
置不是 “O”时)。
安全需知
使用 Polaroid C201 前,请仔
细阅读
所有的安全措施并遵守本手册
规
定的所有程序,正确操作设备。
●
如本指南未说明,请勿拆卸或改动本产品的任何配件或零部
件。
●
该产品为非防水设计,请避免使设备接触水或其他液体。
●
若有液体进入设备内部,应立即断掉设备的电源。继续使用
设备可能会导致起火或漏电,届时请向您购买本产品的经销
商或离您最近的服务中心咨询处理方法。
●
为避免触电危险,请勿用湿手操作或连接、断开设备。
●
请勿将设备靠近热源或与火焰、高温接触。
●
请勿将设备靠近产生强大电磁场的设备或环境,与强磁场接
触可能会导致发生故障或数据损坏、丢失。
SC-6 SC-7
Page 34

Polaroid ● C201 Polaroid ● C201
技术规格
录影像素
1920x1080 (30 幀 ), 1280x720(60 幀 ),
1280x720( 幀 ), 640x480 픽셀(30 幀 )
录影格式 AVI
图片格式 JPG
电源 內置 320mAh 可充电电池、车载充电器
接口
USB 接口、SD 卡槽(最大支持 32GB,
建议用高速卡)
麦克风 內置
工作溫度 0~ 45° C
录像、拍照存储容量参照表
储存卡
(G)
H.264
1080P
H.264
720P
640X480P
(VGA)
2560X1920
(5M)
3264X2448
(8M)
4000X3000
(12M)
8G
100 分
钟
100 分钟 350 分钟
4600
张
2800
张
1850
张
4G 50 分钟 50 分钟 160 分钟
2200
张
1380
张
900
张
2G 25 分钟 25 分钟 80 分钟
1100
张
700
张
450
张
1G 13 分钟 13 分钟 40 分钟 550 张 350 张 230 张
免责声明
●
若设备因为接触液体(如水、咖啡、饮料等)而损坏,其维
修不在 Polaroid 一(1)年有限质保范围内。
●
如果使用其他车载充电器导致设备损坏或其他损失,我司概
不负责。
●
由于 Polaroid 产品会不断更新和改善,您所购买的产品可能
与本快速使用指南所述外观或功能上稍有不同。
SC-8 SC-9
 Loading...