

Page 1
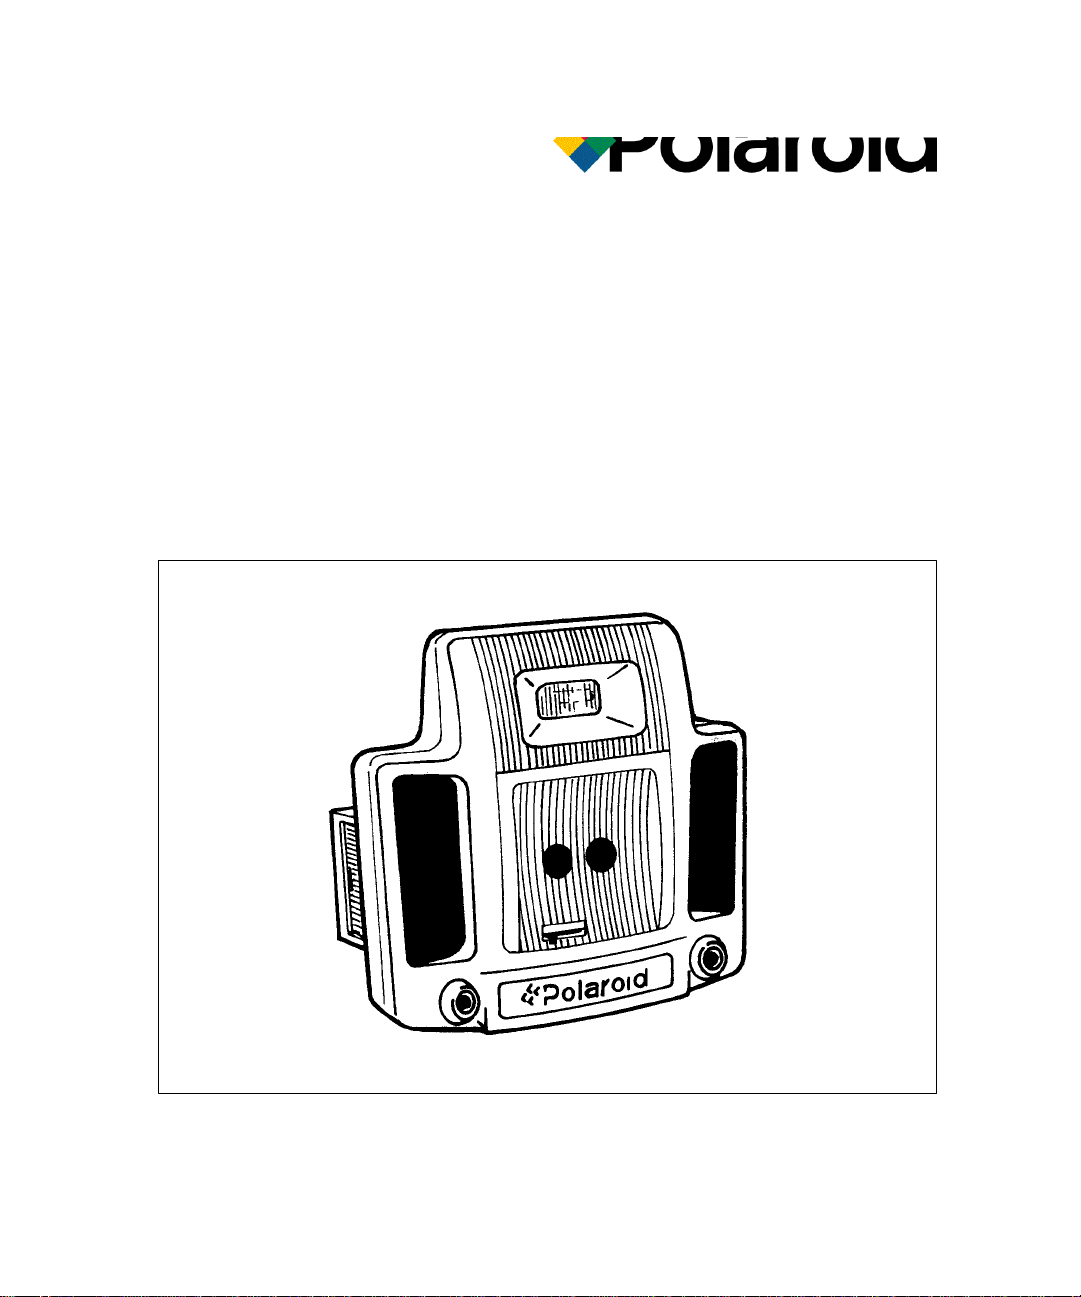
MiniPortrait Camera
Model 206
User Manual
Page 2

Radio and television interference
FCC Notice (U.S.A. only) This equipment has been tested and found to comply with the
limits for a Class B digital device, pursuant to Part 15 of the
FCC Rules. These limits are designed to provide reasonable
protection against harmful interference when the equipment is
operated in a residential environment.
This equipment generates, uses, and can radiate radio
frequency energy and, if not installed and used in accordance
with the instruction manual, may cause harmful interference
to radio communications.
However, there is no guarantee that interference will not occur
in a particular installation. If this equipment does cause
harmful interference to radio or television reception, which can
be determined by turning the equipment on and off, the user is
encouraged to try to correct the interference by one or more of
the following measures:
• Reorienting or relocating the receiving antenna of the radio
or television set
• Increasing the separation between this equipment and the
radio or television receiver
• Connecting this equipment to an outlet on a circuit different
from that to which the receiver is connected
• Consulting the dealer for help
Note: Changes or modifications not expressly approved by
the party responsible for compliance could void the user's
authority to operate this equipment.
EMI Notice (Canada) This Digital Apparatus does not exceed the Class B limits for
radio noise emissions from digital apparatus set out in the
Radio Interference Regulations of the Canadian Department
of Communications.
EMC Notice (Germany) Polaroid garantiert, daß dieses Gerat die nachstehend
aufgeführten Internationalen Standards erfülit:
•• die Vorschriften für RF-Störungen laut EN55022 Klasse B -
•• die Anforderungen für Funkschutz laut EN50082-1,
IEC 801-2, IEC 801-3, IEC 801-4.
i
Page 3

Table of contents
Certifications i
1 Setting up
Using this guide 1-1
Unpacking the camera 1-2
The camera 1-3
Setting up the work area 1-4
Setting up the camera 1-5
Setting the Timer 1-6
Technical Assistance 1-6
2 Loading film
Inserting fresh film 2-2
Removing spent film 2-4
Cleaning the rollers 2-5
Cleaning the film exit door 2-6
3 Taking a picture
Preparing the camera 3-2
Taking the photo 3-4
ii
Page 4

4 LED display functions
Making display selections 4-2
5 Troubleshooting
Correcting common errors 5-1
Polaroid Warranty and Service
MiniPortrait 206 Camera warranty S-1
MiniPortrait 206 Camera service S-1
Polaroid Offices and Service Centers S-2
iii
Page 5

Using this guide
1 Setting up
The Polaroid MiniPortrait 206 Camera lets you take instant
photos, quickly and easily, for use with ID systems. You can
use the camera to take ID photos for use on passports,
identification cards, credit cards, and many other small
formats.
This guide describes all the features of the Polaroid
MiniPortrait 206 Camera. It takes you from unpacking the box
to setting up the camera, through troubleshooting problems
you may have with photos.
This guide is written for the person who will be setting up and
running the camera. You do not need prior knowledge of
Polaroid cameras in order to use this new portrait camera.
1-1
Page 6
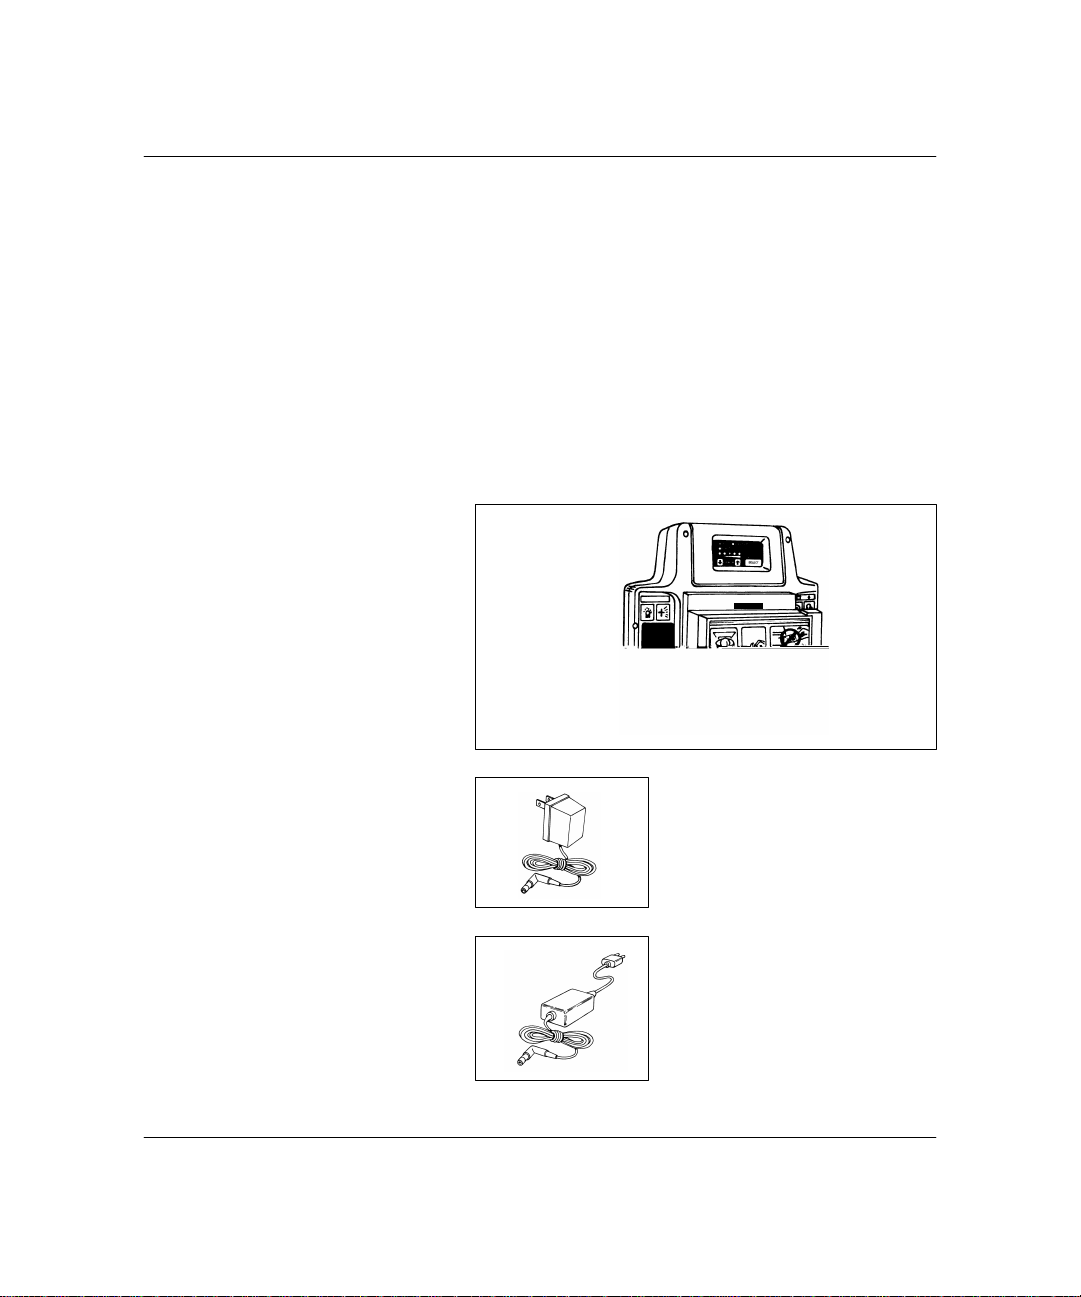
Unpacking the camera
The following figures illustrate the standard parts you will find
in the camera box, in addition to this manual. If you are
missing anything, contact your dealer or Polaroid Customer
Support at (800) 343-5000 immediately.
a MiniPortrait 206 Camera (a)
b an AC adapter
depending on the configuration ordered, you may receive
the wall-mounted unit for 110V (b) or, for all other
voltages, the table-top unit (c)
a
1-2
b
c
Page 7
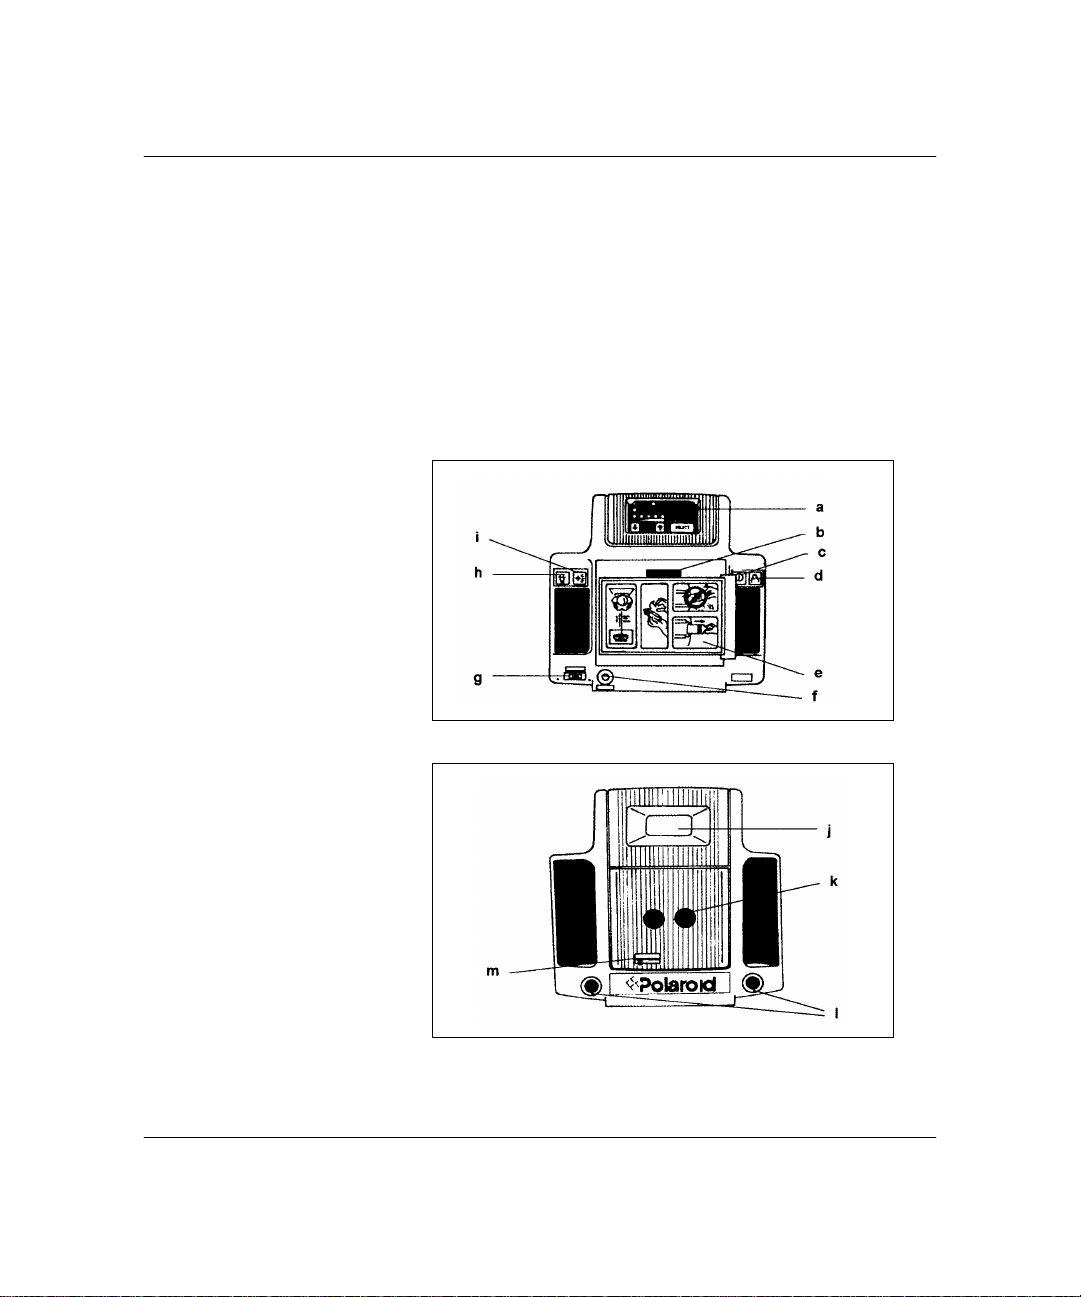
The camera
The following illustrates the parts of the camera.
a LED Display h Aiming button
b Timer i Face Brightener button
c On button j Flash
d Shutter button k Lenses
e Camera back l Aiming lights
f AC adapter socket m Aperture selector switch
g Aiming light selector
1-3
Page 8
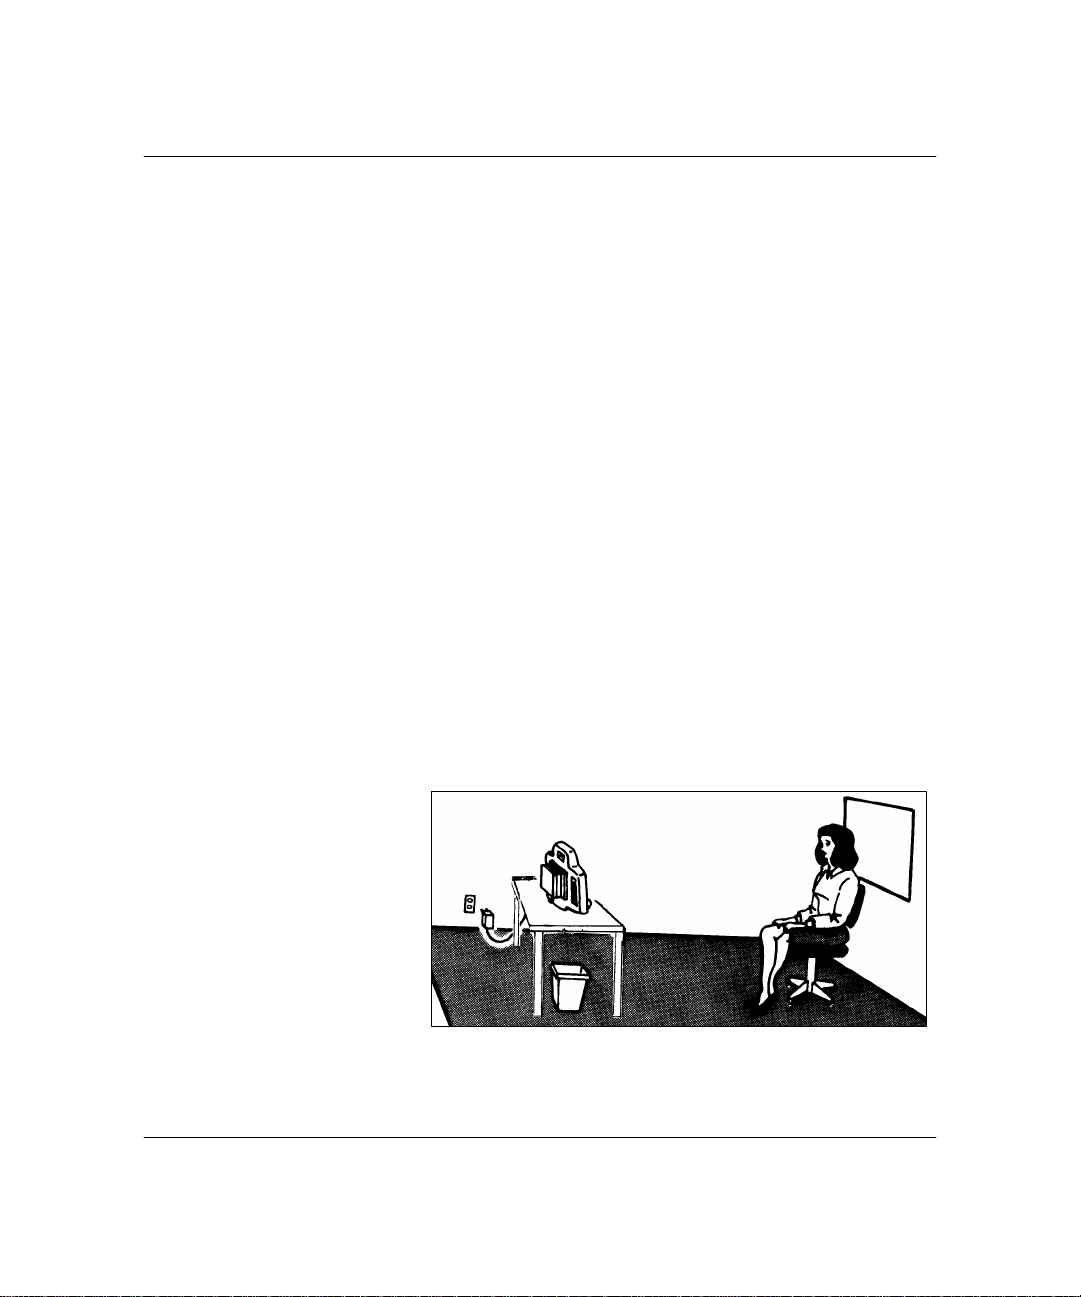
Setting up the work area
You need the following items when setting up your work area:
• the camera
• a wastebasket
• a non-reflective cloth backdrop for ID photos
• a white backdrop for passport photos
• a chair, 17 to 18 inches (45cm) high
To set up the work area for the MiniPortrait Camera:
1 Use a work area that measures 8 X 10 feet (2.4 X 3m).
2 Make sure an electrical outlet is accessible to the camera.
3 Use a wastebasket for discarding tabs and film waste.
4 Place the backdrop behind where the subject will be
Avoid placing the camera where it may be exposed to
extreme temperatures, for example, near a door or
window.
seated. Passport regulations require a white background.
For ID pictures hang a piece of non-reflective cloth as a
backdrop.
1-4
5 Place a chair against the backdrop.
Page 9

Setting up the camera
Setting up the camera is simple; just follow these steps and
you'll have your MiniPortrait 206 Camera set up and ready to
take photos in no time.
Note: The following instructions refer to callouts in the
illustrations in the section, The camera, earlier in this chapter.
Preparing the camera To set up the camera:
1 Power up the camera by plugging the small end of the AC
power cord into the socket on the back of the camera (f).
Plug the other end of the cord into a grounded AC outlet.
After a brief warm-up period, the following will be illuminated in the LED display:
A green Ready light, and a green Exposure light. For
detailed instructions on adjusting the exposure, see
Chapter 4, LED display functions.
2 Adjust the aperture selector switch (m) on the front of the
camera for the recommended f-stop. To adjust the
aperture switch, move the switch to the desired setting.
Film Speed Aperture
ASA 80 f11-1/2
ASA 100 f11-1/2
ASA 125 f16
ASA 3000 f64
Note: Use these settings at 75oF (24oC) and above. At
colder temperatures, you may have to adjust the settings.
Refer to the film instructions for details.
3 Set the aiming light selector (g) to the passport (PP) or ID
setting.
4 Set the timer (b). To do this, refer to Setting the Timer on
page 1-6.
1-5
Page 10
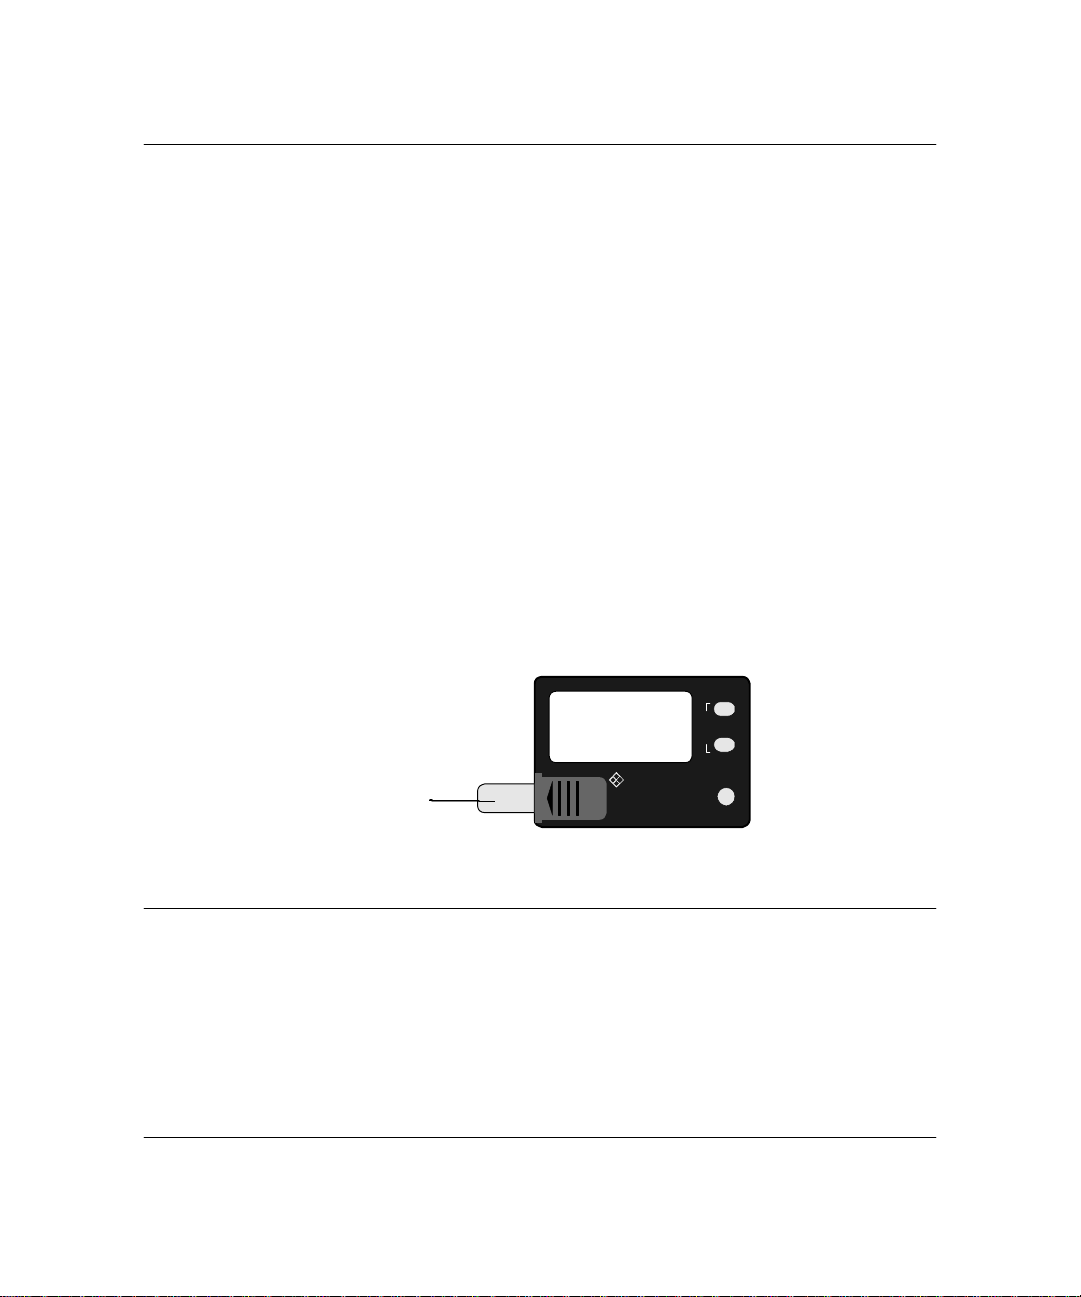
Setting the Timer
Before setting the timer, first remove the insulation strip (a)
which protects the timer’s battery during shipment.
• To set minutes (larger numbers), press the MIN button.
Each time you press it, the next higher number will appear;
after the first press, “01” (1 minute) is indicated; second
press, “02” is shown, etc.
• To set seconds (smaller numbers), press the SEC button.
With each press, the next higher number will appear. It
will read “01” for one second; or “10” for ten seconds.
• To start the timer, press the START button.
• To clear the numbers, press the MIN button and the SEC
button at the same time.
Replacement battery: The timer uses one #LR4 battery.
They can be purchased wherever watch, calculator, or hearing
aid batteries are sold.
a
Technical Assistance
1-6
M S
00
For technical assistance, call toll-free within the U.S.A.:
1-800-343-5000, Monday through Friday, 8 a.m. to 8 p.m.
(Eastern Time). Or, write to the Polaroid Resource Center,
201 Burlington Road, Bedford, MA 01730. In Canada, call
toll- free: 1-800-268-6970. Outside North America, please
contact the office nearest you.
0 0
Polaroid
MIN
SEC
CLEAR
START
Page 11

2 Loading film
Loading film into the camera is quick and simple. After you
have loaded film a few times, you will not need to refer to
these instructions.
This chapter explains how to:
•• Insert a fresh film pack
•• Remove the spent film pack
•• Clean the processing rollers
2-1
Page 12

Inserting fresh film
To insert a fresh film pack:
1 Insert a fresh film pack into the camera back with the
black paper tab facing you.
2 Check below the black tab to make sure you see a
number of white tabs. One white tab is used for each film
exposure.
2-2
Page 13

3 Close the camera back and rotate its latching cover,
making sure the black paper tab is outside the camera
back.
4 Pull the black paper tab out of the camera back, keeping
the tab perpendicular to the camera at all times. The best
method is to place the camera on a flat surface, grip the
camera with your left hand and pull the tab with your right
hand. This ensures that the film in the camera remains
aligned.
2-3
Page 14

Removing spent film
To remove the spent film pack:
1 Open the film compartment and swing open the hinged
camera back door to access the spent film pack.
2 Remove the empty film pack by grasping it at the tab end,
pulling it up and lifting it out (see the first illustration on
page 2-2).
2-4
Page 15

Cleaning the rollers
Clean the rollers each time you replace a film pack. To clean
the rollers:
1 Open the door of the camera back.
2 Remove the rollers by placing your thumbs at the ends of
the roller assembly and rotating it upward.
3 While the rollers are out of the camera back, wipe them
gently with a clean, lint-free cloth moistened with water.
Caution: Use water only; other cleaning solutions may
permanently damage the rollers.
4 Replace the rollers by placing the assembly against the
film exit door and rotating it downward.
2-5
Page 16

Cleaning the film exit door
Check the film exit door and remove any pieces of paper or
dried film developer.
2-6
Page 17

3 Taking a picture
Taking pictures with the Polaroid MiniPortrait 206 Camera is
simple. It requires only a few steps to produce high quality
passport or ID photos.
This chapter describes the steps you should take each time
you take a photo. The first few times you use the MiniPortrait
206 Camera, follow these instructions closely. After you are
familiar with the steps, you will be able to take photos on your
own. This chapter tells you how to:
• Prepare the camera to take photos
• Take the photo and process the exposed film
3-1
Page 18

Preparing the camera
To prepare the camera to take passport or ID photos:
1 Plug the AC power cord into the back of the camera and
into a wall outlet. The camera will power up.
Both the green Ready light and the green Exposure light
will illuminate. See the example in Chapter 4, LED
display functions.
Note: If the camera is unused for approximately ten
minutes, it will automatically shut off to conserve power.
Press the On button to reactivate the camera.
2 If necessary, load film into the camera. Refer to Chapter
2, Loading film, for detailed instructions.
3 Place your subject in a chair against the backdrop. For
best results, position the subject as close to the backdrop
as possible. Remember, passport photos require a white
background. For questions regarding passport specifications and techniques, call toll-free: 1-800-343-5000.
3-2
Note: For passport photos, move the aiming light selector
to “PP”; for ID photos, set the selector to “ID”. Refer to the
section The camera, in Chapter 1, for the location of the
aiming light selector.
Page 19

4 Press the Aiming button and aim the lights at your
subject. The lights blink for 15 seconds while you aim the
camera.
Note: The aiming lights must be blinking in order for you
to take a picture.
5 Position the camera so that the lights converge on your
subject's chin.
3-3
Page 20

Taking the photo
6 If your subject has a dark complexion, press the face
brightener (Boost) button. Refer to The camera, in
Chapter, 1 for location of the button. A green Boost light
will illuminate in the LED display. The face brightener
function turns off and its light goes out after you take the
picture. To turn the face brightener function off before
you take the picture, press the button again.
When you turn the Face Brightener function on, the
camera increases the flash output by 0.3 to 0.5
photographic stops.
To take a photo:
3-4
1 Press the Shutter button.
After you press the button, the green Pull Film light
illuminates in the LED display; if the camera is set to take
another picture on this sheet of film, the Ready light will
come on. If it reads Ready, take another picture.
Note: You can take the two pictures at the same time,
giving you two of the same pose, or you can take one
picture after another, giving you two different poses. To
set the number of photos to be taken at once, refer to
Chapter 4, LED display functions.
Page 21

2 To begin processing the film, pull the white film tab,
keeping the tab perpendicular to the camera at all times.
Rest the camera on a flat surface and pull the tab straight
out using the right hand. This ensures that the film in the
camera remains aligned.
3 Pull the yellow tab, keeping the tab perpendicular to the
camera. Position the camera and pull the tab as described in 2 above. A smooth, straight pull will prevent
blemishes in the picture.
As soon as you pull the yellow tab, the film starts to
develop.
3-5
Page 22
4 Push the START button to start the timer. See Chapter 1,
setting up, for instructions about setting the timer. Refer
to the film instructions for proper development time.
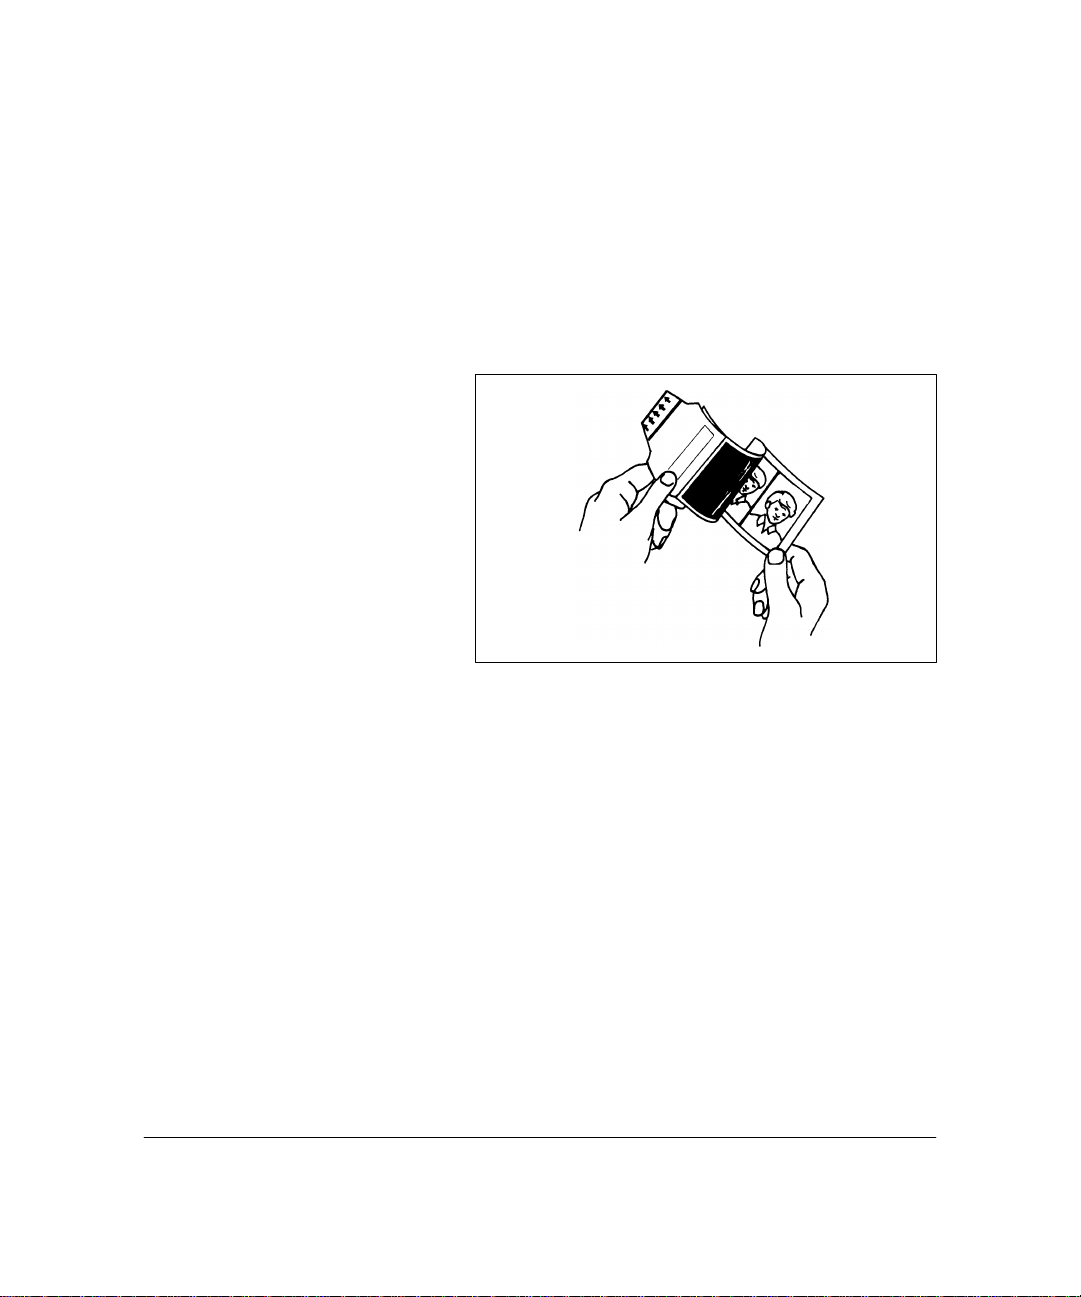
5 When the timer beeps, the film is fully developed; peel
the back from the print.
Note: Development time will vary with temperature
fluctuations; refer to the film instructions for proper
development time in hot and cold conditions.
3-6
You can lighten or darken your picture by adjusting the
aperture selector and/or the flash exposure setting (using
the exposure selector in the LED display). Refer to
Chapter 4, LED display functions, for details about
adjusting the flash exposure.
Page 23

4 LED display functions
The Polaroid MiniPortrait 206 Camera has an LED display
that guides the operator through camera operation. The
following camera adjustments can be made from this display:
• Exposure
• Select (to make one or two pictures each time the shutter
button is pressed)
4-1
Page 24

Making display selections
The following functions can be adjusted from the LED display:
1 Exposure
For normal flash exposure, the middle light will be on.
READY
BOOST
PULL FILM
1
EXPOSURE
To increase exposure, press the UP arrow in the display.
Each time the arrow is pressed, the next higher light will
come on. To decrease exposure, press the DOWN
arrow; the next lower light will come on.
2 Select
Pressing “select” in the LED display, allows you to toggle
between “1”, shown above, and “2”.
Select “1” if you want to take two different poses in one
picture frame. When you press the shutter button to take
the first photo, the LED display will read “ready”,
prompting you to take another photo. Press the shutter
button a second time and the picture will contain two
different photos.
SELECT
4-2
Select “2” If you want two identical poses in one frame.
When you press the shutter button, the camera will take
twin photos of the same subject.
Page 25

5 Troubleshooting
Correcting common errors
From time to time you may observe faults with your photos.
The following information will help you solve problems you
may encounter.
Picture Fault Cause Corrective Action
Repeated, evenly
spaced spots
Missing corners, or
orange-red marks
along edges
Rectangular outline in
print
Dirty developer
rollers.
Pull the film tab from
the camera at an
angle.
Dried developer on
rollers.
The white leader was
not pulled completely
off prior to pulling the
film tab; white tab
passed through the
rollers with film.
Clean developer
rollers.
Pull the yellow/black
film tab straight from
the camera.
Clean the rollers.
Pull white tab
completely out of the
camera before pulling
the film from the
camera.
5-1
Page 26

Picture Fault Cause Corrective Action
Small, white specks,
pink lines, streaks or
blotches
Muddy-looking print Development time not
Broad streak or mark
across the picture
Very light or no image Film fogged or
Pulling the film
through the rollers
too fast.
long enough.
Hesitating while
pulling the film from
the camera.
extremely
overexposed.
Pull the film using a
smooth, even,
moderate pull speed.
Develop film for time
recommended in film
instruction sheet.
Pull the film tab
straight out in one
motion, without
hesitation.
Do not remove the
safety cover prior to
loading the film.
Do not open the
camera and remove
the film pack while
taking a picture.
5-2
Page 27

MiniPortrait 206 Camera warranty
Polaroid Corporation warrants the MiniPortrait 206 Camera
against defects in manufacture or workmanship for a period of
two years from the date of purchase. To verify the warranty
period, you should keep the invoice, sales receipt, or other
proof of the purchase date.
Should this product or any component or accessory included
with it, except software, prove to be defective at any time
during the warranty period, Polaroid Corporation will, at its
discretion, either replace or repair this item, without charge.
This warranty does not cover damage caused by accident,
incorrect installation, unauthorized modification, and misuse
or abuse. A charge will be made for repair of such damage.
This warranty excludes all consequential damages and
does not affect your statutory rights. Some jurisdictions
do not allow the limitation or exclusion of consequential
damages, so the foregoing may not apply to you.
MiniPortrait 206 Camera service
U.S.A. and Canada If your MiniPortrait 206 Camera requires service, call Polaroid
Technical Assistance toll-free from within the U.S.A. at 1-800-
343-5000, Monday through Friday, 8 a.m. to 8 p.m., (Eastern
Time). From Canada, call toll-free at 1-800-268-6970.
To return the camera for service, pack it carefully in its
original shipping carton or other sturdy container, with plenty
of padding. Shipping instructions will be provided by your
Polaroid Technical Assistance specialist.
Outside North America Please contact your nearest Polaroid dealer (see the section
immediately following).
S-1
Page 28

Polaroid Offices and Service Centers
Australia
Polaroid Australia Pty Ltd
13-15 Lyonpark Road
PO Box 163
North Ryde, NSW 2113
Tel.: (02) 950 7000
Fax: (02) 887 2209
Belgique/Beigië
Polaroid (Belgium) S.A.-N.V.
rue Colonel Bourg 111
Kolonel Bourgstraat 111
1140 Bruxelles-1140 Brussel
Tel.: 32 2 702 86 20
Fax: 32 2 726 92 99
Toll free line: 32 2 78 155 905
Brasil
Polaroid do Brasil Ltda.
Av. Paulista, 1776/11o andar
Cerqueira Cesar
São Paulo - Capital
01310-921
Tel.: 55.11.285.6411
Fax: 55.11.287.5393
Canada
Polaroid Canada Inc.
350 Carlingview Drive
Etobicke, ON M9W 5G6
Tel.: 1 416 675 3680
Fax: 1 416 675 4245
Toll free: 1-800-268-6970
Danmark
Polaroid a.s.
Blokken 75, 3460 BirkerØd
Tel.: 45 42 81 75 00
Fax: 45 42 81 70 26
Deutschland
Polaroid GmbH
Sprendlinger Landstrasse 109
63069 Offenbach
TeI.: 49 69 840 4100
Fax: 49 69 840 4204
España
Polaroid (España), S.A.
Calle Orense 16, 2a planta.
28020-Madrid, Spain
Tel.: 34-1-597 02 52
Fax: 34-1-597 27 82
France
Polaroid (France) S.A.
12 Bis Ave. Gay Lussac78391
La Clef de Saint-Pierre, B.P. 7
78996-Elancourt Cédex
Tel.: 33 1 30 68 38 38
Fax: 33 1 30 68 38 39
Great Britain
Polaroid (U.K.) Ltd. &
Polaroid Export Operations
Wheathampstead House
Codicote Road
Wheathampstead
Hertfordshire AL4 8SF
Tel.: 44 1582 632000
Fax: 44-1582 632001
Hong Kong
Polaroid (Far East) Ltd.
32/F Windsor House
311 Gloucester Road Causeway Bay
Tel.: (852) 2894 0333
Fax: (852) 2895 1382
Italia
Polaroid (Italia) S.p.A.
Via Piave 11
21051 Arcisate (Varese)
Tel.: 39 332-470031
Fax: 39 332-478249
Japan
Nippon Polaroid
Kabushiki Kaisha
Mori Building, No. 30
2-2 Toranomon 3-chome
Minato-ku, Tokyo (105)
Tel.: 81-3-3438-8811
Fax: 81-3-3433-3537
S-2
Page 29

México
Polaroid de México S.A. de C.V.
Paseo de la Reforma 195-Piso 17
C.P. 06500 México, D.F.
Tel.: 52 5 703-1111
Fax: 52 5 566-0505
Del interior al 91 (800) 70-727
Ventas 91 (800) 70-747
Portugal
Polaroid (España) S.A.
Sucursal em Portugal
Edificio Monumental
Avenida Praia da Vitória 71-A, 4oB
1050 Lisboa
Tel.: (35 1) 316.10.49
Fax: (35 1) 316 10 56
Nederland
Polaroid Nederland B.V.
Zonnebaan 45
3606 CH Maarssen
Tel.: 31-30-2410-420
Fax: 31-30-2411-969
Reparaties:
Polaroid (Europa) B.V.
Hoge Bothofstraat 45
7511 ZA Enschede
Tel.: 31 53 4865 400
New Zealand
Polaroid New Zealand Ltd
Camera Services
24-26 Anzac Avenue
Auckland
Tel.: (64 9) 377 3773
Norge
Polaroid (Norge) A/S
Industriveien 8B
1471 Skårer
Tel.: 47 67 90 47 10
Fax: 47 67 90 51 73
Österreich
Polaroid Ges.m.b.H.
Eitnergasse 5A
1231 Wien
Tel.: 43 1 869 86 27
Fax: 43 1 869 81 00
Puerto Rico
Polaroid Caribbean Corporation
Centro de Seguros
Ave. Ponce de León 701,
Miramar, Santurce 00907
Tel.: (1 809) 725-6240
Fax: (1 809) 725-5462
Schweiz/Suisse/Svizzera
Polaroid AG
Hardturmstrasse 133
8037 Zürich
Tel.: (41 1) 277.72.72
Fax: (41 1) 271 38 84
Suomi
Polaroid Oy
Sinikalliontie 10
02630 Espoo, Finland
Tel.: 358 0:-502 35 33
Fax: 358 0 502 35 50
Sverige
Polaroid AB
Ekholmsvägen 36, Box 204
127 24 Skärholmen, Sweden
Tel.: 46 8-710 08 50
Fax: 46 8-740 73 68
U.S.A.
Polaroid Corporation
Technical Assistance
Toll Free: 1-800-343-5000
 Loading...