

Polaris Sportsman Forest570 Owner's Manual

Owner's Manual
for Maintenance and Safety
Read this manual carefully. It contains important safety information.
This is an adult vehicle only.
Operation is prohibited for those under 16 years of age.
Sportsman Forest 570

1
WELCOME
Thank you for purchasing a POLARIS vehicle, and welcome to our
world-wide family of POLARIS enthusiasts. Be sure to visit us online at
www.polaris.com for the latest news, new product introductions,
upcoming events, career opportunities and more.
Here at POLARIS we proudly produce an exciting line of utility and
recreational products.
• Snowmobiles
• All-terrain vehicles (ATVs)
• Low emission vehicles (LEVs)
• RANGER® utility vehicles
• RZR® sport vehicles
• VICTORY® motorcycles
• GEM® vehicles
Always follow the instructions and recommendations in this manual.
The manual contains instructions for minor maintenance, but
information about major repairs is outlined in the POLARIS Service
Manual and should be performed only by a factory-certified Master
Service Dealer® (MSD) technician. Please see your dealer for all of
your service needs during (and after) the warranty period.

2
POLARIS® and SPOR TSMAN® are registered trademarks of POLARIS Industries Inc.
Copyright 2013 POLARIS Sales Inc. All information contained within this publication
is based on the latest product information at the time of publication. Due to constant
improvements in the design and quality of production components, some minor
discrepancies may result between the actual vehicle and the information presented in
this publication. Depictions and/or procedures in this publication are intended for
reference use only. No liability can be accepted for omissions or inaccuracies. Any
reprinting or reuse of the depictions and/or procedures contained within, whether whole
or in part, is expressly prohibited.
The original instructions for this vehicle are in English. Other languages are provided as
translations of the original instructions.
Printed in U.S.A.
2014 SPORTSMAN FOREST 570 EFI/EPS Owner’s Manual
P/N 9924299

3
TABLE OF CONTENTS
Introduction . . . . . . . . . . . . . . . . . . . . . . . . . . . . 4
Safety . . . . . . . . . . . . . . . . . . . . . . . . . . . . . . . . . 8
Features and Controls. . . . . . . . . . . . . . . . . . . 20
Operation . . . . . . . . . . . . . . . . . . . . . . . . . . . . . 38
Winch Guide . . . . . . . . . . . . . . . . . . . . . . . . . . . 58
Emission Control Systems . . . . . . . . . . . . . . . 70
Maintenance . . . . . . . . . . . . . . . . . . . . . . . . . . . 71
Troubleshooting. . . . . . . . . . . . . . . . . . . . . . . 122
POLARIS Products. . . . . . . . . . . . . . . . . . . . . 126
Specifications. . . . . . . . . . . . . . . . . . . . . . . . . 127
Warranty . . . . . . . . . . . . . . . . . . . . . . . . . . . . . 129
Maintenance Log . . . . . . . . . . . . . . . . . . . . . . 133
Index . . . . . . . . . . . . . . . . . . . . . . . . . . . . . . . . 135

4
INTRODUCTION
The following signal words and symbols appear throughout this manual
and on your vehicle. Your safety is involved when these words and
symbols are used. Become familiar with their meanings before reading
the manual.
The safety alert symbol indicates a potential personal injury ha zard.
DANGER
A DANGER indicates a hazardous situation that, if not avoided, will result in
death or serious injury.
WARNING
A WARNING indicates a hazardous situation that, if not avoided, could result in
death or serious injury.
CAUTION
A CAUTION indicates a hazardous situation that, if not avoided, could result in
minor or moderate injury.
NOTICE
A NOTICE indicates a situation that could result in property damage.
The Prohibition Safety Sign indicates an action NOT to take in order
to avoid a hazard.
The Mandatory Action Sign indicates an action that NEEDS to be
taken to avoid a hazard.

5
INTRODUCTION
Failure to heed the warnings and safety precautions contained in this manual
can result in severe injury or death. A POLARIS ATV is not a toy and can be
hazardous to operate. This vehicle handles differently than other vehicles, such
as motorcycles and cars. A collision or rollover can occur quickly, even during
routine maneuvers like turning, or driving on hills or over obstacles, if you fail to
take proper precautions.
• Read this owner’s manual. Understand all safety warnings, precautions and
operating procedures before operating a POLARIS ATV. Keep this manual
with the ATV.
• Never operate an ATV without proper instruction. Take a training course.
• This vehicle is an ADUL T VEHICLE ONL Y. Operation is prohibited for anyone
under 16 years of age.
• Never permit a guest to operate the ATV unless the guest has read this
manual and all product labels and has completed a certified safety training
course.
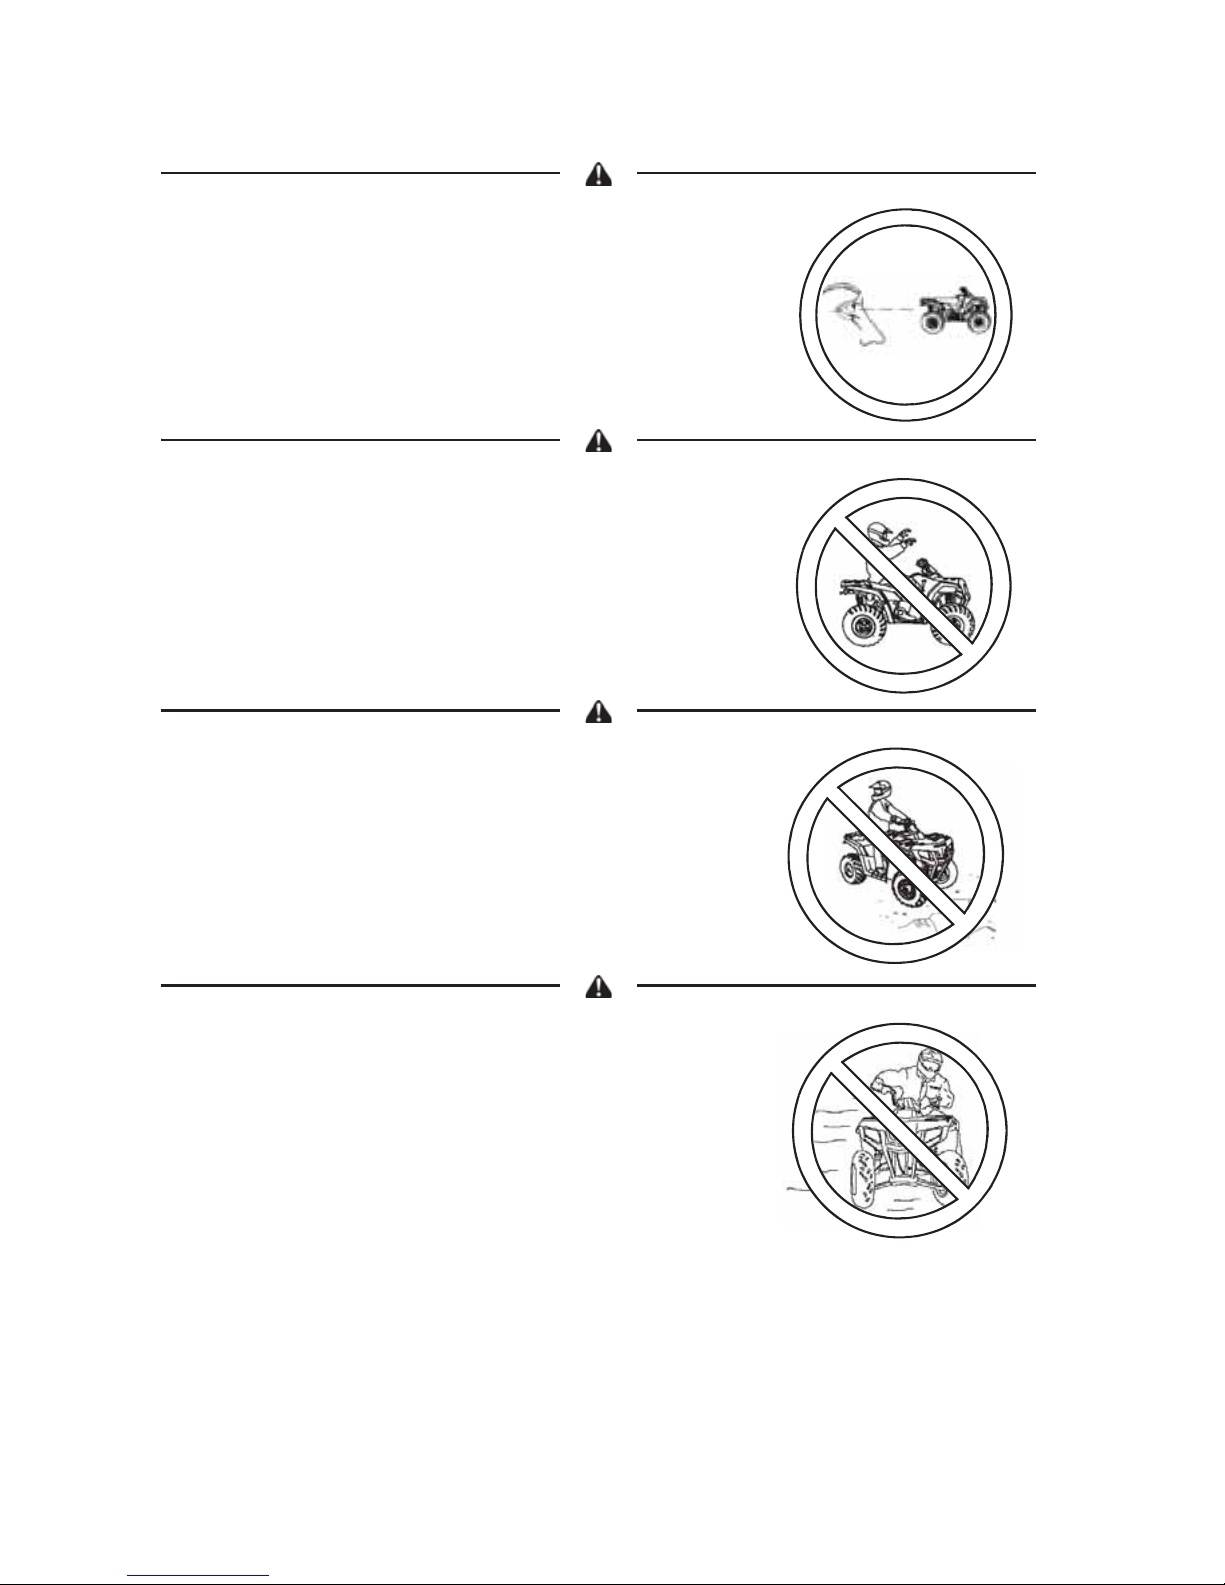
• This vehicle is approved for OFF-ROAD TOWING ONL Y. Towing a trailer with
this vehicle on public roads is prohibited.
WARNING
6
INTRODUCTION
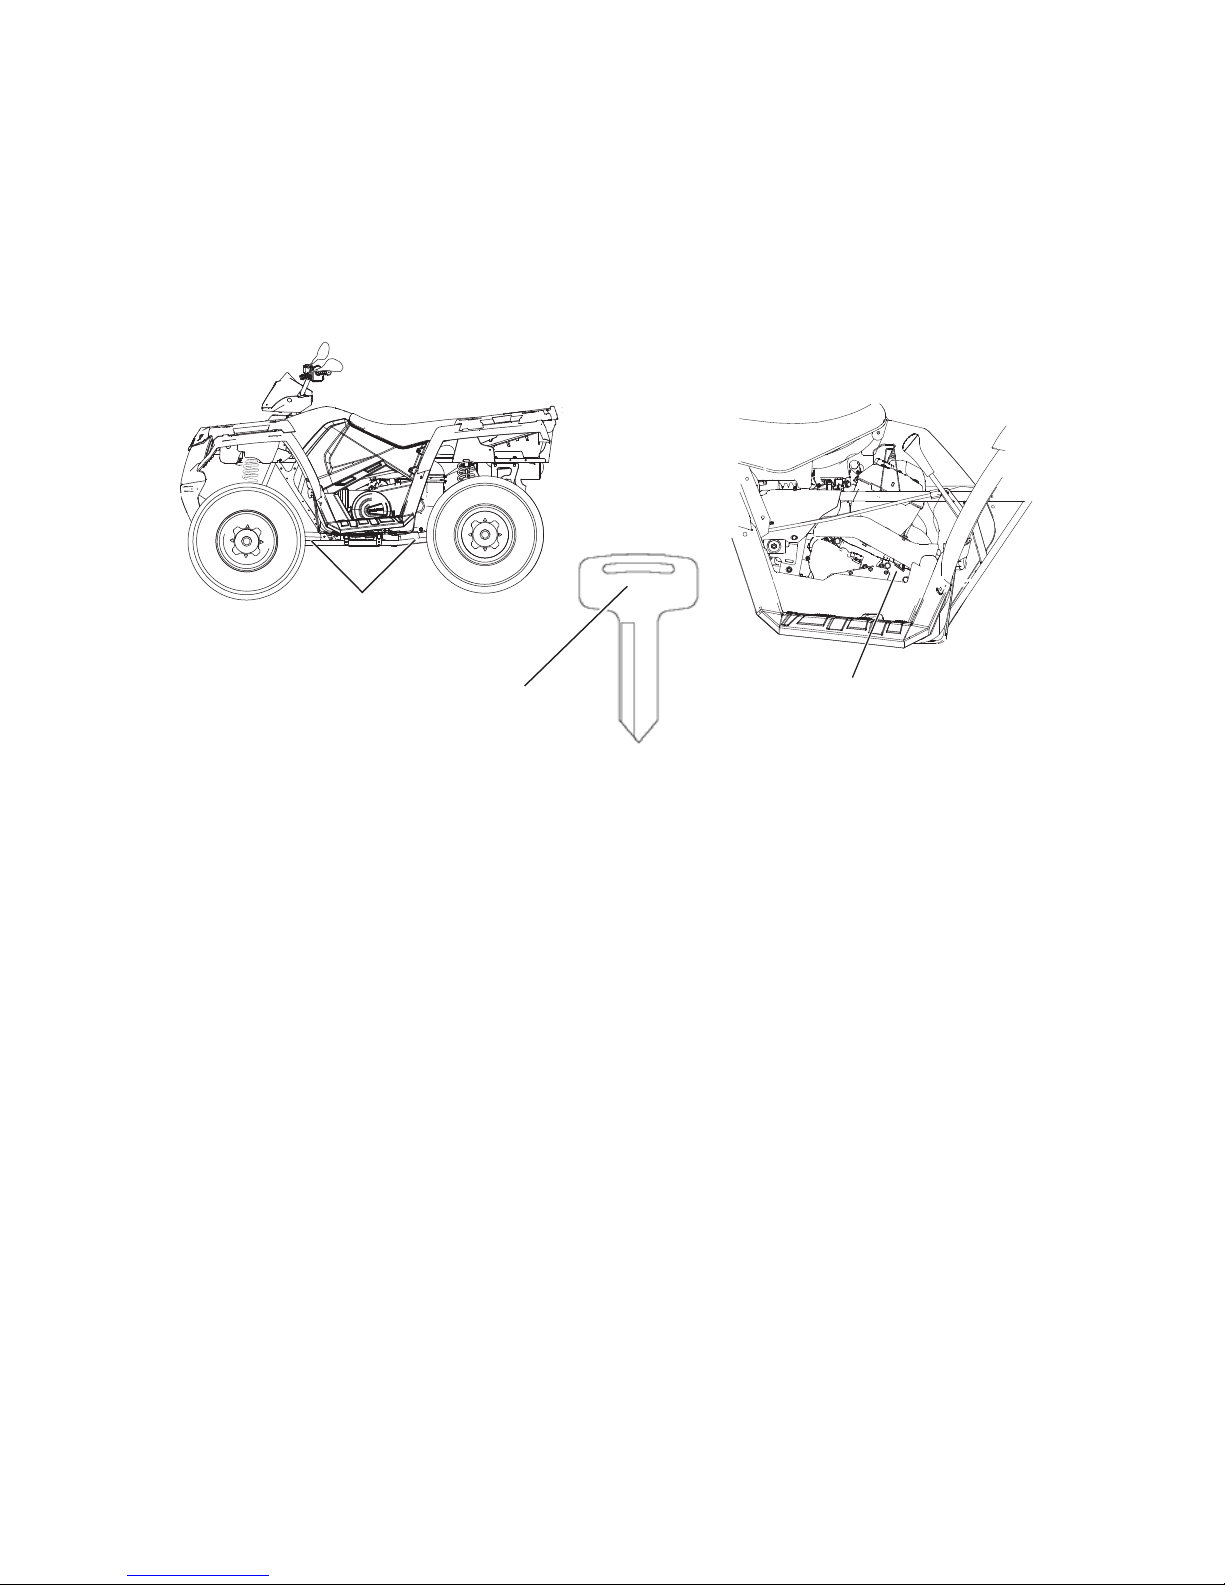
Vehicle Identification Numbers
Record your vehicle's identification numbers and key number in the
spaces provided. Remove the spare key and store it in a safe place. An
ignition key can be duplicated only by ordering a POLARIS key blank
(using your key number) and mating it with one of your existing keys.
The ignition switch must be replaced if all keys are lost.
Vehicle Model Number: ___________________________________________________
Frame VIN: ____________________________________________________________
Engine Serial Number: ___________________________________________________
Key Number: ___________________________________________________________
####
Engine Serial
Number
Key Number
VIN
(front or rear frame)

7
INTRODUCTION
European Vibration and Noise
The driver-perceived noise and hand/arm and whole body vibration
levels of this machinery is measured per prEN 15997.
The operating conditions of the machinery during testing:
The vehicles were in like-new condition. The environment was
controlled as indicated by the test procedure(s).
The uncertainty of vibration exposure measurement is dependent on
many factors, including:
• Instrument and calibration uncertainty
• Variations in the machine such as wear of components
• Variation of machine operators such as experience or physique
• Ability of the worker to reproduce typical work during measurements
• Environmental factors such as ambient noise or temperature
8
SAFETY
Safety Training
Never operate this vehicle without proper instruction. Take a training
course. For more information about safety, contact an authorized
POLARIS dealer or visit the POLARIS web site at www.polaris.com.
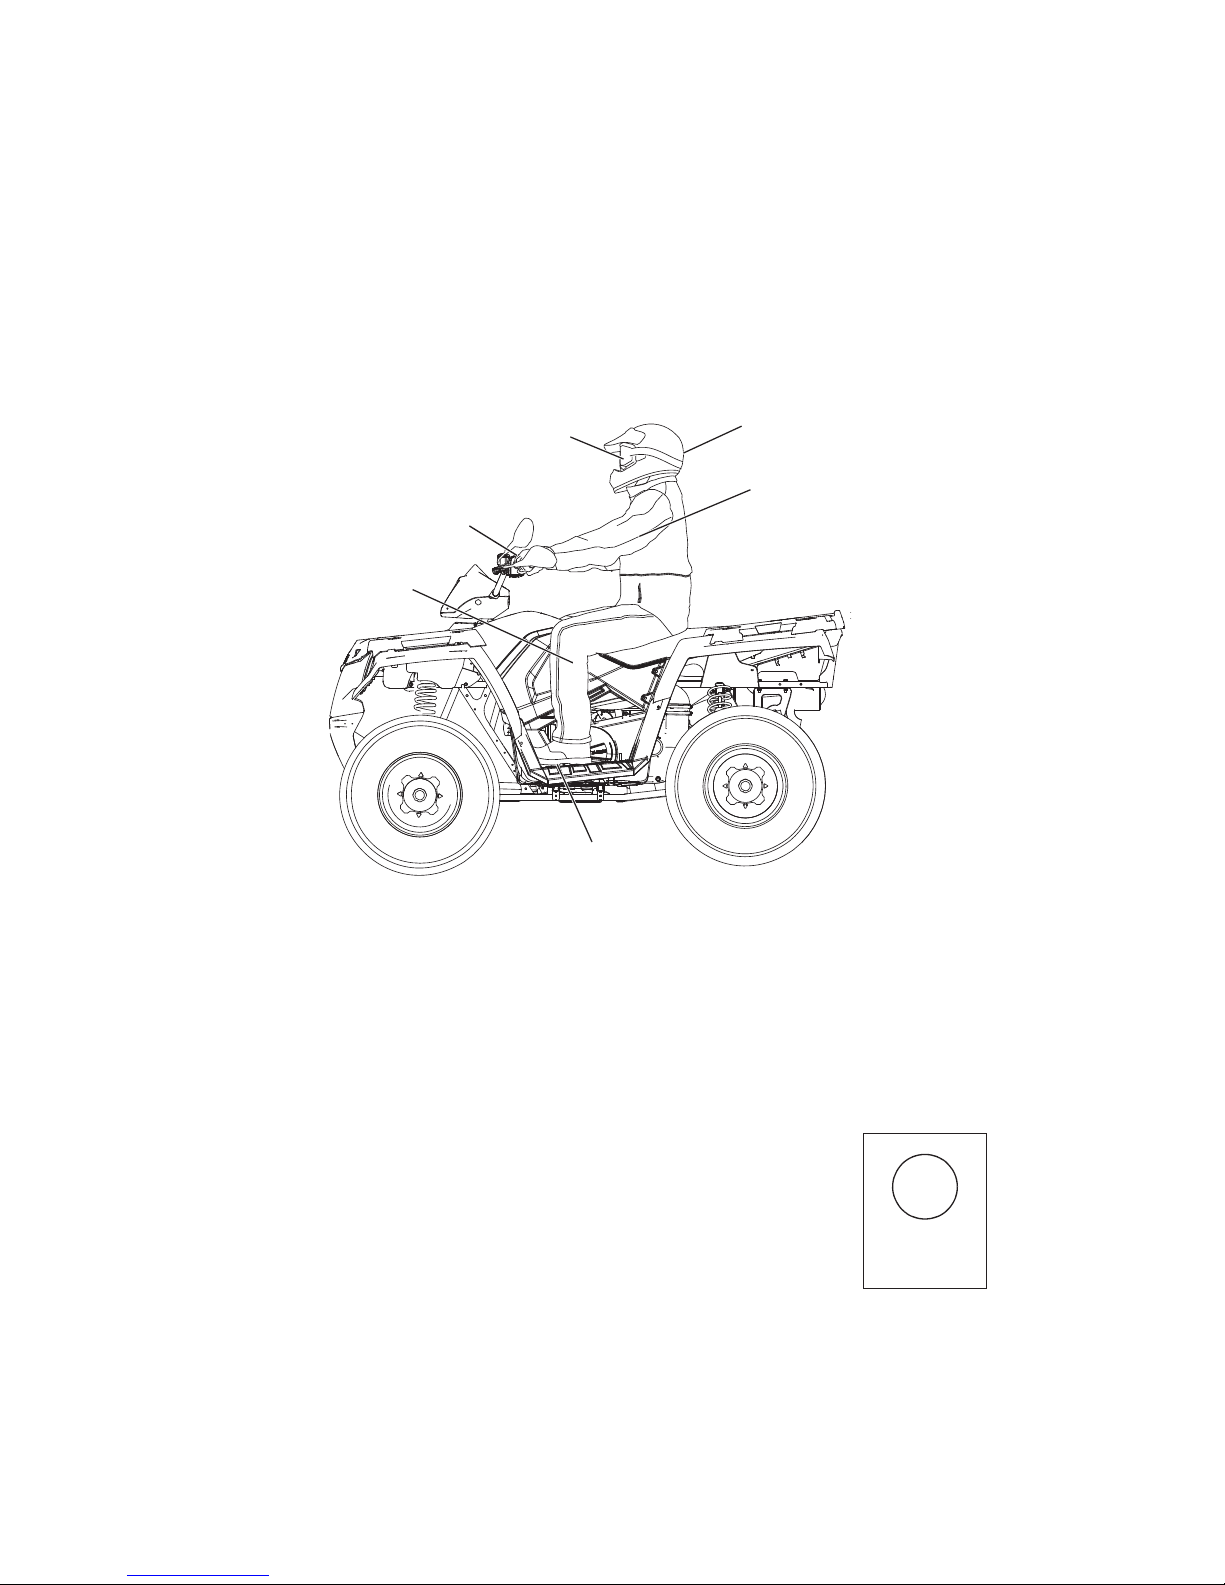
Safe Riding Gear
Always wear appropriate clothing when riding an ATV. Wear protective
clothing for comfort and to reduce the chance of injury.
Helmet
Wearing a helmet can prevent a severe head injury. Whenever riding a
POLARIS vehicle, always wear a helmet that meets or exceeds
established safety standards.
Approved helmets in the USA and Canada bear a U.S. Department of
Transportati on (DOT) label.
Approved helmets in Europe, Asia and Oceania
bear the ECE 22.05 label. The ECE mark consists
of a circle surrounding the letter E, followed by the
distinguishing number of the country which has
granted approval. The approval number and serial
number will also be displayed on the label.
Helmet
Eye Protection
Gloves
Boots
Long Sleeves
Long Pants
E
4
051039
0006.31

9
SAFETY
Safe Riding Gear
Eye Protection
Do not depend on eyeglasses or sunglasses for eye protection.
Whenever riding a POLARIS vehicle, always wear shatterproof goggles
or use a shatterproof helmet face shield. POLARIS recommends
wearing approved Personal Protective Equipment (PPE) bearing
markings such as VESC 8, V-8, Z87.1, or CE. Make sure protective eye
wear is kept clean.
Gloves
Off-road style gloves with knuckle pads are the best for comfort and
protection.
Boots
The best footwear is a pair of sturdy over-the-calf boots with low heels.
Clothing
Always wear long sleeves and long pants to protect arms and legs.
Riding pants with kneepads and a jersey with shoulder pads provide the
best protection.
Equipment Modifications
We strongly recommend that consumers do not install on a POLARIS
ATV any equipment that may increase the speed or power of the vehicle,
or make any other modifications to the vehicle for these purposes.
The warranty on your POLARIS ATV is terminated if any equipment
has been added to the vehicle, or if any modifications have been made to
the vehicle, that increase its speed or power.
The addition of certain accessories, including (but not limited to)
mowers, blades, tires, sprayers, or large racks, may change the handling
characteristics of the vehicle. Use only POLARIS-approved accessories,
and familiarize yourself with their function and effect on the vehicle.
10
SAFETY
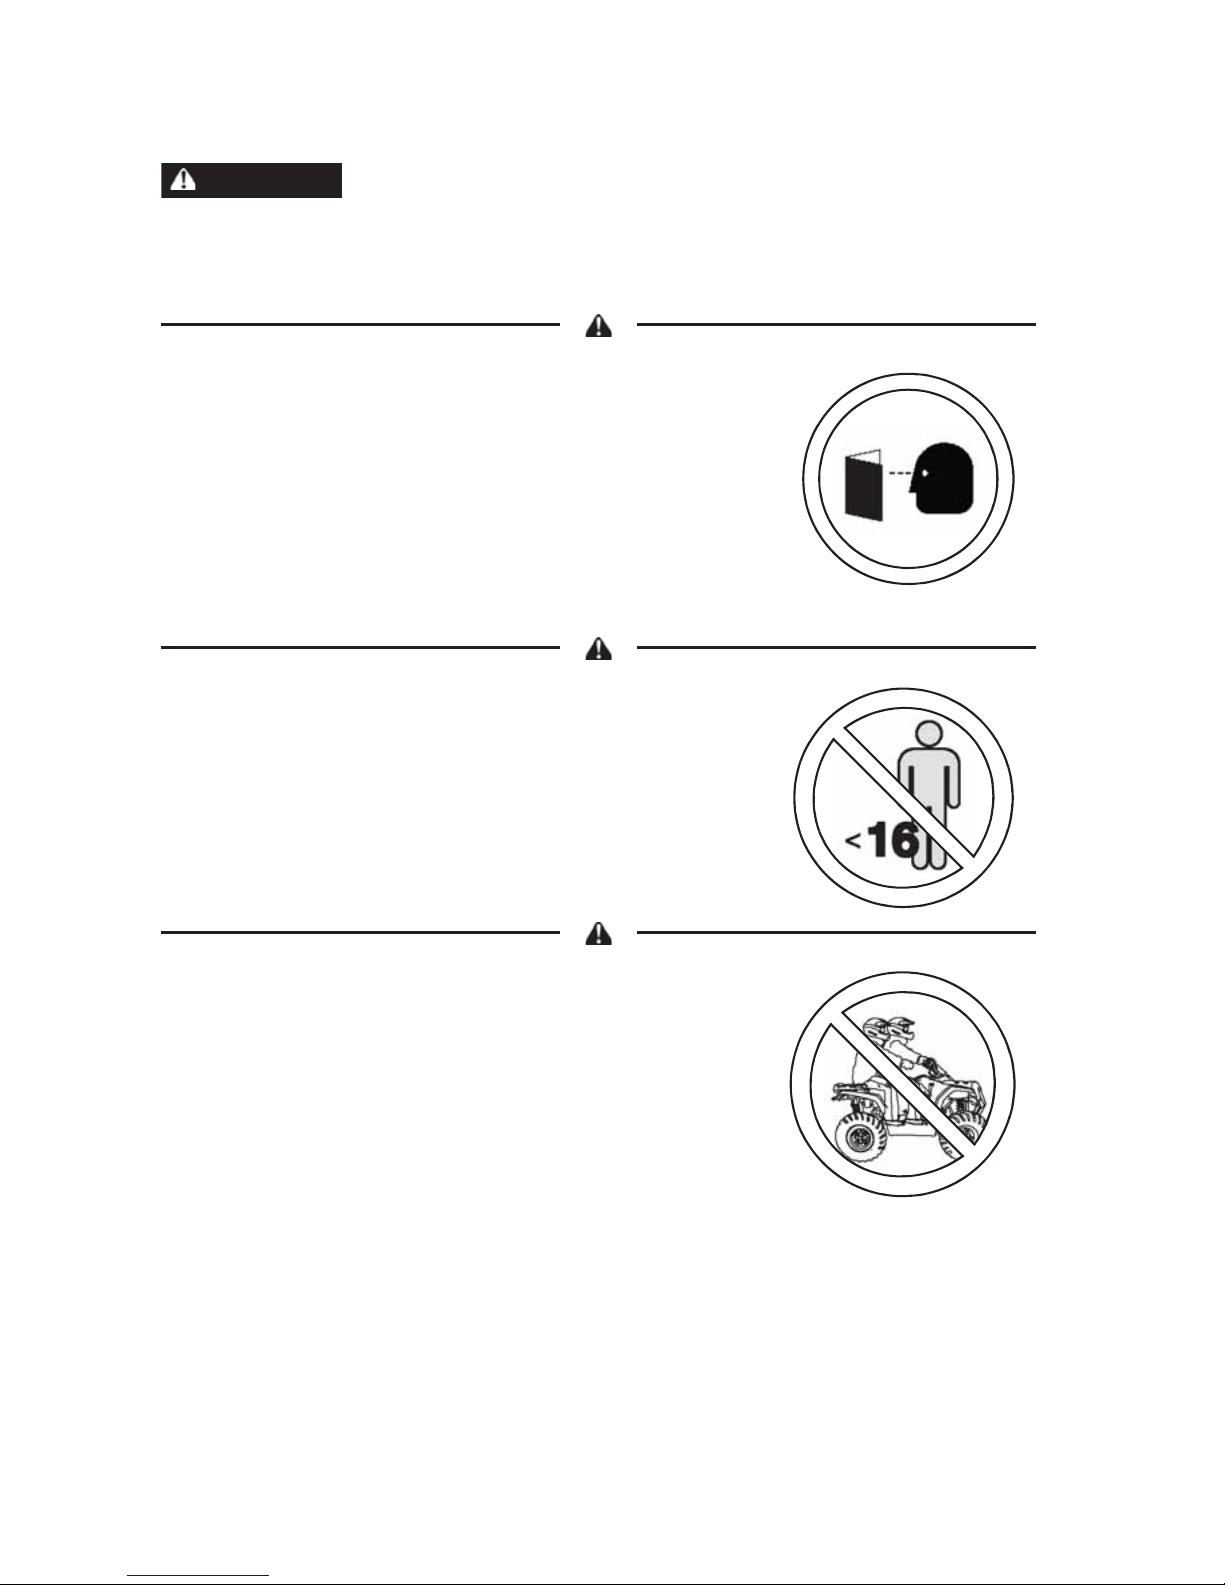
Operator Safety
Serious injury or death can result if you do not follow the instructions and
procedures listed here and throughout this manual.
Read and understand all warnings, cautions and
operating procedures in this manual and on the safety
labels before operating the vehicle.
Never operate this vehicle without proper instruction.
Take a training course. Beginners should receive
training from a certified instructor.
Never permit others to operate the vehicle unless they
have read and understand this manual and all product
labels, and have completed a certified safety training
course.
Never allow anyone under 16 years of age to operate
this vehicle.
Never carry a passenger . The purpose of the long seat
is to allow the operator to shift position.
WARNING
11
SAFETY
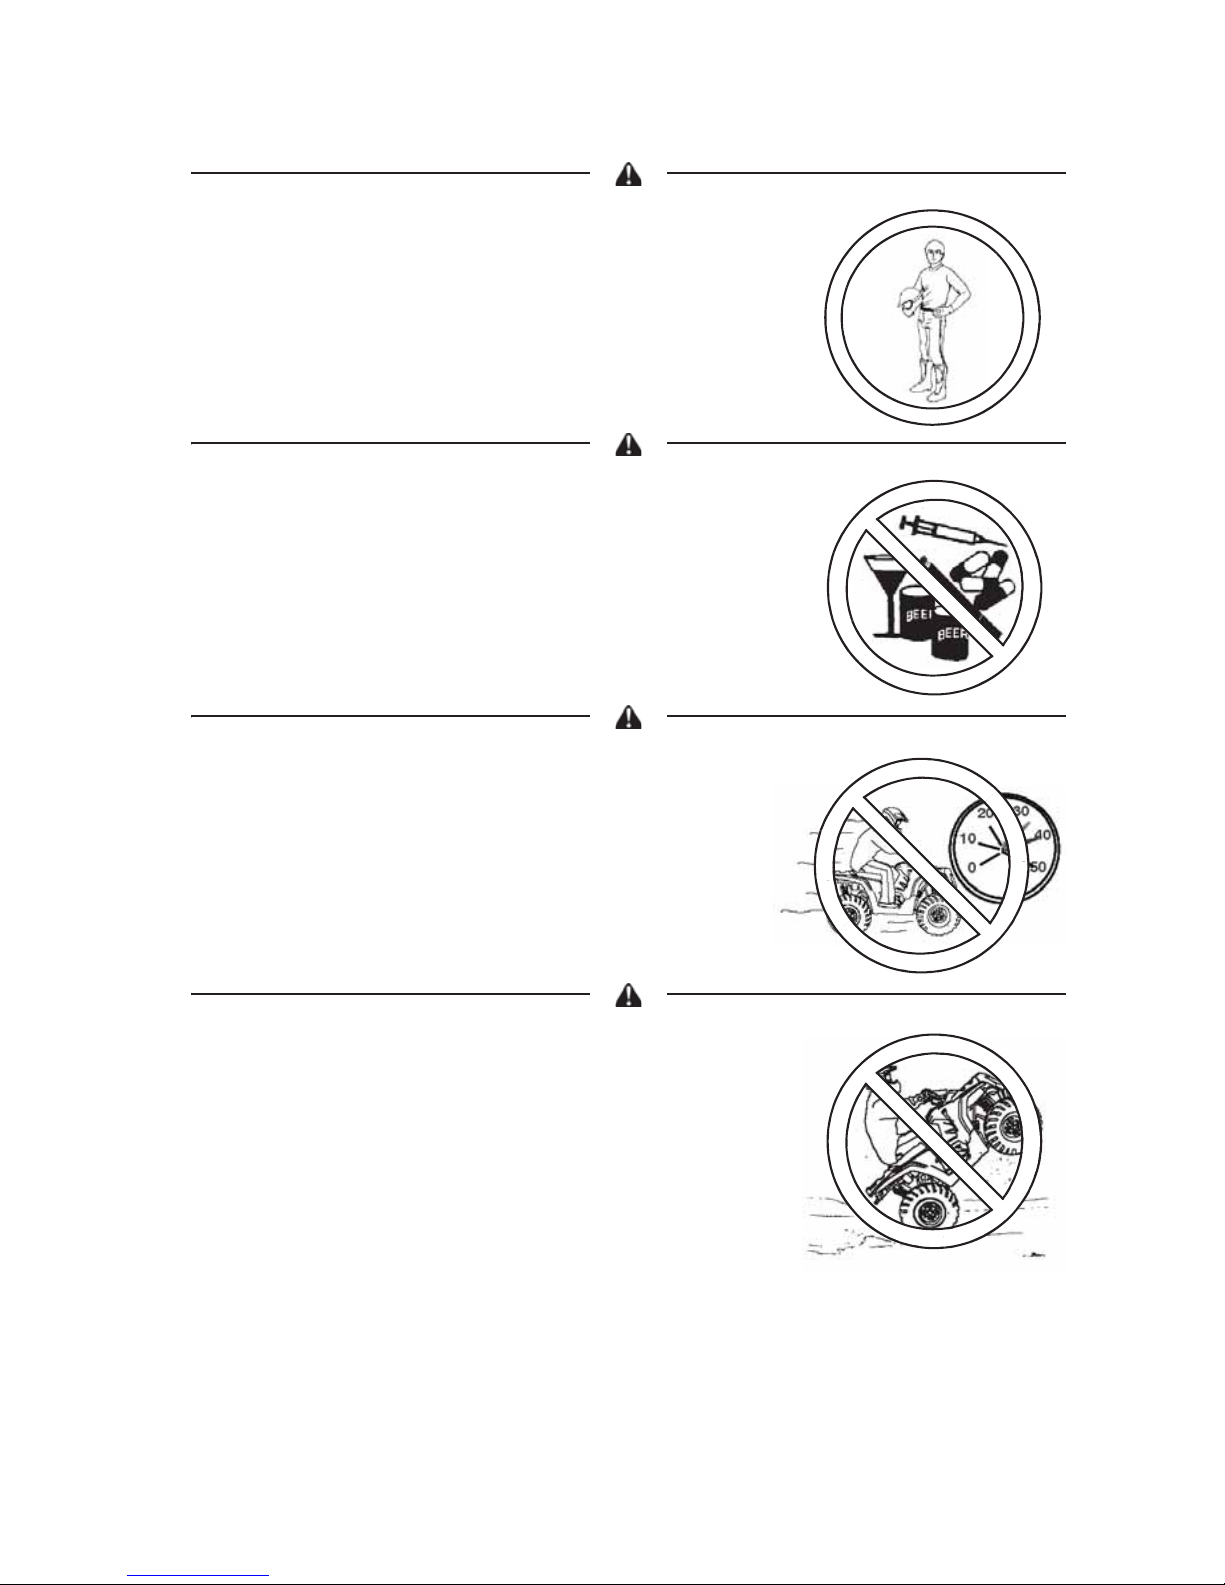
Operator Safety
Always wear an approved helmet that fits
properly. Wear eye protection (goggles or face
shield), gloves, boots, long sleeves and long
pants.
Never consume alcohol or drugs before or while
operating this vehicle.
Never operate at excessive speeds. Travel
and turn at speeds appropriate for the
terrain, visibility, operating conditions and
your experience.
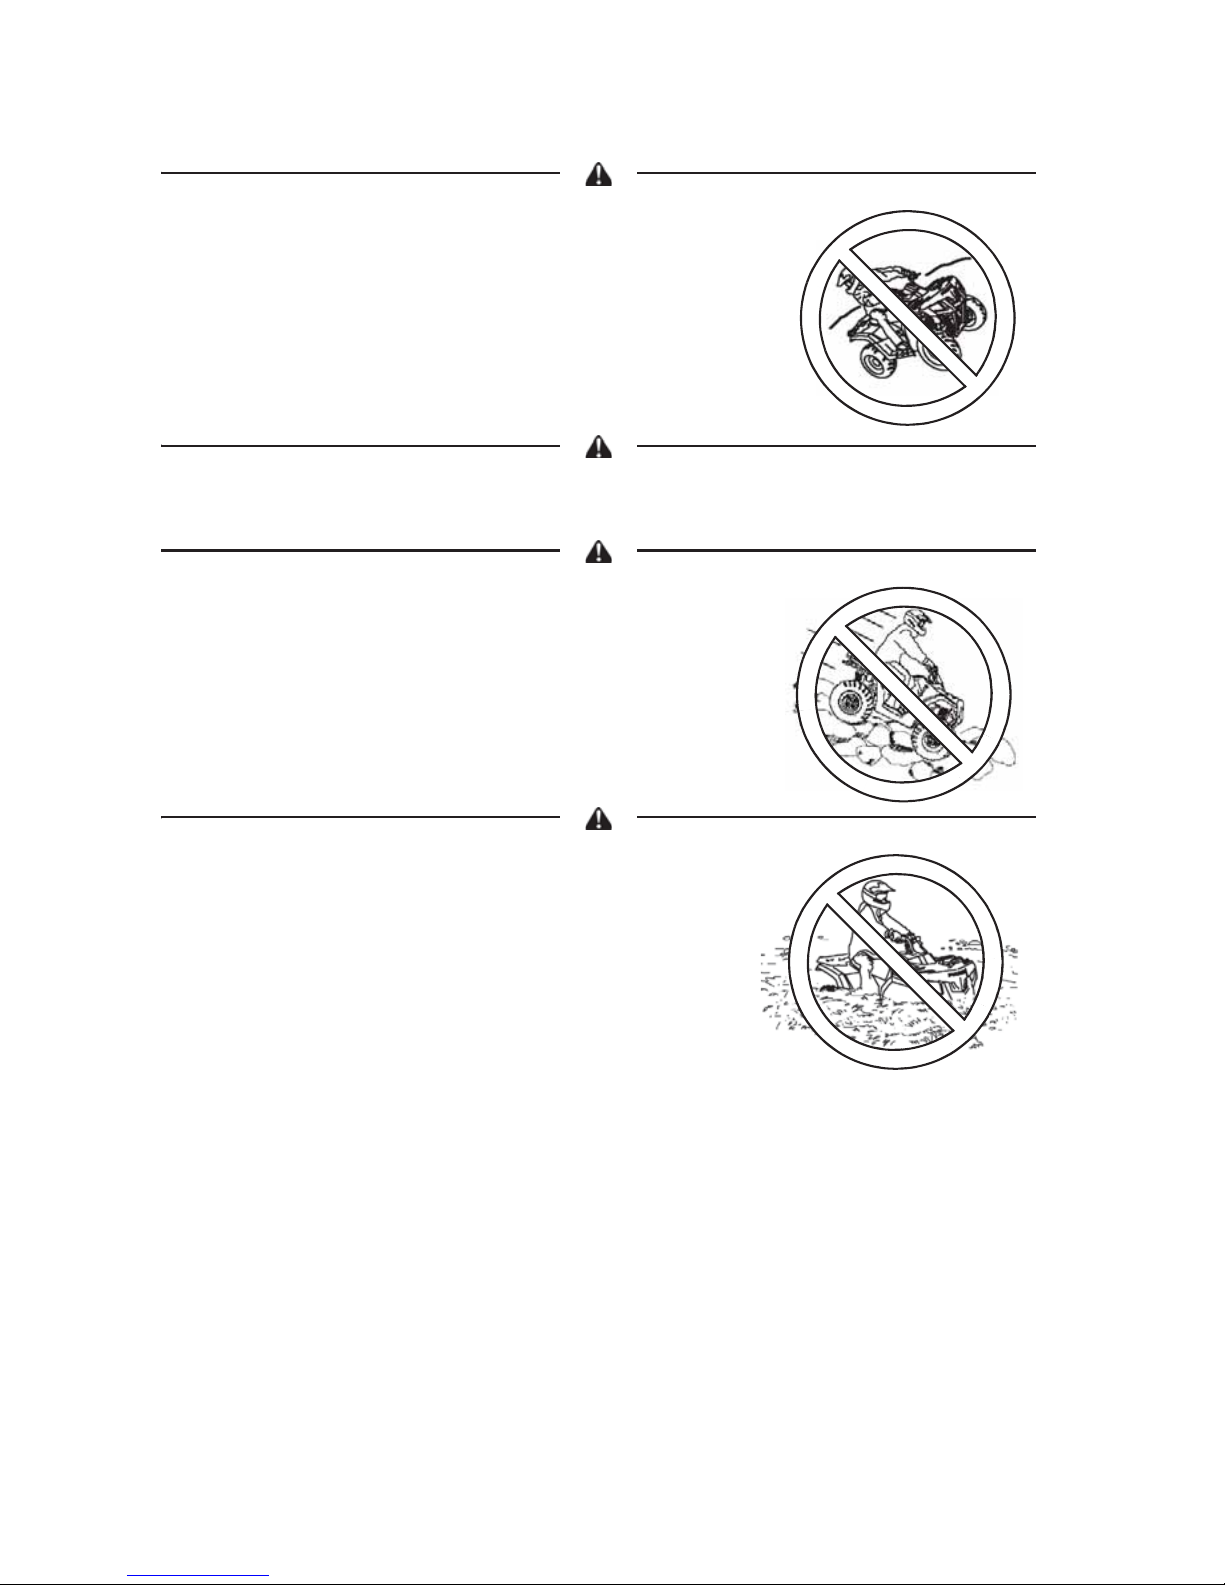
Never attempt jumps or other stunts.
12
SAFETY
Operator Safety
Always inspect your POLARIS vehicle before each
use to verify that it's in safe operating condition.
Follow the inspection and maintenance procedures
outlined in this manual. See page 40.
Keep both hands on the handlebars. Keep your feet
on the footrests.
Always travel slowly when operating on unfamiliar
terrain. Use extra caution.
Always follow the procedures outlined in this
manual for turning. See page 43.
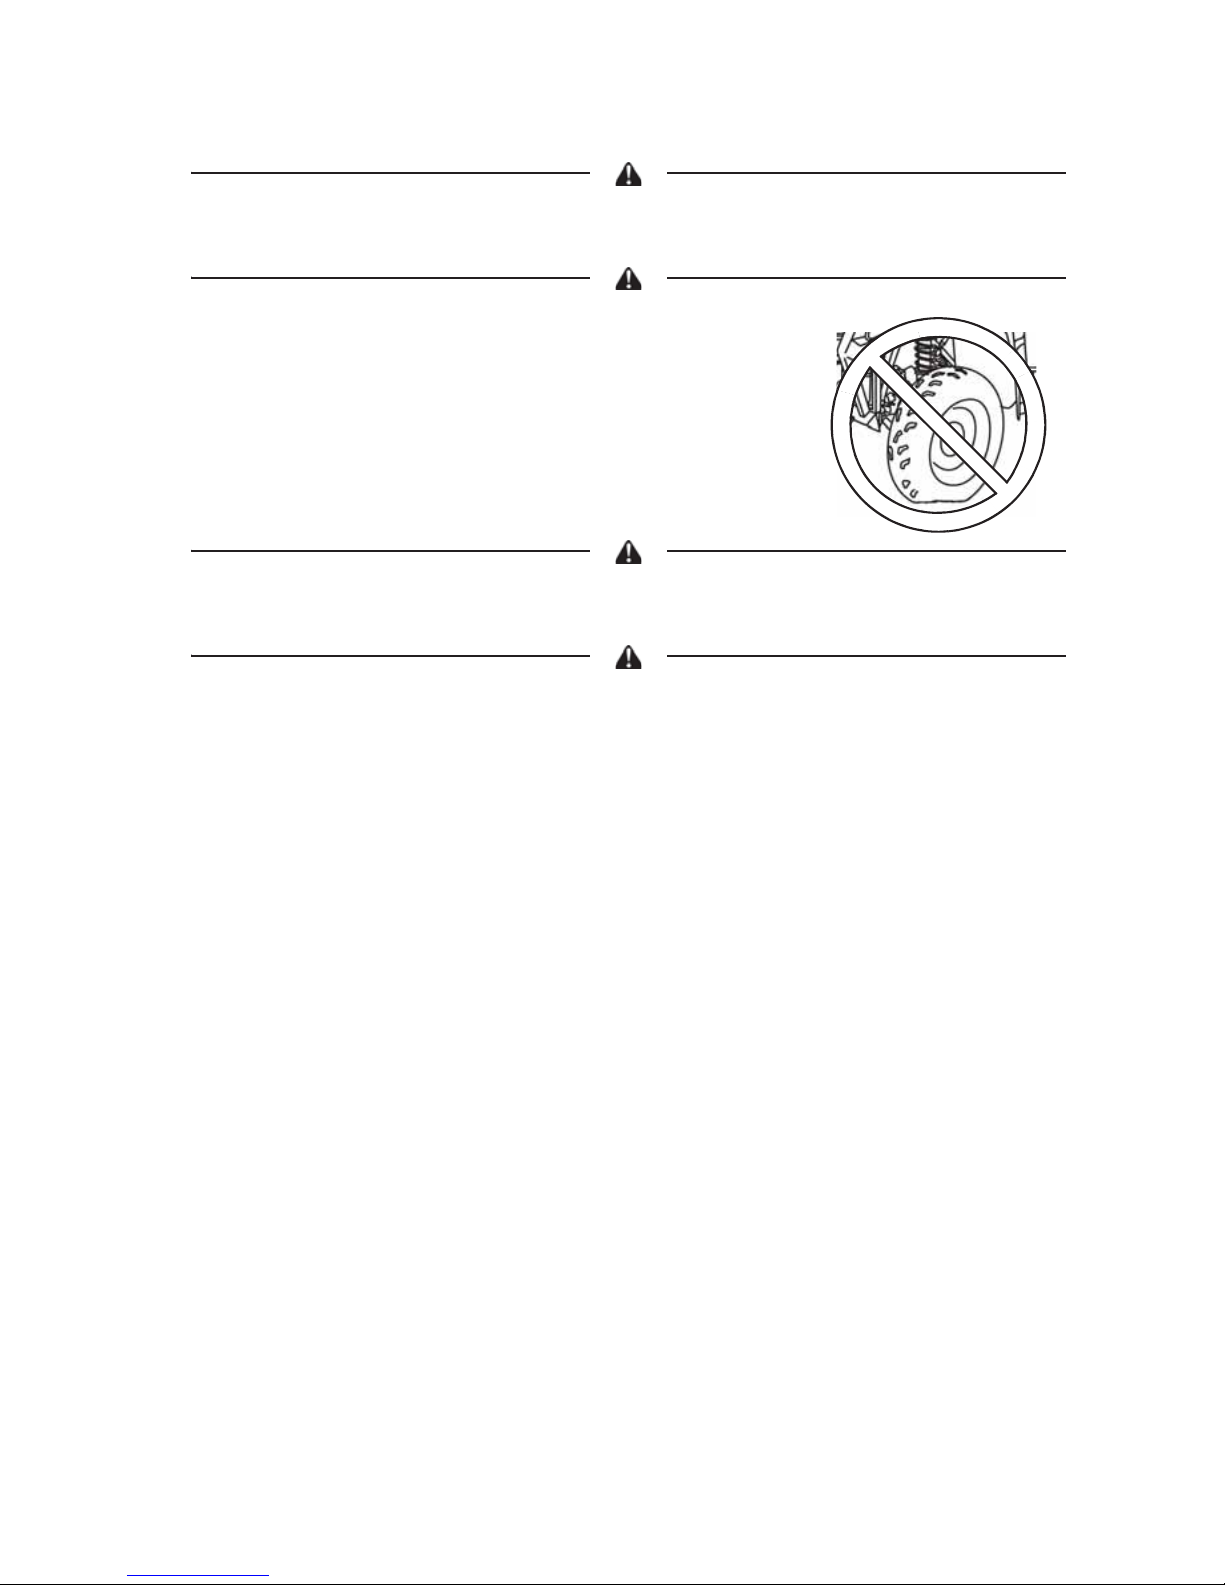
Never turn sharply at excessive speeds, which
can lead to vehicle overturn.

13
SAFETY
Operator Safety
If the vehicle has been involved in an accident, always have an authorized
POLARIS dealer inspect the entire vehicle for possible damage, including (but
not limited to) brake, throttle and steering systems.
Never operate on hills too steep for the vehicle or for
your abilities. Practice on smaller hills before
attempting larger hills. Avoid climbing hills steeper
than 25°.
Always follow the procedures outlined in this manual
for driving on hills. See page 44.
Always follow the procedures outlined in this
manual for driving downhill and for braking on
hills. See page 47.
Always follow the procedures outlined in this
manual for crossing the side of a hill. See page 46.
Never attempt to turn the vehicle around on any hill
until you've mastered (on level ground) the turning
technique outlined in this manual. See page 48.
14
SAFETY
Operator Safety
Always follow the procedures outlined in this manual
for braking if you stall or roll backwards while
climbing a hill. Never back down a hill. See page 48.
Always follow the procedures outlined in this manual for operating over
obstacles. See page 51.
Always follow the procedures outlined in this manual
for operating on slippery or loose surfaces. Use
extra caution. Always avoid skidding or sliding. See
page 50.
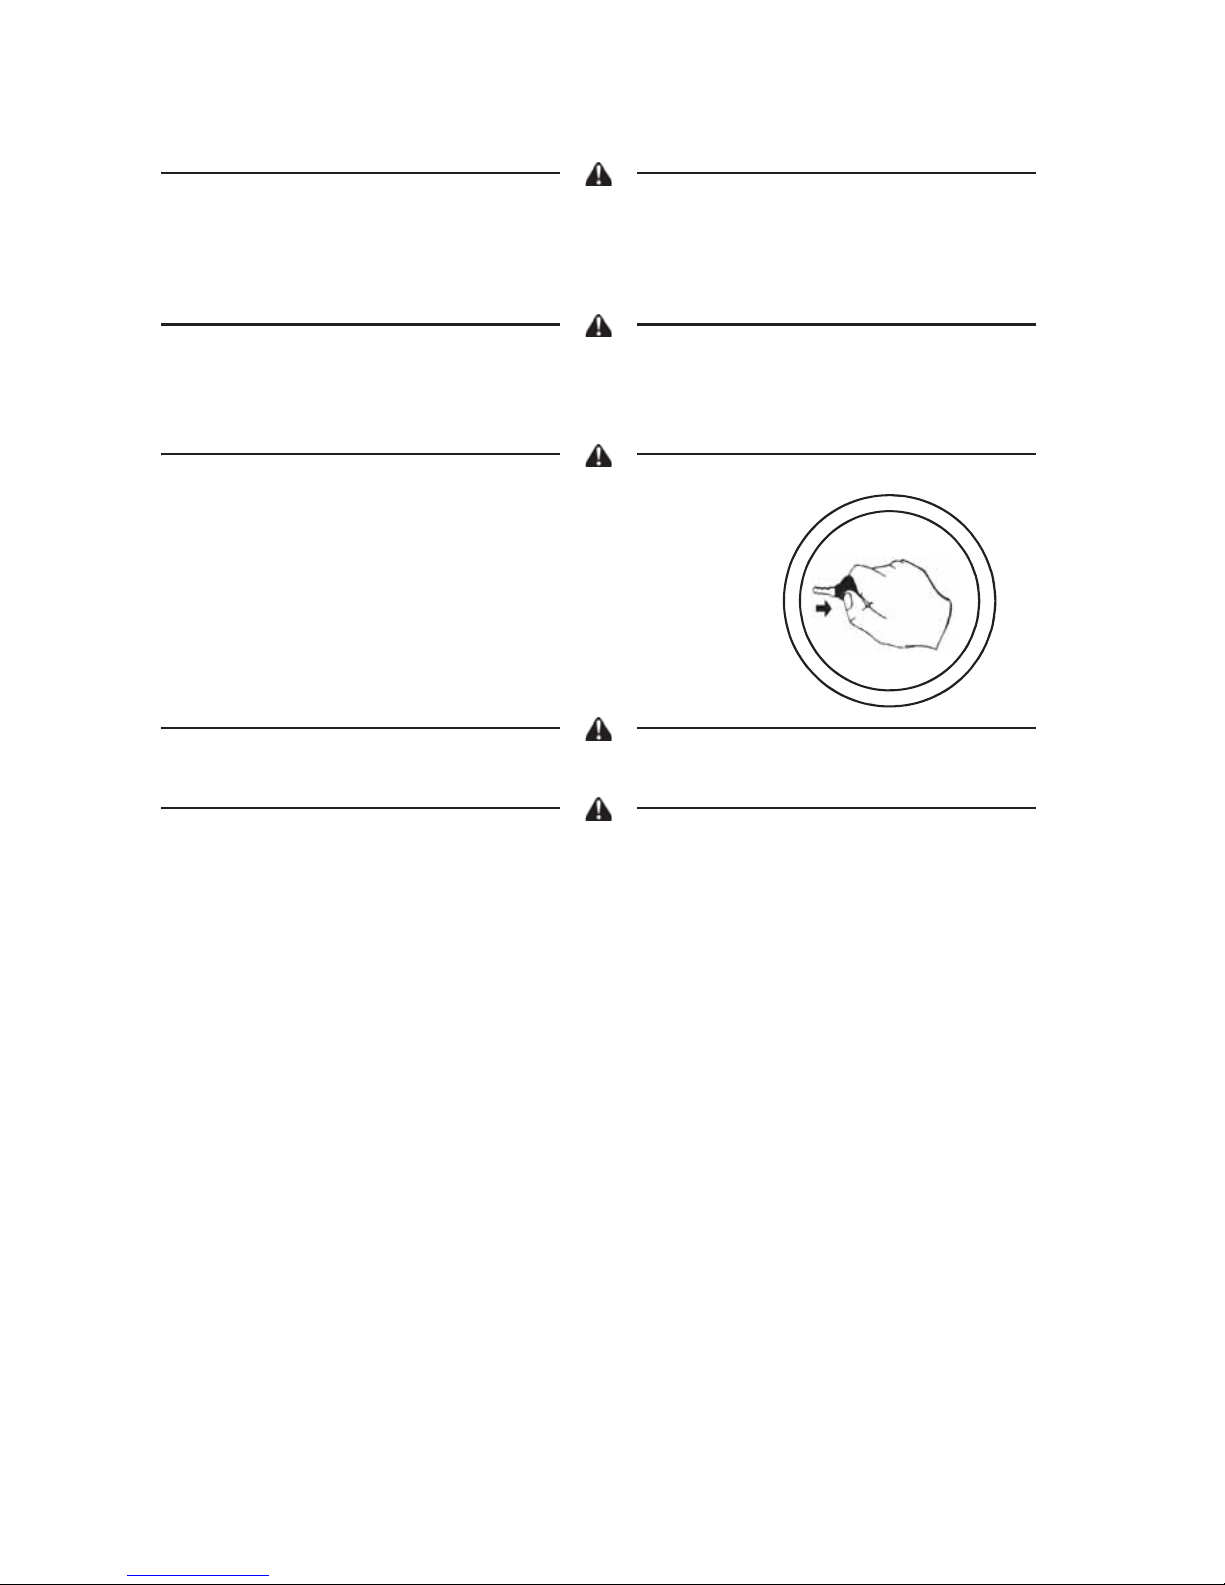
Always follow the procedures outlined in this
manual for driving through water. Never drive
through deep or fast-flowing water. See page
52.
15
SAFETY
Operator Safety
Always follow the procedures outlined in this manual for driving in reverse. See
page 54.
Always use the size and type of tires specified
for your vehicle. Maintain the proper tire
pressure.
Never modify this POLARIS vehicle through improper installation or use of
accessories.
Never exceed the stated load capacity for your vehicle. Cargo must be properly
distributed and securely attached. Reduce speed and follow the instructions in
this manual for carrying cargo or towing. NEVER exceed 80 km/h when rear
cargo loads are above 34 kg and/or front cargo loads are above 17 kg. Allow a
greater distance for braking.
16
SAFETY
Operator Safety
Never operate the vehicle on a frozen body of water unless you have
independently verified that the ice is sufficiently thick to support the weight and
moving force of the vehicle, you and your cargo, together with any other
vehicles in your party.
Operating on paved surfaces may affect the handling and control of the vehicle
and could result in loss of control. Avoid sudden turns or swift movement of the
handlebars.
Always remove the ignition key when the
vehicle is not in use to prevent unauthorized
use or accidental starting.
Always unlock the steering before starting the engine. See page 25.
Hot components can cause serious burns and fire. Do not touch hot exhaust
system components. Always keep combustible materials away from the exhaust
system.
For more information about safety, contact an
authorized POLARIS dealer or visit the POLARIS web site at
www.polaris.com.

17
SAFETY
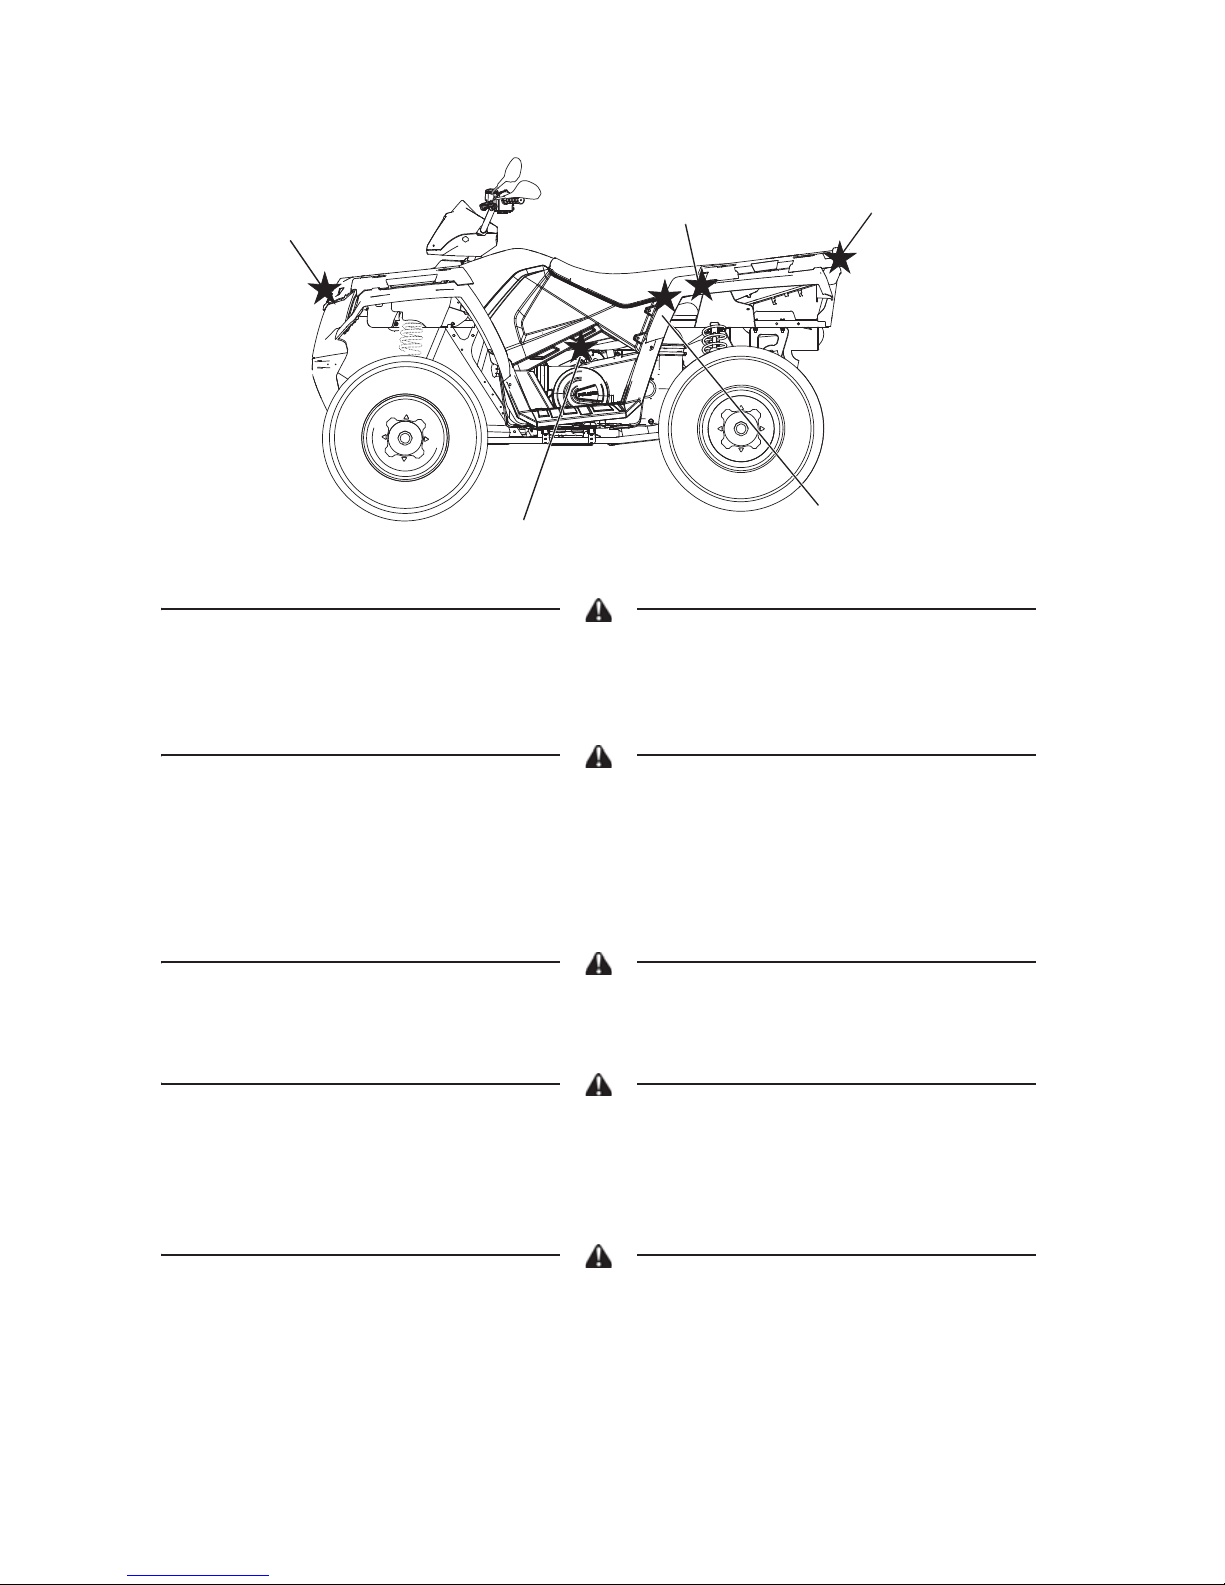
Safety Labels and Locations
Warning labels have been placed on the vehicle for your protection.
Read and follow the instructions on each label carefully. If a label
becomes illegible or comes off, contact your POLARIS dealer to purchase a replacement. Replacement safety labels are provided by
POLARIS at no charge. The part number is printed on the label.
The following pages repeat the information found on each label.
General Alert
(Multi-Lingual)
Before you operate this
vehicle, read the owner’s
manual.
Hill Operation Alert
• Never operate this vehicle on HILLS
steeper than 25 degrees 25°.
• To prevent flip-over on hilly terrain,
when going up or down, use throttle
and brakes gradually.
General
Alert
Hill
Operation
Alert
Age 16
Alert
18
SAFETY
Safety Labels and Locations
“No Passenger” Warning
WARNING - NEVER ride as a passenger . Passengers can cause a loss of
control, resulting in SEVERE INJURY or DEATH.
Tire Pressure/Load Alert
TIRE PRESSURE IN PSI (KPa): FRONT 5 (34.5) REAR 5 (34.5)
MAXIMUM WEIGHT CAPACITY (Gross Vehicle Weight) INCLUDING
MACHINE, DRIVER AND CARGO IS 485 LBS. (220 kg). Read Owner's Manual
for more detailed loading information.
Clutch Cover Alert
NO STEP
Rack Warning, Front and Rear
WARNING - DO NOT TOW FROM RACK OR BUMPER. Vehicle damage or
tipover may result causing severe injury or death. Tow only from tow hooks or
hitch. Maximum Rack Loads: Front 90 lbs. (41 kg) Rear 180 lbs. (82 kg)
Reverse Override Alert
Pushing reverse override button may cause sudden increases in power and
traction if too much throttle is applied. Loss of control or forward flipover may
result, especially in AWD. See Owner's Manual.
“No Passenger”
Warning
Rack
Warning
Rack
Warning
Tire Pressure/
Load Alert
Clutch Cover Alert

19
SAFETY
Safety Labels and Locations
Clutch Cover Warning
WARNING
• Moving parts hazard under belt-clutch guard. T o prevent serious injury, do not
operate vehicle with guard removed.
• Do not modify engine or clutch. Doing so can cause part failure, possible
imbalance, and excessive engine RPM, which can result in serious injury or
death.
NO STEP
Rack Warning, Front and Rear
WARNING
• DO NOT TOW FROM RACK OR BUMPER. Vehicle damage or tipover may
result causing severe injury or death. Tow only from tow hooks or hitch.
• Max Rack Loads: Front 90 lb s. (41 kg) Rear 180 lbs. (82 kg)
Reverse Override Warning
WARNING
Improper use of override button can lead to loss of control resulting in serious
injury or death. Do not activate override while throttle is engaged. Always apply
throttle gradually while in reverse.
4X4 (AWD) Caution
CAUTION
Do not push switch to engage 4X4 (AWD) if the rear wheels are spinning. This
may cause severe drive shaft and clutch damage.
Tire Pressure/Load Warning
“No Passenger”
Warning
Rack
Warning
Clutch Cover
Warning
4X4 (AWD)
Warning
Reverse Override
Warning
Age 16 Warning
Rack
Warning
20
FEATURES AND CONTROLS
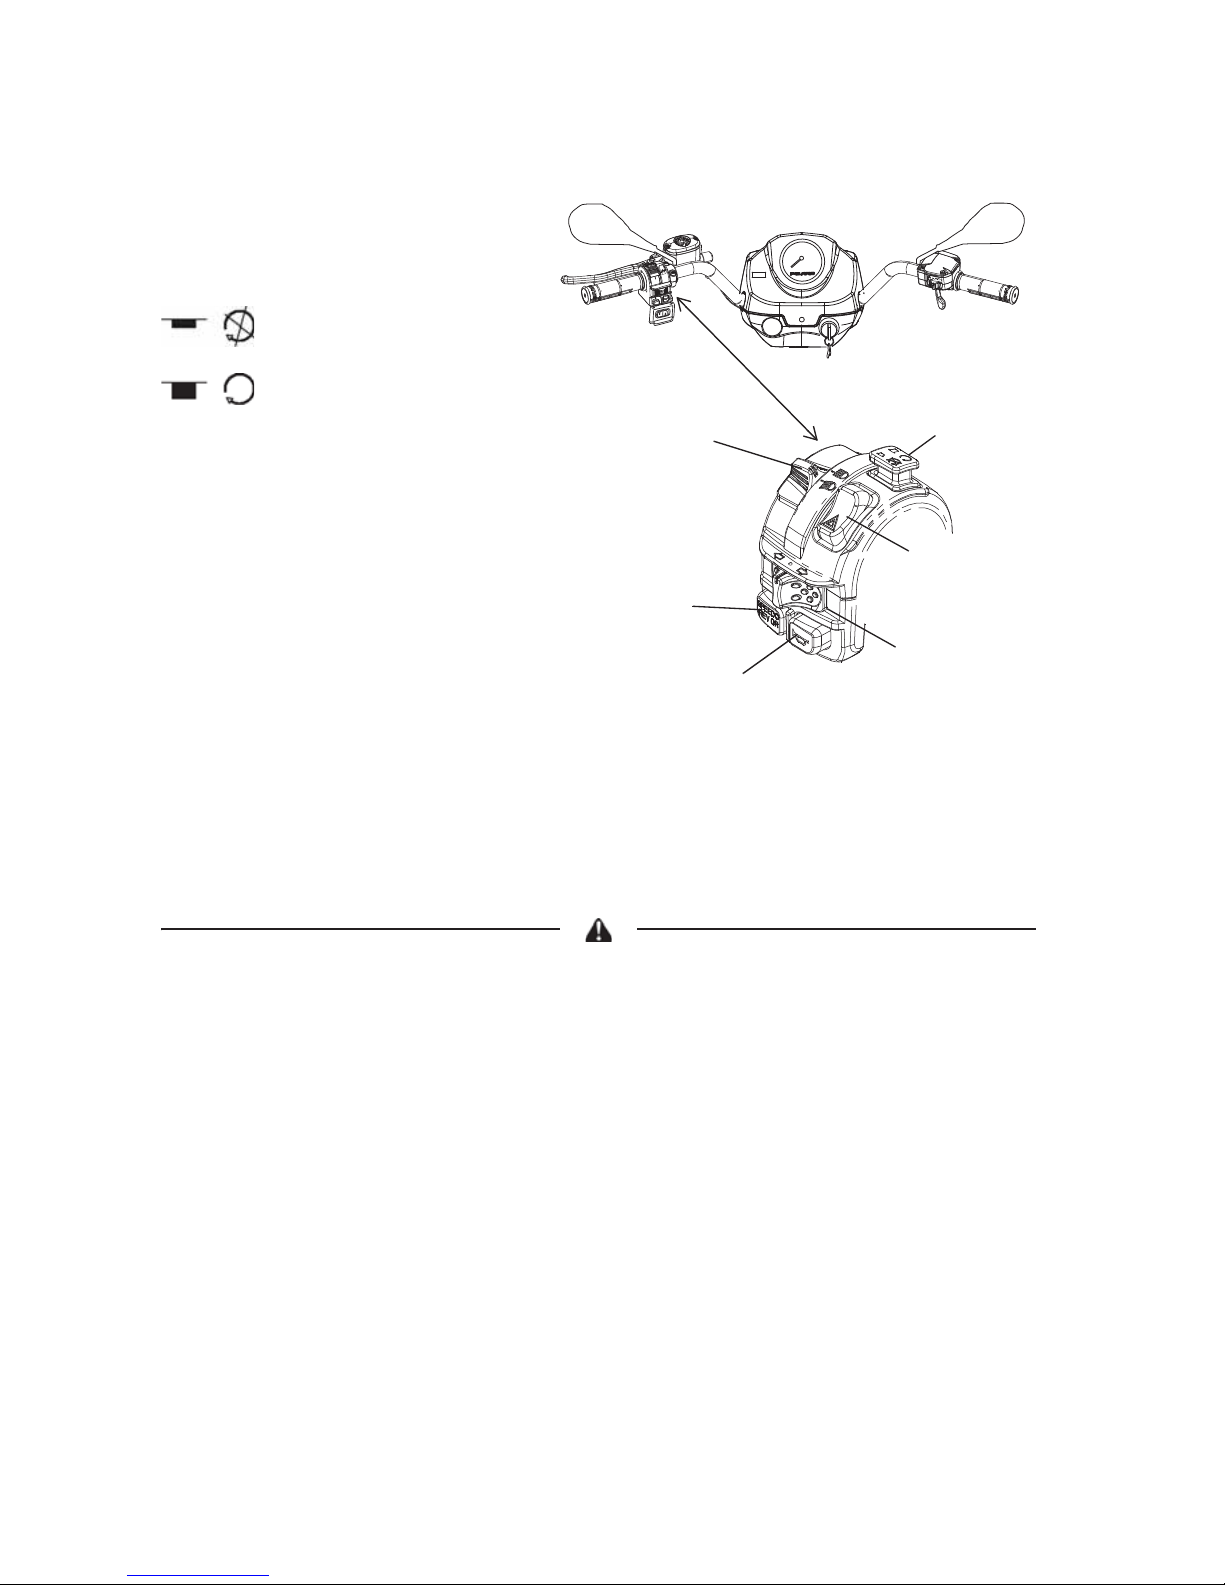
Switches
Engine Stop Switch
The engine will not start or
run when the switch is in the
OFF position.
OFF
RUN
Push the stop switch down to
stop the engine quickly. Pull
the stop switch up to the
RUN position before
attempting to start the
engine.
Both the main switch and the
engine stop switch will shut
off all electrical power to the
vehicle, including lights.
Mode/Reverse Override Switch
This vehicle is equipped with a reverse speed limiter system. To gain
additional wheel speed while backing, release the throttle and depress
the override switch.
Pressing the override switch while the throttle is open can cause loss of control,
which may result in serious injury or death. Always release the throttle before
pressing the override switch.
The reverse override button also acts as a MODE button when held
down for approximately one half second. See the instrument cluster
information beginning on page 28. The transmission cannot be in
reverse when using the override button as a MODE button.
OUT
IN
Engine
Stop
Switch
Headlight
Switch
Horn
Switch
Hazard
Switch
Turn
Signal
Switch
Reverse
Override
Switch

21
FEATURES AND CONTROLS
Switches
Headlight Switch
The lights do not operate unless the main key switch is on and the
engine stop switch is in the RUN position.
High Beam
Low Beam
Turn Signal Switch
Push the toggle switch either left or right to activate the corre-
sponding turn signal light. The indicator on the pod will also flash.
Return the toggle to the center position to end the signal.
Horn Switch
Press the horn switch to sound the horn.
Hazard Warning Switch
Push the hazard warning switch to cause all turn signal lights to
flash simultaneously. Use this feature to alert others of an emergency or
other situation requiring caution.
22
FEATURES AND CONTROLS
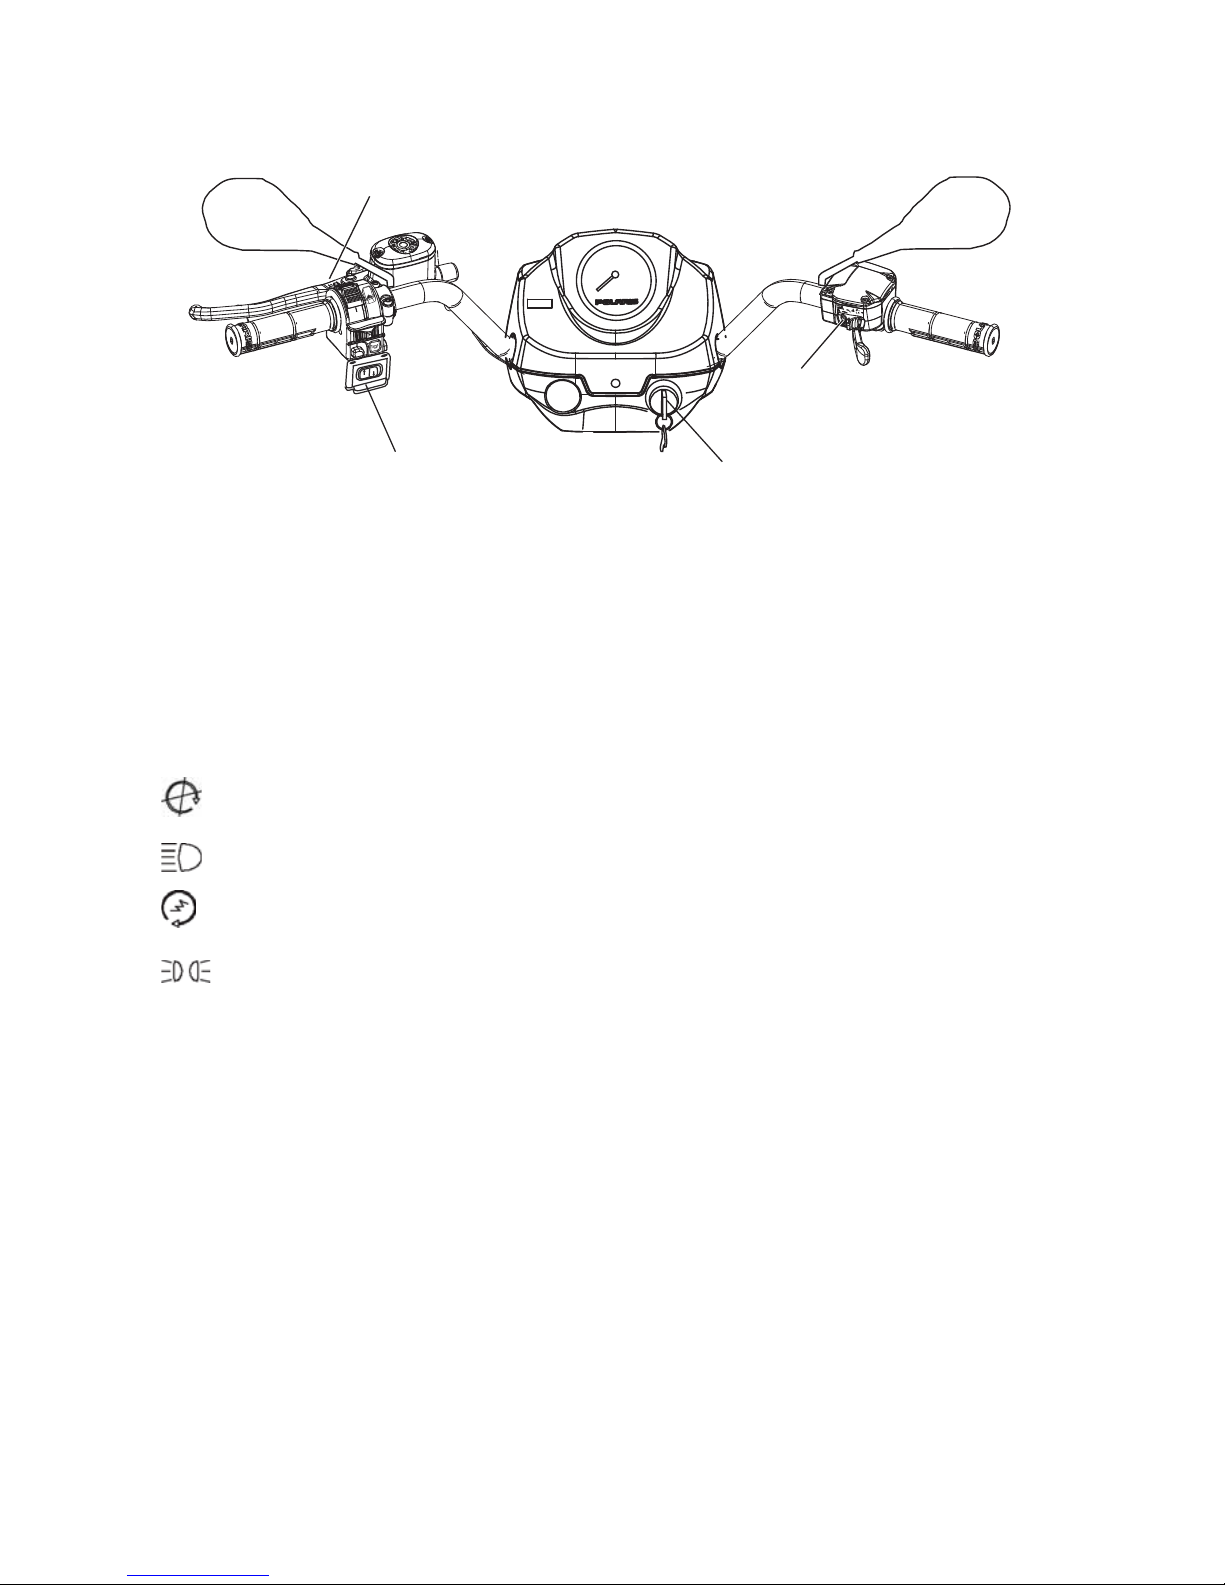
Switches
Momentary High Beam Switch
Press this switch with your left forefinger to activate the headlight high
beam. The lights will return to low beam when the switch is released.
Winch Switch
See page 58 for winch information.
Main Key Switch
End all electrical power to the vehicle.
LIGHTS ON position turns the headlights on.
Start the engine. The headlights are not on in this position.
After starting the engine, release the key switch to the PARKING
LIGHTS ON position. The parking lights and taillights are on in
this position. See page 41 for starting procedures.
4X4 Switch
Use the 4X4 switch to engage 4X4 or 2X4. See page 27.
Mirrors
Use the mirrors to assist in traffic maneuvers. Always check and adjust
the mirrors before driving the vehicle.
OUT
IN
Winch Switch
Momentary High-Beam Switch
4X4
Switch
Main Key Switch
23
FEATURES AND CONTROLS
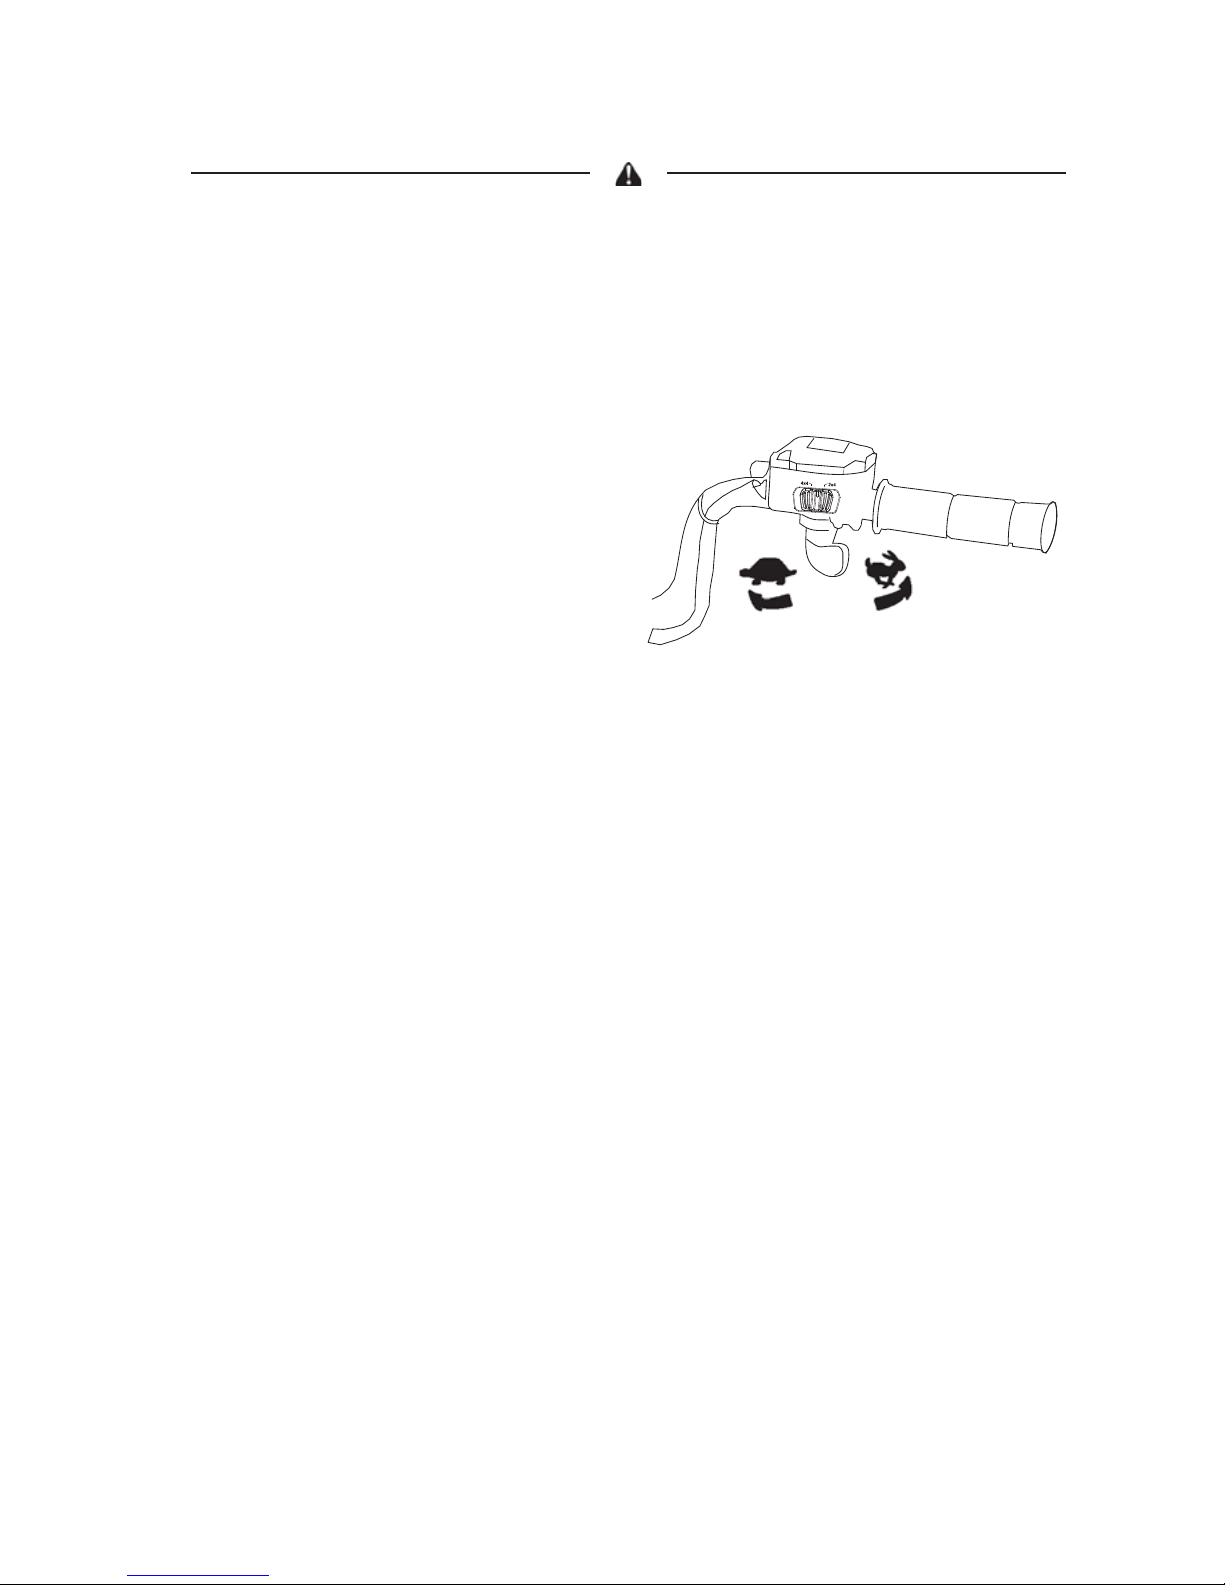
Throttle Lever
Failure to check or maintain proper operation of the throttle system can result in
an accident if the throttle lever sticks during operation. Check the lever for
proper operation before starting the engine. Check occasionally during
operation.
Do not start or operate a vehicle with sticking or improperly operating throttle
controls. Contact your dealer for repair if throttle problems arise.
Press the throttle lever to increase
engine speed and vehicle
movement.
Release the lever to reduce engine
speed and vehicle movement.
This vehicle is equipped with a
throttle release switch, which is
designed to reduce the risk of a
frozen or stuck throttle. If the
throttle cable should stick in an open position when the operator releases
the throttle lever , t he engine wil l stop, and power to the rear wheels will
cease.
Electronic Power Steering (EPS)
Electronic power steering (EPS), if equipped, engages when the ignition
key is turned to the ON position. EPS remains engaged whether the
vehicle is moving or idle. See page 29 for EPS Warning Indicator information.
2x4
24
FEATURES AND CONTROLS
Foot Brake
The all-wheel foot brake is located
on the right footrest. The foot brake
operates both front and rear brakes.
Press the brake pedal down with
your foot to apply the all-wheel
brakes.
If the rear wheels begin to skid or
slide while using the foot brake,
reduce brake pressure.
Hand Brake Lever
The hand brake operates both
front and rear brakes. Squeeze
the brake lever toward the handlebar to apply the all-wheel
brakes.
If the rear wheels begin to skid
or slide while using the brake,
reduce lever pressure.
Aggressively applying the brakes when backing down a hill may cause rear
tipover. Aggressively applying the brakes while moving forward may cause the
rear wheels to skid and result in loss of control.
Read this owner's manual and understand the operation of all brake systems on
this vehicle. Always use caution whenever applying the brakes.
Foot Brake
25
FEATURES AND CONTROLS
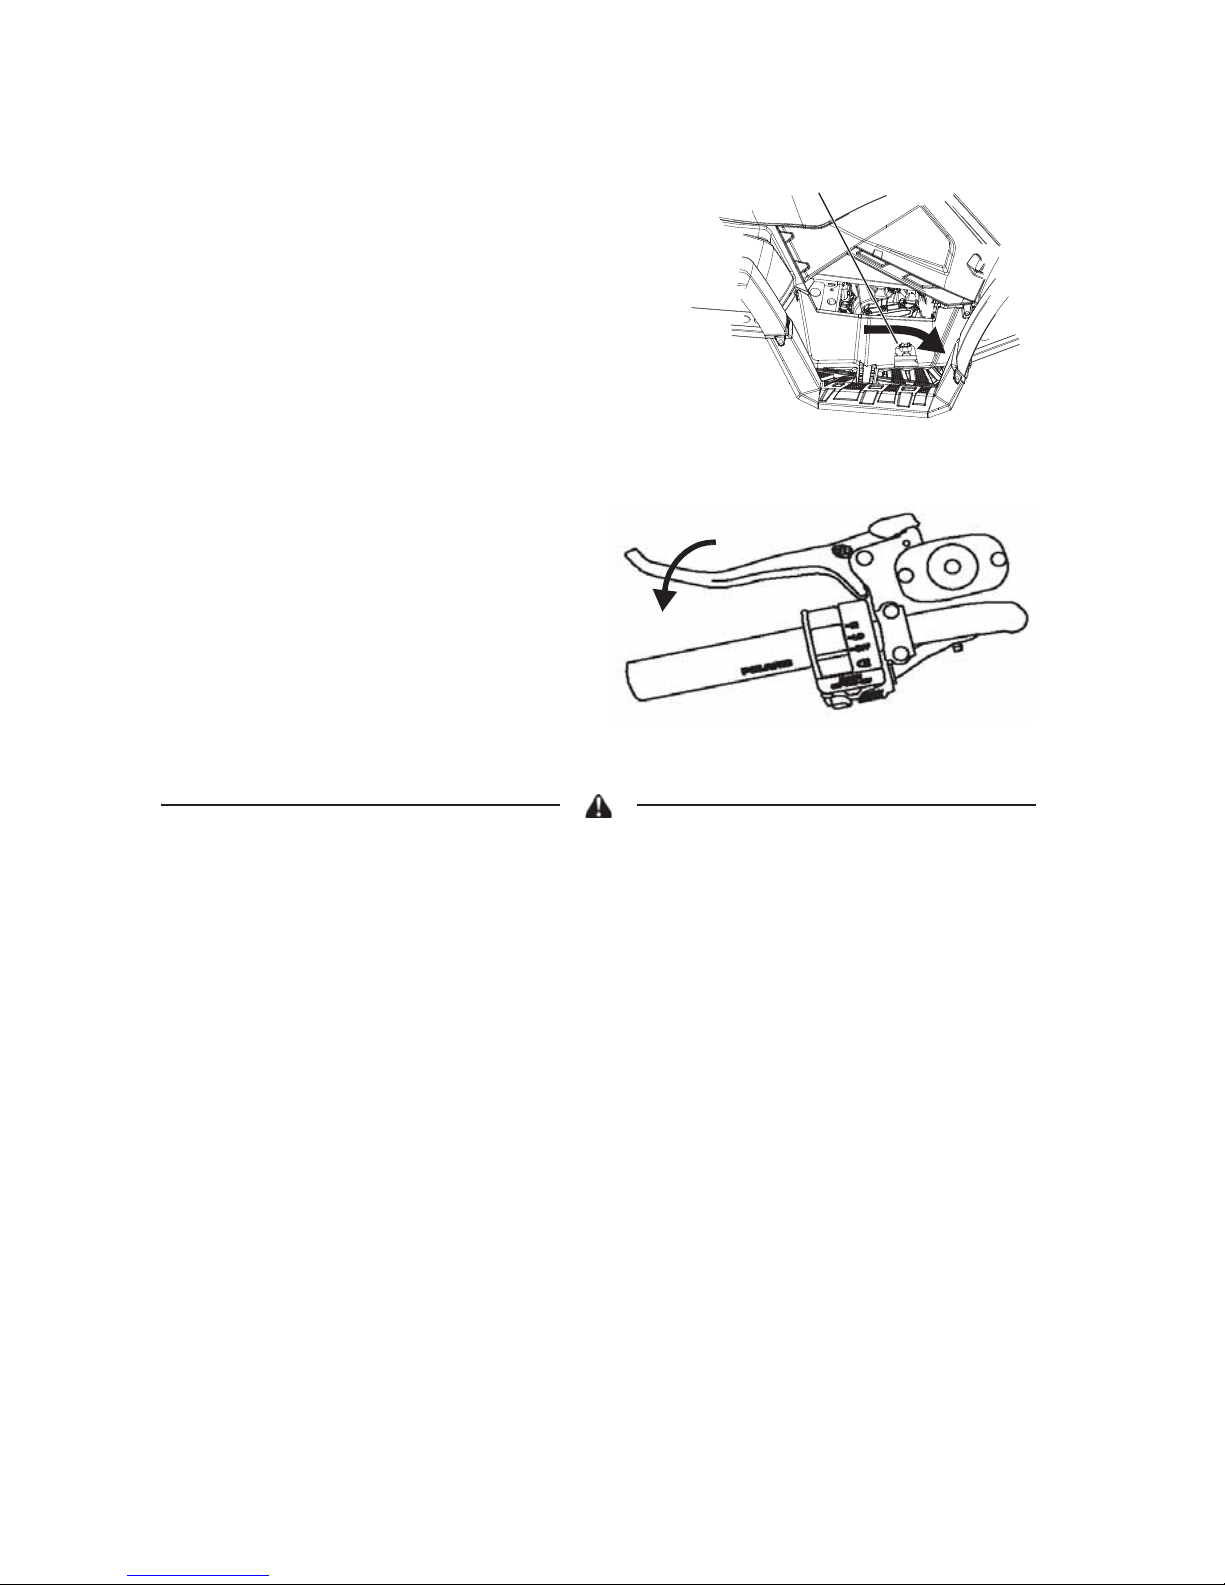
Parking Brake
Locking the Parking Brake
1. Place the transmission in
PARK.
2. Squeeze the brake lever
toward the handlebar.
3. Push the parking brake lock
forward to engage the lock.
4. Release the brake lever.
5. To rele ase the parking brake
lock, squeeze and release the brake lever.
Operating the vehicle while the parking brake is engaged could result in an
accident and serious injury or death. Always release the parking brake lock
before operating.
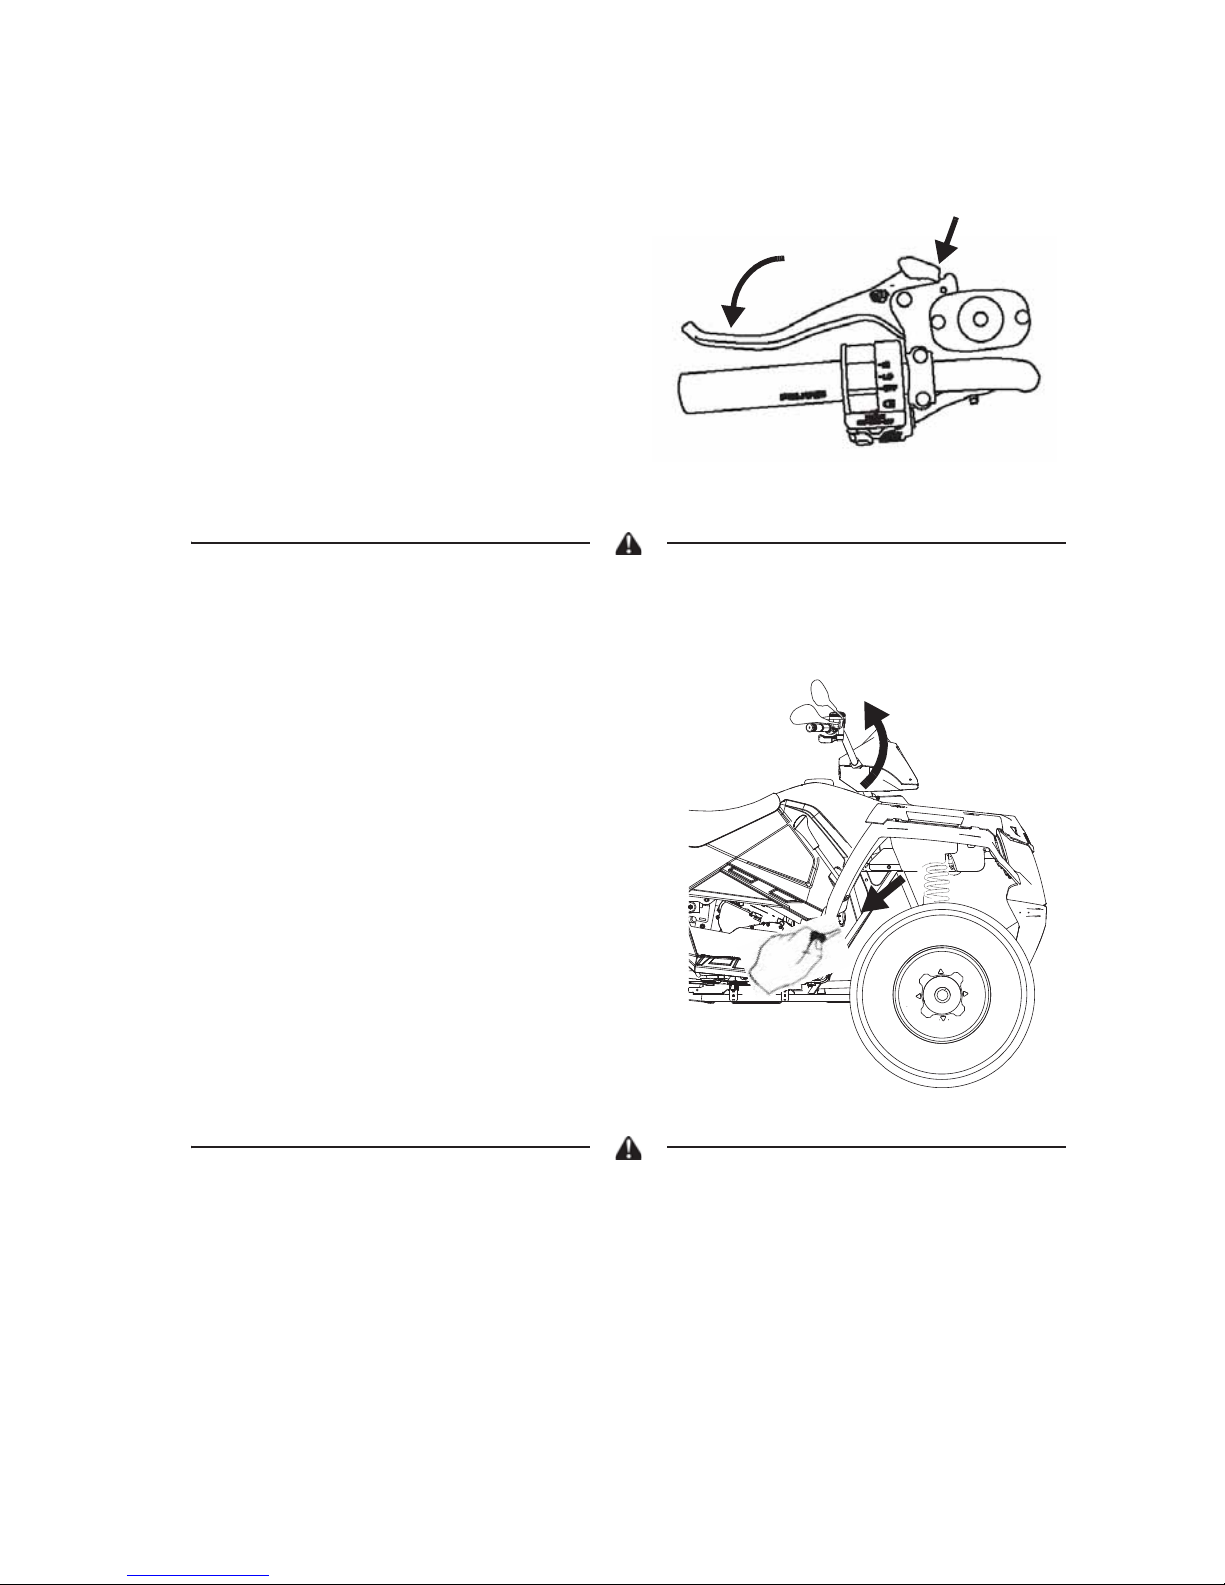
Steering Lock
Lock the steering to prevent unauthorized use or theft of the vehicle.
Tip: Place the steering lock keys in a safe
place. The lock must be replaced if the
keys are lost.
1. Turn the handlebars to the full left
position.
2. Insert the steering lock key and
turn it clockwise.
3. Remove the key.
4. Reverse the procedure to unlock
the steering.
The handlebars are locked in the full left position when the steering is locked.
Always unlock the steering before starting the engine.
26
FEATURES AND CONTROLS
Fuel Tank Cap
This vehicle is equipped with a digital
fuel gauge that will indicate a low fuel
condition. Refuel when the gauge
indicates a low fuel condition.
Always refuel with the engine
stopped, and outdoors or in a well
ventilated area. Refuel on a level
surface.
Remove the fuel tank cap to add fuel
to the fuel tank. Use either leaded or
unleaded gasoline with a minimum
pump octane number of 87 = (R + M/
2) octane. Do not use fuel with
ethanol content greater than 10
percent, such as E-85 fuel.
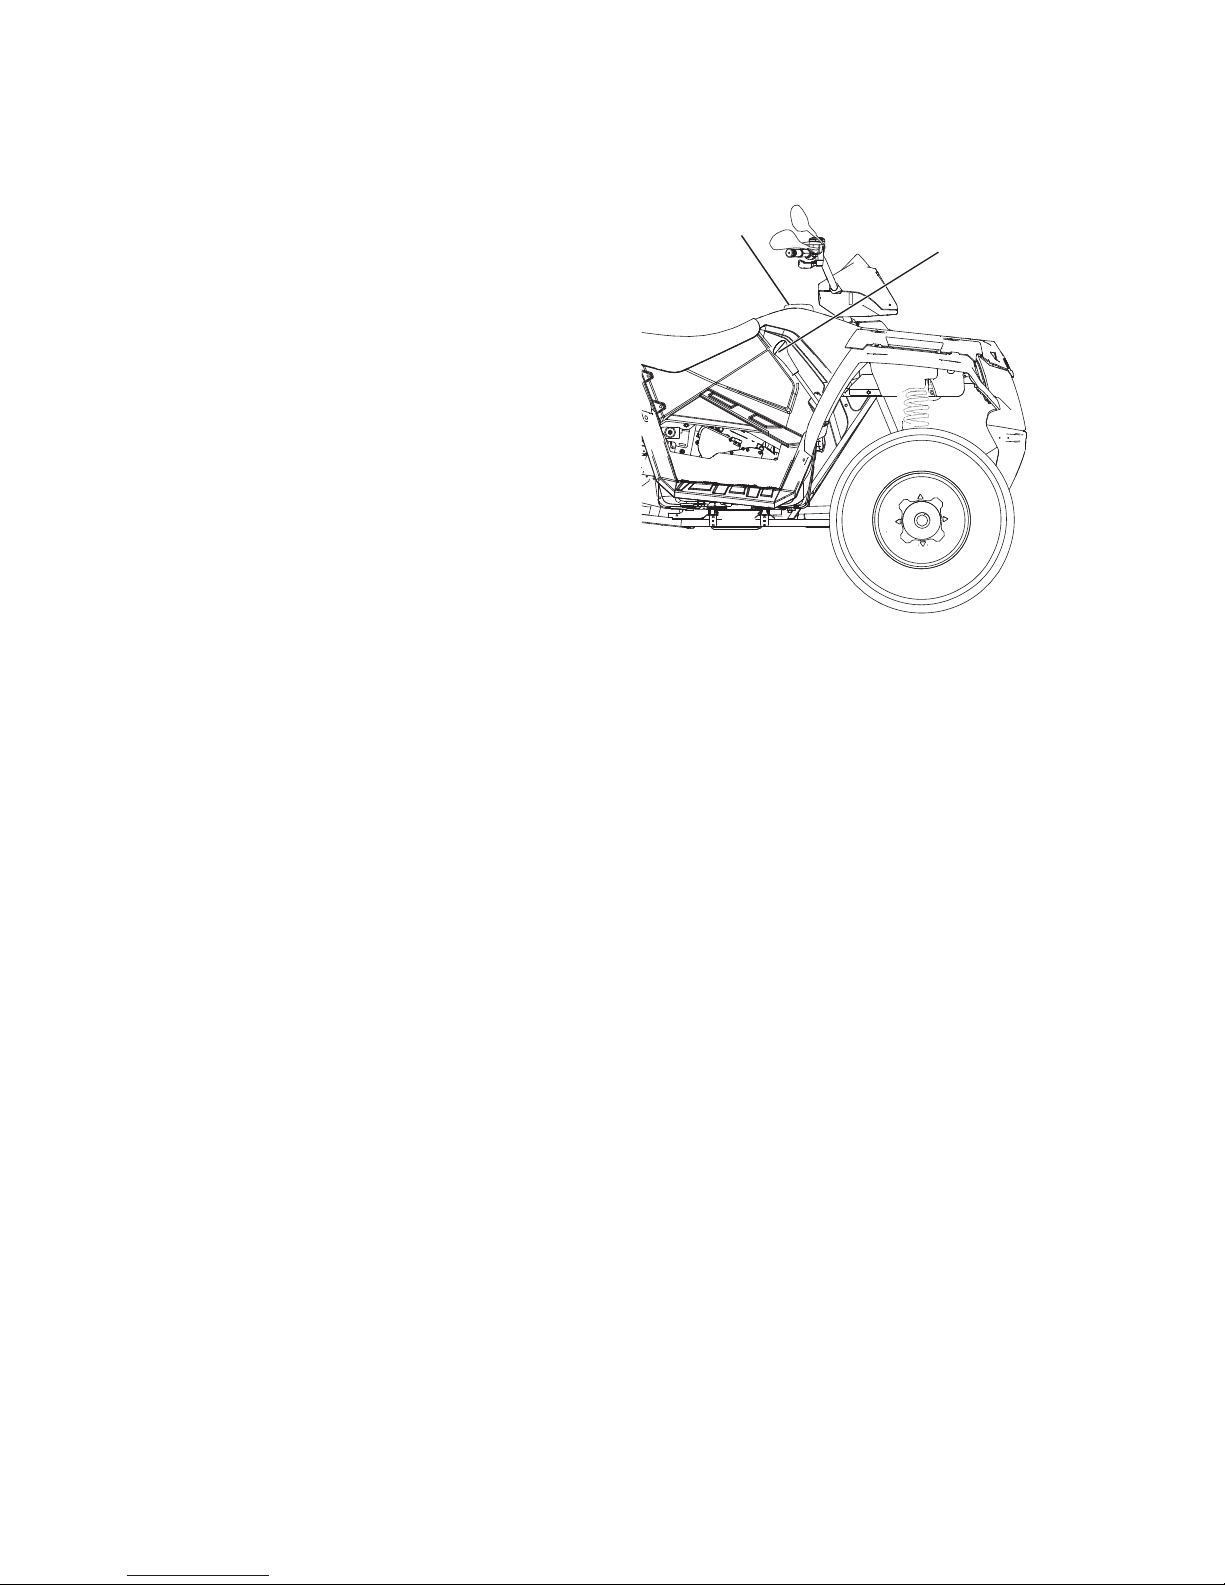
Automatic Transmission Gear Selector
The transmission gear selector is located on the right side of the vehicle.
H: High Gear
L: Low Gear
N: Neutral
R: Reverse
P: Park
To shift gears, brake to a complete stop. When the engine is idling,
move the lever to the desired gear.
NOTICE: Shifting gears with the engine speed above idle or while the vehicle is
moving could cause transmission damage.
Whenever the vehicle is left unattended, always place the transmission
in PARK. The transmission is locked when it’s in PARK.
Belt Life
To extend belt life, use low forward gear when pulling a heavy load at
less than 11 km/h for extended periods and when operating uphill at a
slow speed.
Fuel Tank
Cap
Gear
Selector
27
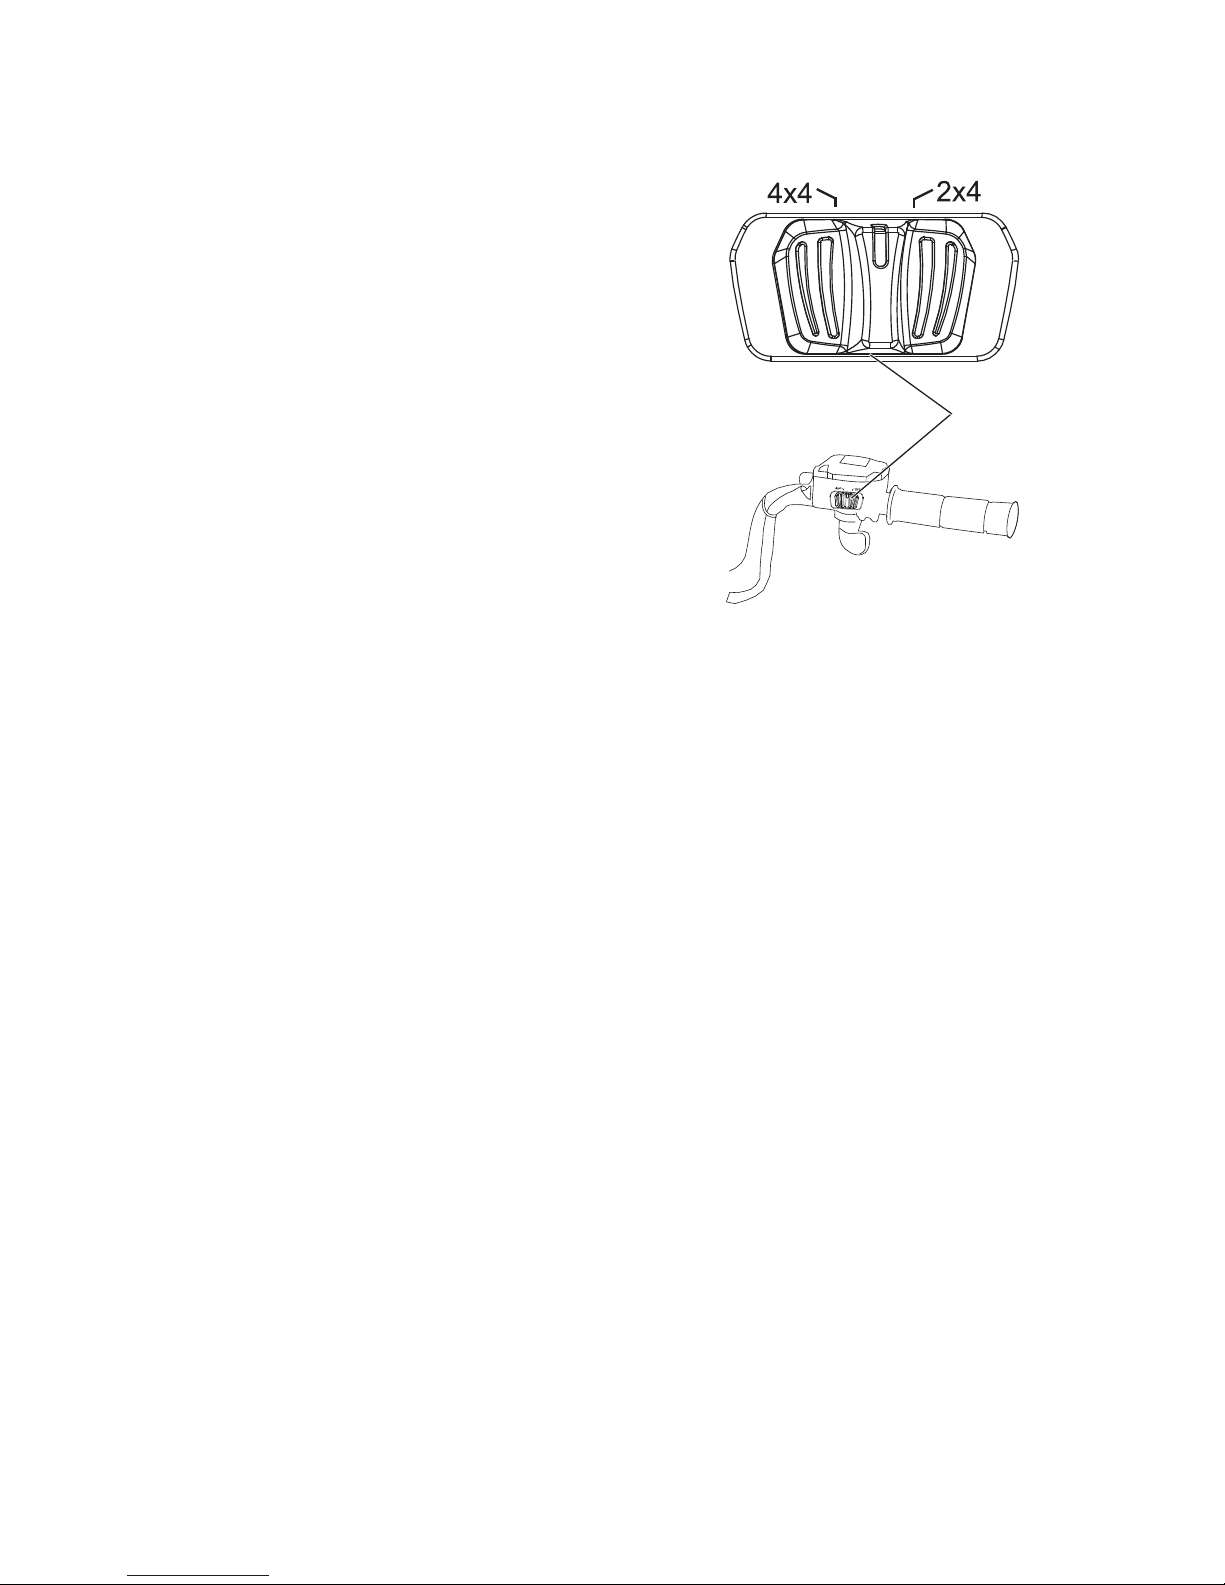
FEATURES AND CONTROLS
All Wheel Drive System
The All Wheel Drive system is
controlled by the 4X4 switch.
4X4 Mode
When the switch is on 4X4, the ATV is
in 4X4, and the 4X4 indicator icon in
the instrument cluster display will be
visible.
When in 4X4, the demand drive unit
will automatically engage any time the
rear wheels lose traction. When the
rear wheels regain traction, the
demand drive unit will automatically
disengage.
There is no limit to the length of time
the vehicle may remain in 4X4. The vehicle automatically engages 4X4
when operating in reverse if the switch is set to the 4X4 position.
2X4 Mode
When the switch is on 2X4, the ATV is in two-wheel drive at all times.
Engaging 4X4
The 4X4 switch may be turned on or off while the vehicle is moving.
Initially, the vehicle's electronic system will not enable 4X4 until the
engine RPM is below 3100. Once enabled, 4X4 remains enabled until
the 4X4 switch is turned of f. If the switch is turned of f while the demand
drive unit is moving, it will not disengage until the rear wheels regain
traction.
Engage the 4X4 switch before getting into conditions where front wheel
drive may be needed. If the rear wheels are spinning, release the throttle
before switching to 4X4.
NOTICE: Switching to 4X4 while the rear wheels are spinning may cause
severe drive shaft and gearcase damage. Always switch to 4X4 while
the rear wheels have traction or are at rest.
2x4
4X4
Switch
28
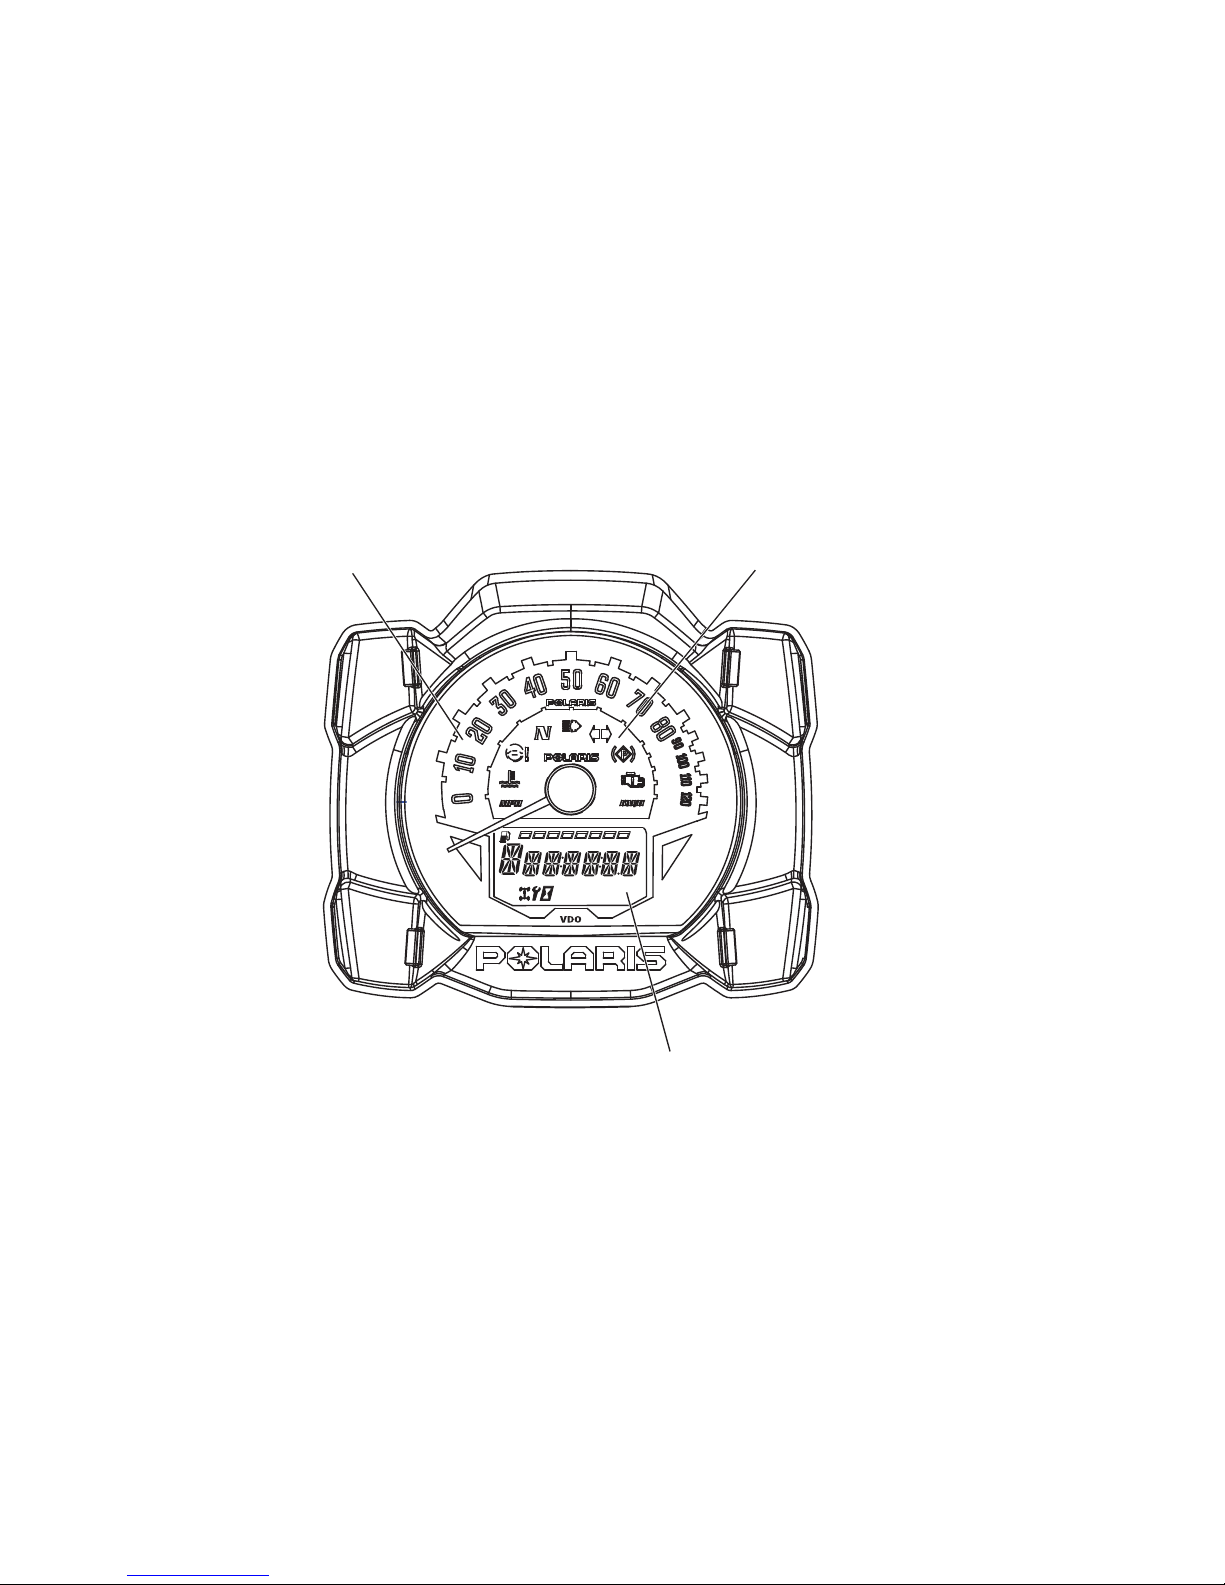
FEATURES AND CONTROLS
Instrument Cluster
NOTICE: High water pressure may damage ATV components. Wash the A T V
by hand or with a garden hose using mild soap.
Certain products, including insect repellents and chemicals, will
damage the speedometer lens and other plastic surfaces. Do not use
alcohol to clean the instrument cluster. Do not allow insect sprays to
contact the lens. Immediately clean off any gasoline that splashes on
the instrument cluster.
Digital/Analog Gauge
Speedometer
The speedometer displays vehicle speed in either miles per hour (MPH)
or kilometers per hour (km/h).
Trip 1
km
mi
RPM
FE
88
:
88
Rider Information
Center
Speedometer
Indicator Lamps
29
FEATURES AND CONTROLS
Instrument Cluster
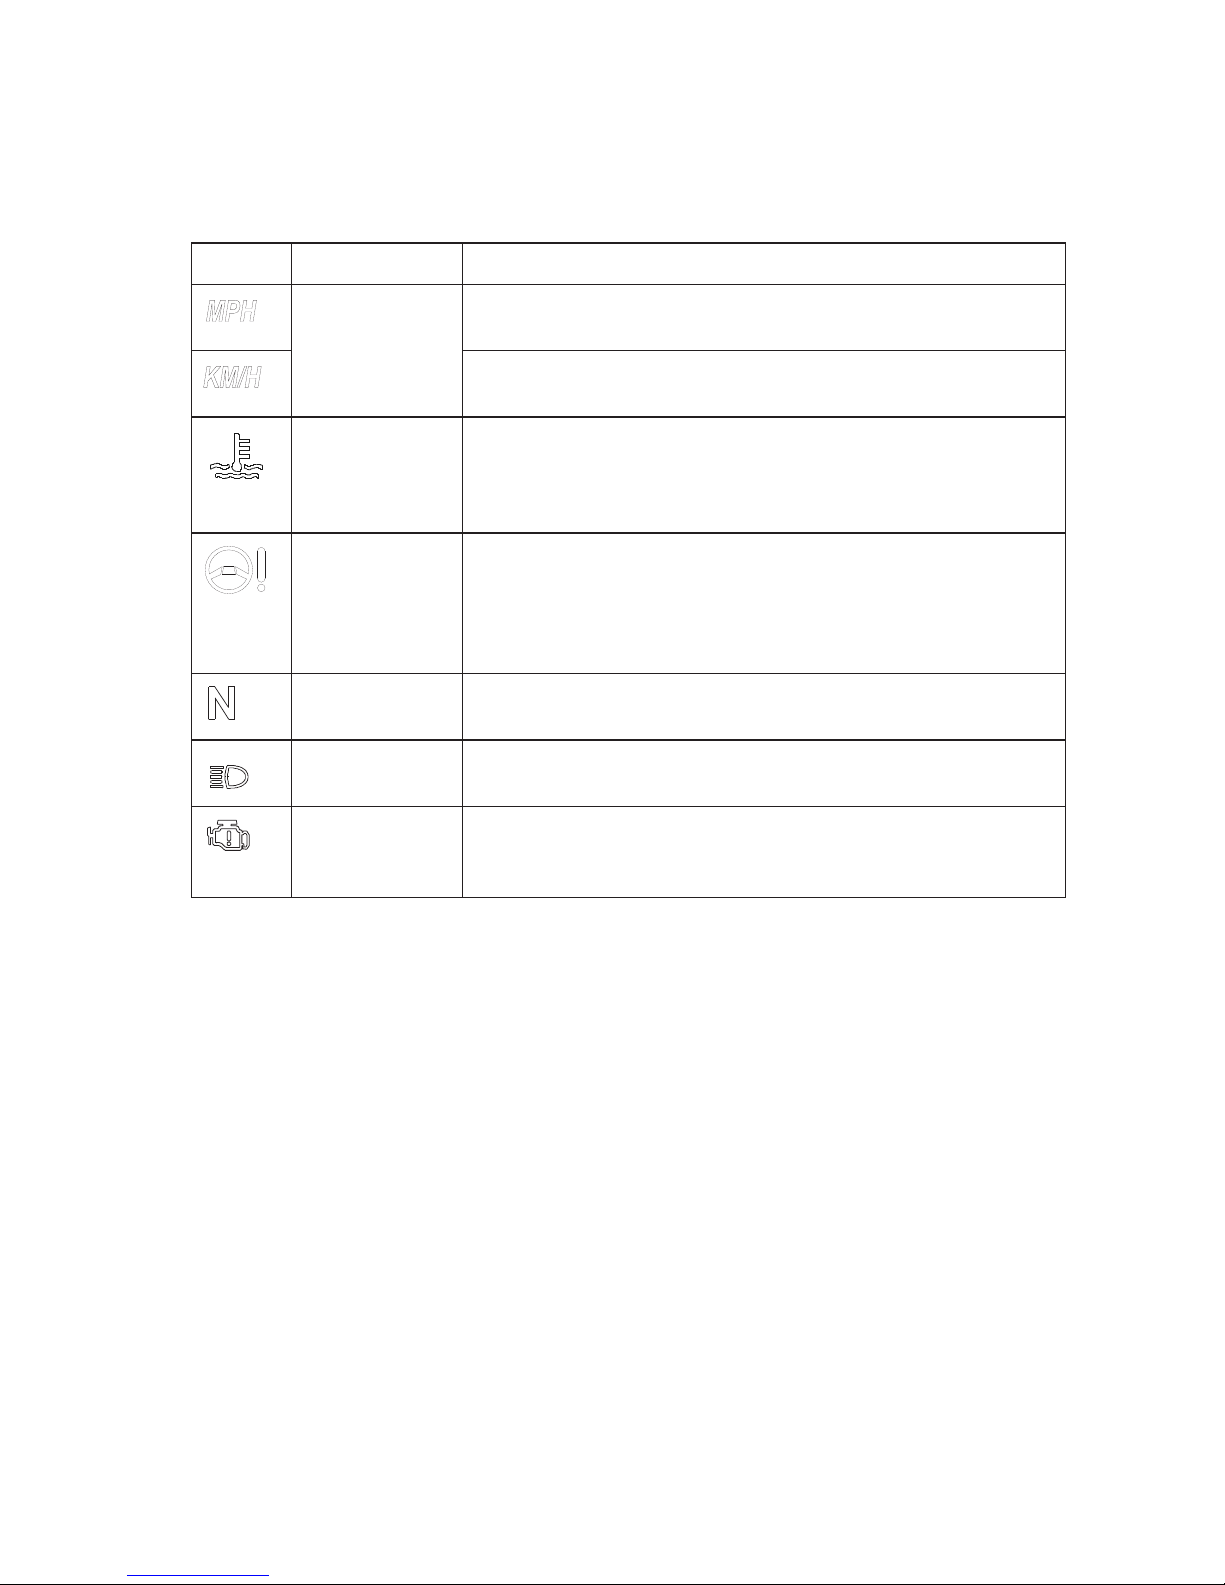
Digital/Analog Gauge
Indicator Lamps
Lamp Indicates Condition
Vehicle
Speed
When standard mode is selected, speed displays in
miles per hour.
When metric mode is selected, speed displays in
kilometers per hour.
Over
Temperature
This lamp flashes to indicate an overheated engine. If
the indicator stops flashing but remains illuminated,
the overheating condition remains, and the system
will automatically reduce engine power.
EPS Warning
(if equipped)
This indicator illuminates when the key is turned to
the ON position and goes off when the engine is
started. If the light remains on after starting the
engine, the EPS system is inoperative. See your
authorized POLARIS dealer for service.
Neutral This lamp illuminates when the transmission is in
neutral and the ignition key is in the ON position.
High Beam This lamp illuminates when the headlamp switch is
set to high beam.
Check Engine This indicator appears if an EFI-related fault occurs.
Do not operate the ATV if this warning appears.
Serious engine damage could result. See your dealer.
 Loading...