

Page 1
NG7
User Manual
NG7 User Manual Polaris 16/05/2017 3:40 pm Page 1
Page 2
- 2 -
Thank you for purchasing the Polaris NG7.
Before operation, be sure to thoroughly read these instructions.
Keep these instructions with your vehicle records for future reference.
Warranty for this product is 3 years from date of purchase, however warranty will be voided if:
• The unit is tampered with, damaged or modified in any way.
• Reverse camera cable is cut or modified in any way.
• Reverse camera is subjected to over voltage.
• The Navigation SD card is damaged or tampered with in any way (this includes installing foreign
mapping or software onto the SD card).
Warranty Terms
The NG7 is covered for 3 years and includes:
• Defective Equipment • Defective Cables
Not Covered under warranty:
• Abuse • Improper installation
• Alteration to cables (this includes cutting of any cables) • Remote control batteries
• Accidents • Water Damage • Improper use • Labour
If you have any questions concerning the installation, warranty or the operation of the unit,
please contact
Polaris
on
1300 555 514.
We hope that you enjoy the Polaris NG7.
INDEX
Wiring Diagram ................................................. Page 3
Home Screen ..................................................... Page 4
Street Navigation .............................................. Page 5
Off Road Navigation ......................................... Page 5
DVR Function .................................................... Page 6-9
Camera Functionality.......................................... Page 10-13
USB .................................................................... Page 14-17
Set Up ................................................................ Page 18
Display .............................................................. Page 18
General ............................................................. Page 19
Date/Time ........................................................... Page 20-21
Specifications .................................................... Page 23
NG7 User Manual Polaris 16/05/2017 3:40 pm Page 2
Page 3
- 3 -
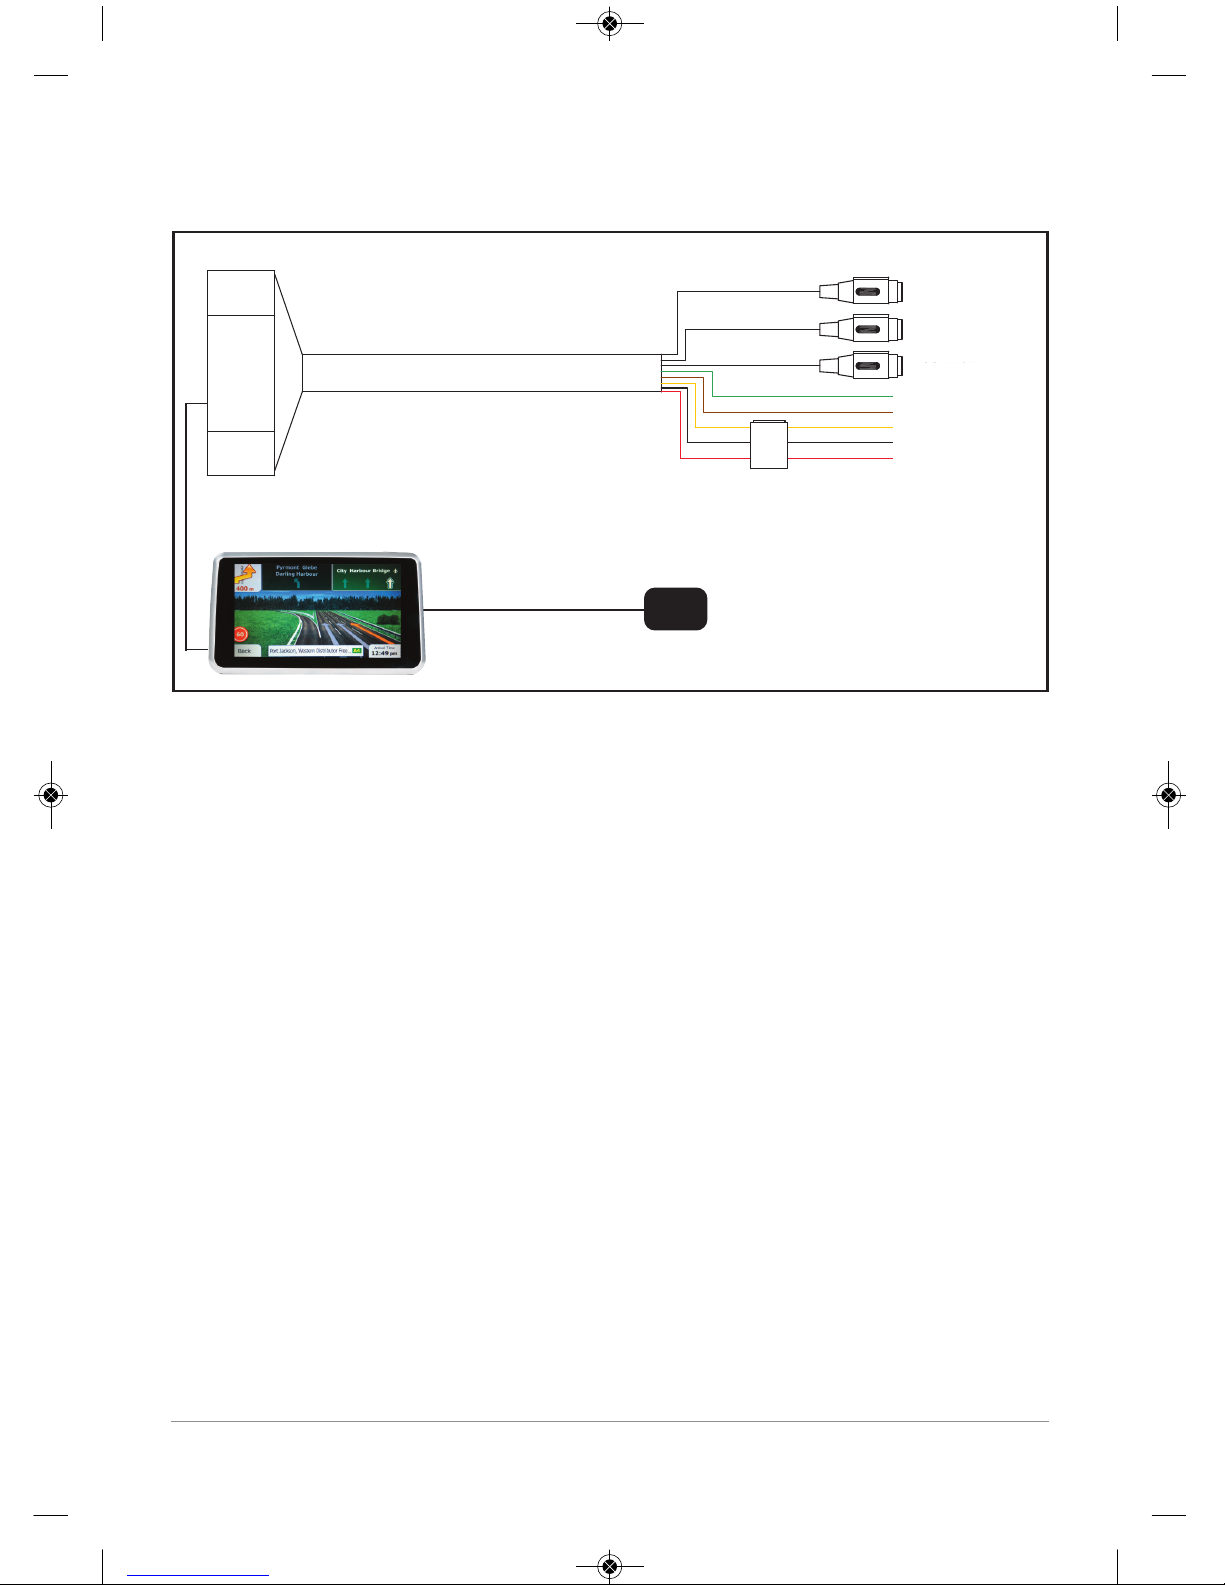
Wiring Diagram
WIRING NOTES
• Please make sure that the correct reverse / front camera is connected to the correct camera
input on the wiring harness, otherwise the cameras may not appear according to the
NG7’s software sequence.
• Please make sure you connect the reverse trigger wire in order for the reverse camera to
appear on the screen when reverse gear is selected (you can still access caravan camera
whilst the car is in reverse as well, please see page 10).
• If you are connecting a caravan camera to the NG7, please see page 19 to make sure the
setting is switched on.
• If you are connecting a front camera, please see page 19 to make sure the setting is
switched on and to nominate a time interval for the front camera to appear after
reverse gear has been disengaged.
• The illumination wire is to be connected in order for the screen to dim when the vehicle’s
headlights are switched on.
• We recommend mounting the GPS external antenna on the dash either in the top left or
top right hand corner.
• Constant power is needed (yellow) so that the date and time holds its setting for the DVR
function.
• Please make sure you connect the GPS external antenna, otherwise the NG7 will not pick
up any satellites.
If you have any questions in regards to the wiring of the NG7, please do not hesitate to give
us a call on 1300 555 514.
FR CAM
REAR CAM
CARAVAN CAM
REVERSE (GREEN)
ILL (BROWN)
+12V-24V CONSTANT (YELLOW)
GND (BLACK)
ACC+ (RED)
Plugs into back of monitor
GPS Antenna - plugs into the
back of the monitor
NG7 User Manual Polaris 16/05/2017 3:40 pm Page 3
Page 4
1 2
3 4
5
6 7
8
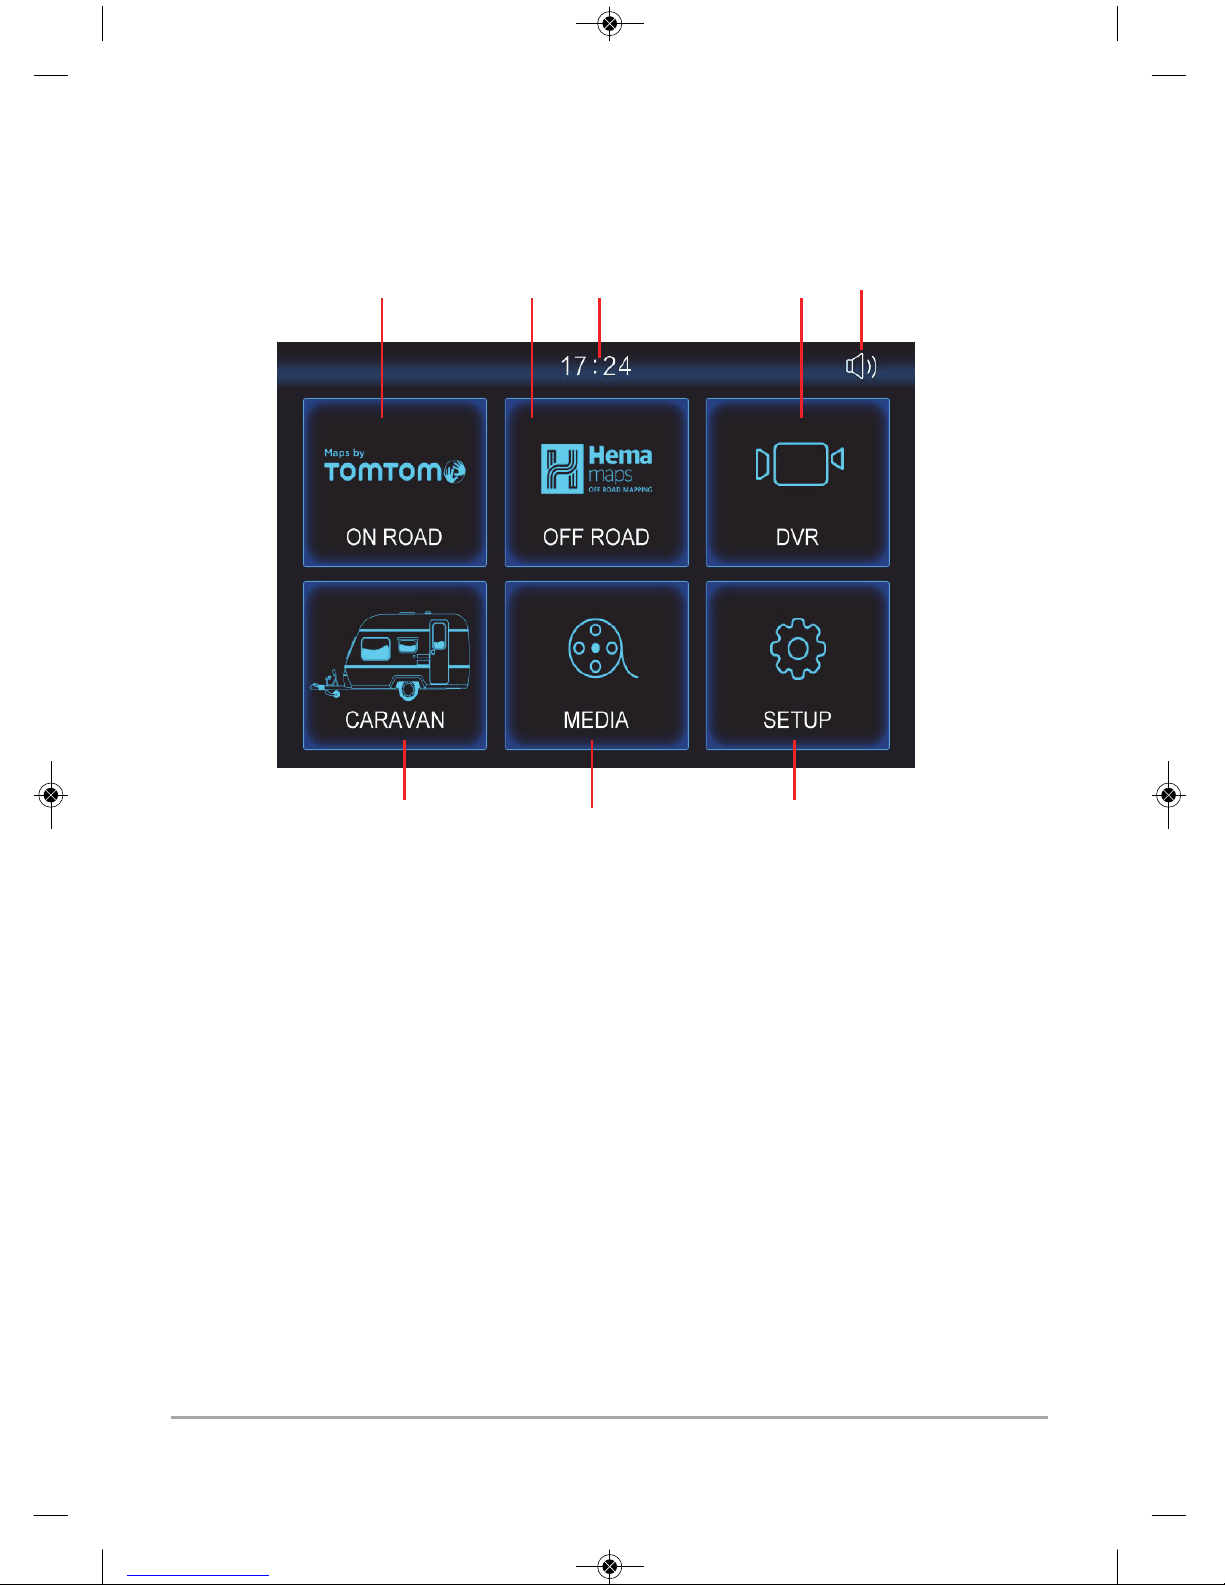
Home Screen
1. Street Navigation: Touch this icon to enter into street navigation.
2. Off Road Navigation: Touch this icon to enter into off road navigation.
3. Clock: This feature displays the current time.
4. DVR: Touch this icon to enter into the built in crash cam function.
5. Volume: Touch this icon to adjust volume or to mute volume.
6. Caravan: Touch this icon to view reverse, caravan or forward vision camera at any time.
7. Media: Touch this icon to enter into the USB function.
8. Setup: Touch this icon to enter into settings.
- 4 -
NG7 User Manual Polaris 16/05/2017 3:40 pm Page 4
Page 5
- 5 -
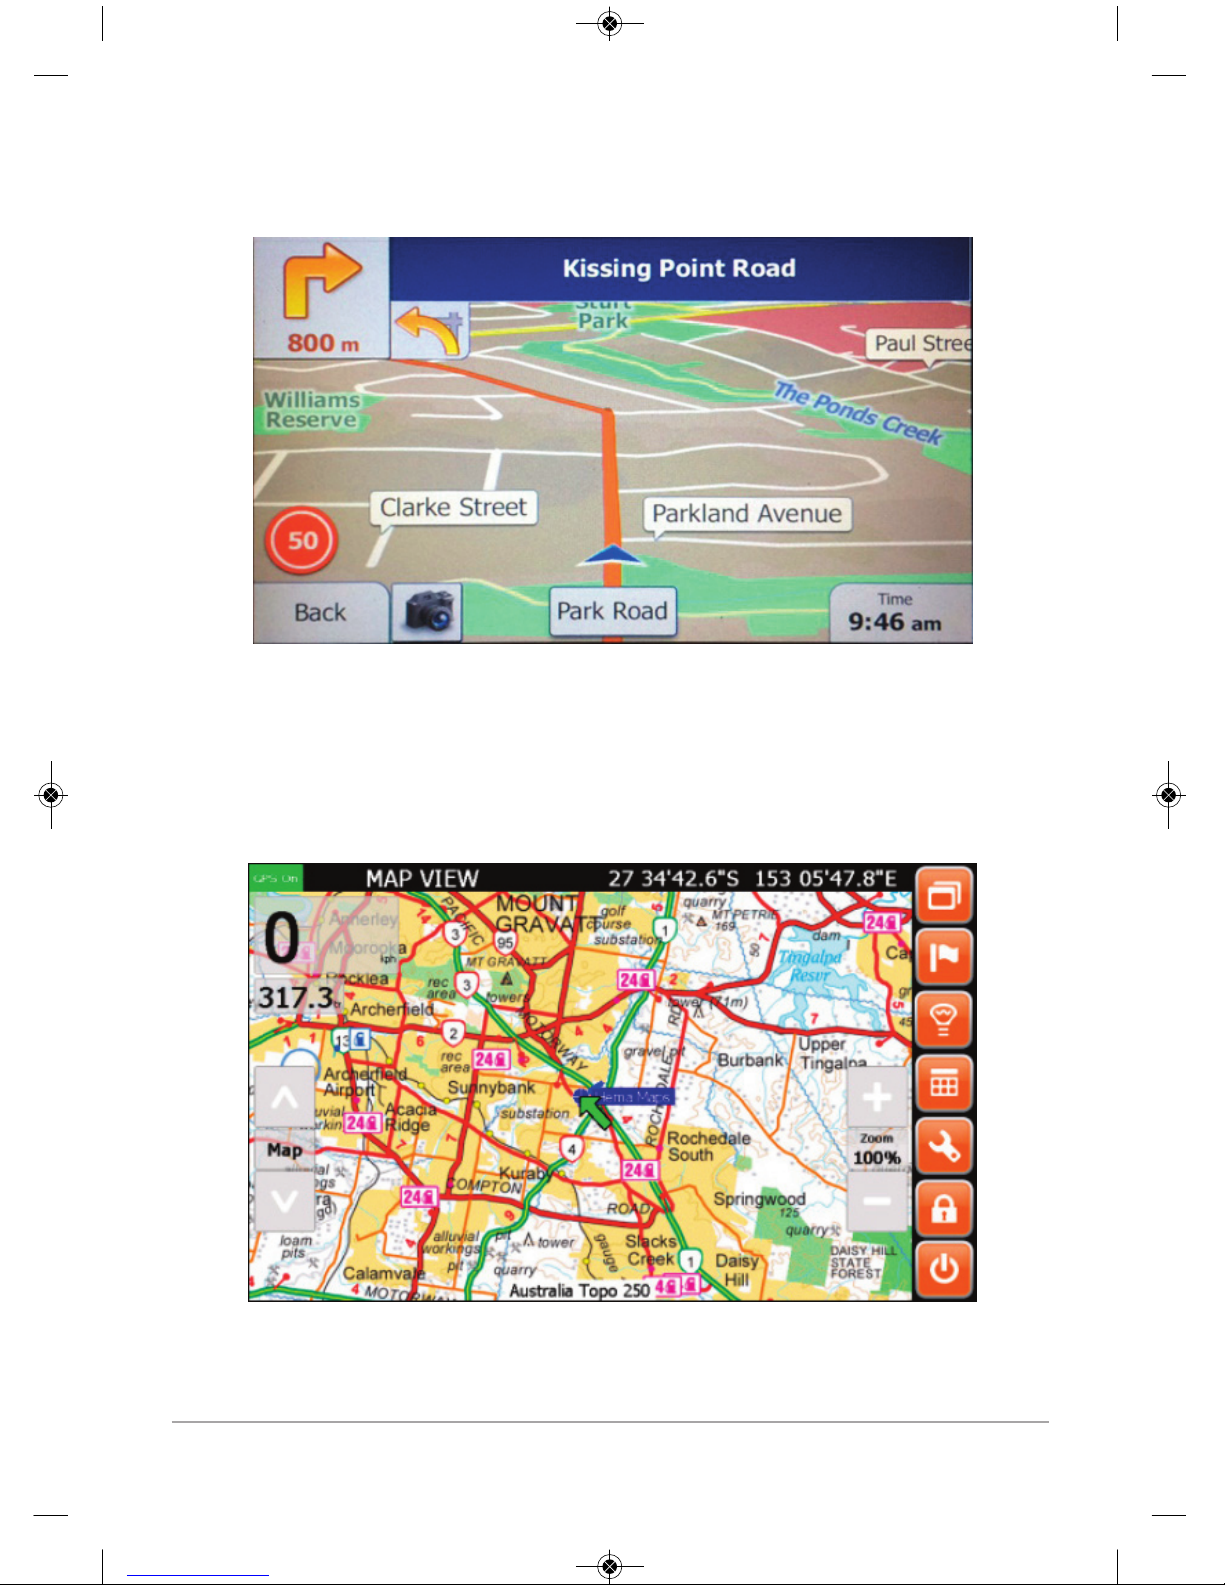
Street Navigation
Off Road Navigation
For a detailed user guide please download the TomTom w/igo user
manual from www.mypolaris.com.au
For a detailed user guide please download the EziOzi HEMA user
manual from www.mypolaris.com.au
NG7 User Manual Polaris 16/05/2017 3:40 pm Page 5
Page 6
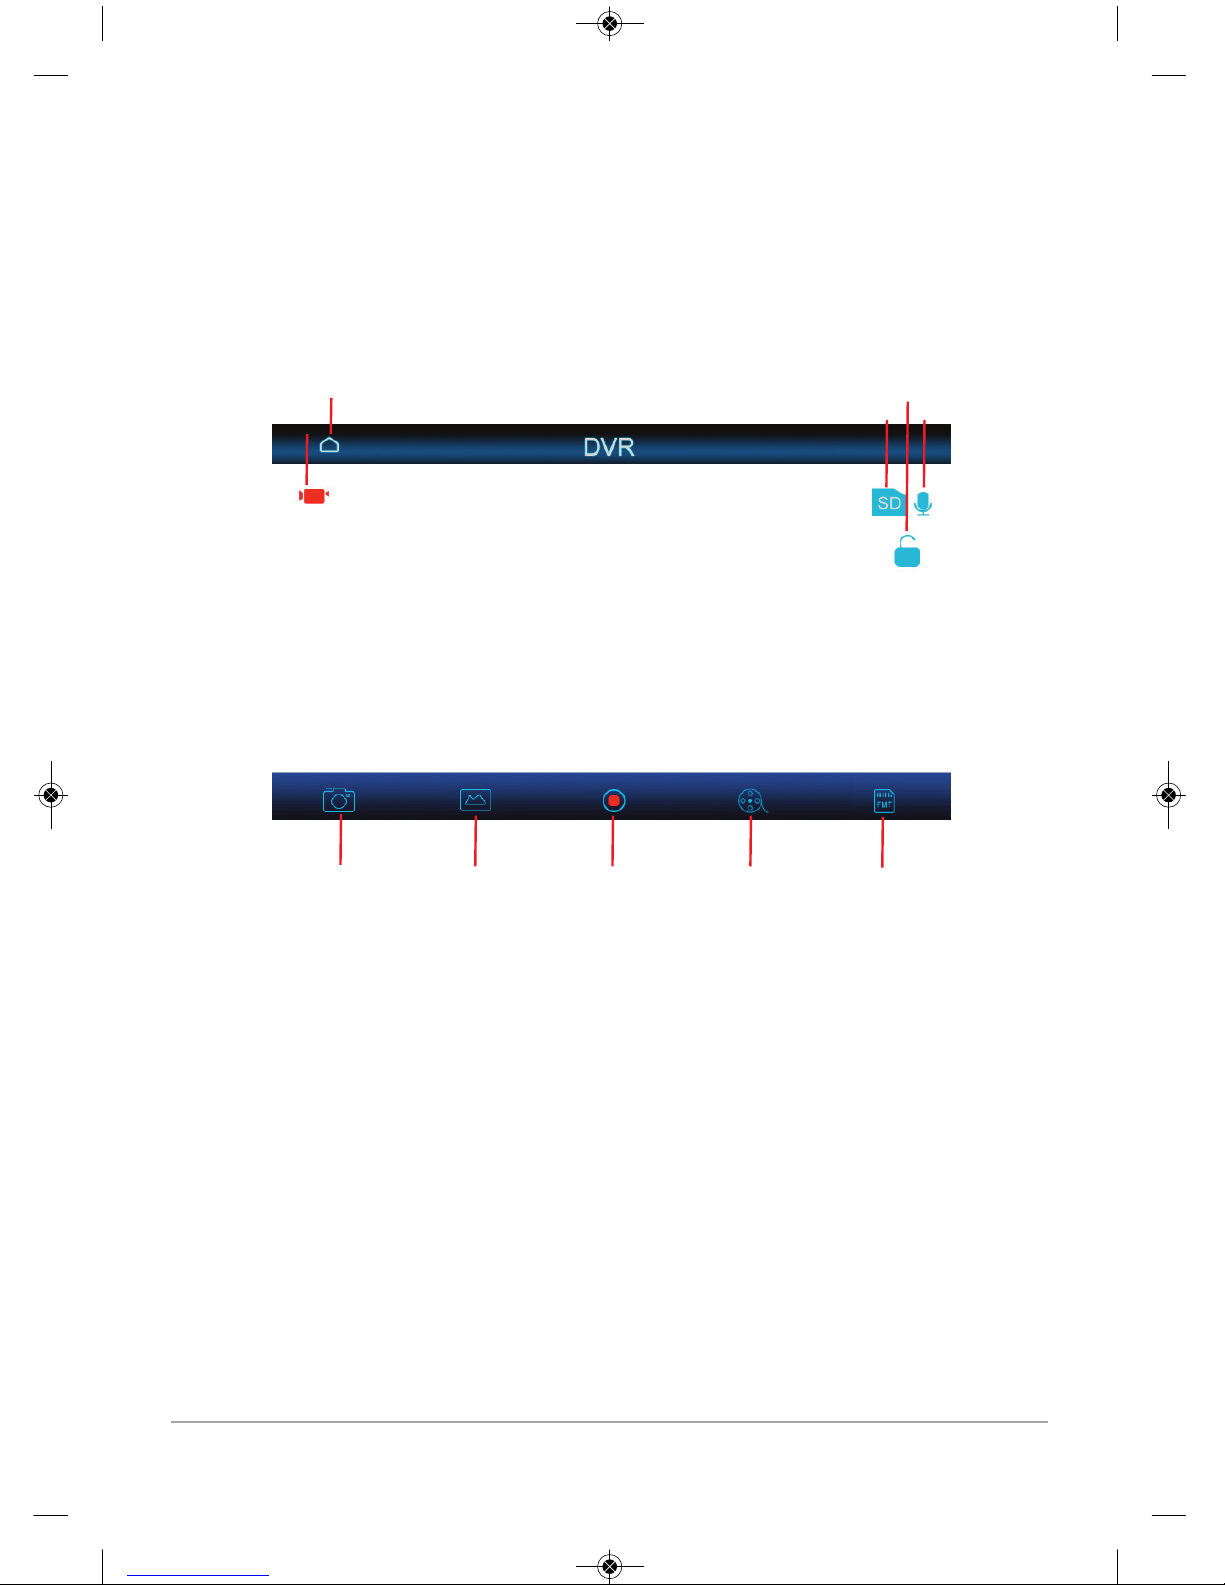
1. Recording: When this icon flashes red the DVR is in record mode.
2. Home: Will take you back to the main menu.
3. SD: SD Card icon indicates that the unit has registered the SD card.
4. Lock: Touch this icon to lock the current time interval recording.
5. Audio: Touch this icon to turn record audio on/off.
6. Photo: Captures a photo.
7. Picture Reel: Touch this icon to view photos captured on the NG7.
8. Record: Toggle between record on/off.
9. Video Reel: Touch this icon to view footage captured on the NG7.
10. Format: Touch this icon to format the SD card —
WARNING: Will wipe all the data from SD card.
- 6 -
DVR Function
The DVR function will start recording as soon as you power the NG7 on.
The Dash cam records in 5 minute intervals and once the card has reached capacity, it will start re-recording
over the intervals .
IMPORTANT: To make sure that you have the correct date and time for your footage, please see page 20
so you can set it up correctly according to your time zone.
2
3 5
4
1
6
7 8 9
10
NG7 User Manual Polaris 16/05/2017 3:40 pm Page 6
Page 7
- 7 -
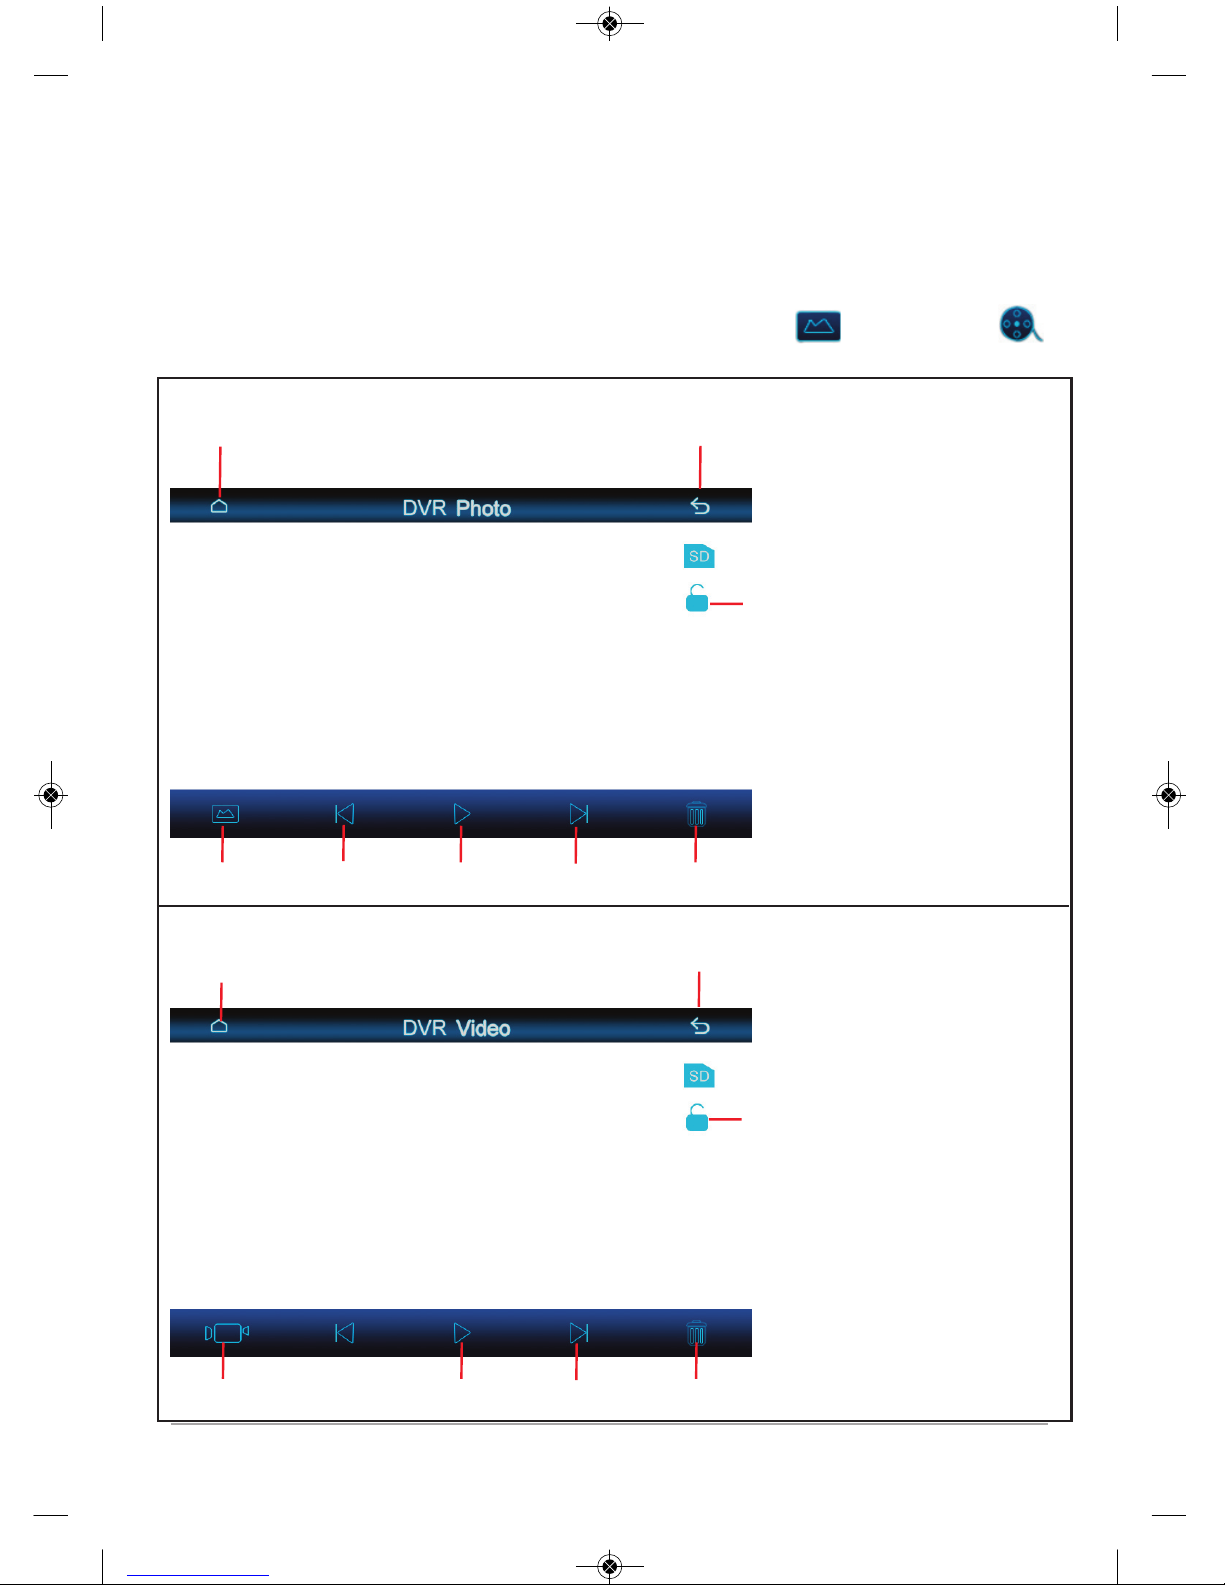
Viewing recorded footage and photos
Photo reel
Video reel
You can view the recorded footage on the NG7 by selecting the photo reel or the video reel
from the DVR main menu.
DVR Function
1. Home.
2. Back to previous screen.
3. Lock selected footage so that it
cannot be overridden.
4. Will take you back to photo reel.
5. Filter back through photos.
6. Enlarge selected photo.
7. Filter forward through photos.
8. Delete selected photo.
Note: You can also select different
photos by touching on the desired
photo.
1. Home.
2. Back to previous screen.
3. Lock selected footage so that it
cannot be re-recorded over.
4. Will take you back to video reel.
5. Filter back through videos.
6. Play footage.
7. Filter forward through videos.
8. Delete selected video.
Note: You can also select different
videos by touching on the desired
video.
1
1
2
3
2
3
4
5
6
7
8
4
5
6
7
8
NG7 User Manual Polaris 16/05/2017 3:40 pm Page 7
Page 8
- 8 -
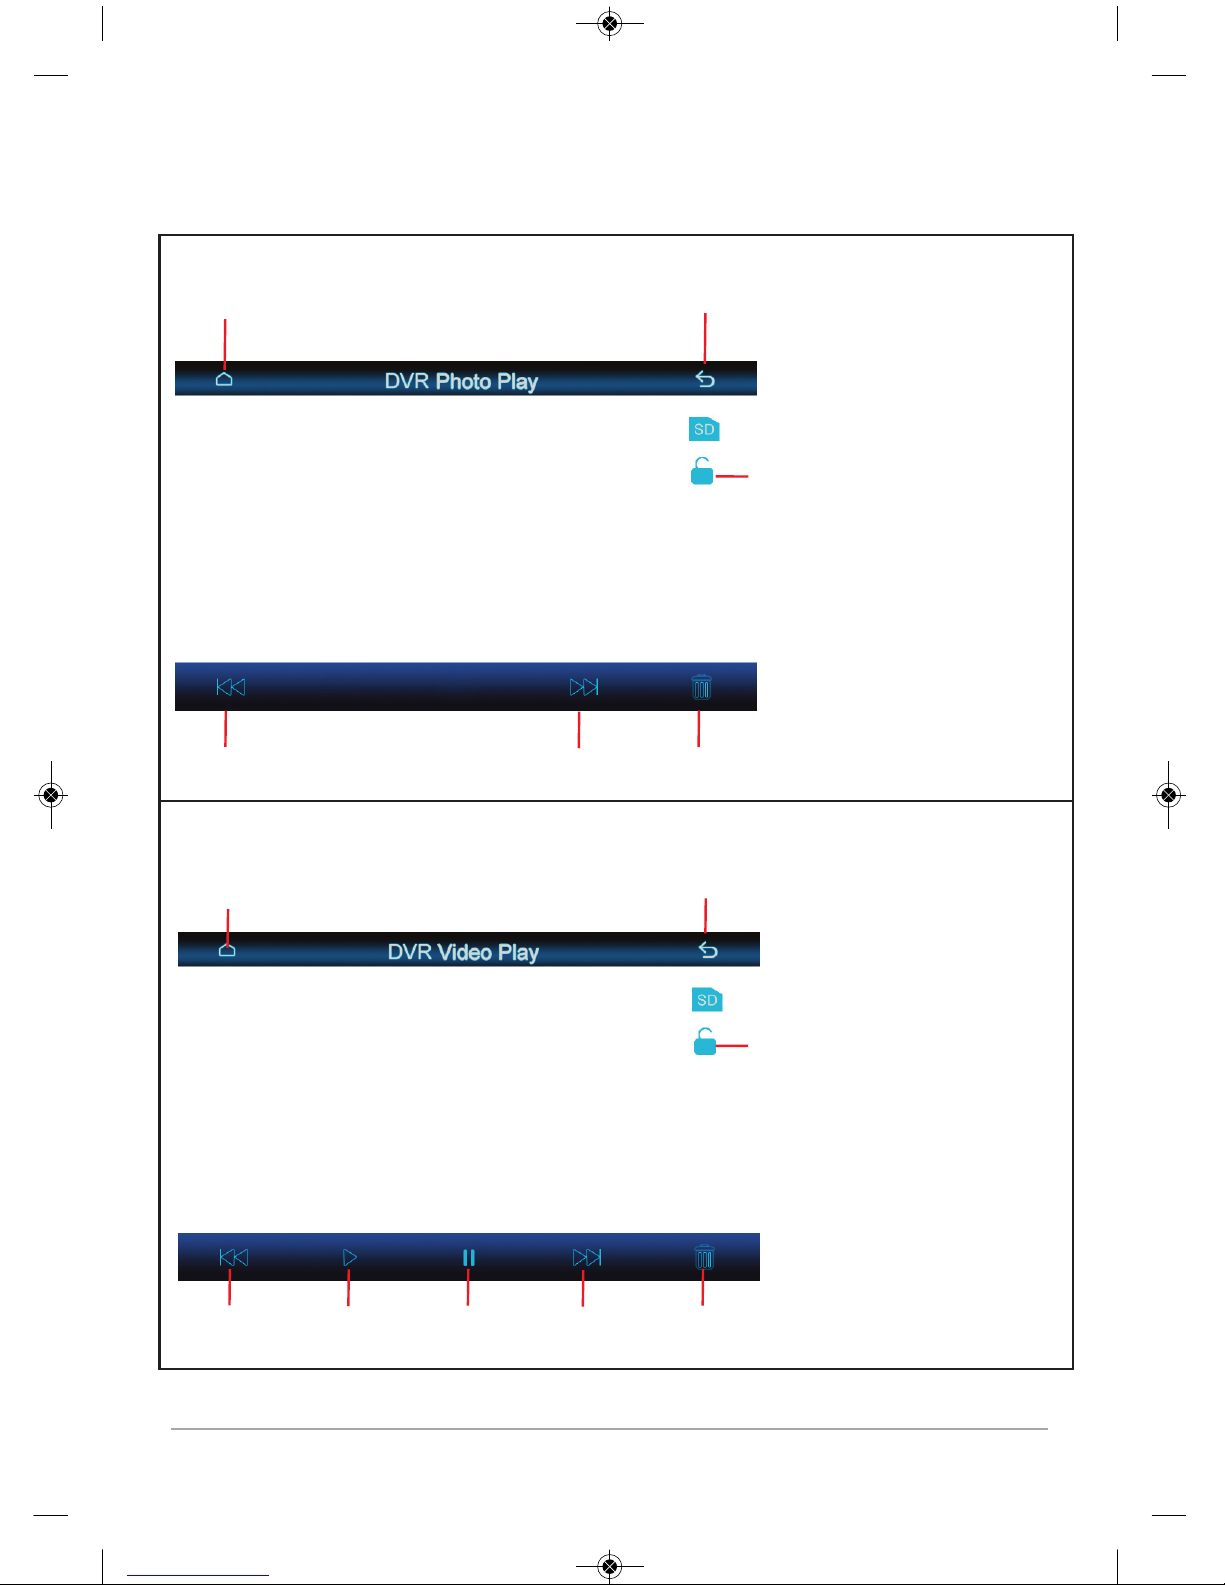
Photo playback
Video reel
DVR Function
1. Home.
2. Back to previous screen.
3. Lock selected footage so that it
cannot be overridden.
4. Filter back through photos.
5. Filter forward through photos.
6. Delete photo.
1. Home.
2. Back to previous screen.
3. Lock selected footage so that it
cannot be re-recorded over.
4. Filter back through video.
5. Play video.
6. Pause video.
7. Filter forward through photos.
8. Delete video.
1
2
3
4
5
6
7
8
1
2
3
4
5
6
NG7 User Manual Polaris 16/05/2017 3:40 pm Page 8
Page 9

- 9 -
1. Load the Micro SD card into your computer.
2. Open the desired folder (photo or recording).
3. Click on the footage required and simply drag and drop onto your computer.
You will notice that the SD card has multiple video files, this is normal. This is to make it easier for you to
find your desired footage rather than having to filter through one long recorded video.
Warning: If you rename any of the files on the SD card, it will automatically lock the footage. These files
will not be recorded over when you insert the SD card back into the NG7.
Retrieving Data
DVR Function
NG7 User Manual Polaris 16/05/2017 3:40 pm Page 9
Page 10

- 10 -
The ideal camera setup for the NG7 is a reversing camera, front camera and caravan/trailer camera
Please see wiring diagram on page 3 to make sure that all your cameras are plugged into the correct
inputs.
Camera functionality
If wired up correctly, the camera that is plugged into the reverse camera input will trigger when reverse
gear is engaged.
Please note: If you have also have a caravan/trailer camera plugged in, you can still access this camera
whilst in reverse, please see below for further instructions on how to do this.
Reverse Camera
When the Reverse camera is triggered, if you touch the screen it will bring up the above icons.
1. Brightness: Will bring up brightness, contrast, colour and saturation settings.
2. Guidelines: Will add guidelines on the screen.
3. Caravan camera: Will switch to the caravan / trailer camera whilst in reverse.
1
2
3
NG7 User Manual Polaris 16/05/2017 3:40 pm Page 10
Page 11

- 11 -
Camera functionality
Brightness Settings
Select to save the desired settings.
Select to revert all settings back to default.
Guidelines
Guideline icon will add guidelines onto the screen like the above photo.
NG7 User Manual Polaris 16/05/2017 3:40 pm Page 11
Page 12

Camera functionality
- 12 -
Caravan/Additional Reverse Camera
Please see wiring diagram on page 3 to make sure that the caravan camera is plugged into the correct
input.
To turn the caravan camera on, please see page 19.
To view the caravan camera whilst driving you can select the caravan icon from the main menu.
1. Home: Will take you back to the main menu.
2. Brightness: Brings up Brightness,
contrast, colour and saturation settings —
please see page 11 to see how to set these.
3. Front: Activates front camera (if applicable).
4. Rear 1: Activates
Reverse Camera.
5. Rear 2: Activates Caravan Camera (if applicable).
6. Back: Takes you back to the previous screen.
When the caravan camera is activated, if you touch the screen it will bring up the below icons:
1
6
2
3
4 5
NG7 User Manual Polaris 16/05/2017 3:40 pm Page 12
Page 13

- 13 -
Camera functionality
Front Vision Camera
Please see wiring diagram on page 3 to make sure that the front camera is plugged into the
correct input.
The front camera can be activated at anytime and it will also appear once reverse gear is disengaged for a
nominated time interval. Please see page 19 to turn the front camera on and to select the nominated time
interval.
To view the front camera whilst driving you can select the caravan icon from the main menu.
When you select the caravan camera icon, the caravan camera will trigger > touch the screen and select
front to switch to the front camera.
Please see page 12 to view the functionality of the above icons.
NG7 User Manual Polaris 16/05/2017 3:40 pm Page 13
Page 14

USB Functionality
- 14 -
USB Playback
The NG7 will support the following file formats:
MPEG, AVI, RM, ASF, MP4, MKV, MP3, AAC, FLAC, APE, JPEG, PNG and GIF.
Once you have inserted a USB into the NG7 unit select Media from the main menu:
Depending on what files you have on your USB the unit will default in the following order:
Music Video Photos.
For example: if you don't have any music files on your USB it will then default to video.
If at any stage you want to view what is on your USB, all the playback screens have a “list” icon:
Press the applicable icon to be taken back to the following screen to select your preferred media:
NG7 User Manual Polaris 16/05/2017 3:40 pm Page 14
Page 15

- 15 -
USB Functionality
Music Files
1. Home: Return to Home screen.
2. Back: Return to previous page.
3. Volume: Adjust volume.
4. List: Shows you what files are on the USB.
5. Skip back: Skip to the previous song.
6. Pause: Pause song.
7. Skip forward: Skip to the next song.
8. Repeat: press to toggle between repeat once and repeat all.
9. Shuffle: press to randomly shuffle through song list.
10. Equaliser: press to adjust sound equaliser.
3
4
5 6
7
8
9
10
1
2
NG7 User Manual Polaris 16/05/2017 3:40 pm Page 15
Page 16

- 16 -
USB Functionality
Movie Files
1. Home: Return to Home screen.
2. Back: Return to previous page.
3. Equaliser: Press to adjust sound equaliser.
4. Volume: Adjust volume.
5. More: Brings up more options (more options are shown in the picture).
6. Repeat: Press to toggle between repeat once and repeat all.
7. Shuffle: Shuffle movie files.
8. List: Shows you what files are on the USB.
9. Ratio: Changes the aspect ratio.
10. Skip Back: Skip to the previous movie file.
11. Settings: Brightness, colour, contrast and saturation settings.
12. Pause: Pause movie.
13. Skip Forward: Skip to the next movie file.
14. GOTO: Allows you to skip ahead to a movie file if you happen to know what number it is in the
sequence of uploaded files.
1
2
3
5
4
6
7
8
9
11
12
13
14
10
NG7 User Manual Polaris 16/05/2017 3:40 pm Page 16
Page 17

- 17 -
USB Functionality
Photo Files
1. Home: Return to Home screen.
2. Back: Return to previous page.
3. Zoom in: Zoom in.
4. More: Brings up more options (more options are already shown in the picture).
5. Zoom Out: Zoom out.
6. List: Shows you all the files on the USB.
7. Skip Back: Skip to the previous photo file.
8. Pause/play: Pause/play slideshow.
9. Skip Forward: Skip to the next image file.
10. Rotate: Rotates image.
1
2
3
4
5
6
7
8
9
10
NG7 User Manual Polaris 16/05/2017 3:40 pm Page 17
Page 18

- 18 -
Setup
Display
Overview
Daytime Back Light Set: Increase or decrease the brightness of the monitor.
Night-time Backlight Set: Works in conjunction with the illumination wire.
To see the difference in the night time backlight setting, turn your headlights on (providing that the
illumination wire is wired up correctly).
Enter into Setup via the main menu for general settings:
NG7 User Manual Polaris 16/05/2017 3:40 pm Page 18
Page 19

- 19 -
Setup
General
1. Home: Return to Home screen.
2. Back: Return to previous page.
3. Front Camera: If you have setup a front camera make sure the setting is switched to Y.
4. Rear Camera: If you have setup up a caravan camera make sure the setting is switched from single
to double.
5. Front Camera Time: Nominate a specific time interval for the front camera to appear once reverse
gear is disengaged.
6. Navi Path 1: Set the street navigation path file.
7. Navi Path 2: Set the off road navigation path file.
When using the maps preloaded onto the SD card, the nav path files should be set to the following:
Nav Path 1 should be set to: Navigation.exe.
Nav Path 2 should be set to: OziExplorerCE.exe.
1
2
3
4
5
6
7
NG7 User Manual Polaris 16/05/2017 3:40 pm Page 19
Page 20

- 20 -
Setup
Date & Time
It is important to make sure that the date and time is set correctly as it will affect what date and time
appears on your dash cam footage.
You can either set the date and time up manually or you can choose to set it up so that date and time
syncs with the navigation time.
Important: If your area has switched over to daylight savings, you will need to change the UTC+ time
accordingly otherwise the wrong date and time may appear on your dash cam footage. Please see below
the correct
daylight savings UTC+ times:
+11:00 Canberra, Sydney, Hobart, Melbourne.
+10:30 Adelaide.
Once daylight savings has ceased, please change it back to the correct UTC+ time.
Set the correct UTC+ time applicable to your location.
Manual Setting
NG7 User Manual Polaris 16/05/2017 3:40 pm Page 20
Page 21

- 21 -
Setup
Date & Time
Once you have set the UTC+ time manually set the correct year, month, day, hour and minute and press ok.
Important: The NG7 will remember the date and time as long as you have picked up constant power,
please see wiring diagram located on page 3 for further reference.
Set the correct UTC+ time applicable to your location.
Syncing date and time with the GPS time
Please refer to page 20 for correct daylight savings UTC times.
Once you have set the correct UTC+ time, press GPS time:
Important: Please be aware that if you opt for this setting, the date and the time will not be correct
until the GPS picks up satellite. if something does occur within this time frame, the date and time may be
incorrect on the footage. We suggest still setting it manually as well but instead of pressing ok once set,
press GPS time. Once the unit picks up satellite, it will override the manual setting.
NG7 User Manual Polaris 16/05/2017 3:40 pm Page 21
Page 22

- 22 -
Setup
About Device
Will display all the software information of the device.
NG7 User Manual Polaris 16/05/2017 3:40 pm Page 22
Page 23

- 23 -
Specifications
General Information
Monitor:
Large 7.0"Anti Glare Capacitive Touch Screen (Resolution: 800x480)
Operating Temperature:
minus 20°C to 60°C
Operating system:
Windows CE 6.0
Power supply:
DC12V-24V
Video form:
PAL/NTSC
OSD Language:
English
Wiring:
Universal wiring harness with three camera inputs
Built in speaker:
Yes
Warranty:
3 years
Multi Camera support:
Yes, 3 camera inputs with Polaris configuration 4 pin DIN plugs (suggested for reverse camera, forward
Vision camera & caravan/trailer camera).
GPS Navigation:
Street Navigation:
Australia Wide TomTom Navigation with iGo Software platform loaded on 16GB micro SD card
Off Road Navigation:
HEMA maps with EZIOZI platform loaded on 16GB micro SD card
GPS Chipset:
MT3336
GPS refresh rate:
1s/time
GPS Language:
Multi-languages
Maximum micro SD card capacity:
64GB Class 10
GPS satellite:
Acquired via External GPS Antenna
Built in DVR function
Resolution:
1080P@30FPS
Automatic Loop Function:
Yes
Interval times:
5 minutes
Data Storage:
Micro SD Card - comes standard with a 16GB Micro SD card
Maximum micro SD card capacity:
64GB Class 10
Data Retrieval:
Via micro SD card
Ability to Lock footage:
Yes
Playback footage on device:
Yes
Records on Startup:
Yes
Records Audio:
Yes (Can switch off)
Takes Photos:
Yes
Reverse Camera Function
Reversing Camera:
Comes standard with 170 degree miniature camera with butterfly style bracket (other camera choices
available)
Reverse Trigger:
Reverse camera function will appear on screen when reverse gear is engaged or it can be selected at any
time via the caravan icon in the main menu
Forward Vision Camera*
Functionality:
Once reverse gear is disengaged, the forward vision camera will appear on the screen for a nominated time
interval. The forward vision camera can also be viewed at any time by selecting caravan icon in the main
menu
NOTES:
*Optional Extra
Caravan / Trailer camera*
Functionality:
The caravan/trailer camera can be viewed at any time by selecting the caravan icon in the main menu
NOTES:
*Optional Extra
USB Function
USB Flash drive:
Supports up to 128GB Maximum
Compatible with:
MPEG, AVI, RM, ASF, MP4, MKV, MP3, AAC, FLAC, APE, JPEG, PNG, GIF
Accessories Included:
POLNG7 7" On road/Off Road GPS
Universal wiring harness with three camera inputs
GPS External Antenna
Dash mount with 3m stick pad
170° miniature camera with 7 metre cable
Instruction manual
NG7 User Manual Polaris 16/05/2017 3:40 pm Page 23
Page 24

- 24 -
NG7 User Manual Polaris 16/05/2017 3:40 pm Page 24
 Loading...