

Page 1
Polaris® EOS® Wireless Antenna and Remote
Installation Instructions
Installation
Wireless Antenna
Mount the antenna in a high location, in line-ofsight with the wireless remote and in the center
of the coverage area. Avoid areas where the radio
signal must pass through fencing, stucco walls,
reinforced block walls, etc.
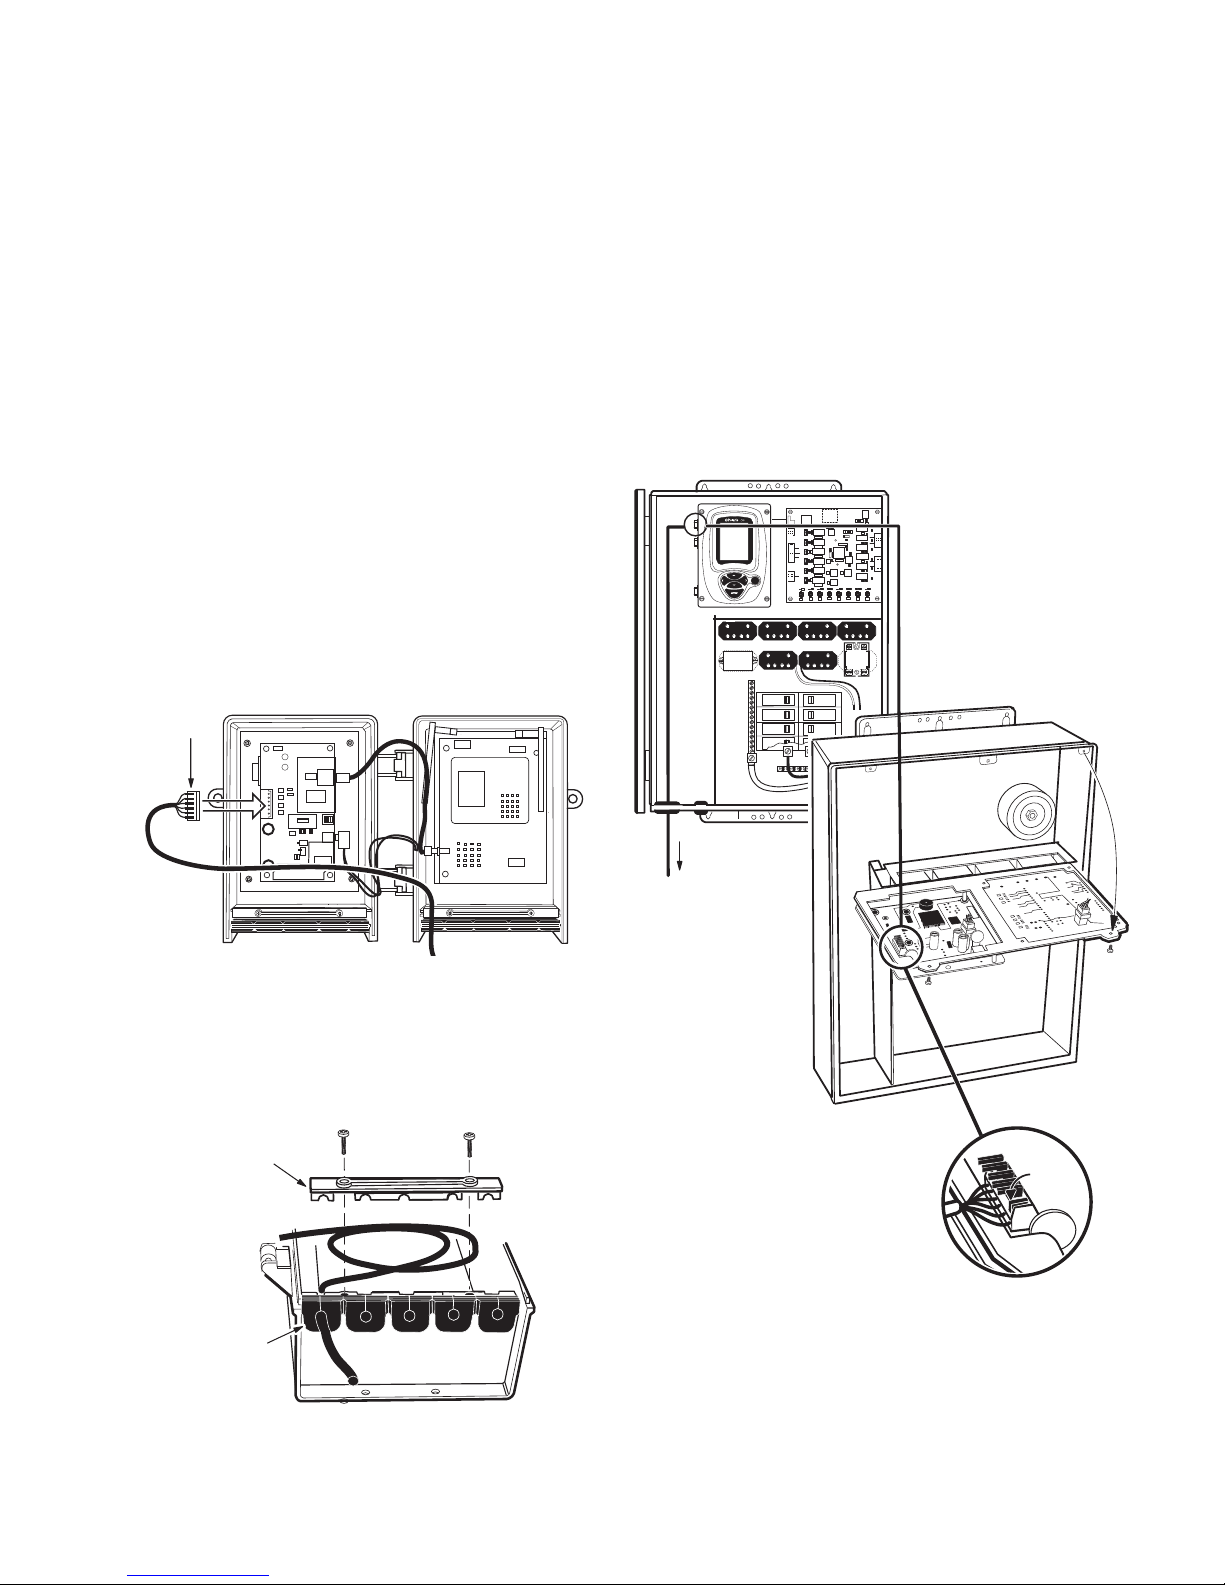
1. Open the antenna door and connect cable
wires to the removable terminal block using
this color-coded sequence:
Pin # Wire Color
1 Green
2 Yellow
3 Orange
4 Red
5 Blue + Brown
6 Black + Purple
Removable
Terminal
Block
3. Route the antenna cable to the EOS Command
Center and in through the low voltage
compartment.
4. Unscrew and swing down the hinged board
plate to access the circuit boards.
5. Connect the antenna wire to the removable
terminal on the command center board using
the same pin/color sequence. To connect
multiple remotes with the antenna, install a
RBC Hub Card (part #E36).
High Power Relay 1
Optional
High Power Relay 5
Or 2 Speed
Pump Relay
E
SVC
High Power Relay 2
Optional
High Power
Relay 6
VLV1 VLV2 VLV3 VLV4 VLV5 VLV6
+
24VDC
GND
GND
SNS1
GND
SNS2
GND
SNS3
GND
SNS4
GND
SNS5
PRE
OUT
HP1
High Power Relay 3
HP2
Optional
High Power
Relay 7
HP3 HP4 HP5 HP6
HP7
High Power Relay 4
Optional
High Power
Relay 8
Or 2 Speed
Pump Relay
LP6 LP5 LP4 LP3 LP2 LP1
HP8
Command
Center
2. Remove the wire clamp and feed the wire into
the left-most position, leaving about 12” of
extra cable in the box. Push the wire into the
rubber grommet seal. Reinstall the clamp and
close the box.
Wire Clamp
Grommet
To Antenna
Wire
Connector
Lock
Down
on
Wire
For installations with multiple antennas, the wires
can terminate at the Command Center or be wired
to the terminal block of another antenna or wired
remote (max. 2000 ft.).
After all connections are complete, power-up
the EOS Command Center to verify that
communication has been established.
Page 2
Wireless Remote
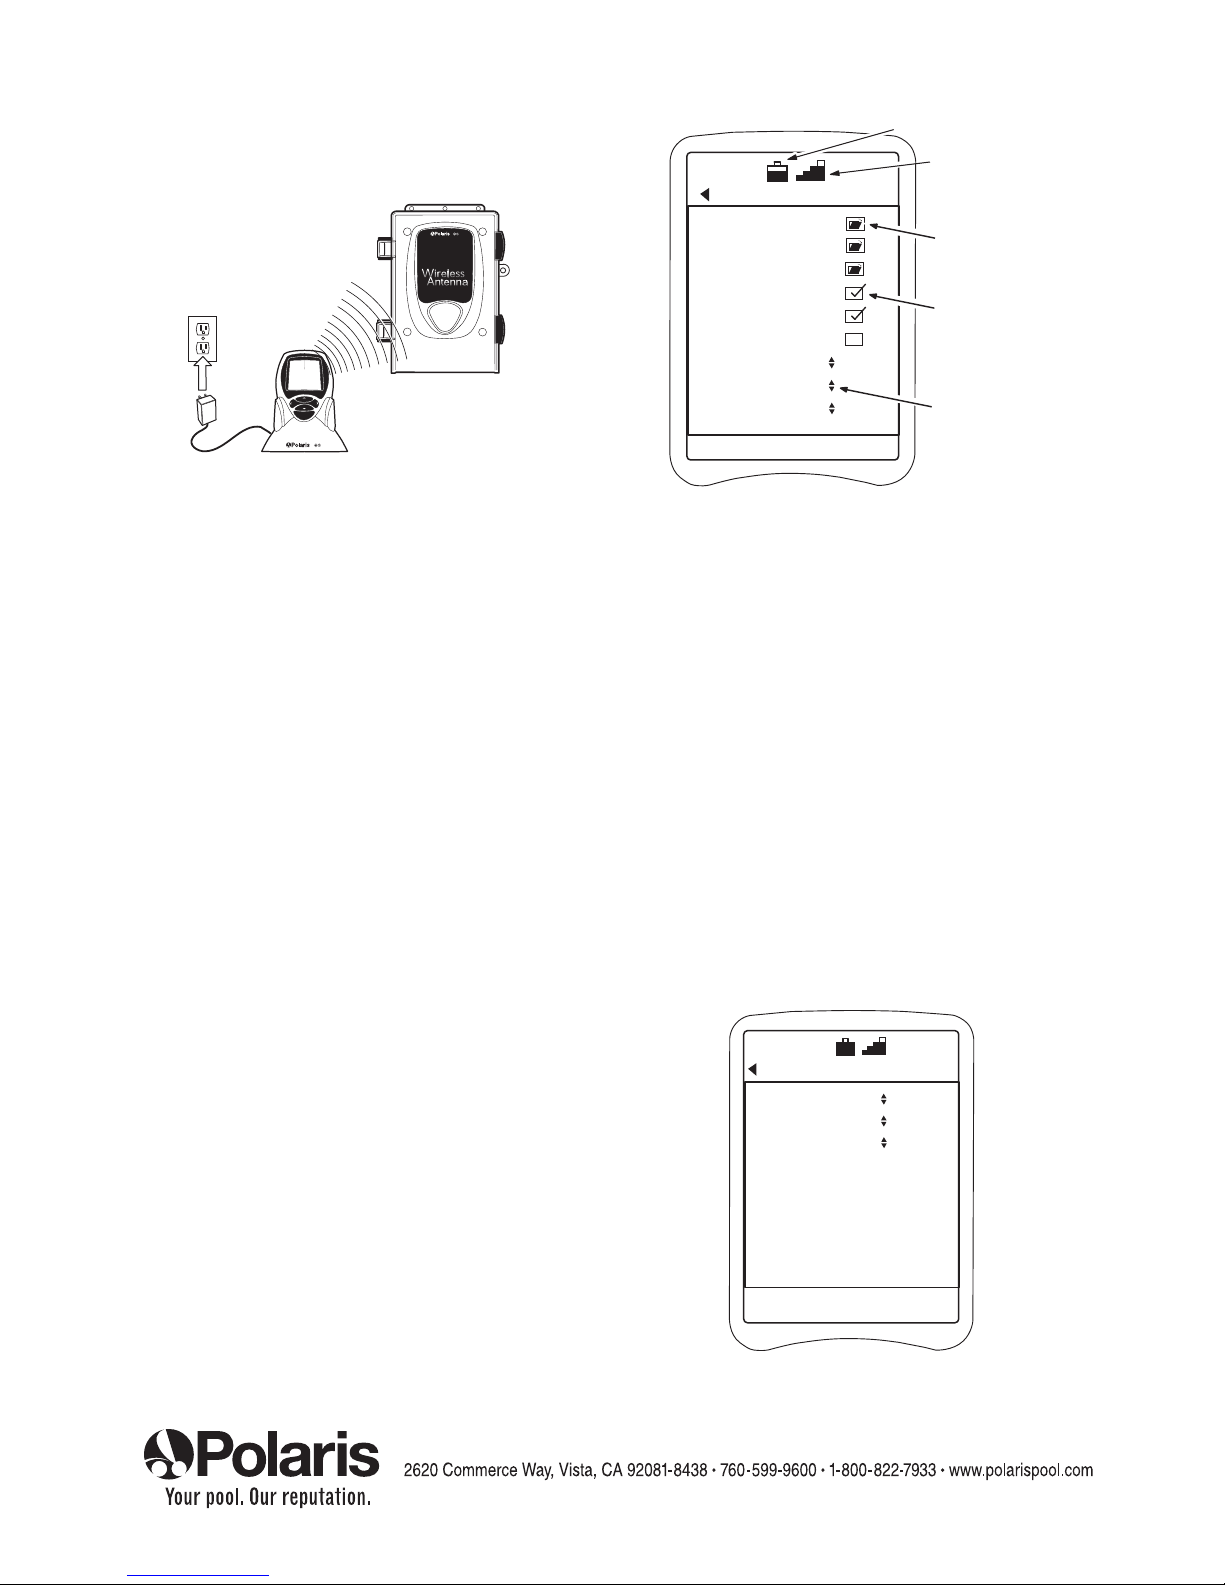
Position the remote and charging base in a
location away from prolonged direct sunlight.
E
Wireless
ENTER
E
Wireless Remote
Antenna
Wireless Remote Setup
Software Versions
Network Settings
Shutdown
Audible Alarm
Spa Temp Notify
Access Code
Contrast Adjust
Backlight Adjust
Sleep Timeout 3 min
Battery
Charge
Signal
Strength
Move cursor over
folder icon. Press
<Enter> to select
and open new screen.
Press <Enter> to
select and activate.
Up/down keys
adjust setting.
The wireless remote uses the Polaris
®
rechargeable Lithium ion battery (part #E33). The battery
must be charged for at least five (5) hours before
use. Charging is indicated by an animated scrolling of the battery symbol on the display.
With a full charge, the remote can operate for up
to two days, depending on usage. It is normal
for the battery to discharge when not in use. To
ensure a full charge, always store remote on the
charging base when not in use. To replace the
battery contact a Polaris service professional.
Wireless Remote Setup
System measurements and settings are displayed
on the remote display screens. Adjustments are
made with the keypad. Use the cursor control
(arrow) keys to move through the screens and
menu options. Use the enter key to select an item.
Display settings such as brightness, contrast,
etc. as well as certain device-specific settings are
adjusted separately for each display device using
the display setup screens.
For a complete description of using the
wireless remote, refer to the EOS® Installation and
Maintenance Guide or EOS Owner’s Manual.
If the remote is purchased with the Eos Command
Center, it is factory set for communication. If the
remote is purchased separately or is a second
remote on the system, it must be configured for
communication via the setup screen.
When activated, the Audible Alarm in this
device signals when an alert condition exists.
Alert messages are displayed on the Main screen.
Select Contrast and Backlight to adjust the
display features to user preferences.
To configure remote for communications:
1. Select Network Settings and press <Enter>
to open the Network Settings screen.
3. If two remotes are used with the antenna,
assign each remote its own unique Remote
Address. (Ex: first remote is set to 101 and
second is set to 102)
2. Enter the system SSID and Key number. The
SSID is the antenna serial number (located
on left side of the antenna) with three leading
zeros. The Key consists of two rows of
numbers, the second row is the serial
number with four leading zeros.
Network Settings
Remote Address 101
Network Settings 802.11a
Channel Auto
Encryption
SSID 000042105083
Key 0000000000000
0000042105083
RSSI No Signal
To access the Wireless Remote Setup screen:
1. Press the left and right arrow keys on the
remote simultaneously to open the Wireless
Remote Setup screen.
® 2005 Polaris Pool Systems. All rights reserved. TL-553 11/05
 Loading...