

Page 1
Quick Start Instructions – M Series
Sheet 1 of 6
k-121
WED 23
4:14
48
START
▼
PM
options
START
▼
Scroll
up
user
SET
START
▼
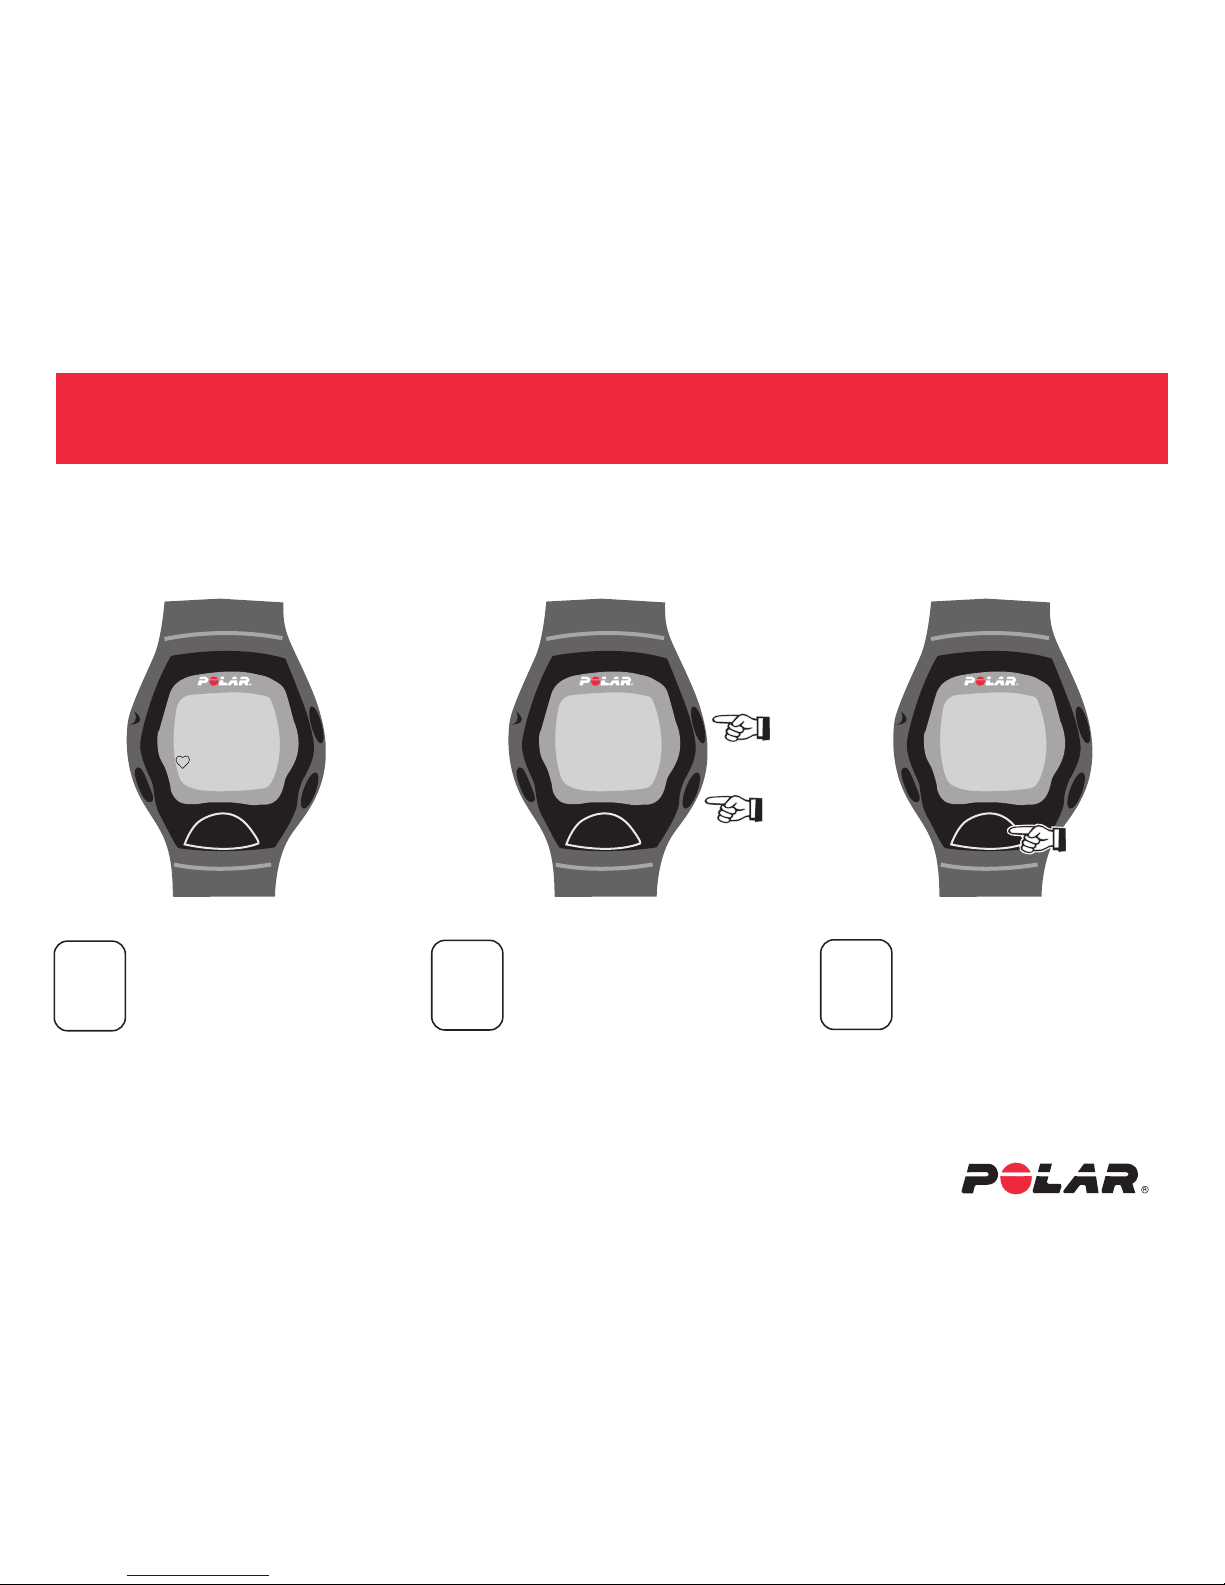
Press 1X
STEP
1
Set User Data:
Start from the
Time of Day screen.
STEP
2
Press the scroll up or
down button until “Options”
appears.
STEP
3
Press the center button 1 time.
“User Set” will appear.
Scroll
down
Page 2
Quick Start Instructions – M Series
Sheet 2 of 6
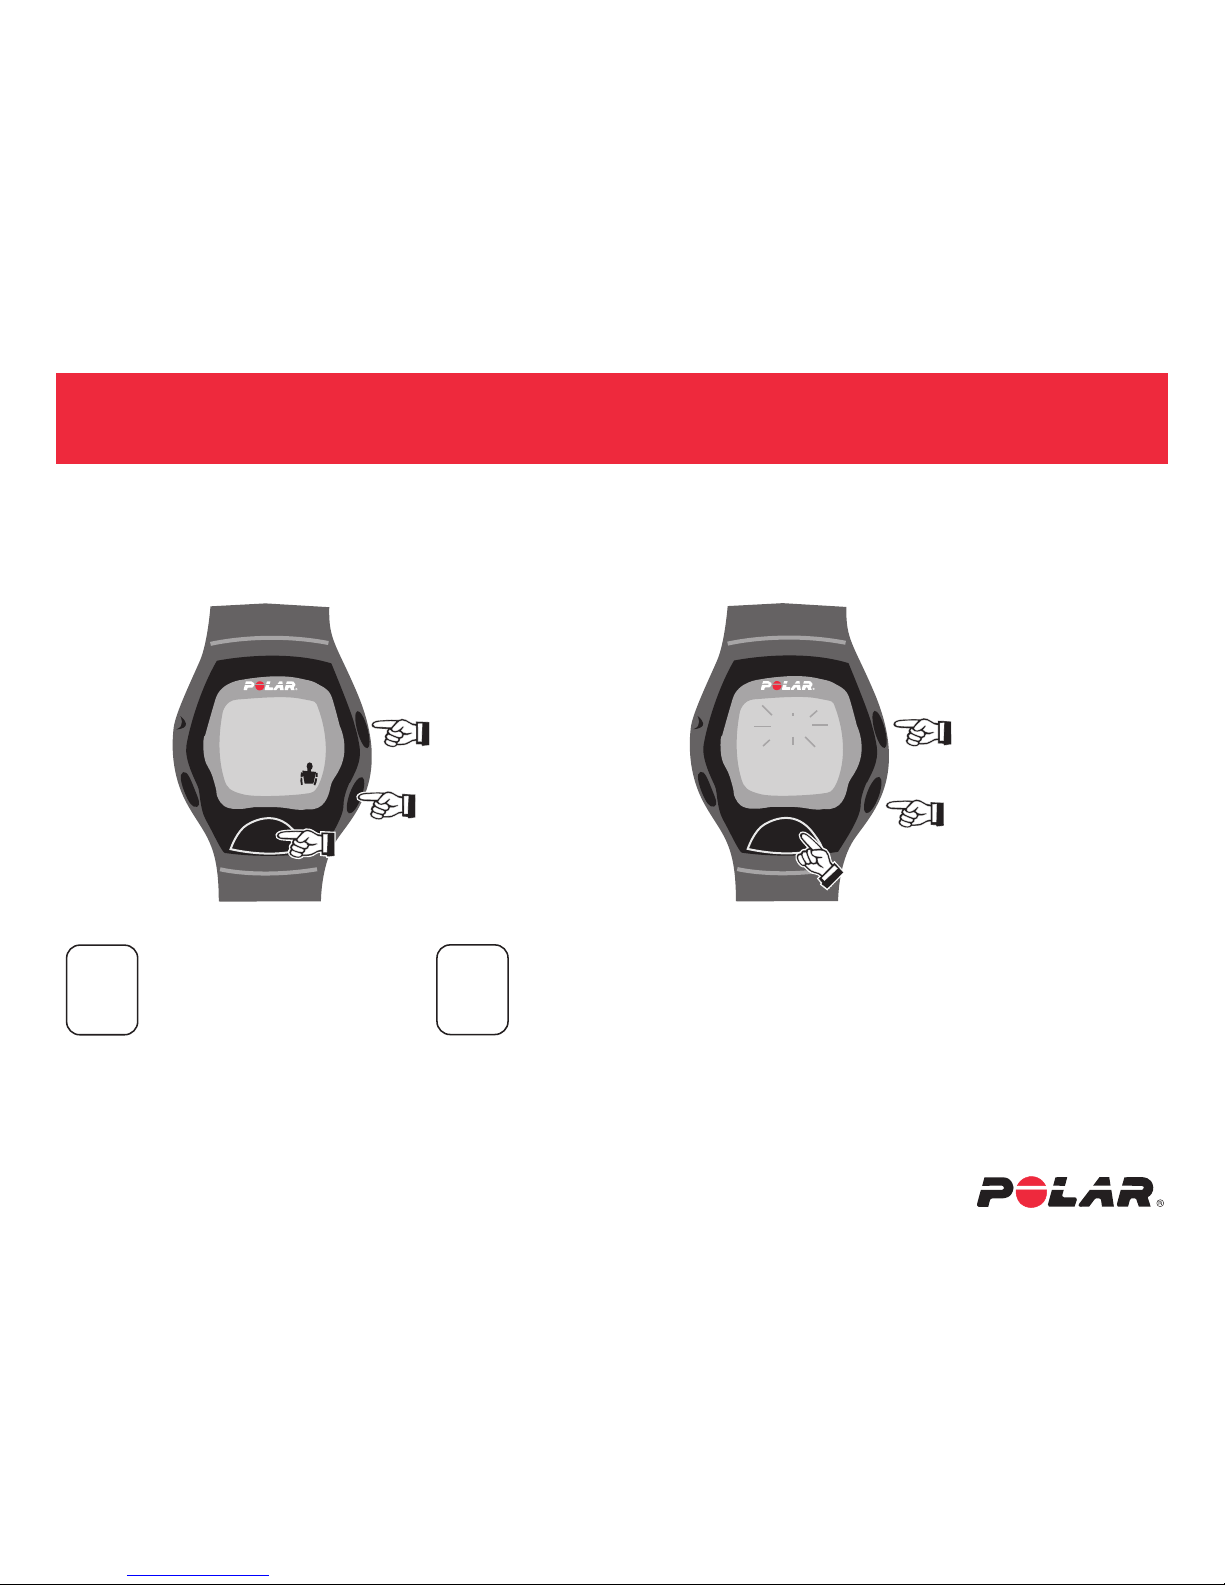
STEP
5
Note:
You can change the
weight unit between lbs
and kg in watch settings.
12h time mode = lbs,
24h time mode = kg.
“LBS” or “KG” will appear
and the digits are flashing.
Press the scroll up or
down button to select the
correct weight.
Press the center button
1 time to lock your
selection.
user
1
▼
OK
Press 1X
Lock in
STEP
4
Press the center button
again.
Press the scroll up or
down button until you have
selected either one or two
users.
Press the center button 1
time to lock your selection.
▲
▼
LBS
125
▼
OK
▲
▼
Up
Down
Lock in
Press 1X
either button
Up
Down
k-121
Page 3
Quick Start Instructions – M Series
Sheet 3 of 6
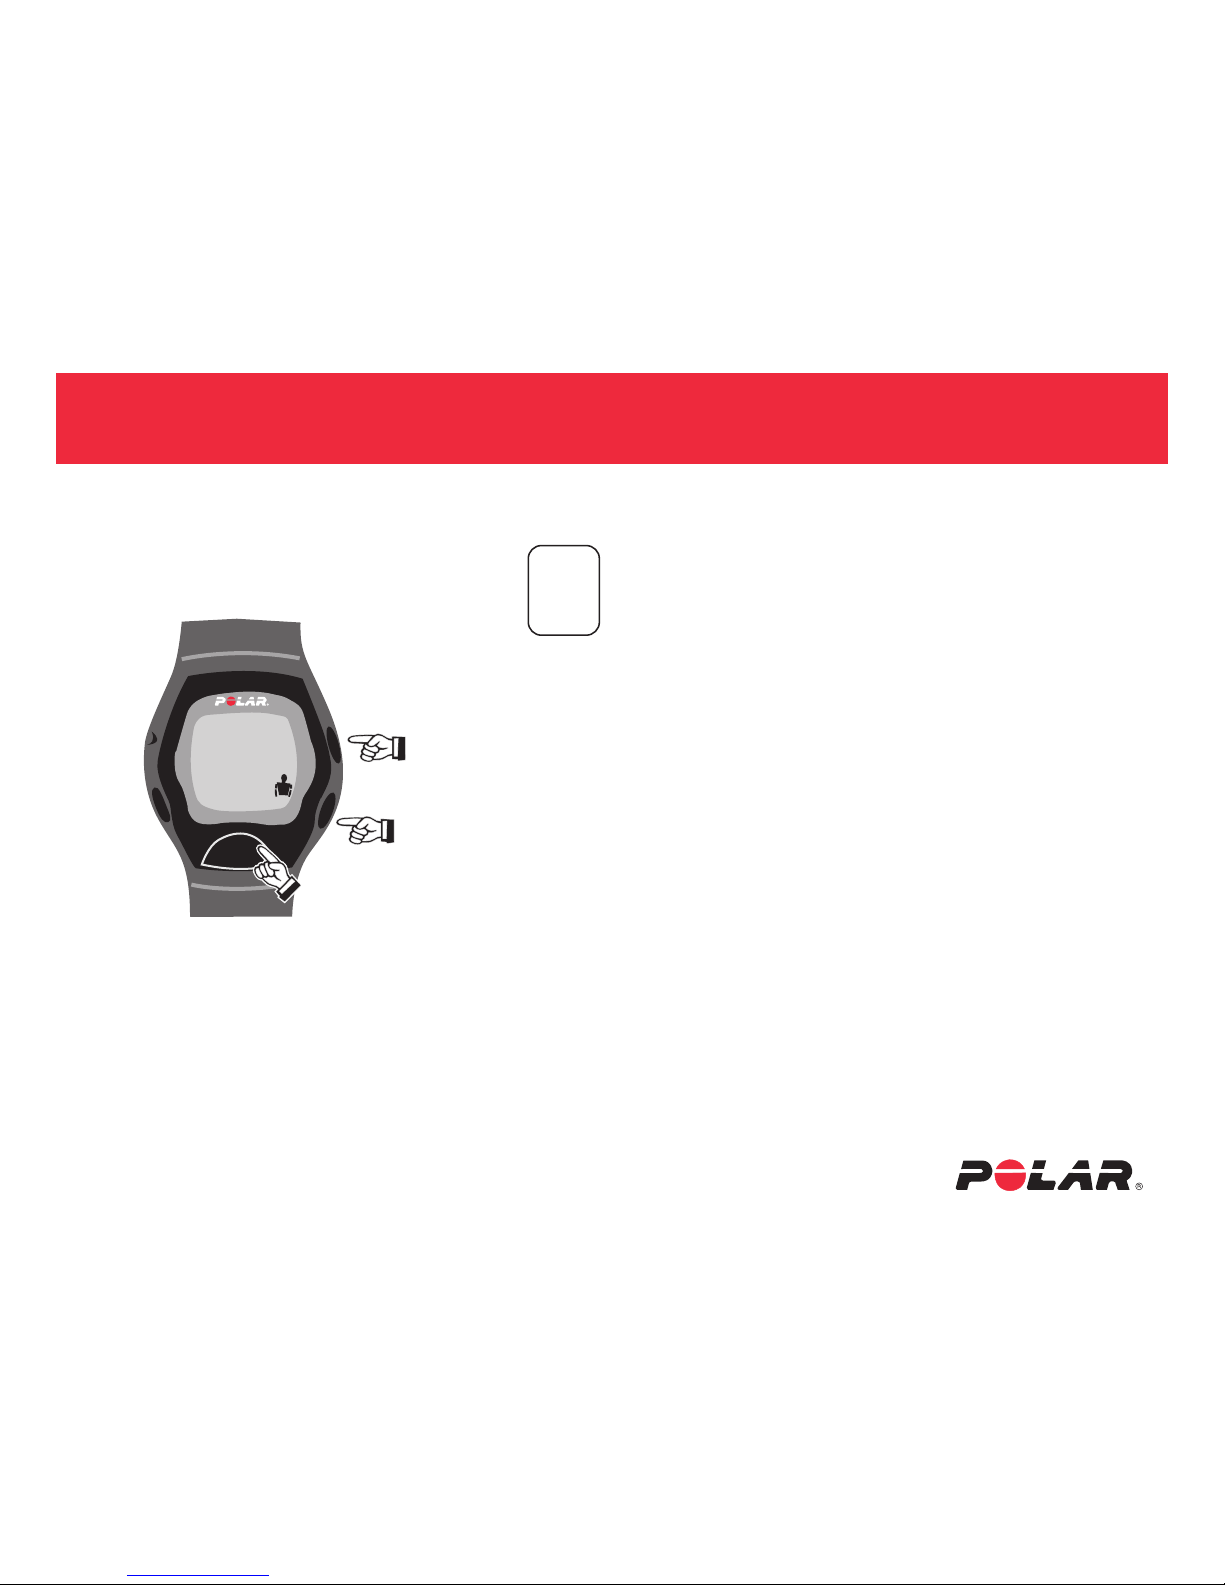
STEP
6
“FT/INCH”
Press the scroll up or down button to select the correct feet,
then press the center button to lock your selection.
Press the scroll up or down button to select the
inches, then press the center button 1 time to lock your
selection.
“AGE”
Press the scroll up or scroll down button to select
the correct age.
Press the center button 1 time to lock your selection.
“SEX”
Press the scroll up or scroll down button to select male
or female.
Press the center button 1 time to lock your selection.
ft/inch
5
▼
OK
▲
▼
Lock in each
selection
Up
Down
k-121
7
Page 4
Quick Start Instructions – M Series
Sheet 4 of 6
ownzone
LOW
▼
OK
▲
▼
Press 1X to lock in each
selection
Press and hold to
return back to time of day.
Up
Down
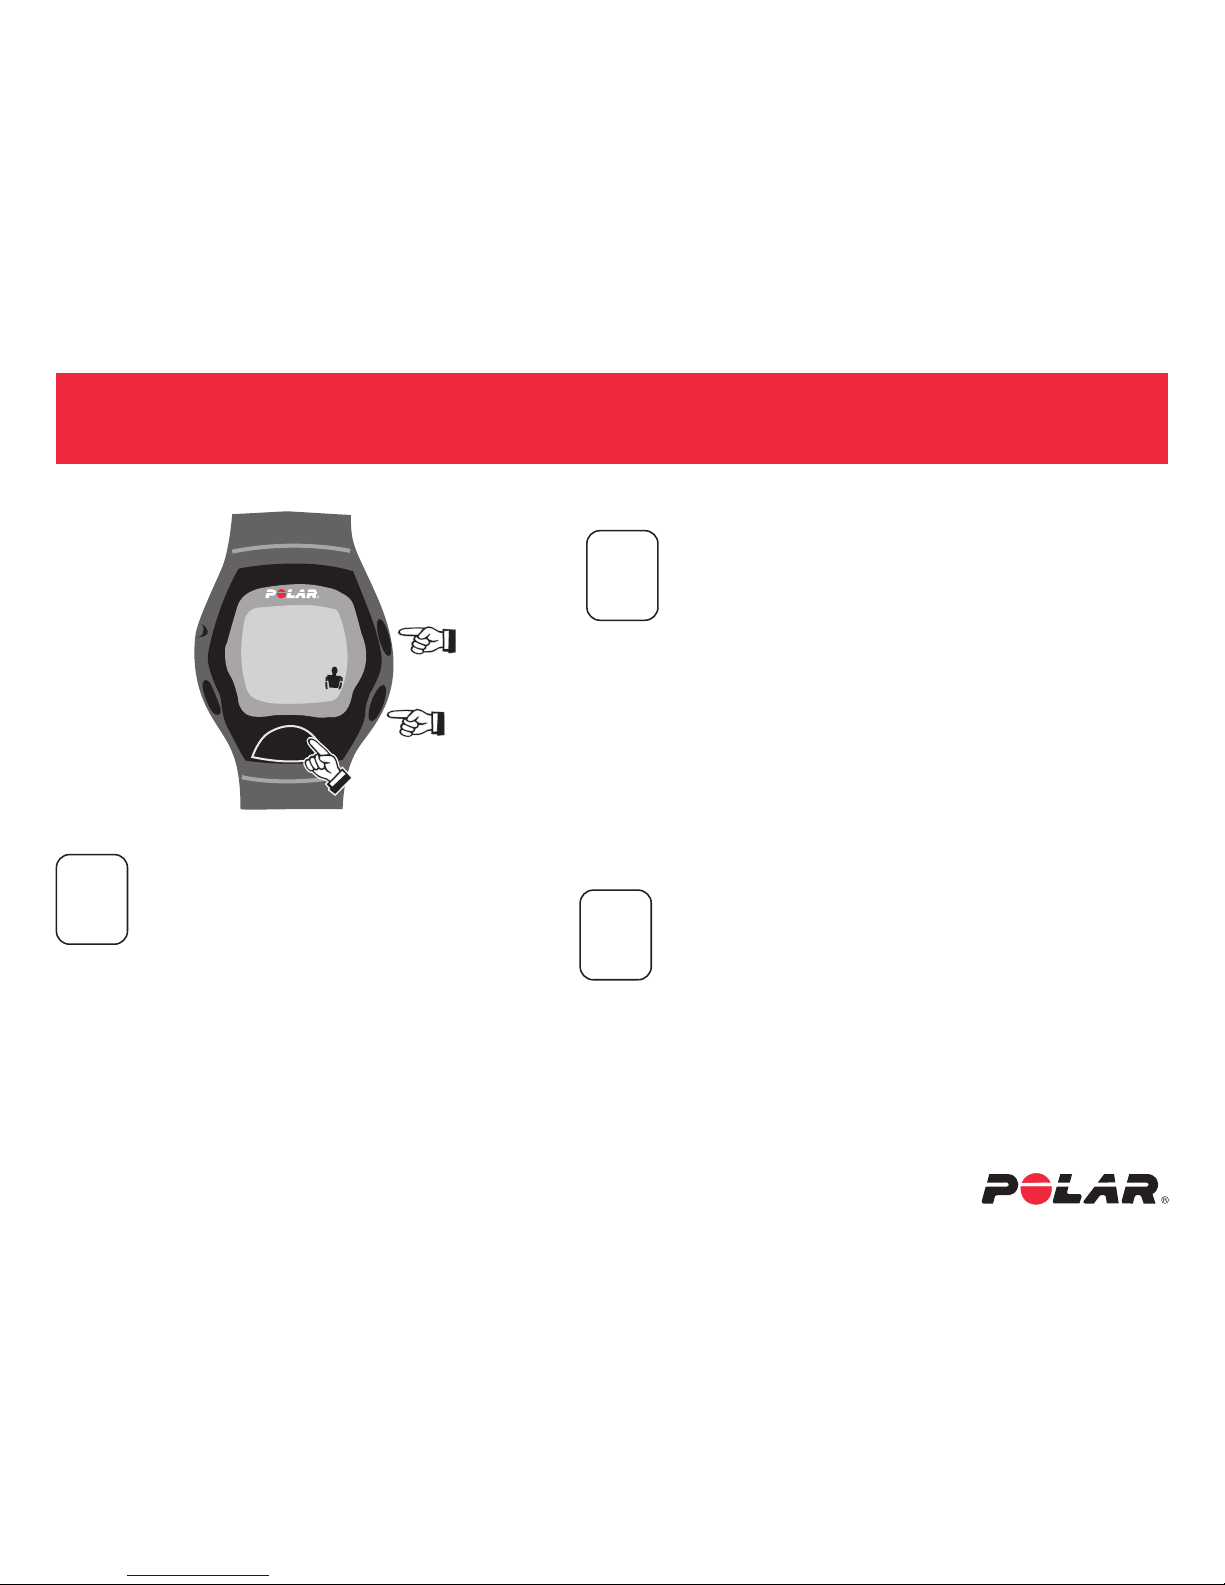
STEP
8
“OWNZONE™
Press the scroll up button 1 time. “OwnZone” will appear.
Press the center button 1 time. “Off”, “Basic”, “Low”, or
“High” will flash and you need to choose an intensity
level.
Basic: Maintain cardiovascular fitness
Low: Fat burning
High: Increase cardiovascular performance
If the OwnZone feature is set at OFF, the target zone can
be manually set.
Scroll up or down until you have selected the
desired OwnZone intensity level, then press the center
button to lock your selection.
“OWNCAL™”
Press the scroll up button 1 time. “OwnCAL” will appear.
Press the center button 1 time. “ON” or “OFF” will begin
flashing.
Scroll up or scroll down to select whether you
want the calorie expenditure count to be ON or OFF.
Press the center button 1 time to lock your selection.
Press and hold the center button. You will be brought back
to the time of day screen and are ready to begin
recording.
STEP
7
“ACTIVITY”
Choose from:
Low: occasionally exercise
Middle: regularly exercise
High: consistently exercise at least
3 times a week.
Scroll up or down until you have arrived
at the correct activity level.
Press the center button 1 time to lock your selection.
k-121
STEP
9
Page 5
Sheet 5 of 6
k-121
How to Start, Stop, and Recall Data – M Series
MEASURE
5:30
45
140
START
▼
▲
▼
Lock in each
selection
Scroll Up
Scroll Down
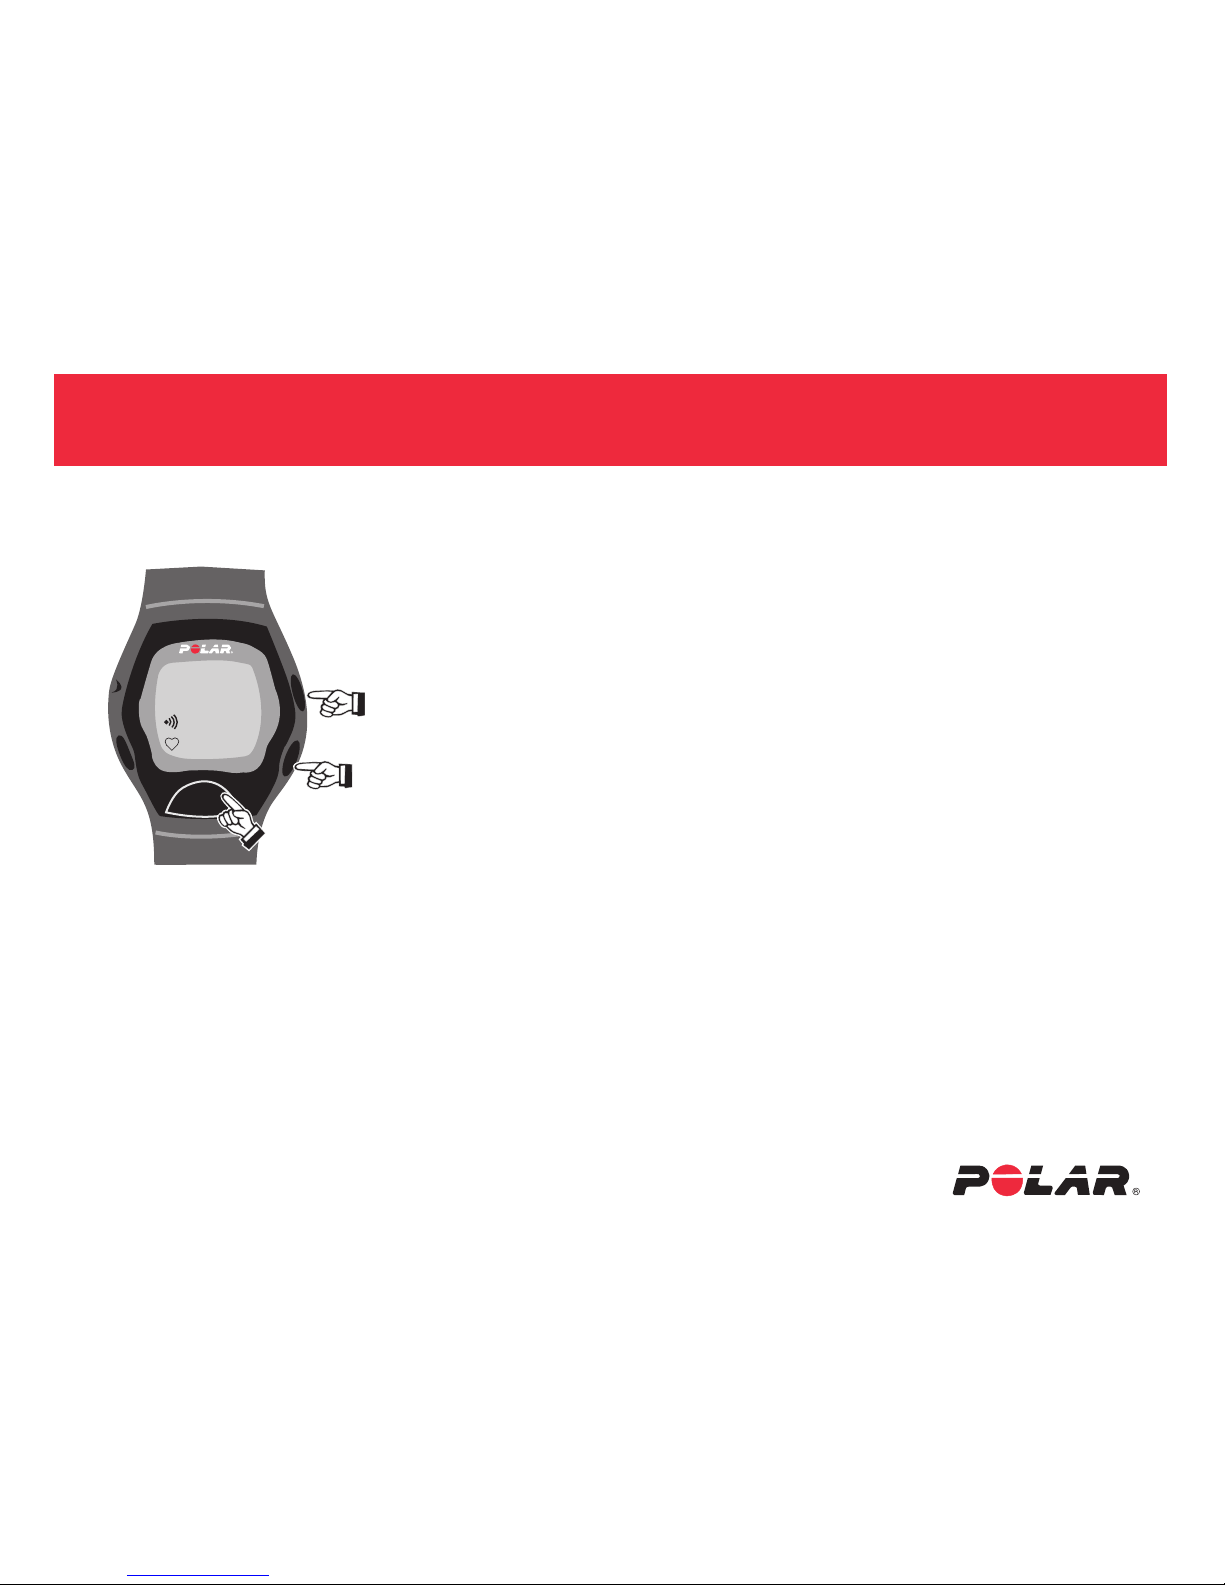
Start from the Time of Day screen.
Press the center button 1 time. This is the Measure screen.
Wait for your heart rate to appear. Then press the center button 1 time.
You are now recording.
After exercise, press the center button 1 time. “Quit?” will appear at the
top of the screen.
(If you are doing a test run and the OwnZone feature is on, you need
to press the center button 2 times for “Quit?” to appear.)
Press the scroll up or scroll down button 1 time.You are now back in
the Time of Day Screen.
Press the scroll up button 1 time. “File” is where your data is stored.
Press the center button 1 time to enter into the file. The date of the
exercise session will appear, and you can scroll through the stored
data by repeatedly pressing the scroll up button.
To return to Time of Day Screen keep pressing the scroll up button or
press and hold the center button.
PM
Page 6
FIT TEST – M Series
Sheet 6 of 6
k-121
options
START
▼
teston
stop
▼
excellent
06 1703
51
START
▼
Press 1X
STEP
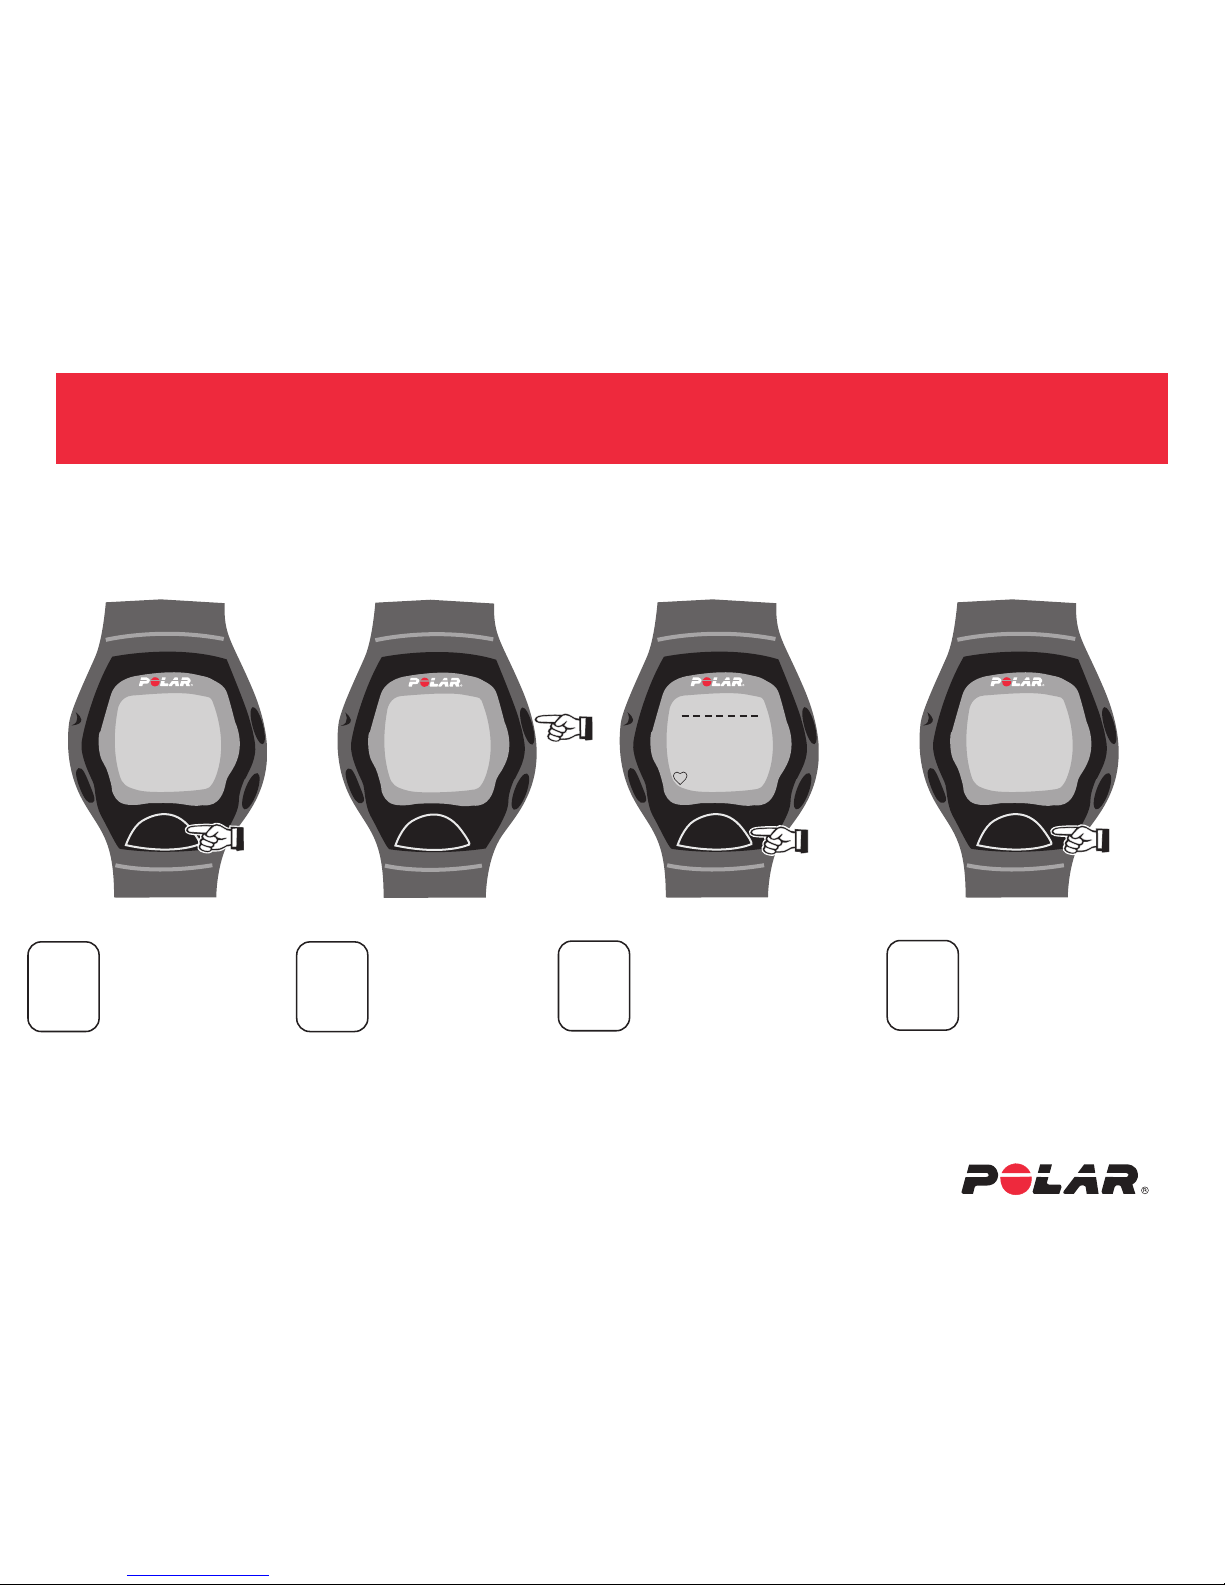
1
Scroll to options.
Hit the center
button. Scroll up
until “FIT TEST”
appears. Hit the
center button and
use the scroll button to set the“FIT
TEST” on. Press
and hold the center
button to return to
“TIME of DAY.”
STEP
3
Press the center button
one time to start the test.
“TEST ON” will appear.
Note: Test takes 5 - 8
minutes and will beep
once completed.
All your user
information must
be entered before
taking the test.
STEP
4
Once completed, the test
results and date will be
displayed on the screen.
Press and hold the center
button to return to “TIME
of DAY.”
Press 1X
▼
▼
▼
1
1
fit test
START
▼
STEP
2
Scroll up until
“FIT TEST”
appears.
 Loading...