

Page 1

POLAR
RCX5
User Manual
Page 2

ENGLISH
CONTENTS
1. INTRODUCTION ...... ....... ....... ....... ....... ....... ....... ....... ....... ....... ...................... . ....... ....... ....... ... 5
2. TRAINING COMPUTER PARTS ....... ....... ....... ....... ....... ....... ....... ....... ...................... . ....... ....... ...... 6
Polar RCX5 Training Computer Parts ... ....... ....... ....... ....... ....... ....... ....... ....... ....... ....... ................. 6
Optional Accessories ......................................................................................................... 7
3. GETTING STARTED ....... ....... ....... ....... ....... ....... ....... ....... ....... ....... ....... ....... ...................... . ..... 8
Basic Settings.. ....... ....... ....... ....... ....... ....... ....... ....... ...................... . ....... ....... ....... ....... ....... . 8
Button Functions and Menu Structure.. ....... ....... ....... ....... ....... ....... ....... ...................... . ....... ....... . 8
Button Functions ....................................................................................................... ....... 8
Menu Structure ......................................................................... ....................................... 8
4. PREPARE FOR TRAINING .... . ....... ....... ....... ....... ....... ....... ....... ....... ....... ....... ....... ....... ....... ....... .. 10
Plan Your Training ..... ....... ....... ....... ....... ....... ....... ....... ....... ....... ....... ....... ....... ...................... 10
Sport Profiles................................................................................................................... 10
Polar Endurance Training Program.......................... ................................................ .............. 10
Calibrate the Polar s3+ Stride Sensor ...... ....... ............... . ....... ....... ....... ....... ....... ....... ....... ....... .. 10
Calibration by Running Wizard.......... ................................................ ........................ ........... 11
Set Calibration Factor Manually ................................................ ........................................... 11
Calibrate Sensor by Running a Known Distance (on-the-fly calibration) ........................................ 11
5. TRAINING... ....... ....... ....... ....... ....... ....... ....... ...................... . ....... ....... ....... ....... ....... ....... ...... 13
Wear the Heart Rate Sensor ....... ....... ....... ....... ....... ....... ...................... . ....... ....... ....... ....... ....... 13
Start Training.... ....... ....... ....... ....... ....... ....... ....... ....... ...................... . ....... ....... ....... ....... ....... 13
Train With Polar ZoneOptimizer ... ....... ....... ....... ....... ....... ....... ....... ....... ....... ....... ....... ....... ....... .. 14
Start Training Session with Polar ZoneOptimizer .................. ........................ ............................ 14
Use Polar Endurance Training Program..... ....... ....... ....... ....... ....... ....... ....... ....... ....... ....... ....... ..... 16
Use RCX5 in Multisport Training... ....... ....... ....... ....... ....... ....... ...................... . ....... ....... ....... ...... 16
Train With Race Pace . ....... ....... ....... ....... ....... ....... ....... ....... ....... ....... ....... ....... ....... ....... ....... . 16
Button Functions During Training . ....... ....... ....... ....... ....... ....... ....... ....... ...................... . ....... ....... 16
Record a Lap ............. ........................ ........................ ................................................ ...... 17
Lock a Zone......................................................... ................................................ ............ 17
Zoom the Training View Display ........................................................................................... 17
HeartTouch ..................................................................................................... ............... 17
Night Mode ...................................................................................................... ............... 18
View Quick Menu .............................................................................................................. 18
Pause Training .............................................................................................. ................... 18
Customize the Training Views .. ....... ....... ....... ....... ....... ....... ....... ....... ....... ....... ...................... . ... 18
Reminder.. ....... ....... ....... ....... ....... ....... ....... ....... ....... ...................... . ....... ....... ....... ....... ....... 20
Pause/ Stop Training Recording .. ....... ....... ....... ....... ....... ....... ....... ....... ....... ....... ....... ....... ....... .. 20
6. AFTER TRAINING ..... ....... ....... ....... ....... ....... ....... ....... ....... ....... ...................... . ....... ....... ....... .. 22
Analyze Training Results ...... . ....... ....... ....... ....... ....... ....... ....... ....... ....... ....... ....... ....... ....... ...... 22
Single Sport Training Files.................................................................................................. 22
Multisport Training File ...................................................................................................... 24
Week Summaries ........................................................... ................................................ ... 24
Totals Since xx.xx.xxxx .......................................................................................... ............. 25
Delete Files ..................................................................................................................... 25
Reset Week Summaries............. ................................................ ........................ ................. 25
Reset Trip .............................................. ................................................ ......................... 25
Reset Totals .............................................................................................................. ...... 25
7. DATA TRANSFER .... ....... ....... ....... ....... ...................... . ....... ....... ....... ....... ....... ....... ....... ....... ... 26
Transfer Data ...... . ....... ....... ....... ....... ....... ....... ....... ....... ....... ....... ....... ....... ....... ....... ....... ...... 26
8. SETTINGS .... ....... ....... ....... ....... ....... ....... ...................... . ....... ....... ....... ....... ....... ....... ....... .... 27
Page 3

ENGLISH
Sport Profile Settings ..... ....... ....... ....... ....... ....... ....... ....... ....... ....... ...................... . ....... ....... ... 27
Running Settings ....................................................................................................... ....... 27
Cycling Settings ............................................................................................................... 28
Swimming Settings .............................................................................. ............................. 29
Other Sport Settings ....... ................................................ ................................................ ... 30
Heart Rate Settings... ....... ....... ....... ....... ....... ....... ....... ...................... . ....... ....... ....... ....... ....... . 30
User Information Settings ..... ....... ....... ....... ....... ....... ....... ....... ....... ....... ....... ....... ....... .............. 31
Maximum Heart Rate (HRmax) ........................ ................................................ .................... 33
OwnIndex® ................................................ ................................................ ..................... 33
General Settings ..... ....... ....... ....... ....... ....... ....... ....... ....... ....... ....... ....... ...................... . ....... .. 33
Watch Settings.... ....... ....... ...................... . ....... ....... ....... ....... ....... ....... ....... ....... ....... ....... ..... 34
Connection Settings.. ....... ....... ....... ....... ....... ....... ....... ...................... . ....... ....... ....... ....... ....... . 35
Quick menu . ....... ....... ....... ....... ....... ....... ....... ....... ....... ...................... . ....... ....... ....... ....... ..... 35
Time Mode ....................................................... ................................................ ............... 35
Pre-training mode ......................................................................... .................................... 35
Training Mode......................................................... ................................................ ......... 35
9. APPLICATIONS .... ....... ....... ....... ....... ....... ...................... . ....... ....... ....... ....... ....... ....... ....... ..... 37
Polar Fitness Test..... ....... ....... ....... ....... ....... ....... ....... ....... ....... ....... ...................... . ....... ....... . 37
Before the Test..................................................................... ............................................ 37
Performing the Test........................................................................................... ................ 37
After the Test................................................................... ................................................ 38
Polar Race Pace . ....... ....... ....... ....... ....... ....... ....... ...................... . ....... ....... ....... ....... ....... ...... 39
10.USING A NEW HEART RATE SENSOR ..... ....... ....... ....... ....... ....... ....... ....... ....... ...................... . ...... 41
Using a New Heart Rate Sensor.. ....... ....... ....... ....... ....... ....... ....... ....... ...................... . ....... ....... . 41
Pairing a New Heart Rate Sensor With Training Computer.............. ............................................ 41
11.USING A NEW ACCESSORY.. ....... ....... ....... ....... ....... ....... ....... ....... ....... ....... ....... ....... ....... ....... .. 42
Pairing a New Speed Sensor With Training Computer ............................................................... 42
Pairing a New Cadence Sensor With Training Computer ............................................................ 42
Pairing a New GPS Sensor With Training Computer .................................................................. 42
Pairing a New Stride Sensor With Training Computer................................................................ 43
12.BACKGROUND INFORMATION ....... ...................... . ....... ....... ....... ....... ....... ....... ....... ....... ....... ...... 44
Polar Sport Zones ... ....... ....... ....... ....... ....... ....... ....... ....... ...................... . ....... ....... ....... ....... .. 44
Heart Rate Variability ....... ....... ....... ....... ....... ....... ....... ....... ....... ....... ....... ....... ....... ....... .......... 45
Polar ZoneOptimizer ... ....... ....... ....... ....... ....... ....... ....... ....... ...................... . ....... ....... ....... ...... 45
Maximum Heart Rate.. ....... ....... ....... ....... ....... ....... ....... ....... ....... ...................... . ....... ....... ....... 47
Running Cadence and Stride Length ... ....... ....... ....... ....... ....... ...................... . ....... ....... ....... ....... . 47
Polar Running Index... ....... ....... ....... ....... ....... ....... ....... ...................... . ....... ....... ....... ....... ....... 48
Polar Training Load Feature ..... ....... ....... ....... ....... ....... ....... ....... ....... ....... ....... ....... ....... ....... .... 50
Polar Endurance Training Program for Running and Cycling.... ....... ....... ....... ....... ....... ....... ....... ....... .. 51
Polar Training Articles.... ....... ....... ....... ....... ....... ....... ....... ....... ....... ....... ....... ....... ................... 51
13.IMPORTANT INFORMATION..... ....... ....... ....... ....... ....... ....... ....... ....... ....... ....... ............... . ....... .... 52
Caring for Your Product .. ....... ....... ....... ....... ....... ....... ....... ....... ....... ....... ....... ....... ....... ....... ..... 52
Service ....... ........................ ................................................ ............................................ 52
Changing Batteries ..... ....... ....... ....... ....... ....... ....... ....... ....... ....... ....... ....... ...................... . ...... 52
Change Batteries Yourself................................................................................................... 53
Power Save Mode .... ....... ....... ....... ....... ....... ....... ....... ...................... . ....... ....... ....... ....... ....... . 54
Battery Lifetime in RCX5 ... ....... ....... ....... ....... ...................... . ....... ....... ....... ....... ....... ....... ....... . 54
Precautions.. ....... ....... ....... ....... ....... ....... ....... ....... ....... ...................... . ....... ....... ....... ....... .... 55
Interference During Training .................................................. ............................................. 55
Minimizing Risks When Training .......................................................................................... 55
Technical Specifications ... ....... ....... ....... ....... ....... ....... ....... ....... ....... ....... ....... ....... ................. 56
Frequently Asked Questions.... ....... ....... ....... ....... ....... ....... ....... ....... ....... ...................... . ....... .... 58
Limited International Polar Guarantee .... ....... ....... ....... ....... ....... ...................... . ....... ....... ....... ..... 59
Disclaimer .... ....... ....... ....... ....... ....... ....... ....... ....... ...................... . ....... ....... ....... ....... ....... ... 60
Page 4

ENGLISH
INDEX . ....... ....... ....... ....... ....... ....... ....... ....... ...................... . ....... ....... ....... ....... ....... ....... ..... 62
Page 5

ENGLISH
1. INTRODUCTION
Congratulations on your purchase of a new Polar RCX5™training computer! It is a complete training
system for multisport and endurance athletes, and supports your training from planning through training to
analyzing.
This user manual includes complete instructions, helping you to get the most out of your training
computer.
The latest version of this user manual can be downloaded at www.polar.com/support
[http://www.polar.com/support]. For video tutorials, go to http://www.polar.com/en/support/video_tutorials.
• Polar ZoneOptimizer feature personalizes your heart rate zones during the warm-up. The ZoneOptimizer
feature measures your heart rate variability and determines your personal sport zones.
• Polar Endurance programs for running and cycling are personalized training programs for your personal
fitness level. Training program guides you to train in the correct way by defining the training volume,
training intensity and training placement on weekdays for optimal fitness improvement. The training
program works together with the Polar ZoneOptimizer feature, and the training program sessions are
modified according to your personalized sport zones.
• The RCX5 training computer has four default Sport profiles for you to choose from. You can also create
your own sport profiles in WebSync software and download them onto your training computer using
DataLink data transfer unit. It is easy to switch sport profiles during training, no need to stop, do it
on-the-fly.
• Cumulative training load graph is available in polarpersonaltrainer.com. Transfer training results from your
training computer to polarpersonaltrainer.com and follow your training load and recovery in the training
diary. Continuous monitoring of training load and recovery will help you recognize personal limits, avoid
over- or under training, and adjust training intensity and duration according to your daily and weekly
targets.
• Polar WearLink®+ Hybrid / Polar H2 heart rate sensor also works in water activities.
• Race Pace feature helps you to keep a steady pace, and achieve your target time for a set distance.
Introduction 5
Page 6
ENGLISH
2. TRAINING COMPUTER PARTS
Polar RCX5 Training Computer Parts
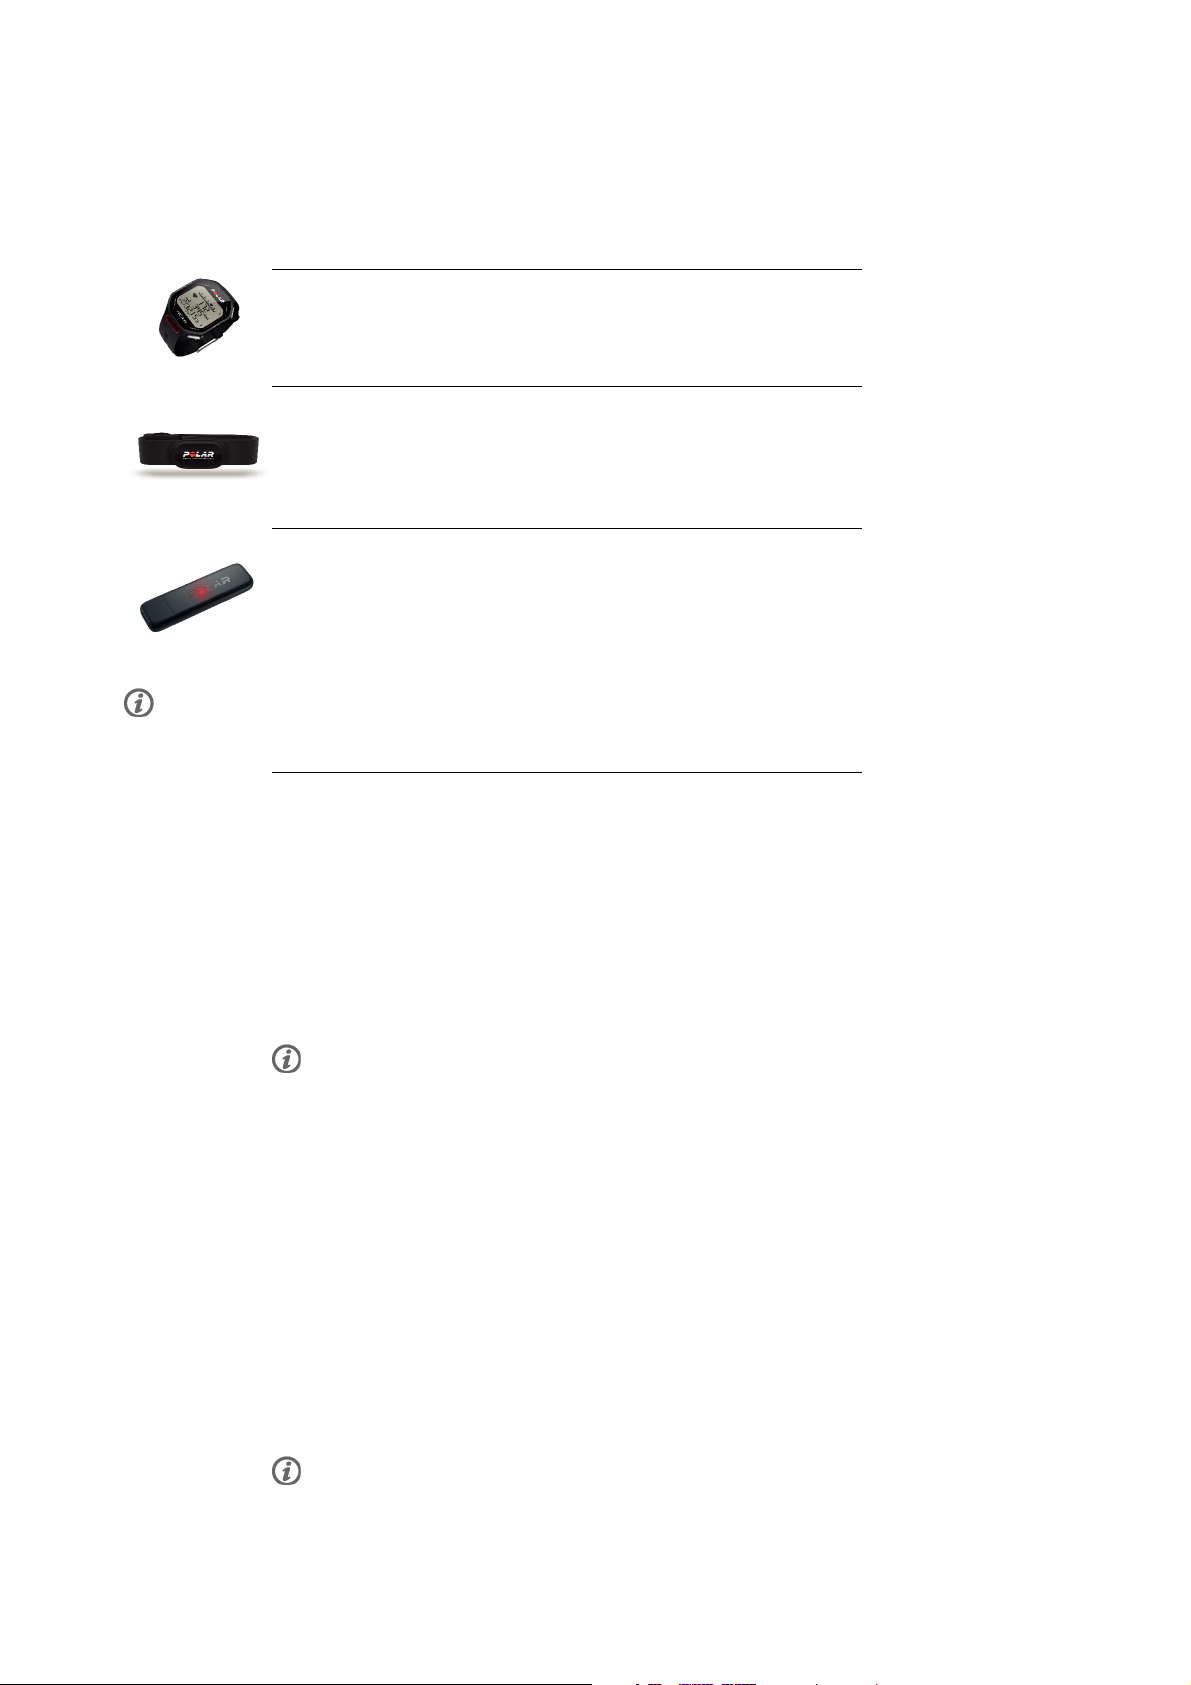
Polar RCX5 training computer provides you with data you need to enhance your
training performance, and also saves the data for later analysis.
Comfortable Polar WearLink®+ Hybrid / Polar H2 heart rate sensor sends
ECG-accurate heart rate signal to the training computer over the 2.4 GHz W.I.N.D. and
the GymLink (in water activities) technology, both proprietary to Polar. The heart rate
sensor consists of a connector and a strap.
Transfer data be tween th e tra ining co mpute r and th e pol arper sonal train er.com
[http://www.polarpersonaltrainer.com] web service with Polar DataLink data
transfer unit and WebSync software. DataLink plugs into a USB port on your computer,
and it detects your training computer with wireless W.I.N.D. technology.
Heart rate sensors with Polar specific GymLink technology, e.g. Polar H1 and H2, can be used with compatible gym
equipment.
With polarpersonaltrainer.com [http://www.polarpersonaltrainer.com] web
service you can:
• create and download the Polar Endurance training programs onto to
your training computer and utilize them in your training.
• store your training files for a long-term follow-up.
• analyze and follow your progress in the training diary.
• analyze training intensity and needed recovery time using the training
load feature.
• challenge your friends to a virtual sports competition and interact with
other sports enthusiasts.
The username for your Polar Account is always your email address. The
same username and password are valid for Polar product registration,
polarpersonaltrainer.com, Polar discussion forum and Newsletter
registration.
With Polar WebSync 2.4 Software (or newer), you can:
• fine-tune your training computer settings
• personalize your RCX5 training computer display for example with your
own logo
• modify training views
• set a reminder that reminds you to drink, eat or take other important
actions during training
• set the Power Save mode on/off
The WebSync software can be downloaded at www.polarpersonaltrainer.com.
6 Training Computer Parts
Page 7

ENGLISH
Register your Polar product at http://register.polar.fi/ to ensure we can keep improving our products and
services to better meet your needs.
Optional Accessories
Optional Polar s3+ stride sensor wirelessly measures speed/pace, distance,
running cadence and stride length.
Optional Polar G5 GPS sensor / Polar G3 GPS sensor W.I.N.D. transmits
speed/pace, distance and location data, as well as track information to RCX5, which
records and displays the data for later analysis.
Optional Polar CS cadence sensor W.I.N.D. wirelessly measures cycling
cadence, i.e. your real-time and average pedaling rate as revolutions per minute.
Optional Polar CS speed sensor W.I.N.D. wirelessly measures cycling distance
and your real-time, average and maximum speeds.
Data from all compatible sensors is sent wirelessly to the training computer over the 2.4GHz W.I.N.D.
technology, proprietary to Polar. This eliminates interference during training. During swimming the data is
sent from the Polar WearLink®+Hybrid/PolarH2heartratesensortothetrainingcomputeroverthe
GymLink technology, proprietary to Polar.
Training Computer Parts 7
Page 8

ENGLISH
3. GETTING STARTED
Basic Settings
Before using your training computer for the first time, customize the basic settings. Enter as accurate data
as possible to ensure correct feedback based on your performance.
Activate your training computer, by pressing OK. Select language is displayed. You can select from
Deutsch, English, Español, Français, Italiano, Português, Suomi or Svenska and accept with OK. Please
enter basic settings is displayed. Press OK and adjust the following data:
1. Time: Select 12h or 24h. With 12h, select AM or PM. Enter the local time.
2. Date: Enter current date.
3. Units: Select metric (kg/cm) or imperial (lb/ft) units.
4. Weight: Enter your weight.
5. Height: Enter your height. In LB/FT format, first enter feet then inches.
6. Date of birth: Enter your date of birth.
7. Sex: Select Male or Female.
8. Settings OK? is displayed. To change your settings, press BACK until you return to the desired setting. To
accept the settings, press OK and the training computer goes to the time mode.
Button Functions and Menu Structure
Button Functions
The training computer has five buttons that have different functionalities depending on the situation of
use.
LIGHT BACK OK UP DOWN
• Illuminate the
display
• With a long
press you can
enter QUICK
MENU to edit
different
settings in
different
modes. For
more
information, see
Quick menu
(page 35).
• Pause training
recording by
pressing BACK
once
• Stop training
recording by
pressing BACK
twice
• Exit the menu
• Return to
previous level
• Leave settings
unchanged
• Cancel
selections
• With a long
press, return to
time mode from
any mode
• Confirm
selections
• Start a training
session
• Take a lap
• With a long
press, lock your
heart rate to the
current sport
zone in Training
mode when
training without
preset target
zones
• Move through
selection lists
• Adjust a
selected value
• Change the
watch face with
long press
• With a long
press, zoom the
upmost row
information in
Training mode
• Move through
selection lists
• Adjust a
selected value
• Switch between
Time 1 and
Time 2 with a
long press in
time mode
• With a long
press, zoom
lowest row
information in
Training mode
Menu Structure
8 Getting Started
Page 9

ENGLISH
Program
Program will appear in the menu only if you have created and downloaded an Endurance program from
polarpersonaltrainer.com. For more information, see Polar Endurance Training Program for Running and
Cycling (page 51)
Data
Follow up on your training data. For more information, see After Training (page 22).
Settings
Personalize your training computer and select the necessary features for each of the sport profiles to suit
your training. For more information, see Settings (page 27).
Applications
• Fitness Test
To train right and to monitor your progress, it is important to know your current fitness level. The Polar
Fitness Test is an easy and quick way to measure your cardiovascular fitness and aerobic capacity. The
test is performed at rest. The test result is a value called OwnIndex. OwnIndex is comparable to maximal
oxygen uptake (VO2
), which is a commonly used aerobic capacity measure. For more information, see
max
Polar Fitness Test (page 37).
• Race Pace
You can define a target time for a set distance, for example, to run 10 kilometers in 45 minutes. During
training recording this target pace/speed is compared with training information. For more information, see
Polar Race Pace (page 39).
Connect
For a long-term follow-up, store all your training files in polarpersonaltrainer.com web service. There you
can view information of your training data and get a better understanding of your training. Polar DataLink
data transfer unit and WebSync software make it easy to transfer training files to the web service. For
more information, see Data Transfer (page 26)
Getting Started 9
Page 10

ENGLISH
4. PREPARE FOR TRAINING
Plan Your Training
You c an util ize the read y-made Polar E nduranc e Progr am for running or c ycling, or c reate y our own phas ed
training sessions in polarpersonaltrainer.com. Transfer them to the training computer by using the
DataLink and WebSync software. For more information, see polarpersonaltrainer.com Help.
Sport Profiles
The default sport profiles in the training computer are: Running, Cycling, Swimming and Other sport. To
set up the optional* sensors for each sport profile go to MENU > Settings > Sport profiles.
1. To start training press OK.
2. Select the sport profile with UP/DOWN and press OK to start the training session recording.
If you want to modify the sport profile settings without stopping the recording, press BACK once to enter
pre-training mode and then press and hold LIGHT to enter QUICK MENU. For more information, see Quick
menu (page 35).
*Optional sensors include the Polar s3+ stride sensor, Polar G5 GPS sensor / Polar G3 GPS sensor
W.I . N.D. , P o lar CS spee d se n sor W.I. N .D. and Pol a r C S c a den c e s enso r W.I . N.D .
Create New Sport Profiles
You c an crea te new sport profil es in Web Sync so ftware, and downloa d them to your trai ning co mputer. Fo r
more information on creating new sport profiles, see WebSync Help.
Polar Endurance Training Program
Polar Endurance training programs for running and cycling are available for you to create and download in
polarpersonaltrainer.com.
You w ill get a pe rsonali zed tra ining p rogram for you r fitne ss leve l. The fitness leve l will either be
calculated from your previous training history in polarpersonaltrainer.com or you will be asked to fill in a
short questionnaire which will help to define your current fitness level.
Endurance training program guides you to train in the correct and effective way, and it defines the training
volume, training intensity and training schedule for optimal fitness improvement. Each training session
will consist of warm-up, work and cool down phases.
The training program works together with the Polar ZoneOptimizer feature, which means that the training
program sessions are modified according to your personalized sport zones. For more information, see Polar
ZoneOptimizer (page 45)
For more information on Endurance programs, see polarpersonaltrainer.com Help.
Calibrate the Polar s3+ Stride Sensor
Calibration of the stride sensor improves the accuracy of speed, pace and distance measurements. It is
recommended that you calibrate the stride sensor before using it for the first time, if there are significant
changes in your running style, or if the position of the stride sensor on the shoe is dramatically changed
(e.g. if you have new shoes or if you switch the sensor from your right shoe to your left one). You can
calibrate the stride sensor by running a known accurate distance, or by setting the calibration factor
manually. The calibration should be done at the speed you normally run. If you run at different speeds,
the calibration should be done at your average speed.
s3+stride sensor calibration is sport specific. You can use different calibration factor for different styles of
10 Prepare for Training
Page 11

ENGLISH
running. For example, if you have created new sport (Jogging) in WebSync software, you need to calibrate
the stride sensor for that sport also.
If you select Running as your sport profile and do walking activities, there is no need to calibrate the s3+ stride
sensor.
Calibration by Running Wizard
Before you can calibrate the stride sensor it needs to be paired with the training computer. For more
information on pairing the stride sensor and training computer, see Using a New Accessory (page 42).
Make sure the stride sensor function in the training computer is on. Select Settings > Sport profiles >
Running> Stride sensor > On.
To c a l i b r ate a c e r tain d i s t a n c e with a step-by- s t e p guidance, s e lect
1. Settings > Sport profiles > Running > Stride sensor calibration > By running.
2. Adjust the distance, how far you wish to run, to calibrate the stride sensor and press the OK to confirm.
Stand still until stride sensor is found is displayed.
3. Press OK and run ... km/mi is displayed.
4. Press the OK and start the run by making the first step with the sensor foot onto the starting line and run
the preset distance at a steady pace.
5. Press OK after xxx km/mi is displayed.
6. Stop exactly on the finish line of the preset distance. Press OK.
7. When the calibration succeeds, Calibrated to x.xxx is displayed. The new calibration factor is used.
8. If the calibration fails, Calibration failed is displayed. If you cancel the calibration by pressing the STOP
button, Calibration canceled is displayed.
9. After calibration, Continue recording? is displayed. If you wish to continue session, select Yes.
Otherwise, select No.
Set Calibration Factor Manually
The calibration factor is calculated as a ratio of the actual distance to the uncalibrated distance. Example:
you run 1200m, and the training computer shows a distance of 1180m, the calibration factor is 1.000.
Calculate the new calibration factor as follows: 1.000*1200/1180 = 1.017. The measuring range for the
factor is 0.500-1.500.
To c a l i b r ate t h e s tride s e n s o r manua l l y b efore t r a i n i n g, s e l e c t
1. Settings > Sport profiles > Running> Stride sensor > Set factor
2. Adjust the factor.
The calibration factor can also be set during training, when the stride sensor is in use. Press and hold
LIGHT to go to Quick menu > Calibrate stride sensor > Set factor .
*Optional s3+ stride sensor required.
Calibrate Sensor by Running a Known Distance (on-the-fly calibration)
You c an cali brate t he sens or at any ph ase o f your trainin g with lap dis tance c orrecti on, pro vided y ou are
not training with distance-based targets. Just run a known distance, preferably more than 1000 meters.
Make sure the stride sensor function in the training computer is on. In Time mode press UP and select
Settings > Sport profiles > Running> Stride sensor > On.
1. In time mode press OK once. Browse the sport profiles with UP/DOWN and select Running by pressing
OK. Start running.
2. When you are at a starting point of a known lap distance, press OK. When you have run the whole lap
distance, press OK.
3. Then calibrate the sensor: Press and hold LIGHT to go to Quick menu > Calibrate stride sensor .
Prepare for Training 11
Page 12

ENGLISH
4. Fix the displayed lap distance with the distance you just ran, and press OK. Calibrated to x.xxx is
displayed. The sensor is now calibrated and ready for action.
Alternatively, you can calibrate the stride sensor by fixing the whole distance gathered.
1. In time mode press OK once. Browse the sport profiles with UP/DOWN and select Running by pressing
OK. Start running.
2. Press and hold LIGHT to go to Quick menu > Calibrate stride sensor .
3. Fix the displayed distance with the distance you just ran, and press OK. Calibrated to x.xxx is displayed.
The sensor is now calibrated and ready for action.
During training, there is also the possibility to set the calibration factor manually.
*Optional s3+ stride sensor required.
12 Prepare for Training
Page 13
5. TRAINING
Wear the Heart Rate Sensor
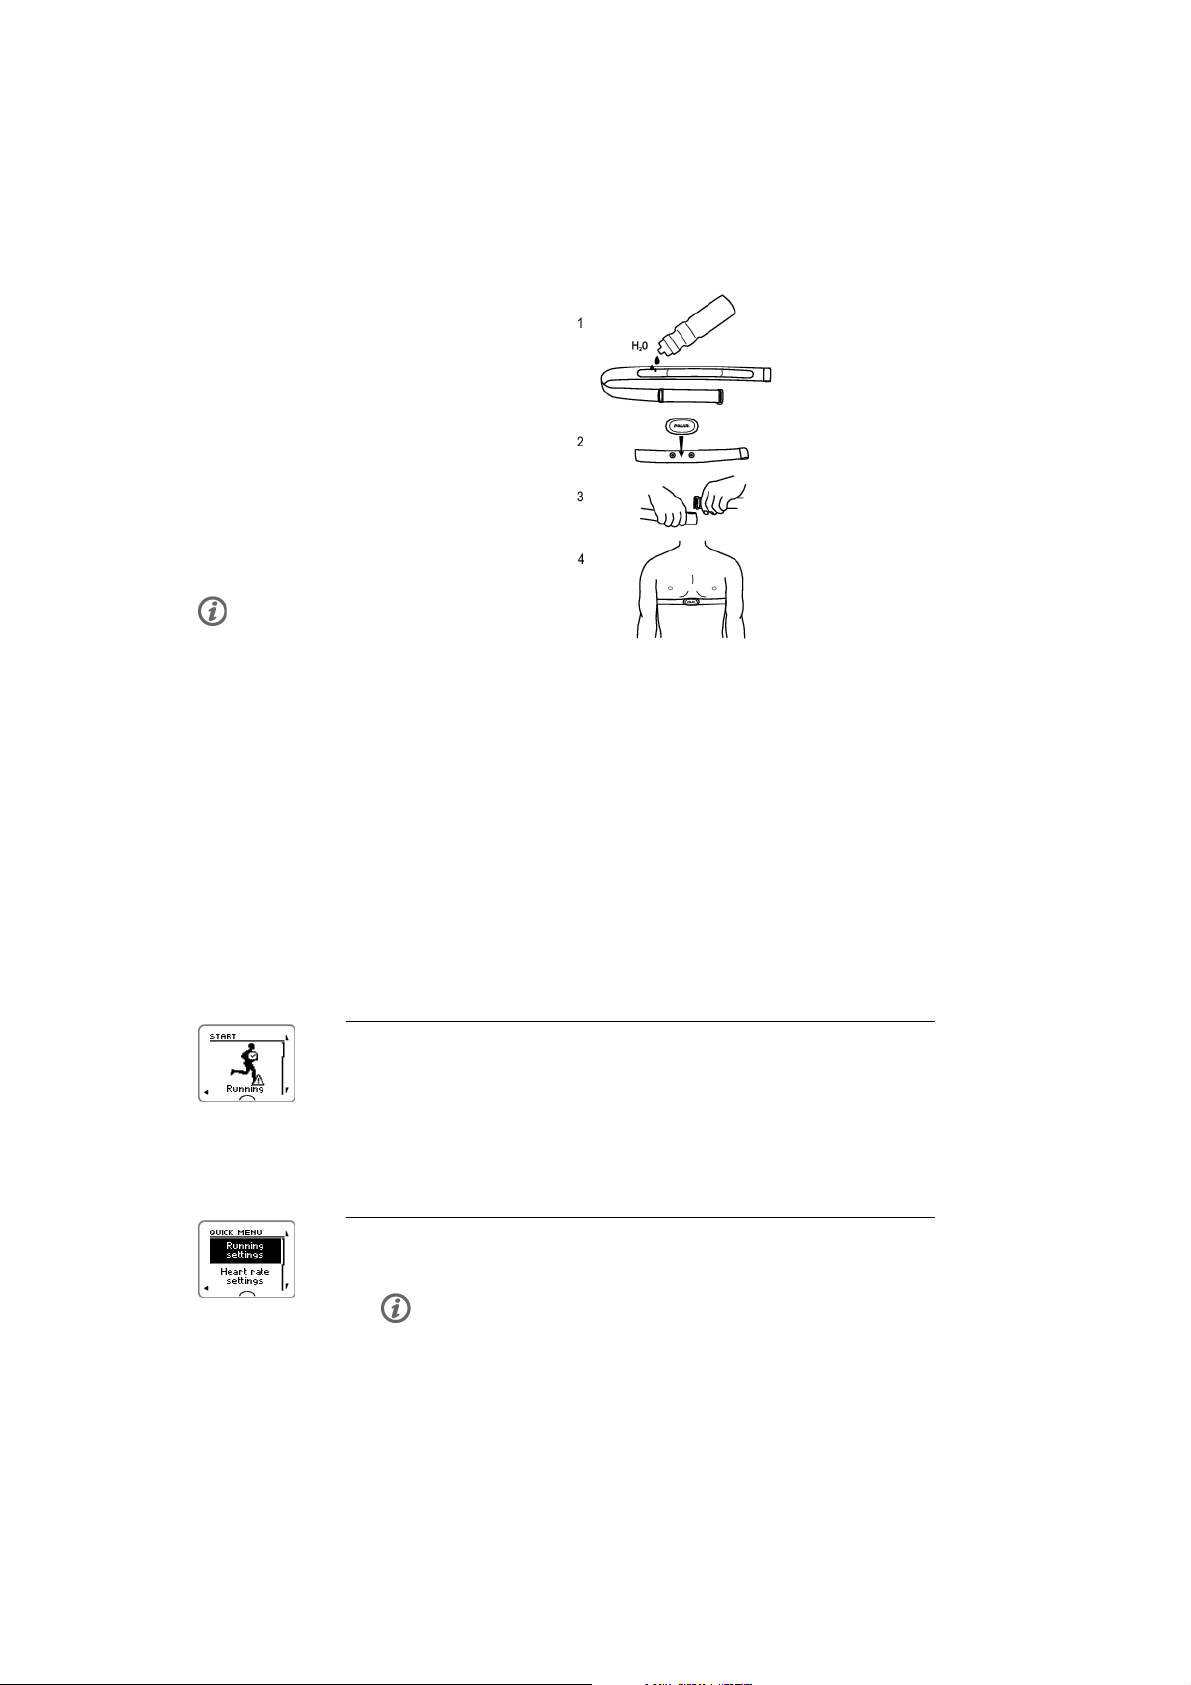
Wear the heart rate sensor to measure heart rate.
1. Moisten the electrode area of the
strap.
2. Attach the connector to the strap.
3. Tie the strap around your chest, just
below the chest muscles, and attach
the hook to the other end of the strap.
4. Adjust the strap length to fit tightly
but comfortably. Check that the moist
electrode areas are firmly against your
skin and that the Polar logo of the
connector is in a central and upright
position.
Detach the connector from the strap after
every use, to maximize the battery
lifetime. Sweat and moisture may keep
the electrodes wet and the heart rate
sensor activated. This will reduce the
battery life.
ENGLISH
See detailed washing instructions in Important Information (page 52).
For video tutorials, go to http://www.polar.com/en/support/video_tutorials.
Start Training
Wear the heart rate sensor and make sure you have set up an optional sensor* as instructed in the sensor's
user manual. If you are using a speed, cadence, GPS or stride sensor for the first time, see Using a New
Accessory (page 42). For sport profile settings see Sport Profile Settings (page 27). To use Polar
ZoneOptimizer feature for your training session, see Train With Polar ZoneOptimizer (page 14).
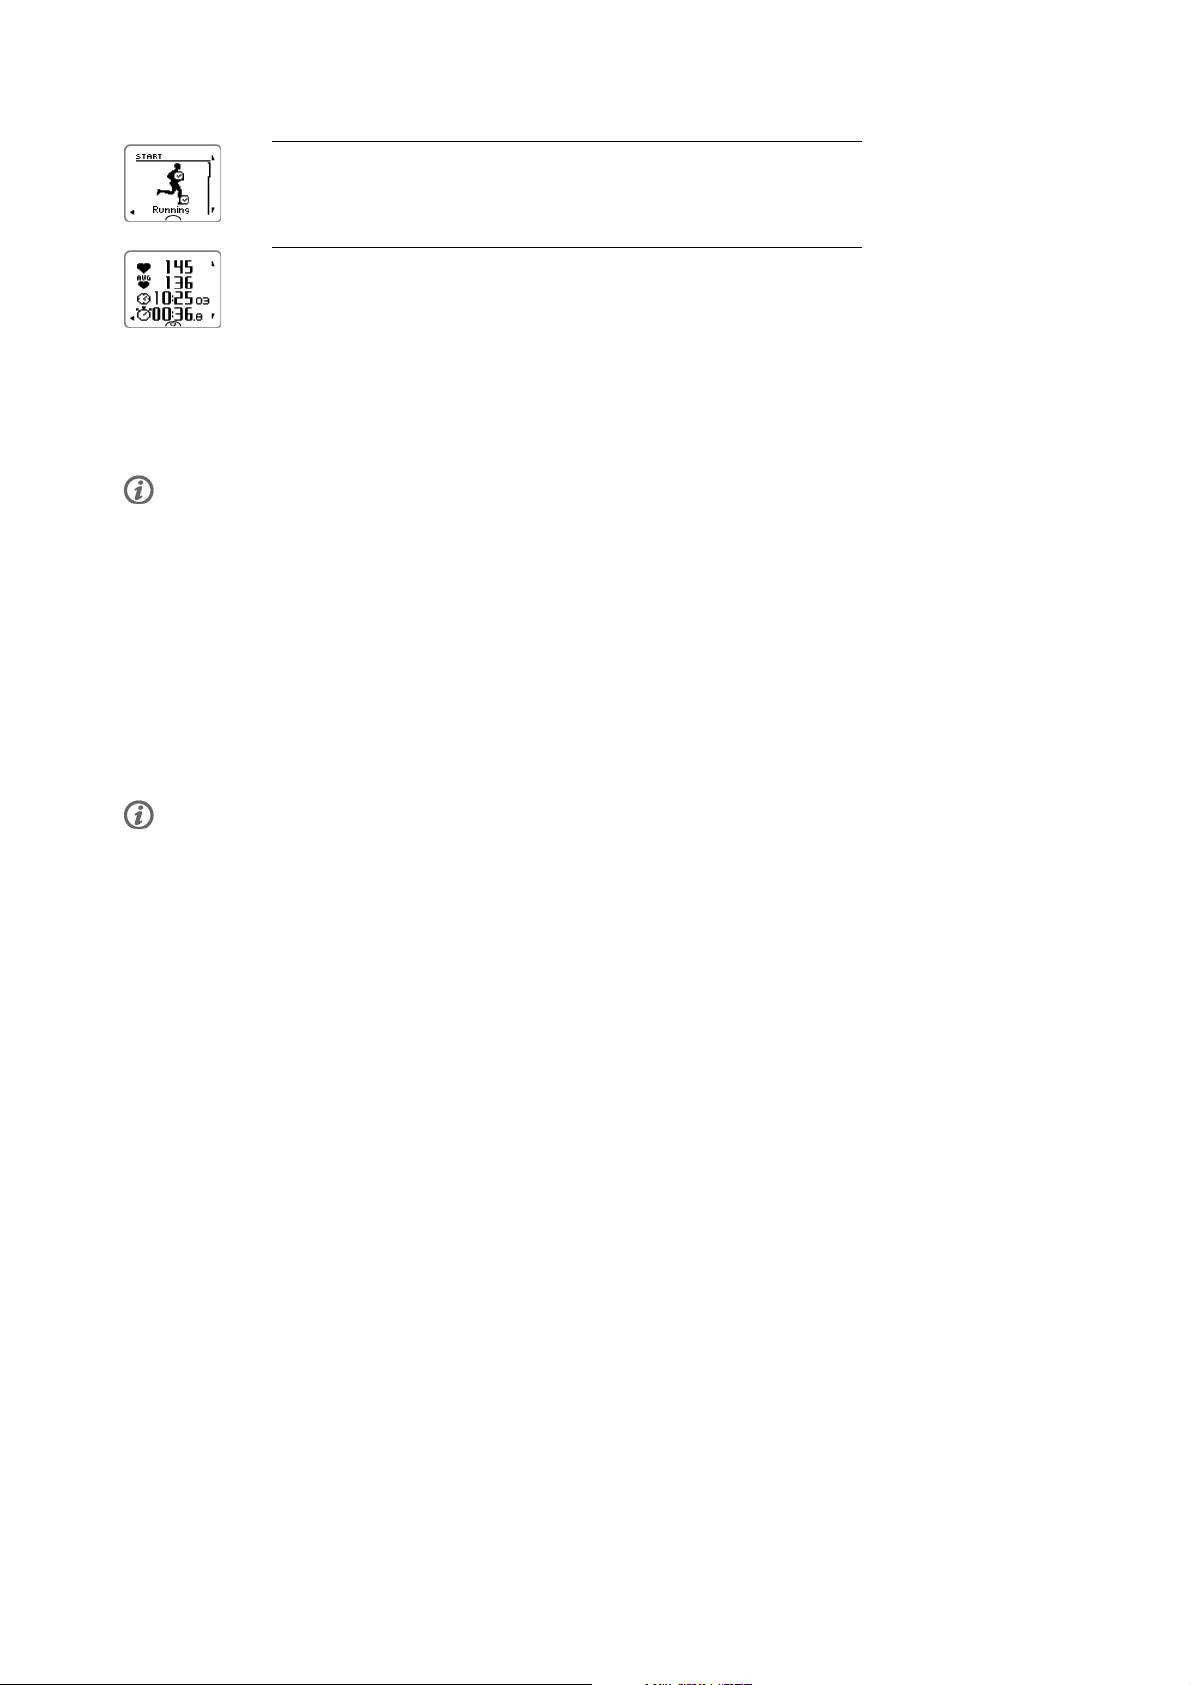
1. Start your training session by pressing OK.
Training computer goes into pre-training mode and starts searching
for the sensor signals (providing you have set the sensors on in sport
profile settings).
If a sensor signal is not found, the display will show a triangle with an
exclamation mark. The check mark indicates that the sensor signal is
found.
2. Select the sport for the training session by browsing with UP/DOWN
buttons.
The sport profile shown first on the list is the sport previously used in a
training session.
To change sport profile settings or heart rate settings before the
training recording is started (in pre-training mode), press and hold
LIGHT to enter QUICK MENU. For more information, see Quick menu
(page 35).
Training 13
Page 14
ENGLISH
3. When you are ready to start the training session, press OK. Recording
started is displayed and you can start training.
4. During training recording you can change the training view by
browsing with UP/DOWN. To change settings without stopping the
training recording, press and hold LIGHT to enter QUICK MENU. For
more information, see Quick menu (page 35).
*Optional sensors include Polar s3+ stride sensor, Polar G5 GPS sensor / Polar G3 GPS sensor W.I.N.D.,
Polar CS speed sensor W.I.N.D. or Polar CS cadence sensor W.I.N.D.
"XX sensor low battery" is displayed during training if any of the possible sensors have low battery.
Change sport during training session
If your training session includes different types of sports, you can change the sport without stopping the
training recording.
1. Press BACK once, Recording paused is displayed.
2. Change the sport by scrolling with UP/DOWN buttons and select the desired sport. Press OK to continue
the training recording.
You c an view four line s of tr aining informa tion si multane ously. Pre ss UP/DOWN to view the different
displays.
For more information on modifying training views, see Sport Profile Settings (page 27).
Train With Polar ZoneOptimizer
The ZoneOptimizer function determines your personalized sport zones (heart rate zones) for your aerobic
training session. It measures your heart rate variability during the warm-up and determines your personal
sport zones. For more information, see ???.
To u s e the Z o n e O p t imizer f u n c t ion i n y o ur t r a i n i n g , set i n on b y selecting MENU > Settings > Heart rate
settings > ZoneOptimizer > On .
The ZoneOptimizer function defines the personalized target heart rate zones for you in the beginning of
every training session. If there is less than an hour since your last ZoneOptimizer definition, the given
target heart rate zones are not necessarily valid, because you may have not recovered from previous
training, and during instant recovery, heart rate variability returns to normal state slower than heart rate.
Start Training Session with Polar ZoneOptimizer
Before ZoneOptimizer determination, make sure that you have the Polar default sport zone heart rate
limits in use i.e. you have not modified the heart rate limits manually. If you want to modify the Sport
Zone heart rate limits manually, set the ZoneOptimizer function off.
To s e t the Z o n e O p t imizer f u n c t ion o n , s elect MENU > Settings > Heart rate settings > ZoneOptimizer > On.
The ZoneOptimizer determination will start in the background already when you are in pre-training mode.
When you see the ECG-curve on the top right hand corner on the display, you will know that the heart rate
measurement and ZoneOptimizer are on.
14 Training
Page 15
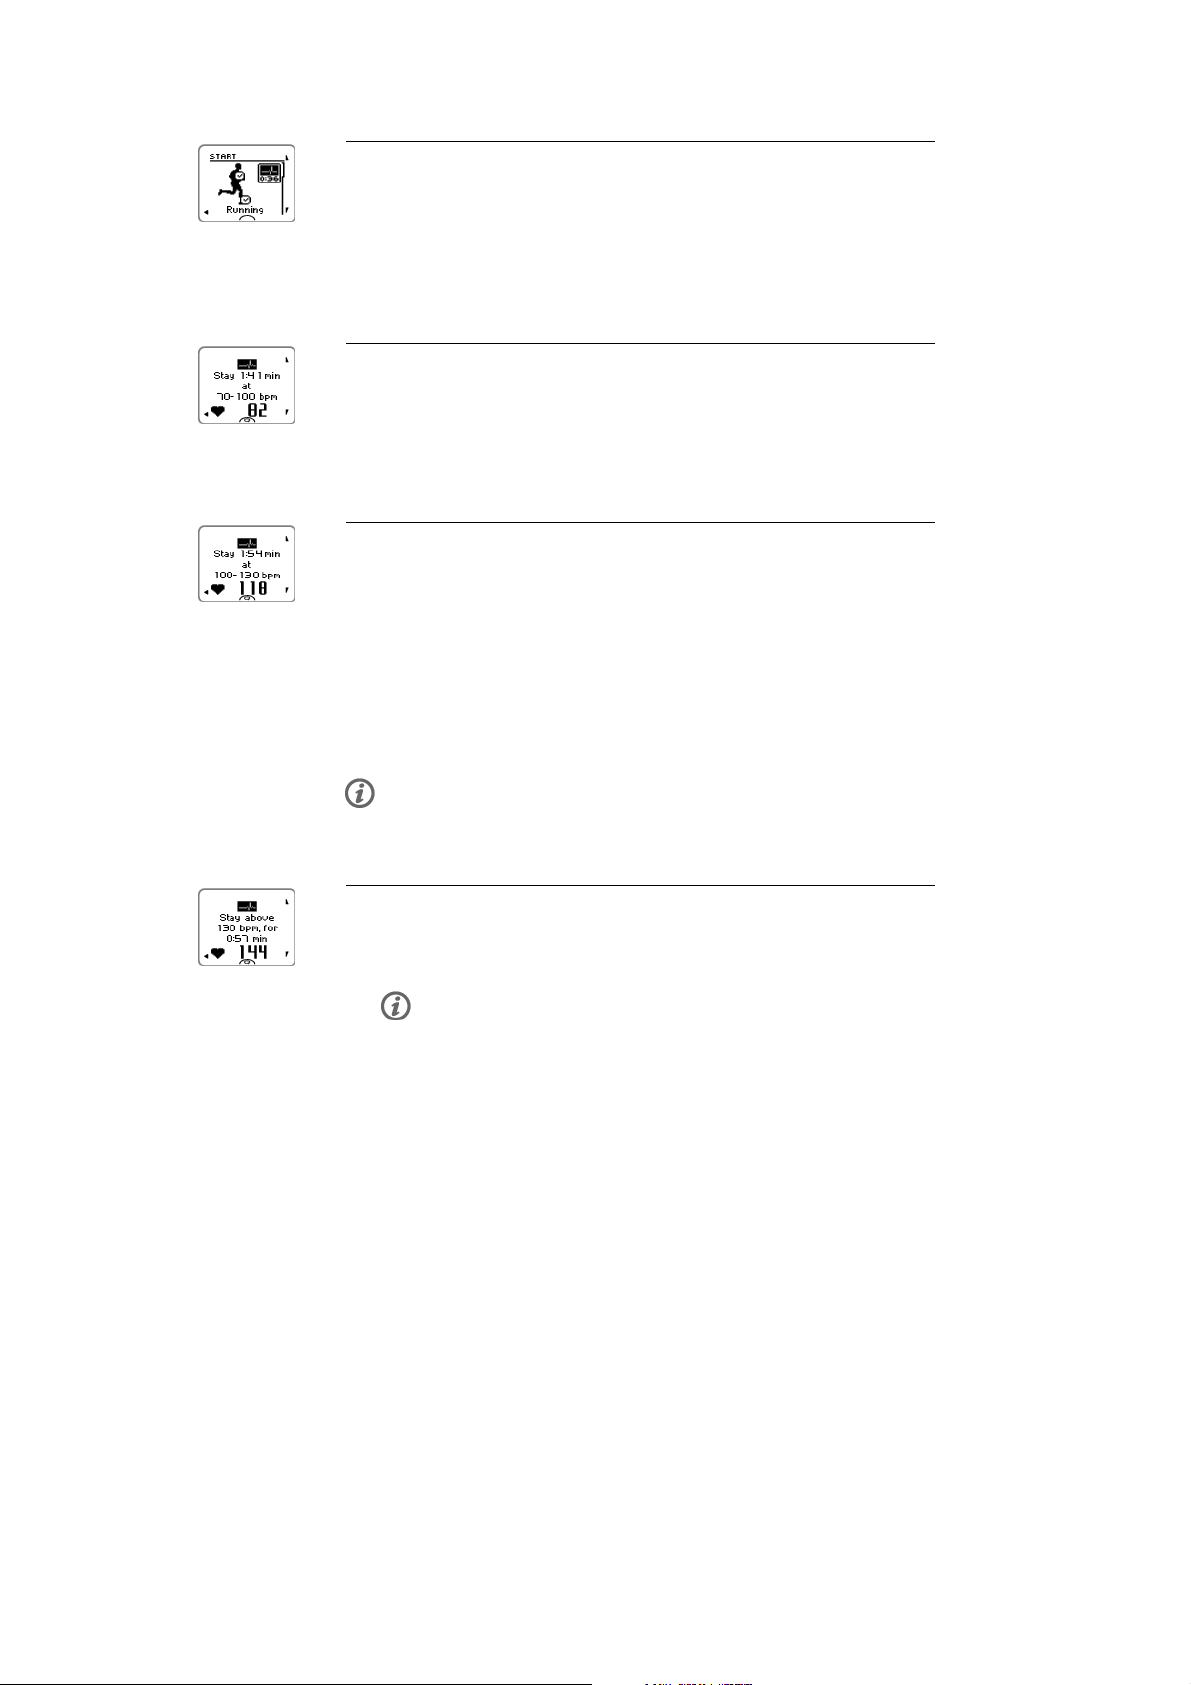
1. To start the training session with ZoneOptimizer press OK.
The display will show the sport used in the previous training session
and the count down timer will start running in the background as soon
as the heart rate has reached 70 beats per minute. An ECG-curve will
appear in the top right had corner of the display.
Select the sport profile you want to use for your training session with
UP/DOWN and press OK to start training.
2. Keep your heart rate between 70 and 100 beats per minute for two
minutes.
This can be achieved by standing or with very light training intensity,
for example, walking slowly.
The alarm will sound, when the first part of the determination is
finished.
3. The second part of the determination will start when your heart rate
has risen above 100 beats per minute.
Continue training at light intensity. Increase heart rate gradually, and
keep it between 100 – 130 bpm for two minutes.
This can be achieved, for example, by walking briskly, or by
cycling/jogging at low intensity during warm up.
ENGLISH
If you have a very low HR
,thetrainingcomputerwillgiveyouspeciallimits.
max
The alarm will sound when the second part of the ZoneOptimizer determination is
finished.
The ZoneOptimizer determination may already finish here, if the heart rate
variation limit is reached .
4. The third part of the determination will start when your heart rate has
risen above 130 beats per minute.
Gradually increase your heart rate above 130 bpm and keep it there.
The ZoneOptimizer determination will be finalized when the heart rate
has been above 130 beats per minute for more than half a minute.
The alarm will sound, when the third and final part of the
determination is finished.
Training 15
Page 16

ENGLISH
5. After the determination is finished, the training computer displays one
of the following:
• Default sport zones (heart rate zones) in use. The determination was
not successful. The Polar sport zone (heart rate) limits will be used.
• Sport zones optimized. Heart rate zones on higher level. The limits
have been raised compared to your average ZoneOptimizer limits.
• Sport zones optimized. Heart rate zones on normal level. The limits
have been raised or lowered only slightly compared to your average
ZoneOptimizer limits.
• Sport zones optimized. Heart rate zones on lower level. The limits
have been lowered compared to your average ZoneOptimizer limits.
6. After you have received and read the feedback, press any button,
except LIGHT, to exit the message display and continue your training
session.
Use Polar Endurance Training Program
Download Polar Endurance program from polarpersonaltrainer.com, and have a ready made program to
guide you in your training.
To b e able t o download t h e progr a m y o u n e e d a n a c c o u n t in t h e polarperso n a l t r a i n e r. c o m , t h e D a taLink
data transfer unit and WebSync software. For more information, see polarpersonaltrainer.com Help.
Once you have downloaded the program onto to your training computer, go to MENU > PROGRAM and press
OK.YoucanbrowsethroughtheplannedtrainingsessionswithUP/DOWN buttons and select the training
session you want to do (for example Thu 26.8.Long run 20km). To start training press OK.
Use RCX5 in Multisport Training
Before commencing a multisport training session, make sure that you have set the sport profile settings for
each of the sports that you are going to use for the training session. For more information, see Sport
Profile Settings (page 27).
During a mulstisport training session it is easy to change sports without stopping the training recording.
During training recording press BACK once, and select another sport by browsing with UP/DOWN button
and confirm your selection by pressing OK.Thencontinuewithyourtrainingsession.
Train With Race Pace
To s e t Race p a c e on f o r the t r a i n i ng s e s s i o n go t o MENU > APPLICATIONS > Running > Set race pace xx:xx:xx
MIN/KM or MIN/MI.Firstsetthedistanceandthenthetimeinhours,minutesandseconds.Race pace set
to xx:xx MIN/KM is displayed.
When starting the training session with Race pace go to MENU > APPLICATIONS > Running > Start session
with race pace. Race pace set to xx:xx MIN/KM is displayed. You can now start your training session.
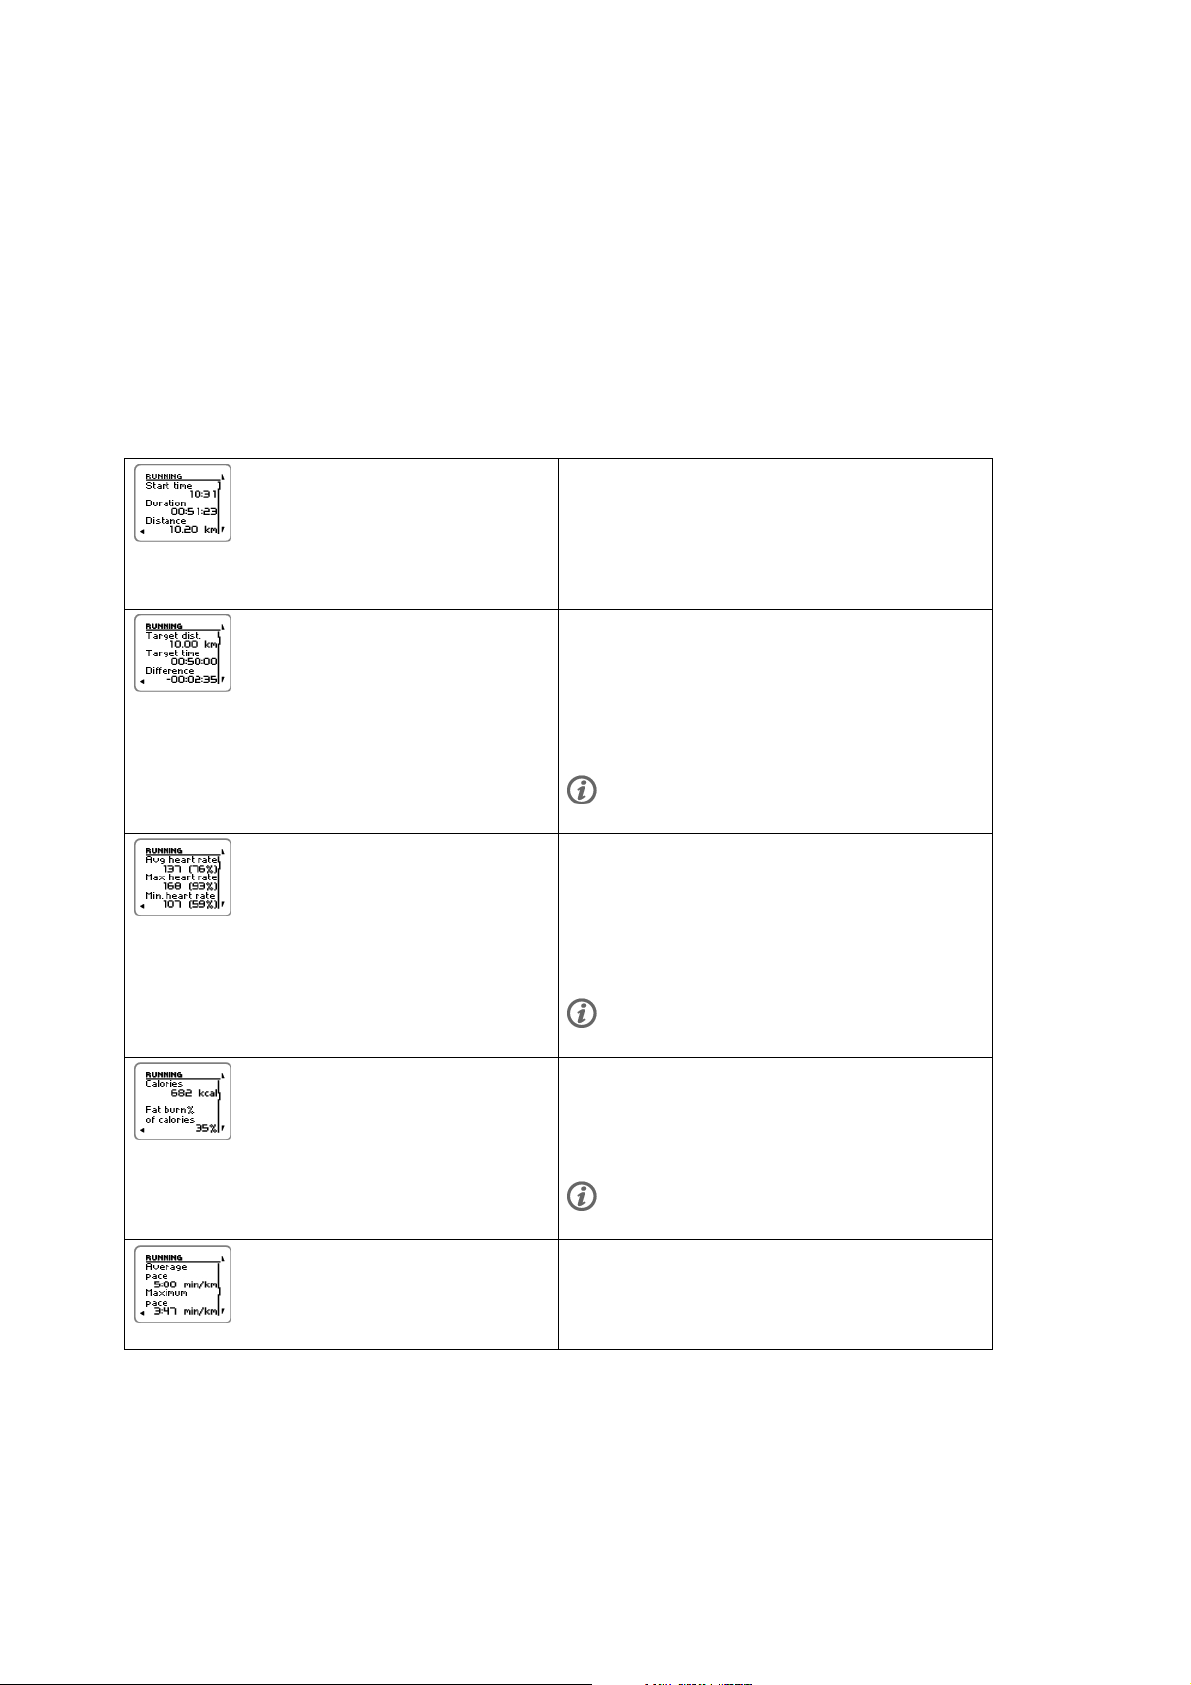
Race pace during training
Running man:Indicatesifyouareaheadorbehindthetargetpace.Theiconwill
change according to the sport profile (running, cycling or other sport)
-0:35 :Timeahead(-)/behind(+)
5:05min/km:paceneededtoachievethetarget.
20:9 km:Distancelefttoreachthetarget.
Current speed
Current heart rate
Button Functions During Training
16 Training
Page 17
ENGLISH
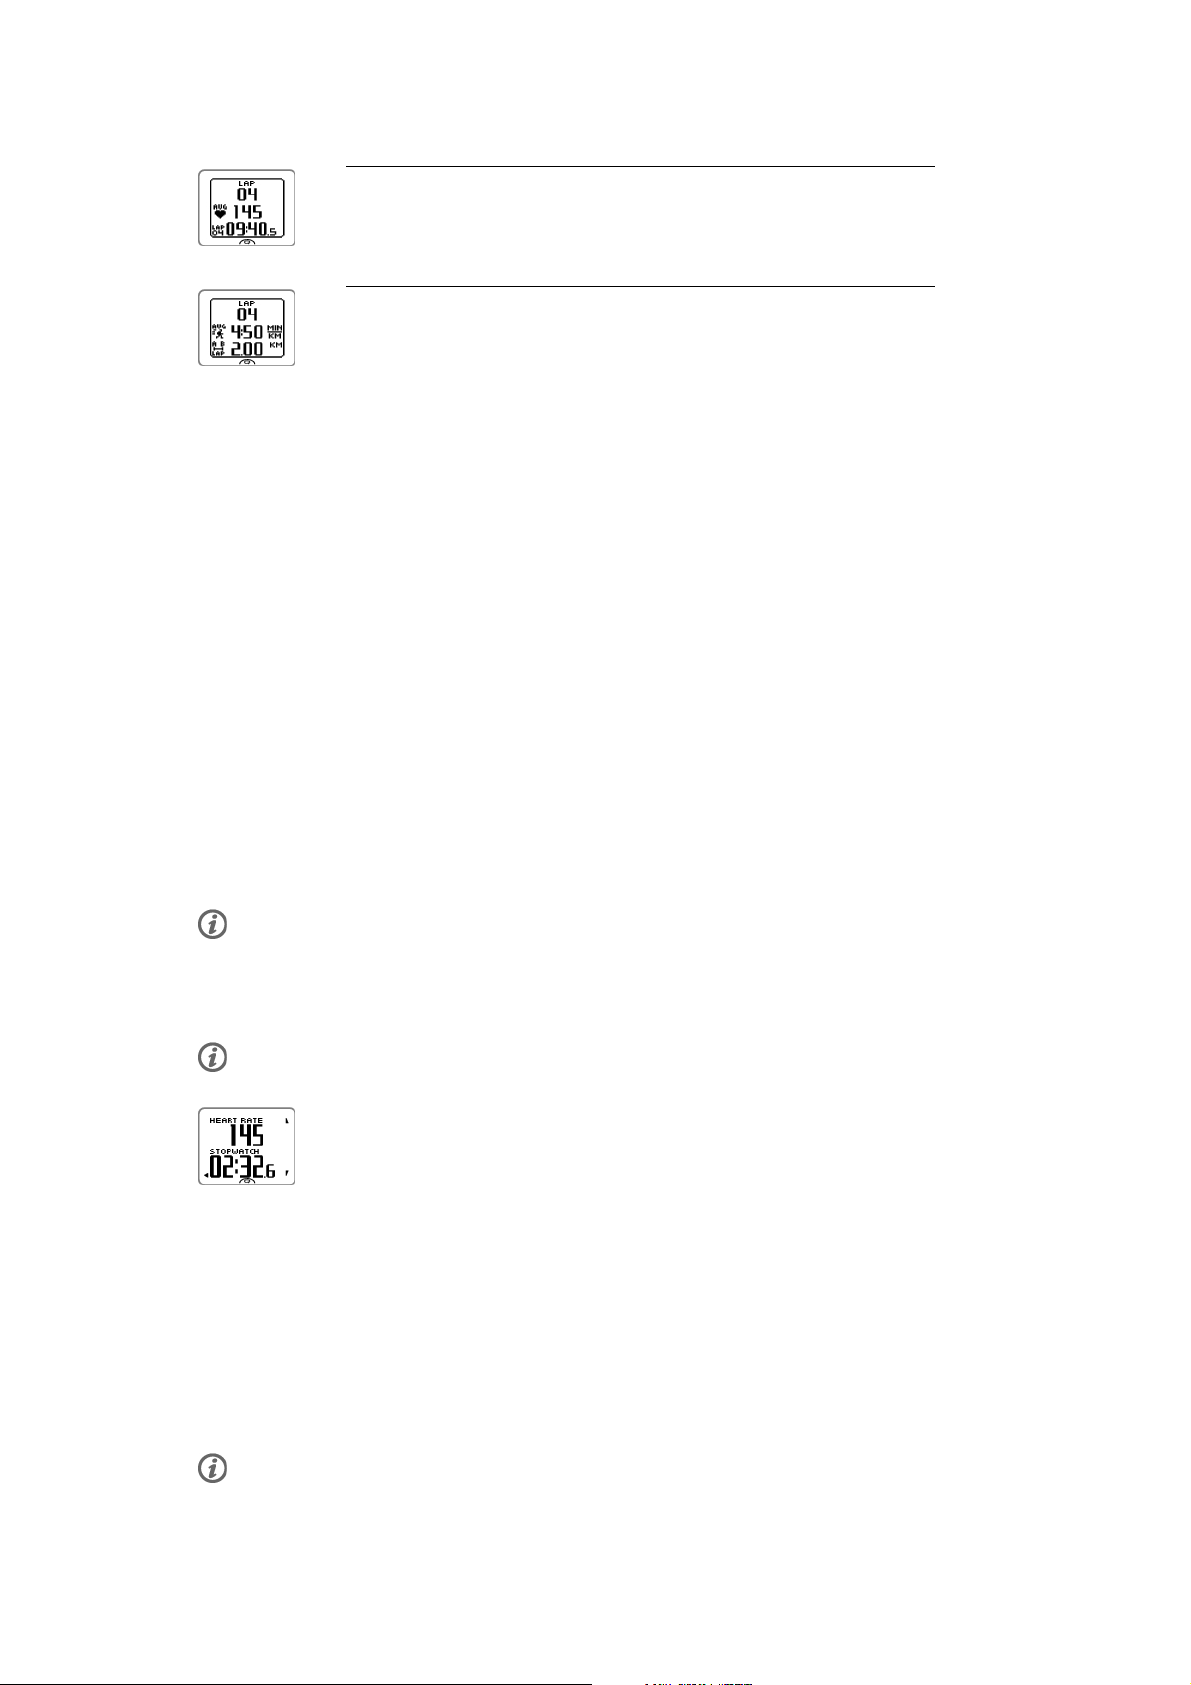
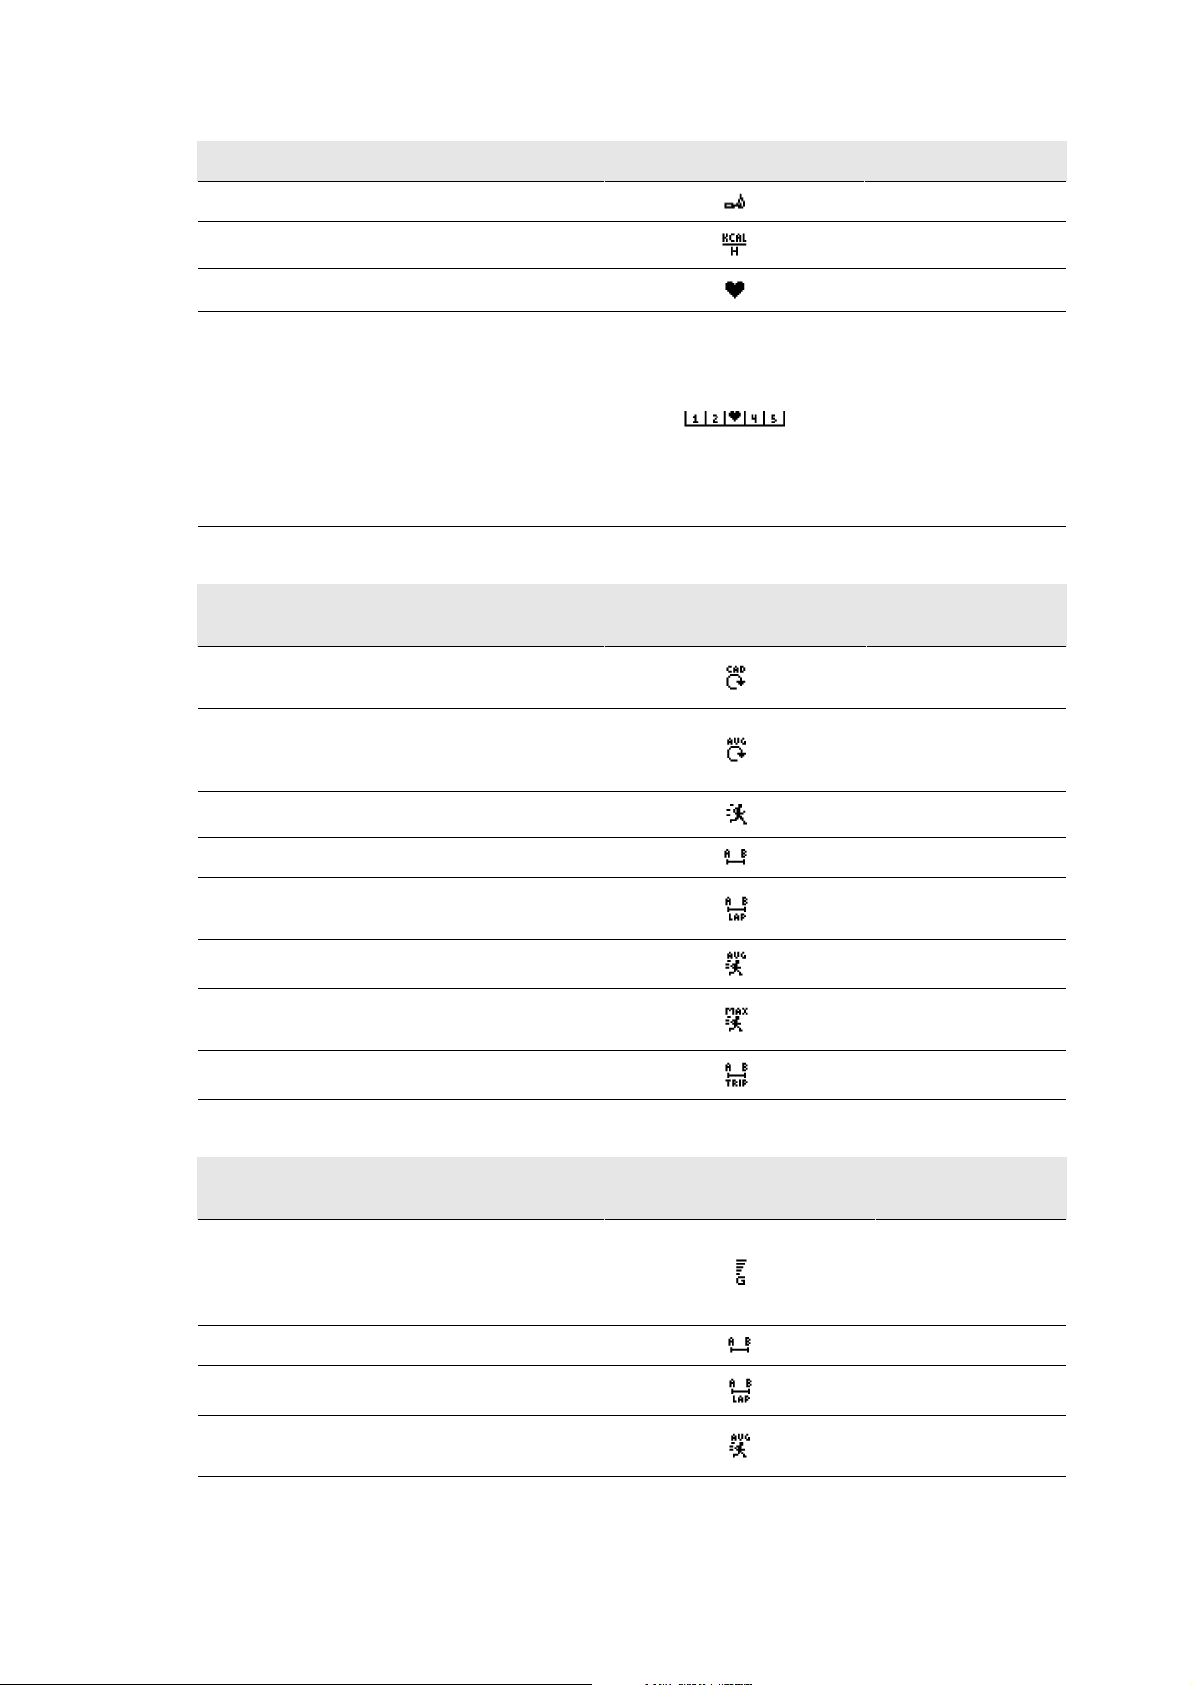
Record a Lap
Press OK to record a lap. The display will show:
Lap number
Average heart rate of the lap
Lap time
If a speed sensor is activated, the following will also appear:
Lap number
Average speed/pace of the lap
Lap distance
Lock a Zone
When training without preset target zones, you can lock your heart rate to the current sport zone. This way,
if you did not preset target zones before starting the training, you can do it on-the-go during a session.
To l o c k / u nlock t h e zone, p r e s s and h o l d OK.
During a training session that is part of a Polar Endurance training program: Press and hold OK and select
Lock zone/Unlock zone from the Lap menu.
If, for example, you are running with a heart rate of 130 bpm which is 75% of your maximum heart rate,
and matches sport zone 3, you can press and hold OK to lock your heart rate into this zone. Sport zone3
Locked 70%-79% is displayed. An alarm sounds if you are below or above the sport zone (if the target zone
alarm function is on). Unlock the sport zone by pressing and holding OK again: Sport zone3 Unlocked is
displayed.
Zoom the Training View Display
Each training view can have four rows of information shown during training. It is possible to zoom the
upper row or bottom row information.
1. To zoom the upper row information during training press and hold UP. To cancel the upper row zoom,
press and hold UP.
If you zoom the upper row or bottom row, the display will show three rows of information.
2. To zoom the bottom row information during training, press and hold DOWN. To cancel the bottom row
zoom, press and hold DOWN.
If you zoom both upper row and bottom row, the display will show two rows of information.
HeartTouch
HeartTouch function makes it easy for you to view certain information during training by bringing the
training computer near the heart rate sensor. You can select the function to
• activate backlight.
• change training view.
• show limits.
• show time of day.
• take a lap.
Please note that HeartTouch function only works with Polar WearLink®+Hybrid/PolarH2heartratesensor.
Training 17
Page 18

ENGLISH
For more information, on the HeartTouch settings see Sport Profile Settings (page 27).
Night Mode
There is a night mode function in RCX5 training computer. Press the LIGHT button once during
pre-training mode, training recording mode or pause mode. The backlight will be activated every time you
press any of the buttons, or use the HeartTouch function during training recording.
The display will also light up if a message, for example, Check heart rate transmitter ,isdisplayed.
Night mode will be switched off when you finish the training recording.
View Quick Menu
Press and hold LIGHT. QUICK MENU is displayed. You can change certain settings without pausing the
training recording. For further information, see Quick menu (page 35).
Pause Training
Pause training recording by pressing BACK, Recording paused is displayed.
In pause mode you can:
• Continue: Continue training recording by pressing OK.
• Stop training recording by pressing BACK.
Customize the Training Views
Customize the training views to show the information you want to see during training, either by using the
training computer or the WebSync software. Polar Endurance training programs downloaded from the
polarpersonaltrainer.com web service have their own training views that cannot be modified.
In time mode press UP,selectSettings > SPORT PROFILES >Sport(Running,Cycling,Swimming,Other
sport) > Set training views .
You c an also cust omize t he trai ning vi ews in pre-tra ining m ode by long pressing the LIGHT button . You
enter QUICK MENU,selectRunning settings (current sport settings) > Set training views.
There are six different training views which you can customize for each of the sport profiles.
• Select the display you want to change by pressing UP or DOWN, and press OK.
• Select the training view Off, On or Modify.
• Select the information for the blinking upper row with UP or DOWN, and press OK. The information
available depends on the features that are activated. Repeat the same to change rest of the rows.
To r e t u r n the d e f a ult s e t t i n g s of t h e display, p r e s s and h o l d LIGHT when the rows are blinking. For further
information on changing the training views, see Sport Profile Settings (page 27).
Information on the display Symbol Explanation
Time of day
Countd. timer
Stopwatch Total du ratio n of the
Time of day
Countdown timer
training session so far
Lap time
Average heart rate Average heart rate of the
Time use d for th e lap.
training session so far.
18 Training
Page 19
Information on the display Symbol Explanation
ENGLISH
Calories
Calories/ hour
Heart rate
Zone pointer (Polar sport zones) Target z one i ndica tor w ith
Expended calories
Expended calories per hour
Current heart rate
aheartsymbolthatmoves
left or right on the sport
zone scale according to
your heart rate. For further
information on setting a
sport zone, see Sport
Profile Settings
(page 27).
Information on the display (Polar s3+ stride
Symbol Explanation
sensor required)
Cadence Running cadence (pair of
steps per minute)
Avg Cadence The average running
cadence so far (pair of
steps per minute)
Speed
Distance
Lap distance Lap number and lap
Current speed/pace
Distance covered so far
distance
Average speed
Max speed Maximum speed/pace so
Average speed/pace so far
far
Trip
Information on the display (Polar G5 GPS
Symbol Explanation
Trip dis tance
sensor / Polar G3 GPS sensor W.I.N.D. required)
Speed Current speed/pace. The
amount of bars above
the letter G indicates the
GPS signal strength.
Distance
Lap distance
Distance covered so far
Lap distance
Average speed Average speed/pace so
far
Training 19
Page 20

ENGLISH
Information on the display (Polar G5 GPS
sensor / Polar G3 GPS sensor W.I.N.D. required)
Max speed Maximum speed/pace so
Symbol Explanation
far
Trip
Information on the display (Polar CS speed
sensor W.I.N.D. required)
Speed Speed you are currently
Symbol Explanation
Trip dis tance
cycling at
Distance
Lap distance* Lap number and lap
Distance cycled
distance
Avg speed The average speed so
far.
Max speed The maximum speed so
far.
Information on the display (Polar CS cadence
sensor W.I.N.D. required)
Cadence Measures the speed at
Symbol Explanation
which you turn the
cranks of your bicycle
(i.e. cadence), in
revolutions per minute
(rpm).
Avg Cadence
The average cadence.
Reminder
Trainin g r e m inder r e m i n d s you t o drink, e a t or t a k e other i m portant a c t i o ns d u r i n g training .
Reminder is based on energy consumption (kcal), distance (km) or time. Reminder alarms when certain
calories, distance or time has been reached during training. When reminder alarms, reminder counter is
reset. This means reminder alarms regularly (for example if reminder is set for 300 kcal, reminder alarms
when 300kcal, 600kcal, 900kcal... are consumed). To exit the reminder message on the display, press
any button except LIGHT.
You c an crea te the reminde r text in WebSyn c softw are and down load it to t he trai ning co mputer with
DataLink data transfer unit. The text is shown when the reminder alarms. The reminder can only be set in
the software but it can be switched off in the monitor.
Pause/ Stop Training Recording
1. To pause training recording, press BACK once. To change the sport, browse the sport profiles with
UP/DOWN buttons and select the sport you want to use next. To continue training recording press OK.
2. To stop recording completely, press BACK twice.
20 Training
Page 21

ENGLISH
Care for your heart rate sensor after training. Detach the connector from the strap and rinse the strap under
running water after every use. For complete care and maintenance instructions, see Caring for Your Product
(page 52).
Training 21
Page 22
ENGLISH
6. AFTER TRAINING
Analyze Training Results
To v i e w basic d a t a on y o u r perfo r m a n c e , see MENU > Data > Training files on your training computer. For
deeper analysis, transfer the data to polarpersonaltrainer.com with DataLink data transfer unit and
WebSync software. The web service offers various options to analyze the data with.
Single Sport Training Files
To v i e w trainin g f i l es o n d i fferent s p o r t s go t o MENU > Data > Training filesand browse with UP/DOWN
buttons to select the file you want to review and press OK.
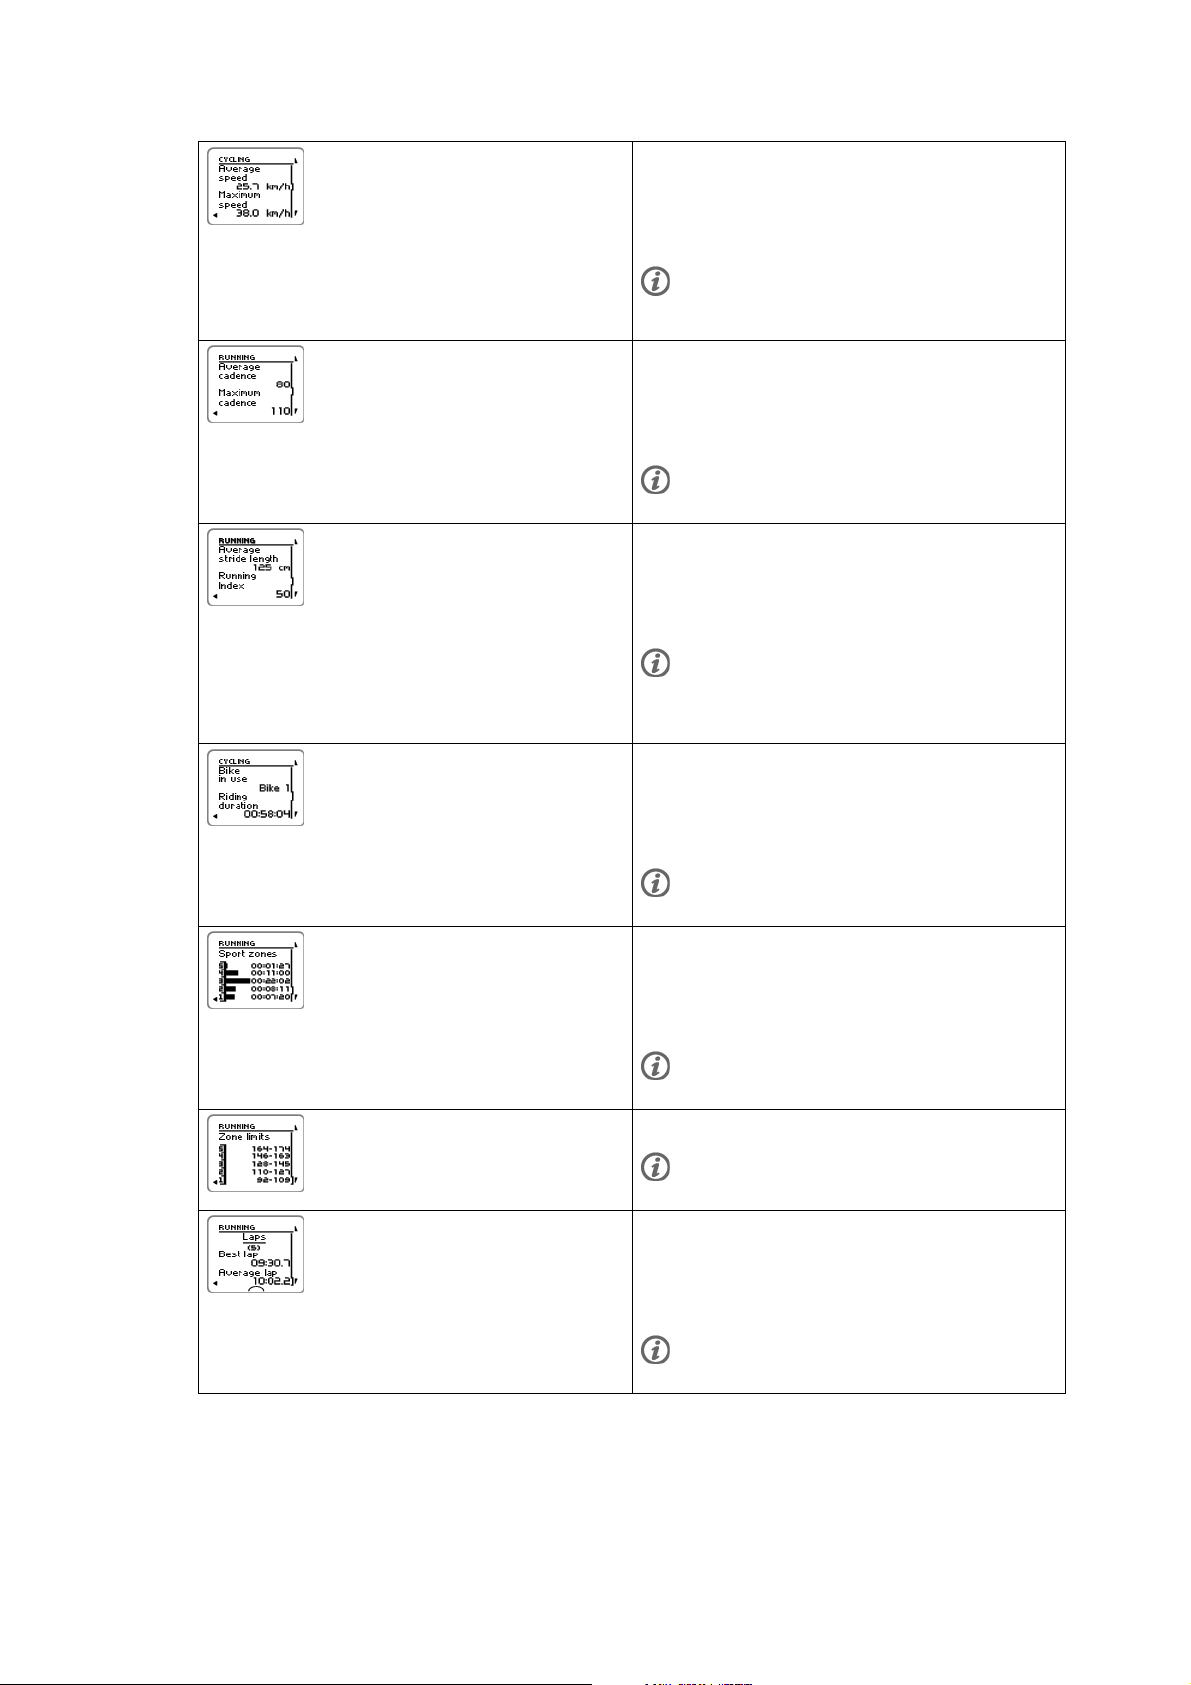
Running
Start time
Duration
Distance
Running
Target d i stance
Target p a ce
Difference+
Visible if Race pace feature in use
Running
Avg h eart ra te
Max heart rate
Min. heart rate
Visible if HR data available
Running
Calories
Fat burn % of calories
Visible if heart rate data available
Running
22 After Training
Avera ge pace
Maximum pace
Page 23
Cycling
Avera ge spee d
Maximum speed
Visible only if speed data from GPS, stride sensor, or bike speed
sensor available.
Running
Avera ge cade nce
Maximum cadence
Visible if stride sensor or bike cadence sensor data available.
Running
Avera ge stri de leng th
RunningIndex
Visible if stride sensor data available.
If GPS sensor in use, running index is shown, but stride length is
not shown.
ENGLISH
Cycling
Bike in use
Riding duration
Visible if training file is cycling sport.
Running
Sport zones
Time o n each z o n e
Visible if heart rate data available.
Zone limits
Visible if daily ZoneOptimizer used and heart rate data available.
Laps
Best lap
Avera ge lap
Visible if laps feature is set on.
After Training 23
Page 24

ENGLISH
Automatic laps
Best lap
Avera ge lap
Visible if automatic lap feature is set on.
Multisport Training File
To v i e w a m u l t i s p o rt t r a i n i n g file g o to MENU > Data > Training filesand browse with UP/DOWN buttons to
select the file you want to review and press OK.
MULTISPORT Summary gives you the general
information on the whole training session.
Duration
Distance
Press DOWN to view the separate sport files of the
multisport training session.
Running
Duration
Distance
Press OK to view the details of the running part of
the training session.
Running
Duration
Press OK to view the details of the running part of
the training session.
Cycling
Duration
Distance
Press OK to view the details of the cycling part of
the training session.
Swimming
Start time
Duration
Press OK to view the details of the other sport part
of the training session.
Week Summaries
To v i e w week s u m m a ries o f the t r a i n i n g files g o to MENU > Data > Week summaries > Summary and press
24 After Training
Page 25
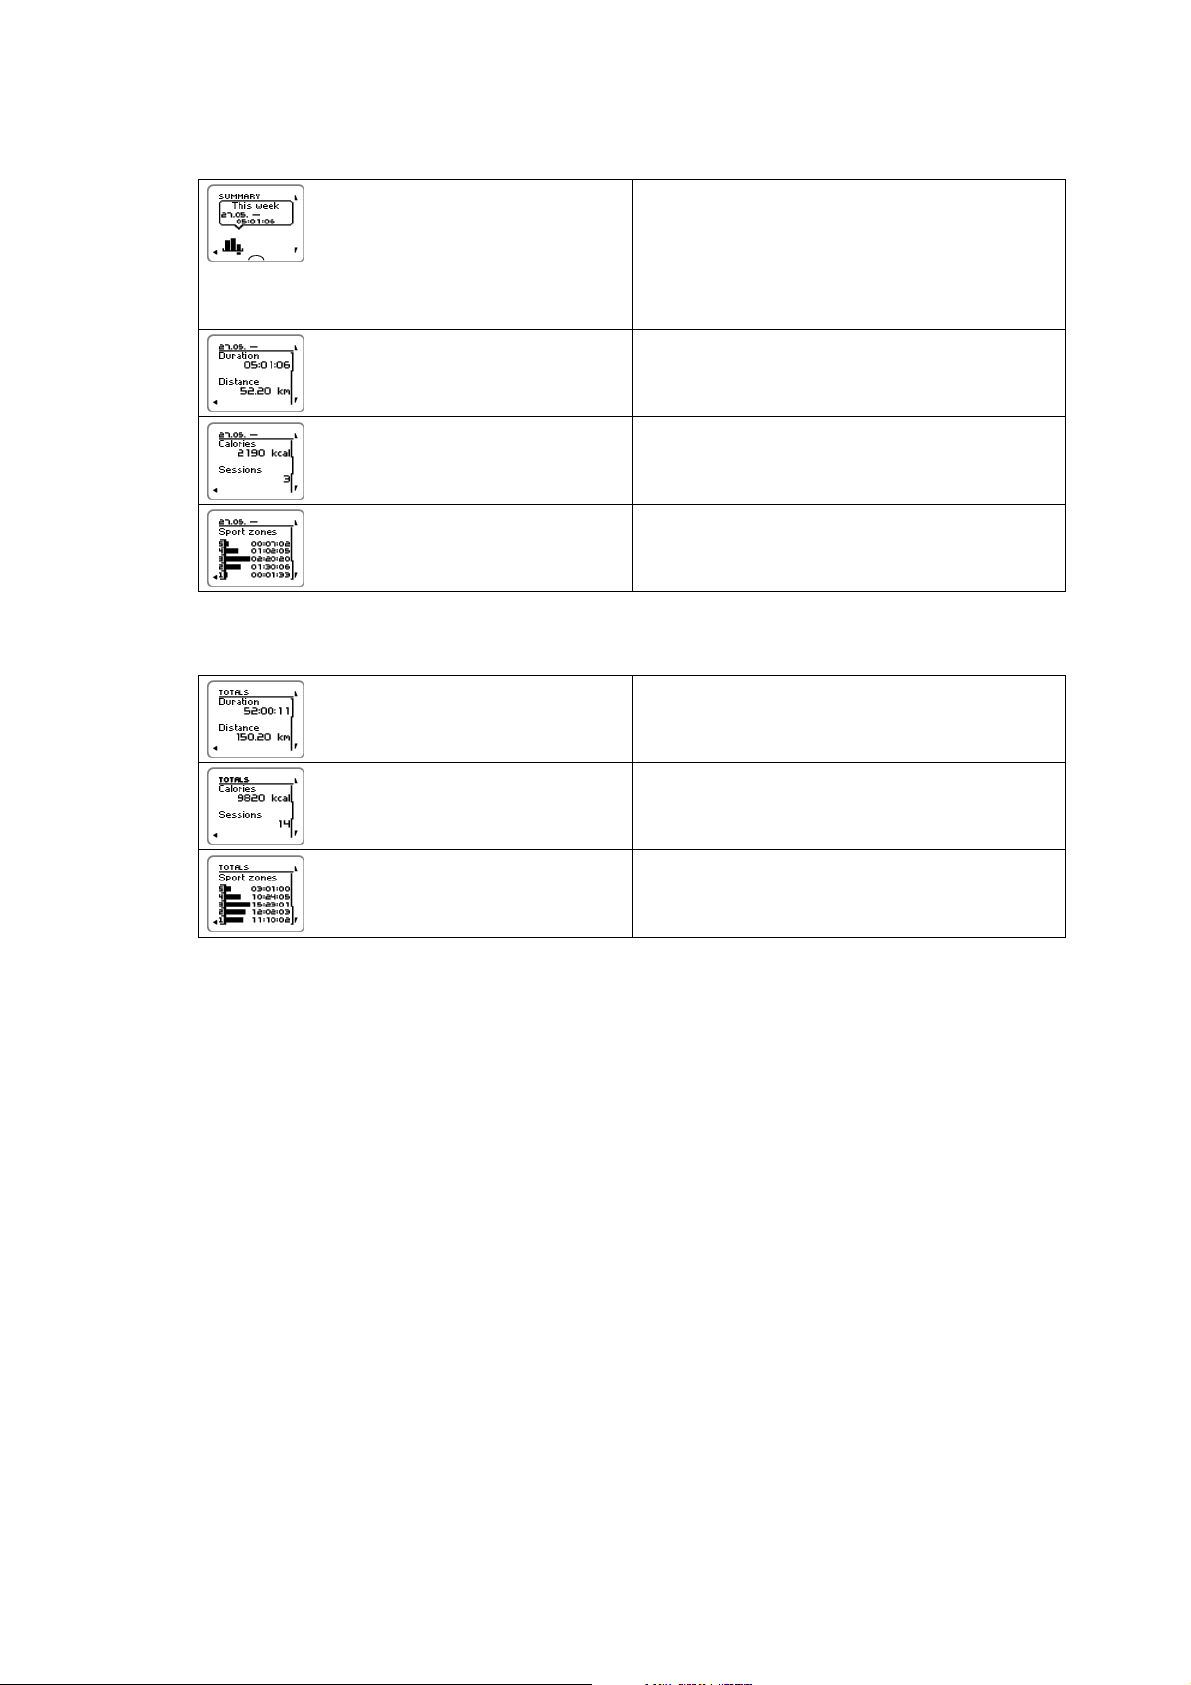
OK.
SUMMARY
This week
The dates on which the data was collected
Duration
Duration
Distance
Calories
Sessions
Sport zones 1, 2, 3, 4 and 5
Time p e r zone
Totals Since xx.xx.xxxx
To v i e w totals o f the t r a i ning f i l e s go t o MENU > Data > Totals since and press OK.
ENGLISH
Duration
Distance
Calories
Sessions
Sport zones 1, 2, 3, 4 and 5
Time p e r zone
Delete Files
To d e l e t e a t r a i n i ng f i l e , select MENU > DATA > Delete files > Training file and press OK.Browsethefiles
with UP/DOWN buttons and select the file you want to delete. Press OKDelete file? YES/NO is displayed. If
you select YES, File deletedis displayed. After thatRemove file from totals? is displayed. If you select YES
, File deleted from totals is displayed. If you select NO,thetrainingcomputerreturnstothetrainingfile
menu.
To d e l e t e all f i l e s s e l e c t , MENU > DATA > Delete files > All filesand press OK. Delete all files? YES/NO is
displayed. Select YES and All files deleted is displayed. If you select NO training computer returns to the
training all files menu.
Reset Week Summaries
To r e s e t weeks s u m maries s e l e c t MENU > DATA > Reset week summaries?.SelectYes and Week summaries
reset is displayed or No and the training computer returns to Data menu.
Reset Trip
To r e s e t trip s e l e ct MENU > DATA > Reset trip?.SelectYes and Trip reset is displayed or Noand the training
computer returns to Data menu.
Reset Totals
To r e s e t totals s e l e ct MENU > DATA > Reset totals? Select Yes and Totals reset is displayed or No and the
training computer returns to Data menu.
After Training 25
Page 26

ENGLISH
7. DATA TRANSFER
Transfer Data
For long-term follow-up, store all your training files in polarpersonaltrainer.com web service. There you can
view detailed information of your training data and get a better understanding of your training. With Polar
DataLink data transfer unit and WebSync software it is easy to transfer training files to the
polarpersonaltrainer.com web service.
How to set your PC for data transmission
1. Register at polarpersonaltrainer.com
2. Download and install the Polar WebSync software on your computer at polarpersonaltrainer.com.
3. Plug your DataLink data transfer unit into the USB port of the computer and activate your training
computer by selecting Menu/ Connect/ Start synchronizing .
Remove the heart rate sensor strap from your chest before data transfer.
4. Follow the data transfer process and the instructions for downloading the data, from the WebSync
Software on your computer screen.
For further instructions on data transfer, see polarpersonaltrainer.com "Help".
To t r a n s f er d a t a i n t h e f u ture, f o l l o w the p o i n ts 3 a n d 4 a s instruct e d a b ove.
The synchronization can be set to automatic. For more information, see Connection Settings (page 35)
26 Data Transfer
Page 27

ENGLISH
8. SETTINGS
All the settings can be modified in Polar WebSync software and transferred onto your training computer
with DataLink data transfer unit. For more information, see WebSync Help.
Sport Profile Settings
There are four different sport profiles set on as default in the Polar RCX5 training computer.
To m o d i f y sport p r o f ile s e t t i n g s select SETTINGS > Sport profiles.
You can cr eate new sport profiles and mo dify t he settings with Polar WebSync sof tware and transfer th em ont o
your training computer with DataLink data transfer unit. For more information, see WebSync Help.
Running Settings
To v i e w or m o d i f y sport p r ofile s e t t i n g s f o r r u nning s e l e c t SETTINGS > Sport profiles > Running
• Training sounds > Select training sounds > Off, Soft, Loud or Very loud
• Heart rate transmitter > On, Off or Search new
• GPS sensor > On, Off or Search new
• Stride sensor > On, Off or Search new
• Stride sensor calibration > Calibrate > By running or Set factor
Stride sensor calibration is visible only if stride sensor has been set On previously.
• Speed View > Select speed view > Kilometers per hour or Minutes per kilometer or if you have chosen
imperial units select Miles per hour or Minutes per mile
• HeartTouch > Off, Activate back light, Change training view , Show limits, Show time of day or Take lap
• Automatic lap > On or Off. If you set the automatic lap On, Set automatic lap distance is displayed. Set
the distance in kilometers or miles.
• Set reminder > On or Off
Reminder is visible only if it has been set with a PC. For more information on setting the reminder, see
polarpersonaltrainer.com Help.
• Set training views Select, for example, Training view 1 (there are six separate training views) and set the
training view Off, On, or Modify. Each training view can be modified to suit your training purposes.
Set training views Select Training view 1 Modify >
OK
Training view numbering Set view numbering > Off or On Training view numbering On/Off
Restore default views Press OK > Restore default
views YES/NO? is displayed.
The first row starts blinking.
Select the desired information
with UP/DOWN and confirm with
OK.Repeatuntilallthefour
rows are modified.
Repeat this until all six training
views are set Off, On or you have
modified them.
is displayed.
Select YES/NO with UP/DOWN.If
you select YesDefault views
restored is displayed.
• Show in pre-training mode? Select YES, Sport shown in pre-training mode is displayed. The sport will be
Settings 27
Page 28

ENGLISH
visible in the list of sports in pre-training mode, when you press OK in Time mode. Select No, Sport not
shown in pre-training mode is displayed.
This option helps you to use the training computer more efficiently. For example in the summer you can
select the winter sports to be hidden.
Also if you participate in a multisport event, it is recommended to hide unnecessary sports, in order to
make changing the sport as effective as possible.
All the new sensors must be paired with the training computer, before they can be activated.
For more information on pairing a new sensor with the training computer see Using a New Accessory
(page 42).
Cycling Settings
To v i e w or m o d i f y sport p r ofile s e t t i n g s f o r c y cling s e l e c t SETTINGS > Sport profiles > Cycling (Bike1) /
Cycling2 (Bike 2)
• Training sounds > Select training sounds > Off, Soft, Loud or Very loud
• Heart rate transmitter > On, Off or Search new
• GPS sensor > On , Off or Search new
• Bike 1 settings For more information, see Bike Settings.
• Speed View> Select speed view > Kilometers per hour or Minutes per kilometer If you have chosen
imperial units select Miles per hour or Minutes per mile
• HeartTouch > Off, Activate back light, Change training view , Show limits, Show time of day or Take lap
• Automatic lap is set off as default. Press OK, Set distance is displayed. Set the distance in kilometers or
in miles and confirm with OK. Automatic lap set to x.x km is displayed. After this you can select to have
the Automatic lap Off or On.
• Set reminder > On or Off
Reminder is visible only if it has been set with a PC. For more information on setting the reminder, see
polarpersonaltrainer.com Help.
• Set training views For more information, on training views, see Set training views
• Show in pre-training mode? Select YES, Sport shown in pre-training mode is displayed. The sport will be
visible in the list of sports in pre-training mode, when you press OK in Time mode. Select No, Sport not
shown in pre-training mode is displayed.
This option helps you to use the training computer more efficiently. For example in the summer you can
select the winter sports to be hidden.
Also if you participate in a multisport event, it is recommended to hide unnecessary sports, in order to
make changing the sport as effective as possible.
Bike Settings
To v i e w or m o d i f y bike s e t tings s e l e c t SETTINGS > Sport profiles > Cycling > Bike 1 settings > BIKE 1
• Speed sensor > Off, On or Search new
• Wheel size > Set wheel sizeto xxxx mm. For more information, on measuring the wheel size, see
Measuring Wheel Size.
• Cadence sensor > Off, On or Search new
• Autostart > Set autostart Off or On. If you select On, Speed sensor for bike required, Activate speed
sensor YES/NO is displayed. Select YES and Autostart on is displayed. If you select NO, Activation
canceled is displayed.
All the new sensors must be paired with the training computer, before they can be activated.
28 Settings
Page 29

ENGLISH
For more information on pairing a new sensor to the training computer see Using a New Accessory
(page ? ).
Measuring Wheel Size
Select MENU > SETTINGS > Sport profiles > Cycling (Bike 1)/Cycling 2 (Bike 2) > Bike 1 settings > Wheel
size > Set wheel size
Wheel size settings are a prerequisite for correct cycling information. There are two ways of determining
the wheel size of your bike:
Method 1
Look for the diameter in inches or in ETRTO printed on the wheel. Match it to the wheel size in
millimeters in the right column of the chart.
ETRTO Wheel size diameter (inches) Wheel size setting (mm)
25-559 26 x 1.0 1884
23-571 650 x 23C 1909
35-559 26 x 1.50 1947
37-622 700 x 35C 1958
47-559 26 x 1.95 2022
20-622 700 x 20C 2051
52-559 26 x 2.0 2054
23-622 700 x 23C 2070
25-622 700 x 25C 2080
28-622 700 x 28 2101
32-622 700 x 32C 2126
42-622 700 x 40C 2189
47-622 700 x 47C 2220
Wheel sizes on the chart are advisory as wheel size depends on the wheel type and air pressure.
Method 2
Measure the wheel manually for the most accurate result.
Use the valve to mark the point where the wheel touches the ground. Draw a line on the ground to mark
that point. Move your bike forward on a flat surface for one complete rotation. The tire should be
perpendicular to the ground. Draw another line on the ground at the valve to mark a full rotation. Measure
the distance between the two lines.
Subtract 4 mm to account for your weight on the bike to get your wheel circumference. Enter this value in
the training computer.
Swimming Settings
To v i e w or m o d i f y sport p r ofile s e t t i n g s f o r s w imming s e l e c t SETTINGS > Sport profiles > Swimming
• Training sounds > Select training sounds > Off, Soft, Loud or Very loud
• Heart rate transmitter > On, Off or Search new
• HeartTouch > Off, Activate back light, Change training view , Show limits, Show time of day or Take lap
Settings 29
Page 30

ENGLISH
• Set reminder > On or Off
Reminder is visible only if it has been set with a PC. For more information on setting the reminder, see
polarpersonaltrainer.com Help.
• Set training views For more information, see Set training views
• Show in pre-training mode? Select YES, Sport shown in pre-training mode is displayed. The sport will be
visible in the list of sports in pre-training mode, when you press OK in Time mode. Select No, Sport not
shown in pre-training mode is displayed.
This option helps you to use the training computer more efficiently. For example in the summer you can
select the winter sports to be hidden.
Also if you participate in a multisport event, it is recommended to hide unnecessary sports, in order to
make changing the sport as effective as possible.
All the new sensors must be paired with the training computer, before they can be activated.
For more information on pairing a new sensor with the training computer see Using a New Accessory
(page 42).
Other Sport Settings
To v i e w or m o d i f y sport p r ofile s e t t i n g s f o r o t her s p o r t select SETTINGS > Sport profiles > Other sport
• Training sounds > Off, Soft, Loud or Very loud
• Heart rate transmitter > On, Off or Search new
• GPS sensorOn , Off or Search new
• Speed View Select Kilometers per hour or Minutes per kilometer or if you have chosen imperial units
select Miles per hour or Minutes per mile
• HeartTouch > Off, Activate back light, Change training view , Show limits, Show time of day or Take lap
• Automatic lapOn or Off. If you set the automatic lap On, Set automatic lap distance is displayed. Set the
distance in kilometers or miles.
• Set reminder > On or Off
Reminder is visible only if it has been set with a PC. For more information on setting the reminder, see
polarpersonaltrainer.com Help.
• Set training views For more information, see Set training views
• Show in pre-training mode? Select YES, Sport shown in pre-training mode is displayed. The sport will be
visible in the list of sports in pre-training mode, when you press OK in Time mode. Select No, Sport not
shown in pre-training mode is displayed.
This option helps you to use the training computer more efficiently. For example in the summer you can
select the winter sports to be hidden.
Also if you participate in a multisport event, it is recommended to hide unnecessary sports, in order to
make changing the sport as effective as possible.
All the new sensors must be paired with the training computer, before they can be activated.
For more information on pairing a new sensor with the training computer see Using a New Accessory
(page 42).
Heart Rate Settings
To v i e w and c h a n g e heart r a t e sett i n g s , select MENU > SETTINGS > Heart rate settings > HR SETTINGS.
30 Settings
Page 31

ENGLISH
The display reads: Browse the selection with
To c o n f i r m the v a l ue, p r e s s OK
UP/DOWN and select the value
to be modified.
ZoneOptimizer Set ZoneOptimizer Off or On Confirm with OK
Heart rate view Select heart rate view Beats
per minute (BPM) or Percent of
maximum (% of maximum)
Heart rate zone lock Select Heart rate zone lock OFF ,
Confirm with OK
Confirm with OK
or lock one of the zones
separeately and select Zone 1,
Zone 2, Zone 3, Zone 4 or Zone 5
and press OKZone X locked is
displayed.
Zone 1, 2, 3, 4 and 5 heart rate
limits
Set zone 1, 2, 3, 4 and 5 heart
rate limits: Set lower limit and
Confirm with OK
accept the value with OK. Set
upper limit
Before modifying the zone limits you need to set the ZoneOptimizer off. ZoneOptimizer requires restoring
default sport zones is displayed. Set ZoneOptimizer off? YES/NO? Select YES, ZoneOptimizer off is
displayed. You can start modifying the zone limits.
If you have an active endurance program, you need to remove the program in polarpersonaltrainer.com and perform
the synchronization, before you can modify the zone limits. For more information, see polarpersonaltrainer.com
Help.
User Information Settings
Enter accurate user information in the training computer to receive the correct feedback on your
performance.
To v i e w and m o d i f y user i n formation s e t tings, s e l e c t MENU > Settings > USER INFORMATION > USER INFORMAT..
Browse the selection with UP/DOWN and accept the value with OK.
The display reads: Browse the selection with
UP/DOWN and select the value
to be modified.
Weight Set your weight in kilograms (kg)
or pounds (lb).
Height Set your height in centimeters
(cm) or in feet and inches (if you
chose imperial units)
Date of Birth Set your birthday.
The order in which you set date
settings depends on which time
mode you have chosen (24h: day
-month-year/12h:monthday - year).
Sex Select Male or Female. OK
To c o n f i r m the v a l ue, p r e s s OK
OK
OK
OK
Settings 31
Page 32

ENGLISH
The display reads: Browse the selection with
UP/DOWN and select the value
to be modified.
Activity level Set Low (0-1 h/wk), Moderate
(1-3 h/wk), High (3-5 h/wk) or
Top (5+ h/wk)
Activity level is an assessment of
your level of long-term physical
activity. Select the alternative
that best describes the overall
amount and intensity of your
physical activity during the past
three months.
• Top (5+ h/wk): You
participate in heavy physical
exercise at least 5 times a
week, or you exercise to
improve performance for
competitive purposes.
• High (3-5 h/wk): You
participate at least 3 times a
week in heavy physical
exercise, e.g. you run 20-50
km/12-31 miles per week or
spend 3-5 hours per week in
comparable physical activity.
• Moderate (1-3 h/wk) : You
participate regularly in
recreational sports, e.g. you
run 5-10 km or 3-6 miles per
week or spend 1-3 hours per
week in comparable physical
activity, or your work requires
modest physical activity.
• Low (0-1 h/wk): You do not
participate regularly in
programmed recreational sport
or heavy physical activity, e.g.
you walk only for pleasure or
exercise hard enough to cause
heavy breathing or perspiration
only occasionally. In the
training computer, these
values are used to calculate
your energy expenditure.
Maximum heart rate Set your maximum heart rate, if
you know your laboratory
measured current maximum
heart rate value. Your
age-predicted maximum heart
rate value (220-age) is displayed
as a default setting when you set
this value for the first time.
To c o n f i r m the v a l ue, p r e s s OK
OK
OK
32 Settings
For more information, see
Maximum Heart Rate (HR
max
)
Page 33

ENGLISH
The display reads: Browse the selection with
UP/DOWN and select the value
to be modified.
OwnIndex (VO2
Maximum Heart Rate (HR
HR
is used to estimate energy expenditure. HR
max
during maximum physical exertion. HR
accurate method for determining your individual HR
laboratory.
OwnIndex
Polar OwnIndex, the result of Polar Fitness Test, predicts your maximal oxygen uptake (VO2
usually ranges from 20 to 95 and is comparable to VO2
Your long-te rm leve l of ph ysical activit y, heart r ate, he art rat e varia bility at rest , gende r, age, he ight, a nd
body weight all influence OwnIndex. The higher the OwnIndex value is, the better your aerobic fitness is.
®
) Set your OwnIndex (VO2
max
max
value).
For more information, see
OwnIndex.
)
is also useful when determining training intensity. The most
max
max
max
max
is the highest number of heartbeats per minute
is to perform a maximal exercise stress test in a
,commonlyusedtoevaluateaerobicfitness.
max
To c o n f i r m the v a l ue, p r e s s OK
OK
). OwnIndex
max
General Settings
• Sounds : Select On or Off
• Button lock: Select either Manual lock or Automatic lock
To l o c k buttons m a n u ally, press a n d hold LIGHT in time mode to enter Quick menu.SelectLock buttons
and press OK.TounlockbuttonspressandholdLIGHT again.
Automatic button lock is activated when you have not pressed the buttons for a minute.
• Units : Select Metric units (kg, m) or Imperial units (lbs, ft)
• Recording rate : Select 1second,2seconds,5seconds,15secondsor 1minute.
The training computer can store your heart rate, running speed/pace, and cycling speed and distance in 1,
2, 5, 15 or 60 second intervals. A longer interval gives you more recording time, while a shorter interval
allows you to record more heart and other data. This enables accurate data analysis in
polarpersonaltrainer.com.
A shorter recording rate consumes the memory of the training computer more rapidly. Default recording
rate is 5 seconds.
The following table shows the maximum recording times for each recording rate. Note that recording rate
might change when there is less than 30 minutes of recording time left.
WearLink+
Hybrid /
H2 heart
rate sensor
Off
Off
Speed Cadence S3+ GPS Recording Rate
1s 2s 5s 15s 60s
On On Off Off
Off On Off On
30h
49min
11h
54min
23min
57min
52h
20h
118h
54min
45h
10min
325h
30min
124h
33min
1101h
47min
405h
57min
Off
Off
On Off Off On
On On Off On
13h
5min
11h
54min
23h
17min
20h
57min
50h
23min
45h
10min
137h
39min
124h
33min
Settings 33
446h
17min
405h
57min
Page 34

ENGLISH
WearLink+
Hybrid /
H2 heart
rate sensor
On
On
On
On
On
On
On
Off
Speed Cadence S3+ GPS Recording Rate
1s 2s 5s 15s 60s
Off On Off Off
On Off Off Off
On On Off Off
Off Off Off On
Off On Off On
On Off Off On
On On Off On
Off Off On On
58h
13min
29h
6min
23h
49min
11h
38min
10h
41min
11h
38min
10h
41min
11h
54min
104h
38min
23min
55min
57min
3min
57min
3min
57min
52h
41h
20h
19h
20h
19h
20h
217h
30min
118h
54min
93h
4634min
45h
10min
40h
56min
45h
10min
40h
56min
45h
10min
599h
39min
312h
58min
252h
25min
122h
35min
112h
365min
122h
35min
112h
5min
124h
33min
2151h
34min
1101h
47min
887h
5min
405h
57min
371h
58min
405h
57min
371h
58min
405h
57min
On
On
On
On
Off
Off
Off
Off
• Select language Deutsch , English, Español, Français, Italiano, Português, Suomi or Svenska and accept
with OK.
Off Off Off On
Off Off On Off
Off Off On On
Off Off Off Off
Off Off On Off
On Off Off Off
Off On Off Off
Off Off Off On
11h
38min
23h
49min
10h
41min
104h
38min
30h
49min
40h
18min
130h
47min
13h
5min
20h
57min
41h
55min
19h
3min
208h
48min
52h
23min
69h
51min
208h
48min
23h
17min
45h
10min
93h
34min
40h
56min
433h
0min
118h
54min
163h
27min
433h
0min
50h
23min
122h
35min
252h
25min
112h 5
min
1101h
48min
325h
30min
433h
19min
1287h
2min
137h
39min
405h
57min
887h
5min
371h
58min
4100h
2min
1101h
47min
1458h
20min
4100h
2min
446h
17min
Watch Settings
To v i e w and c h a n g e your Watch settings select Settings > Watch settings
• Select alarm repetition Off , Once, Monday to Friday or Every day
• Select Time 1, Time2or Time in use
34 Settings
Page 35

ENGLISH
• Set date, Date format and Date separator
• Select week' starting day Monday , Saturday or Sunday
• Select watch face Time only , Time and logoTime and event (if you have set an event date on your PC)
Connection Settings
To m o d i f y your c o n nection s e t t ings s e l e c t Menu > Connect.
• Select Start synchronizing > OK. The training data will be synchronized with polarpersonaltrainer.com
web service via WebSync or you can connect to WebSync, adjust the settings and transfer the settings to
your training computer.
• Select Remove pairings?YES or NO. If you select YES the paring of the training computer and PC will be
removed.
• Select AutoSync > Set AutoSync (automatic synchronization) > On or Off. If you select On the
synchronization will start automatically when you come close to your PC.
The AutoSync function is set On as default.
Quick menu
Some settings can be modified with a shortcut button. You can enter Quick menu by pressing and holding
LIGHT from Time mode, Pre-training mode or Training mode. Depending on which mode you enter the
Quick menu from, you will find different functions to modify.
Time Mode
In time mode press and hold LIGHT to enter Quick menu .
• Select Lock buttons and press OK. To unlock buttons press and hold LIGHT again.
• Select alarm repetition Alarm > Off, Once, Monday to Friday or Every day .
• Select Time in use > Time 1 or Time 2.
Pre-training mode
In pre-training mode press and hold LIGHT to enter Quick menu .
• Edit current sport profile settings. For more information, see Sport Profile Settings (page 27).
• Edit heart rate settings. For more information, see Heart Rate Settings (page 30) .
Training Mode
In training mode press and hold LIGHT to enter Quick menu .
• Select Lock buttons and press OK. To unlock buttons press and hold LIGHT again. Buttons unlocked is
displayed.
• Select Start next phase and the training computer starts next phase of your training.
The option is only available in training sessions that are created with polarpersonaltrainer.com.
• Select Search sensor and the training computer starts searching for the missing sensor.
This selection is only available if connection to any of the sensors has been lost.
• Select Calibrate stride sensor to calibrate s3+ stride sensor.
Settings 35
Page 36

ENGLISH
The option is only available when s3+ stride sensor is in use.
• Select Training sounds and set training sounds Off, Soft, Loud or Very loud
• Select Set automatic lap off or On.
This selection is only available if speed information is available i.e. optional CS speed sensor for cycling or s3+
stride sensor for running has been set on for the sport profile.
• Select Reset trip and select Yes/No. Trip reset is displayed.
This selection is only available if speed information is available i.e. optional CS speed sensor or s3+ stride
sensor has been selected on for the sport profile.
• Set timing view on or off
• Select Countdown timer. Start the countdown timer or set time.
• Set automatic lap off to disable the automatic lap taking. If automatic lap is off, you can set it on by
selecting Set automatic lap on.
The option is only available when distance information is available i.e. optional s3+ stride sensor, cycling
speed sensor or GPS sensor is in use.
• Select Location to view your location coordinates and number of satellites visible. The optional GPS sensor
required.
• Select Show zone limits if you want to see the sport zone heart rate limits.
This selection is only available if heart rate sensor is set on.
36 Settings
Page 37

ENGLISH
9. APPLICATIONS
Polar Fitness Test
The Polar Fitness Test is an easy, safe, and quick way to measure your aerobic (cardiovascular) fitness at
rest. The result, Polar OwnIndex, is comparable to maximal oxygen uptake (VO2
used to evaluate aerobic fitness. Your long-term level of physical activity, heart rate, heart rate variability
at rest, gender, age, height, and body weight all influence OwnIndex. The Polar Fitness Test is developed
for use by healthy adults.
Aerobic fitness relates to how well your cardiovascular system works to transport oxygen to your body. The
better your aerobic fitness, the stronger and more efficient your heart is. Good aerobic fitness has many
health benefits. For example, it helps in decreasing high blood pressure and your risk of cardiovascular
diseases and stroke. If you want to improve your aerobic fitness it takes, on average, six weeks of regular
training to see a noticeable change in your OwnIndex. Less fit individuals see progress even more rapidly.
The better your aerobic fitness, the smaller the improvements in your OwnIndex.
Aerobic fitness is best improved by training types that use large muscle groups. Such activities include
running, cycling, walking, rowing, swimming, skating, and cross-country skiing.
To m o n i t o r your p r o g ress, s t a r t by m e a s u r ing y o u r OwnIndex a couple o f times d u r i ng t h e f irst t w o weeks
in order to get a baseline value, and then repeat the test approximately once a month.
), which is commonly
max
With the Polar Fitness Test, you can also calculate the predicted maximum heart rate value (HR
predicted HR
formula (220 - age). For further information on HR
To m a k e sure t h e test r e s u lts a r e reliable, t h e follo w i n g basic r e q u i r ements a p p l y :
• You can perform the test anywhere - at home, at the office, at a health club - provided the testing
environment is peaceful. There should be no disturbing noises (e.g. television, radio, or telephone) and no
other people talking to you.
• Always take the test in the same environment and at the same hour.
• Avoid eating a heavy meal or smoking 2-3 hours prior to testing.
• Avoid heavy physical exertion, alcohol, and pharmacological stimulants on the test day and the previous
day.
• You should be relaxed and calm. Lie down and relax for 1-3 minutes before starting the test.
score predicts your individual maximum heart rate more accurately than the age-based
max
,seeUserInformationSettings(page31)
max
max
-p). The
Before the Test
Wear the Heart Rate Sensor
For further information, see Wear the Heart Rate Sensor (page 13)
Enter User Information
Select Settings > User information
To c a r r y out t h e Polar F i t ness Te s t , enter y o u r person a l u s er i n f o r m a t i on a n d l o ng-term p h y s ical a c t i v i t y
level in User settings.
Set Predicted HRmax On
If you want to obtain your predicted maximum heart rate value, turn predicted HR
Select APPLICATIONS > Fitness test > Predicted HRmax > On
Performing the Test
Select APPLICATIONS > Fitness test > Start test
on.
max
Applications 37
Page 38

ENGLISH
The progress bar indicates that the test is ongoing. Stay relaxed and limit body movements and
communication with other people.
If you have not set your long-term physical activity level in User information settings, Set activity level of
past 3 months is displayed. Select Top, High, Moderate ,orLow.Forfurtherinformationonactivitylevels,
see User Information Settings (page 31).
If your training computer does not receive your heart rate at the beginning or during the test, the test fails
and Test failed , Check heart rate transmitter is displayed. Check that the heart rate sensor electrodes
are wet and that the strap is snug enough, and start the test again.
When the test is over, you will hear two beeps. OwnIndex is displayed with a numerical value and level
evaluation. For further information on evaluations, see Fitness Level Classes.
To d i s p l a y your P r e d icted m a x i m u m heart r a t e valu e p r e ss DOWN.PressOK to exit.
Update to VO2
• Select Yes to save the OwnIndex value to your user settings and Latest results menu.
• Select No only if you know your laboratory-measured VO2
level class from the OwnIndex result. Your OwnIndex value is saved only to the Latest results menu. For
further information on fitness trend see Latest results .
Update to HR max? (if HRmax-p is on)
• Select Yes to save the value to your user settings.
• Select No if you know your laboratory-measured HR
You c an stop the test at any time by pres sing BACK. Test canceled is displayed for a few seconds.
max
?
value, and if it differs more than one fitness
max
.
max
After saving the OwnIndex and predicted HRmax values, they will be used for calculating calorie consumption.
After the Test
Fitness Level Classes
Men
Age / Years Very low Low Fair Moderate Good Very good Elite
20-24 <32 32-37 38-43 44-50 51-56 57-62 >62
25-29 <31 31-35 36-42 43-48 49-53 54-59 >59
30-34 <29 29-34 35-40 41-45 46-51 52-56 >56
35-39 <28 28-32 33-38 39-43 44-48 49-54 >54
40-44 <26 26-31 32-35 36-41 42-46 47-51 >51
45-49 <25 25-29 30-34 35-39 40-43 44-48 >48
50-54 <24 24-27 28-32 33-36 37-41 42-46 >46
55-59 <22 22-26 27-30 31-34 35-39 40-43 >43
60-65 <21 21-24 25-28 29-32 33-36 37-40 >40
Women
Age / Years Very low Low Fair Moderate Good Very good Elite
20-24 <27 27-31 32-36 37-41 42-46 47-51 >51
38 Applications
Page 39

ENGLISH
Age / Years Very low Low Fair Moderate Good Very good Elite
25-29 <26 26-30 31-35 36-40 41-44 45-49 >49
30-34 <25 25-29 30-33 34-37 38-42 43-46 >46
35-39 <24 24-27 28-31 32-35 36-40 41-44 >44
40-44 <22 22-25 26-29 30-33 34-37 38-41 >41
45-49 <21 21-23 24-27 28-31 32-35 36-38 >38
50-54 <19 19-22 23-25 26-29 30-32 33-36 >36
55-59 <18 18-20 21-23 24-27 28-30 31-33 >33
60-65 <16 16-18 19-21 22-24 25-27 28-30 >30
The classification is based on a literature review of 62 studies where VO
healthy adult subjects in the USA, Canada and 7 European countries. Reference: Shvartz E, Reibold RC.
Aerobic fitness norms for males and females aged 6 to 75 years: a review. Aviat Sp ace Env iron Me d ;
61:3-11, 1990.
Latest results
Select FITNESS TEST > Latest results
In the Latest results menu you can see how your OwnIndex value has been developing. Up to three latest
OwnIndex values and respective dates are included in the display. When the latest results file becomes
full, the oldest result is automatically deleted.
Delete OwnIndex Value
Select FITNESS TEST > Latest results
Select the value you wish to delete and press and hold LIGHT > Delete value? No/Yes is displayed.
Confirm with OK.
Analyzing OwnIndex Results with Software
Downloading test results to polarpersonaltrainer.com offers you the possibility of analyzing results in
various ways, as well as accessing more detailed information about your progress. The
polarpersonaltrainer.com also allows you to make graphical comparisons with previous results.
was measured directly in
2max
Polar Race Pace
Race pace feature helps you to keep a steady pace and achieve your target time for a set distance. Define
atargettimeforthedistance,forexample,45minutesfora10kilometerrun.
During the training session the target pace/speed is compared with training information. You can follow up
on how far behind or ahead you are, compared to your pre-set target.
You c an also chec k what is the requi re d ste ad y pac e/ speed in ord er to meet your set ta rget.
Race Pace features and ZoneOptimizer can not be used in same training session. The ZoneOptimizer
definition is always done in the beginning of the training session, before the actual work phase starts. It is
then very difficult to start the race pace measurement in the right location.
How to Use Race Pace
Before starting to use Race Pace feature, make sure that you have enabled a speed sensor (CS Speed
W.I . N.D. sen sor or the s3+ Str i de sens or) for the spo r t p rofi le y ou are goin g t o us e in you r tr a inin g s e ssi o n.
For more information, see Sport Profile Settings (page 27).
Applications 39
Page 40

ENGLISH
1. Select MENU > Applications > Race pace > Select sport > Set race pace > Set target distance in
km/mi > Set target time > Race pace set to xx:xx MIN/KM or MIN/MI is displayed.
2. To set the Race pace on for your training session, select MENU > Applications > Race pace > Select
sport > Start session with race pace and confirm with OK.
40 Applications
Page 41

ENGLISH
10. USING A NEW HEART RATE SENSOR
Using a New Heart Rate Sensor
If you purchase a new compatible heart rate sensor as an accessory, it has to be introduced to the training
computer. This is called pairing and takes only a few seconds. Pairing ensures that your training computer
receives signals from your accessory only, and enables disturbance-free training in a group.
Please note that WearLink W.I.N.D. heart rate sensor does not measure heart rate in water.
Pairing a New Heart Rate Sensor With Training Computer
Wear the heart rate sensor and make sure that you are not near (40 m/131 ft) other heart rate sensors.
1. Go to Menu > Settings > Sport profiles > Sport > Heart rate transmitter > Search new and press OK.
2. The training computer starts searching for the sensor signal, Searching for new heart rate transmitter
is displayed.
3. Once the new sensor is identified, Heart rate transmitter is found is displayed. Pairing is complete.
4. If the search is not successful, Heart rate transmitter not found or Other heart rate transmitters
interfering. Move further. , Try again? YES / NO is displayed.
5. Select YES to start the search again.
6. Select NO to cancel the searching.
7. To return to time mode, press and hold the BACK button.
Using a New Heart Rate Sensor 41
Page 42

ENGLISH
11. USING A NEW ACCESSORY
Before taking a new accessory into use, it has to be introduced to the training computer. This is called
pairing and takes only a few seconds. Pairing ensures that your training computer receives signals from
your accessory only, and enables disturbance-free training in a group.
Pairing a New Speed Sensor With Training Computer
Make sure the speed sensor has been correctly installed.
1. Go to Menu > Settings > Sport profiles > Cycling (Bike 1) > Bike 1 settings > Speed sensor > Search
new and press OK.
2. Press OK to start the test drive is displayed.
3. Press OK and Searching for new speed sensor is displayed. The training computer starts searching for
the speed sensor signal. Rotate the wheel a few times to activate the sensor. The flashing red light in the
sensor indicates that the sensor is activated.
4. Once the new speed sensor is identified, Speed sensor found is displayed. Pairing is complete.
5. If the search is not successful, Speed sensor not found or Other speed sensors interfering. Move
further., Try again? YES / NO is displayed.
6. Select YES to start the search again.
7. Select NO to cancel the searching.
8. To return to time mode, press and hold the BACK button.
For more information, on installing the speed sensor refer to the user manual of the speed sensor or for video
tutorial at http://www.polar.com/en/support/video_tutorials .
Pairing a New Cadence Sensor With Training Computer
Make sure the cadence sensor has been correctly installed.
1. Go to Menu > Settings > Sport profiles > Cycling Bike 1 > Bike 1 settings > Cadence sensor > Search
new and press OK.
2. Press OK to start the test drive is displayed.
3. Press OK and Searching new cadence sensor is displayed. The training computer starts searching for
the cadence sensor signal. Rotate the wheel a few times to activate the sensor. The flashing red light in
the sensor indicates that the sensor is activated.
4. Once the new cadence sensor is identified, Cadence sensor found is displayed. Pairing is complete.
5. If the search is not successful, Cadence sensor not found or Other cadence sensors interfering. Move
further., Try again? YES / NO is displayed.
6. Select YES to start the search again.
7. Select NO to cancel the searching.
8. To return to time mode, press and hold the BACK button.
For more information on installing the cadence sensor refer to the user manual of the cadence sensor or to the
video tutorial at http://www.polar.com/en/support/video_tutorials .
Pairing a New GPS Sensor With Training Computer
Make sure the GPS sensor has been correctly attached, in an upright position and that your are wearing
the GPS sensor on the same arm as you are wearing your training computer. Also make sure you have
turned the GPS sensor on. For more information on how to set up the GPS sensor refer to the user manual
of the GPS sensor.
1. Go to Menu > Settings > Sport profiles > Running > GPS sensor > Search new and press OK.
42 Using a New Accessory
Page 43

ENGLISH
2. Searching for new GPS sensor is displayed. The training computer starts searching for the GPS sensor
signal.
3. Once the new GPS sensor is identified, GPS sensor found is displayed. Pairing is complete.
4. If the search is not successful, GPS sensor not found or Other GPS sensors interfering. Move further. ,
Try again? YES / NO is displayed.
5. Select YES to start the search again.
6. Select NO to cancel the searching.
7. To return to time mode, press and hold the BACK button.
Pairing a New Stride Sensor With Training Computer
Make sure the stride sensor has been correctly attached to your shoe.
1. Go to Menu > Settings > Sport profiles > Running > Stride sensor > Search new and press OK.
2. Searching for new stride sensor is displayed. The training computer starts searching for the stride
sensor signal.
3. Once the new stride sensor is identified, Stride sensor found is displayed. Pairing is complete.
4. If the search is not successful, Stride sensor not found or Other stride sensors interfering. Move
further., Try again? YES / NO is displayed.
5. Select YES to start the search again.
6. Select NO to cancel the searching.
7. To return to time mode, press and hold the BACK button.
For more information on setting up the stride sensor refer to the user manual of the stride sensor or to the video
tutorial at http://www.polar.com/en/support/video_tutorials .
Using a New Accessory 43
Page 44

ENGLISH
12. BACKGROUND INFORMATION
Polar Sport Zones
Polar sport zones introduce a new level of effectiveness in heart rate-based training. Training is divided
into five sport zones based on percentages of maximum heart rate. With sport zones, you can easily select
and monitor training intensities.
Target zone
MAXIMUM
HARD
MODERATE
LIGHT
Intensity % of
HR
,bpm
max
90–100%
171–190 bpm
80–90%
152–172 bpm
70–80%
133–152 bpm
60–70%
114-133 bpm
Example
durations
less than 5
minutes
2–10 minutes
10–40
minutes
40–80
minutes
Training benefit
Benefits: Maximal or near maximal effort for
breathing and muscles.
Feels like: Very exhausting for breathing and
muscles.
Recommended for: Very experienced and fit
athletes. Short intervals only, usually in final
preparation for short events.
Benefits: Increased ability to sustain high speed
endurance.
Feels like: Causes muscular fatigue and heavy
breathing.
Recommended for: Experienced athletes for
year-round training, and for various durations.
Becomes more important during pre competition
season.
Benefits: Enhances general training pace,
makes Moderate intensity efforts easier and
improves efficiency.
Feels like: Steady, controlled, fast breathing.
Recommended for: Athletes training for events,
or looking for performance gains.
Benefits: Improves general base fitness,
improves recovery and boosts metabolism.
Feels like: Comfortable and easy, low muscle
and cardiovascular load.
Recommended for: Everybody for long training
sessions during base training periods and for
recovery training sessions during competition
season.
VERY LIGHT
50–60%
104–114 bpm
20–40
minutes
Benefits: Helps to warm up and cool down and
assists recovery.
Feels like: Very easy, little strain.
Recommended for: For recovery and cool-down,
throughout training season.
HR
=Maximumheartrate(220-age).Example:30yearsold,220–30=190bpm.
max
Trainin g i n heart rate zone 1 is done at a very low intensity. The main training principle is that
performance improves when recovering after, and not only during training. Accelerate the recovery process
with very light intensity training.
Trainin g i n heart rate zone 2 is for endurance training, an essential part of any training program. Training
sessions in this zone are easy and aerobic. Long-duration training in this light zone results in effective
energy expenditure. Progress will require persistence.
44 Background Information
Page 45

ENGLISH
Aerobic power is enhanced in heart rate zone 3.Thetrainingintensityishigherthaninsportzones1and
2, but still mainly aerobic. Training in sport zone 3 may, for example, consist of intervals followed by
recovery. Training in this zone is especially effective for improving the efficiency of blood circulation in
the heart and skeletal muscles.
If your goal is to compete at top potential, you will have to train in heart rate zones 4 and 5.Inthese
zones, you exercise anaerobically in intervals of up to 10 minutes. The shorter the interval, the higher the
intensity. Sufficient recovery between intervals is very important. The training pattern in zones 4 and 5 is
designed to produce peak performance.
The Polar target heart rate zones can be personalized by using a laboratory measured HR
taking a field test to measure the value yourself. When training in a target heart rate zone, try to make use
of the entire zone. The mid-zone is a good target, but keeping your heart rate at that exact level all the
time is not necessary. Heart rate gradually adjusts to training intensity. For instance, when crossing from
heart rate target zone 1 to 3, the circulatory system and heart rate will adjust in 3-5 minutes.
Heart rate responds to training intensity depending on factors such as fitness and recovery levels, as well
as environmental factors. It is important to look out for subjective feelings of fatigue, and to adjust your
training program accordingly.
value, or by
max
Heart Rate Variability
Heart rate varies with every heartbeat. Heart rate variability (HRV) is the variation of beat to beat intervals,
also known as R-R intervals.
HRV indicates the fluctuations of heart rate around an average heart rate. An average heart rate of 60
beats per minute (bpm) does not mean that the interval between successive heartbeats would be exactly
1.0 sec, instead they may fluctuate/vary from 0.5 sec up to 2.0 sec.
HRV is affected by aerobic fitness. HRV of a well-conditioned heart is generally large at rest. Other factors
that affect HRV are age, genetics, body position, time of day, and health status. During exercise, HRV
decreases as heart rate and exercise intensity increase. HRV also decreases during periods of mental
stress.
HRV is regulated by the autonomic nervous system. Parasympathetic activity decreases heart rate and
increases HRV, whereas sympathetic activity increases heart rate and decreases HRV.
HRV is used in the OwnIndex and ZoneOptimizer features.
Polar ZoneOptimizer
The Polar ZoneOptimizer feature adjusts your sport zones based on your personal information including
heart rate variability. It recommends lower intensity training when little heart rate variability is detected
and higher intensity training when plenty of heart rate variability is detected. It also gives you feedback on
Background Information 45
Page 46

ENGLISH
your heart rate zones in comparison to your normal level.
Benefits of the ZoneOptimizer feature
Each Sport Zone has a different physiological response which is described briefly in the Polar Sport Zones
(page 44). The ZoneOptimizer measurement takes your personal information, including your heart rate
variability, into account and personalizes your sport zones before every training session.
ZoneOptimizer measurement
Polar ZoneOptimizer recommends lower intensity training when little heart rate variability is detected and
higher intensity training, when plenty of heart rate variability is detected at a given heart rate. It also gives
you feedback if your current limits are higher, normal or lower than your normal level, when compared to
your earlier measurements. You may get feedback on your daily physiological status by paying attention to
how fast and how easily you can do training at the recommended heart rates.
Action Heart rate in beats per
Duration How to achieve
minute
Keep your heart rate
between 70 and 100
beats per minute.
70 - 100 bpm 2minutes Standing or training
with very light training
intensity, for example,
walking slowly.
Increase heart rate
gradually from 100 to
130 beats per minute
within two minutes.
Gradually increase your
heart rate above 130
beats per minute.
100 - 130 bpm 2minutes Walking briskly or
cycling/ jogging at low
intensity during warm
up.
130 bpm < At least 30 seconds Gradually increase your
heart rate and continue
as planned. The
ZoneOptimizer
determination will
finalize in one minutes
time.
Measurement phases
Target z o ne l i m i t determinat i o n i s d o n e i n thre e p h a ses.
1. Preparing for training session and plenty of heart rate variability exists. As there is a lot of heart rate
variability, this is a very good and sensitive phase to detect daily changes. In absolute figures this means
heart rates from 70 to 100 beats per minute.
2. Warming up, heart rate rises slowly and heart rate variability drops. During this phase heart rate
variability starts dropping, and the body prepares for higher intensities. In absolute figures this means
heart rates from 100 to 130 beats per minute.
3. Heart rate variability levels off. After this phase heart rate variability stays at a very low level or almost
disappears. This usually takes place at around 130 beats per minute and higher. All Zone limits are
updated after heart rate has been continuously, for at least 30 seconds, above the upper limit of Phase2
(130 beats pre minute / 75% of HR
max
).
ZoneOptimizer guidance normally uses absolute figures (70-100-130 beats per minute), but the two
uppermost figures change if personal HR
130 beats per minute, is limited not to exceed 75% of HR
is very low. The second phase upper limit, which is normally
max
.Thisisdoneautomaticallywithoutactions
max
from you.
ZoneOptimizer allows different durations of Phase1 (preparing for training session, heart rate in between
70-100 beats per minute) and Phase2 (warming up, heart rate in between 100-130 beats per minute).
The recommended minimum durations to get the limits successfully determined are 2 minutes at Phase1,
2minutesatPhase2andhalfaminuteormoreinPhase3.
ZoneOptimizer function is developed for the use of healthy people. Some health conditions may cause heart rate
46 Background Information
Page 47

ENGLISH
variability-based ZoneOptimizer determination to fail or give lower intensity targets. These conditions include high
blood pressure, cardiac arrhythmia, and certain medications.
Maximum Heart Rate
Maximum heart rate (HR
physical exertion. It is individual and depends on age, hereditary factors, and fitness level. It may also
vary according to the type of sport performed. HR
Determining Maximum Heart Rate
)isthehighestnumberofheartbeatsperminute(bpm)duringmaximum
max
is used to express training intensity.
max
Your HR
• The most accurate way is to have your HR
can be determined in several ways.
max
clinically measured, usually on a maximal treadmill or by
max
taking a bicycle stress test supervised by a cardiologist or an exercise physiologist.
• You can also determine your HR
• You can obtain a HR
• HR
can also be estimated by using the commonly used formula: 220 - age, although research shows
max
-p score that predicts your HR
max
by taking a field test together with a training partner.
max
by taking the Polar Fitness Test.
max
that this method is not very accurate, especially for older persons or those who have been fit for many
years.
If you have done some hard training in recent weeks and know that you can safely reach maximum heart
rate, you can safely take a test to determine your HR
yourself. Having a training buddy with you during
max
the test is recommended. If you are uncertain, consult your physician before undertaking the test.
Here is an example of a simple test.
Step 1: Warm up for 15 minutes on a flat surface, building up to your usual training pace.
Step 2: Choose a hill or stairwell that will take more than 2 minutes to climb. Run up the hill/steps once,
building to as hard a pace as you can hold for 20 minutes. Return to the base of the hill/steps.
Step 3: Run up the hill/steps again, building towards a pace you could just about hold for 3 kilometers.
Note your highest heart rate. Your maximum is approximately 10 beats higher than the noted value.
Step 4: Run back down the hill, allowing your heart rate to drop 30-40 beats per minute.
Step 5: Run up the hill/steps once again at a pace that you can only hold for 1 minute. Try to run halfway
up the hills/steps. Note your highest heart rate. This brings you close to your maximum heart rate. Use this
value as your maximum heart rate to set training zones.
Step 6: Make sure you get a good cool-down, a minimum of 10 minutes.
Running Cadence and Stride Length
Cadence* is the number of times the foot with the stride sensor* hits the ground per minute.
Stride length* is the average length of one step. That is the distance between your right and left foot
contacting the ground.
Running speed = 2 * stride length * cadence
There are two ways to run faster: moving your legs at a higher cadence or taking longer steps.
Elite long distance runners typically run with a high cadence of 85-95. On uphills, typical cadence values
are lower. On downhills they are higher. Runners adjust stride length to gather speed: stride length
increases as speed increases.
Yet o ne of the mo st comm on mist akes no vice ru nners m ake i s over-s triding. The m ost eff icient stride
length is the natural one – the one that feels most comfortable. You will run faster in races by
strengthening your leg muscles so they take you forward with a longer stride.
You s hould a lso wor k on maximizin g caden ce effi ciency. Ca dence d oes not prog ress ea sily, b ut if proper ly
Background Information 47
Page 48

ENGLISH
trained, you will be able to sustain it throughout your runs and maximize your performance. To develop
cadence, the nerve-muscle connection needs to be trained - and reasonably frequently. A session of
cadence training a week is a good start. Incorporate some cadence work into the rest of your week. During
long easy runs, you could include some faster cadence every now and then.
When training for longer running events (½ marathon, marathon or longer), it may be helpful to monitor
cadence. A low cadence at expected race pace can cause problems later in the event, as your legs tire.
One way around this is to work on increasing leg speed at expected race pace. You can set your training
computer to show pace and cadence. Try to shorten your stride and increase cadence while holding the
same pace (set a narrow pace zone to give you audio feedback).You can aim to raise running cadence
above the following:
• 80/min (4 hour marathoners)
• 85/min (3 hour 30 min marathoners)
• 88/min (3 hour marathoners)
This is a general guide only, taller runners will naturally have slightly lower cadences. Runners should also
tune in to what feels comfortable for them personally.
Agoodwayofimprovingstridelengthistoundertakespecificstrengthwork,likerunninghills,runningin
soft sand, or running up steps. A six-week training period including strength work should result in
noticeable improvements in stride length, and if combined with some faster leg speed work (such as short
strides at best 5km pace), noticeable improvements should be seen in overall speed, as well.
*Optional s3+ stride sensor required.
Polar Running Index
Running Index offers an easy way to monitor performance changes. Performance (how fast/easily you run
at a given pace) is directly influenced by aerobic fitness (VO2
your body is at running), and Running Index is a measurement of this influence. By recording your
Running Index over time, you can monitor progress. Improvement means that running at a given pace
requires less of an effort, or that your pace is faster at a given level of exertion. The Running Index feature
calculates such improvements. Running Index also gives you daily information on your running
performance level which may vary from day to day.
Benefits of Running Index:
• emphasizes the positive effects of good training sessions and resting days.
• monitors fitness and performance development at different heart rate levels - not only during maximal
performance.
• you can determine your optimal running speed by comparing running indexes from different kinds of
training sessions.
• stresses progress through better running technique and fitness level.
Running Index is calculated during every training session when heart rate and the Polar s3+ stride sensor /
Polar G5 GPS sensor / Polar G3 GPS sensor W.I.N.D.* signal is recorded, and when the following
requirements apply:
• speed should be 6 km/h / 3,75 mi/h or faster and duration 12 minutes minimum.
• heart rate should be above 40% of HRR (heart rate reserve). Heart rate reserve is the difference between
maximum heart rate and resting heart rate.
Make sure that the stride sensor is calibrated. Calculation begins when you start recording the session.
During the session, you may stop once at traffic lights, for example, without interrupting the calculation.
)andtrainingeconomy(howefficient
max
In the end, your training computer displays a Running Index value and stores the result in the Training
files section. Compare your result to the table below. Using the software, you can monitor and analyze
your progress in Running Index values against time and different running speeds. Or compare values from
different training sessions and analyze them in short and long term.
Short-term analysis
48 Background Information
Page 49

Men
Age / Years Very low Low Fair Moderate Good Very good Elite
20-24 <32 32-37 38-43 44-50 51-56 57-62 >62
25-29 <31 31-35 36-42 43-48 49-53 54-59 >59
30-34 <29 29-34 35-40 41-45 46-51 52-56 >56
35-39 <28 28-32 33-38 39-43 44-48 49-54 >54
40-44 <26 26-31 32-35 36-41 42-46 47-51 >51
45-49 <25 25-29 30-34 35-39 40-43 44-48 >48
50-54 <24 24-27 28-32 33-36 37-41 42-46 >46
55-59 <22 22-26 27-30 31-34 35-39 40-43 >43
60-65 <21 21-24 25-28 29-32 33-36 37-40 >40
Women
Age / Years Very low Low Fair Moderate Good Very good Elite
ENGLISH
20-24 <27 27-31 32-36 37-41 42-46 47-51 >51
25-29 <26 26-30 31-35 36-40 41-44 45-49 >49
30-34 <25 25-29 30-33 34-37 38-42 43-46 >46
35-39 <24 24-27 28-31 32-35 36-40 41-44 >44
40-44 <22 22-25 26-29 30-33 34-37 38-41 >41
45-49 <21 21-23 24-27 28-31 32-35 36-38 >38
50-54 <19 19-22 23-25 26-29 30-32 33-36 >36
55-59 <18 18-20 21-23 24-27 28-30 31-33 >33
60-65 <16 16-18 19-21 22-24 25-27 28-30 >30
The classification is based on a literature review of 62 studies where VO
healthy adult subjects in the USA, Canada and 7 European countries. Reference: Shvartz E, Reibold RC.
Aerobic fitness norms for males and females aged 6 to 75 years: a review. Aviat Sp ace Env iron Me d ;
61:3-11, 1990.
There may be some daily variation in the Running Indexes due to running circumstance changes, for
example different surface, hills, wind or temperature.
Long-term analysis
was measured directly in
2max
The single Running Index values form a trend that predicts your success in running certain distances.
The following chart estimates the duration that a runner can achieve in certain distances when performing
maximally. Use your long-term Running Index average in the interpretation of the chart. The prediction is
best for those Running Index values that have been received at speed and running circumstances similar
to the target performance.
Background Information 49
Page 50

ENGLISH
Running Index Cooper test (m) 5km(h:mm:ss) 10 km (h:mm:ss) 21.098 km
(h:mm:ss)
42.195 km
(h:mm:ss)
36 1800 0:36:20 1:15:10 2:48:00 5:43:00
38 1900 0:34:20 1:10:50 2:38:00 5:24:00
40 2000 0:32:20 1:07:00 2:29:30 5:06:00
42 2100 0:30:40 1:03:30 2:21:30 4:51:00
44 2200 0:29:10 1:00:20 2:14:30 4:37:00
46 2300 0:27:50 0:57:30 2:08:00 4:24:00
48 2400 0:26:30 0:55:00 2:02:00 4:12:00
50 2500 0:25:20 0:52:40 1:57:00 4:02:00
52 2600 0:24:20 0:50:30 1:52:00 3:52:00
54 2700 0:23:20 0:48:30 1:47:30 3:43:00
56 2800 0:22:30 0:46:40 1:43:30 3:35:00
58 2900 0:21:40 0:45:00 1:39:30 3:27:00
60 3000 0:20:50 0:43:20 1:36:00 3:20:00
62 3100 0:20:10 0:41:50 1:32:30 3:13:00
64 3200 0:19:30 0:40:30 1:29:30 3:07:00
66 3300 0:18:50 0:39:10 1:26:30 3:01:00
68 3350 0:18:20 0:38:00 1:24:00 2:55:00
70 3450 0:17:50 0:36:50 1:21:30 2:50:00
72 3550 0:17:10 0:35:50 1:19:00 2:45:00
74 3650 0:16:40 0:34:50 1:17:00 2:40:00
76 3750 0:16:20 0:33:50 1:14:30 2:36:00
78 3850 0:15:50 0:33:00 1:12:30 2:32:00
*Optional Polar s3+ stride sensor or Polar G5 GPS sensor / Polar G3 GPS sensor W.I.N.D. required.
Polar Training Load Feature
The training load feature in the calendar view in polarpersonaltrainer.com will conveniently tell you how
hard your training session was, and how much time is needed for complete recovery.This feature tells you
if you have recovered enough for your next session, helping you find the balance between rest and
training. In polarpersonaltrainer.com you can control your total workload, optimize your training, and
monitor your performance development.
Trainin g l o a d t a k e s into c o n s i d e r ation d i f f e r e nt f a c t o r s which a f f e ct y o u r training l o a d and r e c overy t i m e ,
such as heart rate during training, duration of training, and your individual factors, e.g. sex, age, height,
and weight. Continuous monitoring of training load and recovery will help you recognize personal limits,
avoid over or under training, and adjust training intensity and duration according to your daily and weekly
targets.
Trainin g L o a d f e a t u r e helps y o u to c o n t r o l tota l w o r kload, o p t i m ize y o u r training, a n d moni t o r y our
50 Background Information
Page 51

ENGLISH
performance development. The feature makes different kinds of training sessions comparable with each
other, and helps you to find the perfect balance between rest and training.
For more information on Training load, see polarpersonaltrainer.com Help.
Polar Endurance Training Program for Running and Cycling
Polar has created tailored Endurance training programs for running and cycling, which are available for
you in polarpersonaltrainer.com. You get a personalized training program to best suit your current fitness
level.
Endurance training programs are ideal for you, if running or cycling is incorporated in your main fitness
routine. Endurance programs improve cardiovascular fitness and are not targeted to any sport event.
Endurance training programs are continual i.e. the program will continue as long as you want to stop it.
The program guides you to train in the correct way by defining the training volume, training intensity and
training placement on weekdays, for the optimal fitness improvement.
The training program works together with the ZoneOptimizer feature, which means that the training
program sessions are modified according to your personal sport zones determined by the ZoneOptimizer.
For more information, see Polar ZoneOptimizer (page 45).
Suitable Program Starting Level for Everybody
Program level must be known before a suitable training module can be selected. The determination of the
program level can be done:
• automatically using your previous training history in polarpersonaltrainer.com
• or using a short questionnaire which you will have to fill in.
General programs are compiled of 4 week long training modules. Training module in level 1 is the least
demanding and the module in level 20 is the most demanding. Steps between 1-20 are linear, which
means that you can improve your fitness step by step (for example from level 7 to level 8 et cetera).
Trainin g m o d ules a n d your t r a i n i n g a c t i v i t y are l i n k e d toget h e r so t h a t t raining m o d u les g e t m ore
challenging as your training activity increases, and also less challenging if your training activity decreases.
Beginner stage consists of levels 1-5. At this stage the 4 weeks training module contains mainly medium
and long training sessions; interval training sessions are given from level 5 onwards.
Moderate stage consists of levels 6-10. At this stage the 4 weeks training module contains mainly
medium, long and interval training sessions; tempo training sessions are given from level 11 onwards.
Advanced stage consists of levels 11-20. At this stage the 4 weeks training module contains mainly
medium, long, interval and tempo training sessions; easy training sessions are given from level 12
onwards.
For more information on Polar Endurance training programs see polarpersonaltrainer.com Help.
Polar Training Articles
For more facts and know-how to enhance your running, visit Polar Article Library
[http://www.polar.com/en/training_with_polar/training_articles] .
Background Information 51
Page 52

ENGLISH
13. IMPORTANT INFORMATION
Caring for Your Product
Like any electronic device, the Polar training computer should be treated with care. The suggestions below
will help you fulfill guarantee obligations and enjoy this product for many years to come.
Connector: Detach the connector from the strap after every use and dry the connector with a soft towel. Clean the connector
with a mild soap and water solution when needed. Never use alcohol or any abrasive material (eg. steel wool or cleaning
chemicals).
Strap: Rinse the strap under running water after every use and hang to dry. Clean the strap gently with a mild soap and
water solution when needed. Do not use moisturizing soaps, because they can leave residue on the strap. Do not soak, iron,
dry clean or bleach the strap. Do not stretch the strap or bend the electrode areas sharply.
Check the label on your strap to see if it is machine washable. Never put the strap or the connector in a dryer!
Tra i ning com pute r an d se n sor s : Keep your training computer and sensors clean. To maintain the water
resistance, do not wash the training computer or the sensors with a pressure washer. Clean them with a
mild soap and water solution and rinse them with clean water. Do not immerse them in water. Dry them
carefully with a soft towel. Never use alcohol or any abrasive material such as steel wool or cleaning
chemicals.
Keep your training computer and sensors in a cool and dry place. Do not keep them in a damp
environment, in non-breathable material (a plastic bag or a sports bag) nor with conductive material (a wet
towel). The training computer and heart rate sensor are water resistant, and can be used in water
activities. Other compatible sensors are water resistant, and can be used in rainy weather. Do not expose
the training computer to direct sunlight for extended periods, such as by leaving it in a car or mounted on
the bike mount.
Avoid hard hits to t he trai ning co mputer and the sens ors, as thes e may d amage t he sens or unit s.
Operating temperatures are -10 °C to +50 °C / +14 °F to +122 °F.
Service
During the two-year guarantee/warranty period we recommend that you have service, other than battery
replacement, done by an authorized Polar Service Center only. The warranty does not cover damage or
consequential damage caused by service not authorized by Polar Electro. For further information, see
Limited International Polar Guarantee (page 59 )
For contact information and all Polar Service Center addresses, visit www.polar.com/support
[http://www.polar.com/support] and country specific websites.
Register your Polar product at http://register.polar.fi/ to ensure we can keep improving our products and
services to better meet your needs.
The same user credentials are also valid, when registering for polarpersonaltrainer.com, Polar Newsletter and
Discuss Forums.
Changing Batteries
The RCX5 training computer and the WearLink®+Hybrid/H2heartratesensorbothhaveauser
changeable battery. To change the battery yourself, please follow the instructions carefully as instructed in
chapter Change Batteries Yourself.
The batteries for the speed and cadence sensors cannot be replaced. Polar has designed speed and
cadence sensors to be sealed in order to maximise mechanical longevity and reliability. The sensors have
long-life batteries inside. To purchase a new sensor contact your authorized Polar Service Center or
retailer.
For information on how to change the battery for the Polar s3+ stride sensor, Polar G5 GPS sensor or Polar
G3 GPS sensor W.I.N.D., consult the user manual for the product in question.
52 Important Information
Page 53

ENGLISH
Prior to changing the battery, please note the following:
• The low battery indicator is displayed when 10-15% of the battery capacity is left.
• Before battery change, transfer all data from your RCX5 to polarpersonaltrainer.com to avoid data loss. For
more information, see Transfe r D a t a ( p a g e 26).
• Excessive use of the backlight drains the battery more rapidly.
• In cold conditions, the low battery indicator may appear, but will disappear when the temperature rises.
• The backlight and sound are automatically turned off when the low battery indicator is displayed. Any
alarms set prior to the appearance of the low battery indicator will remain active.
Keep the batteries away from children. If swallowed, contact a doctor immediately. Batteries should be disposed of
properly according to local regulations.
Change Batteries Yourself
To c h a n g e the b a t t eries o f the t r a i n i n g compu t e r and h e a r t rate s e n s o r yours e l f , carefully f o l low t h e
instructions below:
When changing the battery, make sure the sealing ring is not damaged, in which case you should replace
it with a new one. You can purchase the sealing ring/battery kits at well-equipped Polar retailers and
authorized Polar Services. In the USA and Canada, the additional sealing rings are available at authorized
Polar Service Centers. In the USA the sealing ring/battery kits are also available at www.shoppolar.com
[http://www.shoppolar.com]. Go to www.polar.com [http://www.polar.com] to find your own country's
shoppolar online store.
When handling a new, fully charged battery, avoid clasp-like contact, i.e. simultaneously from both sides,
with metal or electrically conducting tools, like tweezers. This may short circuit the battery, causing it to
discharge more rapidly. Typically, short circuiting does not damage the battery, but it may decrease the
capacity and the lifetime of the battery.
Changing Training Computer Battery
1. Open the battery cover with a coin by turning it
from CLOSE to OPEN.
2. When changing training computer battery (2),
remove the battery cover and lift the battery out
carefully with a suitable sized small rigid stick or
bar, for instance, a toothpick or small
screwdriver. However, prefer a non-metal tool for
wrenching the battery out. Be careful not to
damage the metal sound element (*) or the
grooves. Insert a new battery with the positive (+)
side outwards.
3. Replace the old sealing ring with a new one (if
available), fitting it snugly in the cover groove to
ensure water resistance.
4. Put the cover back on and turn it clockwise to
CLOSE.
5. Re-enter the basic settings.
Important Information 53
Page 54

ENGLISH
Changing Polar H2 Heart Rate Sensor Battery
1. Lever the battery cover open by using the clip on
the strap.
2. Remove the old battery from the battery cover
with a suitable sized small ridgid stick or bar,
such as a toothpick. A non-metal tool is
preferable. Be careful not to damage the battery
cover.
3. Insert the battery inside the cover with the
negative (-) side outwards. Make sure the sealing
ring is in the groove to ensure water resistance.
4. Align the ledge on the battery cover with the slot
on the connector and press the battery cover
back into place. You should hear a snap.
Changing Polar WearLink+ Hybrid Heart Rate
Sensor Battery
1. Using a coin, open the battery cover by turning it
counterclockwise to OPEN.
2. Insert the battery inside the cover with the
negative (-) side outwards. Make sure the sealing
ring is in the groove to ensure water resistance.
3. Press the cover back into the connector.
4. Use the coin to turn the cover clockwise to
CLOSE.
For video tutorials on how to change the batteries, go to http://www.polar.com/en/polar_community/videos.
Danger of explosion if the battery is replaced with wrong type.
Power Save Mode
The power save mode is enabled by default. During the night, in between the hours 24:00 - 06:00 / 12:00am - 06:00am,
the training computer display will be switched off automatically. During this time the AutoSync function is not enabled. To
exit the power save mode, press any button. After five minutes, the display returns to power save mode.
The time period during which the power save mode is enabled, can be modified in the WebSync software, to better
suit your training schedule. For more information, see WebSync Help.
Battery Lifetime in RCX5
The battery lifetime for the RCX5 training computer is on average 8-11 months and depends on which
features and sensors you use. The suggestions below will help you to lengthen the battery lifetime.
To e n s u r e 11 m o n t h lifet i m e of t h e b a ttery:
• Set the AutoSync feature off in Connect # AutoSync.
• Set GPS sensor off when you do not need speed, distance or location data.
If you do not need speed, distance, cadence, location or heart rate data, make sure that the corresponding
sensor (GPS/Stride/Speed/Cadence/Heart rate) is disabled. Go to Settings > Sport profiles and select Off
to disable the sensor you are not using. When a sensor is set On,thetrainingcomputersearchesforthe
sensor signal throughout the training session. This consumes the battery capacity which is likely to
shorten the battery lifetime.
54 Important Information
Page 55

ENGLISH
Remove the connector from to the strap after training. If you leave the connector attached to the strap, it
will keep the sensor awake and consumes the sensor battery. The heart rate sensor is on whenever you are
wearing it on your chest, even when the training computer is not measuring your heart rate.
The battery is inserted at the factory. Therefore, when you purchase the product, the actual lifetime of the
first battery can seem shorter than estimated.
• The low battery indicator is displayed when 10-15% of the battery capacity is left.
• To avoid data loss, transfer all data from your RCX5 to polarpersonaltrainer.com before changing the
battery.
• If you use the backlight a lot, the battery drains more rapidly.
• In cold conditions, the low battery indicator may appear, but will disappear when the temperature rises.
• The backlight and sounds are automatically disabled when the low battery indicator is displayed. Any
alarms set prior to the appearance of the low battery indicator will remain active.
Precautions
The Polar training computer shows your performance indicators. Polar training computer is designed to
indicate the level of physiological strain and recovery during and after exercise session. It measuresheart
rate, speed and distance when cycling with a Polar CS speed sensor W.I.N.D. It also measures speed and
distance when running with a Polar s3+ stride sensor or with a Polar G5 GPS sensor / Polar G3 GPS sensor
W.I . N.D. . T h e P olar CS cade nce sen s or W.I.N .D. is d esi g ned to meas ure cad e nce whe n cy c lin g . N o o t her
use is intended or implied.
The Polar training computer should not be used for obtaining environmental measurements that require
professional or industrial precision.
Interference During Training
Electromagnetic Interference and Training Equipment
Disturbance may occur near electrical devices. Also WLAN base stations may cause interference when
training with the training computer. To avoid erratic reading or misbehavior, move away from possible
sources of disturbance.
Trainin g e q u ipment w i t h electro n i c or e l e c t r i c a l compo n e n t s such a s LED d i s p l a y s , m o t o r s and e l e c t r i c al
brakes may cause interfering stray signals. To solve these problems, try the following:
1. Remove the heart rate sensor strap from your chest and use the training equipment as you would
normally.
2. Move the training computer around until you find an area in which it displays no stray reading or does not
flash the heart symbol. Interference is often worst directly in front of the display panel of the equipment,
while the left or right side of the display is relatively free of disturbance.
3. Put the heart rate sensor strap back on your chest and keep the training computer in this
interference-free area as much as possible.
If the training computer still does not work with the training equipment, it may be electrically too noisy for
wireless heart rate measurement.
For further information, see www.polar.com/support [http://www.polar.com/support].
Minimizing Risks When Training
Trainin g m a y inclu d e s o me r i s k . Before b e g i n ning a r egular t r a i n ing p r o g r a m , it i s recommen d e d t hat y o u
answer the following questions concerning your health status. If you answer yes to any of these questions,
we recommend that you consult a doctor before starting any training program.
• Have you been physically inactive for the past 5 years?
• Do you have high blood pressure or high blood cholesterol?
• Are you taking any blood pressure or heart medication?
• Do you have a history of breathing problems?
• Do you have symptoms of any disease?
Important Information 55
Page 56

ENGLISH
• Are you recovering from a serious illness or medical treatment?
• Do you use a pacemaker or other implanted electronic device?
• Do you smoke?
• Are you pregnant?
Note that in addition to training intensity, medications for heart conditions, blood pressure, psychological
conditions, asthma, breathing, etc., as well as some energy drinks, alcohol, and nicotine may also affect
heart rate.
It is important to be sensitive to your body’s responses during training. If you feel unexpected pain or
excessive fatigue when training, it is recommended that you stop the training or continue at a lighter
intensity.
Note! If you are using a pacemaker, you can use Polar training computers. In theory interference to
pacemaker caused by Polar products should not be possible. In practice no reports exist to suggest anyone
ever having experienced interference. We cannot however issue an official guarantee on our products'
suitability with all pacemakers or other implanted devices due to the variety of devices available. If you
have any doubts, or if you experience any unusual sensations while using Polar products, please consult
your physician or contact the implanted electronic device manufacturer to determine safety in your case.
If you are allergic to any substance that comes into contact with your skin or if you suspect an allergic
reaction due to using the product, check the listed materials in Technical Specifications (page 56). To
avoid any skin reaction to the heart rate sensor, wear it over a shirt, but moisten the shirt well under the
electrodes to ensure flawless operation.
Your safety is impo rtant t o us. The sh ape o f the s 3+ stri de sens or* is designe d to mi nimize the pos sibilit y
of it getting caught in something. In any case, be careful when running with the stride sensor in
brushwood, for example.
The combined impact of moisture and intense abrasion may cause a black color to come off the heart rate sensor’s
surface, possibly staining light-colored clothes. If you use perfume or insect repellent on your skin, you must
ensure that it does not come into contact with the training computer or the heart rate sensor.
WARNING: This product and its packaging contain chemicals known to the State of California to cause
cancer, birth defects or reproductive harm. This notice is provided in accordance with California’s
Proposition 65. More information: http://www.polar.com/regulatory_information
*Optional s3+ stride sensor W.I.N.D. required.
Technical Specifications
Training computer
Battery life:
Battery type: CR 2032
Battery sealing ring: EPDM O-ring 24.30 x 0.8 mm (No need to change during battery
Operating temperature: -10 °C to +50 °C / 14 °F to 122 °F
Training computer mat erial s: PMMA le ns wi th ha rd coating in to p sur face, tr ainin g computer bo dy
Wrist strap and buckle materials: Polyurethane (TPU) and stainless steel
Watch accuracy: Better than ± 0.5 seconds / day at 25 °C / 77 °F temperature.
Accuracy of heart rate monitor: ± 1% or 1 bpm, whichever larger. Definition applies to stable conditions.
Heart rate measuring range: 15-240
Current speed display range: 0-127 km/h or 0-75 mph
Water resistance: 30 m (Suitable for bathing and swimming)
Average 8-11 months (if you train on average 1h/day, 7 days/week)
replacement, if sealing ring is not damaged.)
ABS+GF metal parts stainless steel
Training computer limit values
Maximum number of files:
56 Important Information
99
Page 57

ENGLISH
Maximum number of training sessions in
99
multisport file:
Maximum time recorded to file: 99 h 59 min 59 s
Maximum number of laps: 99
Maximum number of laps in multi sport sessions: 99 per sport
Total di stanc e: 999 999 k m / 6 21370 mi
Total du ratio n: 9999h 59 min 59 s
Total ca lorie s: 999 9 99 kcal
Total tr ainin g fil es co unt: 9999
WearLink®+ Hybrid heart rate sensor
Battery life:
600 hours of use
Battery type: CR2025
Battery sealing ring: O-ring 20.0 x 1.0, material silicone
Operating temperature: -10 °C to +40 °C / 14 °F to 104 °F
Connector material: Polyamide
Strap material: Polyurethane/Polyamide/Polyester/Elastane/Nylon
Water resistance: 30 m (Suitable for bathing and swimming)
H2 heart rate sensor
Battery life:
800 h
Battery type: CR2025
Battery sealing ring: O-ring 20.0 x 0.90 Material Silicone
Operating temperature: -10 °C to +40 °C / 14 °F to 104 °F
Connector material: ABS
Strap material: 38% Polyamide, 29% Polyurethane, 20% Elastane, 13% Polyester
Water resistance: 30 m (Suitable for bathing and swimming)
The Polar RCX5 training computer applies the following patented technologies, among others:
• OwnIndex®technology for fitness test.
• OwnCal®personal calorie calculation.
• OwnZone®assessment for determining personal target heart rate limits for the day.
• OwnCode®technology for wireless data transmission.
• WearLink®technology for heart rate measurement.
Polar WebSync Software and Polar DataLink™
System Requirements:
Operating system: Microsoft Windows XP/Vista/7 or Intel Mac OS X 10.5 or
newer
Internet connection
Free USB port for DataLink
Water resistance
Water resistance of Polar products is tested according to International IEC 60529 IPX7 (1m, 30min,
20ºC). Products are divided into four different categories according to water resistance. Check the back of
your Polar product for the water resistance category and compare it to the chart below. Please note that
these definitions do not necessarily apply to products of other manufacturers.
Marking on case back Water resistant characteristics
Water resistant IPX7 Not suitable for bathing or swimming. Protected
against wash splashes and raindrops. Do not wash
with a pressure washer.
Water resistant Not suitable for swimming. Protected against wash
splashes, sweat, raindrops etc. Do not wash with a
pressure washer.
Important Information 57
Page 58

ENGLISH
Marking on case back Water resistant characteristics
Water resistant 30 m/50 m Suitable for bathing and swimming
Water resistant 100 m Suitable for swimming and snorkeling (without air
tanks)
Using the Training Computer in Water
The training computer may be worn when swimming. It is not, however, a diving instrument. To maintain
water resistance, do not press the buttons of the training computer under water. When measuring heart
rate in water, you may experience interference for the following reasons: Pool water with a high chlorine
content, and seawater, are very conductive. The electrodes of a heart rate sensor may short-circuit,
preventing ECG signals from being detected by the heart rate sensor. Jumping into water or a strenuous
muscle movement during competitive swimming may shift the heart rate sensor to a location on the body
where ECG signals cannot be picked up. The ECG signal strength is individual and may vary depending on
the individual’s tissue composition. Problems occur more frequently when measuring heart rate in water.
If you are having problems measuring heart rate in salt water or highly chlorinated water, we recommend
you use the Polar T31c heart rate sensor.
Frequently Asked Questions
What should I do if...
...the battery symbol and Low battery is displayed?
The low battery indicator is usually the first sign of an expired battery. However, in cold conditions the low
battery indicator may appear. The indicator will disappear as soon as the temperature rises enough. When
the symbol appears, the training computer sounds and backlight are automatically deactivated. For further
information on changing the battery, see Important Information (page 52).
...I do not know where I am in the menu?
Press and hold BACK until the time of day is displayed.
...there are no reactions to any buttons?
Reset the training computer by pressing all the buttons simultaneously for two seconds until the display
fills with digits. Press any button, select language and set the time and date in Basic Settings after the
reset. All other settings are saved. Skip the rest of the settings by pressing and holding BACK.
...the heart rate reading becomes erratic, extremely high or shows nil (00)?
• Make sure the heart rate sensor strap has not loosened during exercise.
• Make sure the textile electrodes in the sports apparel fit snugly.
• Make sure the electrodes of the heart rate sensor strap are moistened.
• Make sure the heart rate sensor is clean. Strong electromagnetic signals can cause erratic readings. For
further information, see Precautions (page 55).
• If the erratic heart rate reading continues despite moving away from the source of disturbance, slow down
your speed and check your pulse manually. If you feel it corresponds to the high reading on the display,
you may be experiencing cardiac arrhythmia. Most cases of arrhythmia are not serious, but consult your
doctor nevertheless.
• A cardiac event may have altered your ECG waveform. In this case, consult your physician.
…Check heart rate transmitter! is displayed and your training computer cannot find your heart rate
signal?
• Make sure the heart rate sensor strap has not loosened during exercise.
• Make sure the electrodes of the heart rate sensor are moistened.
• Make sure the electrodes of the heart rate sensor are clean and undamaged.
58 Important Information
Page 59

ENGLISH
If you have done all of the above-mentioned actions, and the message still appears and heart rate
measurement does not work, the battery of your heart rate sensor may be empty. For further information,
see Important Information (page 52).
...Calibration failed is displayed?*
Calibration did not succeed and you need to re-calibrate. Calibration fails if you move during the process.
Once you reach lap distance, stop running and stand still for calibration. The range of the calibration
factor during manual calibration is 0.500-1.500. If you have defined the calibration factor below or above
these values, calibration fails.
*Optional s3+ stride sensor required.
...Memory 90...99% full is displayed?
1hourofmemoryleftis displayed when there is approximately 1 hour of memory left. To maximize the
remaining memory capacity, select the longest recording rate (1 minute) from SETTINGS > GENERAL SET. >
Recording rate.OncethememoryhasbeendepletedMemory full is displayed. To free memory transfer
the training files to polarpersonaltrainer.com and delete them from the training computer memory.
ZoneOptimizer determination fails?
• Make sure the electrodes of the heart rate sensor are moistened.
• Make sure the heart rate sensor strap has not loosened during exercise.
• Make sure the electrodes of the heart rate sensor are clean and undamaged.
• Make sure you have followed the instructions carefully.
If you have done all of the above-mentioned actions, and the message still appears and heart rate
measurement does not work, the battery of your transmitter may be empty. For further information, see
Important Information (page 52).
Limited International Polar Guarantee
• This guarantee does not affect the consumer’s statutory rights under applicable national or state laws in
force, or the consumer’s rights against the dealer arising from their sales/purchase contract.
• This limited Polar international guarantee is issued by Polar Electro Inc. for consumers who have
purchased this product in the USA or Canada. This limited Polar international guarantee is issued by Polar
Electro Oy for consumers who have purchased this product in other countries.
• Polar Electro Oy/Polar Electro Inc. guarantees the original consumer/purchaser of this device that the
product will be free from defects in material or workmanship for two (2) years from the date of purchase.
• The receipt of the original purchase is your proof of purchase!
• The guarantee does not cover the battery, normal wear and tear, damage due to misuse, abuse, accidents
or non-compliance with the precautions; improper maintenance, commercial use, cracked, broken or
scratched cases/displays, armband, elastic strap and Polar apparel.
• The guarantee does not cover any damage/s, losses, costs or expenses, direct, indirect or incidental,
consequential or special, arising out of, or related to the product.
• Items purchased second hand are not covered by the two (2) year warranty, unless otherwise stipulated by
local law.
• During the guarantee period, the product will be either repaired or replaced at any of the authorized Polar
Service Centers regardless of the country of purchase.
Guarantee with respect to any product will be limited to countries where the product has been initially
marketed.
This product is compliant with Directives 93/42/EEC, 1999/5/EC and 2011/65/EU. The relevant
Important Information 59
Page 60

ENGLISH
Declaration of Conformity is available at www.polar.com/support [http://www.polar.com/support].
Regulatory information is available at www.polar.com/support [http://www.polar.com/support].
This crossed out wheeled bin marking shows that Polar products are electronic devices and are in the
scope of Directive 2012/19/EU of the European Parliament and of the Council on waste electrical and
electronic equipment (WEEE) and batteries and accumulators used in products are in the scope of
Directive 2006/66/EC of the European Parliament and of the Council of 6 September 2006 on batteries
and accumulators and waste batteries and accumulators. These products and batteries/accumulators
inside Polar products should thus be disposed of separately in EU countries. Polar encourages you to
minimize possible effects of waste on the environment and human health also outside the European Union
by following local waste disposal regulations and, where possible, utilize separate collection of electronic
devices for products, and battery and accumulator collection for batteries and accumulators.
This marking shows that the product is protected against electric shocks.
Polar Electro Oy is a ISO 9001:2008 certified company.
©2013PolarElectroOy,FI-90440KEMPELE,Finland.Allrightsreserved.Nopartofthismanualmay
be used or reproduced in any form or by any means without prior written permission of Polar Electro Oy.
The names and logos in this user manual or in the package of this product are trademarks of Polar Electro
Oy. The names and logos marked with a®symbol in this user manual or in the package of this product are
registered trademarks of Polar Electro Oy. Windows is a registered trademark of Microsoft Corporation and
Mac OS is a registered trademark of Apple Inc.
Disclaimer
• The material in this manual is for informational purposes only. The products it describes are subject to
change without prior notice, due to the manufacturer’s continuous development program.
• Polar Electro Inc./Polar Electro Oy makes no representations or warranties with respect to this manual or
with respect to the products described herein.
• Polar Electro Inc./Polar Electro Oy shall not be liable for any damages, losses, costs or expenses, direct,
indirect or incidental, consequential or special, arising out of, or related to the use of this material or the
products described herein.
This product is protected by the incorporeal rights of Polar Electro Oy as defined by the following
documents: FI88972, DE4223657.6 A,FI9219139.8,FR 92.09150, GB 2258587, HK 306/1996, SG
9592117-7, US 5486818, FI 111514B, DE19781642T1, GB2326240, HK1016857, US6277080,
US20070082789, EP1795128, FI20085432, US12/434143, EP09159601.5, FI114202,
US6537227, EP1147790, HK1040065, FI115289, EP1127544, US6540686, HK1041188,
EP2070473A1, US20090156944, FI110915, US7324841, EP1361819, FI6815, EP1245184,
US7076291, HK1048426, FI 110303, US6104947, EP0748185, JP3831410, FI 96380,
EP0665947, US5611346, JP3568954, FI23471, US D492999SS, EU0046107-002,
EU0046107-003. Other patents pending.
Manufactured by:
Polar Electro Oy
Professorintie 5
FI-90440 KEMPELE
60 Important Information
Page 61

Tel + 3 5 8 8 5 2 0 2 100
Fax +358 8 5202 300
www.polar.com [http://www.polar.com]
EN 5.0 5/2013
ENGLISH
Important Information 61
Page 62

ENGLISH
INDEX
AutoSync . . . . . . . .. . . . . .. . . . . . . . . . .. . . . . . . . . . .. . . . . .. . . . . . . . . . .. . 35
Basic settings . . . . .. . . . . .. . . . . . . . . . .. . . . . . . . . . . . . . . . .. . . . . . . . . . .. 8
Battery symbol .. . . . . . .. . . . . . . . . . . . . . . . .. . . . . . . . . . .. . . . . .. . . . . . . 58
Bike settings . . . . . . . . .. . . . . . . . . . .. . . . . .. . . . . . . . . . .. . . . . .. . . . . . . . 28
Blank display . . .. . . . . .. . . . . . . . . . .. . . . . .. . . . . . . . . . .. . . . . . . . . . . . . . 58
Button functions .. . . . . . .. . . . . . . . . . .. . . . . .. . . . . . . . . . .. . . . . .. . 8, 17
Buttons do not react ... . . . . .. . . . . . . . . . . . . . . . .. . . . . . . . . . .. . . . . .. . 58
Cadence sensor pairing .. . . . . .. . . . . . . . . . . . . . . . .. . . . . . . . . . .. . . . . 42
Calibration . . . . . .. . . . . .. . . . . . . . . . .. . . . . .. . . . . . . . . . .. . . . . .. . . . . . . 10
Calibration by running . . .. . . . . . . . . . . . . . . . .. . . . . . . . . . .. . . . . .. . . . 11
Calibration manually . . . . .. . . . . . . . . . .. . . . . .. . . . . . . . . . .. . . . . .. . . . 11
Care instructions . . . . .. . . . . .. . . . . . . . . . .. . . . . . . . . . . . . . . . .. . . . . . . . 52
Change batteries . . . . .. . . . . . . . . . . . . . . . .. . . . . . . . . . .. . . . . .. . . . . . . . 52
Connection settings .. . . . . .. . . . . .. . . . . . . . . . .. . . . . . . . . . . . . . . . .. . . 35
Create new sport profiles . . . .. . . . . .. . . . . . . . . . .. . . . . .. . . . . . . . . . .. 27
Customize training views . . . .. . . . . .. . . . . . . . . . .. . . . . . . . . . . . . . . . .. 18
Cycling settings .. . . . . .. . . . . .. . . . . . . . . . .. . . . . . . . . . .. . . . . .. . . . . . . 28
Delete files . . . . . . . . .. . . . . . . . . . . . . . . . .. . . . . . . . . . .. . . . . .. . . . . . . . . . 25
Endurance program . . .. . . . . .. . . . . . . . . . .. . . . . .. . . . . . . . . . .. . . 10, 51
Erratic readings .. . . . . .. . . . . .. . . . . . . . . . .. . . . . . . . . . .. . . . . .. . . . . . . 58
Fitness Level Classes for men . . . .. . . . . .. . . . . . . . . . .. . . . . .. . . . . . . 38
Fitness Level Classes for women . . . . . .. . . . . . . . . . . . . . . . .. . . . . . . . 38
Fitness Test . . . . . . . . .. . . . . . . . . . .. . . . . .. . . . . . . . . . .. . . . . .. . . . . . . . . 37
General settings . . . . . . . . .. . . . . . . . . . .. . . . . .. . . . . . . . . . .. . . . . .. . . . . 33
GPS sensor pairing . . . . .. . . . . . . . . . .. . . . . .. . . . . . . . . . .. . . . . .. . . . . . 42
Hear rate sensor .. . . . . .. . . . . .. . . . . . . . . . .. . . . . .. . . . . . . . . . .. . . . . .. 13
Heart rate settings . . . . . . .. . . . . . . . . . .. . . . . .. . . . . . . . . . .. . . . . .. . . . 30
HeartTouch . . . . . . . .. . . . . .. . . . . . . . . . .. . . . . .. . . . . . . . . . .. . . . . . . . . . . 17
HR
.. . . . . . . . . . .. . . . . .. . . . . . . . . . .. . . . . . . . . . . . . . . . .. . . . . . . . . . .. . 47
max
Information on display . . .. . . . . .. . . . . . . . . . .. . . . . .. . . . . . . . . . .. . . . 18
Interference . . . . . . . .. . . . . .. . . . . . . . . . .. . . . . .. . . . . . . . . . .. . . . . .. . . . 55
Low battery . . . . .. . . . . .. . . . . . . . . . .. . . . . .. . . . . . . . . . .. . . . . . . . . . . . . . 58
Reset week summaries . . . . . . . . .. . . . . .. . . . . . . . . . .. . . . . .. . . . . . . . . 25
Running Cadence .... . . . . .. . . . . . . . . . .. . . . . .. . . . . . . . . . .. . . . . .. . . 47
Running Index . . . . .. . . . . . . . . . .. . . . . .. . . . . . . . . . .. . . . . .. . . . . . . . . . . 48
Running settings . . . . .. . . . . . . . . . .. . . . . .. . . . . . . . . . .. . . . . .. . . . . . . . 27
Service . . . . . . . .. . . . . .. . . . . . . . . . .. . . . . .. . . . . . . . . . .. . . . . . . . . . . . . . . 52
Set heart rate view . . . .. . . . . .. . . . . . . . . . .. . . . . .. . . . . . . . . . .. . . . . . . 30
Set zone lock . . . . . . . . .. . . . . . . . . . .. . . . . .. . . . . . . . . . .. . . . . .. . . . . . . . 30
Set ZoneOptimizer . . . . .. . . . . .. . . . . . . . . . .. . . . . . . . . . . . . . . . .. . . . . . . 30
Speed sensor pairing . . .. . . . . .. . . . . . . . . . .. . . . . .. . . . . . . . . . .. . . . . . 42
Sport profiles . . . . .. . . . . .. . . . . . . . . . .. . . . . . . . . . . . . . . . .. . . . . . . . . . .. 10
Sport profile settings . . . . . . . . .. . . . . . . . . . .. . . . . .. . . . . . . . . . .. . . . . . 27
Sport Zones .. . . . . .. . . . . .. . . . . . . . . . .. . . . . .. . . . . . . . . . .. . . . . . . . . . . . 44
Start training . . .. . . . . .. . . . . . . . . . .. . . . . .. . . . . . . . . . .. . . . . .. . . . . . . . 13
Stop recording . . . . . . . . .. . . . . . . . . . .. . . . . .. . . . . . . . . . .. . . . . .. . . . . . . 20
Stride length . . . . . . . .. . . . . . . . . . .. . . . . .. . . . . . . . . . .. . . . . .. . . . . . . . . 47
Stride sensor pairing . . . . .. . . . . . . . . . . . . . . . .. . . . . . . . . . .. . . . . .. . . . 43
Swimming settings . . . . . . . . .. . . . . . . . . . .. . . . . .. . . . . . . . . . .. . . . . .. . 29
Time 1 . . . . . . . . .. . . . . . . . . . .. . . . . .. . . . . . . . . . .. . . . . .. . . . . . . . . . .. . . . 34
Totals . . . . . . .. . . . . .. . . . . . . . . . .. . . . . .. . . . . . . . . . .. . . . . . . . . . . . . . . . .. 25
Training files . . . . .. . . . . .. . . . . . . . . . .. . . . . .. . . . . . . . . . .. . . . . .. . . . . . 22
Training load . . . . .. . . . . .. . . . . . . . . . .. . . . . .. . . . . . . . . . .. . . . . . . . . . . . 50
Training results .. . . . . .. . . . . .. . . . . . . . . . .. . . . . .. . . . . . . . . . .. . . . . .. 22
Transfer data . . . . . . .. . . . . .. . . . . . . . . . .. . . . . .. . . . . . . . . . .. . . . . . . . . . 26
User information settings .. . . . . .. . . . . .. . . . . . . . . . .. . . . . .. . . . . . . . 31
Using a new accessory . . . .. . . . . . . . . . . . . . . . .. . . . . . . . . . .. . . . . .. . . 42
Using new heart rate sensor . . . . .. . . . . . . . . . .. . . . . .. . . . . . . . . . .. . . 41
Watch face . . . . . . . . . .. . . . . .. . . . . . . . . . .. . . . . .. . . . . . . . . . .. . . . . . . . . 34
Watch settings . . . . . . . . . .. . . . . .. . . . . . . . . . .. . . . . .. . . . . . . . . . .. . . . . 34
Water resistance .. . . . . . . . . . . . . .. . . . . . . . . . .. . . . . .. . . . . . . . . . .. . . . 57
Week summaries . . . . . . . . . .. . . . . .. . . . . . . . . . .. . . . . .. . . . . . . . . . .. . . 24
Zonelock .. . . . . . . . . . .. . . . . .. . . . . . . . . . .. . . . . . . . . . .. . . . . .. . . . . . . . . . 17
ZoneOptimizer . . . . . . . .. . . . . .. . . . . . . . . . .. . . . . .. . . . . . . 14, 14, 45, 59
Zoom display .. . . . . .. . . . . .. . . . . . . . . . .. . . . . . . . . . .. . . . . .. . . . . . . . . . 17
Zoom training view . . . . . . . . .. . . . . . . . . . .. . . . . .. . . . . . . . . . .. . . . . .. . . 8
Measure wheel size .. . . . . .. . . . . .. . . . . . . . . . .. . . . . .. . . . . . . . . . .. . . . 29
Memory full . . . . . . . . .. . . . . . . . . . . . . . . . .. . . . . . . . . . .. . . . . .. . . . . . 59, 59
Memory low . . . . . . . . .. . . . . .. . . . . . . . . . .. . . . . . . . . . .. . . . . .. . . . . . . . . . 59
Menu .. . . . . . . . . . .. . . . . . . . . . .. . . . . .. . . . . . . . . . .. . . . . .. . . . . . . . . . .. . . 8
Minimizing risks . . .. . . . . .. . . . . . . . . . .. . . . . .. . . . . . . . . . .. . . . . .. . . . . 55
Modify settings . . . . .. . . . . .. . . . . . . . . . .. . . . . . . . . . . . . . . . .. . . . . . . . . . 27
Multisport training . . .. . . . . .. . . . . . . . . . .. . . . . .. . . . . . . . . . .. . . . . . . . 16
Multisport training file .. . . . . .. . . . . . . . . . . . . . . . .. . . . . . . . . . .. . . . . . 24
Night mode . . . . .. . . . . .. . . . . . . . . . .. . . . . . . . . . . . . . . . .. . . . . . . . . . .. . . 18
On-the-fly calibration . . .. . . . . .. . . . . . . . . . .. . . . . . . . . . . . . . . . .. . . . . 11
Other sport settings . . . . .. . . . . .. . . . . . . . . . .. . . . . .. . . . . . . . . . .. . . . . 30
OwnIndex . . . . . . . .. . . . . .. . . . . . . . . . .. . . . . .. . . . . . . . . . .. . . . . . . . . . .. . 37
Pause recording .. . . . . .. . . . . .. . . . . . . . . . .. . . . . . . . . . .. . . . . .. . . . . . . 20
Pause training .. . . . . .. . . . . . . . . . . . . . . . .. . . . . . . . . . .. . . . . .. . . . . . . . . 18
Precautions . . . . . . . . .. . . . . . . . . . .. . . . . .. . . . . . . . . . .. . . . . .. . . . . . . . . . 55
Quick menu .. . . . . .. . . . . .. . . . . . . . . . .. . . . . .. . . . . . . . . . .. . . . . . . . . . . . 35
Quick menu in Pre-training mode . .. . . . . . . . . . .. . . . . .. . . . . . . . . . . 35
Quick menu in Time mode .. . . . . . . . . . .. . . . . .. . . . . . . . . . .. . . . . .. . . 35
Quick menu in Training mode . . . . . . . . . . . . . . . .. . . . . . . . . . .. . . . . .. 35
Race pace .. . . . . .. . . . . .. . . . . . . . . . .. . . . . .. . . . . . . . . . .. . . . . . 5, 16, 39
Reminder . . . . . . . .. . . . . .. . . . . . . . . . .. . . . . .. . . . . . . . . . .. . . . . .. . . . . . . 20
Remove pairings .. . . . . . .. . . . . . . . . . .. . . . . .. . . . . . . . . . .. . . . . .. . . . . 35
Reset totals .. . . . . . .. . . . . .. . . . . . . . . . .. . . . . . . . . . . . . . . . .. . . . . . . . . . 25
Reset trip . . . . . . . . .. . . . . . . . . . . . . . . . .. . . . . . . . . . .. . . . . .. . . . . . . . . . .. 25
62 Index
Page 63

POLAR
RCX5
Gebrauchsanleitung
Page 64

DEUTSCH
INHALTSVERZEICHNIS
1. EINFÜHRUNG .................................................................................. .................................... 5
2. BESTANDTEILE DES TRAININGSCOMPUTERS ................................................................................. 6
Bestandteile des Polar RCX5 Trainingscomputers......................................................................... . 6
Optionales Zubehör ........ ................................................ ................................................ ... 7
3. ERSTE SCHRITTE............................................................ ...................................................... 9
Basiseingaben......................................................................................... ............................ 9
Tastenfunktionen und Menüstruktur ........................................................................................... 9
Tastenfunktionen................................. ................................................ ............................. 9
Menüstruktur ....... ................................................ ................................................ ............ 10
4. VORBEREITUNG AUF DAS TRAINING ................... ........................................................................ 12
Planen Sie Ihr Training......................................................................... ................................. 12
Sportprofile ......................................................................... ............................................ 12
Polar Ausdauer-Trainingsprogramm...................................................... ................................. 12
Polar s3+ Laufsensor kalibrieren .................................................................. ........................... 12
Kalibrierung durch den Lauf-Assistenten................................................................................ 13
Kalibrierungsfaktor manuell einstellen................................................................................. .. 13
Sensor durch Laufen einer bekannten Distanz kalibrieren (direkte on-the-fly Kalibrierung) .... ........... 14
5. TRAINING.......................................................................... ................................................. 15
So tragen Sie den Herzfrequenz-Sensor
....................................................................................................................................... 15
Beginnen Sie Ihr Training......................................................................... .............................. 15
Training mit dem Polar ZoneOptimizer ........................................................................................ 16
Trainingseinheit mit dem Polar ZoneOptimizer starten .............................................................. 17
Polar Ausdauer-Trainingsprogramm verwenden............................................................................. 18
Verwendung des RCX5 beim Multisport-Training ........................................................................... 18
Mit Race Pace/Renntempo trainieren .......................................................... .............................. 19
Tastenfunktionen während des Trainings .................................................................................... 19
Rundenzeit nehmen ..................................... ........................ ............................................. 19
Zone sperren.................................................................................................................... 19
Anzeige der Trainingsansicht zoomen .................................................................................... 19
HeartTouch ..................................................................................................... ............... 20
Nacht-Modus ....... ................................................ ................................................ ............ 20
Schnell-Menü anzeigen ...................................................................................................... 20
Unterbrechen des Trainings ............................................. ........................ ........................... 20
Anpassen der Trainingsansichten.............................................................................................. 21
Erinnerung ...................................................................................................................... ... 23
Unterbrechen oder Beenden des Trainings................................................................................... 24
6. NACH DEM TRAINING ..................................................... ....................................................... 25
Trainingsergebnisse analysieren .............................................................................................. 25
Trainingsdateien für eine einzelne Sportart.......... ........................ ........................................... 25
Multisport-Trainingsdatei.................................................................................................... 27
Wochenzusammenfassungen ............................................................................................... 28
Gesamtwerte seit dem xx.xx.xxxx ............................................................ .............................. 28
Dateien löschen........... ................................................ ........................ ............................. 28
Wochenzusammenfassungen zurücksetzen ............................................................................. 29
Trip zurücksetzen ............................................................................................................. 29
Gesamtwerte zurücksetzen.......................................................................... ........................ 29
7. DATENÜBERTRAGUNG............................................................ ................................................ 30
Datenübertragung........................................................................................ ......................... 30
Page 65

DEUTSCH
8. EINSTELLUNGEN ......................................................................................... ......................... 31
Sportprofil-Einstellungen................................................................................ ........................ 31
Einstellungen zum Laufen ........................................................... ....................................... 31
Einstellungen zum Rad fahren ................................ ................................................ ............. 32
Einstellungen zum Schwimmen ........................................................... ........................ ........ 34
Einstellungen für andere Sportarten...................................................................................... 34
Herzfrequenz-Einstellungen..................................................................................................... 35
Einstellungen für die Benutzerdaten .......................................................................... ................ 36
Maximale Herzfrequenz (HFmax).................................................. ........................................ 38
OwnIndex® ................................................ ................................................ ..................... 38
Allgemeine Einstellungen ................................................................................................. ...... 38
Uhreinstellungen......................................................................................... ......................... 40
Übertragungseinstellungen ......................................................................................... ............ 40
Schnell-Menü ........................................................................... .......................................... 40
Uhrzeitanzeige ................................................. ................................................ ................ 40
Vorstartmodus............. ................................................ ........................ ............................. 40
Trainingsmodus................................. ................................................ ........................ ....... 41
9. ANWENDUNGEN....................................................................................... ............................ 42
Polar Fitness Test................................................................................................. ................ 42
Vor dem Test ................................................. ........................ .......................................... 42
Durchführen des Fitness Tests............................................................................................. 43
Nach dem Fitness Test ............................. ................................................ ........................ . 43
Polar Race Pace/Renntempo ............................................................ ....................................... 45
10.VERWENDEN EINES NEUEN HERZFREQUENZ-SENSORS ............................................................. ....... 46
Verwenden eines neuen Herzfrequenz-Sensors
....................................................................................................................................... 46
Koppeln eines neuen Herzfrequenz-Sensors mit dem Trainingscomputer...... ................................. 46
11.VERWENDEN EINES NEUEN ZUBEHÖRS ............................................................................... ........ 47
Koppeln eines neuen Rad-Geschwindigkeitssensors mit dem Trainingscomputer ........... ................. 47
Koppeln eines neuen Rad-Trittfrequenzsensors mit dem Trainingscomputer .................................. 47
Koppeln eines neuen GPS-Sensors mit dem Trainingscomputer ................................................. . 47
Koppeln eines neuen Laufsensors mit dem Trainingscomputer.................................................... 48
12.HINTERGRUNDINFORMATIONEN ................................................................................ ................ 49
Polar SportZonen ............................................................................... ................................. 49
Herzfrequenz-Variabilität........................................................................................................ 50
Polar ZoneOptimizer ................................................................................. ............................ 51
Maximale Herzfrequenz ................................................................................................ ......... 52
Schrittfrequenz und Schrittlänge ................................................................... ........................... 53
Polar Running Index.......................................................................... .................................... 54
Polar Training Load/Trainingsbelastungsfunktion........................................................................... 56
Polar Ausdauer-Trainingsprogramm zum Laufen und Rad fahren......................................................... 56
Polar Trainingsartikel......................................................................................... ................... 57
13.WICHTIGE INFORMATIONEN............................................................... ...................................... 58
Pflege Ihres Produktes ................................................................................. ......................... 58
Service ....... ........................ ................................................ ............................................ 58
Batteriewechsel................................................................................. .................................. 58
Batterien selbst wechseln ................................................................................................... 59
Energiesparmodus............................................................................................................ .... 60
Lebensdauer der Batterie des RCX5......................................................................... .................. 61
Wichtige Hinweise ........................................................................... .................................... 61
Störungen während des Trainings ........................................................ ................................. 61
Gehen Sie beim Training auf Nummer sicher ....... ........................ ........................ ................... 62
Technische Spezifikationen .................................................................................................... 63
Häufig gestellte Fragen (FAQ) ................ .................................................................................. 64
Page 66

DEUTSCH
Weltweite Garantie des Herstellers ..... ....... ...................... . ....... ....... ....... ....... ....... ....... ....... ....... 66
Haftungsausschluss . ....... ....... ....... ....... ....... ....... ....... ....... ....... ....... ....... ....... ...................... . .. 67
STICHWORTVERZEICHNIS ..... ....... ....... ....... ....... ....... ....... ....... ...................... . ....... ....... ....... ..... 68
Page 67

DEUTSCH
1. EINFÜHRUNG
Wir gratulieren Ihnen zum Kauf Ihres neuen Polar RCX5™Trainin g s c o m p uters! S i e verfügen d amit über
das komplette Trainingssystem für Multisport- und Ausdauerathleten, welches Ihr Training von der
Planung über das Training selbst bis hin zur Auswertung optimal unterstützt.
Diese Gebrauchsanleitung bietet umfassende Informationen, um die bestmögliche Nutzung Ihres
Trainin g s c o m p uter zu ermöglichen.
Die aktuellste Version dieser Gebrauchsanleitung kann unter www.polar.com/support
[http://www.polar.com/support] heruntergeladen werden. Video-Lernprogramme finden Sie unter
http://www.polar.com/en/support/ video_tutorials.
• Die Polar ZoneOptimizer Funktion personalisiert Ihre Herzfrequenzzonen während des Aufwärmens. Die
ZoneOptimizer Funktion misst Ihre Herzfrequenz-Variabilität und bestimmt Ihre persönlichen Sportzonen.
• Polar Ausdauerprogramme zum Laufen und Rad fahren sind individualisierte Trainingsprogramme die auf
Ihr persönliches Fitnesslevel abgestimmt sind. Das Trainingsprogramm leitet Sie dabei an, richtig zu
trainieren, indem es den Trainingsumfang, die Trainingsintensität und und die Verteilung der
Trainingseinheiten auf die Wochentage festlegt, damit Sie Ihre Fitness optimal verbessern können. Das
Trainingsprogramm arbeitet mit der Polar ZoneOptimizer Funktion zusammen, sodass die
Trainingseinheiten des Programms gemäß Ihren persönlichen Sportzonen angepasst werden.
• Im Polar RCX5 Trainingscomputer können Sie zwischen vier Standard- Sportprofilen wählen. Sie können
auch eigene Sportprofile in der WebSync Software erstellen und mit dem DataLink
Datenübertragungsgerät auf Ihren Trainingscomputer laden. Während des Trainings können Sie das
Sportprofil einfach wechseln, Sie brauchen nicht einmal anzuhalten.
• Das kumulative Trainingsbelastungsdiagramm ist auf polarpersonaltrainer.com verfügbar. Übertragen Sie
Trainingsergebnisse von Ihrem Trainingscomputer auf polarpersonaltrainer.com und verfolgen Sie Ihre
Trainingsbelastung sowie Erholung im Trainingstagebuch. Die kontinuierliche Überwachung der
Trainingsbelastung und Erholung helfen Ihnen, Ihre persönlichen Grenzen zu ermitteln, Über- und
Untertraining zu vermeiden sowie die Trainingsintensität und -dauer Ihren Tages- und Wochenzielen
anzupassen.
• Der Polar WearLink®+ Hybrid / Polar H2 Herzfrequenz-Sensor kann auch im Wasser getragen werden.
• Die Race Pace/Renntempo Funktion hilft Ihnen, eine konstante Geschwindigkeit einzuhalten und Ihre
Zielzeit für eine festgelegte Distanz zu erreichen.
Einführung 5
Page 68
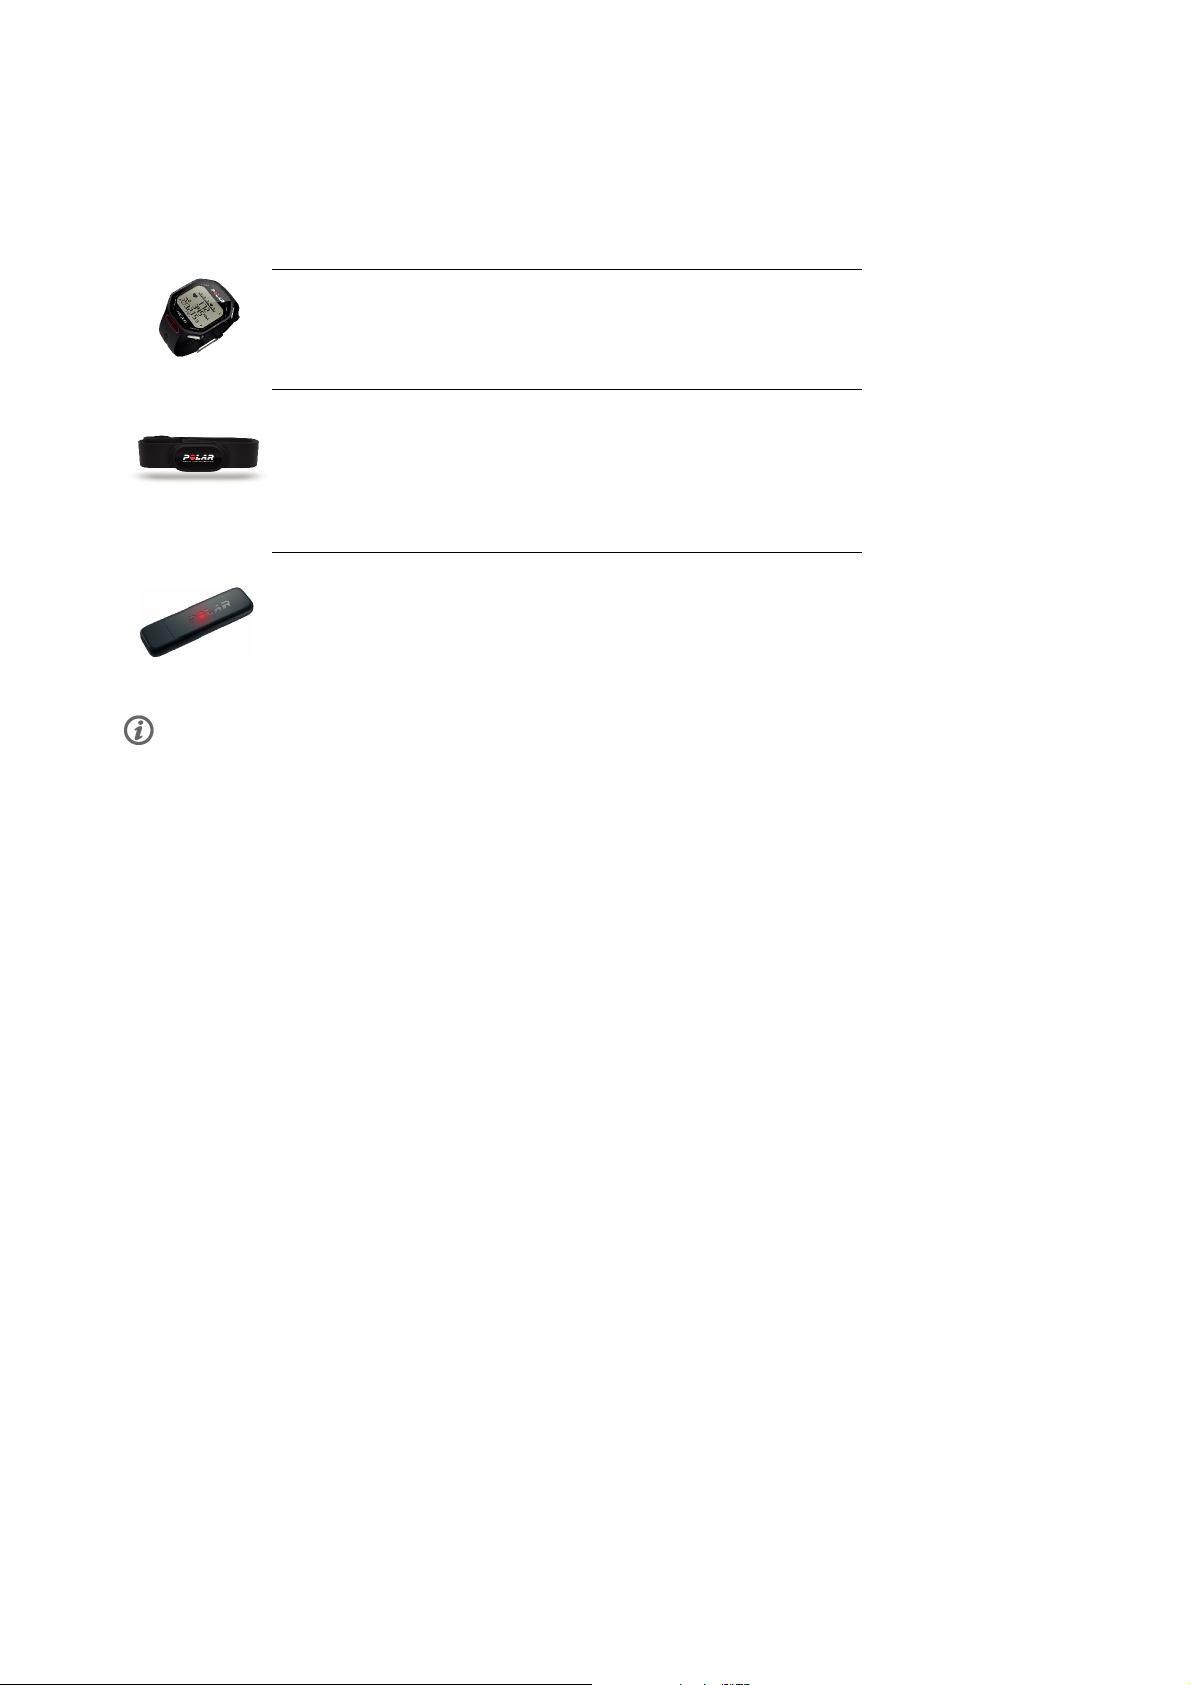
DEUTSCH
2. BESTANDTEILE DES TRAININGSCOMPUTERS
Bestandteile des Polar RCX5 Trainingscomputers
Der Polar RCX5 Trainingscomputer liefert Ihnen die Daten, die Sie zur
Verbesserung Ihrer Trainingsleistung benötigen und speichert diese Daten zur
späteren Analyse.
Der komfortable Polar WearLink®+ Hybrid / Polar H2 Herzfrequenz-Sensor
überträgt Ihre Herzfrequenz mit der exklusiven 2,4 GHz W.I.N.D.- und
GymLink-Technologie (bei Aktivitäten im Wasser) von Polar EKG-genau an den
Trainingscomputer. Der H erzfr equen z-Sen sor b esteh t aus de r Sen deein heit und dem
elastischen Elektrodengurt.
Sie können Ihre Trainingsdaten mit dem Polar DataLink Datenübertragungsgerät
und der WebSync Software vom Trainingscomputer auf den Web-Service
polarpersonaltrainer.com [http://www.polarpersonaltrainer.com] übertragen.
Schließen Sie den DataLink an einen USB-Anschluss Ihres Computers an und Ihr
Trainingscomputer mit k abell oser W.I. N.D.- Techno logie wi rd erkannt.
Herzfrequenz-Sensoren mit polarspezifischer GymLink-Technologie, z. B. Polar H1 und H2, eignen sich zur
Verwendung mit kompatiblen Fitnessgeräten.
6 Bestandteile des Trainingscomputers
Page 69
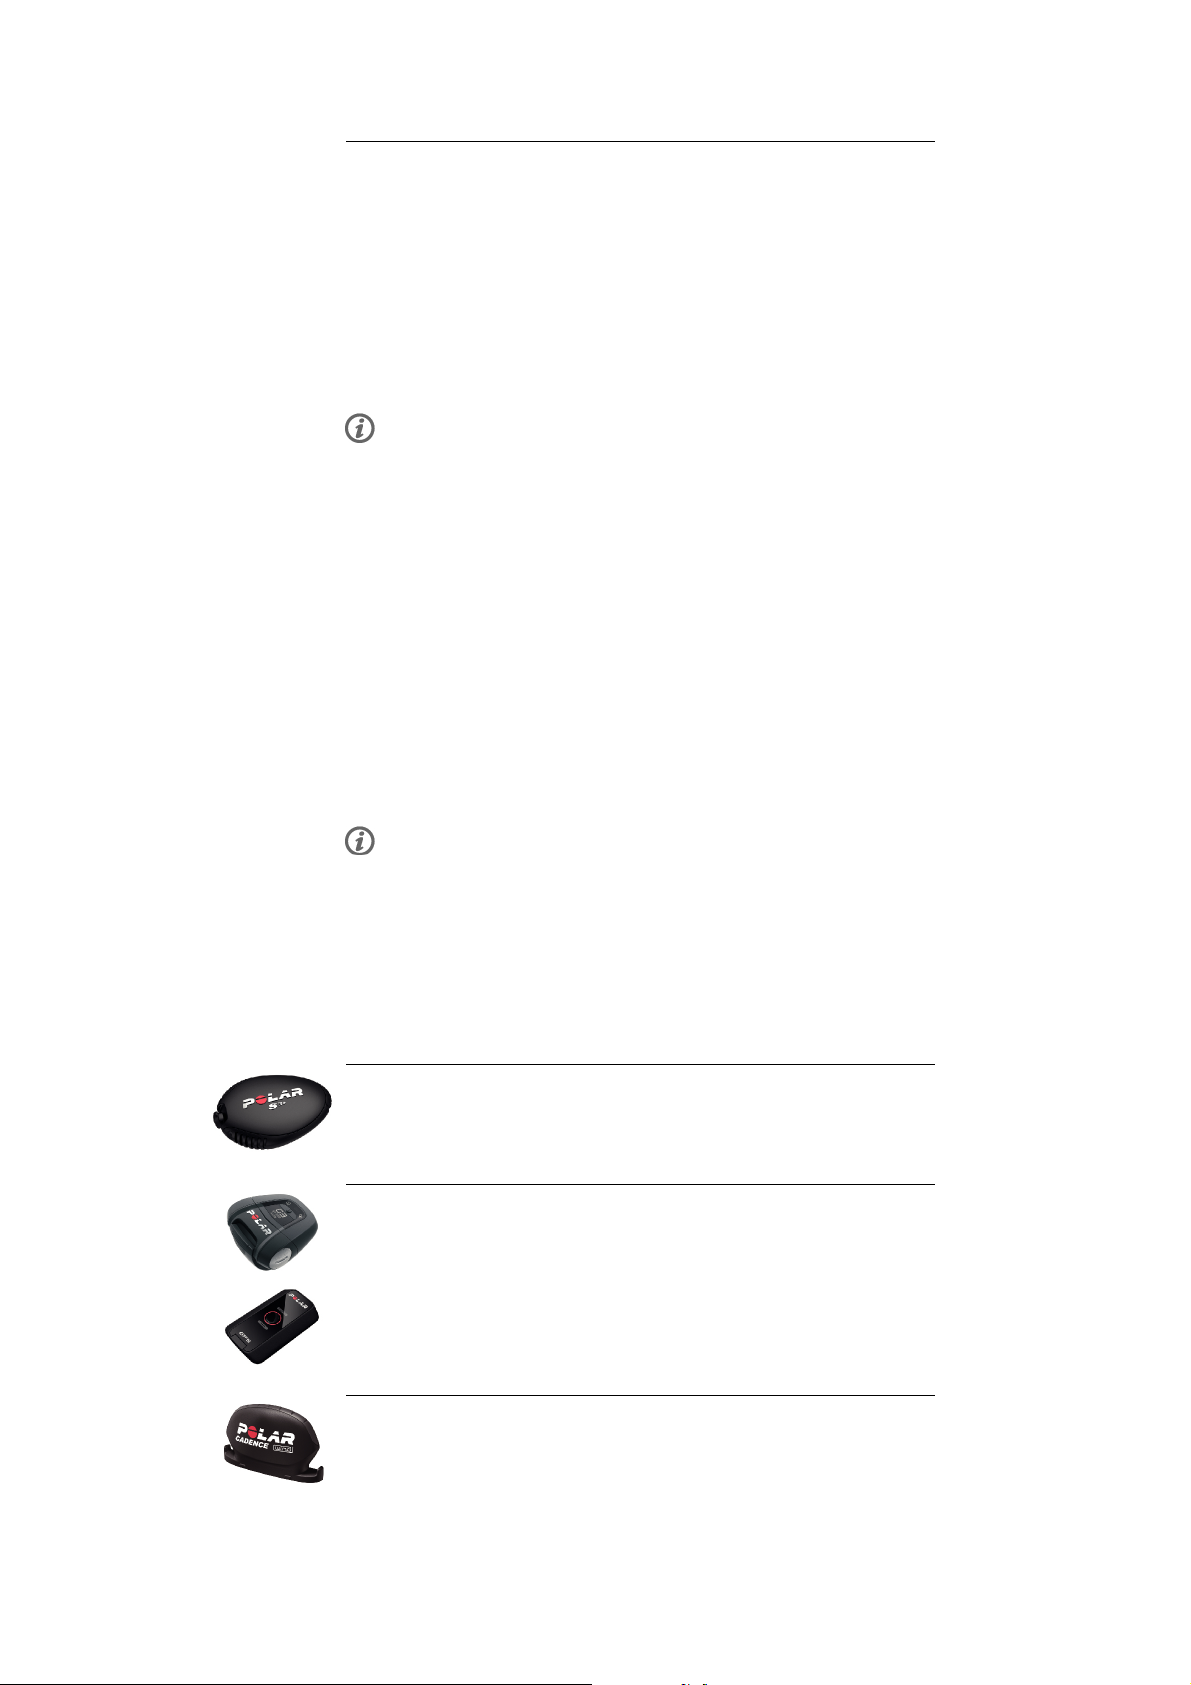
Mit dem Web-Service polarpersonaltrainer.com
[http://www.polarpersonaltrainer.com] können Sie:
• Polar Ausdauer-Trainingsprogramme auf Ihren Trainingscomputer
herunterladen, um diese für Ihr Training zu verwenden.
• Ihre Trainingsdateien zur langfristigen Nachverfolgung speichern.
• Ihre Fortschritte im Trainingstagebuch verfolgen und analysieren.
• Ihre Trainingsintensität analysieren sowie notwendige Erholungszeiten
mit der Trainingsbelastungsfunktion berechnen.
• Ihre Freunde zu einem virtuellen Sportwettkampf herausfordern und
mit anderen Sportlern in Kontakt treten.
Der Benutzername für Ihr Polar Konto ist immer Ihre E-Mail-Adresse. Für die
Polar Produktregistrierung, für polarpersonaltrainer.com, das Polar
Diskussionsforum und die Newsletter-Registrierung gelten der gleiche
Benutzername und das gleiche Kennwort.
Mit der software Polar WebSync 2.4 (oder höher) können Sie:
• die Einstellungen Ihres Trainingscomputers abstimmen
• die Anzeige des RCX5 Trainingscomputers anpassen, z. B. mit einem
eigenen Logo
• Trainingsansichten ändern
• Eine Erinnerung festlegen, die Sie daran erinnert, während des
Trainings zu trinken, zu essen oder andere wichtige Dinge zu tun
• den Energiesparmodus ein-/ausschalten
DEUTSCH
Sie können die WebSync Software unter www.polarpersonaltrainer.com
herunterladen.
Registrieren Sie Ihr Polar Produkt unter http://register.polar.fi/, damit wir unsere Produkte und unseren
Service noch besser auf Sie abstimmen können.
Optionales Zubehör
Der optionale Polar s3+ Laufsensor misst drahtlos Laufgeschwindigkeit, Tempo
und Distanz sowie die Schrittfrequenz und Schrittlänge. Ebenso möglich ist dies mit
dem s3 Laufsensor.
Der optionale Polar G5 GPS-Sensor/Polar G3 GPS-Sensor W.I.N.D. sendet
Daten zu Laufgeschwindigkeit/Tempo, Distanz und zum Standort sowie
Verfolgungsinformationen an den RCX5, der die Daten zur späteren Analyse
aufzeichnet und anzeigt. Der G3 GPS-Sensor ist ebenso kompatibel.
Der optionale Polar CS Trittfrequenzsensor W.I.N.D. misst beim Radfahren
drahtlos Ihre aktuelle und durchschnittliche Trittfrequenz in Umdrehungen pro Minute.
Bestandteile des Trainingscomputers 7
Page 70

DEUTSCH
Der optionale Polar CS Geschwindigkeitssensor W.I.N.D. misst beim
Radfahren drahtlos die Strecke sowie Ihre aktuelle, durchschnittliche und maximale
Geschwindigkeit.
Die Daten aller kompatiblen Sensoren werden drahtlos mit der Polar 2,4 GHz W.I.N.D.-Technologie an den
Trainin g s c o m p u t e r über t r a g e n . Hierdur c h w e rden S t ö r u n g e n w ä h r e n d des Tr a i n i n g s v e r m i e d e n . Beim
Schwimmen werden die Daten vom Polar WearLink®+ Hybrid / Polar H2 Herzfrequenz-Sensor mit der
exklusiven GymLink-Technologie von Polar an den Trainingscomputer übertragen.
8 Bestandteile des Trainingscomputers
Page 71

DEUTSCH
3. ERSTE SCHRITTE
Basiseingaben
Bevor Sie Ihren Trainingscomputer zum ersten Mal benutzen, müssen Sie die Basiseingaben vornehmen.
Geben Sie die Daten so genau wie möglich ein, damit das Feedback tatsächlich Ihrer Leistung entspricht.
Aktivieren Sie Ihren Trainingscomputer durch Drücken der OK-Taste. Select language (Sprache wählen)
wird angezeigt. Wählen Sie mit der UP- oder DOWN-Taste zwischen Deutsch, English, Español, Français,
Italiano, Português, Suomi und Svenska. Bestätigen Sie die Auswahl mit der OK-Taste. Nehmen Sie die
Basiseingaben vor wird angezeigt. Drücken Sie die OK-Taste. Stellen Sie mit der UP- oder DOWN-Taste
die folgenden Daten ein und bestätigen Sie die Eingaben mit der OK-Taste:
1. Zeitformat/Uhrzeit: Wählen Sie 24 h oder 12 h als Zeitformat. Wenn Sie 12 h ausgewählt haben, wählen
Sie AM (vormittags) oder PM (nachmittags). Geben Sie dann die Uhrzeit ein.
2. Datum: Geben Sie das aktuelle Datum ein.
3. Maßeinheiten: Wählen Sie Metrische (kg, m) oder Imperische (lbs, ft) Einheiten.
4. Gewicht: Geben Sie Ihr Gewicht ein.
5. Größe: Geben Sie Ihre Größe ein. Wenn Sie sich für das lb/ft-Format entschieden haben, geben Sie
zuerst die Fuß und danach die Zoll ein.
6. Geburtsdatum: Geben Sie Ihr Geburtsdatum ein.
7. Geschlecht: Wählen Sie Männlich oder Weiblich aus.
8. Eingaben OK? wird angezeigt. Um die Eingaben zu ändern, drücken Sie kurz so oft die RÜCK-Taste, bis
Sie bei der gewünschten Einstellung angelangt sind. Drücken Sie die OK-Taste, um die Eingaben zu
übernehmen. Der Trainingscomputer kehrt in die Uhrzeitanzeige zurück.
Tastenfunktionen und Menüstruktur
Tastenfunktionen
Der Trainingscomputer verfügt über fünf Tasten, die je nach Situation verschiedene Funktionen haben
können.
LIGHT (LICHT) BACK (RÜCK) OK UP
(AUFSTEIGEND)
DOWN
(ABSTEGEND)
Erste Schritte 9
Page 72

DEUTSCH
• Aktivieren der
Displaybeleuchtung
• Durch
Gedrückthalten
dieser Taste
können Sie das
SCHNELL-MENÜ
aufrufen, um
verschiedene
Einstellungen
in
verschiedenen
Modi zu
bearbeiten.
Weitere
Informationen
finden Sie unter
Schnell-Menü
(Seite 40).
• Um die
Aufzeichnung
des Trainings
anzuhalten,
drücken Sie die
RÜCK-Taste
einmal
• Um die
Aufzeichnung
des Trainings
zu stoppen,
drücken Sie die
RÜCK-Taste
zweimal
• Menü verlassen
• Zu vorheriger
Ebene
zurückkehren
• Einstellungen
unverändert
lassen
• Auswahl
abbrechen
• Durch
Gedrückthalten
dieser Taste
kehren Sie aus
jedem Modus
zur
Uhrzeitanzeige
zurück
• Auswahl/Eingaben
bestätigen
• Trainingseinheit
starten
• Rundenzeit
nehmen
• Durch
Gedrückthalten
dieser Taste
können Sie im
Trainingsmodus
Ihre
Herzfrequenz
auf die aktuelle
SportZone
festlegen
(sperren), wenn
Sie ohne
voreingestellte
Zielzonen
trainieren
• Zum Blättern
durch
Auswahllisten
• Ausgewählten
Wert
einstellen/erhöhen
• Durch
Gedrückthalten
dieser Taste
können Sie die
Darstellung der
Uhrzeitanzeige
ändern
• Durch
Gedrückthalten
dieser Taste
können Sie im
Trainingsmodus
die
Informationen
in der obersten
Zeile genauer
betrachten
(zoomen)
• Zum Blättern
durch
Auswahllisten
• Ausgewählten
Wert
einstellen/verringern
• Durch
Gedrückthalten
dieser Taste
können Sie in
der
Uhrzeitanzeige
zwischen
Uhrzeit
1/Uhrzeit 2
umschalten
• Durch
Gedrückthalten
dieser Taste
können Sie im
Trainingsmodus
die
Informationen
in der untersten
Zeile genauer
betrachten
(zoomen)
Menüstruktur
Programm
Programm wird im Menü nur angezeigt, wenn Sie auf polarpersonaltrainer.com ein Ausdauerprogramm
erstellt und heruntergeladen haben. Weitere Informationen finden Sie unter Polar
Ausdauer-Trainingsprogramm zum Laufen und Rad fahren (Seite 56)
Daten
Zum Nachverfolgen Ihrer Trainingsdaten. Weitere Informationen finden Sie unter Nach dem Training
10 Erste Schritte
Page 73

(Seite 25).
Einstellungen
Passen Sie Ihren Trainingscomputer an und wählen Sie die gewünschten Funktionen für jedes der
Sportprofile entsprechend Ihrem Training aus. Weitere Informationen finden Sie unter Einstellungen
(Seite 31).
Anwendungen
• Fitness Test
Damit Sie richtig trainieren und Ihren Fortschritt überwachen können, ist es wichtig, Ihr aktuelles
Fitnesslevel zu kennen. Der Polar Fitness Test bietet ein einfaches und schnelles Verfahren, um Ihre
kardiovaskuläre Fitness und aerobe Ausdauer zu messen. Der Test wird in Ruhe durchgeführt. Der Test
ergibt einen Wert, der als OwnIndex bezeichnet wird. Der OwnIndex ist mit der maximalen
Sauerstoffaufnahmekapazität (VO
) vergleichbar, die allgemein verwendet wird, um die aerobe Fitness
2max
zu messen. Weitere Informationen finden Sie unter Polar Fitness Test (Seite 42) .
• Race Pace/Renntempo
Sie können eine Zielzeit für eine bestimmte Distanz festlegen, z. B. planen Sie, 10 Kilometer in 45
Minuten zu laufen. Während der Aufzeichnung einer Trainingseinheit wird dieses Zieltempo bzw. diese
Zielgeschwindigkeit mit den Trainingsinformationen verglichen. Weitere Informationen finden Sie unter
Polar Race Pace/Renntempo (Seite 45).
Übertragung
DEUTSCH
Speichern Sie für eine langfristige Nachverfolgung alle Trainingsdateien auf unserem kostenlosen
Web-Service polarpersonaltrainer.com. Sie können dort Informationen zu Ihren Trainingsdaten abrufen
und sich einen besseren Überblick über die Trainingsergebnisse verschaffen. Mit dem Polar DataLink
Datenübertragungsgerät und der WebSync Software können Trainingsdateien bequem an den Web-Service
übertragen werden. Weitere Informationen finden Sie unter Datenübertragung (Seite 30).
Erste Schritte 11
Page 74

DEUTSCH
4. VORBEREITUNG AUF DAS TRAINING
Planen Sie Ihr Training
Sie können das Polar Standard-Ausdauerprogramm zum Laufen oder Radfahren verwenden oder individuell
auf Sie abgestimmte Trainingseinheiten auf polarpersonaltrainer.com erstellen. Übertragen Sie das
Ausdauerprogramm oder die Trainingseinheiten mit dem DataLink und der WebSync Software auf Ihren
Trainin g s c o m p uter. Weit e r e Information e n finden S i e in d e r Hilfe a u f polarpers o n a l t r ainer.com.
Sportprofile
Auf dem Trainingscomputer befinden sich folgende Sportprofile: Laufen, Rad fahren, Schwimmen und
Andere Sportart. Um die optionalen* Sensoren für jedes Sportprofil einzurichten, gehen Sie zu MENÜ >
Eingaben > Sportprofile.
1. Um das Training zu starten, drücken Sie in der Uhrzeitanzeige die OK-Taste.
2. Wählen Sie das Sportprofil mit der UP-/DOWN-Taste aus und drücken Sie die OK-Taste, um die
Aufzeichnung der Trainingseinheit zu starten.
Wenn Sie die Einstellungen für das Sportprofil ändern möchten, ohne die Aufzeichnung zu stoppen, drücken
Sie einmal die RÜCK-Taste, um in den Vorstartmodus zu wechseln. Halten Sie dann die LICHT-Taste
gedrückt, um das SCHNELL-MENÜ aufzurufen. Weitere Informationen finden Sie unter Schnell-Menü
(Seite 40).
*DieoptionalenSensorenumfassendenPolars3+Laufsensor,PolarG5GPS-Sensor/PolarG3
GPS-Sensor W.I.N.D., Polar CS Geschwindigkeitssensor W.I.N.D. und den Polar CS Trittfrequenzsensor
W.I .N.D.
Neue Sportprofile erstellen
Sie können neue Sportprofile in der WebSync Software erstellen und auf Ihren Trainingscomputer
herunterladen. Weitere Informationen zum Erstellen von neuen Sportprofilen finden Sie in der WebSync
Hilfe.
Polar Ausdauer-Trainingsprogramm
Sie können Polar Ausdauer-Trainingsprogramme zum Laufen und Radfahren auf polarpersonaltrainer.com
erstellen und herunterladen.
Sie erhalten ein individuelles Trainingsprogramm für Ihr persönliches Fitnesslevel. Das Fitnesslevel wird
entweder anhand Ihres bisherigen Trainingsverlaufs in polarpersonaltrainer.com berechnet oder Sie
werden gebeten, einen kurzen Fragebogen auszufüllen, der Ihnen dabei hilft, Ihr aktuelles Fitnesslevel zu
ermitteln.
Das Ausdauer-Trainingsprogramm leitet Sie dabei an, richtig zu trainieren, indem es den Trainingsumfang,
die Trainingsintensität und den Trainingsplan festlegt, damit Sie Ihre Fitness optimal verbessern können.
Jede Trainingseinheit besteht aus Aufwärm-, Intervall- und Abkühlphasen.
Die Trainingsprogramme arbeiten mit der Polar ZoneOptimizer Funktion zusammen, was bedeutet, dass
die Trainingseinheiten des Programms gemäß Ihren persönlichen Sportzonen angepasst werden. Weitere
Informationen finden Sie unter Polar ZoneOptimizer (Seite 51)
.WeitereInformationenzuAusdauerprogrammenfindenSieinderHilfeaufpolarpersonaltrainer.com.
Polar s3+ Laufsensor kalibrieren
Die Kalibrierung des Laufsensors erhöht die Genauigkeit der Geschwindigkeits-, Tempo- und
Distanzmessung. Es wird empfohlen, den Laufsensor zu kalibrieren, wenn Sie ihn das erste Mal benutzen,
12 Vorbereitung auf das Training
Page 75

DEUTSCH
wenn sich Ihr Laufstil wesentlich geändert hat oder wenn die Position des Laufsensors an Ihrem Schuh
grundlegend geändert wurde (wenn Sie z. B. Ihre Laufschuhe gewechselt haben oder wenn Sie mit dem
Sensor vom rechten zum linken Schuh wechseln). Sie können den Laufsensor kalibrieren, indem Sie eine
bekannte Distanz mit einer gleichmäßigen Geschwindigkeit laufen oder den Kalibrierungsfaktor manuell
einstellen. Die Kalibrierung sollte mit Ihrer normalen Laufgeschwindigkeit erfolgen. Wenn Sie mit
verschiedenen Geschwindigkeiten laufen, sollte die Kalibrierung mit Ihrer Durchschnittsgeschwindigkeit
erfolgen.
Die Kalibrierung des s3+ Laufsensors ist sportartspezifisch. Sie können verschiedene
Kalibrierungsfaktoren für verschiedene Laufstile verwenden. Wenn Sie z. B. eine neue Sportart (Jogging)
in der WebSync Software erstellt haben, müssen Sie den Laufsensor für diese Sportart ebenfalls
kalibrieren.
Wenn Sie Laufen als Sportprofil ausgewählt haben und Walking betreiben, brauchen Sie den s3+ Laufsensor nicht
zu kalibrieren.
Kalibrierung durch den Lauf-Assistenten
Bevor Sie den Laufsensor kalibrieren, muss er mit dem Trainingscomputer gekoppelt werden. Weitere
Informationen zum Koppeln des Laufsensors mit dem Trainingscomputer finden Sie unter Verwenden
eines neuen Zubehörs (Seite 47).
Stellen Sie sicher, dass der Laufsensor und der Trainingscomputer eingeschaltet sind. Wählen Sie
Eingaben > Sportprofile > Laufen> Laufsensor > Ein.
Um eine bestimmte Distanz mit einer Schritt-für-Schritt Anleitung zu kalibrieren, wählen Sie
1. Eingaben > Sportprofile > Laufen > Laufsensor Kalibrierung > Durch Laufen.
2. Stellen Sie die Distanz ein, die Sie laufen möchten, um den Laufsensor zu kalibrieren und drücken Sie
die OK-Taste, um die Eingabe zu bestätigen. Still stehen, bis Laufsensor gefunden wird wird angezeigt.
3. OK drücken und ... km laufen wird angezeigt.
4. Drücken Sie die OK-Taste und beginnen Sie mit dem Laufen. Machen Sie den ersten Schritt mit dem
Fuß, an dem sich der Sensor befindet. Dieser Fuß sollte an der Startlinie stehen. Laufen Sie die
eingestellte Distanz in gleichmäßigem Tempo.
5. OK drücken nach ... km wird angezeigt.
6. Stoppen Sie exakt an der Ziellinie für die eingestellte Distanz. Drücken Sie die OK-Taste.
7. Wenn die Kalibrierung erfolgreich war, wird Kalibriert auf x.xxx angezeigt. Der neue Kalibrierungsfaktor
wird verwendet.
8. Wenn die Kalibrierung fehlschlägt, wird Kalibrierung fehlgeschlagen angezeigt. Wenn Sie die
Kalibrierung abbrechen, indem Sie die RÜCK-Taste drücken, wird Kalibrierung abgebrochen angezeigt.
9. Nach der Kalibrierung wird Aufzeichnung fortsetzen? angezeigt. Um die Aufzeichnung fortzusetzen,
wählen Sie JA. Andernfalls wählen Sie NEIN.
Kalibrierungsfaktor manuell einstellen
Der Kalibrierungsfaktor wird als Verhältnis zwischen der tatsächlichen Distanz und der unkalibrierten
Distanz berechnet. Beispiel: Sie laufen 1200 m und der Trainingscomputer zeigt eine Distanz von 1180
man.DerKalibrierungsfaktorist1,000.BerechnenSiedenneuenKalibrierungsfaktorwiefolgt:
1,000*1200/1180 = 1,017. Der Messbereich für den Faktor beträgt 0,500 bis 1,500.
Um den Laufsensor vor dem Training manuell zu kalibrieren, wählen Sie
1. Eingaben > Sportprofile > Laufen> Laufsensor Kalibrierung > Kalibr. Faktor eingeben
2. Stellen Sie den Faktor ein.
Der Kalibrierungsfaktor kann auch während des Trainings eingestellt werden, wenn der Laufsensor
verwendet wird. Halten Sie die LICHT-Taste gedrückt, um das Schnell-Menü aufzurufen. Wählen Sie
Laufsensor kalibrieren > Kalibr. Faktor eingeben.
Vorbereitung auf das Training 13
Page 76

DEUTSCH
*Optionaler s3+ Laufsensor erforderlich.
Sensor durch Laufen einer bekannten Distanz kalibrieren (direkte on-the-fly Kalibrierung)
Sie können den Sensor in einer beliebigen Phase Ihres Trainings mit Rundendistanzkorrektur kalibrieren,
sofern Sie nicht mit distanzbasierten Zielen trainieren. Laufen Sie einfach eine bekannte Distanz,
möglichst mehr als 1000 Meter.
Stellen Sie sicher, dass die Laufsensor-Funktion auf dem Trainingscomputer eingeschaltet ist. Drücken
Sie in der Uhrzeitanzeige die UP-Taste und wählen Sie Eingaben > Sportprofile > Laufen> Laufsensor >
Ein.
1. Drücken Sie in der Uhrzeitanzeige einmal die OK-Taste. Blättern Sie mit der UP- ODER DOWN-Taste
durch die Sportprofile und wählen Sie Laufen aus, indem Sie die OK-Taste drücken. Beginnen Sie zu
laufen.
2. Wenn Sie an einem Startpunkt mit einer bekannten Rundendistanz angelangt sind, drücken Sie die
OK-Taste. Wenn Sie die gesamte Rundendistanz gelaufen sind, drücken Sie die OK-Taste.
3. Kalibrieren Sie dann den Sensor: Halten Sie die LICHT-Taste gedrückt, um das Schnell-Menü
aufzurufen. Wählen Sie Laufsensor kalibrieren.
4. Ersetzen Sie die angezeigte Rundendistanz mit der soeben gelaufenen Distanz, und drücken Sie die
OK-Taste. Kalibriert auf x.xxx wird angezeigt. Der Sensor ist jetzt kalibriert und kann verwendet werden.
Alternativ können Sie den Laufsensor kalibrieren, indem Sie die erfasste Gesamtdistanz korrigieren.
1. Drücken Sie in der Uhrzeitanzeige einmal die OK-Taste. Blättern Sie mit der UP- ODER DOWN-Taste
durch die Sportprofile und wählen Sie Laufen aus, indem Sie die OK-Taste drücken. Beginnen Sie zu
laufen.
2. Halten Sie die LICHT-Taste gedrückt, um das Schnell-Menü aufzurufen. Wählen Sie Laufsensor
kalibrieren.
3. Ersetzen Sie die angezeigte Distanz mit der soeben gelaufenen Distanz, und drücken Sie die OK-Taste.
Kalibriert auf x.xxx wird angezeigt. Der Sensor ist jetzt kalibriert und kann verwendet werden.
Während des Trainings können Sie auch den Kalibrierungsfaktor manuell einstellen.
*Optionaler s3+ Laufsensor erforderlich.
14 Vorbereitung auf das Training
Page 77

5. TRAINING
So tragen Sie den Herzfrequenz-Sensor
Legen Sie den Herzfrequenz-Sensor an, um die Herzfrequenz zu messen.
1. Befeuchten Sie den Elektrodenbereich
des Gurtes.
2. Befestigen Sie die Sendeeinheit am
Gurt.
3. Legen Sie den Gurt unterhalb der
Brustmuskulatur um die Brust und
hängen Sie den Haken am anderen
Ende des Gurtes ein.
4. Stellen Sie die Gurtlänge so ein, dass
der Gurt fest, jedoch nicht zu eng
anliegt. Stellen Sie sicher, dass die
befeuchteten Elektroden flach auf
Ihrer Haut aufliegen und das Polar
Logo der Sendeeinheit mittig und
aufrecht sitzt.
DEUTSCH
Entfernen Sie die Sendeeinheit nach jeder
Verwendung vom Gurt, um die
Lebensdauer der Batterie zu verlängern.
Schweiß und Feuchtigkeit können
bewirken, dass die Elektroden feucht
bleiben und der Herzfrequenz-Sensor
aktiviert bleibt. Dies verkürzt die
Lebensdauer der Batterie.
Ausführlichere Informationen zur Reinigung des Herzfrequenz-Sensors finden Sie im Kapitel Wichtige
Informationen (Seite 58).
Video-Lernprogramme finden Sie unter http://www.polar.com/en/support/ video_tutorials.
Beginnen Sie Ihr Training
Legen Sie den Herzfrequenz-Sensor an und stellen Sie sicher, dass Sie einen optionalen Sensor* wie in
der Gebrauchsanleitung des Sensors beschrieben eingestellt haben. Wenn Sie einen Geschwindigkeits-,
GPS- oder Laufsensor erstmals verwenden, lesen Sie unter Verwenden eines neuen Zubehörs (Seite 47)
nach. Hinweise zu Einstellungen für Sportprofile finden Sie unter Sportprofil-Einstellungen (Seite 31).
Erläuterungen zur Verwendung der Polar ZoneOptimizer Funktion für Ihre Trainingseinheit finden Sie unter
Trainin g m i t dem P o l ar Z o n e O p t i m i zer ( S e i t e 16).
1. Starten Sie Ihre Trainingseinheit, indem Sie in der Uhrzeitanzeige die
OK-Taste drücken
. Der Trainingscomputer wechselt in den Vorstartmodus und beginnt
nach den Sensorsignalen zu suchen (sofern Sie die Sensoren in den
Sportprofileinstellungen eingeschaltet haben).
Wenn kein Sensor-Signal gefunden wird, erscheint in der Anzeige ein
Dreieck mit einem Ausrufungszeichen. Ein Häkchen gibt an, dass das
Sensorsignal gefunden wurde.
Training 15
Page 78
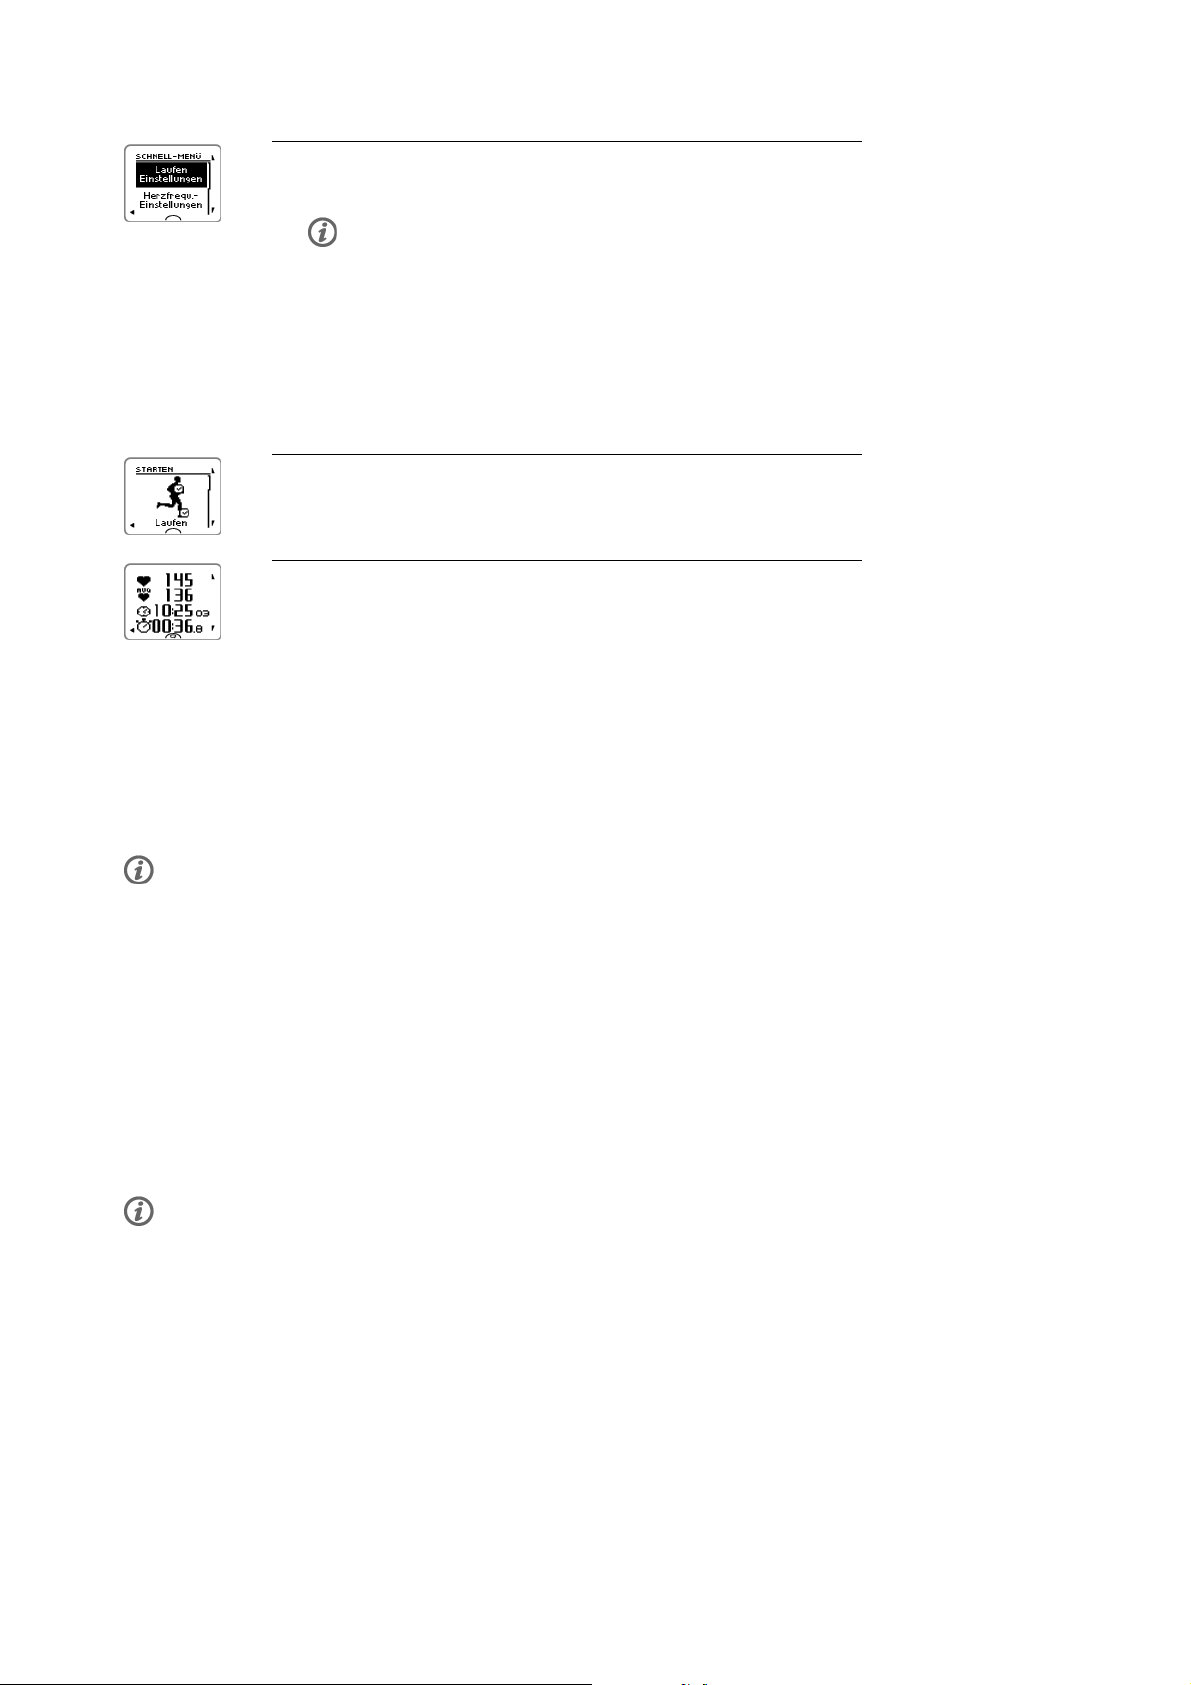
DEUTSCH
2. Wählen Sie Ihre Sportart für die Trainingseinheit mit der UP- oder
DOWN-Taste aus.
Als erstes Sportprofil wird in der Liste die Sportart angezeigt, die Sie
als letztes in einer Trainingseinheit verwendet haben.
Um die Sportprofil- oder Herzfrequenz-Einstellungen zu ändern, bevor
die Aufzeichnung der Trainingseinheit beginnt (im Vorstartmodus),
halten Sie die LICHT-Taste gedrückt, um das SCHNELL-MENÜ
aufzurufen. Weitere Informationen finden Sie unter Schnell-Menü
(Seite 40).
3. Wenn Sie mit der Trainingseinheit beginnen möchten, drücken Sie die
OK-Taste. Aufzeichnung gestartet wird angezeigt, und Sie können
mit dem Training beginnen.
4. Während der Aufzeichnung einer Trainingseinheit können Sie die
Trainingsanzeige mit der UP- ODER DOWN-Taste ändern/wechseln.
Wenn Sie Einstellungen ändern möchten, ohne die Aufzeichnung der
Trainingseinheit zu stoppen, halten Sie die LICHT-Taste gedrückt, um
das SCHNELL-MENÜ aufzurufen. Weitere Informationen finden Sie
unter Schnell-Menü (Seite 40).
*DieoptionalenSensorenumfassendenPolars3+Laufsensor,PolarG5GPS-Sensor/PolarG3
GPS-Sensor W.I.N.D., Polar CS Geschwindigkeitssensor W.I.N.D. und den Polar CS Trittfrequenzsensor
W.I .N.D.
Während des Trainings wird „XX-Sensorbatterie schwach“ angezeigt, wenn einer der Sensoren einen niedrigen Batteriestand aufweist.
Sportart während der Trainingseinheit ändern
Wenn Ihre Trainingseinheit mehrere Sportarten umfasst, können Sie die Sportart ändern, ohne die
Aufzeichnung der Trainingseinheit zu stoppen.
1. Drücken Sie einmal die RÜCK-Taste. Aufzeichnung angehalten wird angezeigt.
2. Ändern Sie die Sportart, indem Sie mit der UP- ODER DOWN-Taste durch die Liste blättern und die
gewünschte Sportart auswählen. Drücken Sie die OK-Taste, um die Aufzeichnung der Trainingseinheit
fortzusetzen.
Es können vier Zeilen mit Trainingsinformationen gleichzeitig angezeigt werden. Drücken Sie die UPODER DOWN-Taste, um die verschiedenen Anzeigen zu betrachten.
Weitere Informationen zur Änderung von Trainingsansichten finden Sie unter Sportprofil-Einstellungen
(Seite 31).
Training mit dem Polar ZoneOptimizer
Die ZoneOptimizer Funktion bestimmt Ihre persönlichen Sportzonen (Herzfrequenzzonen) für Ihre aerobe
Trainin g s e i n h eit. Sie misst w ä h r e n d des A u fwärmens I h r e Herzfreq u e n z - Variabilitä t und besti m m t Ihre
persönlichen Sportzonen. Weitere Informationen finden Sie unter Polar ZoneOptimizer (Seite 51).
Um die ZoneOptimizer Funktion in Ihrem Training zu verwenden, schalten Sie sie ein, indem Sie MENÜ >
Eingaben > HF-Einstellungen > ZoneOptimizer > Ein wählen.
16 Training
Page 79

DEUTSCH
Die ZoneOptimizer Funktion definiert zu Beginn jeder Trainingseinheit die persönlichen
Herzfrequenz-Zielzonen für Sie. Wenn weniger als eine Stunde seit der letzten ZoneOptimizer Definition
vergangen ist, sind die angegebenen Herzfrequenz-Zielzonen möglicherweise nicht anwendbar, da Sie sich
vom vorherigen Training nicht vollständig erholt haben und sich während der Erholung die
Herzfrequenz-Variabilität, auf der der ZoneOptimizer basiert, langsamer normalisiert als die Herzfrequenz.
Trainingseinheit mit dem Polar ZoneOptimizer starten
Stellen Sie vor der Ermittlung der Herzfrequenz-Zonen mit ZoneOptimizer sicher, dass Sie die Polar
Standard-Herzfrequenz-Trainingsbereiche verwenden, d. h. die Herzfrequenz-Trainingsbereiche nicht
manuell geändert haben. Wenn Sie die SportZonen-Herzfrequenzbereiche manuell ändern möchten,
schalten Sie die ZoneOptimizer Funktion aus.
Um die ZoneOptimizer Funktion einzuschalten, wählen Sie MENÜ > Eingaben > HF-Einstellungen >
ZoneOptimizer > Ein.
Die Bestimmung der Herzfrequenz-Bereiche durch den ZoneOptimizer wird im Hintergrund gestartet, auch
wenn Sie sich im Vorstartmodus befinden. Wenn die EKG-Kurve rechts oben auf dem Display angezeigt
wird, wissen Sie, dass die Herzfrequenz-Messung und der ZoneOptimizer eingeschaltet sind.
1. Um die Trainingseinheit mit ZoneOptimizer zu starten, drücken Sie in
der Uhrzeitanzeige die OK-Taste.
Auf der Anzeige erscheint die Sportart, die Sie in der vorherigen
Trainingseinheit verwendet haben und der Countdown-Timer beginnt
im Hintergrund zu laufen, sobald die Herzfrequenz 70 Schläge pro
Minute erreicht hat. Eine EKG-Kurve erscheint oben rechts in der
Anzeige.
Wählen Sie das gewünschte Sportprofil mit der UP- ODER
DOWN-Taste aus und drücken Sie die OK-Taste, um mit dem Training
zu beginnen.
2. Halten Sie Ihre Herzfrequenz zwei Minuten lang zwischen 70 und
100 Schlägen pro Minute.
Bleiben Sie dazu stehen oder trainieren Sie mit sehr geringer
Intensität, indem Sie z. B. gehen oder langsam laufen.
Wenn der erste Teil der Bestimmung abgeschlossen ist, ertönt ein
Signalton.
3. Der zweite Teil der Bestimmung beginnt, wenn Ihre Herzfrequenz
über 100 Schläge pro Minute angestiegen ist.
Fahren Sie mit dem Training mit sehr niedriger Intensität fort.
Erhöhen Sie Ihre Herzfrequenz allmählich, und halten Sie sie zwei
Minuten lang zwischen 100 und 130 Schlägen pro Minute.
Dazu können Sie z. B. während des Aufwärmens zügig laufen oder mit
niedriger Intensität Rad fahren/Joggen.
Wenn Sie eine niedrige maximale HF besitzen, zeigt der Trainingscomputer Ihnen
spezielle Limits an.
Wenn der zweite Teil der ZoneOptimizer Bestimmung abgeschlossen ist, ertönt ein
weiterer Signalton.
Evtl. ist die ZoneOptimizer Bestimmung bereits jetzt abgeschlossen, wenn
das angestrebte Limit für die Herzfrequenz-Variabilität erreicht ist.
Training 17
Page 80

DEUTSCH
4. Der dritte Teil der Bestimmung beginnt, wenn Ihre Herzfrequenz über
130 Schläge pro Minute angestiegen ist.
Erhöhen Sie Ihre Herzfrequenz allmählich über 130 Schläge pro
Minute und halten Sie das Level.
Die ZoneOptimizer Bestimmung ist abgeschlossen, wenn die
Herzfrequenz länger als eine halbe Minute über 130 Schläge pro Minute
bleibt.
Wenn der dritte und letzte Teil der Bestimmung abgeschlossen ist,
ertönt ein Signalton.
5. Nachdem die Bestimmung abgeschlossen ist, zeigt der
Trainingscomputer eine der folgenden Meldungen an:
• Standard-SportZonen (HF-Zonen) in Gebrauch. Die Bestimmung war
nicht erfolgreich. Die Polar Standard-SportZonen (Herzfrequenz-Zonen)
werden verwendet.
• SportZonen optimiert. HF-Zonen auf höherem Level. Die Limits
wurden im Vergleich zu Ihren durchschnittlichen ZoneOptimizer Limits
angehoben.
• SportZonen optimiert. HF-Zonen auf normalem Level. Die Limits
wurden im Vergleich zu Ihren durchschnittlichen ZoneOptimizer Limits
nur etwas angehoben oder abgesenkt.
• SportZonen optimiert. HF-Zonen auf niedrigerem Level. Die Limits
wurden im Vergleich zu Ihren durchschnittlichen ZoneOptimizer Limits
herabgesetzt.
6. Nachdem Sie die Rückmeldungen erhalten und gelesen haben,
drücken Sie eine beliebige Taste außer der LICHT-Taste, um die
Hinweisanzeige zu schließen und Ihre Trainingseinheit fortzusetzen.
Polar Ausdauer-Trainingsprogramm verwenden
Wenn Sie das Polar Ausdauerprogramm von polarpersonaltrainer.com herunterladen, verfügen Sie über ein
komplettes, fertiges Programm, das Sie bei Ihrem Training anleitet.
Um das Programm herunterladen zu können, benötigen Sie ein Benutzerkonto bei
polarpersonaltrainer.com, das DataLink Datenübertragungsgerät und die WebSync Software. Weitere
Informationen finden Sie in der Hilfe auf polarpersonaltrainer.com.
Wenn Sie das Programm auf Ihren Trainingscomputer heruntergeladen haben, rufen Sie MENÜ > PROGRAMM
auf und drücken Sie die OK-Taste. Sie können mit der UP- ODER DOWN-Taste die geplanten
Trainin g s e i n h eiten d u r c h b l ättern u n d die Tr a i n i n gseinheit a u swählen, d i e Sie d u r c hführen m ö c h t en (z. B .
Do. 26.8. Langer Lauf 20 km). Um mit dem Training zu beginnen, drücken Sie die OK-Taste.
Verwendung des RCX5 beim Multisport-Training
Bevor Sie mit einer Multisport-Trainingseinheit beginnen, stellen Sie sicher, dass Sie die
Sportprofil-Einstellungen für jede der Sportarten festgelegt haben, die Sie in der Trainingseinheit
durchführen. Weitere Informationen finden Sie unter Sportprofil-Einstellungen (Seite 31).
Während einer Multisport-Trainingseinheit können Sie die Sportart jederzeit ändern, ohne die
Aufzeichnung der Trainingseinheit zu stoppen. Drücken Sie während der Aufzeichnung einmal die
RÜCK-Taste, und wählen Sie eine andere Sportart aus, indem Sie die Auswahl mit der UP- ODER
DOWN-Taste durchlaufen. Bestätigen Sie Ihre Auswahl mit der OK-Taste. Setzen Sie dann Ihre
Trainin g s e i n h eit fort.
18 Training
Page 81

DEUTSCH
Mit Race Pace/Renntempo trainieren
Um die Race Pace/Renntempofunktion für eine Trainingseinheit einzustellen, gehen Sie zu MENÜ >
Anwendungen > Renntempo > Laufen > Renntempo einstellen xx:xx:xx MIN/KM oder MIN/MI .StellenSie
zuerst die Distanz und dann die Uhrzeit in Stunden, Minuten und Sekunden ein. Renntempo eingestellt
auf xx:xx min/km wird angezeigt.
Wenn Sie mit der Trainingseinheit mit Renntempo beginnen, gehen Sie zu MENÜ > Anwendungen > Laufen
>Renntempo>Einh.imRenntempostarten. Renntempo eingestellt auf xx:xx min/km wird angezeigt. Sie
können jetzt mit Ihrer Trainingseinheit beginnen.
Renntempo während des Trainings
Symbol mit laufendem Sportler:Gibtan,obSieüberoderunterdemZieltempo
liegen. Das Symbol ändert sich entsprechend dem Sportprofil (Laufen, Rad fahren
oder Andere Sportart)
-0:35:Zeitvoraus(-)/zurück(+)
5:05 min/km:ZumErreichendesZielsbenötigtesTempo.
20.9 km:BiszumErreichendesZielsverbleibendeDistanz.
Aktuelle Geschwindigkeit
Aktuelle Herzfrequenz
Tastenfunktionen während des Trainings
Rundenzeit nehmen
Drücken Sie während des Trainings die OK-Taste, um eine Rundenzeit zu nehmen. Auf
dem Trainingscomputer wird Folgendes angezeigt:
Rundenanzahl
Durchschnittliche Herzfrequenz der Runde
Rundenzeit
Wenn ein Geschwindigkeitssensor aktiviert ist, wird außerdem Folgendes angezeigt:
Rundenanzahl
Durchschnittliche(s) Geschwindigkeit/Tempo der Runde
Rundendistanz
Zone sperren
Wenn Sie ohne voreingestellte SportZonen trainieren, können Sie Ihre Herzfrequenz auf die aktuelle
SportZone festlegen (sperren). Auf diese Weise können Sie, wenn Sie vor Beginn des Trainings keine
Zielzonen eingestellt haben, dies unterwegs während einer Trainingseinheit tun.
Um die Zone zu sperren/zu entsperren, halten Sie die OK-Taste gedrückt.
Während einer Trainingseinheit, die Teil eines Polar Endurance Trainingsprogramms ist: Halten Sie die
OK-Taste gedrückt und wählen Sie Zonensperre/Zone freigeben im Rundenmenü.
Wenn Sie z. B. mit einer Herzfrequenz von 130 Schlägen pro Minute laufen, was z. B. 75 % Ihrer
maximalen Herzfrequenz und somit SportZone 3 entspricht, können Sie Ihre Herzfrequenz auf diese Zone
festlegen (sperren), indem Sie die OK-Taste drücken. SportZone 3 gesperrt 70%-79% wird angezeigt.
Wenn Sie sich unter- oder oberhalb der SportZone befinden, ertönt ein Alarm (wenn die
Zielzonenalarm-Funktion aktiviert ist). Um die SportZone zu entsperren, halten Sie die OK-Taste erneut
gedrückt: SportZone 3 freigegeben wird angezeigt.
Anzeige der Trainingsansicht zoomen
Für jede Trainingsansicht können während des Trainings vier Zeilen mit Trainingsinformationen angezeigt
werden. Sie können die Anzeige der Informationen in der obersten oder untersten Zeile zoomen
(vergrößern).
Training 19
Page 82

DEUTSCH
1. Um während des Trainings die Informationen in der obersten Zeile zu zoomen, halten Sie die UP-Taste
gedrückt. Um wieder zur normalen Ansicht zurückzukehren, halten Sie die UP-Taste erneut gedrückt.
Wenn Sie die oberste oder unterste Zeile zoomen, zeigt das Display drei Zeilen mit Informationen an.
2. Um während des Trainings die Informationen in der untersten Zeile zu zoomen, halten Sie die
DOWN-Taste gedrückt. Um wieder zur normalen Ansicht zurückzukehren, halten Sie die DOWN-Taste
erneut gedrückt.
Wenn Sie die oberste und die unterste Zeile zoomen, zeigt das Display zwei Zeilen mit Informationen an.
HeartTouch
Die HeartTouch Funktion ermöglicht es Ihnen, bestimmte Informationen während des Trainings
anzuzeigen ohne eine Taste zu drücken, indem Sie den Trainingscomputer in die Nähe des
Herzfrequenz-Sensors bringen. Sie können zwischen folgenden Anzeigeoptionen/Funktion wählen, um:
• die Displaybeleuchtung zu aktivieren.
• die Trainingsansicht zu ändern.
• Limits anzuzeigen.
• die Uhrzeit anzuzeigen.
• eine Rundenzeit zu nehmen.
Bitte beachten Sie, dass die HeartTouch-Funktion nur mit dem Polar WearLink®+Hybrid/PolarH2
Herzfrequenz-Sensor verwendet werden kann.
Weitere Informationen zu den Einstellungen für die HeartTouch Funktion finden Sie unter
Sportprofil-Einstellungen (Seite 31).
Nacht-Modus
Der RCX5 Trainingscomputer bietet einen Nacht-Modus. Drücken Sie im Vorstartmodus, im
Trainin g s a u f z eichnungsmodus oder im Pausemodus e i nmal die LICHT-Taste. Die Beleuchtung wird jedes
Mal eingeschaltet, wenn Sie eine beliebige Taste drücken oder während der Aufzeichnung des Trainings
die HeartTouch Funktion verwenden.
Die Anzeige wird auch beleuchtet, wenn eine Meldung angezeigt wird, z. B. Herzfrequenz-Sender
überprüfen!.
Der Nacht-Modus wird deaktiviert, wenn Sie die Aufzeichnung des Trainings beenden.
Schnell-Menü anzeigen
Halten Sie die LICHT-Taste gedrückt. SCHNELL-MENÜ wird angezeigt. Sie können bestimmte Einstellungen
ändern, ohne die Aufzeichnung der Trainingseinheit zu unterbrechen. Weitere Informationen finden Sie
unter Schnell-Menü (Seite 40).
Unterbrechen des Trainings
Um die Aufzeichnung der Trainingseinheit zu unterbrechen, drücken Sie die RÜCK-Taste. Aufzeichnung
angehalten wird angezeigt.
Im Pausemodus können Sie:
• Die Aufzeichnung fortsetzen Setzen Sie die Aufzeichnung des Trainings fort, indem Sie die OK-Taste
drücken.
20 Training
Page 83

DEUTSCH
• Stoppen Sie die Aufzeichnung des Trainings, indem Sie die RÜCK-Taste drücken.
Anpassen der Trainingsansichten
Sie können die Trainingsansichten anpassen, um die Informationen anzuzeigen, die Sie während des
Trainin g s sehen m ö c h t en. Sie k önnen d i e Anzeige ü b er den Tr a iningscompute r oder die WebSync Software
anpassen. Polar Endurance Trainingsprogramme, die vom Web-Service polarpersonaltrainer.com
heruntergeladen werden, haben eigene Trainingsansichten, die nicht geändert werden können.
Drücken Sie in der Uhrzeitanzeige die UP-Taste und wählen Sie Eingaben > SPORTPROFILE >Sportart
(Laufen, Rad fahren, Schwimmen, Andere Sportart) > Trainingsans. einstellen .
Sie können die Trainingsansichten auch im Vorstartmodus anpassen, indem Sie die LICHT-Taste gedrückt
halten. Das SCHNELL-MENÜ wird geöffnet. Wählen Sie Laufen Einstellungen (Einstellungen für die aktuelle
Sportart) > Trainingsans. einstellen .
Es gibt sechs verschiedene Trainingsansichten, die Sie für jedes der Sportprofile anpassen können.
• Wählen Sie die zu ändernde Anzeige durch Drücken der UP- oder DOWN-Taste aus und drücken Sie dann
die OK-Taste.
• Wählen Sie für die Trainingsansicht Aus, Ein oder Bearbeiten aus.
• Wählen Sie die Informationen für die blinkende obere Zeile durch Drücken der UP- oder DOWN-Taste aus
und drücken Sie dann die OK-Taste. Welche Informationen verfügbar sind, hängt von den aktivierten
Funktionen ab. Wiederholen Sie den Vorgang für die restlichen Zeilen.
Um die Anzeige auf die Standardeinstellungen zurückzusetzen, halten Sie die LICHT-Taste gedrückt,
während die Zeilen blinken. Weitere Informationen zum Ändern von Trainingsansichten finden Sie unter
Sportprofil-Einstellungen (Seite 31).
Informationen in der Anzeige Symbol Erläuterung
Uhrzeit
Countdown-Timer
Stoppuhr Gesamtdauer der
Uhrzeit
Countdown-Timer
Trainingseinheit b isher
Rundenzeit Die für die Runde
benötigte Zeit
Durchschnittliche Herzfrequenz Durchschnittliche
Herzfrequenz in der
Trainingseinheit b isher
Kalorien
Kalorien/Std. Verbrauchte Kalorien pro
Kalorienverbrauch
Stunde
Herzfrequenz
Aktuelle Herzfrequenz
Training 21
Page 84

DEUTSCH
Informationen in der Anzeige Symbol Erläuterung
Zone Pointer (Polar SportZonen) Zielzonenanzeige mit
einem Herzsymbol, das
sich auf der
SportZonenskala je nach
Höhe Ihrer Herzfrequenz
nach links oder nach
rechts bewegt Weitere
Informationen zur
Einstellung von
SportZonen finden Sie
unter
Sportprofil-Einstellungen
(Seite 31).
Informationen in der Anzeige (Polar s3+
Laufsensor erforderlich)
Schrittfrequenz Schrittfrequenz (Schritte
Symbol Erläuterung
pro Minute)
ØSchrittfrequ. Die durchschnittliche
Schrittfrequenz bisher
(Schritte pro Minute)
Geschwindigkeit Aktuelle(s)
Geschwindigkeit/Tempo
Distanz Bisher zurückgelegte
Distanz
Rundendistanz Rundenanzahl und
Rundendistanz
ØGeschwind. Durchschnittliche(s)
Geschwindigkeit/Tempo
bisher
Max. Geschw. Maximale(s)
Geschwindigkeit/Tempo
bisher
Trip
Tripdistanz
Informationen in der Anzeige (Polar G5
GPS-Sensor/Polar G3 GPS-Sensor W.I.N.D.
erforderlich)
Geschwindigkeit Aktuelle(s)
Symbol Erläuterung
Geschwindigkeit/Tempo.
Die Anzahl von Balken
über dem Buchstaben G
gibt die Stärke des
GPS-Signals an
22 Training
Page 85

DEUTSCH
Informationen in der Anzeige (Polar G5
GPS-Sensor/Polar G3 GPS-Sensor W.I.N.D.
erforderlich)
Distanz Bisher zurückgelegte
Symbol Erläuterung
Distanz
Rundendistanz
ØGeschwind. Durchschnittliche(s)
Rundendistanz
Geschwindigkeit/Tempo
bisher
Max. Geschw. Maximale(s)
Geschwindigkeit/Tempo
bisher
Trip
Informationen in der Anzeige (Polar CS
Geschwindigkeitssensor W.I.N.D. erforderlich)
Geschwindigkeit Aktuelle
Symbol Erläuterung
Tripdistanz
Fahrgeschwindigkeit
Distanz
Rundendistanz* Rundenanzahl und
Gefahrene Distanz
Rundendistanz
ØGeschwind. Durchschnittliche
Geschwindigkeit bisher
Max. Geschw. Maximale
Geschwindigkeit bisher
Informationen in der Anzeige (Polar CS
Tri t tfre quen zsen s or W. I.N. D. erfo r der l ich)
Schrittfrequenz Misst die Anzahl der
Symbol Erläuterung
Kurbelumdrehungen pro
Minute (d. h. die
Trittfrequenz). Di e
Einheit hierfür ist
Umdrehungen pro
Minute (U/min)
ØTrittfrequ. Die durchschnittliche
Trittfrequenz
Erinnerung
Eine Trainingserinnerung erinnert Sie daran, während des Trainings zu trinken, zu essen oder andere
wichtige Dinge zu tun.
Die Erinnerung basiert auf dem Energieverbrauch (kcal), der Strecke (km) oder der Zeit. Der
Erinnerungsalarm ertönt, wenn während des Trainings ein bestimmter Kalorienverbrauch erzielt, eine
Training 23
Page 86

DEUTSCH
bestimmte Strecke zurückgelegt wurde oder eine bestimmte Zeitspanne vergangen ist. Bei einem
Erinnerungsalarm wird der Erinnerungszähler zurückgesetzt. Das bedeutet, dass der Erinnerungsalarm
regelmäßig ausgegeben wird (wenn eine Erinnerung z. B. auf 300 kcal eingestellt ist, ertönt der
Erinnerungsalarm, wenn 300 kcal, 600 kcal, 900 kcal usw. verbraucht sind). Um die Erinnerungsmeldung
auf der Anzeige zu schließen, drücken Sie eine beliebige Taste außer der LICHT-Taste.
Sie können den Erinnerungstext in der WebSync Software erstellen und mit dem DataLink
Datenübertragungsgerät auf Ihren Trainingscomputer herunterladen. Der Text wird angezeigt, wenn der
Erinnerungsalarm ertönt. Die Erinnerung kann nur in der Software eingestellt werden, Sie können sie
jedoch auf dem Trainingscomputer ausschalten.
Unterbrechen oder Beenden des Trainings
1. Um die Aufzeichnung des Trainings zu unterbrechen, drücken Sie einmal die RÜCK-Taste. Um die
Sportart zu ändern, blättern Sie mit der UP- ODER DOWN-Taste durch die Sportprofile und wählen Sie
die gewünschte Sportart. Um die Aufzeichnung des Trainings fortzusetzen, drücken Sie die OK-Taste.
2. Um die Aufzeichnung komplett zu stoppen, drücken Sie zweimal die RÜCK-Taste.
Pflegen Sie Ihren Herzfrequenz-Sensor nach dem Training. Trennen Sie die Sendeeinheit nach dem Training vom
Gurt und waschen Sie den Gurt nach jedem Gebrauch unter fließendem Wasser aus. Ausführliche Informationen zur
Pflege und Wartung finden Sie unter Pflege Ihres Produktes (Seite 58).
24 Training
Page 87

6. NACH DEM TRAINING
Trainingsergebnisse analysieren
Um eine Zusammenfassung Ihrer Trainingsdaten zu erhalten, gehen Sie zu MENÜ > Daten >
Trainingsdateien auf Ihrem Trainingscomputer. Um eine ausführlichere Auswertung vorzunehmen,
übertragen Sie die Daten mit dem DataLink Datenübertragungsgerät und der WebSync Software an
polarpersonaltrainer.com. Der Web-Service bietet verschiedene Optionen für die Datenanalyse.
Trainingsdateien für eine einzelne Sportart
Um Trainingsdateien für verschiedene Sportarten anzuzeigen, gehen Sie zu MENÜ > Daten >
Trainingsdateien und blättern Sie mit der UP- ODER DOWN-Taste, um die Datei auszuwählen, die Sie
anzeigen möchten. Drücken Sie dann die OK-Taste.
Laufen
Startzeit
Dauer
Distanz
Laufen
DEUTSCH
Zieldistanz
Zieltempo
Differenz zur Zielzeit
Sichtbar, wenn die Race Pace/Renntempo Funktion verwendet
wurde
Laufen
Durchschnittliche Herzfrequenz
Maximale Herzfrequenz
Minimale Herzfrequenz
Sichtbar, wenn Herzfrequenz-Daten verfügbar waren.
Laufen
Kalorien
%-ualer Fettanteil der verbrannten Kalorien
Sichtbar, wenn Herzfrequenz-Daten verfügbar waren.
Laufen
Durchschnittliches Tempo
Maximales Tempo
Nach dem Training 25
Page 88

DEUTSCH
Rad fahren
Durchschnittliche Geschwindigkeit
Maximale Geschwindigkeit
Nur sichtbar, wenn Geschwindigkeitsdaten vom GPS-Sensor,
Laufsensor oder Rad-Geschwindigkeitssensor verfügbar waren.
Laufen
Durchschnittliche Schrittfrequenz
Maximale Schrittfrequenz
Nur sichtbar, wenn Daten vom Laufsensor oder
Rad-Trittfrequenzsensor verfügbar waren.
Laufen
Durchschnittliche Schrittlänge
Running Index
Nur sichtbar, wenn Daten vom Laufsensor verfügbar waren. Wenn
die Sportart ein Laufsport ist, sind auch HF-Daten und
Geschwindigkeitsdaten verfügbar.
Wenn der GPS-Sensor verwendet wurde, wird der Running Index
angezeigt, jedoch nicht die Schrittlänge.
Rad fahren
Rad, das in Gebrauch war
Radfahrdauer
Sichtbar bei Trainingsdateien für die Sportart Rad fahren.
Laufen
SportZonen
Zeit, die in jeder Zone verbracht wurde
Sichtbar, wenn Herzfrequenz-Daten verfügbar waren.
Zonenlimits
Sichtbar, wenn die ZoneOptimizer Funktion verwendet wurde und
Herzfrequenz-Daten verfügbar waren.
26 Nach dem Training
Runden
Beste (schnellste) Rundenzeit
Durchschnittliche Rundenzeit
Sichtbar, wenn die Rundenzeitfunktion aktiviert war.
Page 89

DEUTSCH
Automatische Rundenzeitnahme
Beste (schnellste) Rundenzeit
Durchschnittliche Rundenzeit
Sichtbar, wenn die Automatische Rundennahmefunktion aktiviert
war.
Multisport-Trainingsdatei
Um Multisport-Trainingsdateien anzuzeigen, gehen Sie zu MENÜ > Daten > Trainingsdateien und blättern
Sie mit der UP- ODER DOWN-Taste, um die Datei auszuwählen, die Sie anzeigen möchten. Drücken Sie
dann die OK-Taste.
Die MULTISPORT Zusammenfassung bietet Ihnen
allgemeine Informationen zur gesamten
Trainin g s e i n h e i t .
Dauer
Distanz
Drücken Sie die DOWN-Taste, um die einzelnen
Sportdateien der Multisport-Trainingseinheit
anzuzeigen.
Laufen
Dauer
Distanz
Drücken Sie die OK-Taste, um die Details des
Laufanteils der Trainingseinheit anzuzeigen.
Laufen
Startzeit
Dauer
Distanz
Drücken Sie die OK-Taste, um die Details des
Laufanteils der Trainingseinheit anzuzeigen.
Rad fahren
Dauer
Distanz
Drücken Sie die OK-Taste, um die Details des
Radfahranteils der Trainingseinheit anzuzeigen.
Nach dem Training 27
Page 90

DEUTSCH
Schwimmen
Startzeit
Dauer
Drücken Sie die OK-Taste, um die Details des
Schwimmanteils der Trainingseinheit anzuzeigen.
Wochenzusammenfassungen
Um die Wochenzusammenfassung der Trainingsdateien abzurufen, wählen Sie MENÜ > Daten >
Wochenzusammenfass. > ZUSAMMENFASS. Wenn Sie jetzt die OK-Taste drücken, sehen Sie die
Zusammenfassung der aktuellen Woche.
ZUSAMMENFASSUNG
Aktuelle Woche
Die Daten, zu denen die Daten erfasst wurden.
Dauer
Dauer
Distanz
Kalorien
Einheitenanzahl
SportZonen 1, 2, 3, 4 und 5
Zeit, die pro Zone trainiert wurde
Gesamtwerte seit dem xx.xx.xxxx
Um die Gesamtwerte der Trainingsdateien abzurufen, wählen Sie MENÜ > Daten > Gesamtwerte seit dem
und drücken Sie die OK-Taste.
Dauer
Distanz
Kalorien
Einheitenanzahl
SportZonen 1, 2, 3, 4 und 5
Zeit, die pro Zone trainiert wurde
Dateien löschen
Um eine Trainingsdatei zu löschen, wählen Sie MENÜ > DATEN > Dateien löschen > Trainingsdatei und
drücken Sie die OK-Taste. Blättern Sie mit der UP- ODER DOWN-Taste durch die Dateien und wählen Sie
die Datei aus, die Sie löschen möchten. Drücken Sie die OK-Taste. Datei löschen? JA/NEIN wird angezeigt.
Wenn Sie JA auswählen, wird Datei gelöscht angezeigt. Danach wird Datei aus Gesamtwerten löschen?
angezeigt. Wenn Sie JA wählen, wird Datei aus Gesamtwerten gelöscht angezeigt. Wenn Sie NEIN wählen,
kehrt der Trainingscomputer zum Menü „TRAININGSDATEI“ zurück.
Um alle Trainingsdatei zu löschen, wählen Sie MENÜ > DATEN > Dateien löschen > Alle Dateien und
28 Nach dem Training
Page 91

DEUTSCH
drücken Sie die OK-Taste. Alle Dateien löschen? JA/NEIN wird angezeigt. Wählen Sie JA und Alle Dateien
gelöscht wird angezeigt. Wenn Sie NEIN wählen, kehrt der Trainingscomputer zum Menü „Alle Dateien“
zurück.
Wochenzusammenfassungen zurücksetzen
Um Wochenzusammenfassungen zurückzusetzen, wählen Sie MENÜ > DATEN > Wochenzus. zurücksetzen.
Drücken Sie OK. Wochenzusammenfass. zurücksetzen? wird angezeigt. Wenn Sie NEIN wählen, kehrt der
Trainin g s c o m p u t e r zum M e n ü „ D AT E N “ zurück.
Trip zurücksetzen
Um einen Trip zurückzusetzen, wählen Sie MENÜ > DATEN > Reset Trip > Trip zurücksetzen?.WählenSie
JA und Trip zurückgesetzt wird angezeigt. Wenn Sie NEIN wählen, kehrt der Trainingscomputer zum Menü
„DATEN“ zurück.
Gesamtwerte zurücksetzen
Um Gesamtwerte zurückzusetzen, wählen Sie MENÜ > DATEN > Gesamtwerte zurücksetzen > Gesamtwerte
zurücksetzen?.WählenSieJA und Gesamtwerte zurücksetzen wird angezeigt. Wenn Sie NEIN wählen,
kehrt der Trainingscomputer zum Menü „DATEN“ zurück.
Nach dem Training 29
Page 92

DEUTSCH
7. DATENÜBERTRAGUNG
Datenübertragung
Speichern Sie für eine langfristige Nachverfolgung alle Trainingsdateien in unserem kostenlosen
Web-Service polarpersonaltrainer.com. Sie können dort detaillierte Informationen zu Ihren Trainingsdaten
abrufen und sich einen besseren Überblick über die Trainingsergebnisse verschaffen. Mit dem Polar
DataLink Datenübertragungsgerät und der WebSync Software können Sie Trainingsdateien bequem an den
Web-Service polarpersonaltrainer.com übertragen.
Einrichten Ihres PCs für die Datenübertragung
1. Registrieren Sie sich bei polarpersonaltrainer.com.
2. Laden Sie die Polar WebSync Software von polarpersonaltrainer.com auf Ihren Computer herunter und
installieren Sie diese.
3. Schließen Sie das DataLink Datenübertragungsgerät an einen USB-Anschluss Ihres Computers an
aktivieren Sie Ihren Trainingscomputer, indem Sie Menü/Übertragung/ Synchrochnis. starten wählen.
Entfernen Sie vor der Datenübertragung den Gurt des Herzfrequenz-Sensors von Ihrer Brust.
4. Befolgen Sie die Anweisungen der WebSync Software auf dem Bildschirm des Computers für die
Datenübertragung und zum Herunterladen der Daten.
Weitere Informationen zur Datenübertragung finden Sie in der Hilfe auf polarpersonaltrainer.com.
Befolgen Sie für die zukünftige Übertragung von Daten Punkt 3. und 4. in der obigen Anleitung.
Die Synchronisierung kann automatisch ausgeführt werden. Weitere Informationen finden Sie unter
Übertragungseinstellungen (Seite 40).
30 Datenübertragung
Page 93

DEUTSCH
8. EINSTELLUNGEN
Alle Einstellungen können in der WebSync Software bearbeitet und mit dem DataLink
Datenübertragungsgerät auf Ihren Trainingscomputer übertragen werden. Weitere Informationen finden Sie
in der WebSync Hilfe.
Sportprofil-Einstellungen
Auf dem Polar RCX5 Trainingscomputer befinden sich vier verschiedene Sportprofile.
Um Sportprofil-Einstellungen zu bearbeiten, wählen Sie Eingaben > Sportprofile.
Sie können in der WebSync Software neue Sportprofile erstellen sowie die Einstellungen ändern und sie dann mit
dem DataLink Datenübertragungsgerät auf Ihren Trainingscomputer herunterladen. Weitere Informationen finden
Sie in der WebSync Hilfe.
Einstellungen zum Laufen
Um die Sportprofil-Einstellungen zum Laufen anzuzeigen oder zu bearbeiten, wählen Sie Eingaben >
Sportprofile > Laufen
• Trainingstöne> Aus, Leise, Laut oder Sehr laut
• HF-Sender > Ein, Aus oder Neuen suchen
• GPS-Sensor > Ein, Aus oder Neue Suche
• Laufsensor > Ein, Aus oder Neue Suche
• Laufsensor Kalibrierung > Kalibrieren > Durch Laufen oder Kalibr. Faktor eingeben
Die Option zur Kalibrierung des Laufsensors wird nur angezeigt, wenn der Laufsensor zuvor angeschaltet
wurde.
• Geschwind.-Ansicht > Geschwindigk.-ans. auswählen > Kilometer pro Stunde oder Minuten pro
Kilometer oder, wenn Sie imperische Einheiten ausgewählt haben, wählen Sie Meilen pro Stunde oder
Minuten pro Meile
• HeartTouch > Aus, Beleuchtung aktivieren , Trainingsansicht ändern, Limits zeigen, Uhrzeit anzeigen
oder Runde nehmen
• Automatische Rundennahme > Ein oder Aus. Wenn Sie die automatische Rundennahme auf Ein gesetzt
haben, wird Distanz eingeben angezeigt. Stellen Sie die Distanz in Kilometern oder Meilen ein.
• Erinnerung einstellen > Ein oder Aus
Die Erinnerung wird nur angezeigt, wenn diese mit einem PC eine festgelegt wurde. Weitere Informationen zur
Einstellung der Erinnerung finden Sie in der Hilfe auf polarpersonaltrainer.com.
• Trainingsans. einstellen Wählen Sie z. B. Trainingsansicht 1 aus (es gibt sechs verschiedene
Trainingsansichten) und stellen Sie die Trainingsansicht auf Aus, Ein oder Bearbeiten. Jede
Trainingsansicht kann bearbeitet werden, um Ihren Trainingsanforderungen zu entsprechen.
Einstellungen 31
Page 94

DEUTSCH
Trainingsans. einstellen Wählen Sie Trainingsansicht 1
Bearbeiten > OK
Die erste Zeile beginnt zu
blinken. Wählen Sie die
gewünschten Informationen mit
der UP-/DOWN-Taste aus und
drücken Sie zur Bestätigung die
OK-Taste. Wiederholen Sie
diesen Vorgang, bis Sie alle vier
Zeilen nach Ihrem Wunsch
geändert haben.
Wiederholen Sie den Vorgang,
bis alle sechs Trainingsansichten
auf Aus oder Ein gesetzt sind
oder Sie diese bearbeitet haben.
Trainingsans. nummerieren Ansicht nummerieren > Aus oder
Ein
Trainingsans. nummerieren
eingeschaltet/ausgeschaltet
wird angezeigt.
Standardans. wiederherst. Drücken Sie OK >
Standardansichten
wiederherst.? JA/NEIN wird
angezeigt.
Wählen Sie JA oder NEIN mit der
UP-/DOWN-Taste. Wenn Sie JA
auswählen, wird
Standardansichten
wiederhergest. angezeigt.
• Im Vorstartmodus zeigen > Sportart im Vorstartmodus anzeigen? Wählen Sie JA. Sportart im
Vorstartmodus verfügbar wird angezeigt. Die Sportart wird in der Liste der Sportarten im Vorstartmodus
angezeigt, wenn Sie in der Uhrzeitanzeige die OK-Taste drücken. Wählen Sie NEIN. Sport nicht im
Vorstartmodus verfügbar wird angezeigt.
Diese Option hilft Ihnen, den Trainingscomputer effizienter zu nutzen. Sie können z. B. im Sommer
festlegen, dass die Wintersportarten ausgeblendet werden.
Auch wenn Sie an einer Multisport-Veranstaltung teilnehmen, wird empfohlen, nicht benötigte Sportarten
auszublenden, um den Wechsel der Sportart so effizient wie möglich zu gestalten.
Alle neuen Sensoren müssen mit dem Trainingscomputer gekoppelt werden, bevor sie aktiviert werden können.
Weitere Informationen zum Koppeln eines neuen Sensors mit dem Trainingscomputer finden Sie unter
Verwenden eines neuen Zubehörs (Seite 47)
Einstellungen zum Rad fahren
Um die Sportprofil-Einstellungen zum Rad fahren anzuzeigen oder zu bearbeiten, wählen Sie Eingaben >
Sportprofile > Rad fahren (Rad 1)/Rad fahren (Rad 2)
• Trainingstöne > Trainingstöne auswählen > Aus, Leise, Laut oder Sehr laut
• HF-Sender > Ein, Aus oder Neuen suchen
• GPS-Sensor > Ein , Aus oder Neue Suche
• Rad 1 Einstellungen Weitere Informationen finden Sie unter Radeinstellungen.
• Geschwind.-Ansicht> Geschwindigk.-ans. auswählen > Kilometer pro Stunde oder Minuten pro
Kilometer. Wenn Sie imperische Einheiten gewählt haben, wählen Sie Meilen pro Stunde oder Minuten
pro Meile.
• HeartTouch > Aus, Beleuchtung aktivieren , Trainingsansicht ändern, Limits anzeigen, Uhrzeit anzeigen
oder Runde nehmen
• Automatische Rundennahme ist standardmäßig auf AUS gesetzt. Drücken Sie die OK-Taste. Distanz
eingeben wird angezeigt. Geben Sie die Distanz in Kilometern oder in Meilen ein und bestätigen Sie mit
der OK-Taste. Auto. Runde eingestellt auf x.x km wird angezeigt. Danach können Sie durch Drücken der
OK-Taste nochmals festlegen, ob die Automatische Rundennahme ausgeschaltet oder eingeschaltet
werden soll.
• Erinnerung einstellen > Ein oder Aus
32 Einstellungen
Page 95

DEUTSCH
Die Erinnerung wird nur angezeigt, wenn mit einem PC eine festgelegt wurde. Weitere Informationen zur
Einstellung der Erinnerung finden Sie in der Hilfe auf polarpersonaltrainer.com.
• Trainingsans. einstellen. Weitere Informationen zu Trainingsansichten finden Sie unter
Trainin g s a n s i c h t en e i n s t e l l e n .
• Im Vorstartmodus zeigen. Wählen Sie JA. Sportart im Vorstartmodus verfügbar wird angezeigt. Die
Sportart wird in der Liste der Sportarten im Vorstartmodus angezeigt, wenn Sie in der Uhrzeitanzeige die
OK-Taste drücken. Wählen Sie NEIN. Sport nicht im Vorstartmodus verfügbar wird angezeigt.
Diese Option hilft Ihnen, den Trainingscomputer effizienter zu nutzen. Sie können z. B. im Sommer
festlegen, dass die Wintersportarten ausgeblendet werden.
Auch wenn Sie an einer Multisport-Veranstaltung teilnehmen, wird empfohlen, nicht benötigte Sportarten
auszublenden, um den Wechsel der Sportart so effizient wie möglich zu gestalten.
Radeinstellungen
Um Radeinstellungen anzuzeigen oder zu bearbeiten, wählen Sie Eingaben > Sportprofile > Rad fahren >
Rad 1 Einstellungen > RAD 1
• Geschwindigkeitssensor > Aus, Ein oder Neuen suchen
• Reifenumfang > Reifenumfang einstellen auf xxxx mm. Weitere Informationen zum Messen des
Reifenumfangs finden Sie unter Reifenumfang messen.
• Trittfrequenzsensor > Aus, Ein oder Neuen suchen
• Autostart > Autostart einstellen Aus oder Ein. Wenn Sie Ein auswählen, wird Geschwindigk.-sensor für
Rad nötig, Geschwindigkeitssensor aktivieren? JA/NEIN angezeigt. Wählen Sie JA. Autostart
eingeschaltet wird angezeigt. Wenn Sie NEIN wählen, wird Aktivierung abgebrochen angezeigt.
Alle neuen Sensoren müssen mit dem Trainingscomputer gekoppelt werden, bevor sie aktiviert werden können.
Weitere Informationen zum Koppeln eines neuen Sensors mit dem Trainingscomputer finden Sie unter
Verwenden eines neuen Zubehörs (Seite 47).
Reifenumfang messen
Wählen Sie MENÜ > Eingaben > Sportprofile > Rad fahren (Rad 1)/Rad fahren (Rad 2) > Rad 1/2
Einstellungen > Reifenumfang > Reifenumfang einstellen
Die Einstellungen für den Reifenumfang sind für korrekte Informationen zum Rad fahren unbedingt
erforderlich. Es gibt zwei Verfahren, um den Reifenumfang Ihres Fahrrads zu ermitteln:
Methode 1
Suchen Sie nach dem Durchmesser in Zoll oder ETRTO auf dem Reifen. Bestimmen Sie den
Reifenumfang anhand der rechten Spalte in der Tabelle.
ETRTO Reifendurchmesser (Zoll) Reifenumfang (mm)
25-559 26 x 1,0 1884
23-571 650 x 23C 1909
35-559 26 x 1.50 1947
37-622 700 x 35C 1958
47-559 26 x 1.95 2022
20-622 700 x 20C 2051
52-559 26 x 2.0 2054
23-622 700 x 23C 2070
Einstellungen 33
Page 96

DEUTSCH
ETRTO Reifendurchmesser (Zoll) Reifenumfang (mm)
25-622 700 x 25C 2080
28-622 700 x 28 2101
32-622 700 x 32C 2126
42-622 700 x 40C 2189
47-622 700 x 47C 2220
Bei den Reifenumfangswerten in der Tabelle handelt es sich um Durchschnittswerte, weil der tatsächliche Umfang
von der Art des Reifens und dem Luftdruck abhängt.
Methode 2
Das genaueste Ergebnis erzielen Sie, wenn Sie den Reifenumfang manuell messen.
Markieren Sie mithilfe des Ventils den Punkt, an dem der Reifen den Boden berührt. Ziehen Sie eine Linie
auf dem Boden, um diesen Punkt festzulegen. Bewegen Sie Ihr Rad auf der flachen Oberfläche um eine
komplette Umdrehung vorwärts. Der Reifen sollte lotrecht zum Boden stehen. Ziehen Sie eine weitere
Linie auf dem Boden, um eine volle Umdrehung zu markieren. Messen Sie den Abstand zwischen den
beiden Linien.
Ziehen Sie 4 mm ab, damit das Gewicht Ihres Körpers auf dem Rad bei der Bestimmung des
Reifenumfangs berücksichtigt wird. Geben Sie diesen Wert in den Trainingscomputer ein.
Einstellungen zum Schwimmen
Um die Sportprofil-Einstellungen zum Schwimmen anzuzeigen oder zu bearbeiten, wählen Sie Eingaben >
Sportprofile > Schwimmen
• Trainingstöne > Trainingstöne auswählen > Aus, Leise, Laut oder Sehr laut
• HF-Sender > Ein, Aus oder Neuen suchen
• HeartTouch > Aus, Beleuchtung aktivieren , Trainingsansicht ändern, Limits anzeigen, Uhrzeit anzeigen
oder Runde nehmen
• Erinnerung einstellen > Ein oder Aus
Die Erinnerung wird nur angezeigt, wenn mit einem PC eine festgelegt wurde. Weitere Informationen zur
Einstellung der Erinnerung finden Sie in der Hilfe auf polarpersonaltrainer.com.
• Trainingsans. einstellen Weitere Informationen finden Sie unter Trainingsans i c h t e n einstell e n .
• Im Vorstartmodus zeigen? Wählen Sie JA. Sportart im Vorstartmodus verfügbar wird angezeigt. Die
Sportart wird in der Liste der Sportarten im Vorstartmodus angezeigt, wenn Sie in der Uhrzeitanzeige die
OK-Taste drücken. Wählen Sie NEIN. Sport nicht im Vorstartmodus verfügbar wird angezeigt.
Diese Option hilft Ihnen, den Trainingscomputer effizienter zu nutzen. Sie können z. B. im Sommer
festlegen, dass die Wintersportarten ausgeblendet werden.
Auch wenn Sie an einer Multisport-Veranstaltung teilnehmen, wird empfohlen, nicht benötigte Sportarten
auszublenden, um den Wechsel der Sportart so effizient wie möglich zu gestalten.
Alle neuen Sensoren müssen mit dem Trainingscomputer gekoppelt werden, bevor sie aktiviert werden können.
Weitere Informationen zum Koppeln eines neuen Sensors mit dem Trainingscomputer finden Sie unter
Verwenden eines neuen Zubehörs (Seite 47)
Einstellungen für andere Sportarten
Um die Sportprofil-Einstellungen für andere Sportarten anzuzeigen oder zu bearbeiten, wählen Sie
34 Einstellungen
Page 97

DEUTSCH
Eingaben > Sportprofile > Andere Sportart
• Trainingstöne > Aus, Leise, Laut oder Sehr laut
• HF-Sender > Ein, Aus oder Neuen suchen
• GPS-Sensor Ein , Aus oder Neue Suche
• Geschwind.-Ansicht Wählen Sie Kilometer pro Stunde oder Minuten pro Kilometer oder, wenn Sie
imperische Einheiten gewählt haben, wählen Sie Meilen pro Stunde oder Minuten pro Meile
• HeartTouch > Aus, Beleuchtung aktivieren , Trainingsansicht ändern, Limits anzeigen, Uhrzeit anzeigen
oder Runde nehmen
• Automatische Rundennahme Ein oder Aus. Wenn Sie die Automatische Rundennahme auf Ein gesetzt
haben, wird Distanz eingeben angezeigt. Stellen Sie die Distanz in Kilometern oder Meilen ein.
• Erinnerung einstellen > Ein oder Aus
Die Erinnerung wird nur angezeigt, wenn mit einem PC eine festgelegt wurde. Weitere Informationen zur
Einstellung der Erinnerung finden Sie in der Hilfe auf polarpersonaltrainer.com.
• Trainingsans. einstellen Weitere Informationen finden Sie unter Trainingsans i c h t e n einstell e n
• Im Vorstartmodus zeigen? Wählen Sie JA. Sportart im Vorstartmodus verfügbar wird angezeigt. Die
Sportart wird in der Liste der Sportarten im Vorstartmodus angezeigt, wenn Sie in der Uhrzeitanzeige die
OK-Taste drücken. Wählen Sie NEIN. Sport nicht im Vorstartmodus verfügbar wird angezeigt.
Diese Option hilft Ihnen, den Trainingscomputer effizienter zu nutzen. Sie können z. B. im Sommer
festlegen, dass die Wintersportarten ausgeblendet werden.
Auch wenn Sie an einer Multisport-Veranstaltung teilnehmen, wird empfohlen, nicht benötigte Sportarten
auszublenden, um den Wechsel der Sportart so effizient wie möglich zu gestalten.
Alle neuen Sensoren müssen mit dem Trainingscomputer gekoppelt werden, bevor sie aktiviert werden können.
Weitere Informationen zum Koppeln eines neuen Sensors mit dem Trainingscomputer finden Sie unter
(Seite 47).
Herzfrequenz-Einstellungen
Um Herzfrequenz-Einstellungen anzuzeigen und zu bearbeiten, wählen Sie MENÜ > Eingaben >
HF-Einstellungen >>HF-EINSTELLUNG.
Auf der Anzeige erscheint
Folgendes:
ZoneOptimizer ZoneOptimizer einstellen Aus
HF-Ansicht HF-Ansicht auswählen Schläge
Herzfrequenz Zonensperre Wählen Sie Herzfrequenz
Blättern Sie mit der UP- ODER
DOWN-Taste durch die Auswahl
und wählen Sie den Wert aus,
den Sie ändern möchten.
oder Ein
pro Minute ((SCHLÄGE/MIN.)
oder Prozent von HFmax (% DER
HFMAX)
Zonensperre AUS oder sperren
Sie eine der Zonen separat und
wählen Sie Zone 1, Zone 2, Zone
3, Zone 4 oder Zone 5 aus.
Drücken Sie dann die OK-Taste.
Zone X gesperrt wird angezeigt.
Um den Wert zu bestätigen,
drücken Sie die OK-Taste.
Mit OK-Taste bestätigen
Mit OK-Taste bestätigen
Mit OK-Taste bestätigen
Einstellungen 35
Page 98
DEUTSCH
Zone 1, 2, 3, 4 und 5 HF-Limits Stellen Sie die HF-Limits für
Mit OK-Taste bestätigen
Zone 1, 2, 3, 4 und 5 ein:
Unteres Limit eingeben und den
Wert mit der OK-Taste
akzeptieren. Oberes Limit
eingeben
Bevor Sie die Zonenlimits ändern, müssen Sie die ZoneOptimizer Funktion deaktivieren. ZoneOptimizer
erf o rdert Wi e derher st. der Sta ndar d -Spo rtZo nen wird angezeigt. ZoneOptimizer ausschalten? JA/NEIN?
Wählen Sie JA. ZoneOptimizer ausgeschaltet wird angezeigt. Sie können mit der Bearbeitung der
Zonenlimits beginnen.
Wenn auf dem Trainingscomputer ein aktives Ausdauerprogramm vorhanden ist, müssen Sie das Programm auf
polarpersonaltrainer.com entfernen und die Synchronisierung ausführen, bevor Sie die Zonenlimits ändern können.
Weitere Informationen finden Sie in der Hilfe auf polarpersonaltrainer.com.
Einstellungen für die Benutzerdaten
Geben Sie Ihre Benutzerdaten für den Trainingscomputer sorgfältig ein, um korrekte Leistungswerte zu
erhalten.
Um die Benutzerdaten anzuzeigen und zu bearbeiten, wählen Sie MENÜ > Eingaben > Benutzerdaten >
BENUTZERDATEN.BlätternSiemitderUP- ODER DOWN-Taste durch die Auswahl und akzeptieren Sie den
Wert mit OK.
Auf der Anzeige erscheint
Folgendes:
Gewicht Geben Sie Ihr Gewicht in KG
Größe Geben Sie Ihre Größe in
Geburtsdatum Geben Sie Ihr Geburtsdatum ein.
Blättern Sie mit der UP- ODER
DOWN-Taste durch die Auswahl
und wählen Sie den Wert aus,
den Sie ändern möchten.
oder Pfund (lb) ein.
Zentimeter (cm) oder in Fuß und
Zoll ein (wenn Sie imperische
Einheiten gewählt haben).
Um den Wert zu bestätigen,
drücken Sie die OK-Taste.
OK
OK
OK
Die Reihenfolge, in der Sie die
Datumseinstellungen eingeben
müssen, hängt davon ab,
welchen Modus Sie gewählt
haben (24 h: Tag - Monat - Jahr
/12h:Monat-Tag-Jahr).
Geschlecht Wählen Sie Männlich oder
Weiblich aus.
OK
36 Einstellungen
Page 99

DEUTSCH
Auf der Anzeige erscheint
Folgendes:
Blättern Sie mit der UP- ODER
DOWN-Taste durch die Auswahl
und wählen Sie den Wert aus,
den Sie ändern möchten.
Aktivitätsniveau Geben Sie Niedrig (0-1 Std./W.),
Mittel (1-3 Std./W.) , Hoch (3-5
Std./W.) oder Top (5+
Std./Woche) ein.
Beim Aktivitätsniveau handelt es
sich um Ihr langfristiges
physisches Aktivitätsniveau.
Wählen Sie das Niveau, das
Umfang und Intensität Ihrer
physischen Aktivitäten während
der letzten drei Monate am
besten beschreibt.
• Top (5+ Std./W.): Sie
trainieren regelmäßig,
mindestens 5-mal wöchentlich
bei intensiver körperlicher
Bewegung. Sie trainieren z.
B., um Ihre Leistung für
Wettkämpfe zu steigern.
• Hoch (3-5 Std./W.): Sie
trainieren mindestens 3-mal
wöchentlich bei intensiver
körperlicher Belastung. Sie
laufen z. B. 20-50 km pro
Woche oder verbringen 3-5
Stunden wöchentlich mit einer
vergleichbaren sportlichen
Aktivität.
• Mittel (1-3 Std./W.) : Sie
betreiben regelmäßig
Freizeitsport. Sie laufen z. B.
5-10 km pro Woche oder
verbringen 1-3 Stunden
wöchentlich mit einer
vergleichbaren körperlichen
Aktivität, oder Ihre Arbeit
erfordert eine mäßige
körperliche Bewegung.
• Niedrig (0-1 Std./W.): Sie
betreiben nicht regelmäßig
Freizeitsport und sind
körperlich nicht sehr aktiv. Sie
gehen z. B. nur zum
Vergnügen spazieren oder
trainieren nur gelegentlich
intensiv genug, um zu
schwitzen. Anhand dieser
Werte ermittelt der
Trainingscomputer Ihren
Kalorienverbrauch.
Um den Wert zu bestätigen,
drücken Sie die OK-Taste.
OK
Einstellungen 37
Page 100

DEUTSCH
Auf der Anzeige erscheint
Folgendes:
Blättern Sie mit der UP- ODER
DOWN-Taste durch die Auswahl
Um den Wert zu bestätigen,
drücken Sie die OK-Taste.
und wählen Sie den Wert aus,
den Sie ändern möchten.
Maximale Herzfrequenz Geben Sie Ihre maximale
OK
Herzfrequenz ein, wenn Sie
Ihren Labormesswert für die
maximale Herzfrequenz kennen.
Ihre altersabhängig
vorhergesagte maximale
Herzfrequenz (220 minus Alter)
wird als Standardeinstellung
angezeigt, wenn Sie diesen Wert
erstmals eingeben.
Weitere Informationen finden Sie
unter „Maximale Herzfrequenz
(HF
)“.
max
OwnIndex (VO
) Geben Sie Ihren OwnIndex
2max
OK
(VO2max Wert) ein.
Weitere Informationen finden Sie
unter „OwnIndex“.
Maximale Herzfrequenz (HF
Die HF
Herzfrequenz in Schlägen pro Minute während einer maximalen physischen Belastung. Die HF
wird zur Bestimmung des Kalorienverbrauchs verwendet. Die HF
max
max
)
ist die höchste erreichte
max
max
ist auch
zur Bestimmung der Trainingsintensität nützlich. Die genaueste Methode zur Messung der individuellen
HF
besteht aus einem maximalen Belastungstest in einem Labor.
max
OwnIndex
®
Der Polar OwnIndex, das Ergebnis des Polar Fitness Test mit OwnIndex, sagt Ihre maximale
Sauerstoffaufnahmekapazität (VO
ist mit dem VO
Wert vergleichbar, dem Standard zur Bestimmung der aeroben Fitness. Der OwnIndex
2max
)voraus.DerOwnIndexliegtinderRegelzwischen20und95und
2max
wird durch das Langzeitniveau Ihrer physischen Aktivität, Ihre Herzfrequenz und Herzfrequenz-Variabilität
in Ruhe, Ihr Geschlecht, Alter, Größe und Ihr Körpergewicht beeinflusst. Je höher der OwnIndex Wert,
desto besser ist Ihre aerobe Fitness.
Allgemeine Einstellungen
• Töne : Wählen Sie Ein oder Aus
• Tastensperre: Wählen Sie Manuelle Sperre oder Automatische Sperre
Um Tasten manuell zu sperren, drücken und halten Sie die LICHT-Taste in der Uhrzeitanzeige gedrückt,
um das SCHNELL-MENÜ aufzurufen. Wählen Sie Tastensperre und drücken Sie die OK-Taste. Um die Tasten
zu entsperren, halten Sie die LICHT-Taste erneut gedrückt.
Die automatische Tastensperre wird aktiviert, wenn Sie eine Minute lang keine Taste drücken.
• Maßeinheiten: Wählen Sie Metrische Einheiten (kg, m) oder Imperische Einheiten (lbs, ft)
• Speicherintervall : Wählen Sie 1Sekunde,2Sekunden,5Sekunden,15Sekundenoder 1Minute.
Der Trainingscomputer kann Ihre Herzfrequenz, Laufgeschwindigkeit/Tempo, Fahrgeschwindigkeit und die
Distanz in Intervallen von 1, 2, 5, 15 oder 60 Sekunden speichern. Ein längeres Zeitintervall bietet mehr
Speicherzeit. Im Gegensatz dazu bieten kürzere Intervalle die Möglichkeit, mehr Herzfrequenz- und andere
Daten zu speichern. Dies ermöglicht eine präzise Datenanalyse auf polarpersonaltrainer.com.
Durch ein kürzeres Speicherintervall verbraucht der Trainingscomputer mehr Speicherplatz. Das
Standard-Speicherintervall ist 5 Sekunden.
Die folgende Tabelle zeigt die maximalen Speicherzeiten für jedes Speicherintervall. Beachten Sie, dass
38 Einstellungen
 Loading...