

Page 1
DEFENDER XC INSTALLATION
Thank you for purchasing Poison Spyder
DeFender™ XC’s for your Jeep. Installation
is fairly simple with the right tools and good
mechanical abilities. However, some subsequent
procedures such as re-mounting under-hood
components, installing and wiring replacement
turn signals, etc., are outside the purview of
these instructions. If you are not condent in your
mechanical skills or that you will be able to gure
out and execute solutions to these problems on
your own, please seek the help of a professional
to perform the installation. Please read through
these entire instructions before proceeding with
installation.
IMPORTANT: Completely install and remove the
DeFenders™ XC’s prior to painting or powder
coating it. This will allow you to check for tment
or do any clearancing or tting ahead of time, to
reduce the chance of damage to the nish during
nal installation. Poison Spyder Customs Inc. is
not responsible for costs for or damage to paint
or powder coat nish under any circumstances,
including paint or powder coat of incorrectly
shipped or defective parts.
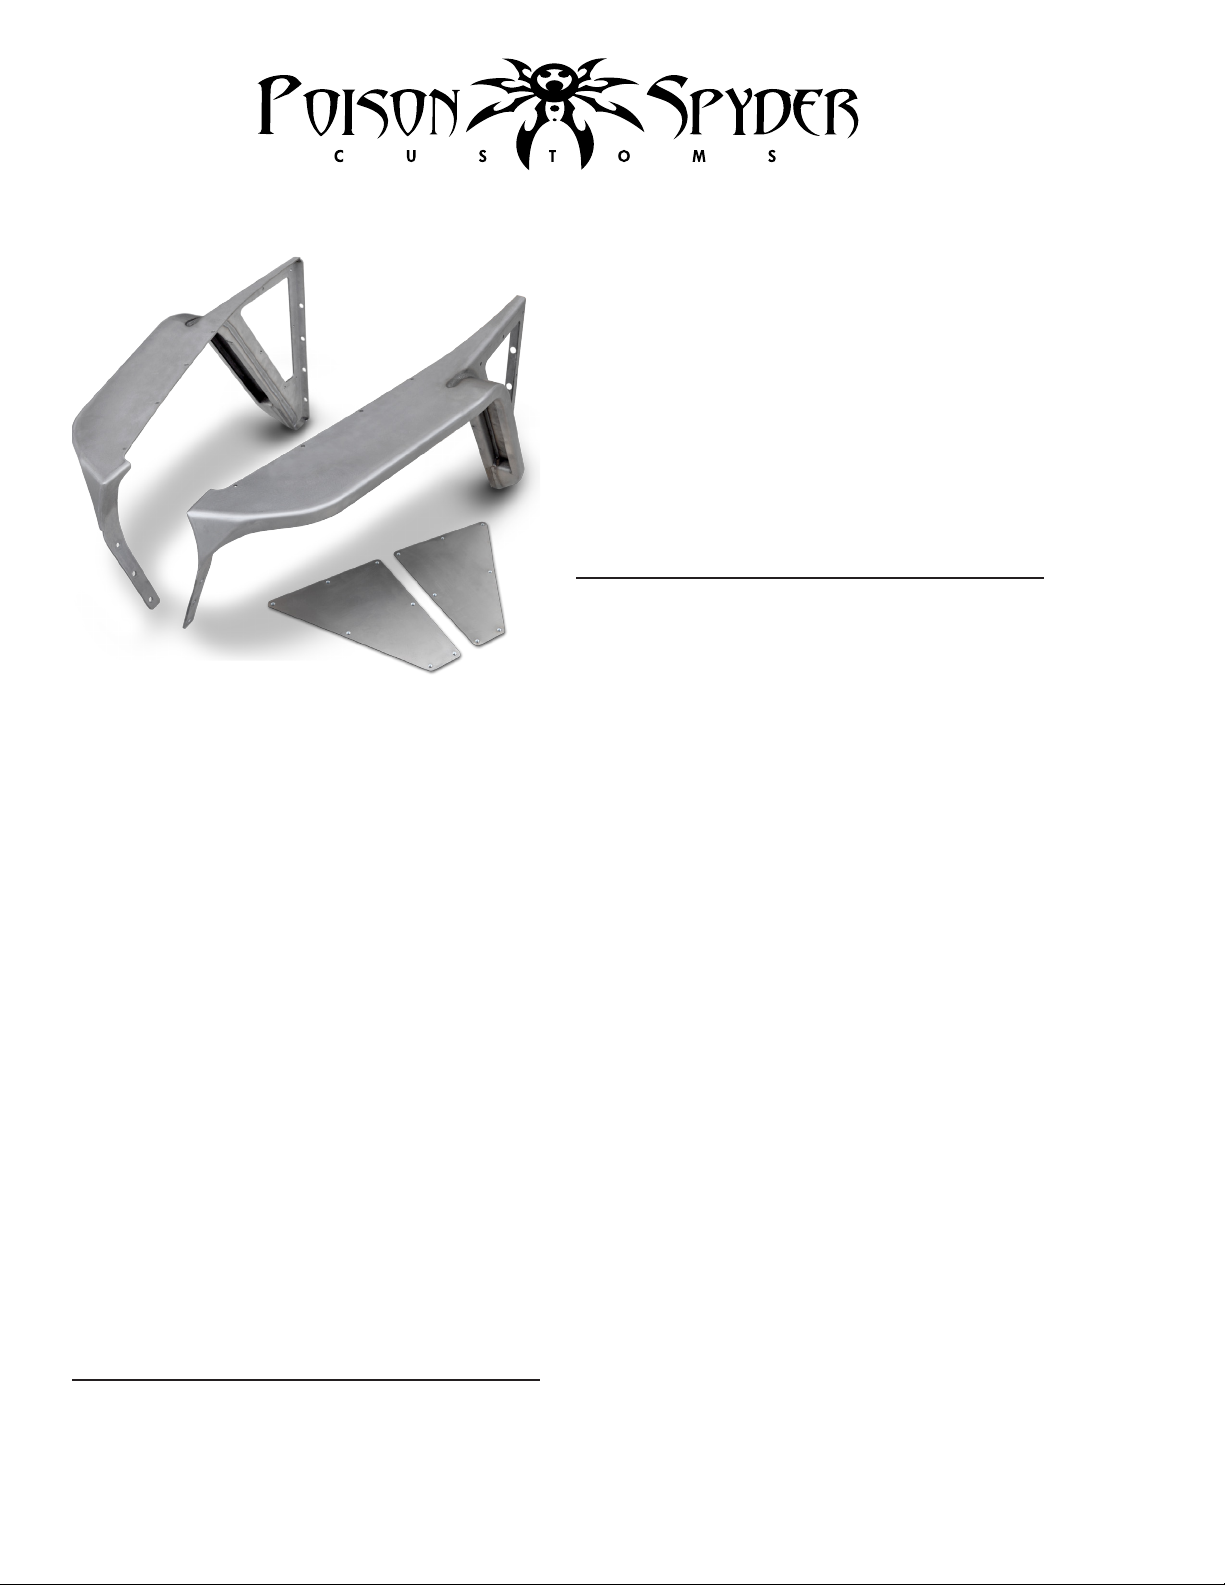
PARTS LIST
Please check your packages immediately upon
arrival to ensure that everything listed is included,
and to check for damage during shipping. If
anything is missing or damaged, call Poison
Spyder at (951) 849-5911 as soon as possible.
(1) Driver side DeFender™ XC
(1) Passenger side DeFender™ XC
(1) Driver side DeFender™ XC Side Insert
(1) Passenger side DeFender™ XC Side
Insert
(1) Battery Tray Bracket (TJ/LJ Only)
(14) 5/16-18 X 3/4 SS button head cap screw
INSTALLATION PROCEDURE
1. Park vehicle on a level surface and set
the emergency brake. Wear eye protection
beyond this point.
2. Remove the hood by unbolting it at the
hinges, and set it aside.
3. Remove the stock fender assemblies,
which includes the inner and outer fenders.
They are bolted to both the rewall and the
grille (retain the OE hardware as it will be reused with the DeFender™ XC’s). You will
need to detach any components that are
attached to the fenders, such as wiring for
the turn signals, air intake lter housing, etc.
4. (TJ/LJ ONLY) Disconnect and remove
battery, battery tray, and battery tray bracket.
Retain the OE hardware.
5. Loosen the front center body mount,
located directly under the grill.
6. Position the DeFender™ XC’s in place.
Loosely install the OE hardware at the
rewall and the grille. Check for proper
position/alignment, then tighten all mounting
hardware. Check and adjust alignment as
you tighten the hardware. Re-tighten the
front-center body mount.
7. (TJ/LJ ONLY) Install the provided Battery
Tray Bracket in the same position as the
removed OE bracket, using the OE hardware.
Reinstall the battery tray and battery, reconnect the battery.
8. Install the Side Inserts using the provided
5/16-18 X 3/4 SS button head cap screws.
©2011 POISON SPYDER CUSTOMS, INC. • 951-849-5911 • WWW.POISONSPYDER.COM
INSTALLATION INSTRUCTIONS
Page 2

Poison Spyder Customs • TJ/LJ-YJ-CJ DEFENDERS INSTALLATION Page 2
Note that the Side Inserts come with preinstalled nuts. The insert is designed to
be placed on the inside surface of the
DeFender™ XC, with the pre-installed nuts
facing toward the center of the Jeep.
HELPFUL TIPS & NOTES
IMPORTANT: This is an ADVANCED level
installation. While bolting in the DeFender™
XC’s is fairly simple, some of the subsequent
procedures needed to make things work may
be complicated and require the installer to gure
out how best to handle each item. Following are
some notes regarding a few of these issues:
• You will need to either modify your stock hood
or purchase an aftermarket “highline” hood to
work with the DeFender™ XC’s. If choosing
to modify the stock hood, it will need to be
trimmed by 3” along the bottom edge, on
each side. Take careful measurements and
take care with your cutting to ensure the best
results. A pneumatic body saw or high speed
cut-off wheel works well for this. You will
also need to determine how you want to hold
the hood down. To re-use the stock hood
latches, you will need to drill the appropriate
holes in both the hood and the DeFenders.
Alternatively you may use hood pins. Details
and procedures for either method are left to
the installer.
• DeFender™ XC Inner Fenders are sold
separately. If desired, it may be possible
to re-use your stock inner fenders. We can
not provide a detailed procedure for this as
it will require some patience, measuring and
cutting. One hint we can give is that you will
need to leave a strip at least 1” wide along the
outside of the fender, outside of the lip under
the hood. This will allow you to attach the
inner fender using the existing holes in the
DeFender™ XC. Hardware is not provided
for this (it is provided in the DeFender™ XC
hardware kit).
• You will need to gure out strategies for
mounting any under-hood components
that were previously mounted to the OE
inner fender. In some of these cases it will
be as simple as drilling a new hole in the
DeFender™ XC Inner Fenders and using
the OE bracket and hardware. Other items
may require more creativity or fabricating a
bracket.
• Re-using the stock air intake box may be a
challenge. Until we develop a more suitable
solution, we recommend using a conical K&N
style intake lter, which is more compact and
easier to mount under the hood.
• DeFender™ XC’s are intended for off-
highway use. If you are going to be using
them on public roads, you may need to reinstall turn signals, marker lights, etc., in
order to be legal in your area. We leave this
issue up to the discretion of each installer. If
desired, it is possible to install a small 3/4”
round LED lamp in the front corner of the
DeFender™ XC near where it attaches to
the grille. Our standard DeFenders™ come
with a hole in this location to accept the small
LED lamp, however we leave the space
blank on the XC’s so that installers may
choose whether to run the lamp. To install
the LED lamp, simply drill a 3/4” hole in that
location. The 3/4” LED lamps are available
from Poison Spyder, part number 41-02-075.
©2011 POISON SPYDER CUSTOMS, INC. • 951-849-5911 • WWW.POISONSPYDER.COM
INSTALLATION INSTRUCTIONS
Page 3

Poison Spyder Customs • TJ/LJ-YJ-CJ DEFENDERS INSTALLATION Page 3
WARRANTY
Poison Spyder Customs™ warranties all of the
products we sell and distribute for one (1) year
from the date of sale. These products will be
free from defects in material and workmanship
under normal installation, and use. Due to the
intended use the powder coat nish is warranted
for ninety (90) days. The nish warranty will not
cover a product if it has been damaged in any
way. Warranty is limited to repair or replacement.
Poison Spyder Customs™ does not offer any
type of labor or shipping allowance and all
warranty claims are subject to inspection by
Poison Spyder Customs™.
At the discretion of Poison Spyder Customs™,
the products in question can be repaired or
replaced when found defective. Prior to any
replacement or repair, written authorization must
be obtained from Poison Spyder Customs™.
Failure to contact us prior to having warranty work
preformed will immediately void all applicable
warranties; and it is then the sole responsibility
of the customer to remit any payment incurred.
The warranty expressed above is the sole
warranty of Poison Spyder Customs™, and
any other expressed or implied warranties are
hereby specically excluded and disclaimed.
HOLD HARMLESS AGREEMENT
1. In purchasing a Poison Spyder Customs
Product™ I release, waive, discharge and
covenant not to sue Poison Spyder Customs
ofcers, servants, agents, or employees
(hereinafter referred to as Releasees) from
any and all liability, claims, demands, actions
and causes of action whatsoever arising out
of or related to any loss, damage, or injury,
including death, that may be sustained by
me (or anyone else), any property belonging
to me (or anyone else), whether caused by
the negligence of the releasees or otherwise,
while working on, using or any activity related
to this product.
2. I am fully aware of risks and hazards connected
with the use of a this product and I elect to
voluntarily engage in such use of this product
knowing that the use may be hazardous to
me and my property. I voluntarily assume full
responsibility for any risks of loss, property
damage or personal injury, including death,
that may be sustained by me (or anyone
else), or any loss or damage to property
owned by me (or anyone else), as a result
of using this product, whether caused by the
negligence of releasees or otherwise.
3. I further agree to indemnify and hold harmless
the releasees from any loss, liability, damage
or costs, including court cost and attorney
fees, that they may incur due to my use of a
this product, whether caused by negligence
of releasees or otherwise.
4. It is my express intent that this Release and
Hold Harmless Agreement shall bind the
members of my family and spouse, if I am
alive, and my heirs assigns and personal
representative, if I am deceased, and shall
be deemed as a release, waiver, discharge,
and covenant not to sue the above named
releasees. I further agree that this Waiver of
Liability and Hold Harmless Agreement shall
be construed in accordance with the laws of
the State of California.
By accepting this product, I acknowledge and
represent that I have read the above Waiver
and Liability and Hold Harmless Agreement,
understand it and accept it voluntarily as my
own free act and deed; no oral presentations,
statements, or inducements, apart from the
foregoing written agreement, have been made;
I am at least eighteen (18) years of age and
fully competent; and I execute this Release for
full, adequate and complete consideration fully
intending to be bound by same.
If you do not agree with the preceding Hold
Harmless Agreement, you may return the product
and receive a full refund. Please, contact a
Poison Spyder Customs™ sales representative
and they will issue a call tag for the product in
question. Once the product has been received
by Poison Spyder Customs™ a full refund will
be issued.
©2011 POISON SPYDER CUSTOMS, INC. • 951-849-5911 • WWW.POISONSPYDER.COM
INSTALLATION INSTRUCTIONS
 Loading...