

PoGo Products Recordable MP3 Player User Manual
User Manual
Congratulations on the purchase of your new RipFlash™ Recordable MP3
Player from PoGo! Products, Inc. The RipFlash™ gives you incredible
versatility in a sleek, compact design! Now, you can download MP3 files
(via the PC USB interface) as well as create MP3 files without a computer.
And, since The RipFlash™ is a recordable device you’ll never have an
excuse not to record those quick voice reminders, or even lengthy business
meetings or lectures. Downloading, listening and recording have never
been easier!
What does MP3 stand for?
MP3 is an abbreviated form of MPEG1 Layer3, which is an industry standard for digital
data compression technology used for coding audio-visual information. An MP3 file is an
audio file made by using the audio data compression technology.
What is the RipFlash Recordable MP3?
The RipFlash Recordable MP3 Player is equipped with an MP3 “encoder” that can
directly record audio contents from the line-in jack. The RipFlash Recordable MP3
Player can be connected to other audio devices such as a portable CD player, enabling
the direct transfer of selected song titles, which are then stored on the player.
Since RipFlash is a Recordable MP3 Player and because it has an internal microphone
and speaker, it also functions as a very high quality voice recorder. Use RipFlash to
record those quick voice reminder memos, or even lengthy business meetings or lectures.
The RipFlash Recordable MP3 Player also works like any traditional MP3 player for
listening to your existing MP3 files or files that you download from the Internet. Just
use the supplied USB cable and software to move MP3 files from your computer to
your RipFlash.
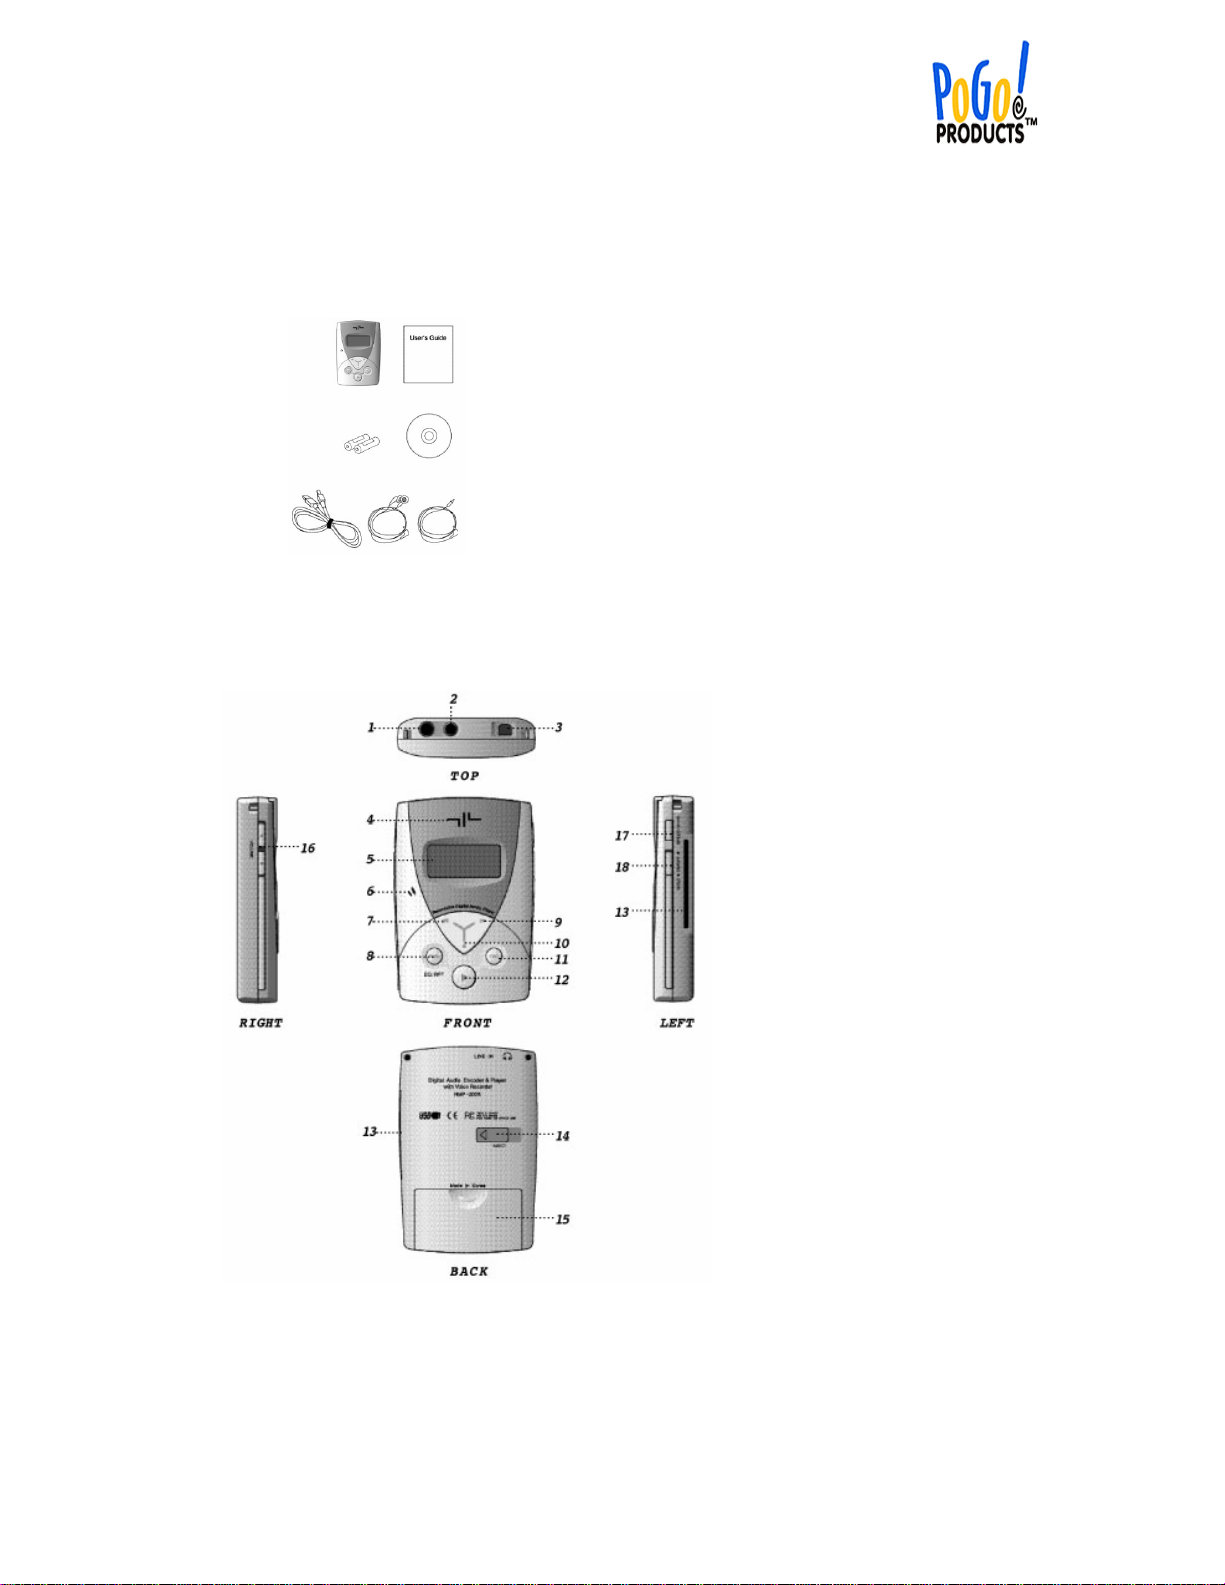
Package Contents
Check the contents of your RipFlash Recordable MP3 player against the list shown below.
Contact the distributor from whom you purchased the player if any of the following items are
missing.
1. RipFlash Recordable MP3 Player
2. User Manual
3. (2) AAA Batteries
4. Managing Program CD
5. USB cable
6. Earbud style headphones
7. Line-in cable
RipFlash™ Recordable MP3 Player
1. Earphone jack
2. Line- in jack
3. USB port
4. Internal speaker
5. LCD
6. Internal microphone
7. Rewind key
8. Menu/A<->B key
9. Forward key
10. Stop/Esc key
11. Record key
12. Play/Pause key
*Smart Media Cards are an added option
13. Smart Media Card slot*
14. Smart Media Card eject
15. Battery cover
16. Volume key
17. EQ/Repeat key
18. Hold key
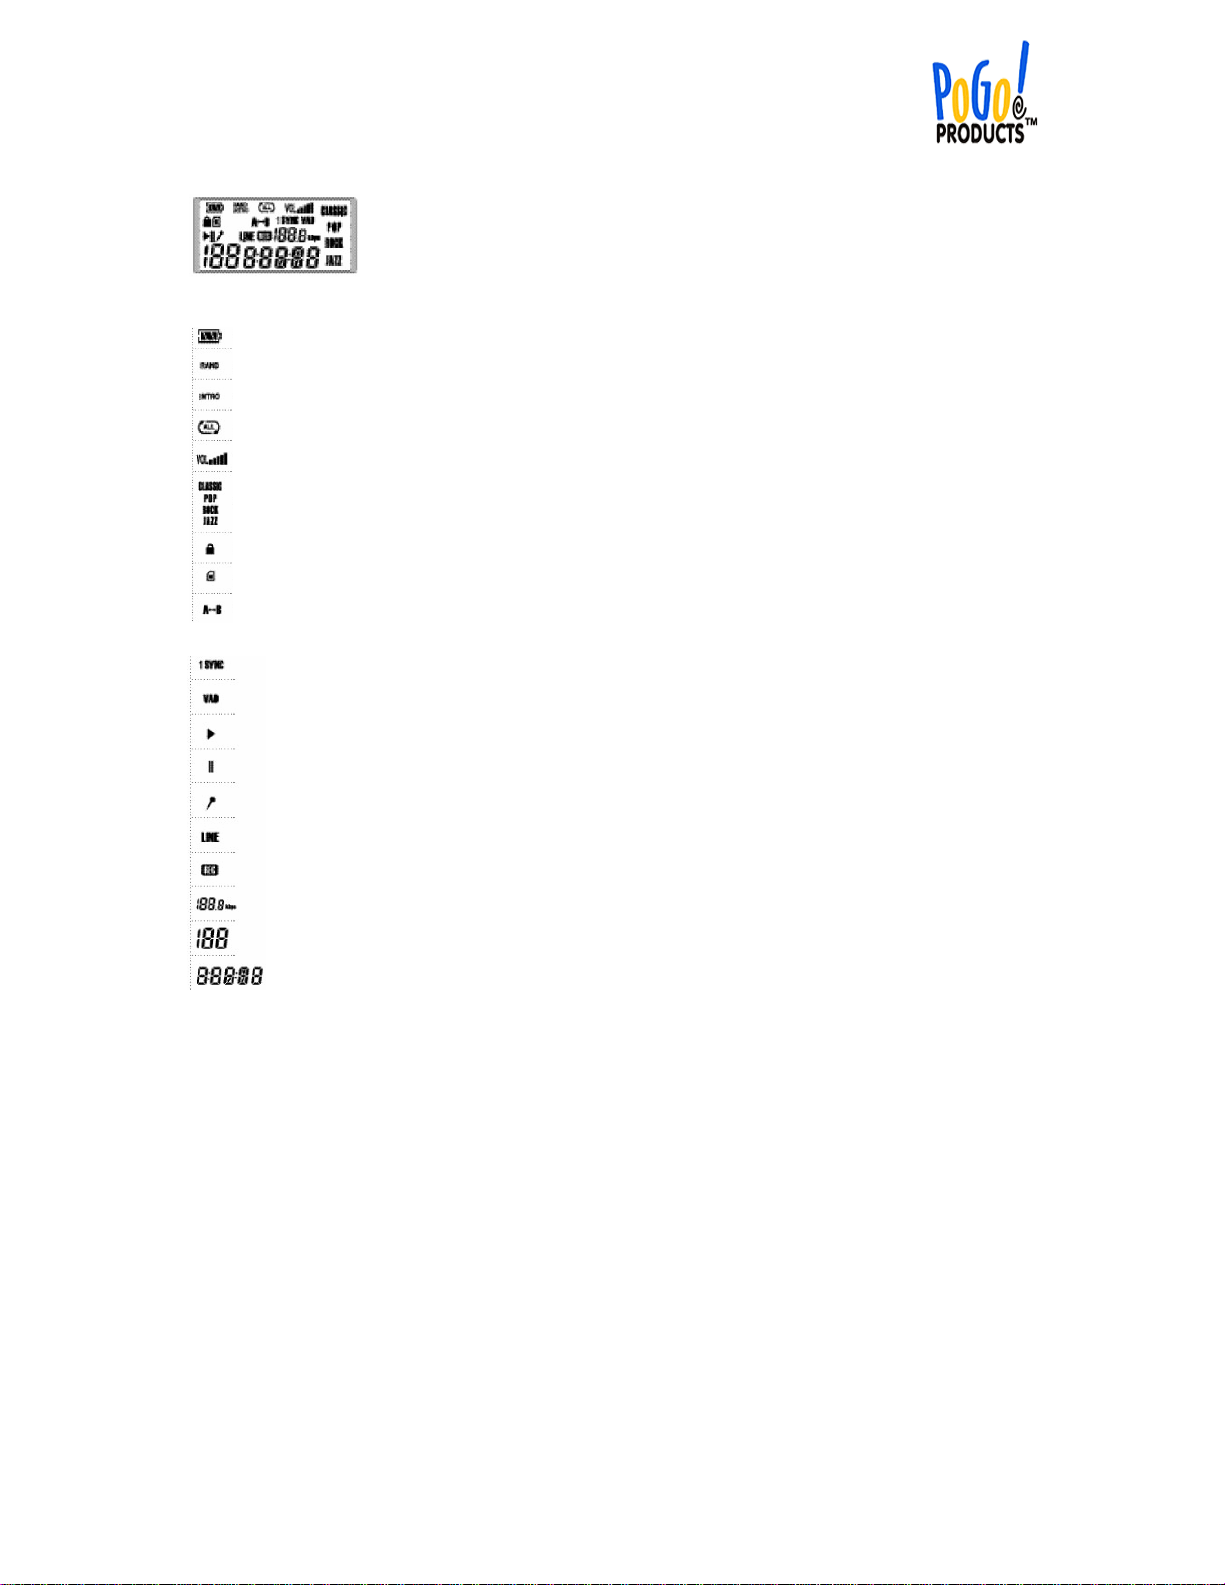
Display Information
Battery state display
RANDOM state display
INTRO state display
Repeat mode display
Volume state display
EQ mode display
Hold state display
External memory state display
Section repeat state display
Encoding mode display
VAD (Voice Activation Detection) display
Play state display
Pause state display
Voice recording display
Line In state display
Recording state display
Bit Rate display
Music number & menu display
Playing time & menu display (time: min. : sec.)
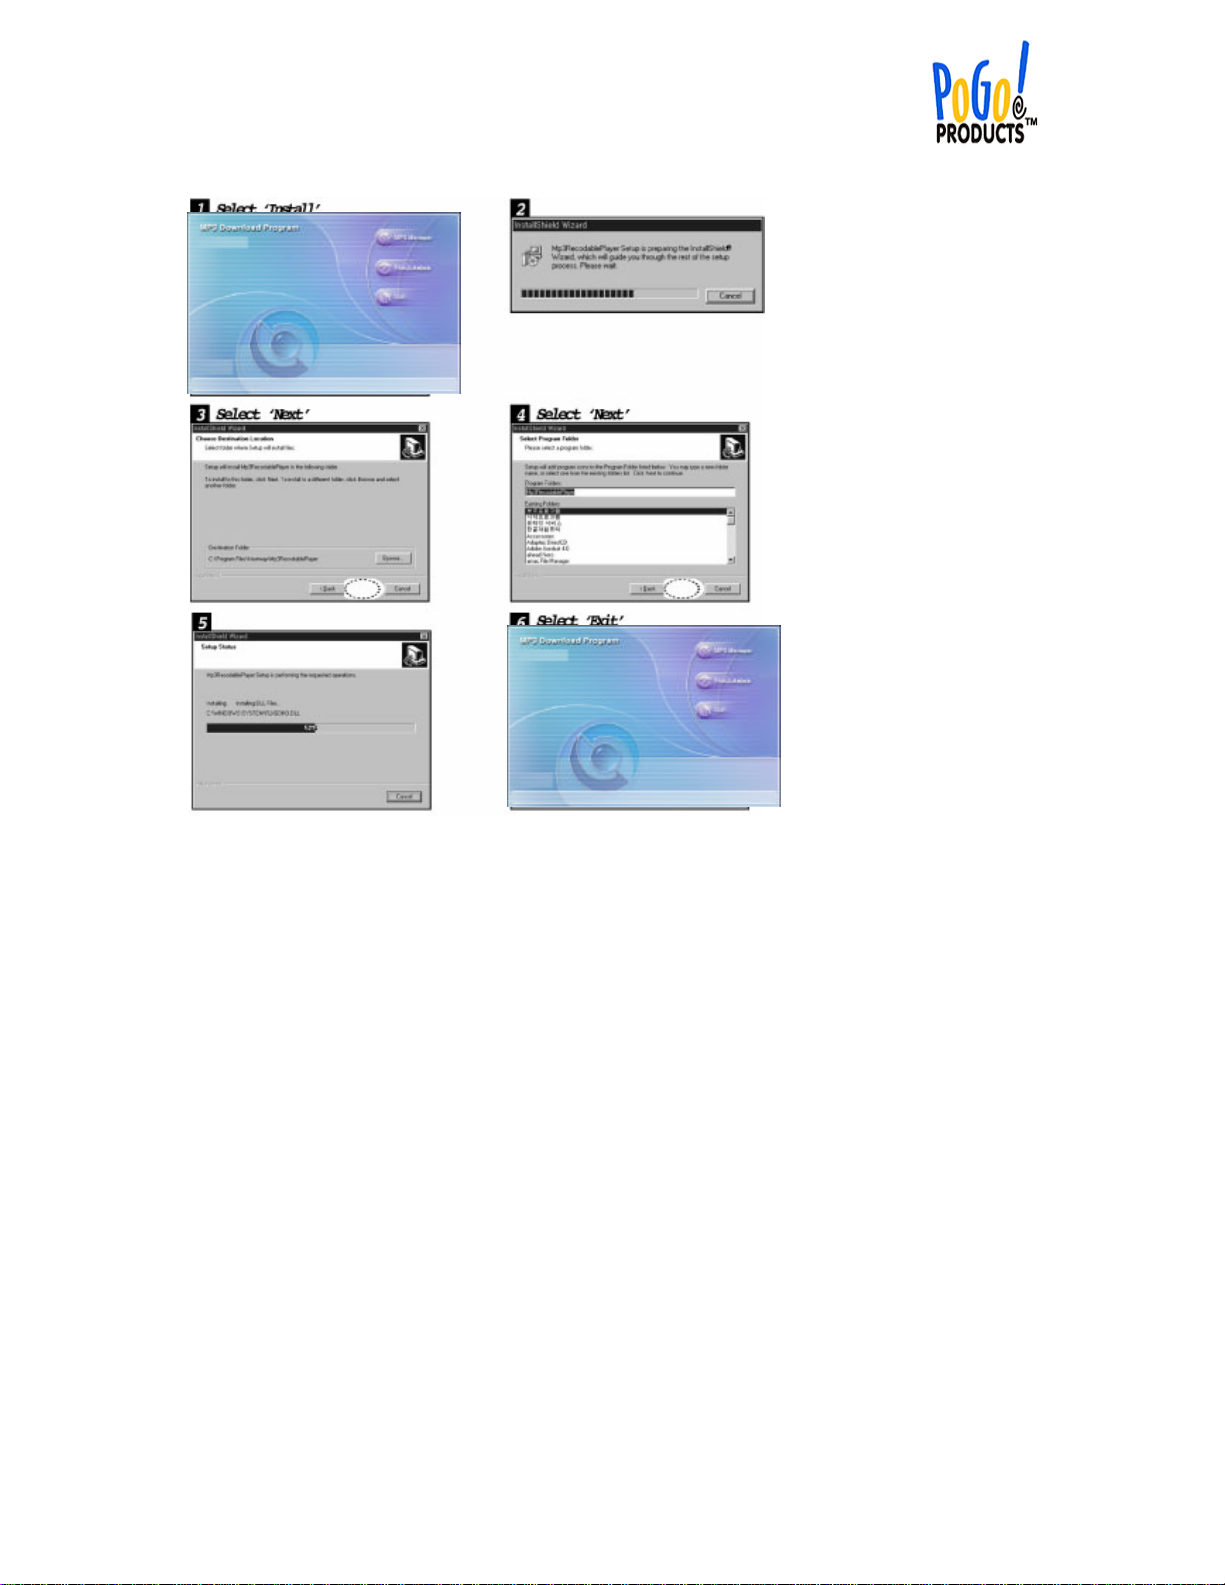
Installing the MP3 Manager Software from the CD
Note: Please install the MP3 Manager before connecting the USB cable to the Ripflash
Recordable MP3 Player.
Place the supplied CD for the RipFlash Recordable MP3 Player in the CD-ROM drive of your
PC. The File Transfer Manager Program for the RipFlash Recordable MP3 Player will start
up automatically. If the installer does not launch automatically use Windows Explorer to
locate the autorun.exe file on the CD drive, then double click it to launch the installer.
Follow the instructions as shown on the sample screens (below). Click on the MP3 Manager
button to install.
After installation of the software you can connect the USB cable to the PC. Turn the power on the
player. Launch the MP3 Manager and you should be able to view the contents of the player. If you
cannot connect to the player try the following procedure.
*After completing the install program, connect the player to your PC using the USB cable. When
prompted with the message “t33510.inf file needed,” follow the directions as shown below.
1. Insert the MP3 Manager Software CD into the CD-ROM device on your PC
2. Click the “Find” button, then double-click the “t33510.inf file” prompt, which will install the
necessary drivers folder from the CD.
Follow the same directions to install the “Tusb100.sys file.”
How to use the MP3 Manager Program
Double click the MP3 Manager icon to reveal the window shown below.
 Loading...