

Page 1

The
Time MachineTM
Users manual
Page 2

Introducing .... Time Machine
The time machine is several tools for the working professional photographer all in one small package.
With the Time Machine it is easy to create rear curtain sync effects with any camera, add depth of field
using the multipop tool, and record events as they unfold using the time machine as an intervalometer.
Specifications:
• Kit includes: Time Machine, Users Manual, and 2 AA batteries
• Delay from .001-99.99 seconds
• Multiple pops: 2-250 pops with a .0011 to 99.99 second recycle time
• Sync input for attachment to camera, PocketWizard receiver, or button
• Immediate Sustained output for motor drive or daisy chaining multiple Time Machines
• Delayed Pulsed sync output for firing strobes or cameras
PocketWizard ™ recommends the purchase of various sync cords depending on your setup. Refer to current
PocketWizard ™ catalog, www.pocketwizard.com or price list for complete listing of cords and accessories.
Page 3
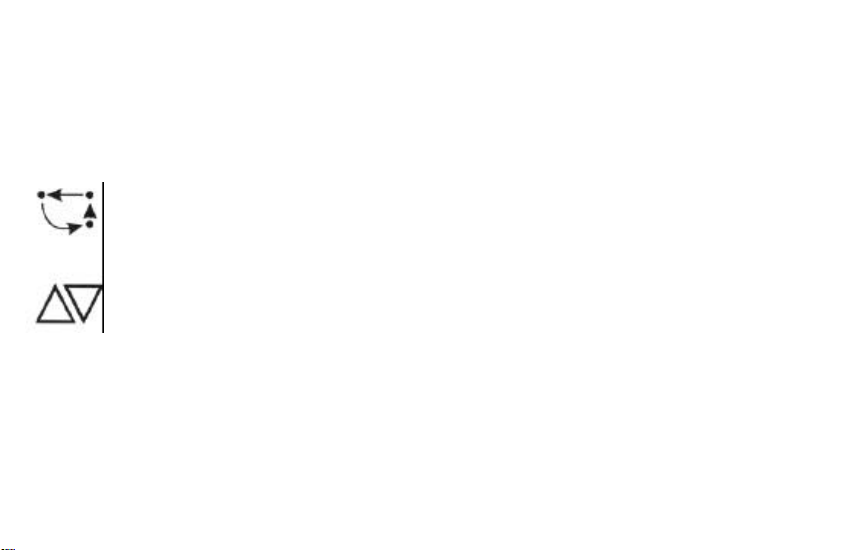
Connections & Controls:
DISPLAY LIGHTS: Light dot indicators in three corners of the display indicate the
programming mode. To modify the settings, the appropriate dot must be lit, then use the UP /
DOWN buttons.
SELECT: The Select button toggles through the three programming modes, QTY,
RECYCLE and DELAY. Press the select button briefly to select each mode.
UP / DOWN: After selecting the mode, the UP / DOWN buttons change the values on
the display. Hold either button down until the desired value is reached. The longer the
button is held, the faster the values change. When you reach 9.999 seconds the decimal
place will shift to the right 1 place so times can be set up to 99.99 seconds
DELAYED PULSED OUTPUT: Connect this output to a strobe, camera, or
PocketWizard transmitter. This output fires AFTER the specified delay in DELAY mode, or in
MULTIPLE mode will fire more than once.
IMMEDIATE SUSTAINED OUTPUT: Connect this output to a Camera Motor Drive,
PocketWizard Transmitter or another Time Machine. This output fires IMMEDIATELY after
the Time Machine is fired. START: The start button will trigger the Time Machine just as the
sync input does. Whatever mode and outputs are used, can be tested using the Start Button.
Page 4
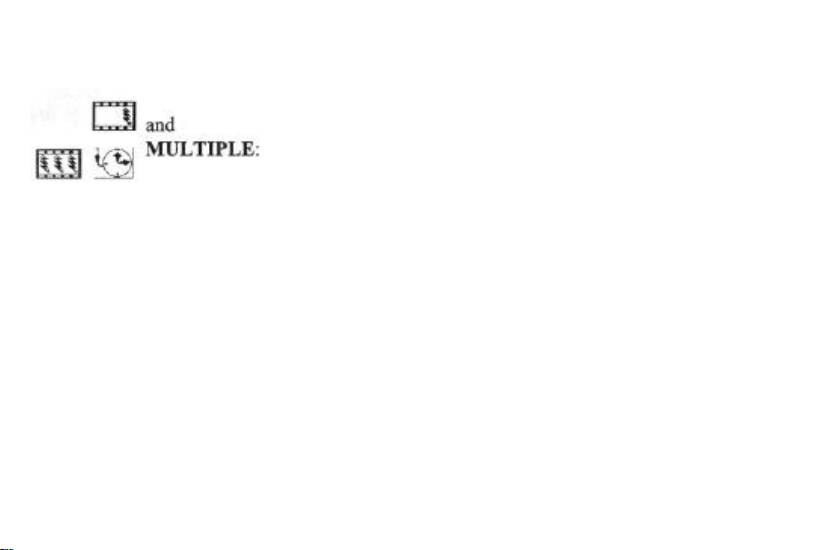
SLIDE SWITCH: The slide switch has three positions: OFF,
DELAY ,
In DELAY mode the select button will toggle between DELAY and RECYCLE displays.
With the DELAY light lit, use the UP and DOWN buttons to select the desired delay. This is
the time between when you trigger the system and when you want the strobes to fire. This can
be used for rear curtain sync effects. Press the SELECT button again to set the RECYCLE
time. This is the delay before the system can be triggered again.
In MULTIPLE mode the select button will toggle through all three modes. QTY sets the
number of times a camera or strobe will be activated. With the QTY light lit, use the UP and
DOWN buttons to select the number of triggers. With the DELAY light lit you can set a delay
before the first trigger occurs. For no delay set the display to 0.000. With the RECYCLE light
lit you can set a recycle time between triggers to allow the strobe to recycle or to set the
interval between frames.
Page 5
DELAY & REAR CURTAIN SYNC
Set the mode switch to DELAY . Press SELECT until the DELAY light is lit. Use the UP and
MULTIPOP
DOWN buttons to set the desired delay time. Press SELECT to toggle to RECYCLE mode and
set a recycle time if needed. Connect a Strobe to the sync out. (See table for recommended rear
curtain sync times).
Set the mode switch to MULTIPLE Press SELECT to set a strobe RECYCLE time. Press
SELECT to set the quantity of triggers. Press SELECT to set a delay time if desired.
Page 6
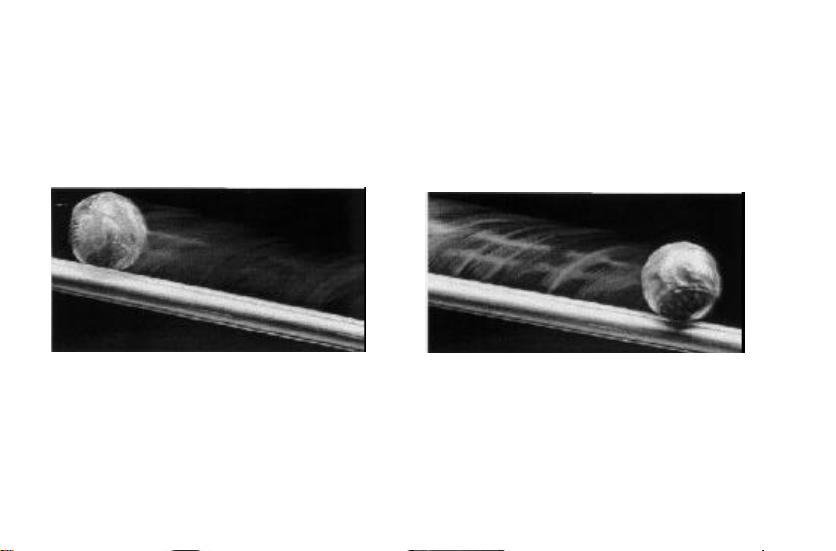
Rear Curtain Sync Information:
Stobe fires immediately and tungsten light
"Rear Curtain Sync": Ball travels down track
As you can see from the examples below, motion without rear curtain sync makes the motion appear
backwards, but if the strobe fires at the end of the exposure the motion effect appears correct. This
example was shot using one stobe overhead and a tungsten spot light from the left to create the motion
effects. The shutter was open for one second, and the modeling light on the strobe was off.
creates a sense of motion after.
On the other side of this page is a table of rear curtain sync times. These are recommended starting times,
you may need to adjust these values slightly for your equipment.
creating sense of motion from tungsten light,
then stobe fires at end of exposure.
Page 7

Shutter Speed
1/250 s.
1/125 s.
1/60 s.
1/30 s.
1/15 s.
1/8 s.
1/4 s.
1 /2 s.
1 s.
2 s.
4 s.
8 s.
Decimal Equivalent
0.004 s.
0.008 s.
0.016 s.
0.032 s.
0.0667 s.
0.125 s.
0.250 s.
0.500 s.
Rear Curtain Sync
Time
0.023 s.
0.055 s.
0.117 s.
0.242 s.
0.470 s.
0.980 s.
1.980 s.
3.980 s.
7.980 s.
Page 8

Setup for Rear Curtain Sync:
The times provided in the table below (and on the back of the
Time Machine) are only suggested starting times. Since every
camera shutter is different, and focal plane and leaf shutters will
be different, some testing may be required to find the optimum
setting. It is possible to have the strobe fire at any time during the
exposure using a Time Machine. However if you want the strobe
to fire at the last possible moment to eliminate any motion effect
forward of the moving object, you will probably want to test
these times. A simple way to test these times is to pick a shutter
speed and shoot several frames of film changing time settings for
each exposure. For instance if you want to use 1/2 second set the
Time Machine for .45 sec and shoot one frame. Shoot one
additional frame for each of the following times: .46, .47, .48,
.485, .488, .49, .492. Somewhere in this sequence you will see a
frame that has been partially cut off. You want to use time from
the frame before it. Because the Time Machine is accurate to .001
sec you may want to fine tune these times with an additional test.
Shutter
Speed
Delay
Time
1/30 s. 0.023 s.
1/15 s. 0.055 s.
1/4 s. 0.242 s.
1/2 S. 0.470 s.
1 s. 0.980 s.
2 s. 1.980 s.
4 s. 3.980 s.
8 s. 7.980 s.
Page 9
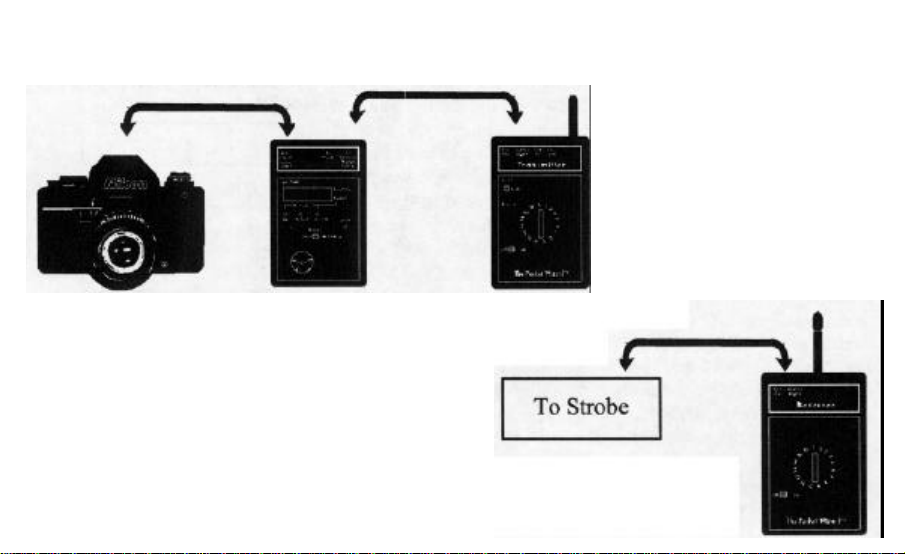
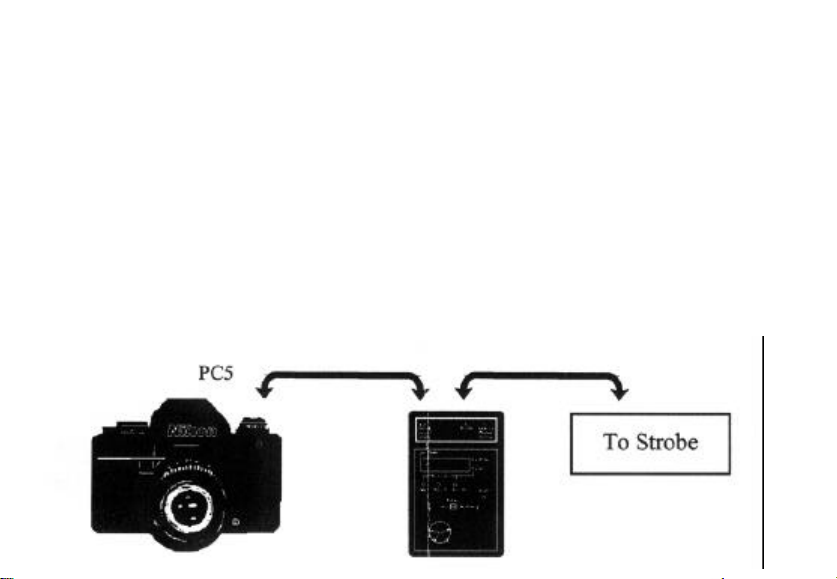
DELAY and MULTIPLE using POCKETWIZARD RADIO SLAVES
connect the camera sync out to
Time Machine SYNC IN.
Connect the DELAYED output to the SYNC IN on the
PocketWizard Transmitter. Connect the PocketWizard
Receiver to the strobe with the appropriate strobe cable.
Set the transmitter and receiver ID#s to the same number.
Use multiple receivers to trigger multiple strobes.
Page 10
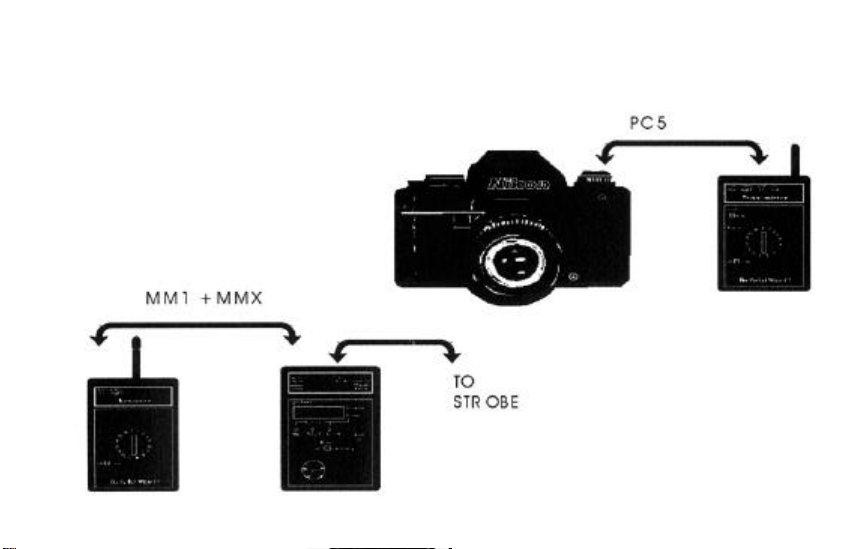
DELAY AND MULTIPOP USING POCKETWIZARD
RADIOS AND ONE STROBE
Page 11
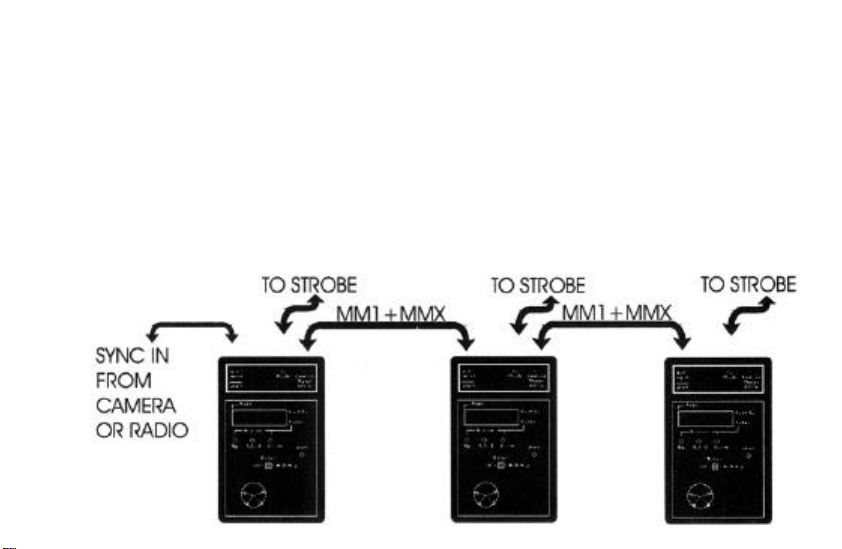
USING MULTIPLE TIME MACHINES
Multiple Time Machines can be used as shown to provide delays on several strobes or make a
sequence of triggers from strobe to strobe. Connect the sync in to the first Time Machine.
Connect the TO STROBE output to a strobe. Connect the TO MOTORDRIVE output to the
SYNC IN on the next Time Machine. When the system fires each Time Machine will
immediately trigger the next Time Machine, then fire it's own strobe based on the delay setting. If
the delays are the same, all the strobes will fire with the same delay. If each successive Time
Machine has a longer delay, the strobes will fire in a sequence.
Page 12

USING MULTIPLE TIME MACHINES
(CONTINUED)
Multiple pops of different quantities are also possible with multiple Time Machines. Connect the
system as shown on the previous page. Set each Time Machine for the number of POPS, DELAY
if needed and the RECYCLE time for each pack. When the first Time Machine is triggered, it's
MOTORDRIVE output will fire the next Time Machine and so on. The MOTORDRIVE output
on each Time Machine will only fire once. Then each Time Machine will fire the chosen number
of POPS at the chosen RECYCLE time.
Page 13

Using the Time Machine with the SpeedCycler for sequencing.
Connect the camera to the sync in on the Time machine and the strobe out to the sync in on the
SpeedCycler. Connect the four sync outs on the SpeedCycler to four strobes. Use the Select
button to choose # of pops and set it for 4. Now Using the delay time you can make the strobes
for in sequence all within one frame of film. For instance if you are shooting at one second and
wanted the strobes to be equally spaced throughout the exposure you could set the delay for .3
seconds. The first strobe will fire immediately and the other three would fire 1/3 of a second apart
and finish before the shutter closes.
Using the Time Machine as a recycle lockout.
Some strobes can be triggered before they are recycled, and if you do this repeatedly the results
can be less than desirable and even downright depressing. First determine your strobe's recycle
time. Now select Multi on the Time Machine, set the delay to 0? And the recycle to your strobe's
recycle time plus a tenth of a second. Now when you fire your camera before the strobe has
recycled, it will not fire. You will not get a properly exposed picture but your strobe won't be
turned into a smoldering mass either.
Page 14

Live Digital Proofing (use diagram from brochure)
Using a Time Machine in conjunction with a Fuji 515 or Nikon E2N Digital camera, and any
motorized film camera you can easily provide live digital proofing for your clients. First we
recommend the Fuji and Nikon cameras because the are the easiest to synchronize and also all you
need to see the files is a TV monitor. No computer is required to download files. Immediately
after shooting you can sit down with your client and view the results. First you need the digital
camera and the EX10 external Synchronization adapter. This device actually will fire the digital
camera automatically when the strobe fires. Next you need an NM3 -P cord from PocketWizard.
This is a standard Nikon motorcord with a pretrigger circiut added. This feature keeps the camera
"awake" during the shoot. If the metering system shut down to save batteries, the camera will not
be ready to fire. Next you need a motor cord for the other camera you are going to use. Connect
the two cameras, the Time Machine and the strobe as the diagram indicates. Set the Time Machine
for delay and input a delay of .25 sec. Now connect a trigger button (BT 1) to the Time Machine,
follow the instuctions with the Digital camera for proper setup with the EX-10, and you are ready
to go.
 Loading...