


TrimLine Vehicle Dock
For Getac V100 and V200 Computers
User Guide
www.precisionmounts.com
Description
Part Number
V100
NPT Dock (No RF Pass Thru)
AS7.V100.100
V100 DPT Dock (Dual RF Pass Thru)
AS7.V100.102
V200 NPT Dock (No RF Pass
Thru)
AS7.V200.100
V200 TPT Dock (Triple
RF Pass Thru)
AS7.V200.103
*Part numbers may vary depending on exact configuration, and supplier

Description of Parts and Layout
Front View
Note: Pictures used are of a standard dual pass thru (DPT) V100 vehicle dock, however
processes and info relate to all V series vehicle docks
Rear Clamp
Dock Actuating Tab
Dock Connector
Locating Pin (2)
Front Clamp (2)
Lock
Release Handle
Lifter Button (4)

Description of Parts Continued
Bottom View
Power LED (red)
Laptop on LED (green)
Mic
Headphone
Ethernet
Serial (com2)
Serial (com1)
USB 2.0
19vdc power
input
Rear View
Video In
WWAN
(option)
WLAN
(option)
GPS
(V200 option)

Inserting the Laptop
Step 1:
Insert key and rotate the lock
90 degrees counter-clockwise
Step 2:
Pull the Release Handle towards you
until you hear a click and the lever locks
into position.
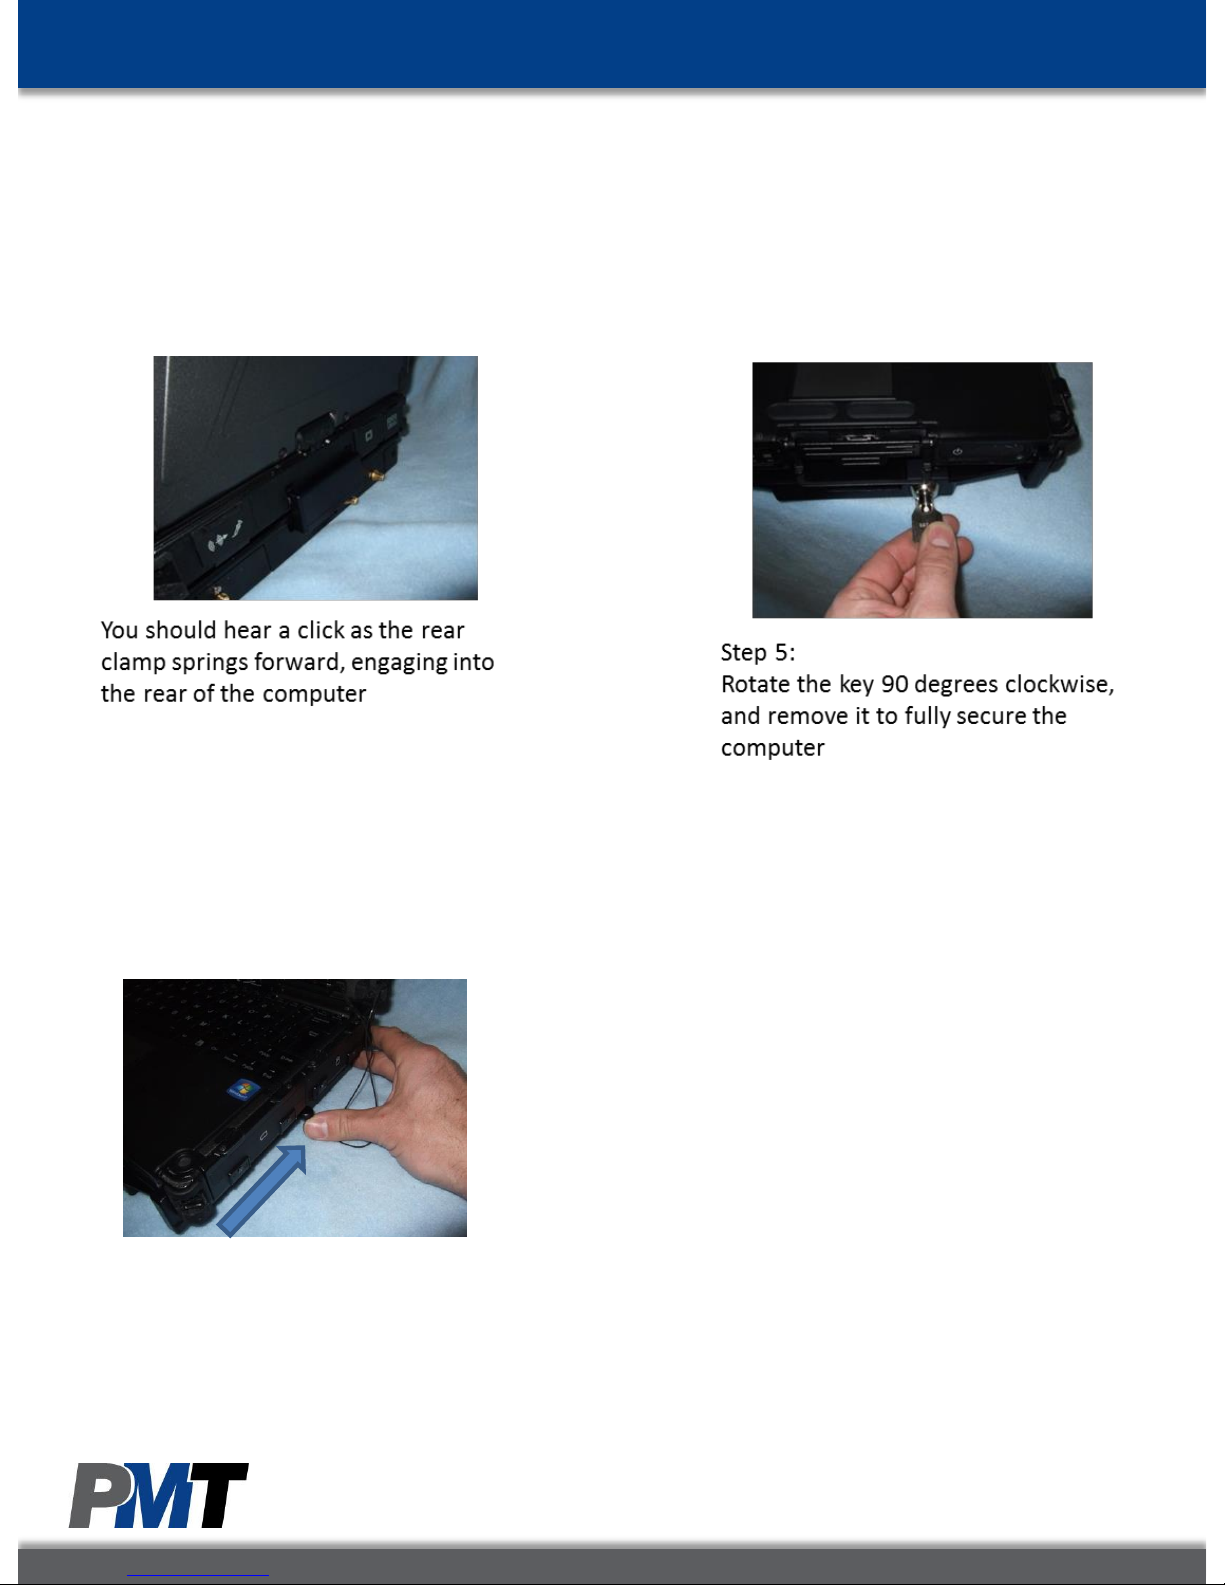
Step 3:
Position the computer front first into the
Front Clamps. (The front of the Laptop has
indents to aid in alignment)
Step 4:
Press the rear of the computer
down into the dock
Before proceeding, prep the laptop for use with the vehicle dock
Turn the laptop over and ensure the
connector cover door is fully open
Once the door is fully open, inspect the
connector for any pre-existing damage, that
could then damage the dock. Do not proceed
with docking if damage is present
Inserting the Laptop Continued
Tip:
If you feel resistance when rotating the lock,
push and hold the release lever forward, until
the lock rotates easily.
Note:
The laptop is not fully secure until the key is
removed
The laptop and vehicle dock are now ready for use
Removing the Laptop
Step 1:
Insert key and rotate 90 degrees counter
clockwise
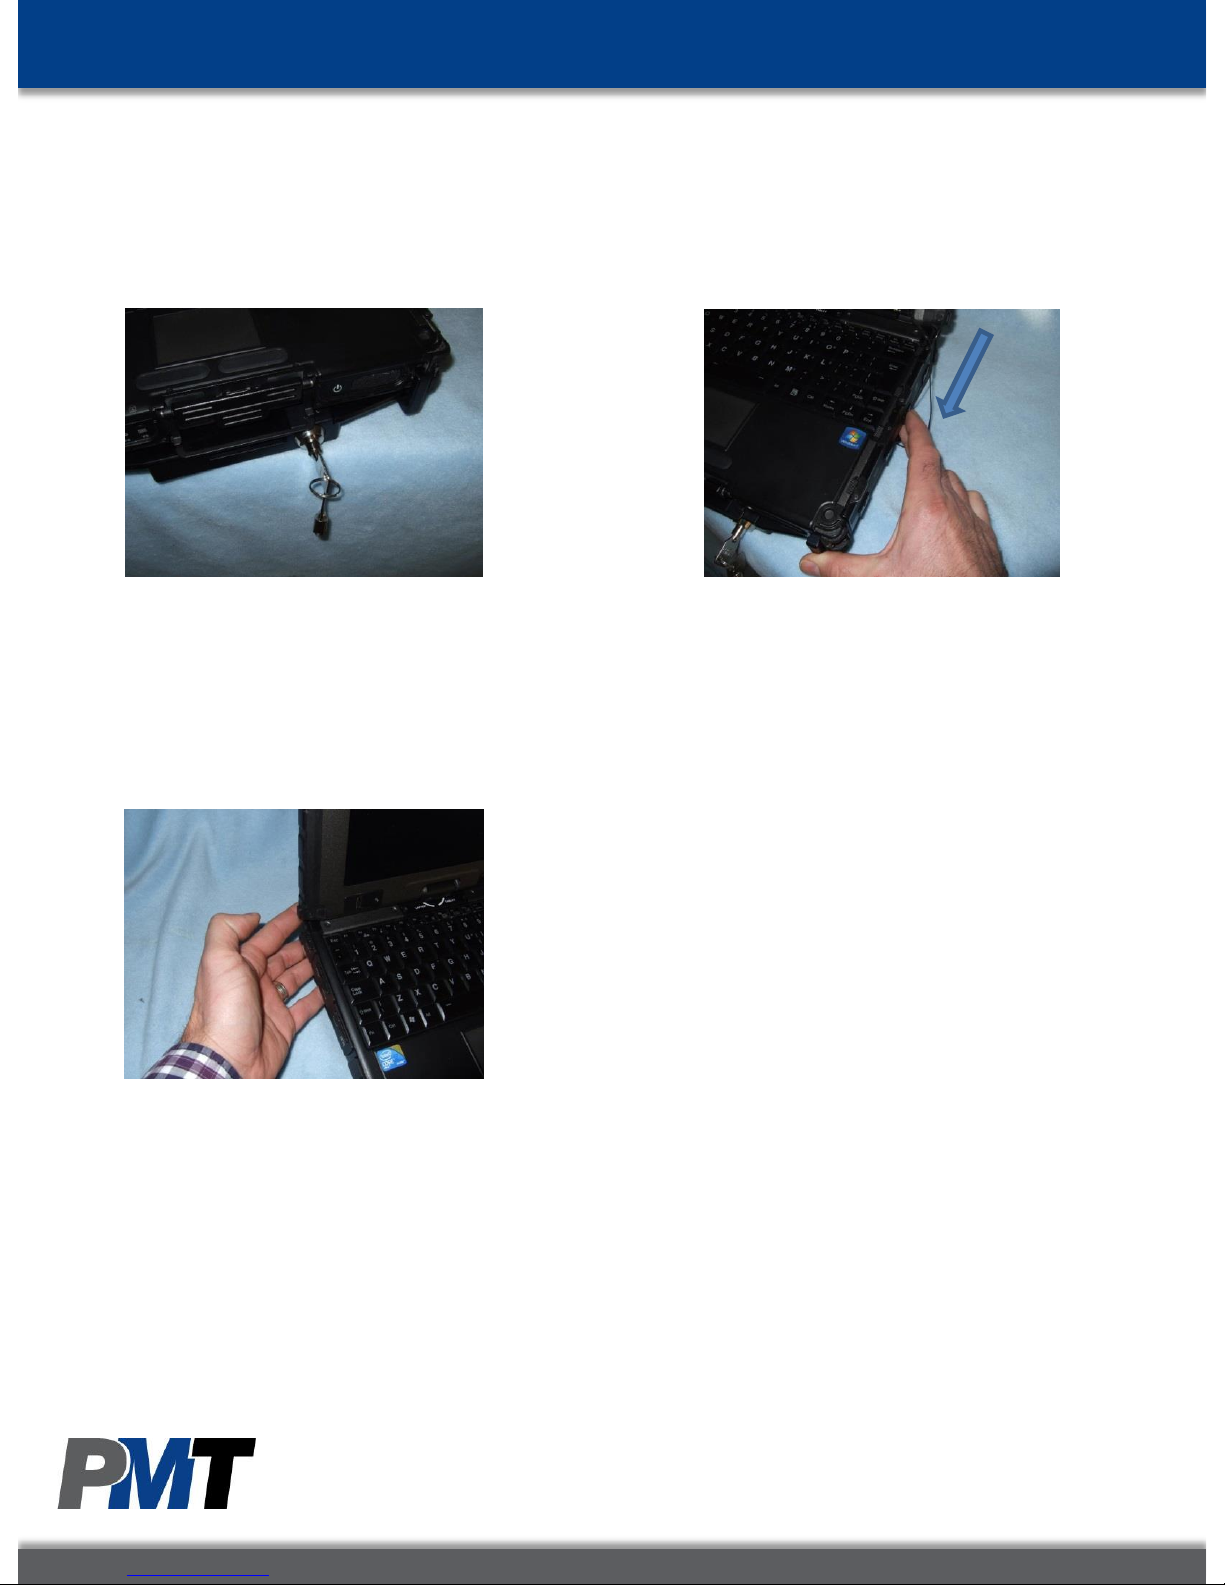
Step 2:
Pull the Release Lever forward and hold
Step 3:
While holding the Release Lever forward
with one hand, use your other to raise the
rear of the laptop out of the dock
Tip:
Once the rear of the laptop is lifted, the
Dock Actuating Tab will spring up and
hold the release lever forward. This
allows for quick re-insertion of the
laptop.
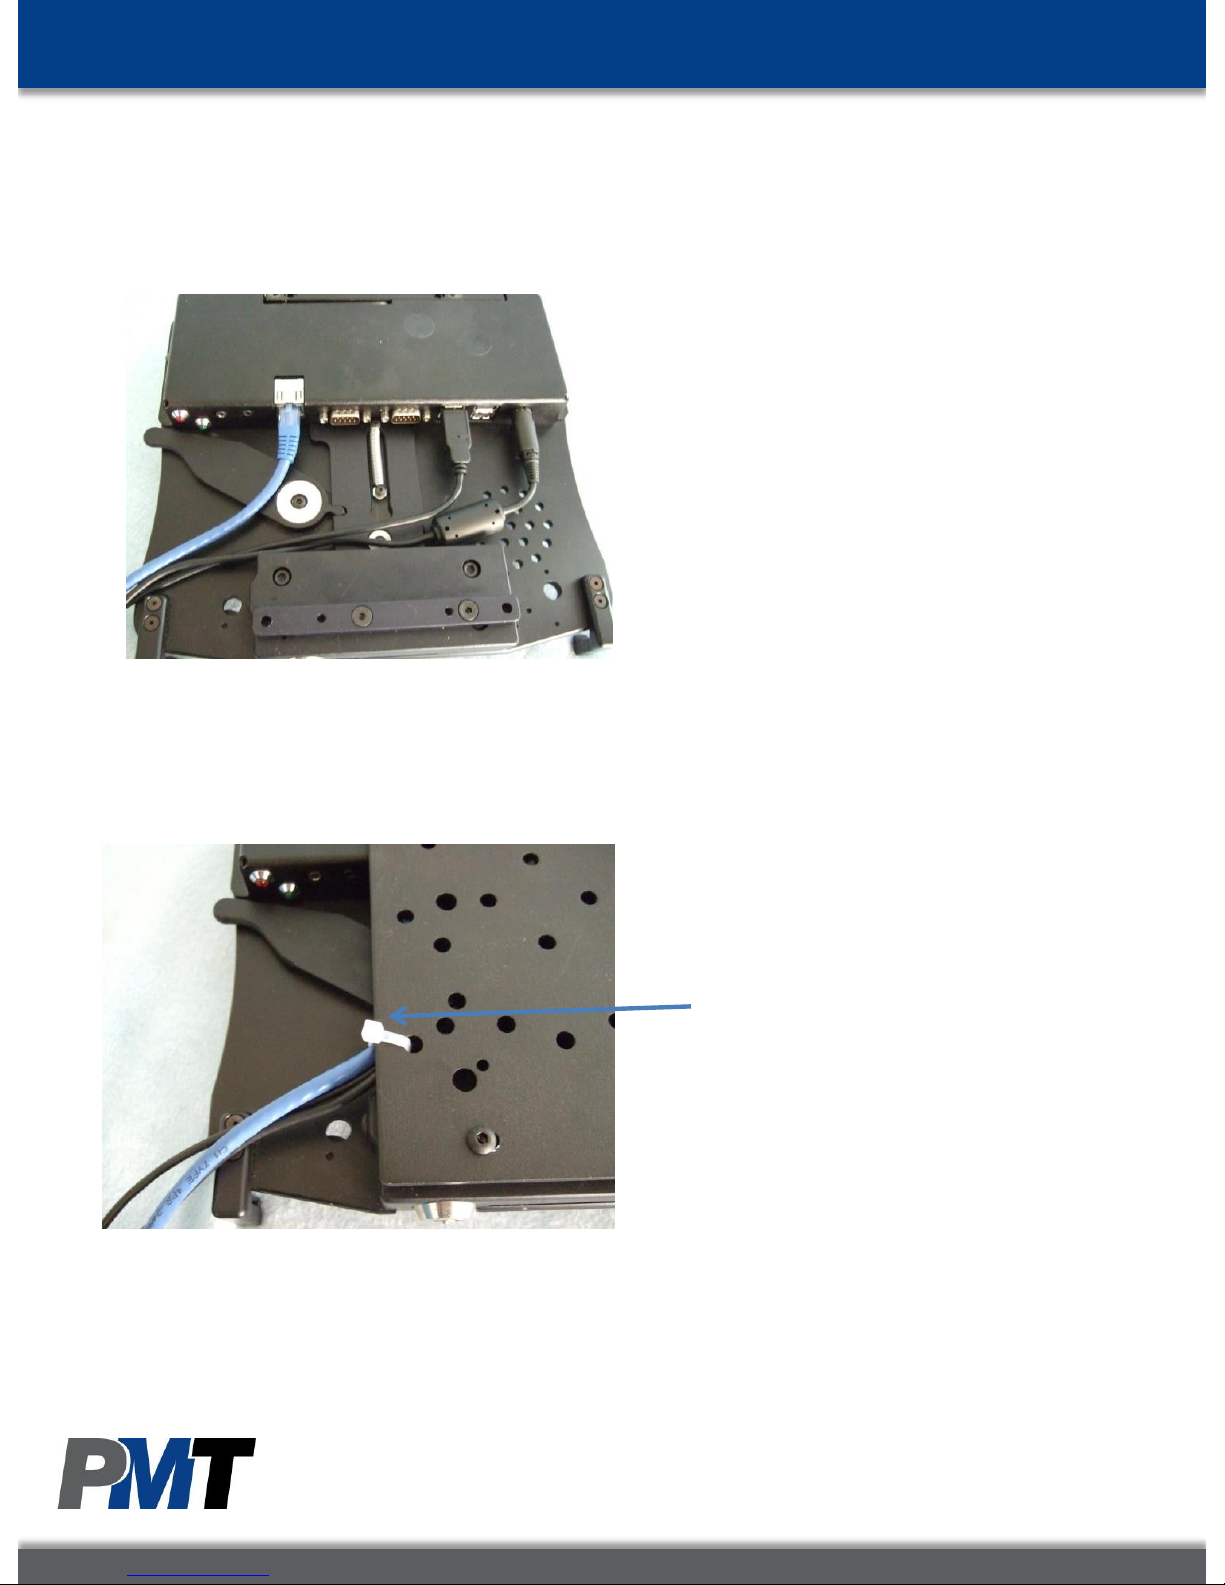
Wiring/Cable Management
Securely connect required cables to
matching ports, and use tie straps to
secure cables to a suitable location on
the dock to prevent cable strain
Cables shown tie strapped and
attached to universal mounting plate
for the V series vehicle docks
Once the cables are secured to the dock,
run the cables away from anywhere where
they may interfere with operating any
vehicle controls
Wiring Tip:
PMT does not recommend relying on a
cigarette socket adaptor for powering
vehicle docks. We recommend hard wiring
using a good clean ground direct from the
vehicle battery (-) post, and (+) supply from
a fused 12v location also directly from the
vehicle battery. All Peripherals connecting
to the docking station should get power
and ground from the same location as the
dock.

Mounting
Once you have attached all cables needed to the
vehicle dock, attach the mounting/interface
plate to whatever mounting infrastructure you
are using, and then attach the dock using the 4
supplied 10-24 UNC screws as shown
The standard mounting/interface plate that
comes with the PMT TrimLine V series vehicle
docks features industry standard mounting
bolt patterns. This allows easy mounting to
many pre-existing mounts as well as
dedicated mounts from PMT
For more info visit: www.precisionmounts.com
Or call us at 1-888-869-7652
Recommended Accessories
Our “Guide Plate” (part# 70.V100.014-1) optional accessory is great for use in environments
where greater stress is placed on the docking connector due to rough handling, or awkward
installations such as vertical walls. The plate works by adding additional locating surfaces that
prevent mis-alignment and damaged dock connectors when inserting the laptop into the dock.
Contact us to learn more, and to inquire about any of our additional accessories.
 Loading...