

Page 1
User Manual
Android 4.4
KitKat
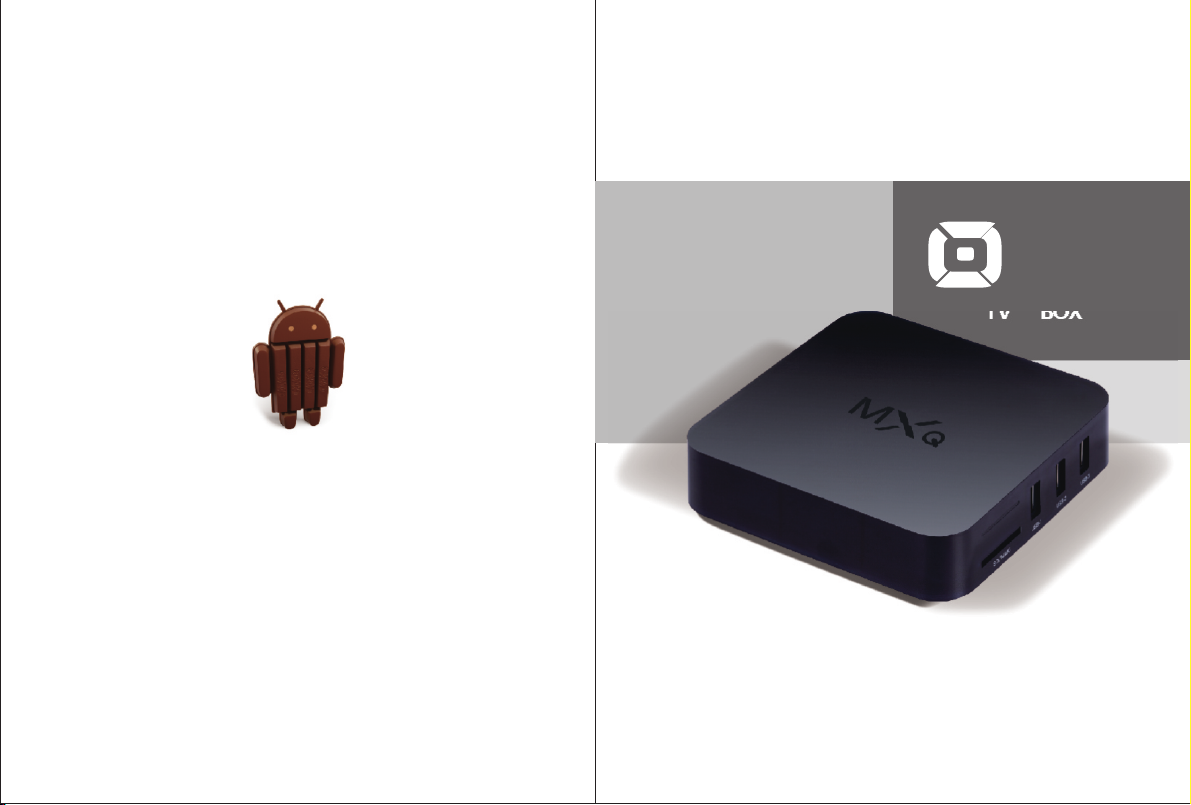
MXQ is the new generation of MX OTT TV BOX
H.264
1080P Encoder
4X CPU Cortex-A5
4X GPU Mali-450
TT
TV
BOX
Page 2

This euipment has been tested and found to comply with the limits for a Class B
digital device, pursuant to part 15 of the FCC Rules. These limits are designed
to provide reasonable protection against harmful interference in a
residential installation. This euipment generates, uses and can radiate
radio freuency energy and, if not installed and used in accordance with the
instructions, may cause harmful interference to radio communications.
However, there is no guarantee that interference will not occur in a particular
installation. If this euipment does cause harmful interference to radio
or television reception, which can be determined by turning the euipment
off and on, the user is encouraged to try to correct the interference by one
or more of the following measures:
o Reorient or relocate the receiving antenna.
o Increase the separation between the euipment and receiver.
o Connect the euipment into an outlet on a circuit different from that
to which the receiver is connected.
o Consult the dealer or an experienced radio/TV technician for help.
Caution: Any changes or modications to this device not explicitly approved
by manufacturer could void your authority to operate this euipment.
This device complies with part 15 of the FCC Rules. Operation is
subject to the following two conditions:
(1) This device may not cause harmful interference, and
(2) this device must accept any interference received, including interference
that may cause undesired operation.
To comply with FCC RF exposure compliance requirements,this grant isapplicable to
only mobile configurations. The antennas used for this transmittermust be installed to
provide a separation distance of at least 20 cm from allpersons and must not be co-located
or operating in conjunction with any otherantenna or transmitter.
Preface
Thanks very much for choosing our TV Box. In order to make it more convenient for you
to use proficiently, we provide you with a user manual. Please read it carefully before
using and properly keep it for reference.
Statements
We have made every effort to provide the most current information about the product.
We do not grant any guarantees as to the contents of the present instruction manual
and disclaim any implied guarantees concerning market value or suitability for specific
purposes.
The information contained here is an instruction intended to enable the correct usage
and maintenance of the receiver.
We reserve the right to introduce amendments, changes or translations of the user
manual without prior notification thereof. For this reason, we recommend you regularly
visit our website in order to obtain the latest information.
Page 3
TT TV BOX
Contents
Chapter 1 System Introduction
1. 1 Key Features
1. 2 Environment for System
1. 3 Package Contents
Chapter 2 Remote Controller
2. 1 Introduction of Remote
Chapter 3 System Connection
3. 1 AV Connection
3. 2 HDMI Connection
3. 3 Startup
Chapter 4 Home
Chapter 5 Apps
5.1 PPPoE
5.2 Browser
5.3 Media Centre
5.4 Samba
5.5 File Browser
5.6 Download
5.7 App Installer
5.8 Muti-interaction (Airplay/Miracast)
5.9 OTA update
Chapter 6 Settings
6.1 Network
6.2 Display
6.3 Advanced
6.4 Other
Chapter 7 Upgrade Steps
Chapter 8 Trouble Shotting
Chapter 1 System Introduction
02
02
02
03
04
04
05
06
07
07
08
08
09
09
10
11
12
13
14
14
1. 1 Key Features
Support many kinds of IPTV and OTT TV programmes.
Support FHD H.265, VC-1, H.264, MPEG-2 and many other formats such as MPEG-1,
MPEG-2, MPEG-4, DIVX, REALMEDIA and so on.
Video formats include hevc, avi, mpg, vob, rmvb, mkv, m2ts, ts and so on.
Photo formats include JPEG, BMP and PNG up to 80M pixels.
Audio formats include MP3,WMA,WAV,AC3, AAC and so on.
Support SD/SDHC/MMC cards.
Support four USB 2.0 host connectors with maximum output current of 1.5A/5V.
Support standard RJ45 cable network connection and wireless network connection.
Support infrared remote controller operation.
1. 2 Environment for System
Operation : Temperature limitation: 0--40℃; Humidity limitation: 20--80%.
Storage: Temperature limitation: -20--50℃; Humidity limitation: 10--90%.
1. 3 Package Contents
Accessories Quantity
Power adaptor
Remote control
HDMI cable
User manual
1
1
1
1
TT
01
TV B OX
02
Page 4
TT TV BOX
Chapter 2 Remote Controller
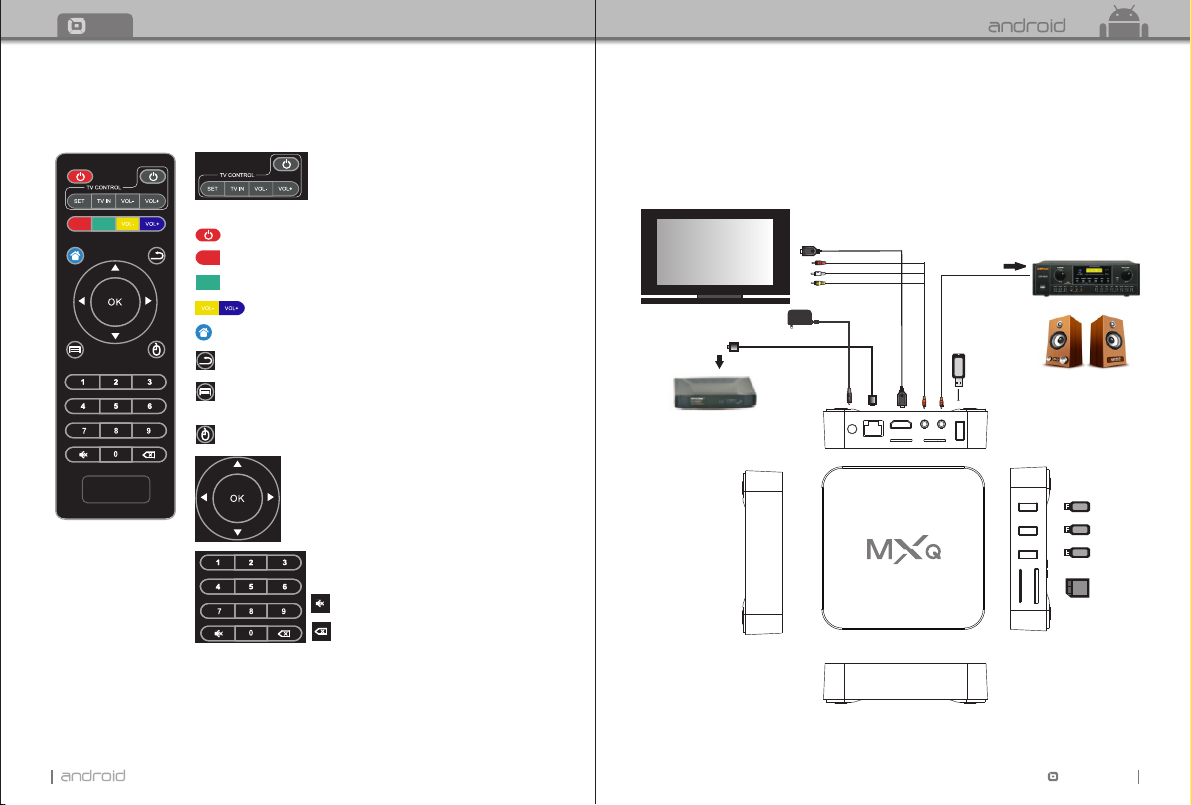
2. 1 Introduction of Remote
SETUP
APP
TV CONTROL AREA: Press to learn from the TV IR remote to control TV.
POWER: Press to standby.
SETUP
SETUP: Fast key to go to system setup.
APP
APP: Fast key to go to android application.
HOME: Fast key to go back to main menu.
RETURN: Press to return back to previous menu.
MENU: Press to choose function menu of corresponding
Cursor:Press to use the navigation button as cursor.
VOL: Press to increase/decrease the volume.
application in video, music, photo and website.
Navigation:Press to navigate left/right/up/down.
Press OK to confirm your choice.
Number keypad 0-9:Press to input Arabic number.
MUTE:Press to turn down the volume.
Backspace:Press to backspace the input.
Chapter 3 System Connection
3. 1 AV Connection
3. 2 HDMI Connection
Television
Router
Adaptor cable
Network cable
Amplifier
Coaxial cable
HDMI cable
Spdif
AV cable
AV
5V DC
USB-4
SPDIF
HDMI ETHERNET
Home Theater Speaker 5.1 Channel
USB -4
USB-3
USB-1 USB-2
SD/MMC
USB-3
USB-2
USB-1
SD/MMC
TT
03
TV B OX
04
Page 5
TT TV BOX
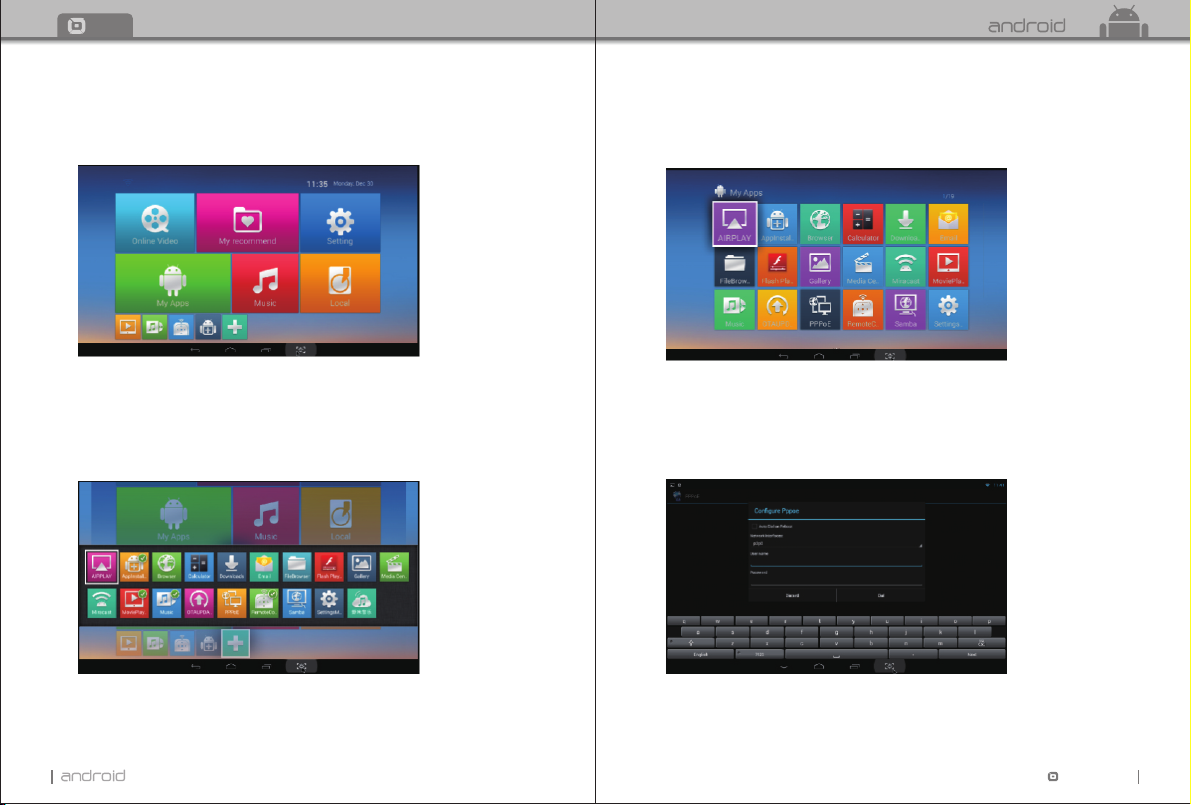
Chapter 5 My Apps
3.3 Startup
Turn on the TV box while indicator light is blue. Enter into main menu at about 30 seconds.
Chapter 4 Home
There are apps which you usually use.
You can add the apps according to your own preference.
Please tick the apps you need. Tick it again when you don’t need it.
Move to “My Apps”, Press OK to enter in.
You can see icons referring to different function on the picture.
5.1 PPPoE
Move to “PPPoE” icon, Press OK to enter in. You can configure PPPoE here.
TT
05
TV B OX
06
Page 6
TT TV BOX
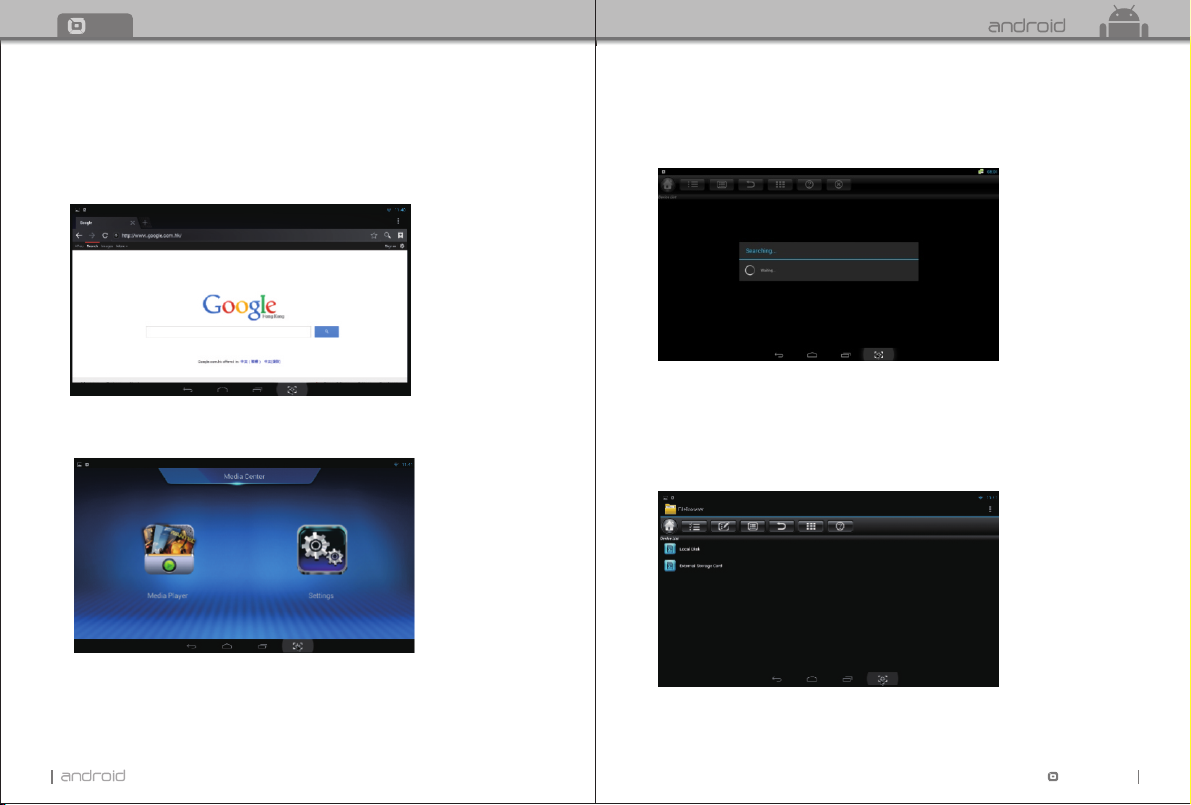
5.2 Browser
Move to “Browser”. Press OK to enter in.
It is a convenient way for you to go to your desired website.
Notice: Please go to the system setting to set the internet connection before entering into the
website.
5.3 Media Center
Move to “Media Center ” icon, You can play all your prefer media here.
5.4 Samba
Move to “Samba”. Press OK to enter in.
The system will search the share files automatically.
5.5 File Browser
Move to “File browser”. Press OK to enter into the device list.
When inserting with USB device or SD/ SDHC/ MMC cards, the sign “Device is mounting”
will be shown on the screen.
Here you can cut, copy, paste and move the files and folder between the local disk and external
storage card.
TT
07
TV B OX
08
Page 7
TT TV BOX
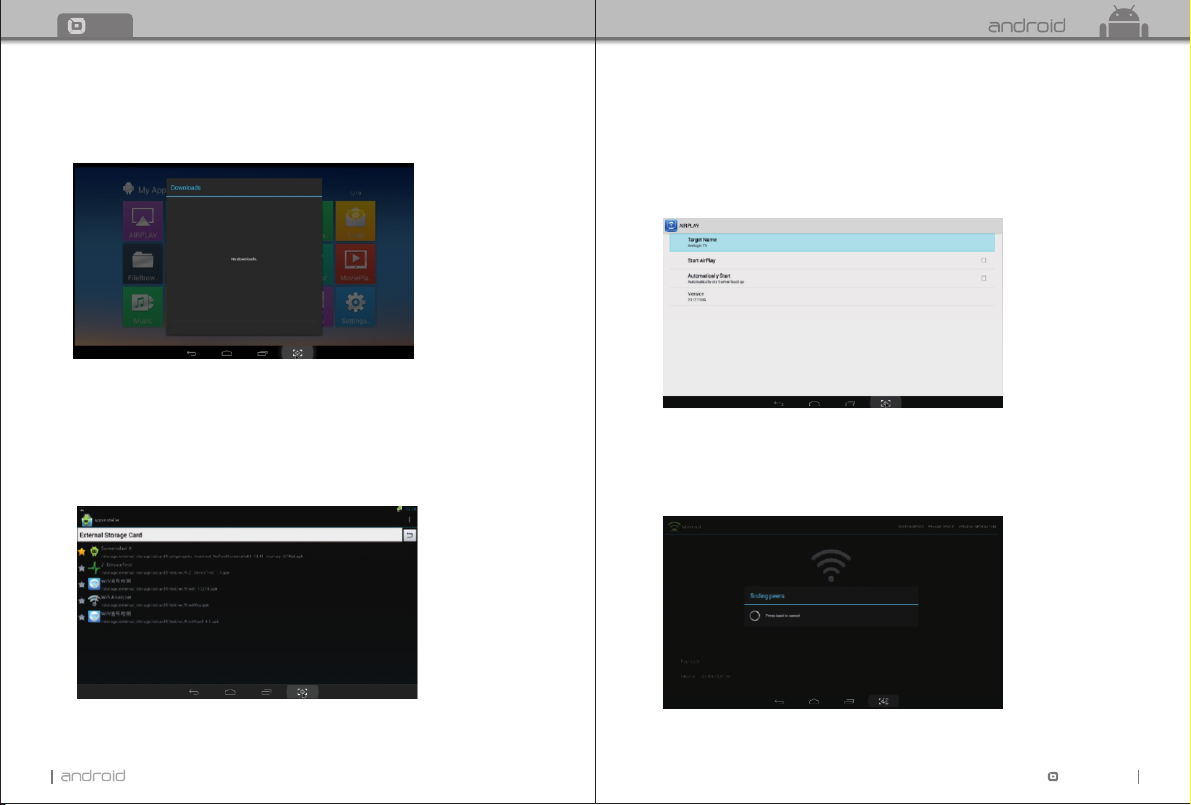
5.6 Download
Move to “Downloads”. Press OK to enter in. You can check the status here when
downloading APKs from the internet.
5.7 App Installer
Move to “App Installer”. Press OK to enter in.
You can install software by this app installer function. Please first download your desired
software by apk formats from the computer to the USB. You will choose your desired
device in order to scan the apks.
Press OK to install your desired software.
After the installation finished, the software icon will be shown on the applications menu.
5.8 Muti-interaction
Airplay
Move to “Airplay” icon or “Miracast” icon, Press OK to enter in.
Airplay: Download airplay application according to the model of the mobile phone. Enter into
Airplay, connect with the same WI-FI hotspot. Play video, picture, or music on your phone. Click
the “airplay” icon on the phone to share files.
Miracast
Miracast: Please make sure TV box and mobile phone under the same WI-FI
environment .Press “Miracast” on TV box. It will find peers automatically, and click “setting”
on your mobile phone, enter into “WLAN”, Click “Menu” to choose “WLAN Display” on your phone.
Choose to share files.
TT
09
TV B OX
10
Page 8
TT TV BOX
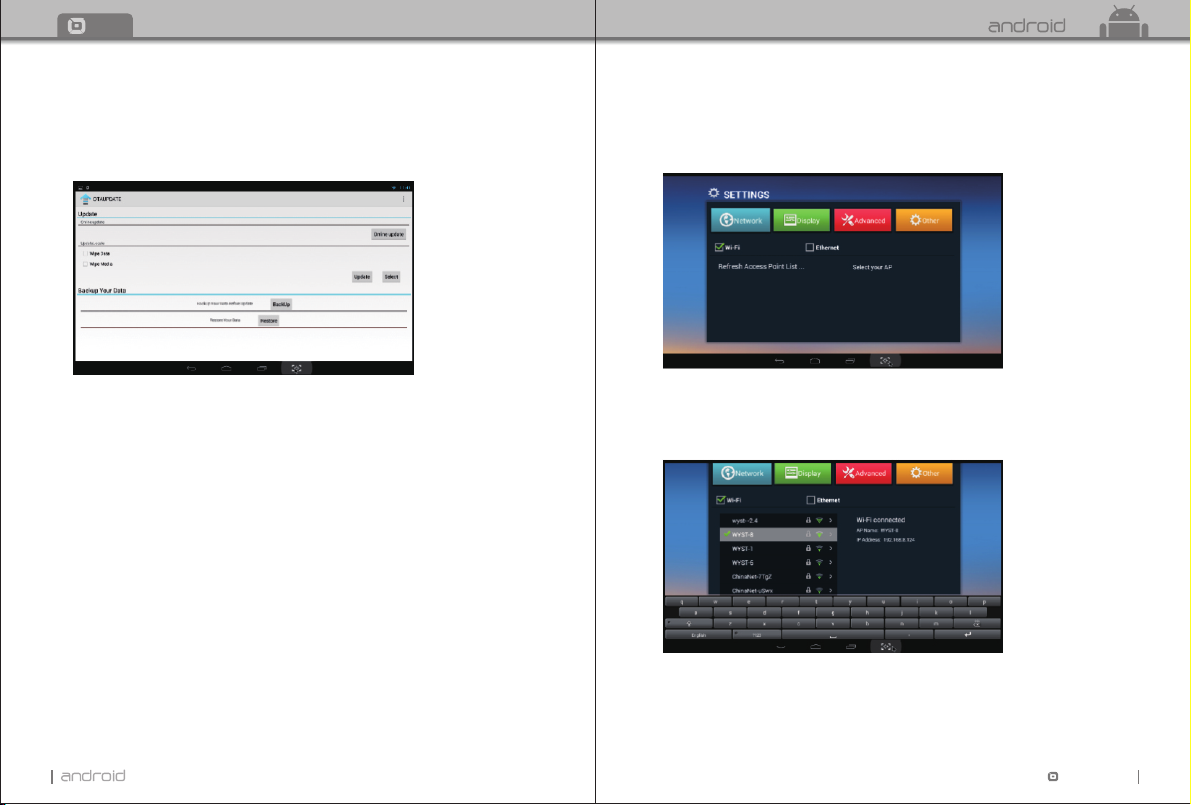
5.9 OTA update Optional
Move “OTA update” icon, press OK to enter.
Click “online update” If there is an update in server, you can choose to download it.
After upgrade is finished, system will restart automatically.
Chapter 6 Settings
6.1 Network
Wi-Fi
Select “Wi-Fi”, System will start scanning available Wi-Fi networks around you automatically.
Press OK to choose your Wi-Fi network and enter your password.
After authenticating IP address, when “connected” is shown, Wi-Fi is available now.
Notice: If Wi-Fi connection failed, please try again.
TT
11
TV B OX
12
Page 9
TT TV BOX
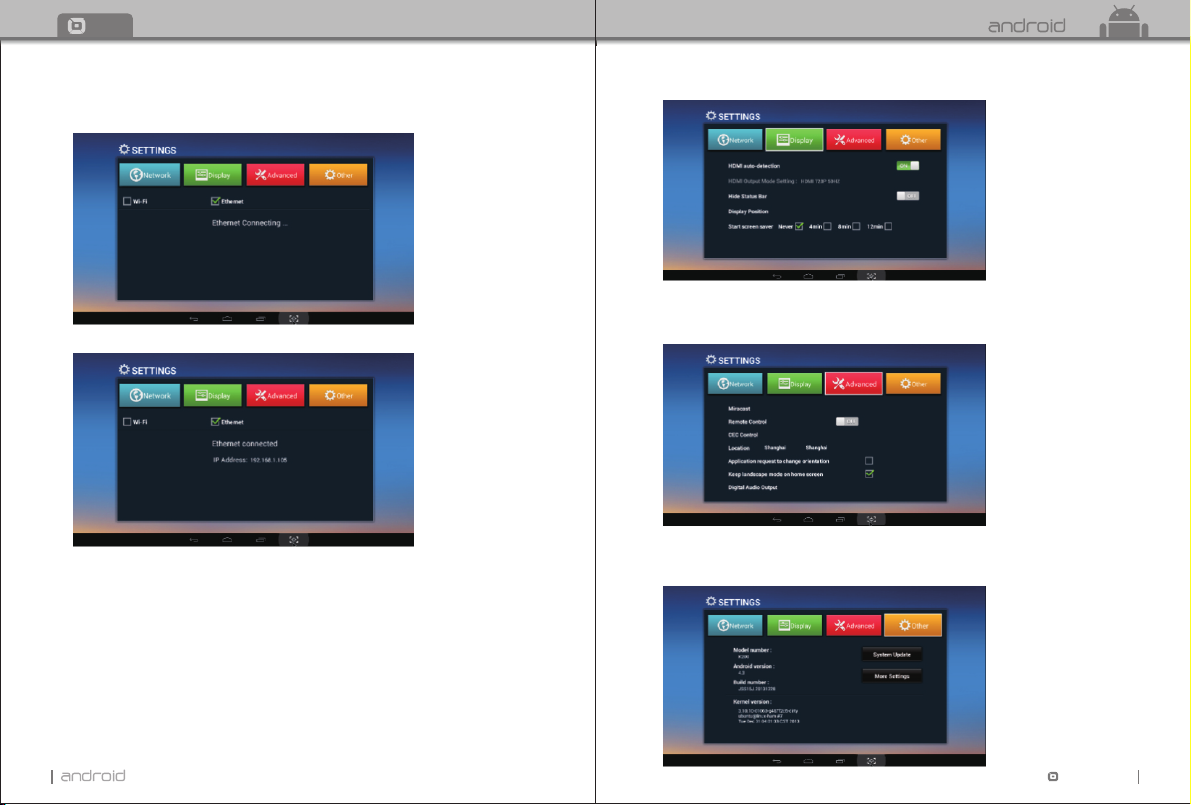
Ethernet:
Select “Ethernet” System will start scanning Ethernet automatically.
When the IP address appears, the Ethernet connected.
6.3 Advanced
Move to “Advanced” to choose advanced settings. Here you can set Miracast, remote control,
CEC control, location, orientation, home screen and digital audio output.
6.2 Display
Move to “Display”.
Here you can set wallpaper, HDMI audio output mode, turn on/off hide status bar,
display position, choose the time of start screen saver.
13
6.4 Other
Move to “Other” to see more TV Box information.
You can do system update and adjust more settings here.
TT
TV B OX
14
Page 10
TT TV BOX
Chapter 7 Upgrade Steps
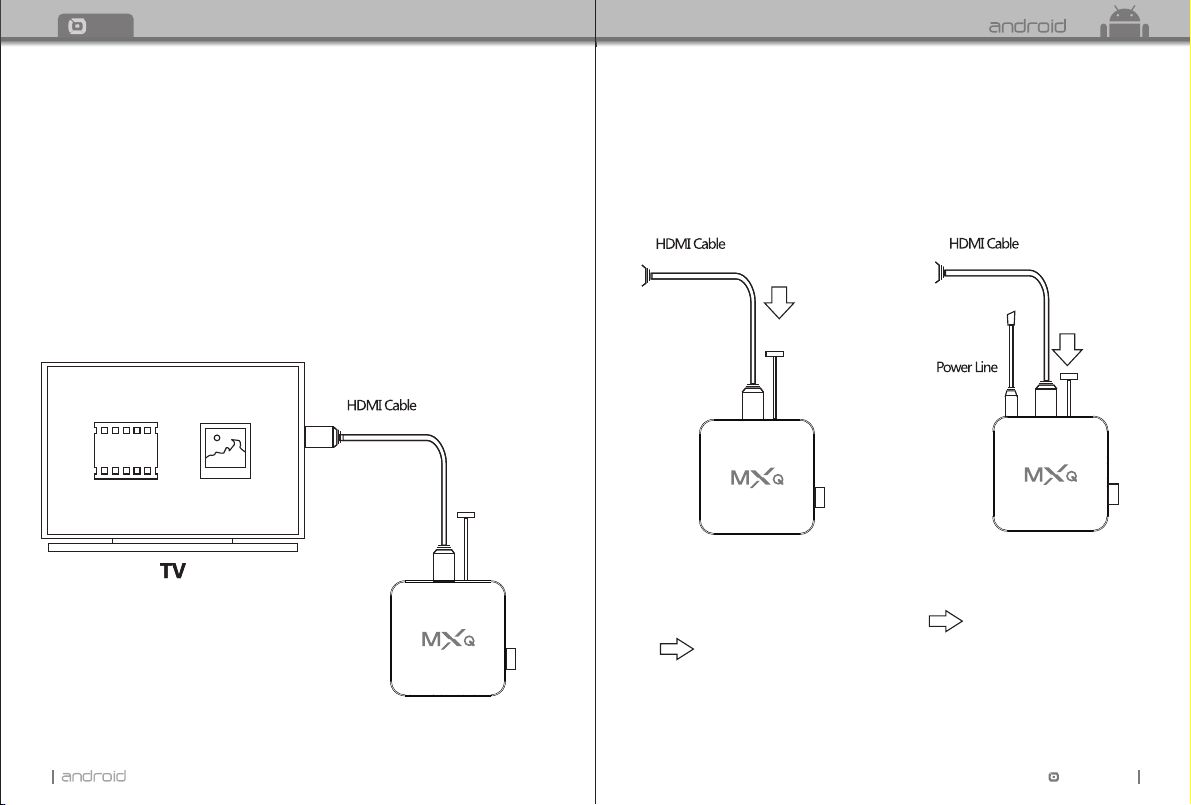
7.1 Please unzip the upgrade package to the SD card .There will be three
files in the root of the SD card as follow,
factory_update_param.aml (Some upgrade packages don’t have this file)
xxx.zip (the upgrade package zip file)
recovery
7.3 Insert a stick into AV port.
There is a reset button inside AV port.
And keep pressing the button.
7.4 Insert power adaptor.
(still pressing the button)
7.2 Insert HDMI cable and SD card with the box.
(connect the other side of the HDMI cable to the TV HDMI port.
15
Stick
SD card
Press
Press
Stick
SD card
7.5 You can stop pressing the reset button until you see the android robot. And use
the remote to choose apply update from EXT" "
choose xxx.zip (the upgrade package file) and press OK. " "
choose Update from sdcard" "
TT
TV B OX
SD card
16
Page 11
TT TV BOX
Chapter 7 Trouble Shotting
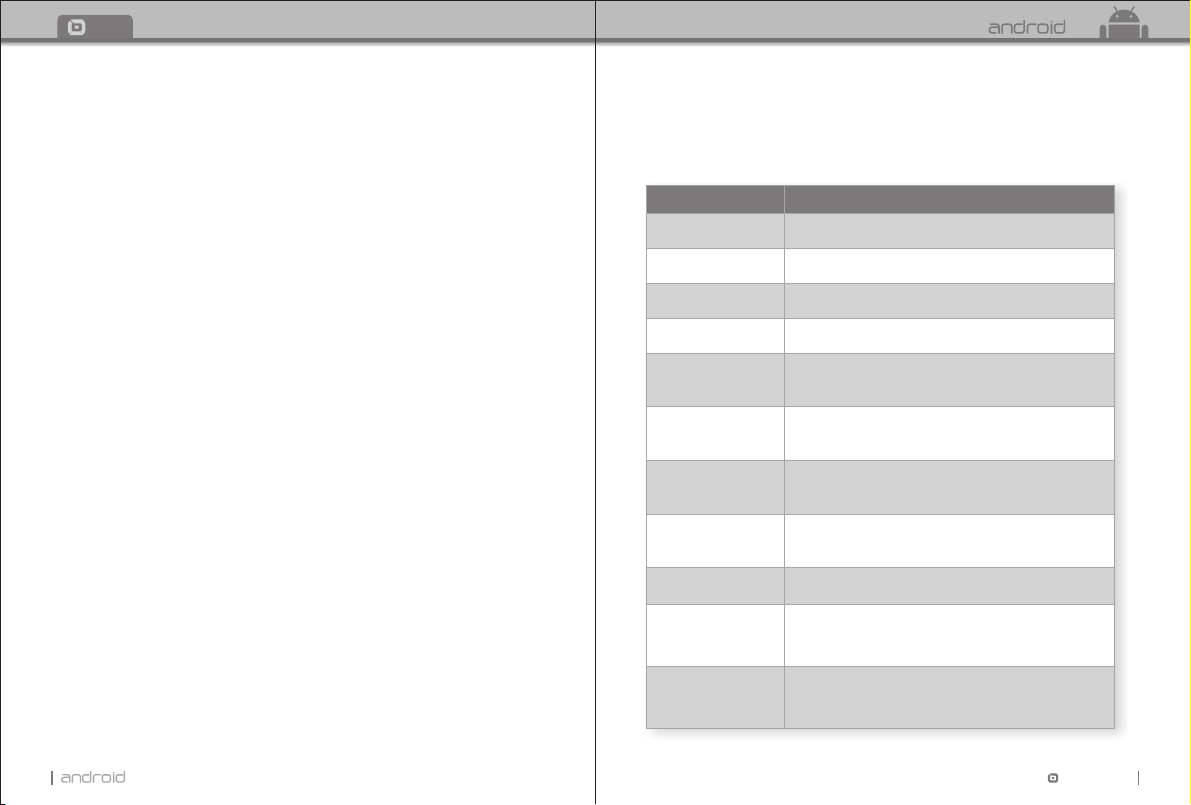
7.6 You will see --Install / sdcard... It means the box is updating." "
After upgrade, you can see Install from sdcard complete at the bottom." "
7. 7 Use remote to choose reboot system now and press OK" "
or plug the power adaptor again to reboot the box.
7.8 Finished upgrade. You can see the Welcome interface." "
Tips:Youcancheckthebuildnumberinsettingtoconfirmthat
youhaveupdatedtheboxsuccessfully.
Under no circumstances should you try to repair the TV Box by yourself, as this will invalidate
the warranty. Do not open the TV Box as there is a risk of electric shock. If a fault occurs, first
check with points listed below before taking the TV Box for repair. If you are unable to remedy
a problem by following hints, consult your dealer for help.
Problem
No power
No picture
No sound or distorted
sound
No audio or digital
output
The box does not respond
to the Remote Control
Player does not respond to
some operating commands
during playback
No sound during movies
playback
The contents of the USB
flash drive cannot be read
Slow operation of the
USB flash drive
No sound with HDMI
connection
The TV screen is blank
and the player LED is
blinking
Solution
-Check if the power adaptor is properly connected to the power
and the TV Box.
-Press the power on the remote controller to turn on the power.
-Reconnect with HDMI cable or AV cable.
-Check if the TV is switched on.
-Adjust the volume.
-Check that the speakers are connected correctly.
-Check the digital connections.
-Check if your amplifier is set correctly.
-Aim the remote control directly at the sensor on the front
of the TV Box.
-Reduce the distance to the TV Box.
-Replace the batteries in the remote control.
-Operations may not be permitted. Refer to the user manual.
-Possibility of system halted, re-insert with power adaptor
to restart.
-The audio codec may not be supported by the TV Box. You
can change to the supported audio on playing menu.
-Check the volume.
-The USB flash drive format is not compatible with the box.
-If one of the USB can not be read, please turn off the TV
Box for 30seconds and restart the TV Box.
-Big file size or high resolution USB flash drive takes
longer time to read and display on the TV screen.
-Check the connection between the TV and the HDMI
jack of box.
-Check your TV system setup.
-Check the volume.
-Turn off your TV Box, wait 30 seconds, turn it on again.
-If under HDMI status, check if HDMI connection is cor-
-rect or change another HDMI cable set the output
resolution of this TV Box into 720p.
TT
17
TV B OX
18
 Loading...