

Page 1
VINYL PRIVACY PANEL ENCLOSURE
INSTALLATION INSTRUCTIONS
TOOLS REQUIRED
• Power Drill
• 1/8" Drill Bit
• #2 Square Bit Driver
• Gloves
• Hammer
• Safety Glasses
ENCLOSURE CONTENTS
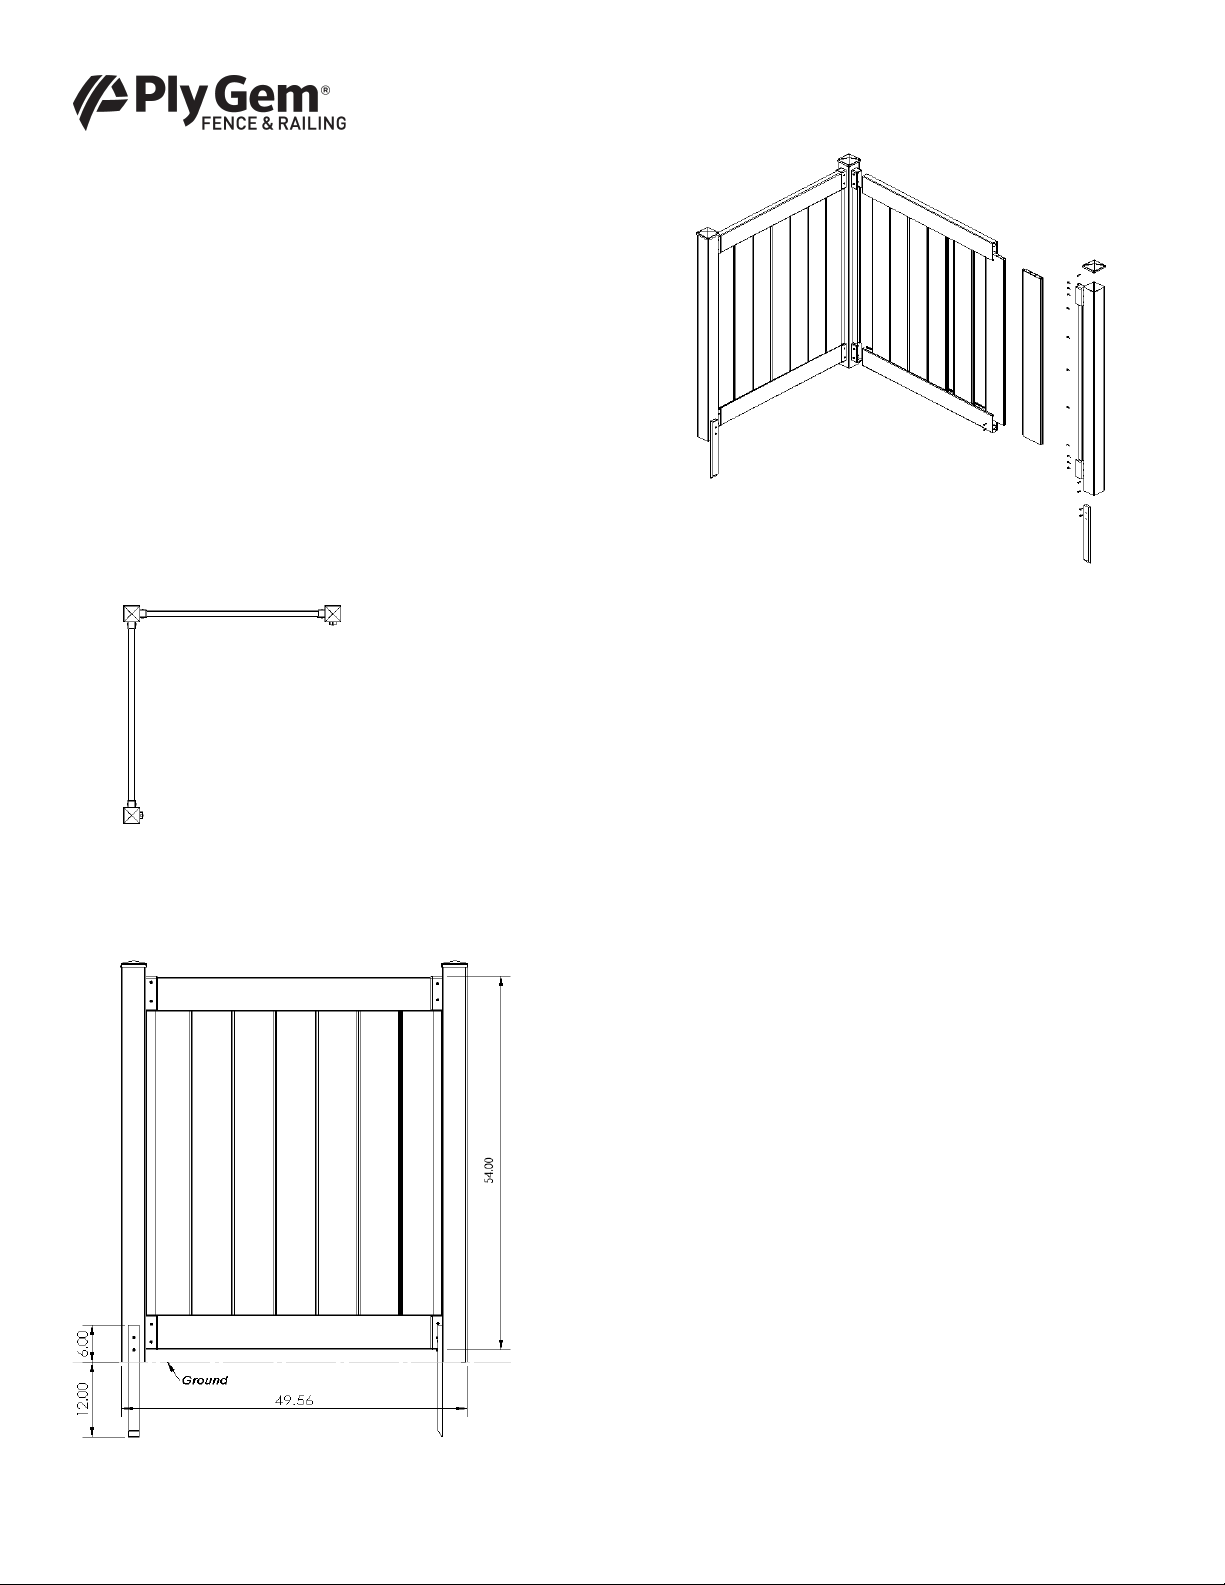
ENCLOSURE LAYOUT
• 90-degree Configuration
OVERALL PRODUCT DIMENSIONS:
ATTACH BRACKETS
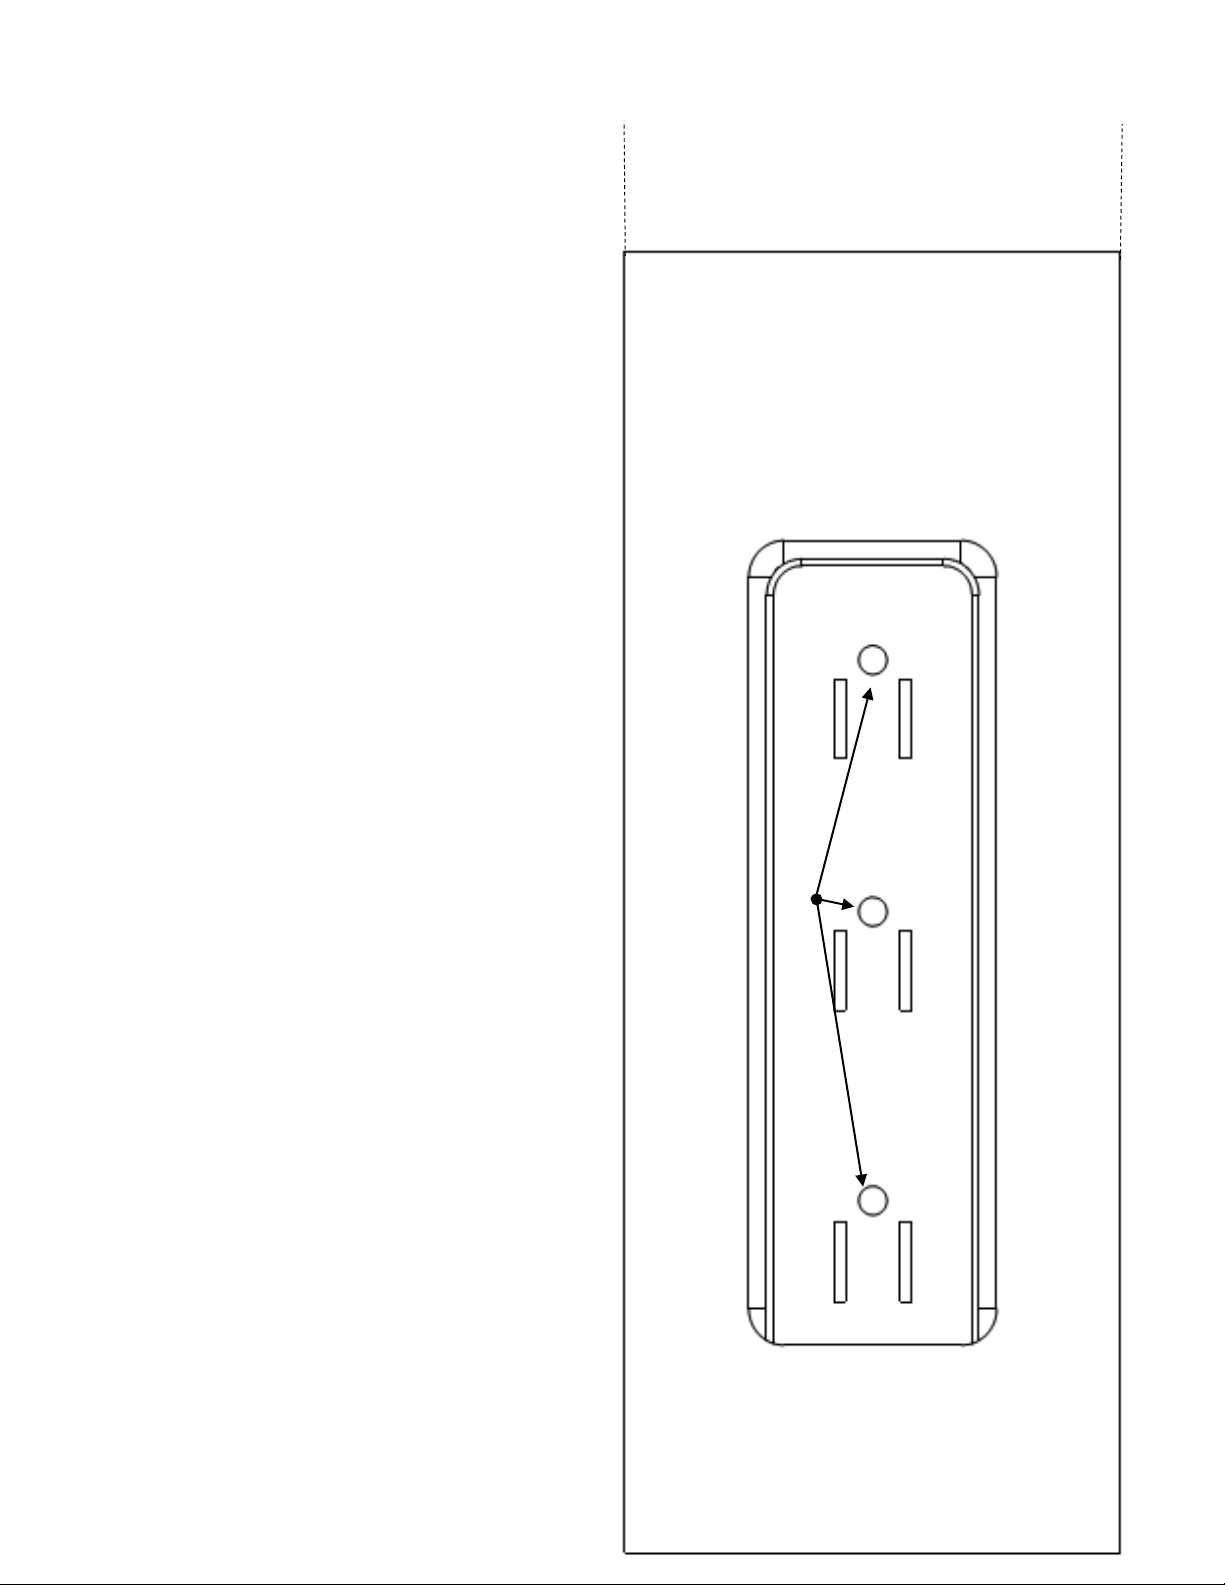
Using template (see reverse) mark all posts, top and bottom, for pre-drilling.
Using 1/8" drill bit, pre-drill holes for brackets. Attach two brackets to each post
with open ends of the bracket facing the center of the post using three - #10 x
3/4" painted screws. Attach last set of brackets on the adjacent side of desired
center post using three - #10 x 3/4" painted screws following predrilling.
INSTALL VINYL U-CHANNELS
Place one U-channel on the post between the brackets. Slide the U-channel
against the top bracket. Make sure the U-channel is in the center of the bracket.
Pre-drill three holes with 1/8" drill bit, one hole in the center, the other two holes
midway between the end of the U-channel and the center hole, as shown in the
expanded view drawing of the enclosure section. Secure the U-channel section
to the post with three - #10 x 3/4" long screws. Repeat this same installation
procedure with the other three U-channels between each set of brackets.
INSERT RAILS INTO BRACKETS
Lay the end posts down with brackets pointing sideways. Lay them on
cardboard or soft surface to keep from damaging the posts. With the slot toward
the middle of the post, insert one end of the rail into each bracket of the end
posts. Install one picket into the rails with the groove edge toward the Uchannel. Slide picket into U-channel. Make sure the rails and picket are pushed
all the way into the brackets and U-channel. Pre-drill two holes through the side
of the brackets and secure the bracket and rail with two - #10 x 3/4" long screws.
Do this for the front and back of each bracket.
INSERT PICKETS
Slide six more pickets into the rails. Make sure the pickets snap together. A
soft hammer can be used to lightly tap the pickets together. Repeat for the other
section.
ATTACH CENTER POST
Slide brackets over the end rails and U-channel over the picket and secure with
two- #10 x 3/4" in the bracket. Flip the panel over and install two - #10 x 3/4"
screws into each of the brackets. Holding the end post, stand section up with
the side of the center post on the ground and brackets on the side. Attach the
second section to the center post. Stand enclosure upright and finish installing
two - #10 x 3/4" screws into the other side of each bracket.
GROUNDING SPIKE
Before attaching spike, place enclosure where you intend it to be, then drive
the spike 12" into the ground on the inside of the end post. Repeat for second
end post. (see
image above for visual)
ATTACHING SPIKE
Attach spike with two - #10 x 1 1/2" screws to the center of the end posts.
GLUE CAPS
Glue the caps onto the posts using a PVC glue which is UV rated and classified
as a hot glue. Wipe excess glue away before drying.
1. Post Caps (3)
2. Posts (3) – 3.5" x 3.5" x 58 1/4"
3. Pickets (14) – 7/8" x 6" x 46 1/4"
4. Rails (4) – 1 1/2" x 5 1/2" x 42 1/2"
5. U-Channel (4) – 7/8" x 42 7/8"
6. U-Brackets (8)
7. Ground Spikes (2)
8. Painted Screws (68) - #10 x 3/4"
9. Unpainted Screws (4) - #10 x 1 1/2"
SKU/MS/0219
Page 2
TEMPLATE FOR PRE-DRILLING BRACKET
Place this edge against end of post
Fold this edge down
Fold this edge down
Fold this edge down
Cut Dotted Line
Cut Dotted Line
Mark these three holes for drilling.
 Loading...