

Page 1
installation
guide
important
In order to have a valid warranty, downspout openings of 9’’ square or more are required if the property is located in a coniferous tree zone.
Any opening exceeding 1/8» square must be sealed with screws or caulking.
Page 2
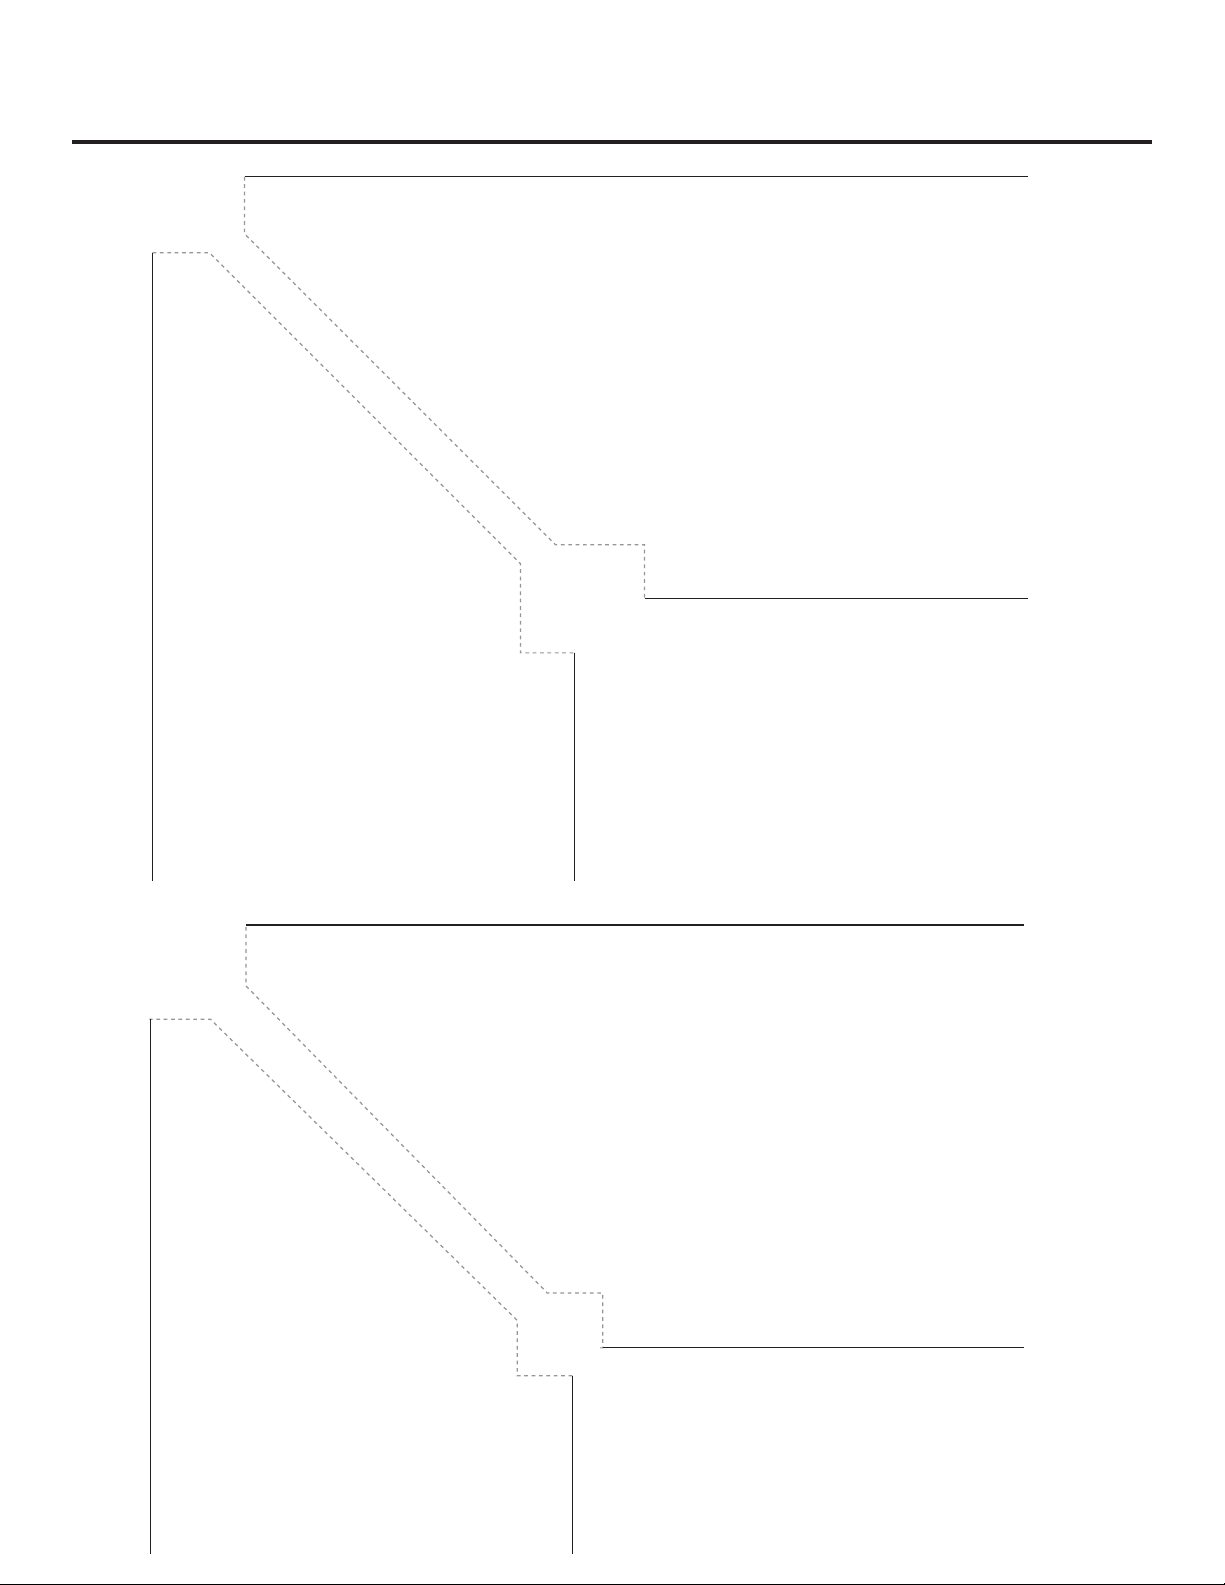
CORNER INSTALLATION
House
Back
Back
Inside corners
Front
Inside corners
Note: Follow a line of perforations to cut in a 45º straight line
Front
Front
Front
Outside corners
Back
Outside corners
Back
House
Page 3
INSTRUCTIONS
1. installation
Clean out the gutters and downspouts before installing Clip N’ Guard™.
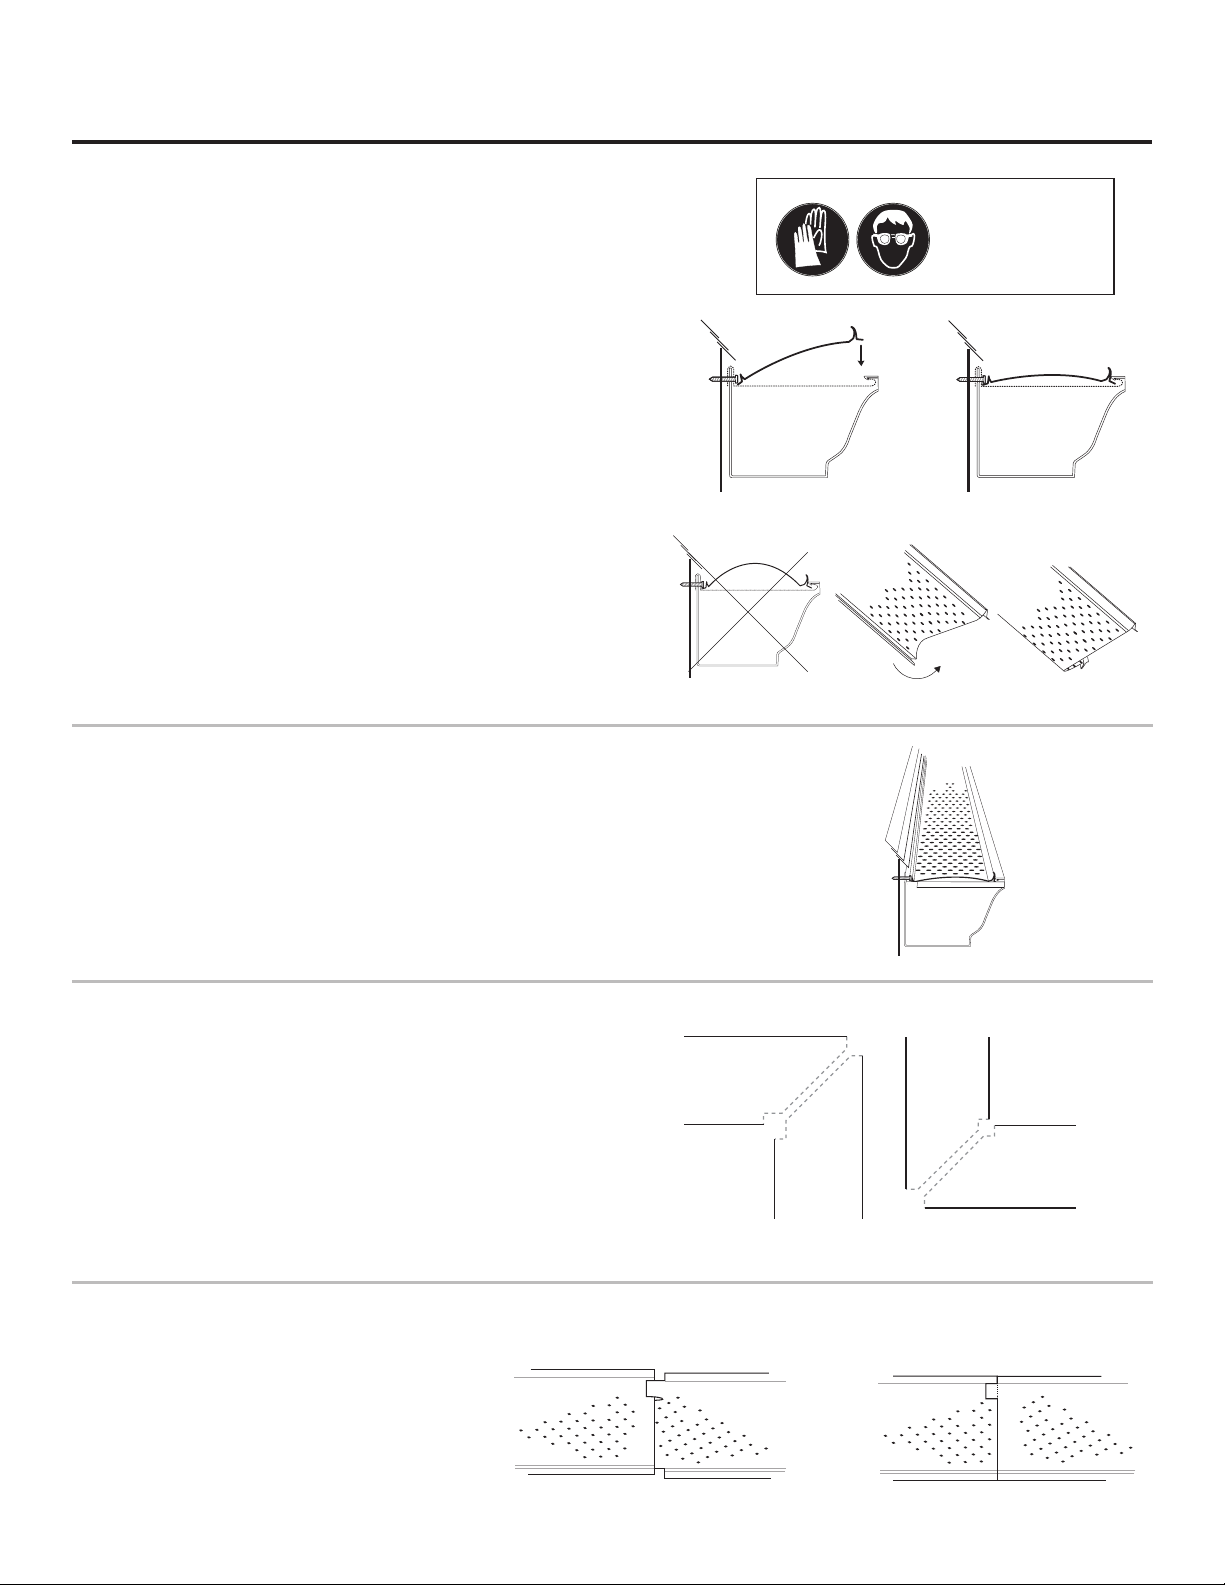
Insert the back of the product underneath the screw or the drip edge. If your
gutter is installed with spikes and without a screw, a screw can be added to
hold the product more rmly.
Insert the product into the gutter by pressing on the front of the product, a
screw can be added at the back of the product for a better hold.
If your gutters have been installed using spikes, make sure they are
spaced a maximum of 18’’ apart. Otherwise, reinforce the gutters using
additional spikes or hangers to reduce the space between them.
note
If the Clip N’ Guard™ is excessively bent during the installation and is dicult to install, the width of the opening of your gutters is probably less than 5
inches. In that case, you will have to fold the back of the product to adjust the
width. Refer to the illustrations.
Measure the width necessary to bend according to the width of your gutters.
Fold and pull down completely the back of the product towards the bottom.
Note that a light curve is normal and necessary to maintain the product
in position.
Once folded, refer to the point 1 and continue the installation.
WARNING
Wear gloves and
safety glasses for
installation.
2. end caps
To avoid any overowing, do not install the Clip N’ Guard™ on the top of the
end cap.
Cut the overlap if necessary.
Be sure no gaps remain between the end cap and the product.
3. corners
Cut 2 sections as shown.
SEE CORNER
INSTALLATION PAGE
Overlap sections by 1’’ making sure no gaps remain. If necessary, add a
screw on top of the perforated part to hold both pieces together.
4. overlaps
House
Inside corners
House
Outside corners
Insert each piece into one another,
without leaving spaces.
Make sure no gaps remain. Add a
screw if necessary.
 Loading...