

Installation
Configuration

Trademarks
© 2009 Plustek Inc. All rights are reserved. No portion of this document may be
reproduced without permission.
All trademarks and brand names mentioned in this publication are property of their
respective owners.
Liability
While all efforts have been made to ensure the accuracy of all contents in this
manual, we assume no liability for errors or omissions or by statements of any kind
in this manual, whether such errors are omissions or statements resulting from
negligence, accidents, or any other cause. The contents of this manual are subject
to change without notice.
Environmental Information
The product is designed and produced to achieve sustainable environmental
improvement. We strive to produce products in compliance with global
environmental standards. Please consult your local authorities for proper disposal.
The product packaging is recyclable.
Attention for recycling (For EU country only)
Protect your environment! This product should not be thrown into the household
waste container. Please give it to the free collecting center in your community.
Screen Examples in This Manual
The screenshots in this guide were made with Windows XP. If you are using
Windows 2000 or Vista, your screen will look somewhat different, but functions are
the same.

Table of Contents
INTRODUCTION.......................................................................................................................... 1
HOW TO USE THIS GUIDE........................................................................................................... 1
Conventions of This Guide................................................................................................... 2
A Note about Icons............................................................................................................... 2
Safety Precautions................................................................................................................2
OPERATING ENVIRONMENT REQUIREMENTS .............................................................................3
PACKAGE CONTENTS ..................................................................................................................4
PRODUCT OVERVIEW..................................................................................................................4
CHAPTER 1: INSTALLING THE SERVER............................................................................. 6
INSTALLATION REQUIREMENTS.................................................................................................. 6
INSTALLING HARD DISK DRIVE ................................................................................................. 6
INSTALLING THE FOOT STAND ...................................................................................................7
MAKING THE CONNECTIONS ......................................................................................................7
POWERING ON ............................................................................................................................ 8
CONFIGURING NETWORK SETTINGS .......................................................................................... 8
SETTING UP WITH WEB BROWSER............................................................................................10
LOGGING IN THE ADMINISTRATOR’S INTERFACE ....................................................................10
INSTALLATION CD ................................................................................................................... 11
CHAPTER 2: SETUP WIZARD................................................................................................12
INITIAL SETUP OF THE SERVER.................................................................................................12
LOGGING IN ADMINISTRATOR LOGIN WINDOW....................................................................... 12
CHANGING ADMINISTRATOR’S PASSWORD .............................................................................13
TYPE OF CONNECTION.............................................................................................................. 13
DNS SETTINGS......................................................................................................................... 14
DOMAIN NAME SETTINGS ........................................................................................................15
TIME SETTINGS......................................................................................................................... 16
REGISTRATION.......................................................................................................................... 17
USER ACCOUNTS...................................................................................................................... 17
CHAPTER 3: STANDARD SETTINGS ...................................................................................19
ADMINISTRATOR’S SETTINGS...................................................................................................19
Admin’s Settings................................................................................................................. 19
Default User Settings......................................................................................................... 21
Bug Report .........................................................................................................................23
Registration........................................................................................................................24
NETWORK SETTINGS ................................................................................................................25
Internet Connection Settings.............................................................................................. 25
Domain Name Settings....................................................................................................... 26
Intranet Network Settings ..................................................................................................27
Firewall..............................................................................................................................28
Virtual Server and DMZ.....................................................................................................30
USER MANAGEMENT................................................................................................................31
User Accounts.................................................................................................................... 31
Service Permissions ...........................................................................................................33
i

New User Account..............................................................................................................34
New User Accounts in Batch..............................................................................................35
Internal User Group...........................................................................................................36
SYSTEM MANAGEMENT ........................................................................................................... 37
System Information ............................................................................................................37
Backup and Update............................................................................................................ 38
Disk Management ..............................................................................................................43
Time Settings......................................................................................................................44
Bandwidth Management.................................................................................................... 45
SERVER MANAGEMENT............................................................................................................46
Service List.........................................................................................................................46
MySQL Server.................................................................................................................... 47
FTP Server......................................................................................................................... 49
Setting Up FTP Network Disk.................................................................................50
Mail Server......................................................................................................................... 57
Mail Server Setup...................................................................................................... 57
Mail Filter....................................................................................................................59
Virus Filter.............................................................................................................60
Spam Filter........................................................................................................... 61
Email White List................................................................................................... 62
Black List ..............................................................................................................63
SAMBA Server....................................................................................................................64
CHAPTER 4: CONFIGURING USER INTERFACE............................................................. 66
LOGGING IN USER LOGIN WINDOW.........................................................................................66
MAIL FUNCTION ....................................................................................................................... 67
Mailbox Status....................................................................................................................67
Email Fetching................................................................................................................... 68
Email Forwarding.............................................................................................................. 69
Auto Reply.......................................................................................................................... 70
Recipient Group................................................................................................................. 71
Webmail..............................................................................................................................71
Logging In Web Mail Login Window.......................................................................71
PASSWORD SETTINGS ............................................................................................................... 72
FTP........................................................................................................................................... 73
CHAPTER 5: CONFIGURING WEB MAIL...........................................................................75
CHAPTER 6: CONFIGURING EMAIL SERVER..................................................................79
APPENDIX A: HOW TO CHECK MAC ADDRESS..............................................................82
APPENDIX B: HOW TO APPLY FOR A FREE PLUSNET DYNAMIC DOMAIN NAME
........................................................................................................................................................83
APPENDIX C: PRODUCT SPECIFICATIONS......................................................................85
APPENDIX D: FCC RADIO FREQUENCY STATEMENT.................................................. 87
CONTACTING PLUSTEK......................................................................................................... 88
ii

Introduction
This server is specifically designed for small/medium enterprises, SOHO, schools and
internet-related product design industries. It provides an overall business solution that
is highly stable and easy to operate with low costs. The web management interface
and icon designs are very user-friendly for general users to easily configure the Server
settings. It is the best tool for small and medium enterprises to increase work efficiency
and decrease operation risk.
How to Use This Guide
This User’s Guide provides instructions and illustrations on how to install and operate
your server. This guide assumes the user is familiar with Microsoft Windows operation
system. If this is not the case, we suggest you learn more about Microsoft Windows by
referring to your Microsoft Windows manual before using your server.
The Introduction section of this manual describes the operating environment
requirements and box contents to use this Server. Before you start installing your
server, check the box contents to make sure all parts are included. If any items are
damaged or missing, please contact the vendor where you purchased your server or our
customer service directly.
Chapter 1 describes how to install the Server and connect the Server to your computer.
Chapter 2 describes how to setup your server.
Chapter 3 describes how to configure the Standard Settings of the server.
Chapter 4 describes how to configure the user interface.
Chapter 5 describes how to configure Web Mail.
Chapter 6 describes how to configure Email server.
Appendix A describes how to check the MAC Address.
Appendix B describes how to apply for a free PlusNet dynamic domain name.
Appendix C describes the product specifications of the Server you purchased.
Appendix D describes FCC statement concerning the product.
1
Conventions of This Guide
“XXX” — Represents the buttons on the Server and important notes.
Bold — Represents commands or contents on your computer screen.
A Note about Icons
This guide uses the following icons to point out information that deserves special
attention.
Warning: A procedure that must be followed carefully to
Warning
Attention
Information
prevent injury or accidents.
Attention: Instructions that are important to remember
and may prevent mistakes.
Information: Optional tips for your reference.
Safety Precautions
To ensure the proper operation of the server, read the following
precautions carefully. Store the user’s guide at a proper place.
Information
Please note the following precautions when you choose a storage location for the
Server:
Place the Server on an even surface.
Keep the Server in a cool and ventilated environment. Please avoid direct
Read the user’s guide for further assistance if you encounter
any problems while using the unit.
sunlight and any sources of heat.
2

Keep the area clear and dust-free during and after installation.
The installation of the Server should obey the national and local electrical
codes.
Make sure the Server can be connected via cable and can be accessed by
you for future configurations.
Do not place or stack any objects directly on top of the Server.
Do not attempt to dismantle or replace the hard disk drive to prevent the
system from being damaged or malfunctioned.
Do not replace incorrect type of battery on the Server main board. There is
risk of explosion if the battery is replaced by an incorrect type. Dispose of
used batteries according to the instructions.
It is extremely important that you use the
foot stand to put the Server in an upright
position while using the server, or the
system might become unstable. Any
damages caused are not included in the
warranty coverage.
The Server is equipped with a built-in CF
Card (Compact Flash Card) to save all the
Warning
application programs running on the
Server. Do not attempt to dismantle or
replace the CF Card (Compact Flash Card)
to avoid the system being damaged or
malfunctioned. Risk of system damage or
malfunction might occur. Any damages
caused by the prohibited CF Card (Compact
Flash Card) replacement are not included in
the warranty coverage.
Operating Environment Requirements
Please make sure the Server is deployed under the following environmental conditions:
Operating Temperature
Storage Temperature
Humidity Max. 90%
3
5°C~40°C
-40°C ~60°C

Package Contents
The product package contents include the following items:
Server
Foot stand
Power cord
Installation CD
If the package content does not include all the items listed above, please contact your
server dealer for further assistance.
Product Overview
Front View
1. Power button: Press this button to turn the Server ON or OFF.
Side View
2. Server cover
4

Rear View
3. WAN port: It is where you connect your ADSL modem.
4. LAN port: It is where you connect your PC.
5. Two USB 2.0 ports: It is where you connect the USB 2.0 device.
6. Power port: It is where you connect the included power cable to a standard power
outlet.
5

Chapter 1: Installing the Server
Installation Requirements
The installation requirements of the Server include the followings:
1. Power outlet.
2. Internet connection provided by a local Internet Service Provider (ISP).
Valid user account and user password.
Network parameters include the fixed Internet IP address, the subnet mask
of your network and the default gateway. Please obtain the network
parameters from your local Internet service provider.
Make sure your Internet connection is successfully connected. Please
3. Suitable cables for connections to LAN and Internet.
4. A domain name if a web site is planned.
5. A personal computer (equipped with 10/100BaseT Network interface card) supports
either Internet Explorer 5.5 or Netscape 5.0 and above to configure the Server.
6. Before you begin to install, it is strongly recommended that you install a 2.5-inch hard
disk drive into the Server. You may consult your dealer for availability.
Installing Hard Disk Drive
consult your local ISP for additional support if you encounter any problem.
If you have purchased a 2.5-inch hard disk drive, please install it before you power on
the Server. The system supports SATA interface, 2.5 inch and up to 750 GB hard disk.
Before you install the hard disk drive, please backup the data stored in the hard disk
drive if there is any. After the installation is completed, the Server will automatically
format the hard disk drive. It takes time to format the hard disk drive. For exam ple, it
takes about 1 hour to format a 500 GB hard disk drive.
Hard disk HDD Jumper must be set to the Master mode.
Attention
Please follow the procedures below to install the hard disk drive:
6

1. Use a screwdriver to open the cover located on the side of the Server.
2. Connect the SATA adaptor and the power source.
3. Slide the hard disk drive into the slot.
4. Tighten the two screws firmly on the side of the hard disk drive to secure the hard disk
drive.
5. Close the lid. Tighten the screw to secure the cover.
Installing the Foot Stand
Place the Server upside down and follow the steps below to install the foot stand:
1. Aim the tabs on the foot stand at the notches on the bottom of the Server, with the
arrow on the foot stand toward the bottom plate of the Server.
2. Insert the tabs on the foot stand into the notches on the bottom of the Server.
3. Press the foot stand toward the bottom plate of the Server until it snaps into place.
Making the Connections
1. Connecting the power
Plug the receptacle end of the power cord into the power socket on the rear
panel of the Server.
Plug the other end of the power cord into a standard power outlet.
2. Connecting a PC directly to the Server (for the initial setup).
Please connect a cable from the LAN port on the PC to the LA N port on the
rear panel of the Server.
(To connect the ADSL modem to the Server, wait until after you finish Setup
Wizard process.)
3. Connecting the whole network
Connect a network cable from ADSL modem to the WAN port on the rear
panel of the Server.
Connect a network cable from the Hub to the LAN port on the rear panel of
the Server.
Connect a network cable from the Hub to the LAN port on the PC.
7

Powering On
Press the Power button on the front panel of the Server to power on the Server. When a
power source is connected to the Server, the blue light around the power button is on.
The indicator light is off when the power is off.
Configuring Network Settings
After both power and network are connected, you may start to configure the network
settings.
You can configure the Server via the web browser on any PC. Before you begin to
configure your Server via the web browser, please contact your ISP to obtain the
following values:
The fixed Internet IP address assigned to the Server
The subnet mask of your network
The default gateway
You are allowed to configure the Server from the browser via any PC. Since the default
network settings of the Server is configured to DHCP for LAN IP assignment, please set
your PC configurations to allow your PC obtaining an IP address from the Server. Make
sure the network connection setting for your PC is configured to Obtain an IP address
automatically, and Obtain DNS server address automatically. For XP operation
system users, follow the steps below to configure:
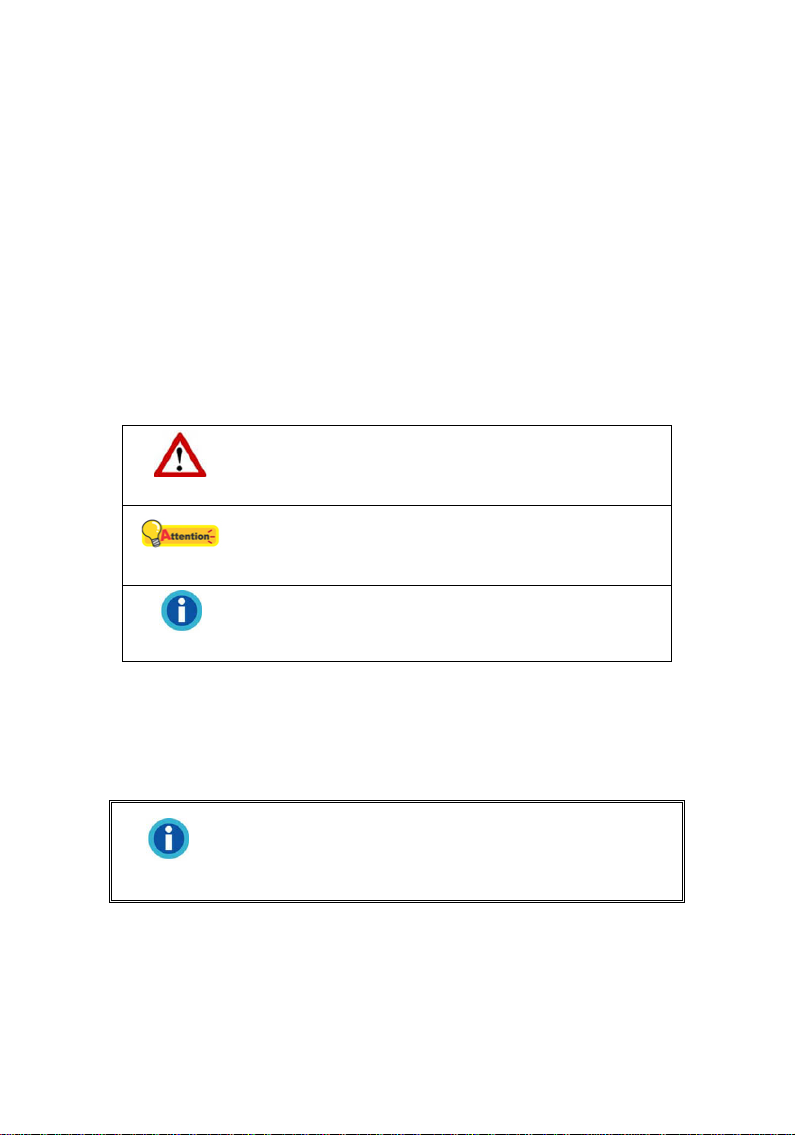
1. Select Start > Connect To > Show all connections.
2. Right-click the Network Connection icon in the window, and select Properties.
3. Select Internet Protocol (TCP/IP) in the window that displays, and press Properties
and OK.
8
4. Enable Obtain an IP address automatically and Obtain DNS server address
automatically. Press OK.
5. Press OK to complete the network connection setting.
Refer to the Operating System User Manual if you encounter problems.
To assign a fixed IP address to your PC, configure the PC’s IP address within the range
from 192.168.0.2 to 192.168.0.254 and the subnet mask as 255.255.255.0. The default
gateway address is 192.168.0.1.
9

You have to assign a fixed IP address to the Server to avoid IP address confliction when
you already have a DHCP server other than this server in your LAN. Please revise the
default IP address according to your local DHCP server settings.
Setting up with Web Browser
The setup process is performed through a web browser running on a computer in your
network. After you complete the setup process, the Server can be managed from any
computer on the network via the web browser. To avoid the control of the Internet being
taken by your PC over the Server, before you start to configure the Server via your PC,
please make sure that the Server is powered on.
Logging in the Administrator’s Interface
You can log in the Server via the administrator’s interface via the web browser, and turn
on the administrator’s functions without the pre-installed hard disk drive. The pu rpose
for this is to make sure the system operate properly. However, it is strongly
recommended that you install a hard disk drive to achieve the best server performance.
All data can’t be saved if the hard disk drive is not installed.
Logging in http://192.168.0.1/admin/ as Server Administrator
To log in as an administrator, enter the default IP address
http://192.168.0.1/admin/ in the URL field of your web browser and press
Return (or Enter) on your keyboard. Administrator interface is designed for
administrators to configure the server management functions.
Logging in http://192.168.0.1/user/ as an individual User
To log in as a user, enter the default IP address http://192.168.0.1/user/ in the
URL field of your browser and press Return (or Enter) on your keyboard. User
Interface is designed for personal users to change personal passwords and
configure the personal email management functions.
10
Installation CD
The installation CD contains quick installation tools that are designed for system
administrators to install applications of the Server’s User management interface and
Web Mail management interface into PCs on LAN.
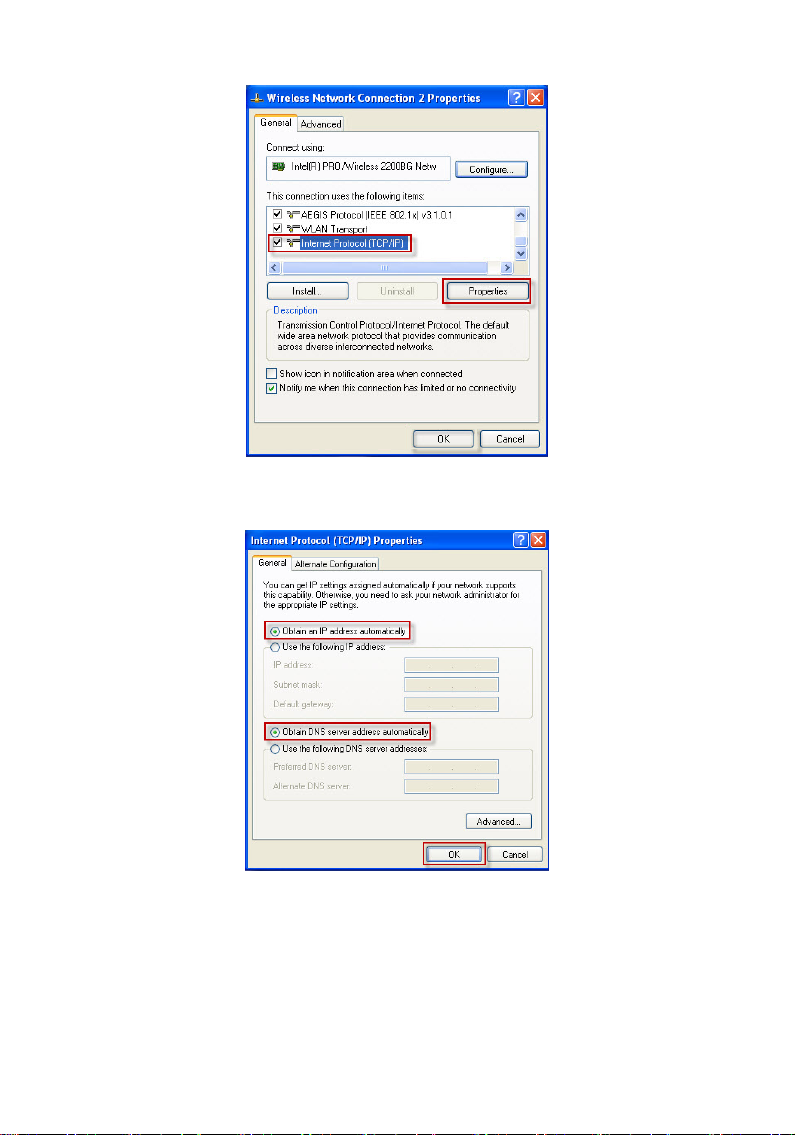
Insert the enclosed installation CD into the CD-ROM drive of your PC. Select a language
for the interface, and select Install user interface. Follow the on-screen installation
procedure. When the “Network changed to DHCP” message is displayed, press OK
to confirm. After the installation is completed, your PC will restart again if the operation
system of your PC is Windows 95, 98 or ME.
After the installation is completed, the system will launch the IE browser automatically,
and link to http://192.168.0.1/user/. If you intend to log in the administrator’s interface,
change the URL path to
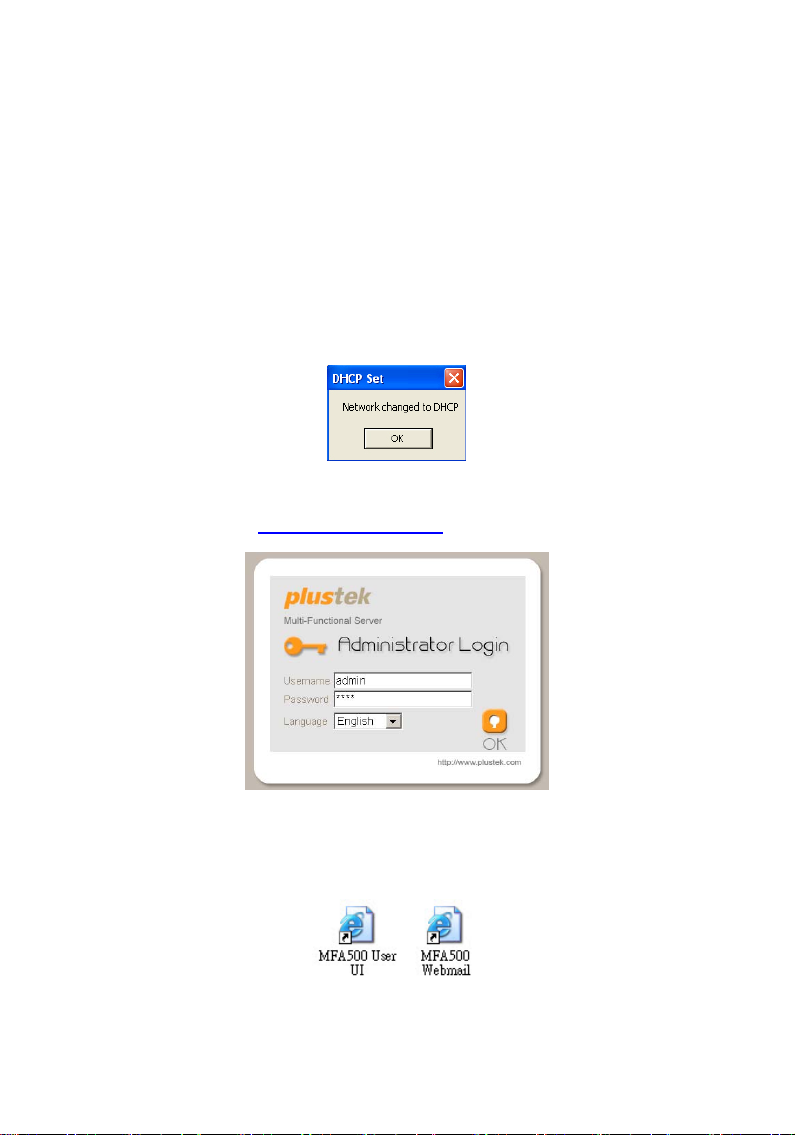
Also, after the installation is completed, you can click the MFA500 User UI shortcut icon
as shown below on the PC desktop to log in the User management interface, and click
the MF A500 Webmail shortcut icon as shown bel ow on the PC desktop to log in Web
Mail management interface.
http://192.168.0.1/admin/.
11

Chapter 2: Setup Wizard
Initial Setup of the Server
When you configure the Server for the initial setup or when the factory default values are
restored, the Setup Wizard will run automatically to guide you through the entire setup
process. Since the Server provides two setup modes for administrators to configure the
Server settings, administrators may choose Standard Settings in addition to Setup
Wizard.
Logging in Administrator Login Window
Follow the steps below to log in Administrator Login page:
1. Launch a standard web browser on a computer connected to the network. (Make sure
the computer you are using supports either Microsoft Internet Explorer 5.5 or
Netscape 5.0 and above.)
2. Enter the default IP address http://192.168.0.1/admin and press Enter key on your
keyboard. The Administrator Login page will be displayed on the screen.
3. Enter the default Username and Password. The default administrator’s username is
admin (cannot be changed), and the default password is 1111 (can be changed).
4. Select the desired interface Language as English. Click OK to log in the Server and
the Setup Wizard will automatically guide you through the initial setup process.
12
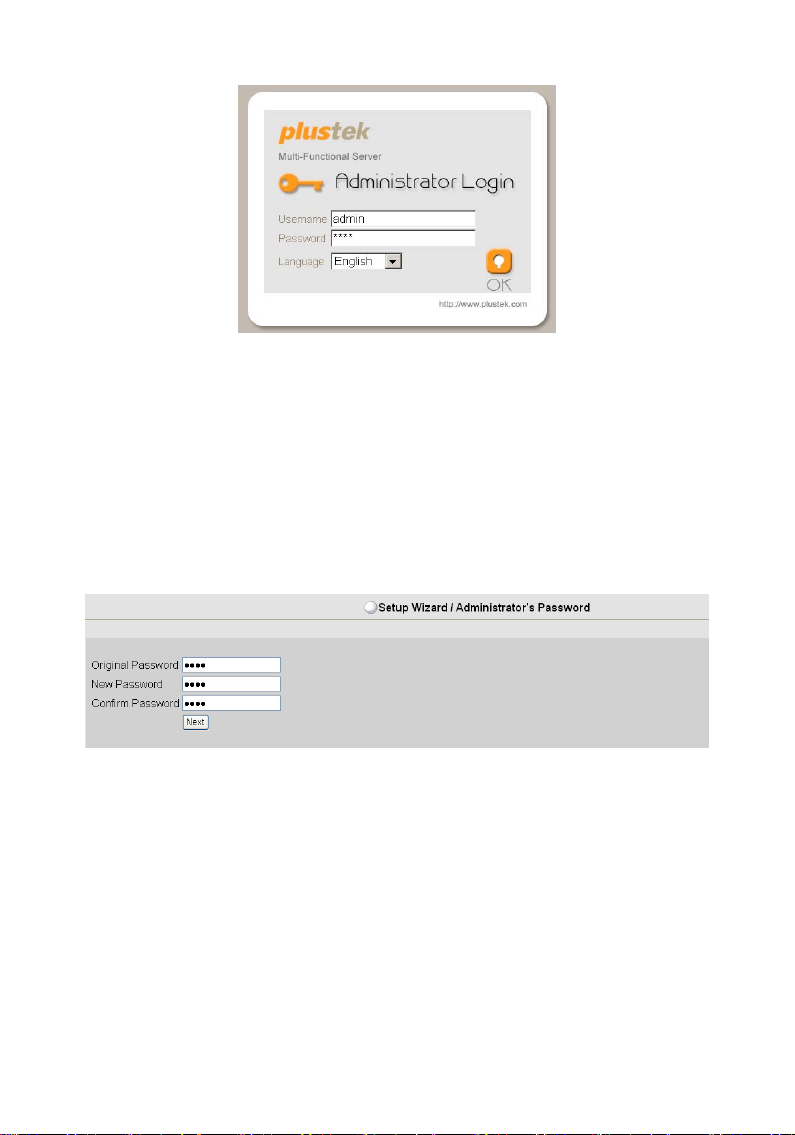
Changing Administrator’s Password
You may change the administrator password in the Administrator’s Password window.
Enter the factory default password 1111 in Original Passw ord first and then enter the
New Password. Enter the new password again in the field of Confirm Password to
confirm, and press Next. The password can be a combination of number and
alphabets.
Type of Connection
Choose the type of connection. There are three options: Cable, Dialup ADSL, and
Fixed IP.
1. If you select Cable, click Next to configure DNS Settings.
13

2. If you select Dialup ADSL, enter PPPoE Settings, including Account and Password.
Click Next.
3. If you select Fixed IP, enter Inte rnet Connection Settings, including IP address,
Netmask and Gateway. Click Next to continue the configurations.
DNS Settings
1. For the first-time users, it is recommended that you select Obtain DNS server
address automatically.
2. If you choose Fixed IP address, enter Preferred DNS server address and Alternate
DNS server address. Click Next to configure Domain Name Settings.
14

Domain Name Settings
Domain Name Settings allow you to assign a domain name for the Server. You may
enter a static domain name specific to your network use, or use the dynamic domain
name service provided by your local ISP.
Static Domain Name: Select Static Domain Name and enter the domain name that
you have applied successfully.
Dynamic Domain Name: Select the service provider of your dynamic domain name and
enter the domain name and related account information.
Before you apply for the dynamic domain name services (dialup ADSL or Cable), confirm
with your ISP if they offer the services. You can apply for the dynamic domain name
services from the following websites:
www.tzo.com, www.oray.cn, www.3322.org, or you can click PlusNet to apply for the
dynamic domain name services.
PlusNet Dynamic DNS system provided by the Server is specially designed for the users
of the Server. All domain names and passwords applied from PlusNet Dynamic DNS
system can only be used on this Server since they cannot be used on other systems or
PCs. Please refer to Appendix B on the steps to apply for the domain names and
passwords from PlusNet Dynamic DNS system.
www.pn99.com, www.twnic.net, www.dyndns.org,
15
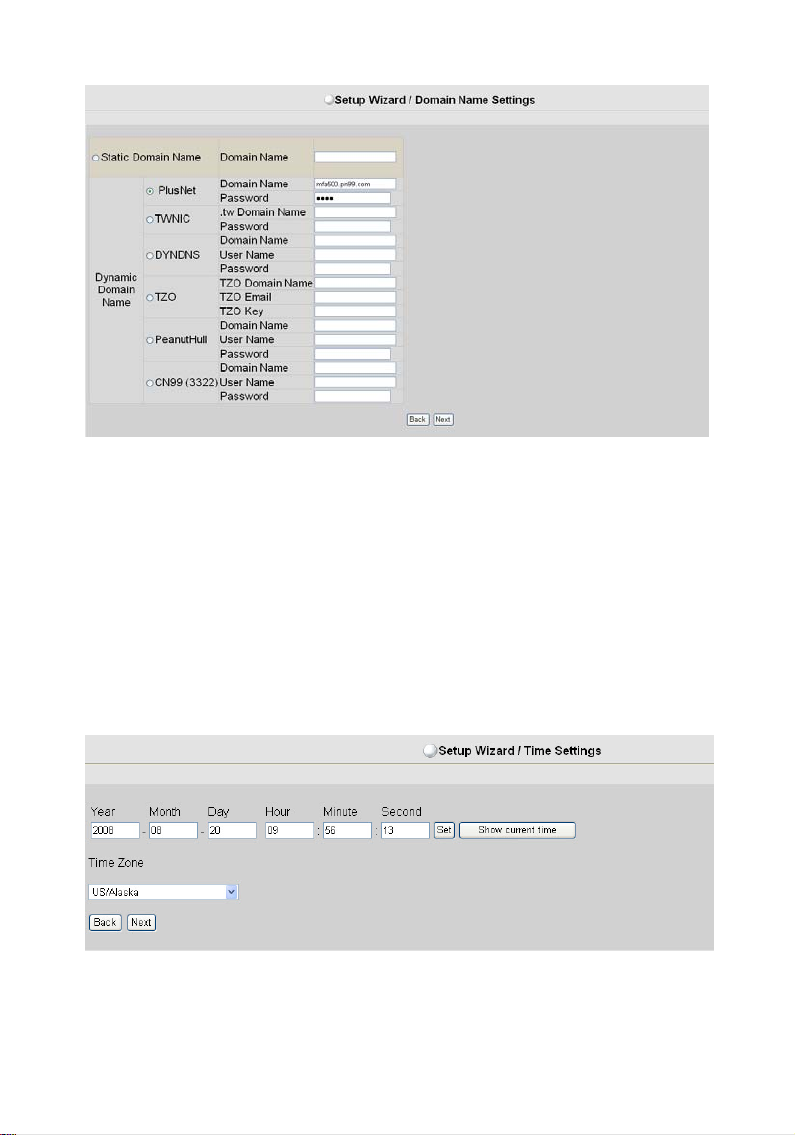
Time Settings
You are able to configure system time and time zone. Click Show current time but ton
to display the current system date/ time before you adjust the system time. You can
manually enter the correct system time and then click Set.
You can select the time zone of your region from the drop-down menu. Changes of the
time zone will convert the system time to a system time that matches the modified time
zone settings. Click Next to continue the configurations.
16

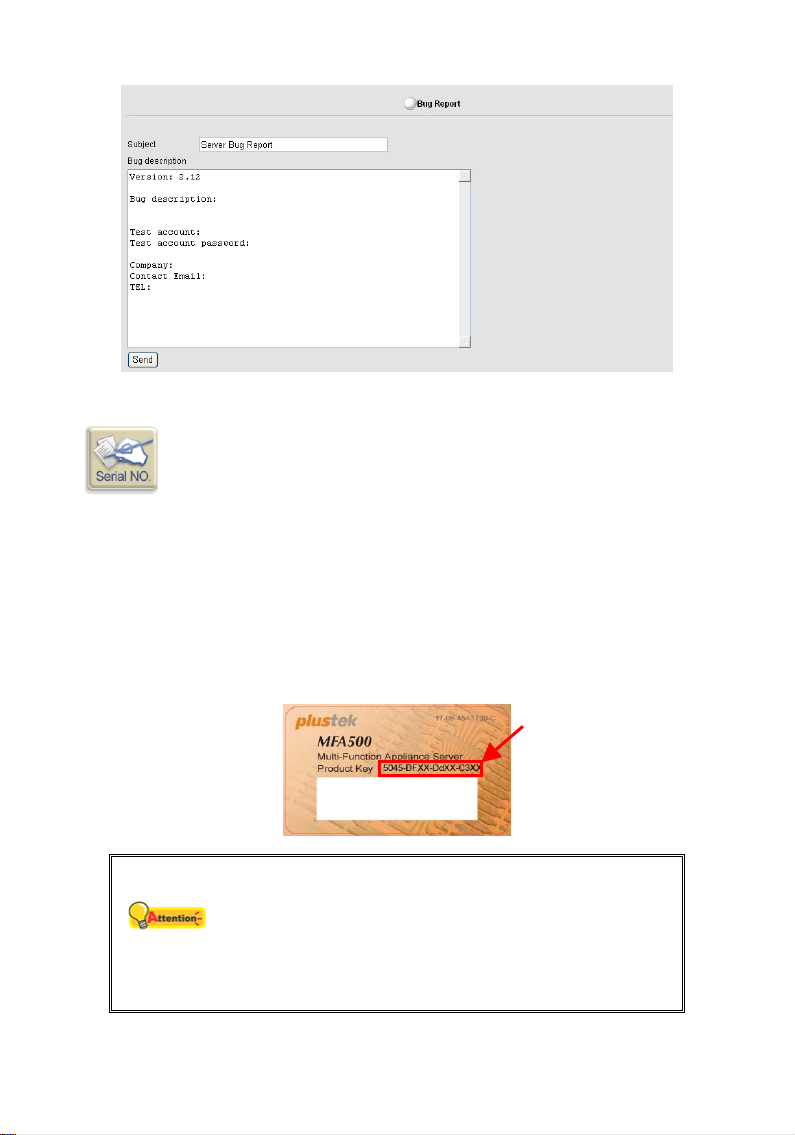
Registration
You must register the serial number of the product key before you continue the rest of
the configurations. Enter the 16-digit Produc t Key in the field of Serial number and
click Register to register the serial number. You may find the Product Key sticker on
the rear panel of the Server.
Attention
You must connect the network successfully before you can
proceed to register the product’s serial number. If the
network is not connected, you are unable to register the
product online.
Before the product is registered online successfully, the
system only supports the WAN function, and you are not
allowed to access other server functions.
User Accounts
You are allowed to create the new user accounts and manage existing user accounts.
To create a new user account, enter the related information in the User Name, Alias,
Description, and Password fields. Refer to the
detailed information of each field. Click New to confirm the creation of a new user
account. Enter the number of allowed disk space for users. The specified disk space
indicates the maximum disk space shared among all server services, including emails,
FTP, and web pages allocated for each user. Click Modify to confirm any modification
made.
Click Export to export and save the created user account data in a specified destination.
Before you import a user list, click Browse to specify the location of the desired list file,
and click Import to restore the user list saved.
To search for any specific user account information, enter the name of the user account
you want to search in the blank box prior to the Search button, and press Search. Then,
the detailed user account information will be displayed for you.
17
New User Account section for

18

Chapter 3: Standard Settings
Standard Settings include standard functions of the Server. Administrator can modify
the following Standard Settings: Administrator’s Settings, Network Settings, User
Management, System Management and Server Management.
You may access the administrator management interface by entering the IP address of
http://192.168.0.1/admin/ in the URL field of your browser if your PC is on the same
LAN of the Server. Enter the assigned domain name (
the URL field if you try to access the administrator management interface from a remote
PC.
After you log in the Server, click Standard Settings on the upper right corner of the
screen to configure the Standard Settings. You can either click the on-screen icons or
select from the drop-down menu on the top of the screen to configure the Server.
Administrator’s Settings
http://<domain name>/admin/) in
After you log in the Server as an Administrator, click Standard Settings on the upper
right corner of the screen and click Administrator’s Settings from the menu bar.
Administrator’s Settings allow you to set up the administrator configurations, user
privileges, view the bug reports and the registration information.
Admin’s Settings
Select Standard Se tt i ng s > Administrator’s Settings > Admin’s Settings to configure
Admin’s Settings. You can change the administrator’s password, enable login
captcha, setup the email notification to a specified mail address for security reasons, and
19

enable the remote access to the administrator interface.
Administrator’s Password Settings
In this section, enter the original password first and then a new password you prefer.
Confirm the new password again and click OK to validate the new password. The
password can be a combination of numbers and alphabets.
Enable Login Captcha
For login security, check the Enable Login Captcha checkbox and press OK. When you
attempt to enter the administrator’s interface next time, you must enter the characters
displayed in a captcha (image with characters) with the correct username, password and
a selected language option before you can log in to the administrator’s interface. The
login captcha is case-sensitive. The approach can effectively prevent any unauthorized
access by spammers and other security threats.
System Notification and Email BCC
System Notification: Check the On box and enter your mail account in the To
field, so you can get the notification emails from the Server whenever any user
account is added or deleted.
Email BCC: Check the On box and enter the desired mail account in the To field
to receive copies of all mails being sent or received by the Server. The specified
mail account can be either a local mail account or an external mail account hosted
by your local ISP, for example, xxx@gmail.com.
Allow Administrator multi-login: Check the box to allow multiple access to the
administrator interface of the server via the administrator’s account.
Allow Administrator from WAN: Check the box to allow access to the
administrator interface of the Server by a remote PC via web browser. You can
only configure your server from the local network if you choose to leave the box
blank. The option is defaulted as enabled.
General Settings
Select a number from the drop-down lists of Account page size and Log page size to
indicate how many records can be displayed on each page. Modify the number of Max
Log Records saved in the log file of the Server, including the Mail log and mail filter
records.
Registration
Displays the registered serial number of the Server.
20

Default User Settings
Select Standard Settings > Administrator’s Settings > Default User Settings to
display the Default User Settings screen. You may set limitations on the password
format, the maximum disk space allocated for users, and user groups settings for all
users.
21

Default Password: enter a default password for any new mail account. The default
value is 1111, and can be changed.
Random Password: click to enable the password of a new user account to be
generated by the Server randomly, and not to use a fixed value.
Type of Random Password: select the format of random passwords. Options include
the followings:
Numeric characters
Numeric characters and lowercase alphabet characters
Numeric characters, lowercase and uppercase alphabet characters
Alpha-numeric characters and symbols
Length of Random Password: enter the length allowed for random passwords.
Max Allowed Disk Space: enter the maximum disk space that can be used by a new
mail account.
The disk space allowed for each new user account includes
the space for personal e-mail, FTP server and personal web
Information
page owned by each individual user.
Service Permissions: select type of services that a new user account is permitted to
use.
Max Mail Forwarding Addresses: enter the maximum number of email addresses that
a user can forward emails to.
Max Mail Fetching Addresses: enter the maximum number of email addresses that a
user can fetch emails from.
Max User Groups: enter the maximum user groups that a user can create.
Max Members/Groups: enter the maximum number of members that a user can include
per user group.
Maximum mailbox size: enter the maximum mailbox size for a new user.
If the values of Maximum mailbox size and Max Allowed Disk Space are different, the
Server will set the smaller of the two to be the actual size that can be used by a user.
For example, if you set Max Allowed Disk Space as 30MB and Maximum mailbox size
as 50MB, the actual disk space allowed for the user will be 30MB, which is shared among
all service types that a user is permitted to access.
Single mail size limit: enter the maximum mail size that a user is allowed to send or
receive. Any mail exceeding the limit will not be processed.
The maximum number of recipients: enter the maximum number of recipients for
users to include in recipient list per mail. The recipient counts include the entries in
both CC and BCC fields.
22

Bug Report
Select Standard Settings > Administrator’s Settings > Bug Report to write and send
bug reports. You may enter the subject and detailed bug descriptions and send bug
report to the product team by clicking Send.
Make sure the network is connected and the domain name of
the Server has been configured before the Bug Report
Attention
function can be used.
23
Registration
Select Standard Settings > Administrator’s Settings > Registration to register or
display the registered serial number of the Server.
You must register serial number of the product key before you continue the rest of the
configurations. Enter the 16-digit Product Key in the field of Serial number and click
Register to register the serial number. You can find the Product Key sticker on the
rear panel of the Server.
Attention
You must connect the network successfully before you can
proceed to register the product’s serial number. If the
network is not connected, you are unable to register the
product online.
Before the product is registered online successfully, the
system only supports the WAN function, and you will not be
allowed to use other server functions.
24
 Loading...