

Pluribus Networks F9532-C, F9532B-C Quick Start Manual
Quick Start Guide
32-Port 100G Fiber Ethernet Switch
F9532-C | F9532B-C
1. Unpack the Switch and Check Contents
F9532-C or F9532B-C
Rack Mounting Kit—2 front-post brackets, 2 rear-post
brackets, 20 screws, and 2 ear-locking screws
Power Cord (included with AC PSUs only)
Console Cable—RJ-45 to DB-9
Documentation——End-User License Agreement, Quick
Start Guide (this document) and Safety and Regulatory
Information
Caution:
and fan tray modules that are installed into its chassis. All
installed modules must have a matching airow direction.
That is, if the installed power modules have a front-to-back
(F2B) airow direction, all the installed fan tray modules
must also have a F2B airow direction.
Note:
illustration only and may not match your particular switch
model.
The switch includes plug-in power supply (PSU)
The switch drawings in this document are for
3. Adjust Rear-Post Bracket Ears
1
Lock the position of the rear-post bracket ears using the
included position-locking screws.
You can also adjust the rear-post bracket ears to t dierent
rack depths from 56 cm to 75 cm.
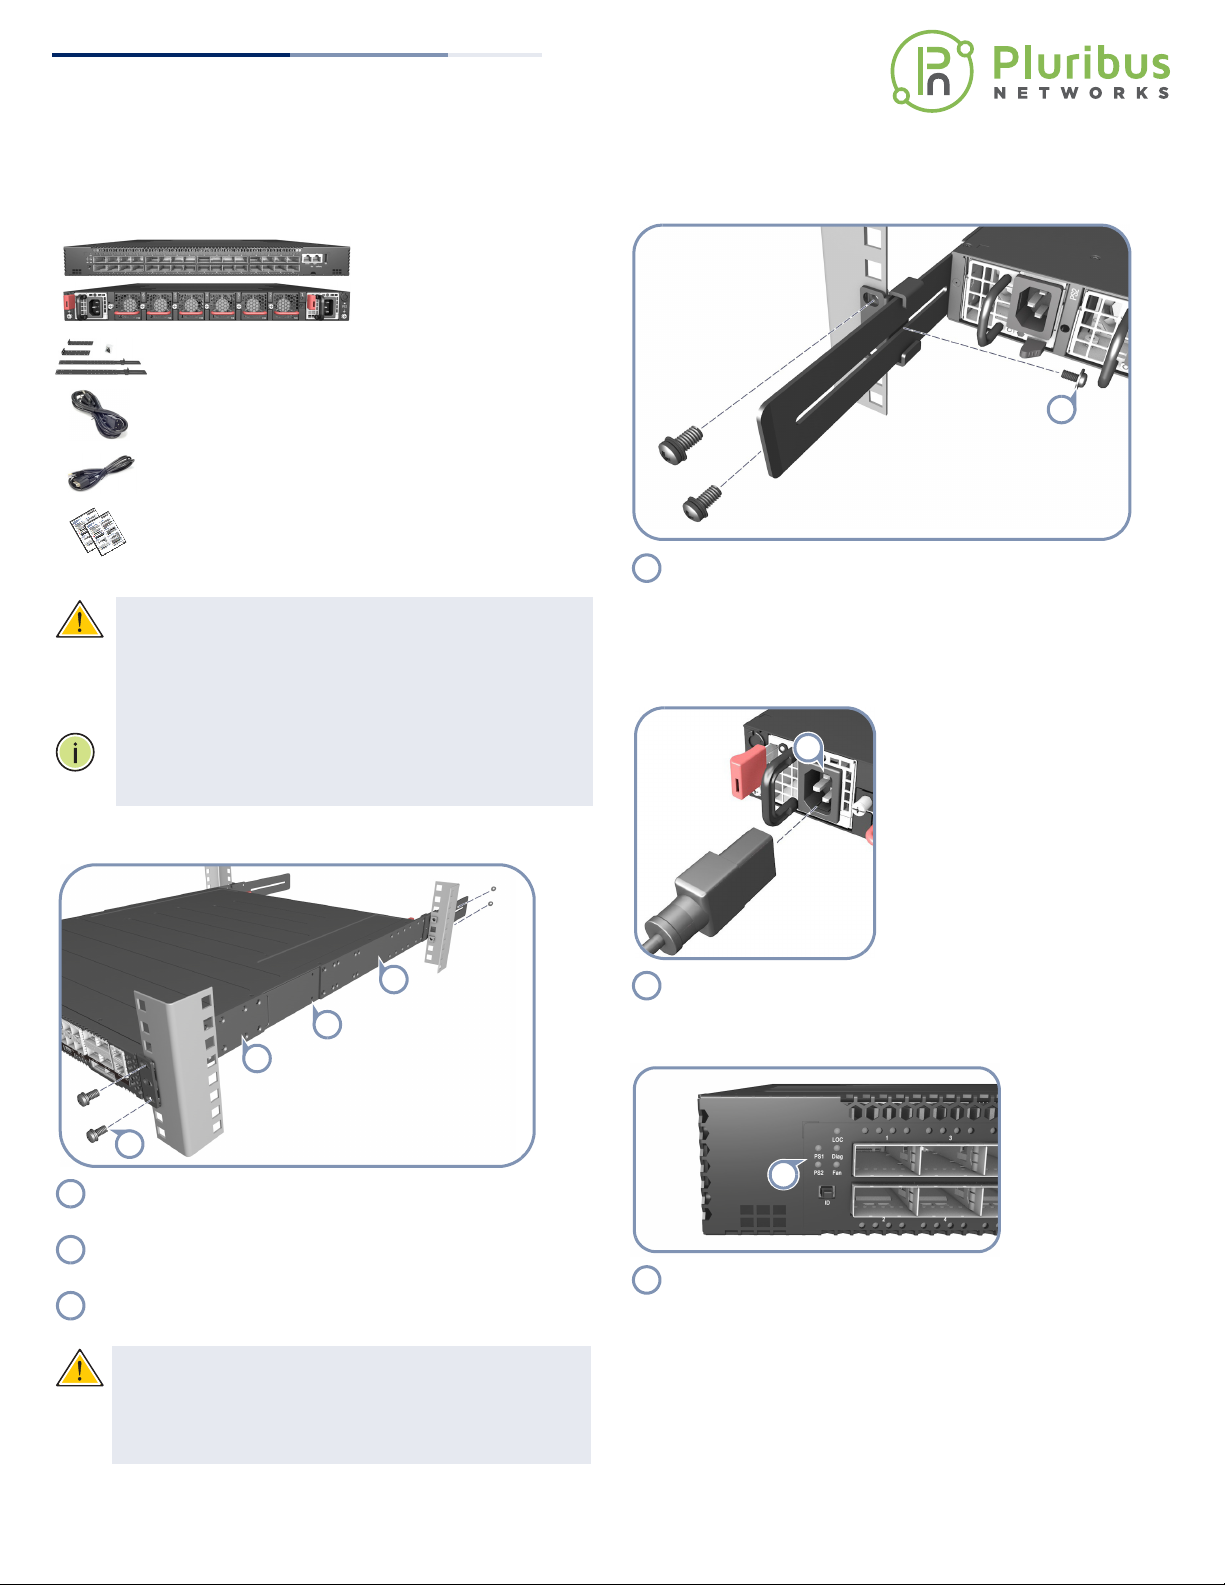
4. Connect Power
1
1
2. Attach the Brackets
1
2
1
3
1
Attach each of the front- and rear-post brackets to the
switch using four of the included bracket screws.
2
Use an additional two screws to secure each of the rear-post
brackets at the mid-point on the sides of the switch.
3
Use the screws and cage nuts supplied with the rack to
secure the switch in the rack.
Caution:
people. One person should position the switch in the rack,
while the other secures it using the rack screws.
装置の吸排気に必要な領域をマニ ュ アル上に規定 し て
い る 。
Installing the switch in a rack requires two
1
Connect an external AC power source to the modules.
5. Verify Switch Operation
1
1
Verify basic switch operation by checking the system LEDs.
When operating normally, the PSU1/PSU2, Diag, and Fan
LEDs should all be on green.
6. Conguring the switch
To congure your switch please refer to the Pluribus Networks
Quick Start Guide available at this location:
http://www.pluribusnetworks.com/get-started/
www.pluribusnetworks.com
– 1 –
19-0019

Hardware Specifications
Switch Chassis
Size (WxDxH) 438.4 x 515 x 43.5 mm (17.26 x 20.28 x 1.71 inch)
Weight 10.87 kg (23.96 lb), with two installed PSUs
Temperature Operating (F2B): 0° C to 45° C (32° F to 113° F)
Operating (B2F): 0° C to 40° C (32° F to 104° F)
Storage: -40° C to 70° C (-40° F to 158° F)
Humidity Operating: 5% to 95% (non-condensing)
Quick Start Guide
Power
Consumption
AC PSU
Power Rating 100–240 VAC, 50-60 Hz, 650 Watts
AC Input 100–240 VAC, 50-60 Hz, 6 A max.
DC Output 5VSB , 3-4A ; 12V , 54-52.9A
Regulatory Compliances
Emissions EN 55032:2012+AC:2013, Class A
Immunity EN 55024:2010+A1:2015
Safety UL (CSA 22.2 No 60950-1 & UL60950-1)
550 Watts maximum
EN 55032:2015+AC:2016, Class A
EN 61000-3-2:2014, Class A
EN 61000-3-3:2013
FCC Class A
VCCI Class A
CE Mark
KC Certification
IEC 61000-4-2/3/4/5/6/8/11
CB (IEC/EN60950-1)
– 2 –
E052017-AP-R01
150200001740A
 Loading...