

Page 1

1
Plum Axe Z400
User Manual
Page 2

2
Introduction
The phone contains a lot of software, including daily office software and entertainment software, Can
facilitate the work of your business, and can enrich your leisure life.
About this User Manual
The user manual can help you quickly and effectively understand the phone's various functions and
operating methods.
Notes:
• To use this phone safely and legally, read the section “Safety Information” carefully;
• Before the first time use, charge the battery with the original charger for 8 to 10 hours. A new battery
may reach its peak performance only after two or three cycles of fully charging and discharging.
• Similar to a computer, your phone will perform best when enough memory is present. Reboot the
phone to clear the memory to store it peak performance.
• Running multiple programs at the same time may prolong the response time of the phone. If it starts to
react slowly, try rebooting the phone to recover.
• In the event that the contents of this manual are not consistent with menu options on the phone, follow
the prompts on the phone.
• Some services described in this manual may not be supported by all the networks. Contact your
network operator or service provider for details.
• All company and product names are the trademarks of their respective owners and registered
trademarks.
• The user manual and the actual layout of the screen layout may be different.
• The information in this guide is subject to change without notice.
• Not all networks can support that described in the manual.
• In some cases, cell phone screen may be some black spots or bright spots. Performance of this
phenomenon and the use of mobile phones will not have any impact.
Intellectual Property
In accordance with copyright law, copyrighted materials (music, pictures, etc.) to copy, change and use
is limited to personal or private purposes. If the user does not own the copyright or larger without the
express consent of the copyright owner and the unauthorized copying, alteration or use of this method to
make or amend a copy, will be deemed to violate copyright law, copyright owners have the right to claim
for their losses . So, please don't illegal use the data that is protected by copyright.
USB Data Cables
This version supports the USB interface. You can connect your ANDROID PHONE with the PC via the
USB & data cable, copying or moving the files amid the ANDROID PHONE and PC, or browning the
images, record files and video files saved in the ANDROID PHONE via the PC.
1. Insert the USB data cable connector into the USB interface of the ANDROID PHONE.
2. Connect the other terminal of the USB data cable with the USB interface of the PC.
CAUTION
THE CONNECTION TO USB INTERFACES HAS TO BE LIMITED TO USB2.O VERSION OR
HAIGHER
OR HAIGHER
THE CONNECTION TO SO CALLED POWER USB PROHIBITED
Appendix – Product Safety Warnings
SAFETY AND COMPLIANCE INFORMATION
Use responsibly. Read all instruction and safety information before use to avoid injury.
BATTERY SAFETY
Charge battery only in temperatures ranging from 32 °F to 95° F(0 °C to 35 °C) .
CAUTION: Danger of explosion if battery is incorrectly replaced. Replace only whit the same or
equivalent of battery recommended the manufacturer. Dispose of used batteries according to battery
manufacturer’s instructions.
WI-FI SAFETY
Turn WI-FI off in areas where WI-FI use is prohibited or when it may cause interference of danger. Such
as in airplanes while flying.
Page 3

3
CARE AND MAINTENANCE
Your ANDROID PHONE is an electronic product and should be treated with care. To reduce the risk of
fire, electronic shock, or product damage.
Do not expose this device to rain, moisture or any type of liquid that corrodes electronic circuits. If you
device gets wet, immediate turn the power off. Allow the device to dry completely before using it again.
Clean the display with a soft cloth and be careful not to wipe the display with anything abrasive .When
carrying your ANDROID PHONE in a bag. Keep it in the included cover to avoid scratches.
Don’t expose your device to extreme heat or cold. For example, do not leave it in the turn of your car in
sub-zero or high heat conditions.
Do not attempt to open the device other than as instructed in this manual.
Do not drop, or knock the device. Rough handing can break internal circuitry.
Do not use harsh chemicals, cleaning solvents, or strong detergents to clean the device.
Use only the recommended accessories.
Doesn’t excessive sound pressure from earphones and headphones can cause hearing loss.
Page 4

4
Contents
1. SAFETY INFORMATION ........................................................................................................6
1.1 WHEN CARRYING THE PHONE ................................................................................................................6
1.2 ENERGY LEAK OF RADIO FREQUENCY .......................................................................................................6
1.3 ELECTROMAGNETIC RADIATION ..............................................................................................................6
1.4 IN PUBLIC ..........................................................................................................................................6
1.5 COMPATIBILITY OF RF INTERFERENCE ......................................................................................................6
1.6 IN AIRCRAFT .......................................................................................................................................6
1.7 PACEMAKERS ......................................................................................................................................6
1.8 HEARING AIDS ....................................................................................................................................6
1.9 OTHER MEDICAL EQUIPMENTS ..............................................................................................................6
1.10 ROAD SAFETY ...................................................................................................................................6
1.11 POTENTIALLY EXPLOSIVE ATMOSPHERES .................................................................................................6
1.12 BATTERY ..........................................................................................................................................6
1.13 OTHERS ...........................................................................................................................................7
2. OVERVIEW ..............................................................................................................................8
2.1 APPEARANCE AND KEYPAD ...................................................................... ERROR! BOOKMARK NOT DEFINED.
2.2 SIM CARDS .......................................................................................................................................8
2.3 STORAGE CARD ...................................................................................................................................8
2.4 ACCESSORIES ......................................................................................................................................8
2.5 THE BATTERY ......................................................................................................................................9
3. BASIC FUNCTIONS ...............................................................................................................9
3.1 SWITCHING ON/OFF............................................................................................................................9
3.2 OPEN AND CLOSE SCREEN .....................................................................................................................9
3.3 SET LOCK AND UNLOCK .......................................................................................................................10
3.4 MAIN SCREEN ...................................................................................... ERROR! BOOKMARK NOT DEFINED.
3.5 THE STATUS BAR ...............................................................................................................................10
3.6 ADD/DELETE SHORTCUTS ...................................................................................................................10
3.7 INPUT METHOD ................................................................................................................................10
3.8 ADJUST THE VOLUME .........................................................................................................................11
3.9 SET DATE AND TIME ..........................................................................................................................11
4. CALL FEATURES ................................................................................................................. 11
4.1 MAKING A CALL ................................................................................................................................11
4.2 ANSWER A CALL ................................................................................................................................11
4.3 DURING A CALL ................................................................................................................................11
5. CONTACTS ........................................................................................................................... 12
5.1 VIEW CONTACT DETAILS .....................................................................................................................12
5.2 EDIT A CONTACT ...............................................................................................................................12
5.3 ADD NEW CONTACT ..........................................................................................................................12
5.4 DELETE CONTACTS .............................................................................................................................12
5.5 IMPORT/EXPORT CONTACTS ................................................................................................................13
6. MESSAGING ......................................................................................................................... 13
6.1 TEXT MESSAGE .................................................................................................................................13
6.2 EMAIL .............................................................................................................................................13
6.3 MMS .............................................................................................................................................14
6.4 MESSAGE SETTINGS ...........................................................................................................................14
Page 5

5
7. MULTIMEDIA......................................................................................................................... 15
7.1 CAMERA ..........................................................................................................................................15
7.2 MUSIC ............................................................................................................................................16
7.3 GALLERY ..........................................................................................................................................17
7.4 RECORDER .......................................................................................................................................17
7.5 FM RADIO .......................................................................................................................................18
8. PROGRAMS .......................................................................................................................... 18
8.1 CALENDAR .......................................................................................................................................18
8.2 CLOCK .............................................................................................................................................19
8.3 CALCULATOR ....................................................................................................................................19
8.4 SIM TOOLKIT ...................................................................................................................................19
8.5 BROWSER ........................................................................................................................................19
9. SETTINGS ............................................................................................................................. 21
9.1 WIRELESS & NETWORKS .....................................................................................................................21
9.2 CALL SETTINGS ..................................................................................................................................23
9.3 SOUND SETTINGS ..............................................................................................................................24
9.4 DISPLAY SETTINGS .............................................................................................................................24
9.5 LOCATION & SECURITY SETTINGS ..........................................................................................................25
9.6 APPLICATIONS SETTINGS .....................................................................................................................25
9.7 PRIVACY ..........................................................................................................................................26
9.8 STORAGE .........................................................................................................................................26
9.9 LANGUAGE & KEYBOARD SETTINGS .......................................................................................................26
9.10 VOICE INPUT & OUTPUT ...................................................................................................................26
9.11 ACCESSIBILITY .................................................................................................................................26
9.12 DATE & TIME ..................................................................................................................................26
9.13 TIMER POWER ON & OFF .................................................................................................................. 27
9.14 ABOUT PHONE ................................................................................................................................ 27
10. HELP ...................................................................................................................................... 27
10.1 TROUBLESHOOTING ......................................................................................................................... 27
11. MAINTENANCE GUIDE ....................................................................................................... 28
Page 6

6
1. Safety Information
To use your phone safely and effectively, please read these guidelines carefully.
1.1 When carrying the phone
When you are using the phone, keep it some distance at least 2.5CM away from your body. In case there
is a need of phone slipcover, belt clip, or other accessories to carry your cell phone, it is important to
ensure they are approved by the manufacturer. Otherwise, it may exceed the upper limit of radio
frequency leakage.
1.2 Energy Leak of Radio Frequency
Your phone is a low-power, wireless transmitter and receiver. After being powered on, it will periodically
send and receive radio signals whilst its transmission power is controlled by the network. This device
complies with local standards restricting energy leak of radio frequency.
1.3 Electromagnetic Radiation
Your phone fully complies with standards related to wireless irradiation enacted by the authority of the
State and International Health Association. These limitations are part of the comprehensive regulations
and constitute public wireless irradiation permission standards. These standards are developed and
formed after long-term intensive scientific research by independent scientific organizations such s
ICNIRP (International Commission on Non-Ionizing Radiation Protection). These standards contain a
large surplus to ensure the safety of all and take the variable factors of various measurement conditions
in consideration.
1.4 In Public
Some public places, such as hospitals, health resorts, or other medical facilities, post signage prohibiting
cell phone usage. Heed such warnings and power off your phone in designated public places.
1.5 Compatibility of RF Interference
Your phone may interfere with other devices that are not properly designed for RF shielding or
configured for RF compatibility.
1.6 In Aircraft
Switch the device off and remove the battery when you are in or near an aircraft. It’s illegal to use cellular
equipment on board aircraft since it may cause interference to aircraft navigation systems and/or
networks. Violators may be suited or face severe penalties.
1.7 Pacemakers
If you are using a pacemaker, do not carry your phone (while switching on) in a breast pocket. A
minimum separation of 15 cm should be maintained between the wireless phone and a pacemaker. Use
the ear opposite the pacemaker to minimize the potential for interference. If you have any reason to
suspect that interference is taking place, switch off your phone immediately.
1.8 Hearing Aids
Wireless phones may interfere with some hearing aids. In the event of such interference, you may want
to consult your service provider.
1.9 Other Medical Equipments
For other personal health care equipments, consult your service provider. Consult a physician or the
manufacturer of the medical device to determine if they are adequately shielded from external RF energy
or if you have any questions.
1.10 Road Safety
Please comply with local traffic laws and regulations. If the driving condition is getting worse, pull off the
road before you make or receive calls. If your vehicle has airbags, keep your phone away from where
the inflated airbags can reach. Otherwise, you may be seriously hurt by the phone once the airbags
expand.
1.11 Potentially Explosive Atmospheres
Switch off your phone when in any area with a potentially explosive atmosphere and obey all signs and
instructions. These areas include fuel depots (below deck on boats, fuel or chemical transfer or storage
facilities), areas where the air contains chemicals or particles, such as grain, dust or metal powders.
They are usually marked with signs, but not always so.
1.12 Battery
Any contact of the battery’s exposed electrodes with a conductor, such as jewelry or keys, may cause
damage to possessions or bodily injury.
Page 7

7
1.13 Others
The phone is comprised of precise electronic circuits, magnets and a battery system. Caution is advised
when handling the components, particularly with regard to the following:
·Keep the phone and its accessories dry. Your phone is not water-proof.
·Keep the phone away from extreme temperatures.
·Do not place it near a flame or a lit cigarette.
·Do not scratch on it.
·Avoid tapping or severe knocking of the phone to prevent damage.
·Keep the device away from computer disks, credit cards, traveling cards, or other magnetic objects,
otherwise the message stored in the magnetic disk or credit card may be affected.
·Do not place it on an automobile dashboard, window or anywhere sunshine can penetrate.
·Do not remove the battery when it’s powering on.
·Do not discard the battery in fire. It may explode.
·Do not place the battery in mouth. It may be poisonous.
·Do not try to disassemble the phone or its accessories.
·Use only approved model-applicable batteries. Incorrect batteries may cause explosion. Follow the
manufacturer’s instructions to dispose used batteries.
·Heat is generated by prolonged usage of the headphones and by prolonged charging of the cellular
device.
·A moist or anti-static cloth may be used to wipe or clean the phone. Do not use a dry cloth that attracts
static electricity to avoid damage to the phone. Do not use a chemical reagent or a cleanser containing
abrasives to avoid damage to the phone’s casing.
·The metal material contained in the phone may cause you in hyper susceptibility, which depends on
your physique or health status.
·Since that parts such as liquid crystal display and pick-up head belong to fragile parts, please carefully
keep them such that the phone may not be impacted or squeezed.
Page 8

8
2. Overview
2.1 SIM Cards
The SIM (Subscriber Identification Module) cards contain the phone number and important information
of services. It also may store a phone book and personal information.
2.1.1 SIM Card Installation Procedure
1.
Open the back cover, remove the battery
;
2. Insert the SIM card into the slot;
3. Installing the battery and back cover.
2.1.2 Cautions
· If there’s fault with the SIM card, contact your service provider.
· Keep all SIM card out of the reach of small children.
· SIM card and its metal contact are susceptible to scratches and damaged by bending. Insert and
remove the card with care.
· Keep the SIM card away from static electricity, dust and water.
2.1.3 PIN and PUK
PIN
PIN is an identification code that is provided with the SIM card. You are protected by the PIN from
unauthorized use of your SIM card. After initiating the PIN protection, you are required to enter the PIN
every time switching on the phone. After three consecutive incorrect PIN code entries, the SIM card is
blocked. Nobody can then access the data in the card or use its services.
PUK
When the SIM card is locked, a PUK (Personal Unlock Key) is required to unlock it. Ten consecutive
incorrect PUK entries will cause permanent lockup of the SIM card. The PUK is usually provided with the
SIM card. If you have lost your PUK or it’s not provided, contact your service provider.
2.2 Storage Card
A storage card can be plugged into your phone to expand the storage capacity.
Install and remove the SD card, you need to remove the back cover, remove the battery, open the SD
card slot, place or remove the SD card, and then fasten the card slot.
2.3 Accessories
ID
Item
Description
1
Battery charger
Charging batteries.
2
Stereo earphone
Stereo output, the Send key can be used to pick up a call.
3
USB cable
Synchronizing with PC; charging batteries
Note: It’s not a recommended way. A battery charger is preferred.
3
2
1
Page 9

9
2.4 The Battery
2.4.1 Battery use
• Your phone is powered by a battery which has a limited life. When a battery has a significant decrease
of working time, replace it.
• Switch off your phone before removing the battery.
• Do not leave the battery on the charger for too long, since it may reduce the battery’s life.
• Excessively high or low temperature will have impact on the charging capability. Maintain its working
temperature at 0~45℃.
• Do not use the battery for other purposes; do not discard it in fire or in water.
• Do not try to disassemble or fix a battery. Choose the certificated or approved batteries by the
manufacturer.
• Avoid short circuit. Do not use damaged chargers or batteries.
• Hot or cold weather will decrease the battery’s capacity and life. Excessively high or low temperature
may result temporary system halt, even though the battery is full.
• Dispose used batteries properly. Do not throw them into a dustbin.
2.4.2 Battery Charge Level
1. See the battery icon on Status bar, the icon indicates the battery level.
2. To check the details charge status, select “Launcher” -> “Settings”->”About phone”; tap “Status”.
2.4.3 Charging Batteries
If the charge level goes lower than the working voltage, a reminder of low battery will be prompted on the
screen as the alerting sound played. Data may be lost and the phone will power off if the battery is not
being charged or replaced in time.
A Lithium-ion battery comes with this phone. It’s recommended to use the manufacturer’s charger and
batteries for best performance.
1. Plug the charger carefully into the USB charger slot;
2. Connect the charger to the AC outlet while the phone powering on. The status indicator is in red light;
the battery icon on the screen shows charging progress; while the phone can be used normally.
When the phone is powering off, the screen shows a charging icon.
3. Before the first time use, charge the battery with the original charger for 8 to 10 hours. A new battery
may reach its peak performance only after two or three cycles of fully charging and discharging.
4. After the charging completes, the status indicator shows the state before charging. If the phone is off,
the screen displays a notified of completion.
5. Disconnect the charger with the AC outlet and the phone.
Note A USB cable can be used to charge the battery. The voltage on the PC’s USB port, however,
does not fully meet the requirement for battery charging, therefore having negative impact on
the battery’s life-span. A battery charger is preferred.
3. Basic Functions
3.1 Switching On/Off
To switch on your phone, press and hold the Power On/Off key for a couple of seconds.
Press and hold the power on/off key for a couple of seconds will pop-up Phone options, hit Power off,
pop-up tip, hit OK to shutdown.
3.2 Open and close screen
Close screen:
You can press the power button to turn off the screen to save power and prevent misuse hit.
Notes:To save battery power, extend battery life, you can set the screen automatically locks the delay
time before, Home screen—touch the Launcher icon—settings—Display—screen timeout.
Open screen:
To open the screen, press any button except volume button to light up the screen.
Page 10

10
3.3 Set lock and unlock
To prevent accidental operation, you can lock the device and screen.
Lock:
Short press Power key will lock the screen.
Unlock:
Short press Power key, then drag the middle zone to the edge of screen to unlock in the lock screen.
Note All the figures in the manual are for reference only. They may be different from the actual display
on your phone.
3.5 The Status Bar
Icons in the status bar are displayed for working status, including battery charge level, signal strength,
GPRS and Bluetooth. They’re listed below:
Icon
Description
Indicates the battery is fully charged.
Indicates the battery is very low.
Battery charging.
No SIM card.
Airplane mode
WLAN is open
WLAN connected.
Bluetooth enabled.
Bluetooth voice gateway.
Send file with Bluetooth
Receive file with Bluetooth
Signal strength
GSM is connected
EDGE is available.
EDGE is connected
USB is connected
SD card is remove
Clock is open
Unread message.
New Email
Music is playing
3.6 Add/Delete Shortcuts
Long press the screen until pop-up the Add home screen tip, you can add a new shortcut, small parts or
application shortcut icons, you can also change wallpaper.
Select a shortcut icon, long press the screen until the shock, and then drag the shortcut icon to the
recycling box to delete the shortcut.
3.7 Input Method
In any edit interface you can input with android keyboard
Notes: ·You can click the toggle button to switch to digital signs and symbols digital input mode.
·Click the toggle button to switch case.
Page 11
11
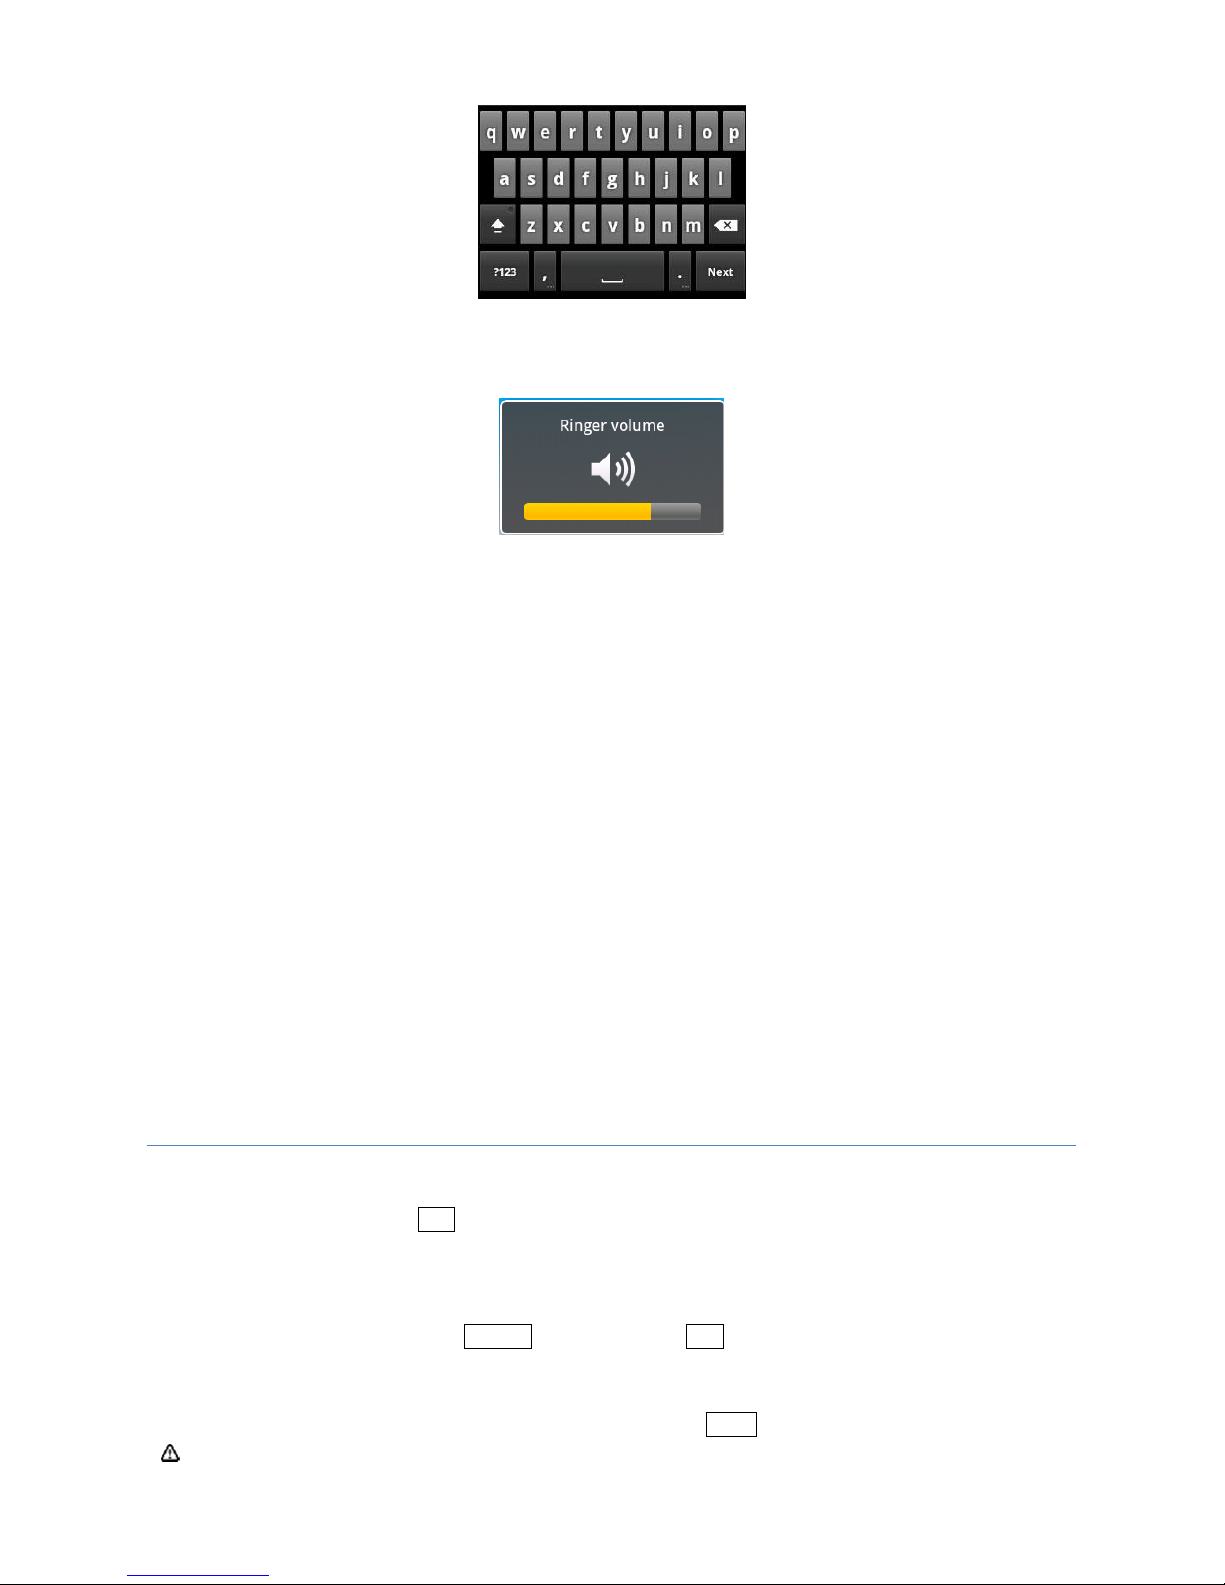
3.8 Adjust the volume
Press volume up\down key can adjust the volume, the phone will into vibrate mode When the volume
adjust to minimum.
3.9 Set Date and Time
You can set the date, time, time zone and format. In Home screen press Launcher key, choose settings,
hit Date & time will enter into setting screen you can set you want.
4. Call Features
4.1 Making a Call
·On the standby screen, click Dial to open the phone keypad;
·Tap the keypad key and then send button to dial the phone number;
4.2 Answer a Call
When there’s an incoming call, tap Answer to answer it; Tap End button to reject it.
4.3 During a Call
During a call, you may select an option on the screen or in the Menu for more functions.
Note The availability of these features depends on the service provider and whether you have
Page 12

12
subscribed them.
4.3.1 Hold
If you tap Hold during a call, you and the party you are talking with can’t hear each other anymore.
However, the call is not hanged up. It will be retrieved after you tap Unhold.
4.3.2 Mute
If you need to turn off the Mic for a while during a call, tap Mute. Then, you can hear the other party, but
he/she can’t hear you. Tap Unmute to restore.
4.3.3 Speaker On
After the loudspeaker is on, the sound will be amplified.
4.3.4 Hands-free On
Tap Bluetooth by press menu key during talking to turn on Hands-free. Both of you can hear clearly
without putting the phone on your ear. Select it again to turn it off.
Note: you must connect with the blue tooth earphone.
4.3.5 Conference
The phone supports conference calls feature, choose Conference in menu when the phone made
two-way call, can make Conference calls.
Note: Your phone GSM supports conference call with up to 6 parties involved.
5. Contacts
You may view or update information of contacts.
The contacts’ information can be saved in the SIM card or in the phone. Such information in the SIM card
usually includes one name and one phone number, (depending on the type of the SIM card and
services). There can be much more stored in the phone – contact’s name, multiple phone numbers,
email address and mailing address, as well as other information such as birthdays and websites. If you
replace your phone while keeping the SIM card, data in the SIM card can still be available, while the data
in the phone remains in it unless you can duplicate the data to the SIM card. Additional data will be lost if
the capacity of SIM card is exceeded.
5.1 View Contact Details
A list of contacts is shown on the screen.
·Contacts are sorted in alphabetical order;
·Scroll the screen to locate a contact for details;
·Press the Menu key you can choose new contact, multiple select, display options, accounts and import /
export etc.
5.2 Edit a Contact
When you want modify the contact record, select a contact from the list and then press menu choose edit
contact.
5.3 Add New Contact
In contact list interface, press menu key and hit New contact item, fill in each item and then tap Done.
The new contact will then be shown in the list.
5.4 Delete Contacts
You may delete contacts either from the contact list.
Choose the contact you want to delete and long hit will pop-up shortcut menu, choose delete contact can
Page 13

13
delete the contact.
5.5 Import/Export contacts
In contact list, press menu key, choose Import/Export item, you can choose Import from SIM card, Export
to SIM card, Import from SD card, Export to SD card.
6. Messaging
You may edit, send and receive text messages and MMS.
6.1 Text Message
The service for text message is offered by your service provider. Wireless subscribers can send and
receive brief text messages.
Before sending the first text message from your phone, make sure the number of SMSC has been set.
Contact your service provider for the local number.
6.1.1 Read Text Messages
·Touch the launcher icon and then touch Messaging.
·The message list displays part of the text.
·To open a message, tap it to open the text.
6.1.2 Edit Text Message
·In the Messaging, select New message to open the editing box.
·Enter the recipient’s phone number in the “To” box, or select add contacts button and then choose a
phone number. Your phone supports group sending to multiple recipients. After entering the text, you
can send the SMS by touching the send button on right.
Note: The 160-character limit may vary from country to country depending on how the SMS is coded.
Note: If an image, Video or audio file is added to an SMS is will be automatically converted to an MMS,
and you will be charged accordingly.
6.2 Email
Your phone can send and receive emails as long as your service provider supports this feature.
6.2.1 Add New Email Account
Touch the Email icon on the Home screen or in the Launcher.
The first time you open Email, you are prompted to set up an email account. After that, you can configure
Email to send and receive email from additional accounts. The accounts that you configure are displayed
in the Accounts screen.
6.2.2 Send Email
1. Home screen--Launch icon—Email.
2. Press menu key, choose Compose.
3. Input address and you can also add multiple recipients.
4. Input subject.
5. Input Compose Mail.
6. Press menu key you can choose add attachment.
6.2.3 Receive Email
1. Home screen--Launch icon—Email.
Page 14

14
2. Press menu key, choose Refresh.
3. Phone connects to the server and download messages, receive e-mail list will be maintained in the
information.
6.2.4 View Email
Hit the Email that you want to view in the message list.
In reading interface you can choose Reply or Reply all.
6.3 MMS
6.3.1 To create and send a multimedia message
1. On the Messaging screen, touch new message.
2. Enter a mobile phone number or email address in the field.
As you type, matching contacts appear. You can touch a suggested contact or continue typing.
You can also enter the name of a contact with a mobile number.
3 Touch the composition text box to start entering your message.
4 Press Menu and touch Add subject to add a message subject.
5 Press Menu and touch Attach to open a menu where you can touch the kind of media file to attach to
the message.
If you touch Pictures, you’re prompted to touch a picture to attach it.
If you touch Capture picture, Camera opens so you can take a picture and attach it.
If you touch Videos, you’re prompted to touch a video to attach it.
If you touch Capture video, Camcorder opens so you can shoot a video and attach it.
If you touch Audio, you’re prompted to touch a ringtone to attach it.
If you touch Record audio, a screen opens where you can record a spoken message and attach it.
If you touch Vcard, Contacts opens, so you can select a contact and attach it.
If you touch Slideshow, a screen opens where you can assemble photos into a slideshow of up to 10
slides to attach to the message.
Use the buttons in the Compose Message screen to preview, remove or replace the attachment.
6. Touch Send MMS.
6.3.2 Receive MMS
If you’re working in a message window, messages that you receive are displayed in it.
Otherwise, you receive a new message notification and a new message icon appears in the Status bar.
When you touch the new message notification, the Message window opens, where you can reply to the
message.
If Auto-retrieve is unchecked, you must touch Download to view the message.
If the message contains a media file, touch Play to view, watch, or listen to it. Touch &hold the media file
to open a menu with an option for saving the message on your SD card.
Touch & hold a message to open a menu with number of options for working with the message and its
sender’s information.
Most of these options are described in this section.
6.4 Message settings
You can change a number of Messaging settings.
To change Messaging settings, open the Messaging window, press Menu, and touch Settings.
Delete old messages: Check to delete older messages in a thread when the text message limit or
multimedia message limit is reached. Uncheck to keep all messages.
Text message limit: Touch to set the number of messages to save per thread of text messages. When
the limit is reached, older messages are deleted if delete old messages is checked.
Multimedia message limit: Touch to set the number of messages to save per thread of multimedia
Page 15

15
messages. When the limit is reached, older messages are deleted if delete old messages is checked.
Delivery reports: Check to receive delivery reports for the messages you send.
Manage SIM card messages: Touch to open a window where you can work with messages stored on
your SIM card—for example, if you used the SIM card in another kind of phone where you exchanged
text messages.
SMSC address setting: Edit the number of SMS centre.
SMS signature: Check to insert SMS signature automatically on the messages you send.
SMS signature Editor: Edit the content of SMS signature.
Delivery reports: Check to receive a report on the messages you send.
Read reports: Check to receive reports when your messages are read or deleted.
Auto-retrieve: Uncheck to download only the heading of multimedia messages, which you can then
touch to open a menu to download the whole message. This is useful for controlling how much data you
download, for example, when connected to a slow data network.
Roaming auto-retrieve: Uncheck to download only the header of multimedia messages when
connected to other carrier’s data networks. This is useful for avoiding unexpected charges, if your
contract has limits on data roaming.
Notifications: Check to receive a notification whenever you receive a new message.
Select ringtone: Opens a dialog where you can select the ringtone to sound when you receive new
message notifications.
Vibrate: Opens a dialog where you can set the phone to vibrate whenever you receive a new message
notification: Always, Only when silent, or Never.
7. Multimedia
7.1 Camera
• The camera included with your phone is produced and assembled with superior and high precision
technologies. However, you should pay particular care when shooting pictures in dimly lit areas to avoid
the amount of impurities (e.g., white lines, bright dots, dim dots, etc.).
• Fingerprints, debris or oil present on the lens may result in difficulties in focusing or obscurities in
picture quality. Before taking pictures, clean the lens with a lens tissue for optimal results.
• Exposure to high temperatures may result in extremely poor quality picture output.
• Exposure to sunlight may change colors of the built-in color filter which may lead to poor color quality
picture output.
• Excess motion while focusing may result in poor quality picture output.
• Do not aim directly into the sun or light source to avoid poor quality picture output.
• Use caution when taking pictures of copyrighted or restricted materials. Even though some pictures are
purely for personal use, laws with regard to photo reproduction may protect entertainment events and
similar scenarios. When in doubt, ask or look for posted signage.
• Use caution to protect others’ privacy while shooting pictures with your phone.
7.1.1 To open Camera
Touch the Camera icon in the Launcher or on the Home screen.
Page 16

16
Camera opens in Landscape mode, ready to take a picture or shoot a video.
7.1.2 Shooting photos
1. If necessary, drag the control to the Camera position.
2. Adjust your exposure, focal length, and other settings if you wish. Or leave them on automatic.
3. Frame your subject on screen.
You can zoom in or out by touching the Zoom icon 1x and then touching a zoom level.
4. Touch the Shutter icon on screen or press the Trackball to take a photo.
The picture you just took is displayed for a moment, and then is displayed as a thumbnail at the lower
right.
5. Touch the thumbnail to view, share, and work with your pictures in Gallery
7.1.3 To take pictures with digital zoom
Touch the onscreen Zoom icon 1x and then touch the amount of zoom you want.
Double-tap the screen to zoom all the way in or out.
Pictures that you take with digital zoom may be smaller (in pixels) than the size you set with the Picture
Size setting.
7.1.4 To shoot a video
1. If necessary, drag the control to the Video position.
2. Adjust the quality, color effect, flash, and other settings if you wish. Or leave them on automatic.
3. Point the lens to frame the scene where you want to start.
4. Touch the Start Video icon or press the Trackball.
Camera starts shooting the video. The time remaining to shoot counts down at the left; when less than
a minute is left, the countdown turns red.
5. Touch the Stop Video icon or press the Trackball to stop shooting.
An image from your most recent video is displayed as a thumbnail at the lower right.
6. Touch the thumbnail to view, share, and work with your videos in Gallery.
7.2 Music
You use Music to organize and listen to music and other audio files that you transfer to your SD card
from your computer.
7.2.1 To play music
Touch a song in your library to listen to it.
While viewing a list of tracks in an album, press Menu and touch SHUFFLE ALL.
The Playback screen opens and the song you touched or the first song in the album or other playlist
starts to play. The tracks in the current playlist play in order until you reach the end of the playlist (unless
you choose a repeat option).
Otherwise, playback stops only if you stop it, even when you switch applications or receive a phone call.
You can return to the Playback screen from most other screens in the Music application by pressing
Menu and touching playback.
You can return to the Playback screen from any other application by opening the Notifications panel and
touching the ongoing music notification.
The Playback screen contains several icons that you can touch to control the playback of songs, albums,
and playlists:
. Touch to pause playback.
. Touch to resume playback.
. Touch to skip to the next track in the album, playlist, or shuffle.
. Touch to skip to the previous track in the album, playlist, or shuffle.
. Touch to open the current playlist.
Page 17

17
. Touch to play the current playlist in shuffle mode (tracks are played in random order).
.Touch to toggle repeat mode: Don’t repeat, Repeat the playlist, or Repeat the current track.
7.3 Gallery
You use Gallery to view pictures and play videos that you’ve taken with Camera, downloaded, or copied
onto your SD card. You can perform basic editing tasks on pictures and set them as your wallpaper or
contact picture. You can also share your pictures and videos with friends, via email or messaging.
7.3.1 Opening Gallery and viewing your albums
Open gallery to view albums of your pictures and videos.
Touch the gallery icon in the Launcher or on the Home screen.
Open gallery from Camera by touching the thumbnail image at the lower right.
Open gallery from Camera by pressing Menu and touching gallery.
Gallery presents the pictures and videos on your SD card, including those you’ve taken with Camera and
those you downloaded from the web or other locations.
Touch an album to open it and view its contents.
The pictures and videos in the album are displayed in chronological order.
Peek into an album stack by touching it with two fingers and spreading them apart.
Touch a picture or video in an album to view it.
7.3.2 Working with albums
Albums are groups of images and videos in folders on your SD card.
Open Gallery and touch the album whose contents you want to view.
Albums open displaying the pictures and videos they contain in a chronologically ordered grid. The name
of the album is shown at the top of the screen.
Touch an arrow in the scroll tool at the bottom of the screen to scroll images a screen at a time.
Drag the scroll tool to the left or right to scroll more or less quickly. The date of the images in view is
displayed, so you can scroll by date.
You can also scroll through an album by swiping left or right.
7.3.3 To view and browse pictures
Open a Gallery album and touch a picture.
Turn the phone to view the picture in upright (portrait) or sideways (landscape) orientation.
The picture is displayed (but not saved) in the new orientation.
Touch the picture to view the Zoom and other controls.
Touch a Zoom icon, double-tap the screen, or pinch two fingers together or spread them apart to zoom in
or out.
When the picture is zoomed in, drag the picture to view parts that are not in view.
When the picture is zoomed to fit in the window, drag left or right to view the next or previous picture in
the album.
7.4 Recorder
You can through recorders to record your favorite sound, and can be set up to record the voice of an
Incoming Call Ring, Alarm, and Message Remind.
In home screen hit launch icon, choose recorder can enter into recorder interface.
Notes: Pleaser insert SD Card before enter into recorder.
Record sound
Keep the phone microphone near the sound, click record button to start recording, click Stop button,
save the recording.
Page 18

18
Play Recording
After recording, you can Press the play button to preview.
7.5 FM Radio
In the idle screen click start the program button in the program list screen select the FM radio into the
interface
7.5.1 Auto search
• Tap menu button and select “Search” to start searching channels.
• Channels will be saved in the current group; channels already in the group will be cleared.
Up to 50 channels can be searched, and the search will stop.
7.5.2 Higher-frequency
You can fine-tune the frequency based on the current frequency value.
• Select in the figure "6 small frequency adjustment button " cut short by the time 100kHz, coming to an
end flip; long after the search by then, or "7 large frequency adjustment button " each time the Canadian
Press 100kHz, coming to an end flip ; long before by the search.
7.5.3 Listen
• Tap “8 Favorite channels” button to start listening.
• The current frequency and current channel are shown as in the figure above
7.5.4 Browse Channels
• A total of 50 channels shown in the “8 Favorite channels ": Short press will play the channel.
7.5.5 Exit
Press menu key, choose exit.
8. Programs
8.1 Calendar
Calendar on the phone works with the web-based Google Calendar that calendaring service for creating
and managing events, meetings, and appointments. It also works with the Microsoft Exchange
ActiveSync calendaring service.
View Calendar
• From the Programs menu select the calendar function, the screen will display the monthly view.
• You can press the menu button, the pop-up menu, select the day, week, month to view calendar
interface for your convenience to view.
New Calendar
• In calendar interface press the Menu key, select More from the popup menu, then select New event,
enter the new calendar interface follow the prompts to set a new appointment reminders.
Set specific reminder
• To set a specific date or time of new appointments, in the "Calendar" screen, double click the date or
time to set new events.
Calendar Settings
Page 19

19
In calendar interface option from the menu, select More from the popup menu, then select Settings,
enter the setup interface, you can view the calendar method, set reminder methods.
8.2 Clock
You can program the clock to set the alarm, access to weather information, the player screen saver
slide show, call the music player or return to the main interface, and other operations.
Set Alarm
• In the idle screen click Launcher button, select the clock to enter, click the clock icon, and enter the
alarm settings interface.
• You can click to add or edit an existing alarm clock, follow the prompts to enter the setting interface
related settings, set the alarm time is reached after the reminder will pop up.
Play slide show screen saver
• In the idle screen click launcher button, select the clock to enter, click the play button to slide-show the
pictures.
Note: Make sure the phone has a memory card and insert the memory card in store pictures.
Enter the music player
• In the idle screen click launcher button, select the clock to enter, click the music button to enter the
music player.
Back to the main interface
• In the idle screen click launcher button, select the clock to enter, click the home button to return to the
main interface.
8.3 Calculator
This feature allows you to phone in a simple arithmetic, including addition, subtraction, multiplication,
division, and percentage of operations and so on.
Into the calculator interface, using digital and analog keyboard operator that you need, the results
can be obtained by an equal sign.
8.4 SIM Toolkit
You can use this function to view the SIM card using a variety of services provided by operators, such as
customized mobile newspapers, mobile phone business offices, custom ring tones and more.
Home screen—Launch icon—SIM Toolkit
Note
:
When using this feature you must first insert the SIM card.
8.5 Browser
Use the browser on your mobile phone can be connected to the Internet or Web-based applications.
Enables mobile phone by browsing to connect to the network, you need to make the following work:
• Make sure your card supports the network function, if you do not know whether the card has this
feature, contact your network service provider counseling;
• Contact your network service provider to subscribe and subscription data services.
• In your phone browser settings correctly.
Note
:
access to WAP network function depends on whether Internet service providers offer this service,
and whether you opened this feature. Contact your network service operator.
8.5.1 Open web
1. In the browser interface, click on the web address bar.
2. Enter to open the web address Click Start.
Page 20

20
8.5.2 New window
If you browse the Web in the process, need to visit the other pages, both to open the new window
browse the Web, as follows:
Web browser interface, click the menu key, Enter your new window to open the site visit.
8.5.3 Windows
You open multiple windows browser page, in the switching window you can click the menu button to
select windows, select the page you want to view.
8.5.4 Add bookmarks
Open the Web page you want to open, if you want to save this URL as a bookmark, you can do the
following: Click the menu key → select more → Click to add bookmark.
8.5.5 Visit website
When browsing the web can browse the entire contents of the sliding screen.
The process of opening the web browser, you can slide up and down the page to navigate, zoom in and
zoom buttons or mediation to zoom in or out on the page.
8.5.6 Find the content
In the web browser interface, click the menu for more, choose Find on page, you can find the current
content of the website information.
8.5.7 Select text
When you want to copy the information page, click the menu for more, click to select text, the web
browser interface to select the page you want to copy the information.
8.5.8 Share page
When you visit the page you want to share collections, click the menu for more, choose to share pages,
you can select via Bluetooth, Email or Messaging.
8.5.9 Download
When browsing the web to download the files, such as your favorite pictures and audio files to download,
you can in the menu for more options, click on downloads to view.
8.5.10 Browser settings
In the web browser interface, click the menu button, select More, select Settings, and enter the setting
interface.
Set your browser settings include page content settings, privacy settings, and security settings and
advanced settings.
• Page Content settings
Content of the website setup, you can set the page size of the text, the default zoom to open the page
overview mode, text encoding, block pop-ups, load images, automatically adjust the page sideways
display, start JavaScript, whether Start the gap in the current window to open a new window and set
home page and so on.
• Privacy settings
Privacy settings are stored in the local cache contains the clear content and database, clear the browser
navigation history, whether to allow the site to save and read the Cookie data, clear all browser Cookie,
remember form data, clear the form data, start position information function, cancel the location
information so the site permission to access other functions.
• Security Settings
You can set security settings are stored in the Web site user name and password, clear the password so
when the page is a security problem warning functions.
• Advanced Settings
Page 21

21
Advanced settings include advanced settings for each site and restore the site defaults.
9. Settings
You can set all the basic functions of mobile phones.
Home screen--Launch icon--Settings
9.1 Wireless & networks
Use Wireless & Network settings to configure and manage connections to networks and devices by using
WLAN, Bluetooth, and mobile networks. You also use Wireless & Network settings to configure connections
Page 22

22
between your phone and virtual private networks (VPNs), to connect your computer to the Internet using your
phone, and to turn off all radios with Airplane mode.
9.1.1 Airplane mode
If you turn the flight mode on, phone, Bluetooth, WLAN, data services are turned off, when other
incoming calls will not be in the machine. If you turn off flight mode, phone, Bluetooth, WLAN, data
services will be fully open. Flight mode enabled, you can just open a separate function you want to open.
You can also press the power button to turn off flight mode selection.
9.1.2 WLAN and WLAN settings
Check to turn on WLAN so you can connect to WLAN networks.
WLAN Check to turn on WLAN so you can connect to WLAN networks.
Network notification Check to receive a notification when an open WLAN network becomes available.
WLAN networks Displays a list of WLAN networks you’ve previously configured and those detected
when the phone last scanned for WLAN networks.
Add WLAN network opens a dialog where you can add a WLAN network by entering its SSID (the
name it broadcasts) and security type.
Advanced WLAN settings screen
WLAN sleep policy opens a dialog where you can set whether and when the WLAN radio disconnects.
Disabling sleep uses more battery power.
MAC addresses The Media Access Control (MAC) address of your phone when connecting to WLAN
networks.
IP settings If you check Use static IP, you can use IP settings to enter an IP address and other network
settings for you phone manually, rather than using the DHCP protocol to obtain network settings from the
WLAN network itself.
9.1.3 Bluetooth and Bluetooth settings
Check to turn on Bluetooth so you can connect to Bluetooth devices.
Bluetooth Check to turn on Bluetooth so you can connect to Bluetooth devices.
Device name Opens a dialog where you can give your phone a name that is visible on some Bluetooth
devices when you pair them. The current name is displayed.
Discoverable Check to make your phone discoverable by other Bluetooth devices for 120 seconds.
Scan for devices Touch to search for and display information about nearby Bluetooth devices.
Bluetooth devices Displays a list of Bluetooth devices that you’ve previously configured and those
detected when the phone last scanned for Bluetooth devices.
9.1.4 Tethering & portable hotspot settings
USB tethering Check to share your phone’s mobile network data connection with your computer via a
USB connection.
Portable WLAN hotspot Check to share your phone’s mobile network data connection as a portable
WLAN hotspot.
Portable WLAN hotspot settings Opens a screen with settings to turn the hotspot on and off and to set
the SSID (its broadcast name) and security.
Help Opens a dialog with information about USB tethering and portable WLAN hotspots as well as
information about where to learn more.
Page 23

23
9.1.5 VPN settings
Add VPN Opens a screen that prompts you to select the type of VPN to add. You are then prompted for
VPN configuration details.
VPNs The list of VPNs that you’ve previously configured.
9.1.6 Mobile networks settings
Data enabled Uncheck to prevent your phone from transmitting data on any mobile network.
This is useful if you are traveling in an area where you do not have a mobile data plan and want to avoid
charges for data use on local carriers’ mobile networks. Unshackling this setting does not prevent your phone
transmitting data on other wireless networks, such as WLAN or Bluetooth.
Data roaming Uncheck to prevent your phone from transmitting data on other carriers’ mobile networks when
you can’t access your own carrier’s mobile networks.
Network Mode In this setting, you can choose to register the network, you can set to WCDMA only mode,
GSM only mode, WCDMA preferred mode.
Access Point Names Opens the APNs screen, where you can select mobile access point configurations; or
press Menu to add a new APN. Consult your carrier about how to use the tools on this screen.
Network operators Opens a screen that searches for and displays mobile networks that are compatible with
your phone. Consult your carrier to understand the billing implications of selecting another carrier.
9.2 Call settings
Use Call settings to configure phone call settings, such as call forwarding, call waiting, and other special
features offered by your carrier. You can also use Call settings to configure the phone so that it can place
outgoing calls only to a fixed set of phone numbers.
Call settings screen
Fixed Dialing Numbers screen
Use the settings on this screen to configure your phone so it can place outgoing calls only to the fixed dialing
numbers (FDN) that you save on the phone’s SIM card.
Enable FDN Opens a dialog that prompts you to enter your PIN2 and then places the phone in FDN mode.
When FDN is enabled, this setting changes to Disable FDN.
Change PIN2 Opens a series of dialogs that prompt you to enter your current PIN2 and then enter and
confirm a new PIN2.
FDN list Opens a screen that lists any FDNs saved on your SIM card. Press Menu and touch
Add contact to add an FDN number to your SIM. Press Menu on that screen to import a number from your
Contacts to the FDN list, or to delete a number from the FDN list.
Voicemail service Opens a dialog where you can select your carrier’s voicemail service or another service,
such as Google Voice.
Voicemail settings If you are using your carrier’s voicemail service, opens a dialog where you can enter the
phone number to use for listening to and managing your voicemail. You can enter a comma (,) to insert a
pause into the number—for example, to add a password after the phone number. If you are using Google
Voice, this setting opens a screen where you can view the Google Voice number or sign out of Google Voice.
Auto Retry Check to enable auto redial while call set up failure.
DTMF Tones Set the length DTMF tones, you can set Normal or Long.
IP Dialer Setting Set the IP number.
Call forwarding Opens a screen where you can configure how your calls are forwarded when you’re on the
phone, when you don’t answer, and so on.
Call Barring In this setting, you can make a call barring settings, you can open or close Incoming barring and
Outgoing barring, when you open incoming barring and outgoing barring you will cannot incoming call and
Page 24

24
outgoing call.
Caller ID Opens a dialog where you can set whether your phone number is displayed to the people you call.
Call waiting Check to see and respond to new calls when you’re already on a call.
My Phone number Set the number for your phone.
9.3 Sound settings
Use the Sound settings to configure how and at what volume the phone rings, vibrates, or the Trackball
light pulses when the phone rings, you receive a notification, an alarm sounds, or when you play music
or other media with audio, as well as some related settings.
Silent mode Check to silence all sounds (including call and notification ringtones) except the audio from
music, videos, and other media and any alarms you have set. (You must silence media and alarms in
their own applications.)
Vibrate Opens a dialog where you can configure when you want the phone to vibrate when you receive
a phone call or notification: Always, never, only when the phone is in Silent mode, or only when the
phone is not in Silent mode.
Vibrate strength Set the vibrate strength of incoming call and other condition.
Volume Opens a dialog where you can set the volume of ringtones that sound when you receive a
phone call or notification, media (music, videos, and so on), and system. If you uncheck the option to use
the same volume for both calls and notifications, you can set the notification ringtone volume
independently.
Phone ringtone Opens a dialog where you can select the ringtone to sound when you receive a phone
call. Touch a ringtone to listen to it. See “To use a song as a ringtone” on page 295 to learn how to add
your own music to this list.
Notification ringtone Opens a dialog where you can select the ringtone to sound when you receive a
notification. Touch a ringtone to listen to it.
Audible touch tones Check to hear tones when you use Phone to dial a number. Audible selection
Check to play a sound when you touch buttons, icons, and other onscreen items that react to your touch.
Audible selection Check to hear tones when you making screen selection.
Screen lock sounds Check to play a sound when the screen is locked or unlocked.
Haptic feedback Check to have the phone vibrate briefly when you touch soft buttons and perform other
actions.
Flip to silent Check to silence sounds during incoming a call by flip phone.
Shake to next Check to switch to next or previous during playing music, FM radio by shake phone.
9.4 Display settings
Use the Display settings to configure brightness and other screen settings.
Brightness Opens a dialog for adjusting the brightness of the screen. You can check Automatic
brightness to set the phone to adjust the brightness automatically, using the phone’s built-in light sensor.
Or uncheck that option to use the slider to set a brightness level you want at all times when using the
phone. For the best battery performance, use the dimmest comfortable brightness.
Auto-rotate screen Check to automatically switch the orientation of the screen as you turn the phone
sideways or even upside down.
Horizontal calibration Use accelerometer to calibrate horizontal.
LED ON/OFF Check to make LED on.
Animation Opens a dialog where you can set whether you want to enjoy animated transitions for some
effects (such as opening menus), for all supported effects (including when navigating from screen to
Page 25

25
screen), or to enjoy a phone without any optional animation effects (this setting does not control
animation in all applications).
Screen timeout Opens a dialog where you can set how long to wait after you touch the screen or press
a button before the screen darkens. For the best battery performance, use the shortest convenient
timeout.
9.5 Location & security settings
Use the Location & Security settings to set your preferences for using and sharing your location when your
search for information and use location-aware applications, such as Maps. You can also configure settings
that help secure your phone and its data.
Use wireless networks Check to use information from Wi-Fi and mobile networks to determine your
approximate location, for use in Maps, when you search, and so on. When you check this option, you’re
asked whether you consent to sharing your location anonymously with Google’s location service.
Use GPS satellites Check to use your phone’s global positioning system (GPS) satellite receiver to pinpoint
your location to within an accuracy as close as several meters (“street level”). Actual GPS accuracy depends
on a clear view of the sky and other factors.
Set unlock pattern Opens a set of screens that guide you through drawing a screen unlock pattern.
Change unlock pattern When an unlock pattern is set, opens a set of screens you can use to change the
unlock pattern.
Use visible pattern When an unlock pattern is set, check to draw lines between points in the unlock pattern
you draw.
Use tactile feedback When you have configured a screen lock, check to have the phone vibrate briefly as
you touch each dot when you draw an unlock pattern or as you enter the unlock PIN or password.
Set unlock PIN Opens a set of screens for setting a numeric PIN you must enter to unlock your screen.
Change unlock PIN When a screen lock PIN is set, opens a set of screens you can use to change PIN.
Set unlock password Opens a set of screens for setting a password you must enter to unlock your screen.
Change unlock password When a screen lock password is set, opens a set of screens you can use to
change password.
Turn off screen lock Touch to stop requiring a pattern, PIN, or password to unlock your screen.
This setting is not visible unless you have configure a screen unlock pattern, PIN, or password.
Set up SIM/RUIM card lock card lock opens a screen where you can configure the phone to require entering
the SIM PIN to use the phone, and where you can change the SIM PIN.
Visible passwords Check to briefly show each character of passwords as you enter them, so that you can
see what you enter.
Select device administrators Can Add or remove device administrators in this setting.
Use secure credentials Check to allow applications to access your phone’s encrypted store of secure
certificates and related passwords and other credentials. You use credential storage to establish some kinds
of VPN and Wi-Fi connections, as described in “Connecting to networks and devices” on page 47. If you have
not set a password for the credential storage, this setting is dimmed.
Install from SD card Touch to install a secure certificate from an SD card.
Set password Opens a dialog where you can set or change the password for your secure credential storage.
Your password must have at least 8 characters.
Clear storage Deletes all secure certificates and related credentials and erases, the secure storage’s own
password, after prompting you to confirm that you want to do this.
9.6 Applications settings
You use the Applications settings to view details about the applications installed on your phone, to
manage their data and force them to stop, and to set whether you want to permit installation of
Page 26

26
applications that you obtain from web sites and email.
Unknown sources Check to permit installation of applications that you obtain from web sites, email, or other
locations other than Android Market.
Warning! To protect your phone and personal data, download applications only from trusted sources, such as
Android Market.
Manage applications Opens a list of all the applications and other software installed on your phone, along
with their sizes. By default, only downloaded applications are shown, and they are sorted in alphabetical
order. Press Menu and touch Filter to change the list to show all applications, only running applications,
or only downloaded applications. Press Menu and touch Sort by size to display applications in order by
size. Touch an application to open its Application Info screen.
Running services Opens a list of services—applications or parts of applications that provide services to
other applications or that run even when their main application isn’t running.
Examples include the Android onscreen keyboard and the small portion of Google Talk that always
listens for incoming messages. Above each service, one or more gray bars show what processes the
running service needs and how much memory it’s using (how much memory you would recover if you
stopped the service). Depending on the service, when you touch it in the list it either opens a dialog in
which you can stop it or opens its Settings screen.
USB debugging Check to permit debugging tools on a computer to communicate you’re your phone via a
USB connection.
Stay awake Check to prevent the screen from dimming and locking when the phone is connected to a
charger or to a USB device that provides power. Don’t use this setting with a static image on the phone for
long periods of time, or the screen may be marked with that image.
Allow mock locations Check to permit a development tool on a computer to control where the phone
believes it is located, rather than using the phone’s own internal tools for this purpose.
9.7 Privacy
You use the Privacy settings to manage your personal information.
Factory data reset Erases all of your personal data from internal phone storage, including information
about your Google Account, any other accounts, your system and application settings, and any
downloaded applications. Resetting the phone does not erase any system software updates you’ve
downloaded or any files on your SD card, such as music or photos. If you reset the phone in this way, the
next time you turn on your phone you’re prompted to reenter the same kind of information as when you
first started Android.
9.8 Storage
Use the SD Card & Phone Storage settings to monitor the used and available space on your phone and
on your SD card and to manage your SD card.
9.9 Language & keyboard settings
Use the Language & Keyboard settings to select the language for the text on your phone and for
configuring the onscreen keyboard, including words that you’ve added to its dictionary.
9.10 Voice input & output
Use voice input & output settings to set up Text-to-speech settings
9.11 Accessibility
Use accessibility settings to use power button end call feature.
9.12 Date & time
Use Date and time settings to set the values of date and time, also the format of date and time.
Page 27

27
9.13 Timer power on & off
Use timer power on & off settings to enable timer power on & off feature, also you can set the timer.
9.14 About phone
About Phone includes information about your phone
System update Opens a screen that reports on the availability of Android system software updates.
Status Opens the Status screen with a long list of information about your battery, mobile network
connection, and other details.
Battery use Opens a list of the applications and operating system components you have used since you
last connected the phone to a power source, sorted by the amount of power they have used. Touch an
application in the list to view details about its power use and, if available, touch a button to open a
settings or information screen.
Legal information Opens a screen where you can obtain legal information about the software included
with your phone.
Version information Lists details about the model numbers and versions of your phone’s hardware and
operating system software. This information is useful if you need to work with your carrier’s support
team.
10. Help
10.1 Troubleshooting
Check these questions first if you have problems with your phone. If you need additional help, contact
your dealer or service provider.
Question
Cause
Answer
Internet Explorer can’t connect
to the Internet.
The service provider does not
offer such a service or you have
not subscribed it.
Contact your service provider
on subscription and use of the
service.
Incorrect configurations
Refer to the help of Internet
Explorer
UIM card error
The UIM card has been damaged
Consult your service provider
The UIM card is incorrectly
inserted
Check the UIM card to make
sure it is inserted properly.
Metal surface of UIM card is
unclean.
Clean the metal surface with a
clean cloth or tissue
Poor signals
The area with poor reception of
signals, such as vicinity of high
rise or the basement, where RF
wave can’t reach effectively
Receive calls in places where a
good signal is available.
Peak hour with congested traffic
Try a different time to use your
phone
Fail to power on
Using an excessively low battery.
Charge the battery
Fail to connect to network
Invalid UIM card
Consult your service provider
Out of GSM service area
Relocate your phone into
service
area
Poor signals
Relocate your phone to places
with strong signals, then try
again.
Fail to charge
Inconsistent voltage between the
AC outlet and the charger
Replace a charge with
consistent voltage
Page 28

28
Non-standard charger
Use a charger designed for this
type of phone
Improperly connected to the main
power
Check the connection in
between
11. Maintenance Guide
Should you experience problems using this phone, contact the dealer where it was purchased or refer to
the repair center specified. If the phone needs repair, you may send it to the local repair center (see the
certificate of three guarantees provided with the phone for specific repair network). If there is no local
repair center specified, deliver your phone and copy of purchasing invoice to the dealer for mailing of
EMS.
Your phone is a product of superior design and artisanship and should be treated with care. The
following guidelines may help you maintain the warranty obligations with regard to the terms of
Maintenance Clauses, which can extend the useful life of your device.
• Keep the phone and all its parts and accessories away from children.
• Keep the phone dry. Precipitation, humidity, and liquids may contain minerals that can corrode
electronic circuits.
• Do not use or store the phone in dusty areas as knock-down components may be damaged?
• Do not store the phone in extreme temperatures. High temperatures can shorten the life of electronic
devices, damage batteries and warp or melt certain plastics components. Cold temperatures may result
in moisture forming inside the phone when temperatures rise, which may damage the electronic circuits.
• Do not attempt to disassemble the phone’s casing. Nonprofessional handling of the phone may cause
damage and void the warranty.
• Do not tap, knock or shake the phone to avoid damage to the internal circuitry.
• Do not apply or clean the device with chemical products, detergents or scouring products.
• Do not use paints on or in the phone. Blockage of sundries inside the knock-down components may
affect the normal operation of the device.
The abovementioned guidelines are applicable to your phone, batteries, charger and accessories. If you
experience difficulties with any of these components please contact the nearest qualified repair center.
Page 29

29
USB Data Cables
This version supports the USB interface. You can connect your eBook with the PC via the USB & data
cable, copying or moving the files amid the eBook and PC, or browning the images, record files and
video files saved in the eBook via the PC.
1. Insert the USB data cable connector into the USB interface of the eBook.
2. Connect the other terminal of the USB data cable with the USB interface of the PC.
CAUTION
THE CONNECTION TO USB INTERFACES HAS TO BE LIMITED TO USB2.O VERSION OR
HAIGHER
OR HAIGHER
THE CONNECTION TO SO CALLED POWER USB PROHIBITED
Appendix – Product Safety Warnings
SAFETY AND COMPLIANCE INFORMATION
Use responsibly. Read all instruction and safety information before use to avoid injury.
BATTERY SAFETY
Charge battery only in temperatures ranging from 32 °F to 95° F (0 °C to 35 °C) .
CAUTION: Danger of explosion if battery is incorrectly replaced. Replace only whit the same or
equivalent of battery recommended the manufacturer. Dispose of used batteries according to battery
manufacture’s instructions.
WI-FI SAFETY
Turn WI-FI off in areas where WI-FI use is prohibited or when it may cause interference of danger. Such
as in airplanes while flying.
CARE AND MAINTENANCE
You Alex reader are an electronic product and should be treated whit care. To reduce the risk of fire,
electronic shock, or product damage.
Do not expos this device to rain. Moisture or any type of liquid that corrodes electronic circuits. If you
device gets wet, immediate turn the power off. Allow the device to dry completely before using it again.
Clean the two displays whit a soft cloth and be careful not to wipe the displays with anything
abrasive .When carrying your Alex in a bag. Keep it in the included cover to avoid scratches.
Don’t expose your device to extreme heat or cold. For example, do not leave it in the turn of your car in
sub-zero or high heat conditions.
Do not attempt to open the device other than as instructed in this manual.
Do not drop, knock, or shake the device. Rough handing can break internal circuitry.
Do not use harsh chemicals, cleaning solvents, or strong detergents to clean the device.
Use only the recommended accessories.
Excessive sound pressure from earphones and headphones can cause hearing loss.
 Loading...