

Page 1
DA17-0200-00
Installation manual
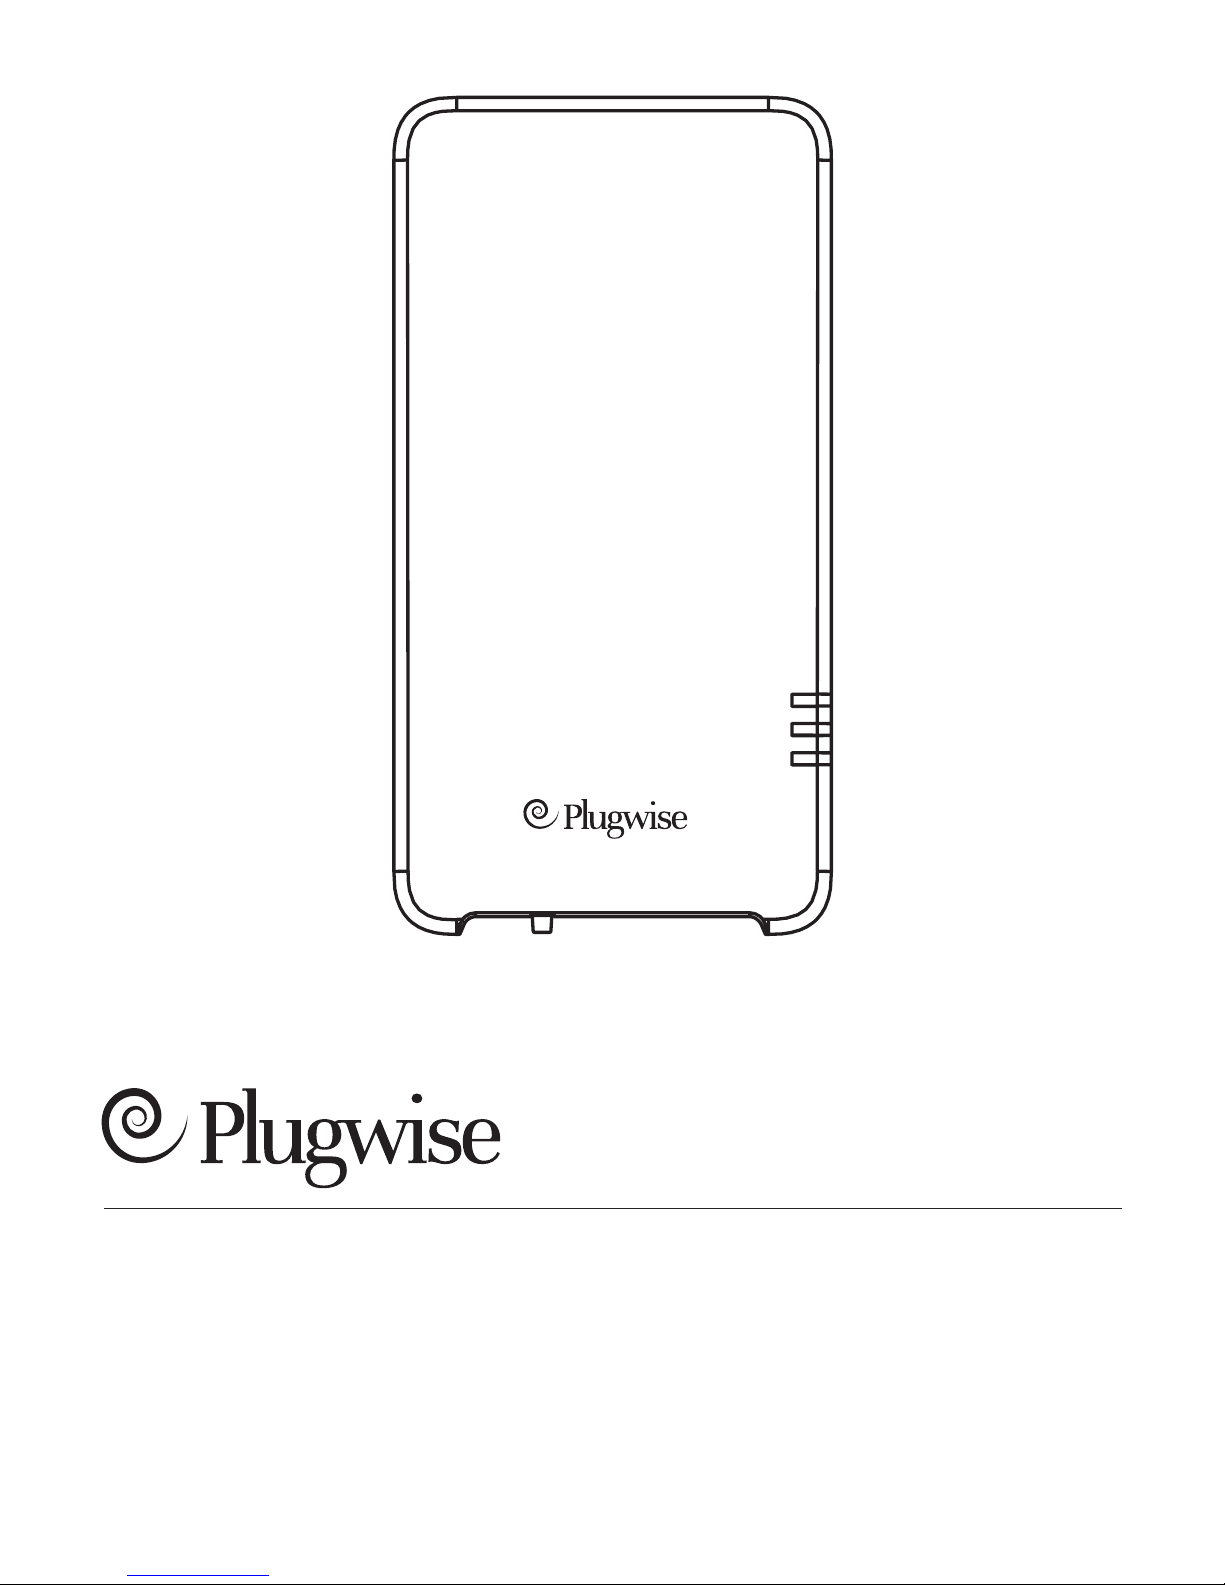
Stretch 3
105-03
Nederlands | English
LAN
WLAN
STATUS
Page 2

Nederlands
Inhoudsopgave
Voor je begint 3
Voorzorg en veiligheid 4
Meer informatie 4
In de verpakking 4
Installatie 5
1. Plaats de Stick in de Stretch 5
2. Plaats de Stretch 5
3. Verbind met het netwerk 5
4. Netwerkverbinding controleren? 7
Niet gelukt via wi? 7
Het gedrag van de lampjes 8
English
Table of contents
Before you start 9
Precautions and safety 10
More information 10
In the package 10
Installation 11
1. Place the Stick in the Stretch 11
2. Place the Stretch 11
3. Connect to the network 11
4. Validate the network connection? 12
Having trouble using WiFi? 13
Behaviour of the lights 14
Page 3
3 | Stretch 3
NL
Copyright 2017, Plugwise.
Alle rechten voorbehouden.
Dit document bevat informatie over de
installatieprocedure van dit product. Voor
meer informatie over de functionaliteiten
van het product wordt verwezen naar
online informatie en documentatie.
Oude elektrische en elektronische
apparaten bevatten vaak waardevolle
materialen. Plaats een afgedankt apparaat
dan ook nooit bij het gewone afval. Lever
altijd het apparaat in bij een gemeentelijk
inzameldepot voor elektrische en
elektronische apparatuur.
Plugwise B.V. verklaart hierbij dat dit
product voldoet aan de benodigde
vereisten van de desbetreffende
Europese richtlijnen, waaronder 1999/5/
EC (R&TTE). Een exemplaar van de
Europese conformiteitsverklaring is
beschikbaar op
www.plugwise.com/product-conformity.
Voor je begint
Dit is de korte installatiehandleiding voor
de Plugwise Stretch 3. De Stretch is de
gateway die samenwerkt met de Plugwise
Circle of Stealth via het Plugwise ZigBee
protocol. De Stretch is de bestuurder
binnen het Plugwise netwerk.
Met de Circle of Stealth kun je het
elektriciteitsverbruik meten en apparaten
in huis aan- of uitschakelen.
In deze handleiding beschrijven wij in het
kort hoe je de Stretch installeert.
Omdat je een Stretch altijd gebruikt in
combinatie met een Circle of Stealth,
lichten wij kort toe hoe je een goed
netwerk opbouwt met de Stretch en
Circles. De Stealth heeft dezelfde
functionaliteiten als een Circle, maar in
tegenstelling tot de Circle die je in het
stopcontact steekt, is de Stealth een
inbouwmodule*.
Uitleg symbolen:
Let op, waarschuwing!
Deze stap moet je uitvoeren
Tip
Wij adviseren je om de Stealth door een
professionele installateur te laten installeren.
*
Page 4
4 | Stretch 3
Voorzorg en
veiligheid
Wees altijd voorzichtig als je de Plugwise
Stretch 3 installeert.
Maak geen gebruik van het product
als deze is beschadigd of niet goed
functioneert.
Breng het product nooit in contact
met water of een andere vloeistof.
Maak de behuizing van het product
nooit open. Het product bevat geen
onderdelen die je zelf kunt herstellen.
Controleer vooraf de aanwezigheid
en kwaliteit van de wi-
netwerkverbinding daar waar je de
Stretch wilt plaatsen. Houd het
wachtwoord van het wi-netwerk
waarmee je de Stretch wilt verbinden
bij de hand.
Wil je de Stretch verbinden met je
netwerk via een LAN-kabel? Plaats
dan de Stretch binnen het bereik van
de router.
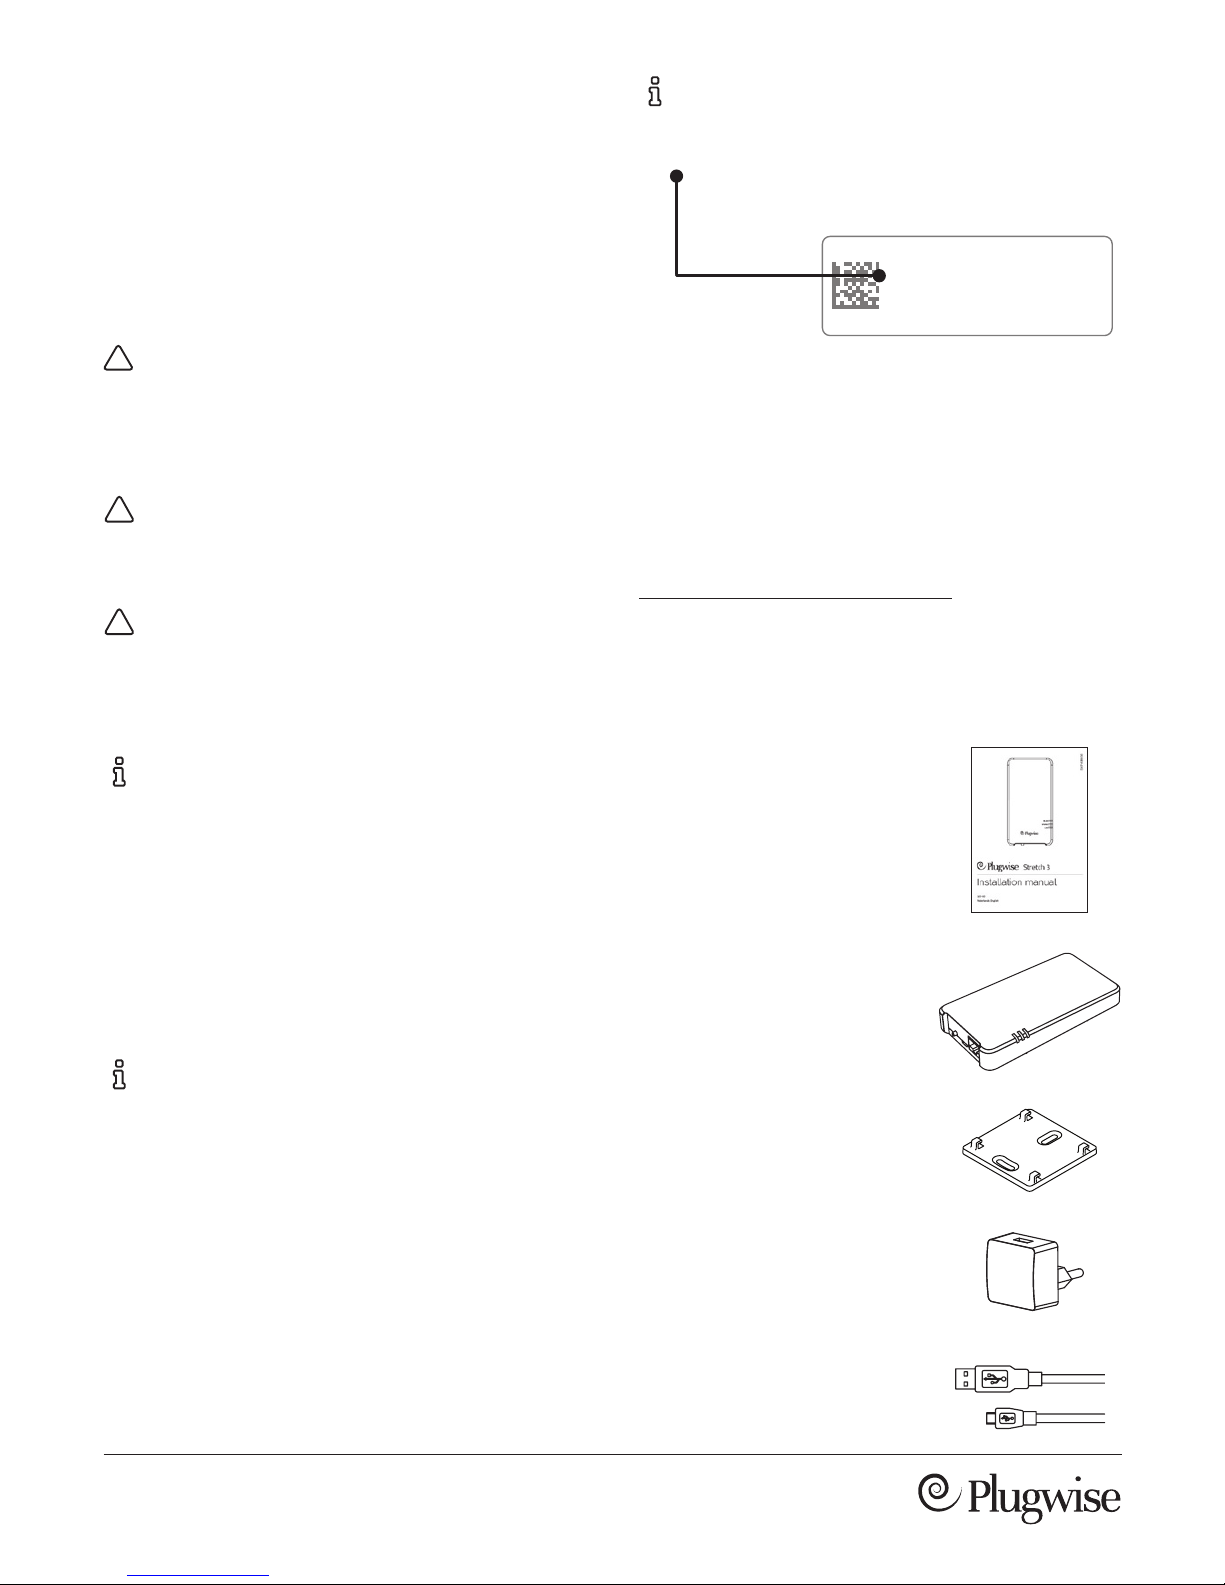
Zorg ervoor dat je het short ID van
de Stretch bij de hand hebt. Het short
Je vindt meer informatie over de Stretch
op onze website:
www.plugwise.nl/stretch-3
ID is de achtletterige code op de
sticker op de achterkant van de
Stretch.
Meer informatie
stuvwxyz
ssid: stretch_abcdef
In de verpakking
Deze korte
installatiehandleiding
Plugwise Stretch 3
Gateway voor de aansturing
van het Plugwise-netwerk
Muurplaatje
Adapterkabel
Adapter
230VAC - 5W
Page 5
5 | Stretch 3
NL
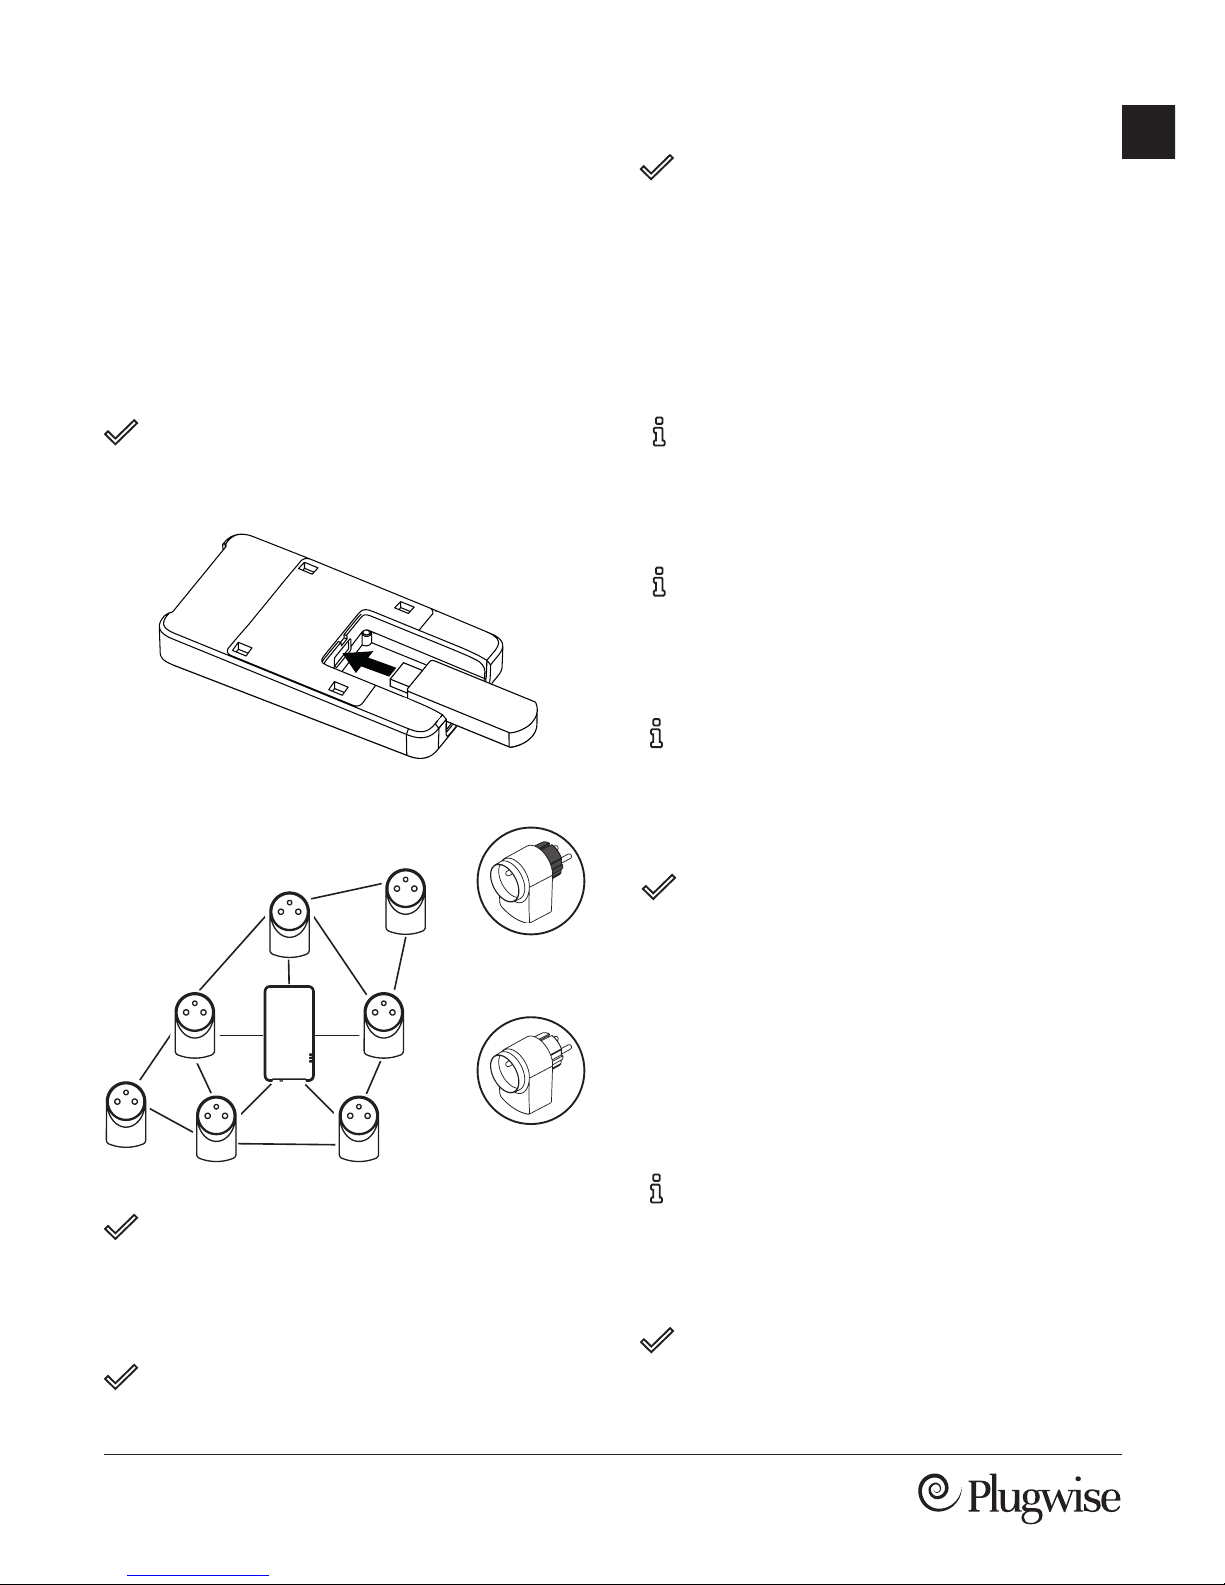
Plaats de Stretch op een centrale plek
in huis, bijvoorbeeld in de buurt van
het trapgat op de eerste verdieping.
Zorg ervoor dat de Stretch
rechtstreeks verbonden is met zoveel
Installatie
De installatie bestaat uit 4 stappen:
1. Plaats de Stick in de Stretch.
2. Plaats de Stretch.
3. Verbind de Stretch met het netwerk.
4. Controleer de netwerkverbinding.
Circle+
mogelijk Circles.
Plaats de Circle+ (de Circle met de
grijze achterkant) altijd op maximaal 5
meter afstand van de Stretch. De
Circle+ gedraagt zich als een ‘router’
binnen het netwerk. De Circle+ is
altijd bereikbaar voor andere Circles.
Een Circle moet altijd binnen 5-10
meter van een andere Circle of van de
Stretch worden geplaatst.
Betonnen muren en plafonds
verminderen het bereik van het
netwerk.
Installeer zoveel mogelijk Circles voor
een snel werkend netwerk.
3. Verbind met het netwerk
Sluit de adapterkabel aan op de
adapter en de Stretch. Steek de
stekker in het stopcontact. Wacht tot
de Stretch is opgestart: het bovenste
(WLAN) en middelste (STATUS)
lampje knipperen langzaam.
Wi via WPS?
Wi via WPS wordt alleen
ondersteund via een speciale
WPS-knop op de router.
Druk 2 seconden op de zwarte knop
op de Stretch. Wacht tot het bovenste
(WLAN) lampje snel en regelmatig
2. Plaats de Stretch
Circle+
Circle
1. Plaats de Stick in de Stretch
Verwijder het klepje van de
achterkant van de Stretch en plaats
de Stick in de Stretch.
Page 6
6 | Stretch 3
blijft knipperen.
Activeer wi via WPS op de
wi-router om te verbinden met het
wi-netwerk. Wacht totdat de Stretch
opnieuw is opgestart. Als de Stretch is
verbonden met het netwerk branden
het bovenste (WLAN) en middelste
(S TATUS) lampje.
Als de Stretch na 2 minuten nog geen
verbinding heeft gemaakt met een
wi-netwerk, wordt de Stretch
opnieuw in aanmeldmodus gezet: het
bovenste (WLAN) en middelste
(STATUS) lampje knipperen langzaam.
Wi?
Wil je de Stretch
verbinden met wi en
maak je gebruik van een
Android-toestel? Zoek
dan naar de Plugwise Connect-app in
de Google Playstore. De app begeleidt
je tijdens het verbinden van de Stretch
met je wi-netwerk.
Geen Android? Volg dan de onderstaande
stappen om de Stretch te verbinden met
het wi-netwerk.
Verbind je smartphone of tablet met
het wi-netwerk van de Stretch dat
begint met ‘stretch_’.
Voer als wachtwoord het short ID in.
Navigeer in de webbrowser van je
smartphone of tablet naar een
willekeurige webpagina. Omdat je
verbonden bent met het netwerk van
de Stretch zal de webpagina van de
Stretch automatisch openen.
Ga rechts onderin het scherm naar
instellingen .
Ga naar de wi-/LAN-instellingen.
Druk op ‘Scan’ en selecteer je eigen
wi-netwerk.
Voer het wachtwoord van je eigen
wi-netwerk in en sla de instellingen
op. Wacht totdat de Stretch opnieuw is
opgestart. Als de Stretch is verbonden
met het netwerk branden het
bovenste (WLAN) en middelste
(S TATUS) lampje.
Netwerkkabel?
Sluit een netwerkkabel aan tussen de
router en de Stretch.
Start de Stretch opnieuw op door de
stekker uit het stopcontact te halen en
weer terug te steken. Als de Stretch is
verbonden met het netwerk branden
het middelste (STATUS) en onderste
(LAN) lampje.
Page 7
7 | Stretch 3
NL
4. Netwerkverbinding controleren?
Open de webpagina van de Stretch
Zorg ervoor dat je je smartphone of
tablet weer verbindt met het (wi-)
netwerk waar je zojuist de Stretch mee
hebt verbonden. Dit is ook nodig als je
de Stretch wilt toevoegen in de
Plugwise app.
Ga naar connect.plugwise.net.
Log in met je short ID. De webpagina
van de Stretch opent als de
netwerkverbinding is gelukt.
Niet gelukt via wi?
Verwijder de netwerkinstellingen
Druk de zwarte knop op de Stretch 5
seconden in: het middelste (STATUS)
lampje knippert 5 keer, het bovenste
lampje (WLAN) gaat vervolgens snel
knipperen.
De netwerkinstellingen worden
verwijderd. Wacht tot de Stretch weer
is opgestart en probeer opnieuw met
het wi-netwerk te verbinden.
Sluit eerst een netwerkkabel aan
Sluit een netwerkkabel aan tussen de
router en de Stretch.
Start de Stretch opnieuw op door de
stekker uit het stopcontact te halen en
weer terug te steken.
Volg de stappen “Netwerkverbinding
controleren? - Open de webpagina van
de Stretch” eerder op deze pagina om
de webpagina van de Stretch te openen.
Ga rechts onderin het scherm naar
instellingen .
Ga naar wi-/LAN-instellingen
Selecteer je eigen wi-netwerk, voer
het wachtwoord van het wi-netwerk
in en sla de instellingen op. Haal de
netwerkkabel uit de Stretch als dit
wordt aangegeven.
Page 8
8 | Stretch 3
LED Kleur Patroon Omschrijving
STATUS Groen Knippert
langzaam
De Stretch wordt opgestart. Wacht tot de Stretch gereed is.
Als de Stretch in aanmeldmodus staat knipperen de lampjes
WLAN en STATUS langzaam.
STATUS Groen Knippert
langzaam,
daarna aan
De Stretch wordt opgestart. Wacht tot de Stretch gereed is:
• als de Stretch verbonden is via een netwerkkabel,
branden de lampjes STATUS en L AN.
• als de Stretch verbonden is via wi, branden de lampjes
STATUS en WLAN
WLAN Groen Knippert Communicatie met het wi-netwerk.
WLAN Groen Knippert
langzaam
Kan geen verbinding maken met het wi-netwerk. Is er iets
gewijzigd in de instellingen van de router? Volg de stappen
onder “niet gelukt via wi?”.
LAN Groen Knippert Communicatie via de netwerkkabel met het netwerk.
Het gedrag van
de lampjes
De Stretch heeft 3 LED-lampjes. In
onderstaande tabel wordt het
belangrijkste gedrag van de lampjes van
de Stretch toegelicht.
Page 9
9 | Stretch 3
EN
Copyright 2017, Plugwise.
All rights reserved.
This document contains information
about the installation procedure of this
product. For more information about the
functionalities of this product, we refer to
online information and documentation.
Old electrical and electronic appliances
very often contain valuable materials.
Therefore, never dispose of discarded
appliances with normal household waste.
Always hand in your old appliances at the
municipal collection points for electrical
and electronic equipment.
Plugwise B.V. hereby declares that this
product is in compliance with the
applicable essential requirements of the
appropriate EC-Directives, including
1999/5/EC (R&TTE). A copy of the EU
declaration of Conformity is available at
www.plugwise.com/product-conformity.
Before you start
This is the short installation manual for
the Plugwise Stretch 3. The Stretch is the
gateway that works together with the
Plugwise Circle or Stealth using the
Plugwise ZigBee protocol. The Stretch is
the manager in the Plugwise network.
With the Circle or Stealth you can
measure the electricity consumption and
switch appliances on or off in your home.
In this manual we shortly describe how to
install the Stretch. Because you will always
use the Stretch in combination with a
Circle or Stealth, we also briey explain
how to set up a good network using the
Stretch and Circles. The Stealth has the
same functionalities as the Circle, but
unlike the Circle that you plug into a
socket, the Stealth is a built-in module*.
Explanation symbols:
Warning, be aware!
You must carry out this step
Advice
We advise you to have the Stealth installed by
an installer.
*
Page 10
10 | Stretch 3
Precautions
and safety
More information
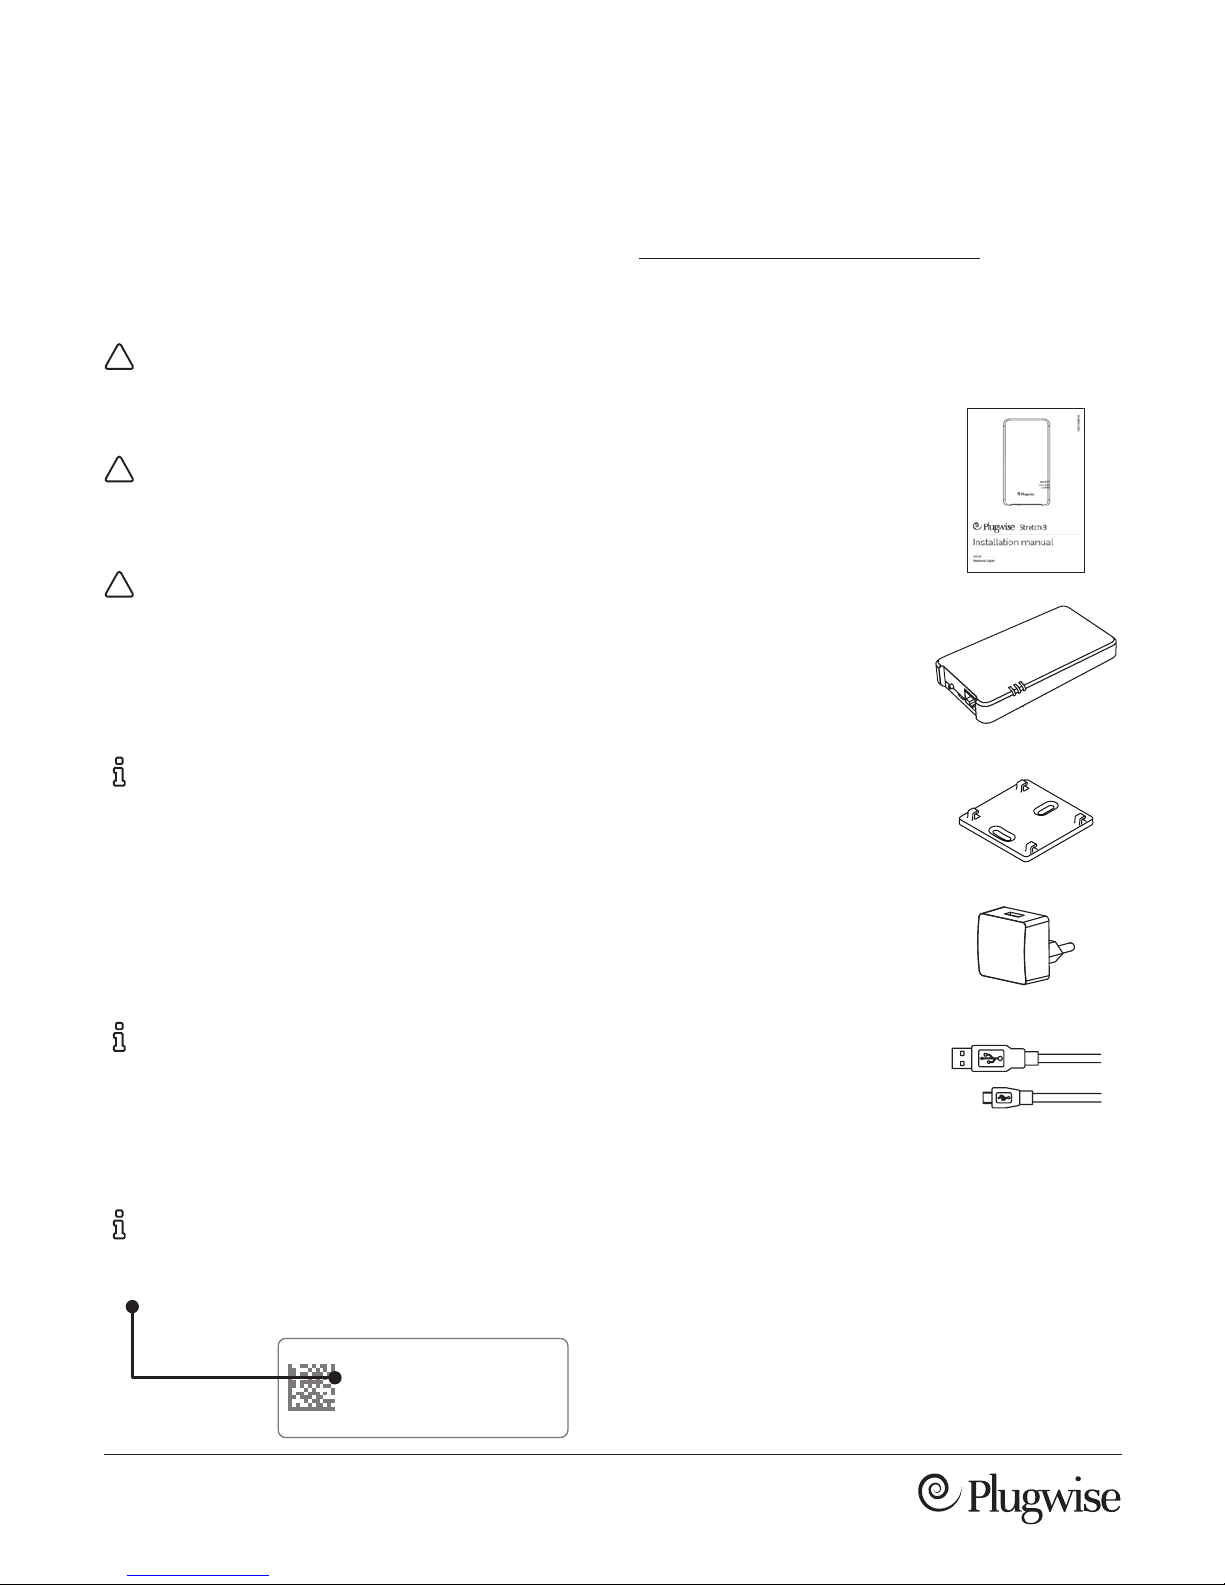
This short installation
manual
We advise you to always be careful when
installing the Plugwise Stretch 3.
Do not use the product when it is
damaged or if it is malfunctioning.
Avoid contact with water or other
liquids.
Never open the casing of the product.
The product does not contain
components that you can repair
yourself.
Check the availability and the quality
of the WiFi network beforehand near
the location where you want to install
the Stretch. Make sure you have the
password of the WiFi network to
which you will connect the Stretch.
Do you want to connect the Stretch
to the network using a LAN cable?
Make sure you install the Stretch
nearby your router.
Keep the short ID of the Stretch at
hand. The short ID is the 8 letter
code on the sticker on the back of the
Stretch.
stuvwxyz
ssid: stretch_abcdef
In the package
Plugwise Stretch 3
Gateway to control your
Plugwise network
Adapter
230VAC - 5W
Adapter cable
More information about the Stretch can
be found on our website:
www.plugwise.com/stretch-3
Wall plate
Page 11
11 | Stretch 3
EN
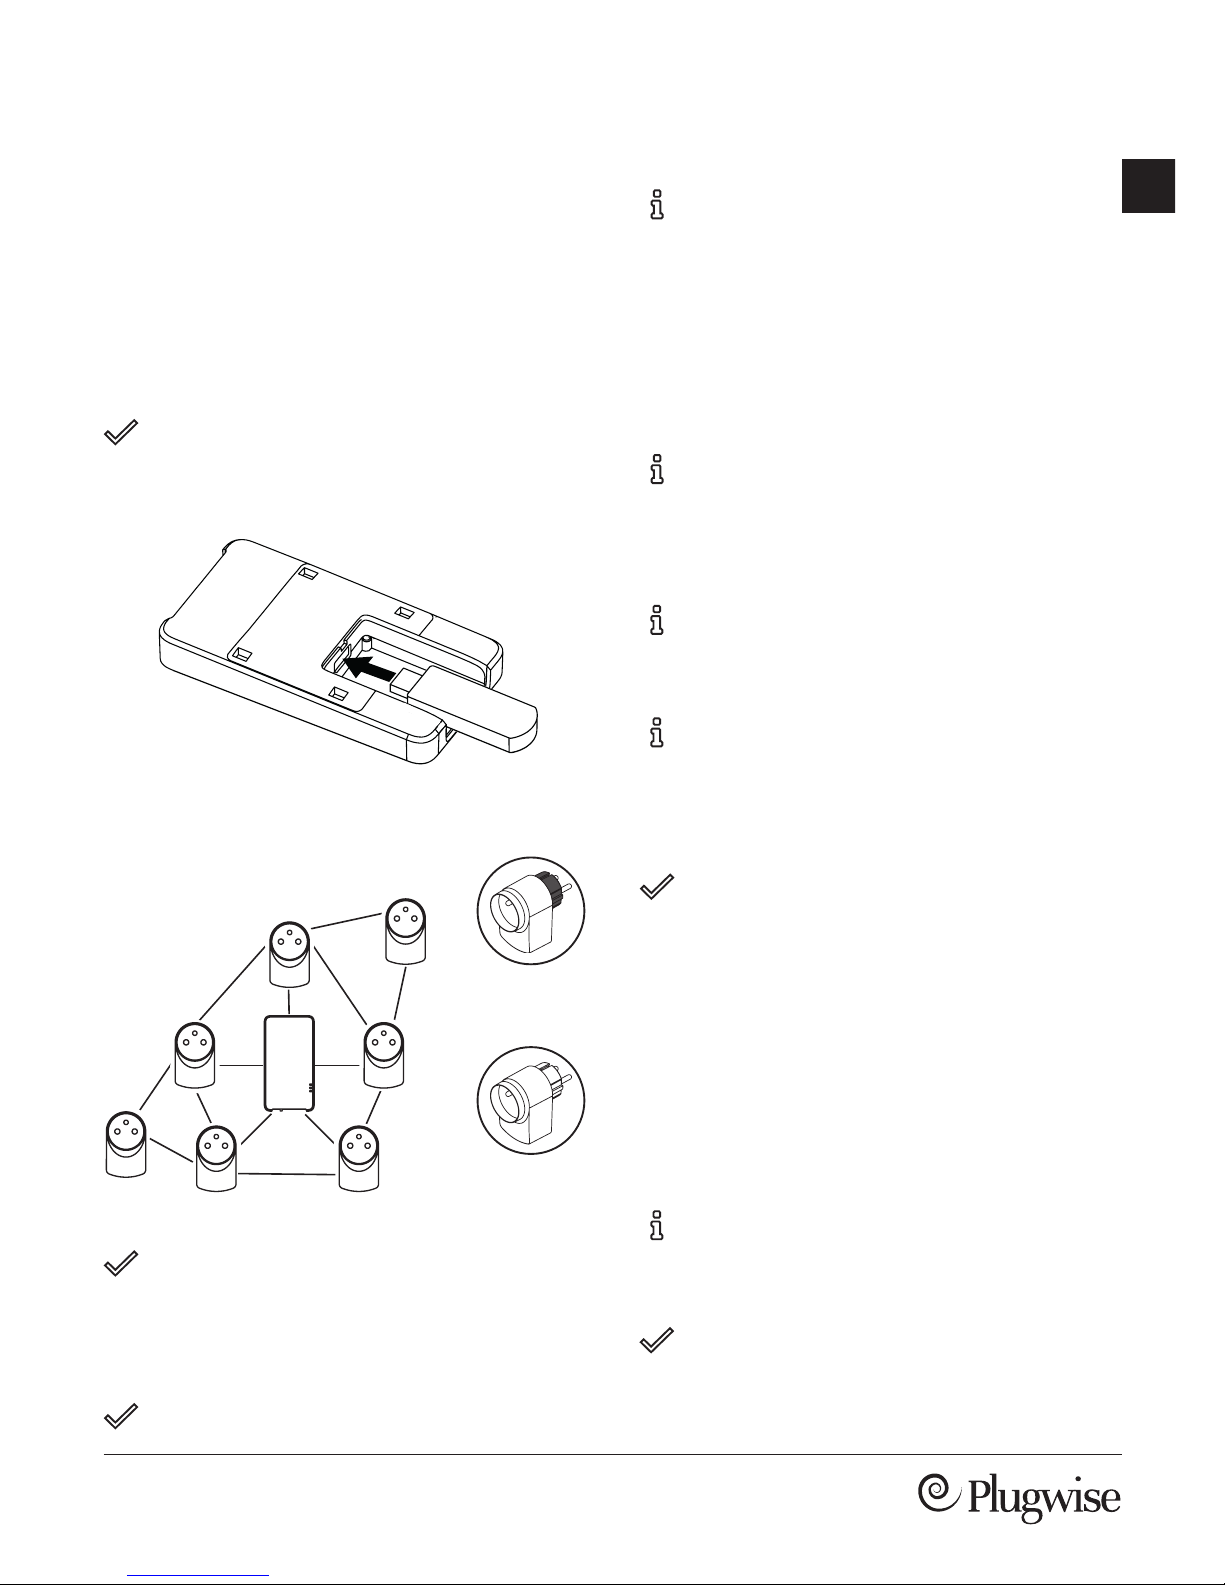
Installation the Stretch with as many Circles as
possible.
The Circle+ (the Circle that contains a
grey back) should always be placed
within a 5-meter range of the Stretch.
The Circle+ behaves like a ‘router’ in
the network. The Circle+ is always
reachable for other Circles.
All Circles should be positioned at a
maximum distance of 5 to 10 meters of
at least one other Circle or the Stretch.
Concrete walls and ceilings will reduce
the range of the network.
For a highly responsive network,
install as many Circles as possible.
3. Connect to the network
Connect the adapter cable to the
adapter and the Stretch and plug the
adapter into the wall socket. Wait until
the Stretch has booted up: the upper
light (WLAN) and the light in the
middle (STATUS) of the Stretch are
blinking slowly.
WiFi via WPS?
WiFi via WPS is only supported via a
special WPS button on the router.
Press the black button on the Stretch
for 2 seconds. Wait until the upper
(WLAN) light is blinking quickly and
The installation can be described in 3 steps:
1. Place the Stick in the Stretch.
2. Place the Stretch.
3. Connect the Stretch to the network.
4. Validate the network connection.
1. Place the Stick in the Stretch
Remove the cover of the back of the
Stretch and place the Stick in the
Stretch.
Place the Stretch centrally located in
the house, for example near the
stairwell at the rst oor.
Make sure that there is direct contact of
Circle+ Circle+
Circle
2. Place the Stretch
Page 12
12 | Stretch 3
regularly.
Enable WPS on the WiFi router to
connect to WiFi. Wait until the Stretch
has booted up: the upper light
(WLAN) and the light in the middle
(STATUS) of the Stretch are on when
connected to the network.
If after 2 minutes the Stretch has not
made a connection yet to your WiFi
network, the Stretch will return back
to the access point mode: the upper
(WLAN) light and the light in the
middle (STATUS) are blinking slowly.
WiFi?
Do you want to connect
the Stretch to WiFi and
you have an Android
smartphone or tablet?
Search for the Plugwise Connect app
in the Google Playstore. The app will
guide you connecting the Stretch to
the WiFi network.
No Android? Follow the steps below to
connect the Stretch to the WiFi network.
Connect your smartphone or tablet
to the WiFi network of the Stretch,
starting with ‘stretch_’.
Enter the short ID as your password.
Open the web browser on your
smartphone or tablet and navigate to
a random web address. Because you
are connected to the network of the
Stretch, you will be redirected to the
web page of the Stretch.
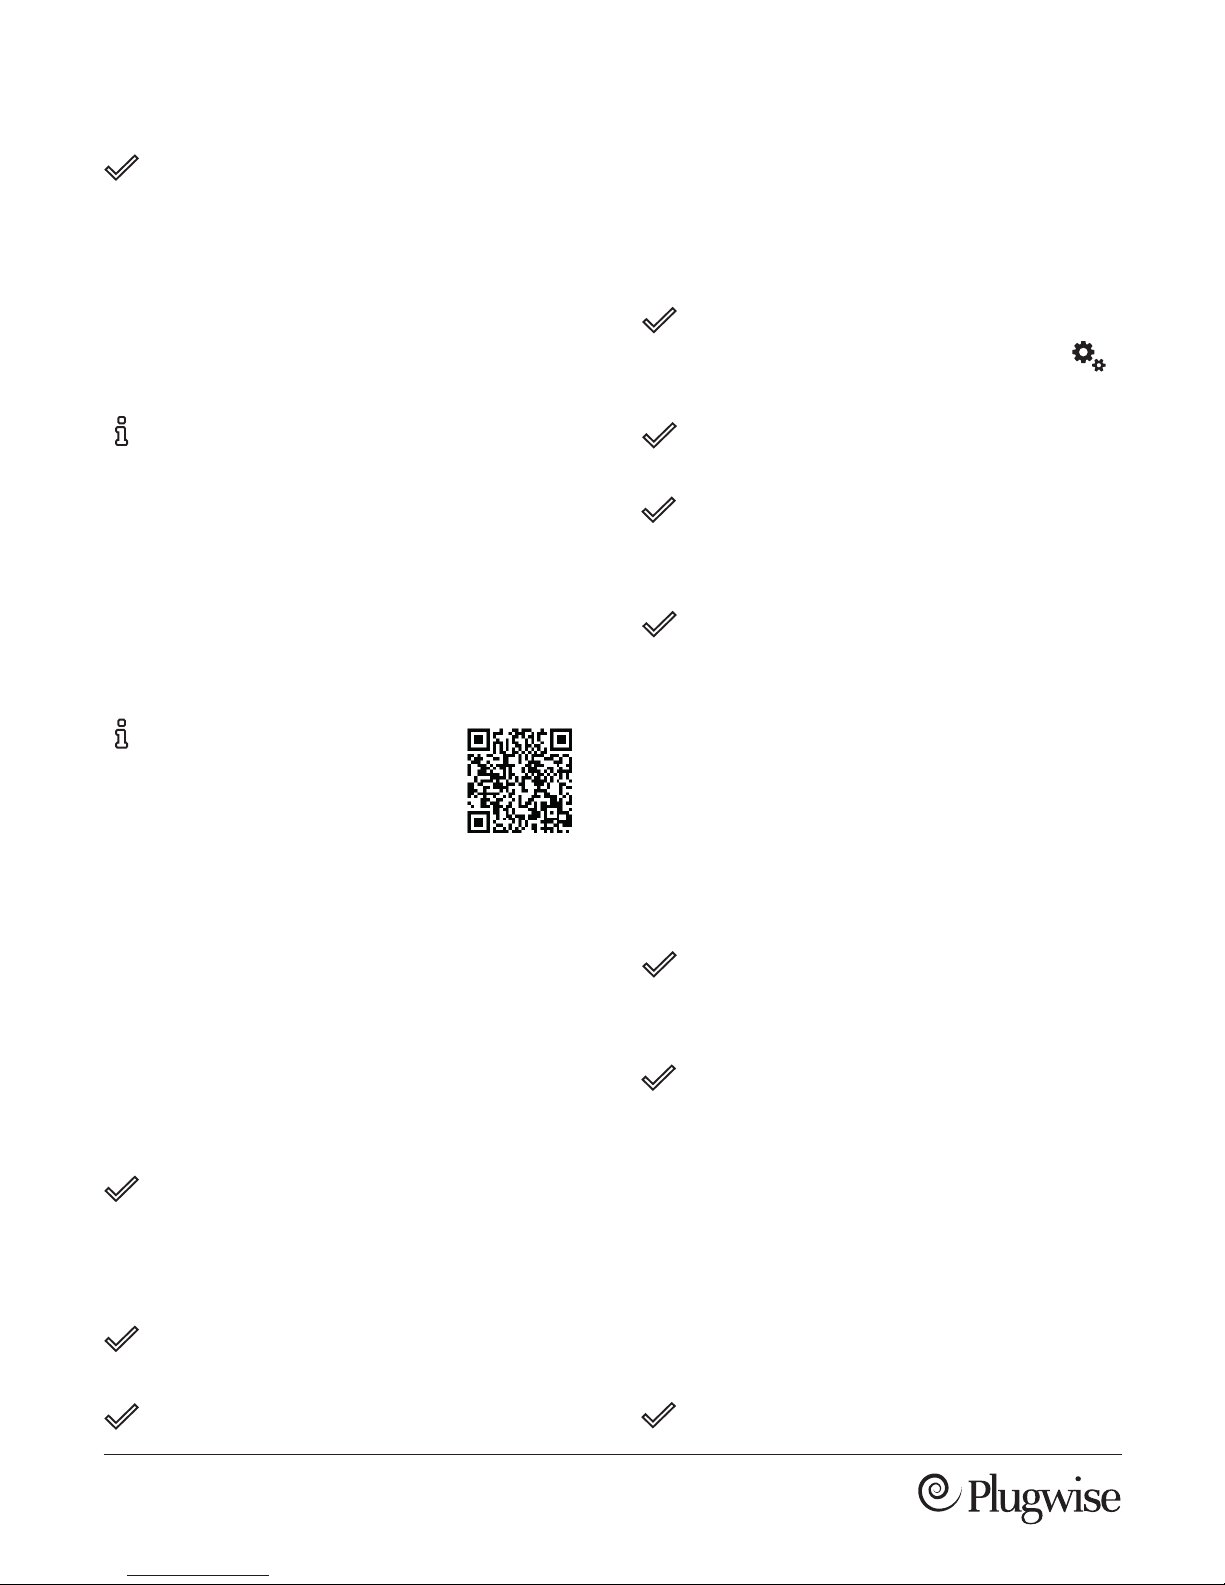
Go to the settings via the button in
the bottom right of the web page .
Go to the WiFi/LAN settings.
Press ‘Scan’ and select your own WiFi
network.
Enter the password of you own WiFi
network and save the settings. Wait
until the Stretch has booted up: the
upper light (WLAN) and the light in
the middle (STATUS) of the Stretch
are on when connected to the
network.
Network cable?
Connect a network cable between
the router and the Stretch.
Restart the Stretch by plugging the
adapter out and into the wall socket.
Wait until the Stretch has booted up:
the light in the middle (STATUS) and
the lower light (LAN) are on when
connected to the network.
4. Validate the network connection?
Open the web page of the Stretch
Make sure that your smartphone or
Page 13
13 | Stretch 3
EN
tablet is reconnected to the same
network as to which the Stretch is
connected to. This is also necessary
when you want to add the Stretch to
the Plugwise app.
Go to connect.plugwise.net.
Use your short ID to log in. You will
be redirected to the web page of the
Stretch when the Stretch is
connected to the network.
Having trouble using WiFi?
Reset the network connection
Press the black button on the Stretch
for 5 seconds until the light in the
middle (STATUS) has blinked 5 times
and the upper light (WLAN) starts to
blink rapidly.
The network settings will be deleted.
Wait until the Stretch has booted up,
then try to connect the Stretch to
your WiFi network again.
First connect the network cable
Connect a network cable between
the router and the Stretch.
Restart the Stretch by plugging the
adapter out and into the wall socket.
Follow the steps “Validate the network
connection? - Open the web page of the
Stretch” on the previous page to open
the webpage of the Stretch.
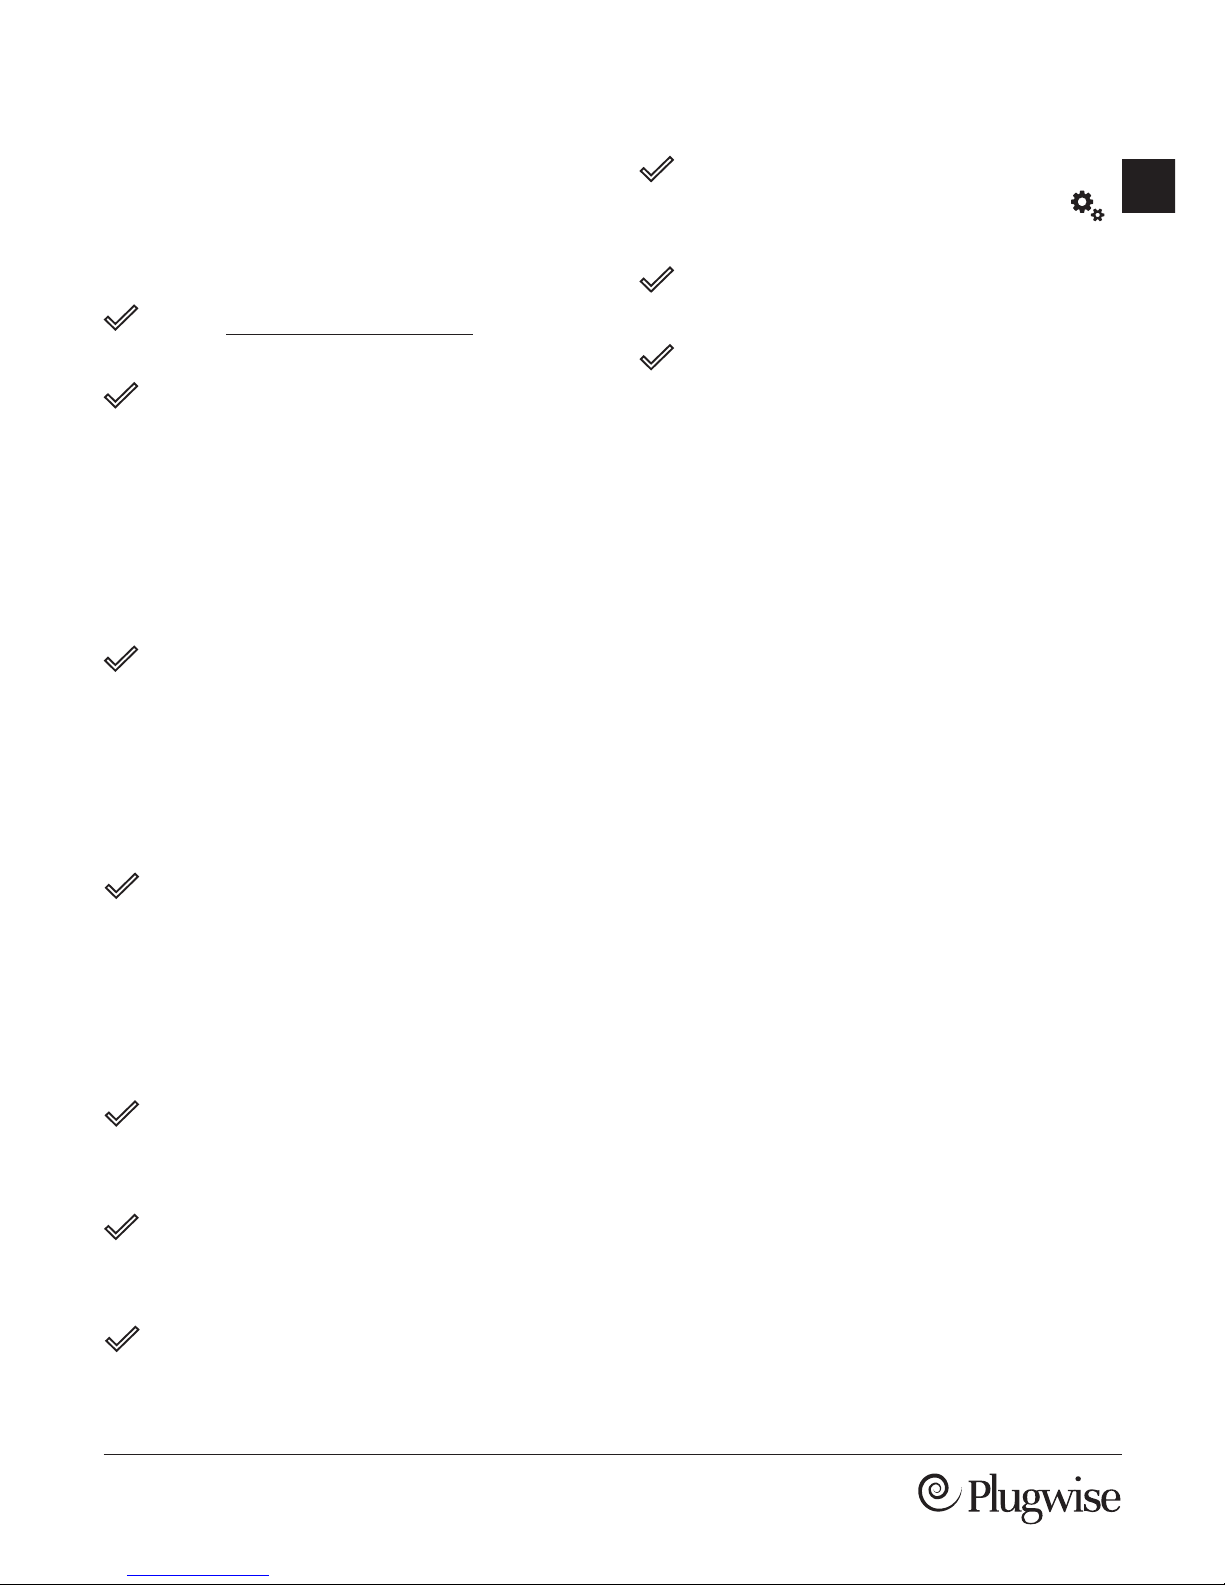
Go to the settings via the button in
the bottom right of the web page .
Go to the WiFi/LAN settings.
Select your own WiFi network, enter
the password of your own WiFi
network and save the settings.
Disconnect the Stretch from the
network cable when instructed.
Page 14
14 | Stretch 3
Behaviour of
the lights
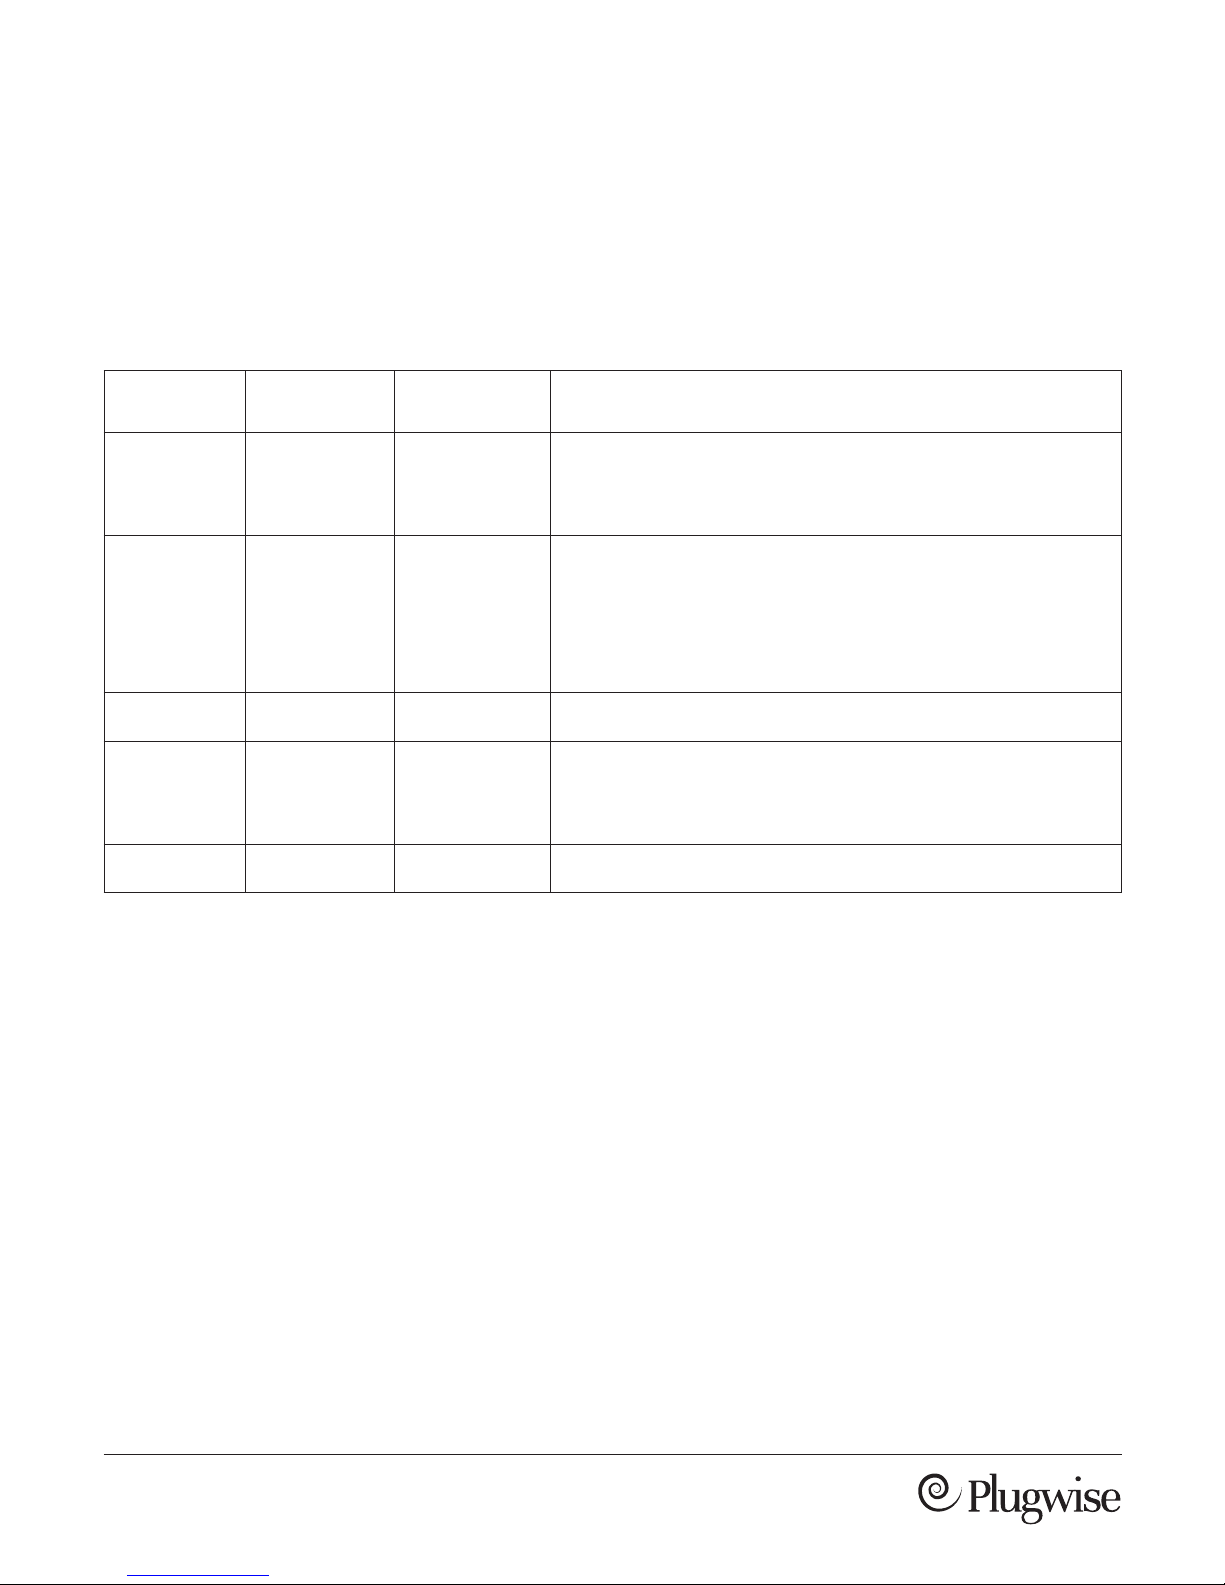
The Stretch has 3 LEDs. In the table below
the most important behaviour of the lights
of the Stretch is explained.
LED Colour Pattern Description
STATUS Green Blink slowly The Stretch is starting up. Wait until the Stretch is ready.
When in access point mode, the LEDs STATUS and WLAN
are blinking slowly.
STATUS Green Blink slowly,
then on
The Stretch is starting up. Wait until the Stretch is ready:
• when connected via a network cable, the LEDs
STATUS and LAN are turned on.
• when connected to WiFi, the LEDs STATUS and
WLAN are turned on.
WLAN Green Blinking Communication with the WiFi network.
WLAN Green Blink slowly Cannot connect to the WiFi network. Has something
been changed in the router settings? Follow the steps
below “having trouble using WiFi?”.
LAN Green Blinking Communication with the network via the network cable.
Page 15

Page 16

Plug wise B.V.
Wattstraat 56
2171 TR Sassenheim
The Netherlands
www.plugwise.com
Support: www.plugwise.com/technical-contact
 Loading...