

Plextalk PTN2 User Manual
1
PLEXTALK PTN2 (ver3)
User's Guide
rev 4.0
©2009 Shinano Kenshi Co., Ltd.

2
IMPORTANT NOTICES.
FCC NOTICE.
Declaration of Conformity.
Model Number: PTN2
Trade Name: PLEXTALK
Responsible party: Shinano Kenshi Co., Ltd.
Address: 6-15-26 Chuo, Ueda-shi, Nagano-ken 386-0012 JAPAN
This device complies with Part 15 of the FCC Rules; Operation is
subject to the following two conditions:
(1) This device may not cause harmful interference, and
(2) This device must accept any interference received, including
interference that may cause undesired operation.
This equipment has been tested and found to comply with the limits
for a Class B digital device, pursuant to part 15 of the FCC Rules.
These limits are designed to provide reasonable protection against
harmful interference in a residential installation. This equipment
generates, uses and can radiate radio frequency energy and, if not
installed and used in accordance with the instructions, may cause
harmful interference to radio communications. However, there is no
guarantee that interference will not occur in a particular installation. If
this equipment does cause harmful interference to radio or television
reception, which can be determined by turning the equipment off and
on, the user is encouraged to try to correct the interference by one or
more of the following measures:
Reorient or relocate the receiving antenna.
Increase the separation between the equipment and receiver.
Connect the equipment into an outlet on a circuit different from
that to which the receiver is connected.
Consult the dealer or an experienced radio / TV technician for
help.

3
CAUTION:
Any changes or modification not expressly approved by the party
responsible for compliance could void the user's authority to operate
the equipment.
Canadian Department of Communications Statement.
This digital apparatus does not exceed the Class B limits for radio
noise emissions from digital apparatus set out in the Radio
Interference Regulations of the Canadian Department of
Communications.
This class B digital apparatus complies with Canadian ICES-003.
Cet appareil numerique de la classe B est conforme a la norme NMB003 du Canada.
CAUTION:
Use of controls or adjustments or performance of procedures other
than those specified herein may result in hazardous radiation
exposure.

4
TABLE OF CONTENTS.
IMPORTANT NOTICES. .................................................................... 2
FCC NOTICE. ................................................................................. 2
Canadian Department of Communications Statement. ................... 3
TABLE OF CONTENTS. .................................................................... 4
1. Legal and copyright information. ............................................... 7
1.1. Copyright information about this guide. ................................... 7
1.2. Licenses and trademarks. ....................................................... 7
1.3. Restrictions on copying. .......................................................... 7
2. Getting started. ............................................................................ 9
2.1. Terminology and conventions used. ....................................... 9
2.2. What you get in the box. ......................................................... 9
2.3. Description of the unit. .......................................................... 10
2.4. Charging PLEXTALK. ........................................................... 13
2.5. Maintenance and battery care. ............................................. 14
2.6. Turning PLEXTALK on and off. ............................................. 16
2.7. Key Describer function. ......................................................... 16
2.8. Key Lock function.................................................................. 16
2.9. Inserting and ejecting SD card, USB memory and CD. ......... 17
3. Introduction to the menu system. ............................................. 19
3.1. Main menu. ........................................................................... 19
3.2. Accessing and navigating the menu. .................................... 19
4. Setting up your PLEXTALK. ..................................................... 21
4.1. Selecting your preferred synthetic voice. .............................. 21
4.2. Selecting the pitch of the synthetic voice. ............................. 21
4.3. Setting the date and time. ..................................................... 22
4.4. Selecting a preferred waiting sound. ..................................... 22
5. Power management features. ................................................... 24
5.1. Battery low warning. .............................................................. 24
5.2. Automatic power off function. ................................................ 24
5.3. Compulsory power off function. ............................................ 24
5.4. Sleep timer function. ............................................................. 25
6. Playing features common to all formats. ................................ 26
6.1. Start and stop playback. ....................................................... 26
6.2. Fast forward or fast rewind. .................................................. 26
6.3. Changing the playback volume. ............................................ 27
6.4. Changing the guide volume. ................................................. 27

5
6.5. Changing the playback speed. .............................................. 28
6.6. Changing the audio tone. ...................................................... 28
6.7. Accessing the Navigation menu. ........................................... 29
6.8. Selecting the media and title. ................................................ 29
6.9. Folder, category and title navigation. .................................... 30
6.10. Getting information about media and title. .......................... 30
6.11. Getting information on the current status. ........................... 31
6.12. Selecting a playback mode. ................................................ 31
6.13. Using bookmarks. ............................................................... 32
7. Playing DAISY titles. ................................................................. 35
7.1. Heading navigation. .............................................................. 35
7.2. Moving to the beginning or end of a DAISY title. .................. 36
7.3. Page navigation. ................................................................... 36
7.4. Group navigation................................................................... 37
7.5. Phrase navigation. ................................................................ 37
7.6. Navigating by screen, paragraph, line, sentence, word or
character (DAISY text). ................................................................. 38
7.7. Playback mode. .................................................................... 38
8. Playing Audio Files or Music CDs............................................ 40
8.1. Track navigation.................................................................... 40
8.2. Moving to the beginning of an album. ................................... 41
8.3. Album navigation. ................................................................. 41
8.4. Playback mode. .................................................................... 42
8.5. Announcing albums and tracks by name or number. ............ 43
9. Playing Text Files. ..................................................................... 44
9.1. Navigating by screen, paragraph, line, sentence, word or
character. ...................................................................................... 44
9.2. Navigating by percentage. .................................................... 45
9.3. Playback mode. .................................................................... 45
10. Playing Audio Book. ................................................................ 46
11. Backup. .................................................................................... 47
11.1. General backup information. ............................................... 47
11.2. Backup a title or album from a CD to other media. ............. 47
11.3. Backup a title or album between SD card and USB media. 48
11.4. Backup time for music CD. ................................................. 48
12. Media Management. ................................................................ 50
12.1. Deleting a title. .................................................................... 50
12.2. Erasing an SD card. ............................................................ 50
13. Other useful features. ............................................................. 52

6
13.1. The built in help file. ............................................................ 52
13.2. Checking system properties. ............................................... 52
13.3. "Skippable" settings. ........................................................... 52
13.4. Reset PLEXTALK to factory defaults. ................................. 53
Appendix A - Main specifications. ................................................ 55
Appendix B - Menu hierarchy. ....................................................... 59
Appendix C - Troubleshooting. ..................................................... 61

7
1. Legal and copyright information.
This chapter contains important information regarding copyright,
licences and trademarks. It also outlines the restrictions, which apply
when using the PLEXTALK for copying or recording digital sound.
You are strongly advised to read this chapter thoroughly before
continuing.
1.1. Copyright information about this guide.
Shinano Kenshi reserves the right to modify the products described in
this guide at any time without prior notice.
Shinano Kenshi makes no representation or warranties with respect
to the contents hereof and specifically disclaims any implied
warranties of merchantability or fitness for any particular purpose.
Further, Shinano Kenshi Co., Ltd. reserves the right to revise this
guide and to make changes in its content, without obligation to notify
any person or organization of such revision or change.
This guide is copyright. All right reserved. It may not be copied,
photocopied, translated, or reduced to any electronic medium or
machine-readable form without prior permission from Shinano
Kenshi.
Manual copyright 2009 Shinano Kenshi Co., Ltd.
1.2. Licenses and trademarks.
All licenses and trademarks are the property of their respective
owners.
1.3. Restrictions on copying.

8
Before using your PLEXTALK, you should review the following
important information to ensure that you understand the legal
restrictions that apply to its use for certain operations.
1.3.1. General information.
This PLEXTALK device is designed to help you record and reproduce
sound works, to which you own the copyright, or where you have
gained permission from the copyright owner or the rightful licenser.
Unless you own the copyright or have gained the appropriate
permission from the copyright owner or the rightful licenser, your
unauthorized recording, reproduction or distribution thereof, may
result in severe civil and criminal penalties under copyright laws and
international copyright treaties. If you are uncertain about your rights,
contact your legal advisor.
Under no circumstances will Shinano Kenshi be responsible for the
consequences of any illegal copying performed using this PLEXTALK
recorder.
1.3.2. Music CDs.
Copies of Music CDs are for individual enjoyment and, under the
Copyright Act, cannot be used otherwise, without the authorization of
the copyright holder.

9
2. Getting started.
2.1. Terminology and conventions used.
This section details the terminology and conventions used throughout
this guide. The details are as follows:
WARNING: A warning notice denotes a hazard that could
result in personal injury.
CAUTION: A caution notice denotes a hazard that could
damage or destroy the PLEXTALK product, destroy the
recording media, destroy or affect your data or computer
configuration.
Note: A note is used to give additional important information
about a feature that has not already been mentioned.
Generally these are listed after the instructions for reference.
SD Card: PLEXTALK is able to use both "SD" and "SDHC"
cards. In this User's Guide, both cards are called "SD cards".
2.2. What you get in the box.
Below is a list of all the items you should find in the box with your
PLEXTALK. Please make sure that all items are included. If there
are any missing items, please contact your local agent.
1 PLEXTALK PTN2
1 Mask
1 AC adaptor
1 User's Guide CD
1 Quick Reference guide
1 Safety Instruction guide
Note: It is strongly recommended that you retain all packaging, in
case you need to return your PLEXTALK for any reason in the future.

10
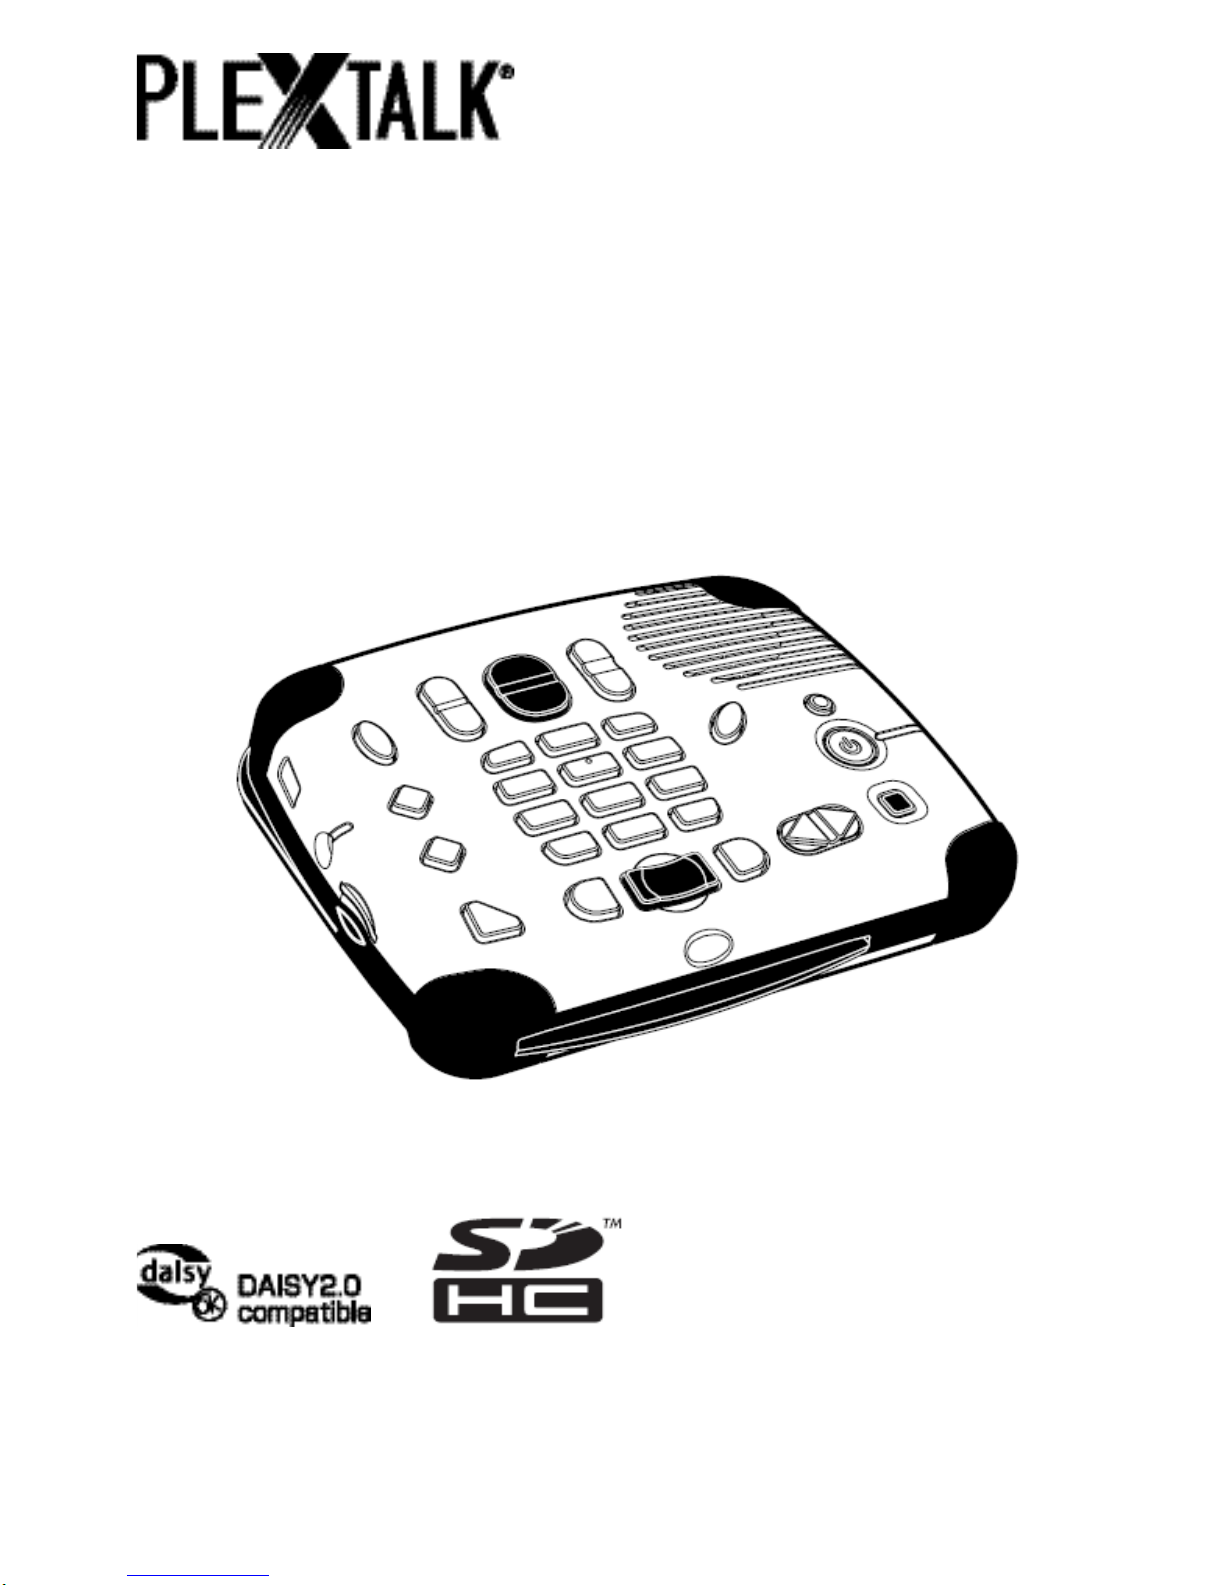
2.3. Description of the unit.
This section describes the physical look of the PLEXTALK and the
layout of the keys and other controls to enable you to locate them
when referred to in later chapters. The names and main purposes
are also detailed here.
Holding the unit carefully, take a few moments to locate the top and
bottom surfaces. The top has 27 rubber keys on it whereas the
bottom has only 5 rubber feet.
Locate the perforated surface of the speaker grill of the PLEXTALK.
Keep the feet downwards and rotate it until the speaker grill is at the
upper right from you. The PLEXTALK should now be set up in its
normal operating position. You can confirm this by feeling the longest
side is closest to you. There should be a narrow, but noticeable,
straight dip in this edge. It is the CD slot.
2.3.1. Top surface.
The PLEXTALK has 27 rubber keys on the top surface. These are
grouped in 5 blocks - a column of 4 keys on the left side, a
rectangular block of 12 keys in the centre, a row of 3 keys below the
rectangular block, a row of 3 keys above the rectangular block and a
column of 5 keys on the right side.
In the column of four keys on the left side, the top key is an ellipse
shaped key and the bottom key is a triangle shaped key. The
remaining two keys in the centre are diamond shaped keys.
From top to bottom, the four keys are:
Menu key - used to access the Main Menu.
Bookshelf key - used to switch media.
GoTo key - used for page and heading navigation.

11
Bookmark key - used for bookmark navigation, insertion and
deletion.
The rectangular block of 12 keys is generally called the Number key
and is located at the centre of the top surface. It is laid out exactly
like a push button telephone keypad with 4 rows of 3 keys. The
number 5 key has a small raised dot on it to help you locate it. The
Hash key, which is located at the bottom right of the Number Pad, is
used for confirming, so it will be called the Enter key throughout this
guide. Similarly, the Star key, which is located at the bottom left of
the Number key, is used to cancel, and will be called the Cancel key.
Some of the keys have secondary functions and these are listed
below:
Number 2 = Arrow Up or Cancel
Number 4 = Arrow Left or Move Back
Number 6 = Arrow Right or Move Forward
Number 8 = Arrow Down or Enter
Number 9 = Backup files
Star = Undo
Hash = Redo
Underneath the Number key is the row of 3 keys. The two outside
keys are semi circular in shape. The centre key is rectangular in
shape and has a distinctive recessed top surface for easy location.
From left to right, the names and the uses of these three keys are as
follows:
Rewind key - Back or Fast Rewind (if held)
Play/Stop key - Play/Stop
Fast Forward key - forward or Fast Forward (if held)
Above the Number key is the row of 3 keys. The two outside keys
are vertically long ellipse in shape and the centre key is larger ellipse
in shape. They are divided into the top and the bottom at the centre.
From left to right, the names of these keys are as follows:
Tone key - the upper side is called "Tone up key", the lower
side is called "Tone down key."

12
Volume key - the upper side is called "Volume up key", the
lower side is called "Volume down key."
Speed key - the upper side is called "Speed up key", the lower
side is called "Speed down key."
The last group of keys on the top surface is the 5 keys on the right
hand side. The key, which is located in immediate right of the
Number 3 or 6 key, is the Information key. It is ellipse in shape. The
key, which is located immediately to the right of the Fast Forward key,
is the Title key. It is divided into the right and the left at the centre.
The right side is called "Next Title key", the left side is called
"Previous Title key." The use of these keys are as follows:
Information key - used to get the information of the DAISY
book, audio files and text files. Press and hold the key to hear
the current date and time.
Title key - used to switch media by pressing the right side and
left side together or pressing and holding the right side or left
side. To switch titles, press the right side called "Next Title
key" or the left side called "Previous Title key."
The other three keys are arranged linearly on the right side of the unit.
The top key is a small round shaped and the bottom key is a small
square shaped. The centre of the two keys is a larger round shaped
key, which is slightly sunken. From top to bottom, the three keys are:
Sleep timer key - used to set sleep timer
Power button - used for power on/off
Eject key - used for ejecting CDs.
2.3.2. Front face.
The CD Insertion and Ejection Slot is located at the front of the unit.
Insert your DAISY book CD, music CD or MP3CD into the slot. Once
the CD has been inserted, the CD will be taken into the unit
automatically.

13
2.3.3. Left side.
On the left side of the unit there are three items. From front to back,
there are the SD card slot, the headphone jack and the USB slot.
The SD card slot is for both the SD card and SDHC card. The USB
slot can be used for USB flash memory.
2.3.4. Back face.
There is one item on the rear of the unit. On the centre is a small
round hole in a square shaped housing. This is the DC input terminal,
which is the socket to take the AC power supply.
2.3.5. Bottom surface.
There is a battery cover on the bottom surface. The battery cover is
fixed with a screw. To replace the battery, remove the screw and
open the battery cover then pull out the battery.
WARNING: You should only use the recommended battery with this
unit. Failure to do so may cause an explosion or fire.
2.4. Charging PLEXTALK.
In order to charge the internal battery, you need to connect the
PLEXTALK to the mains supply. Do this as follows:
To charge the battery using mains power, plug the supplied AC
adapter into the power input terminal on the centre of the back
face.
Then plug the power adaptor into the mains socket. Charging
will start.

14
2.5. Maintenance and battery care.
2.5.1. Unit care.
Carefully wipe any dust and dirt from PLEXTALK with a soft cloth that
has been slightly dampened with a diluted, neutral detergent, then
wipe dry with a cloth.
WARNING: Always disconnect PLEXTALK from the mains supply
before cleaning.
2.5.2. Battery care.
In order that you get the most out of your rechargeable battery, you
should take careful note of the following points:
The battery will normally take 4 hours to fully charge. However,
when using your PLEXTALK for the first time, or after one
month of storage, you should connect to a mains power supply
for at least 24 hours.
The battery life depends on how frequently it is used and
recharged. Its capacity to store charge reduces over time.
When the usable time following a charge becomes too short
for practical use, replace the battery with a new one. These
can be purchased from your local agent. Your agent should
also be able to give you advice about recycling and disposal of
used batteries.
The usable time may be affected by the ambient temperature
and working environment.
In order to maintain battery performance, the following procedure
should be carried out every six months:
Fully charge the battery
Use on battery power until dead
Recharge
15
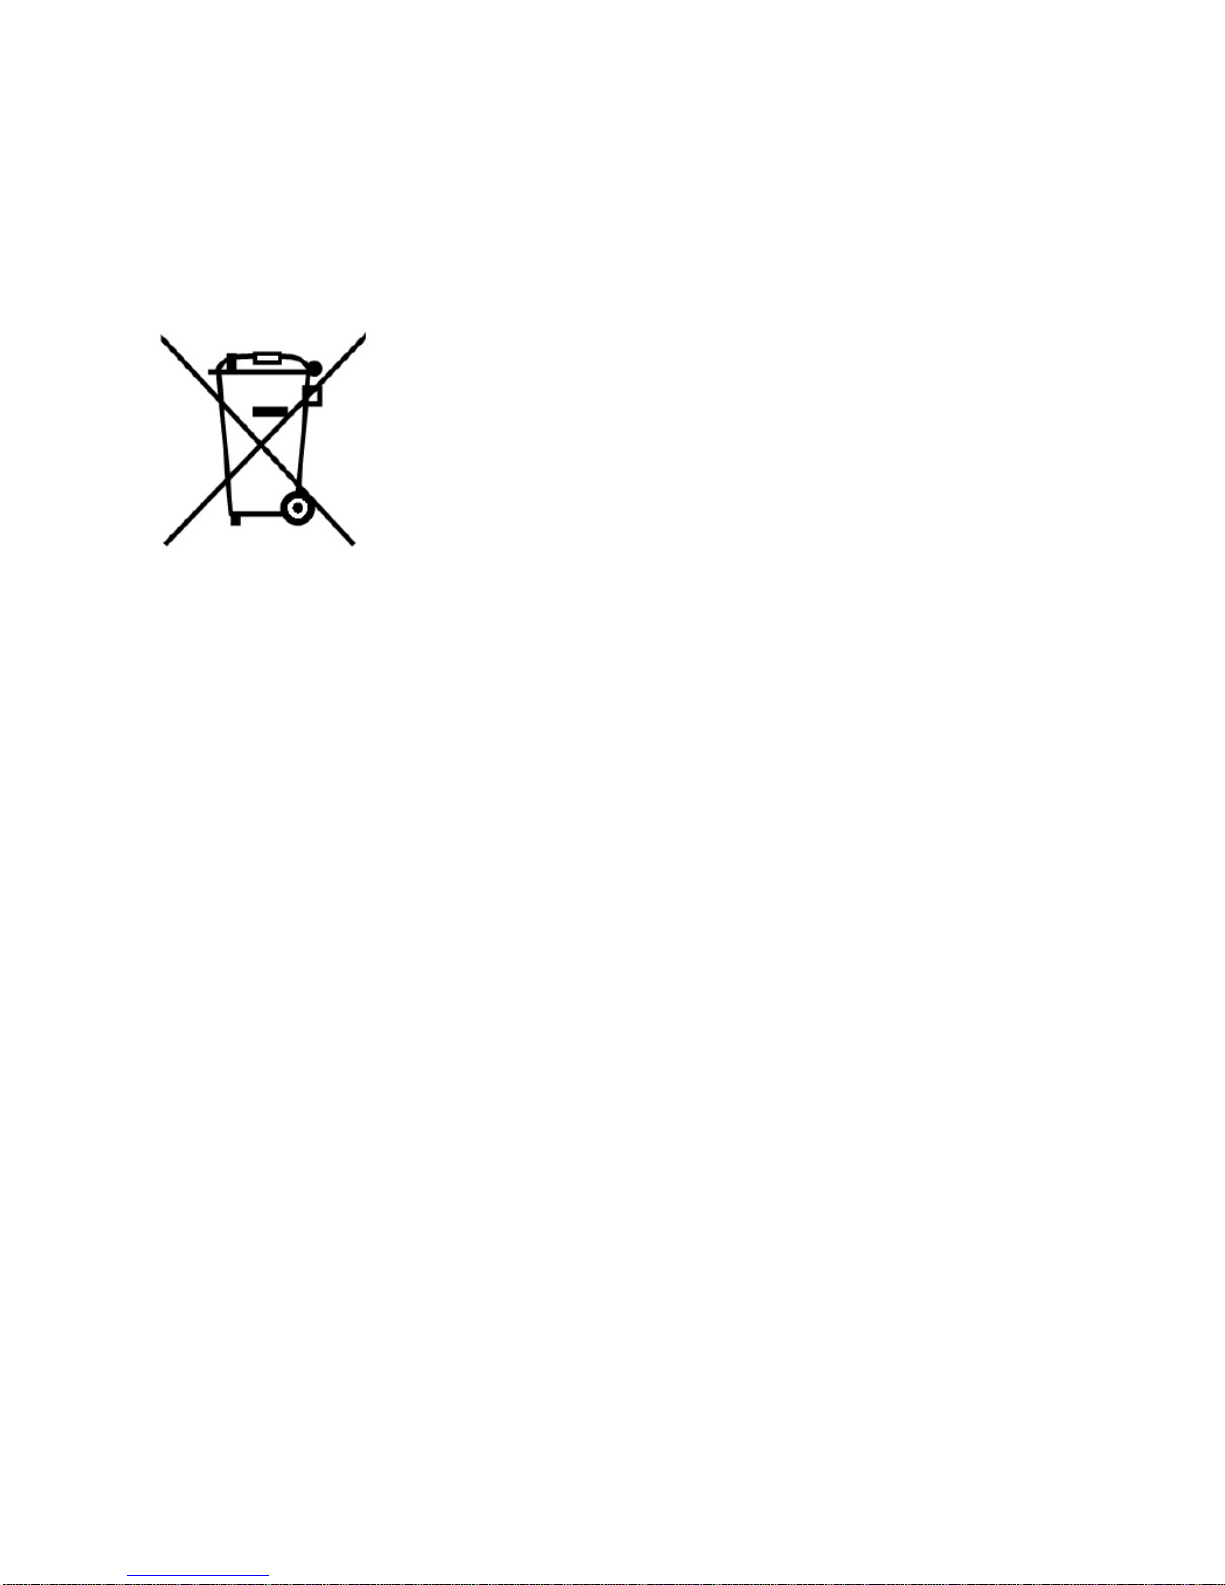
2.5.3. Crossed-out dustbin mark.
Symbol mark called "crossed-out dustbin mark" is printed on the
surface of the battery.
Note: This symbol mark is valid only for EU countries.
This symbol mark is according to the directive 2006/66/EC. This
symbol means that batteries and accumulators, at their end-of-life,
should be disposed of separately from regular municipal waste. If a
chemical symbol is printed beneath the symbol shown above, this
chemical symbol means that the battery or accumulator contains a
heavy metal at a certain concentration listed below.
Hg: mercury (0.0005%)
Cd: cadmium (0.002%)
Pb: lead (0.004%)
These substances may cause serious hazards to human and the
global environment if not cared in an appropriate manner. In the
European Union there are separate collection systems for used
batteries and accumulators. Please dispose of batteries and
accumulators properly at your local community waste collection or
recycling center. Our product is designed and manufactured with
battery and accumulator components which can be recycled or
reused.

16
2.6. Turning PLEXTALK on and off.
To turn the unit on or off, do the following:
Press and hold down the Power button to turn the unit on.
When the power is on, the Power button will turn green.
Press and hold the Power button to turn off the unit.
Note: The booting up process should take approximately 30 seconds
when the unit is first used or after the battery has been replaced.
2.7. Key Describer function.
The Key Describer feature is turned on and off using the Menu key.
As its name implies, the Key Describer function allows the user to get
a description of any key on the PLEXTALK.
Turn on the Key Describer by pressing and holding down the
Menu key. Now press any key on the unit and a description of
its function will be spoken.
Turn off the Key Describer function by pressing and holding
down the Menu key.
2.8. Key Lock function.
Key Lock can be used to lock the keys and controls so that they can't
be accidentally operated.
To lock the keys, press and hold the Fast Forward key and
Rewind key at the same time.
To unlock the keys, press and hold the Fast Forward key and
Rewind key at the same time once more.

17
2.9. Inserting and ejecting SD card, USB memory and CD.
To insert the SD card, do the following:
Turn off the power.
Hold the SD card so that the cut off corner may be located at
the front right corner. In other words, the cut off corner should
be nearest to the front side of the unit.
Insert the SD card into the SD card slot on the left side of the
unit.
Press the card all the way into the slot ensuring that it engages
properly, with the outer edge flush with the body of the
PLEXTALK. Do not use excessive force when doing so.
To eject the SD card, do the following:
Turn off the power.
Push the SD card inwards and then release it. The card
should pop out leaving the outside edge of the card protruding.
Carefully grip the card and pull it out of the slot.
CAUTION: PLEXTALK's SD card slot is only compatible with SD or
SDHC cards. Inserting other memory card such as a Memory Stick
or MultiMedia Card, will cause a malfunction and should not be used.
Note: SD cards have a locking switch that enables you to protect
your data if you want. This is located on the longer side of the card
away from the cut off corner. If the switch is towards the leading
edge of the card, you will be able to back up and delete titles. If the
switch is away from the leading edge, your data will be protected.
To insert the USB memory, do the following:
Turn off the power.
Insert the USB memory into the USB slot.
To eject the USB memory, do the following:
Turn off the power.

18
Pull out the USB memory straight from the unit.
Note: External USB CD/DVD drive can not be used with PLEXTALK.
To insert a CD into the PLEXTALK, do the following:
Ensure that the PLEXTALK is turned on.
Turn the CD so that the label side is upwards.
Gently push the CD into the CD slot on the front of the
PLEXTALK.
Continue to push the CD into the slot until the PLEXTALK
takes over and feeds the CD the rest of the way.
Note: If you accidentally insert a CD upside down, the CD will be
ejected.
To eject a CD, do the following:
Press and release the Eject key.
The CD will be ejected. You can now pull the CD the rest of
the way out of the slot.

19
3. Introduction to the menu system.
A number of the features of PLEXTALK are accessed through the
built in menu system. This chapter aims to give you an
understanding of how the menu is structured and how you access it.
3.1. Main menu.
At the highest level there is the Main Menu which has 4 items. These
are:
Playback setting - allows you to listen to files repeatedly.
Skippable - allows you to select whether you skip some kind of
items or not.
Media management - allows you to get media information,
delete a title in a media except CD.
System settings - allows you to get system information and to
control the way certain features operate or play.
3.2. Accessing and navigating the menu.
To navigate around the menu, use the following methods:
Access the menu by pressing the Menu key once.
To select a different option on the same level of the menu,
press either the Number 4 key to move to the left or the
Number 6 key to move to the right. As you move to a new
menu option, it will be spoken.
On all menus, if you continue in the same direction, you will
eventually return to the starting point as the menus are
designed to loop round.
To select a menu option, press the Number 8 key or the Enter
key. Assuming that there is a sub menu, and it is accessible at
 Loading...