

PlexiDor Electronic Pet Door Owner's Manual

IMPORTANT: You must use a surge
protector with this electronic pet door.
Voltage dips and surges can damage the
circuit board and components.
www.Plexidors.net
*U.S. Patents Pending
*Patents Pending Worldwide
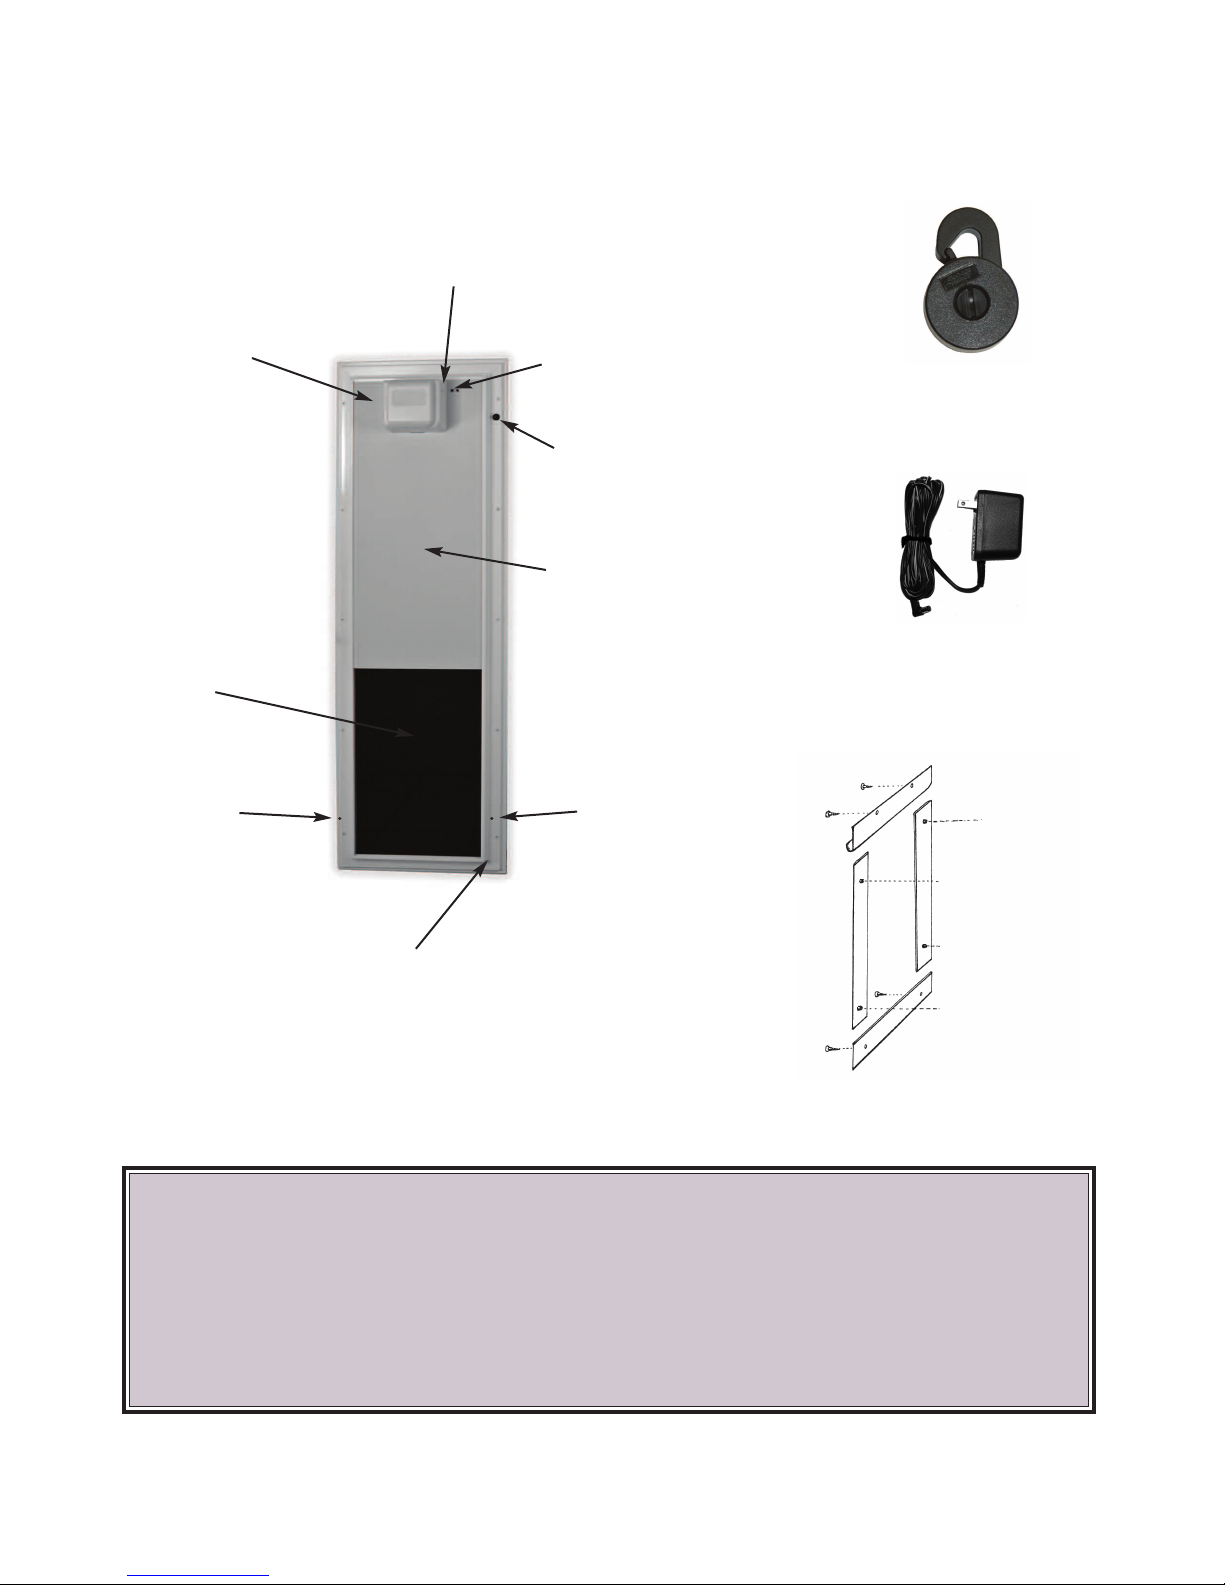
Plexidor®Electronic Pet Door
and Components
Red Motor Light
Motor Cover
Shatter resistant
composite acrylic
closing panel
with imbedded
antenna.
Power Jack
Hook Up
Blue ON/OFF
Light
RFID Collar Key
(2 Keys Included)
Power Button
Durable PVC
Panel Cover
12 volt Transformer and
15ft. Power Cord
Power Jack
Hook Up
Interior Frame of hardened aluminum
with tough, baked on white or bronze
(dark brown) appliance grade finish.
Exterior Frame
Diagram #1
IMPORTANT: You must use a surge protector with
this electronic pet door. Voltage dips and surges
can damage the circuit board and components.
Plexidor® Electronic Owners Manual Pg 2
Version 20091110

Types of Installations
IMPORTANT: Before any installation you must first determine the proper height positioning for the
pet door according to the diagram #2.
Do not mount the pet door too high. Keep it low
enough for the collar key on your shortest pet to be at
or above the lower line of the Antenna Sensing Area.
Upper Line of Antenna Sensing Area - 6 inches down from
the top of the black panel. Centered 3 inches in from sides.
Lower Line of Antenna Sensing Area - 2 inches up from the
bottom of the black panel. Centered 3 inches in from sides
Diagram #2
Door Installation
ollar
C
ey
K
:
Follow the instructions on the template that came with your The Plexidor® Electronic Pet Door.
Wall Installation:
You may build your own tunnel to finish out the interior of the cut hole, see diagram #3, or you may
purchase a Wall Tunnel Kit from your dealer. See the Plexidor
® Electronic Pet Door template for
more instructions. If you are using a Plexidor® Wall Tunnel Kit see the instructions included with
the tunnel kit.
The Plexidor
® Electronic Pet Door can be plugged in using the power cord provided, or you may
have an electrician hard wire the power cord into the wall.
Example of a wall tunnel framing for a
Plexidor
T
® Electronic Pet Door.
Diagram #3
Plexidor® Electronic Owners Manual Pg 3
Version 20091112
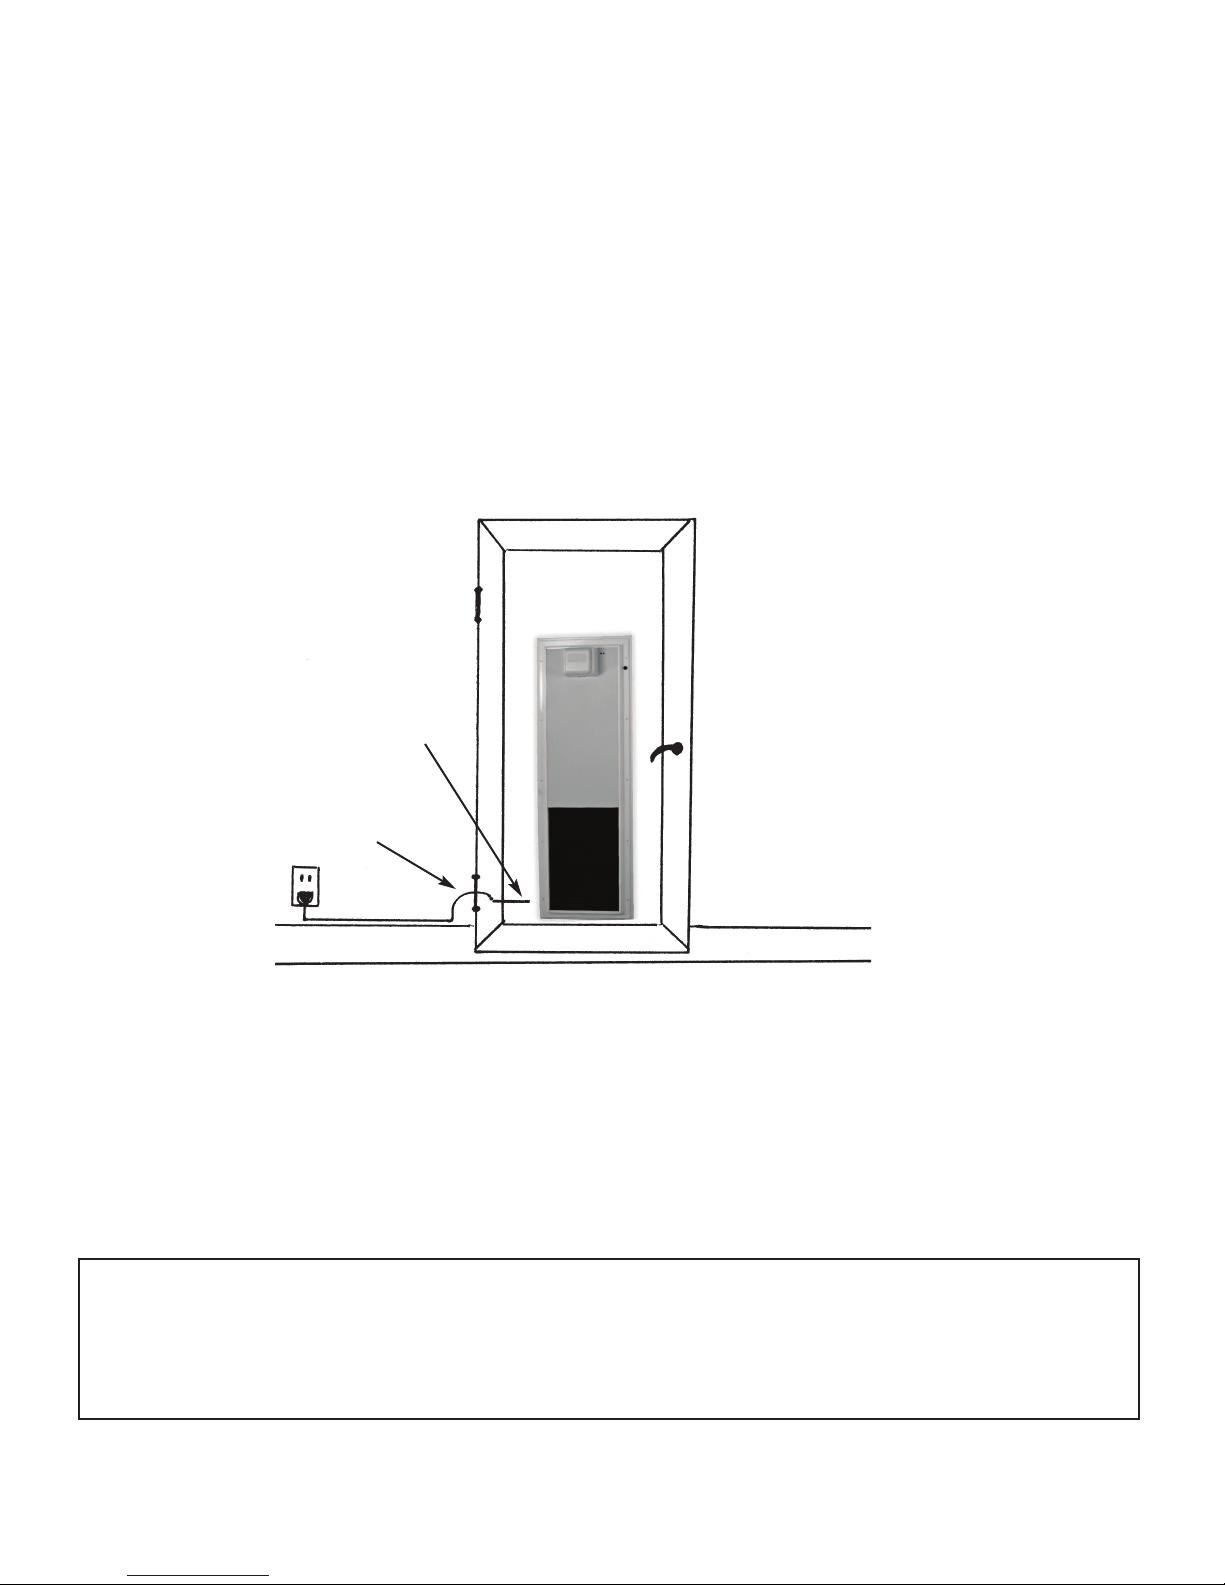
Power Cord:
The Plexidor® Electronic Pet Door can be plugged in using the transformer and 15ft. power cord provided. There are 2 power jacks on the pet door. See diagram #1. One is on the left side of the
door and one is on the right side of the door so you can use the power jack that is closest to your
outlet.
Attach the power cord along the wall. Use the nylon wire holders provided to keep the wire neat
and tight against the wall. Leave a loop of slack over the hinge of the door. This will prevent the
power cord being pinched when the house door is opened and closed. Leave enough slack in the
power cord over the hinge that the wire can move freely as the house door is opened and closed.
See diagram #4.
Power Jack
Hook Up
Power Cord
with slack
Diagram #4
Hard Wiring for Power:
In a wall installation, you also have the option of having an electrician hard wire the pet door. The
electrician will plug the transformer (black 12 volt power supply) into an outlet. *IMPORTANT: This
outlet needs to be installed by a licensed electrician.
Technical Notes for Electrician
The pet door can be hard wired as follows: Cut the end of the low voltage wires and twist them.
Remove the 2 blue wires from the circuit board and put the 2 transformer wires where the 2 blue
wires were at the top of the circuit board.
Plexidor® Electronic Owners Manual Pg 4
Version 20091112
 Loading...