

Playworld Systems Cozy Cocoon, ZZXX0151 Spinami Installation Instructions Manual
Model XX0483
PA1380
Page 1 of 8
Installation Instructions
Installation Instructions
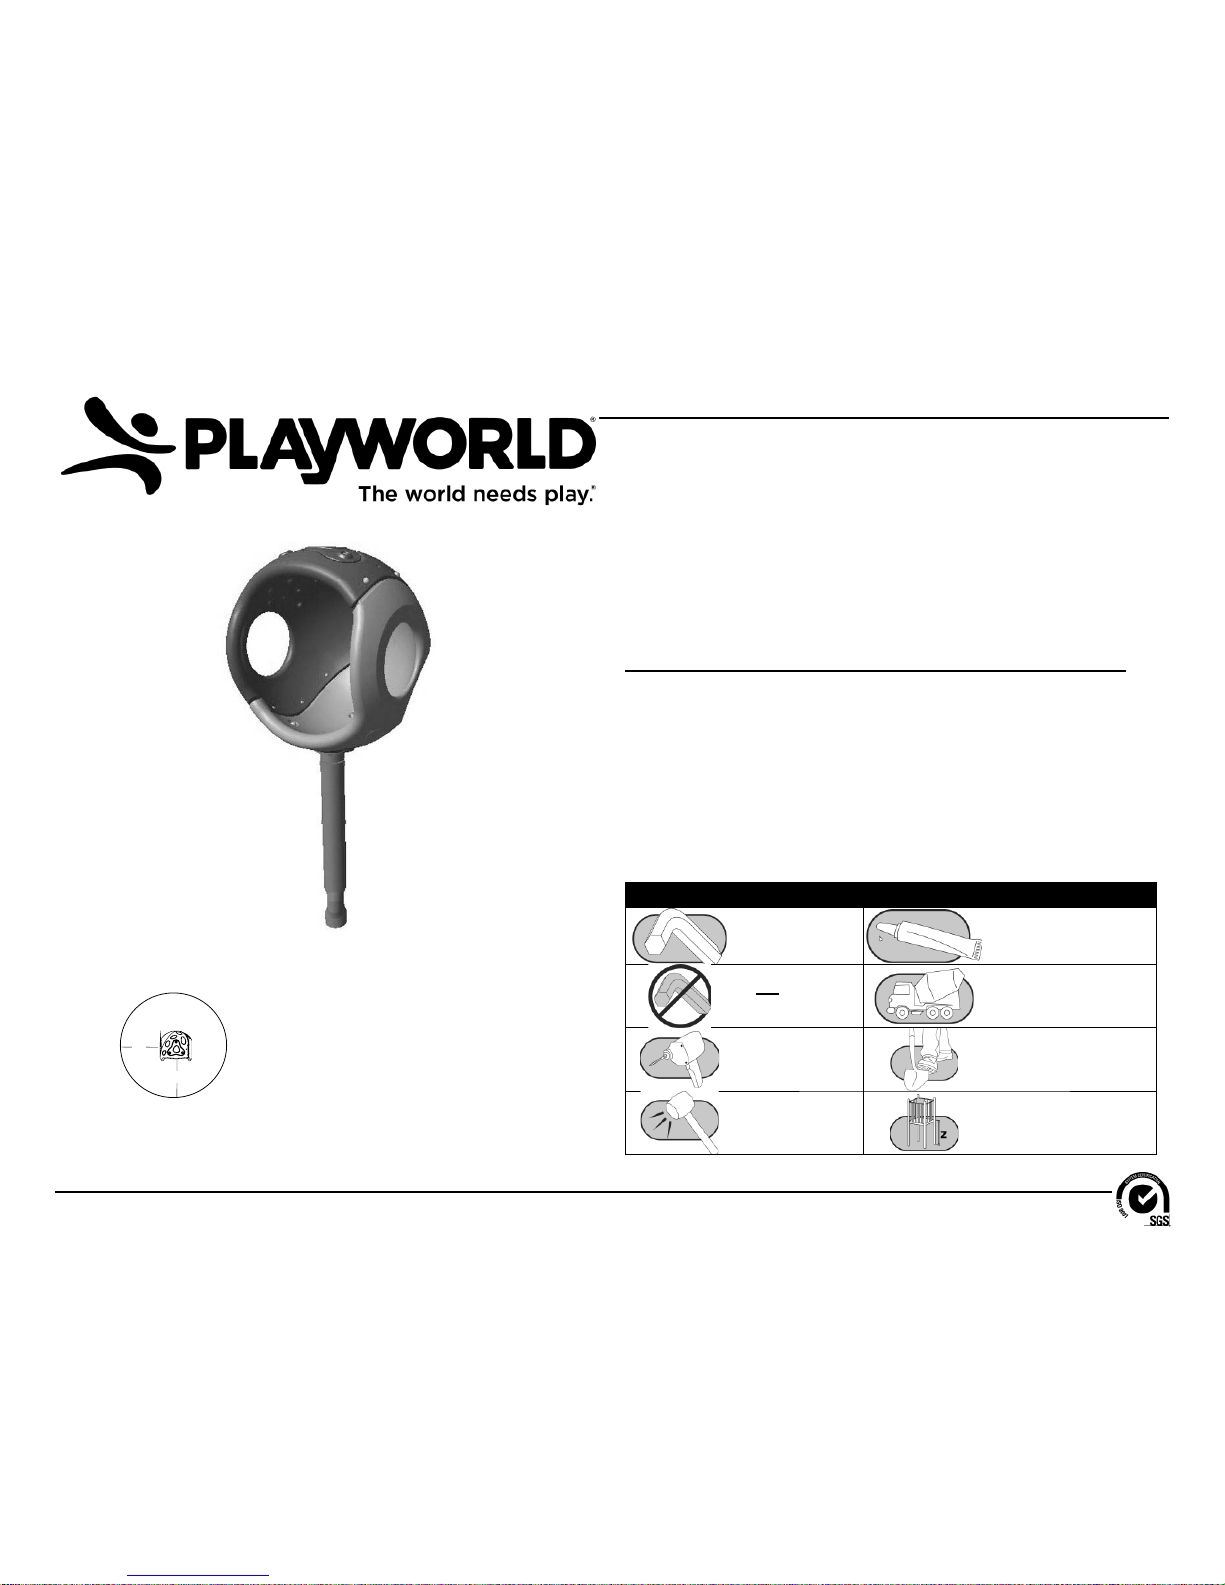
Playworld Systems® Model XX0483
Cozy Cocoon
Spinning Post Mount
Installation Preparation
Recommended Crew: ........................... Two (2) adults
Installation Time: ................................... 1.5 man-hours
Concrete Required: ............................... 0.13 cubic yard (0,10 cubic meters)
Use Zone: .............................................. Refer to information below
User Group Age (years): ....................... ASTM/CSA: 2-12, EN: 2-14
ICON KEY
Fully Tighten
Hardware
Add 1 Drop of
Thread Locking Adhesive
Do Not Fully TIghten
Hardware
Pour Concrete
Drill Dig Footing Holes
Hammer Critical Fall Height
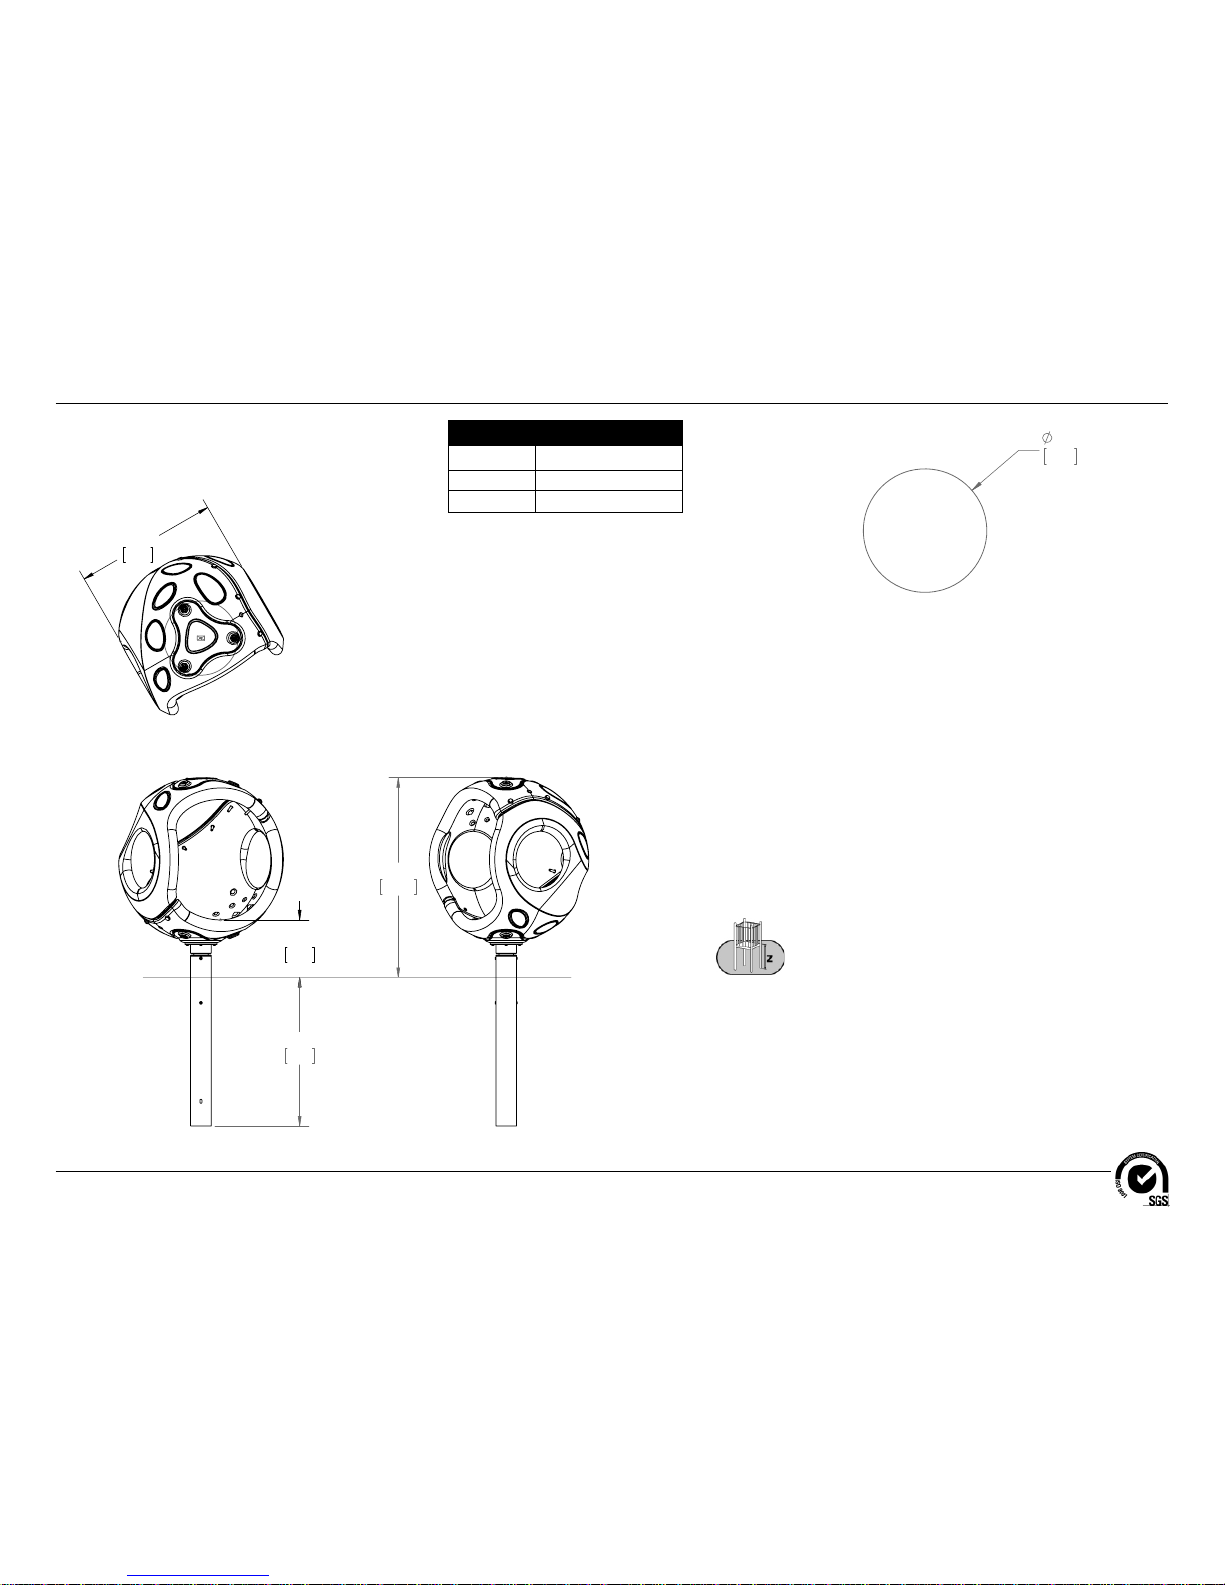
Assembly View
Equipment Use Zone
A - (ASTM) 72 in. (1830 mm)
(CSA) 1800 mm
(EN) 2000 mm
A
A
Installation Instructions
Model XX0483
PA1380
Page 2 of 8
685)$&,1*/(9(/
Top View
Elevation Views
Footing Diagram
ASTM/CSA: 14" (356 mm)
EN: 48.4" (1245 mm)
KEY
Position
Unit of Measurement
Top #
Inches
Bottom #
[Millimeters]

Model XX0483
PA1380
Page 3 of 8
Installation Instructions
Detail A
Step 4
Attach the cocoon cover casting
to a cocoon half.
Follow the details in alphabetical order. For clarifi cation, each detail references the
step description. The step descriptions start on page 5.
Cocoon Cover
Casting
AAU0718
(1 Total)
Cocoon Half
BPL3150
(1 Total)
3/8" x 2-3/4"
Button Head Bolt
BAE06677
(3 Total)
3/8" Button Head Nut
BAE0663
(3 Total)
Plastic Washer
BPL0300
(3 Total)
3/8" Flat Washer
BAE0595
(3 Total)
3/8" I.D. x 1-1/4" O.D.
Fender Washer
BAE0936
(3 Total)
Detail B
Step 5
Attach the cocoon halves together.
3/8" x 2-1/4"
Button Head Bolt
BAE06675
(8 Total)
3/8" x 1.63" Barrel Nut
BAE0633
(8 Total)
Plastic Washer
BPL0300
(8 Total)
3/8" Flat Washer
BAE0595
(8 Total)
Cocoon Half
BPL3150
(1 Total)
Installation Instructions
Model XX0483
PA1380
Page 4 of 8
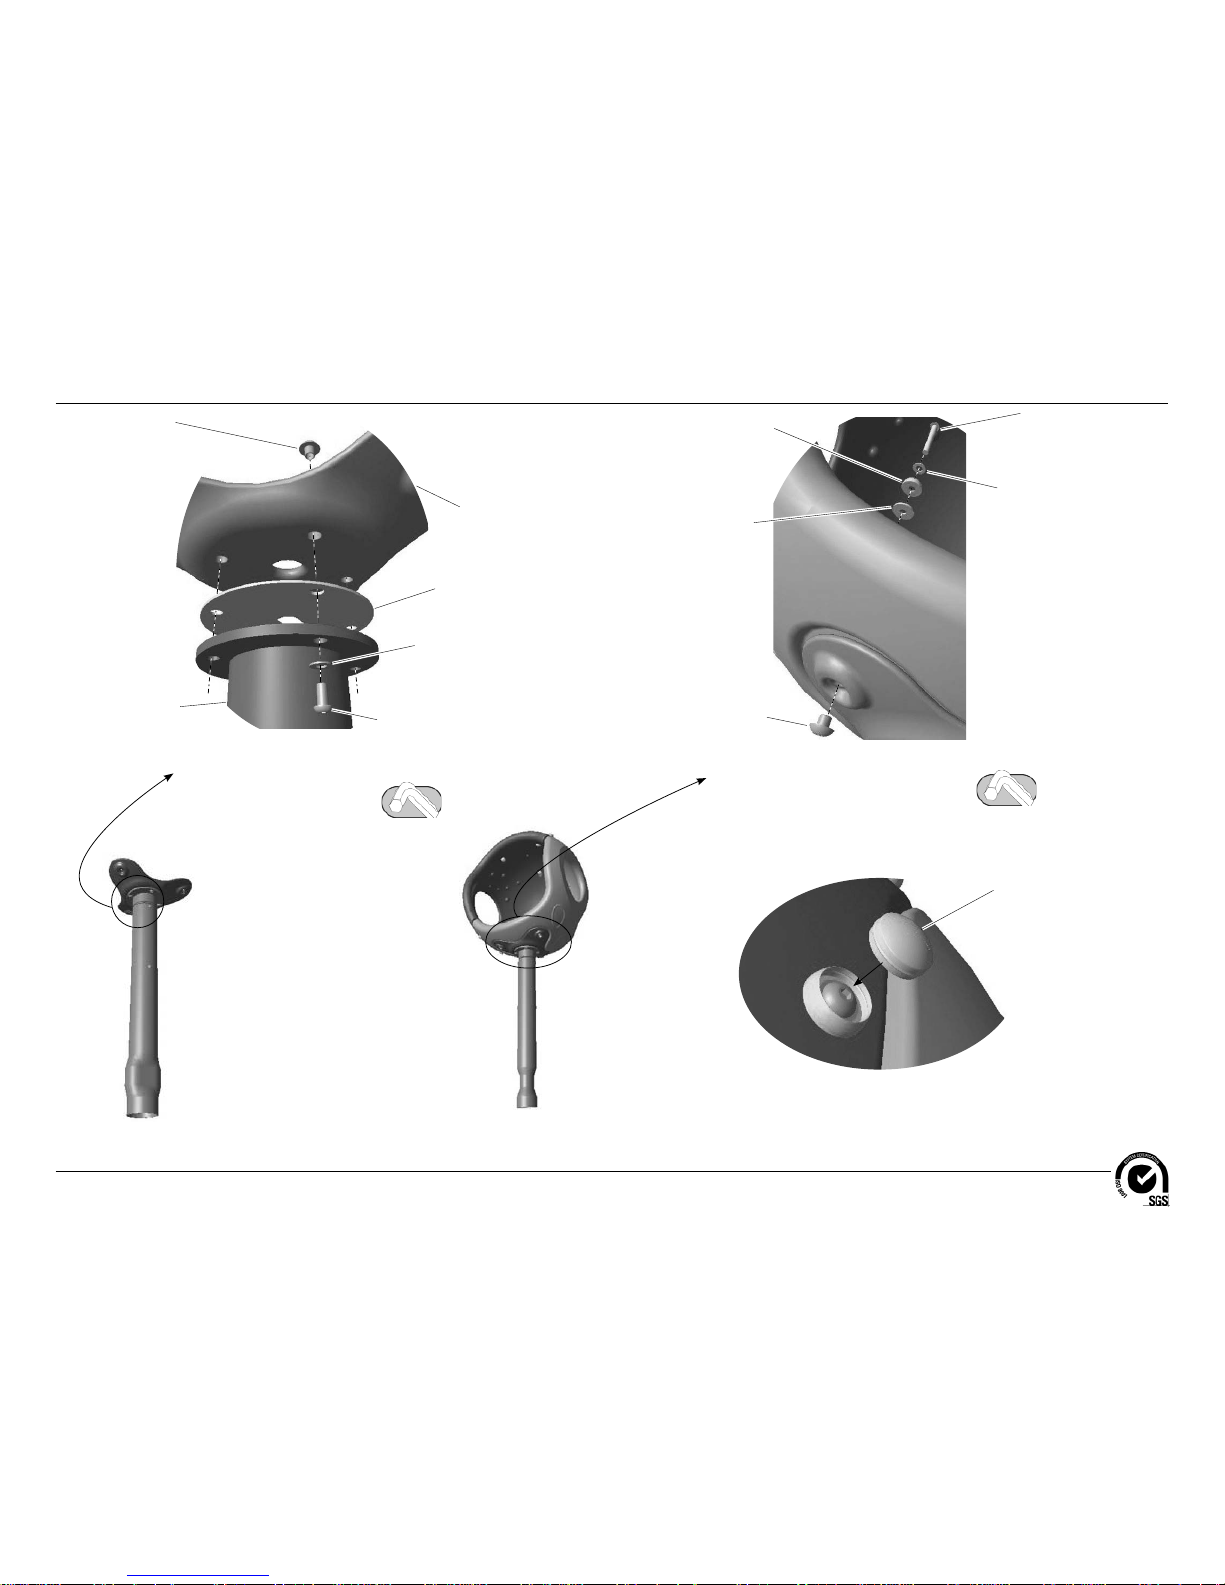
Detail D
Step 7
Attach the cocoon support post assembly to the
bottom of the cocoon.
Cocoon Post Casting
AAU0715
(1 Total)
Post Casting Plate
APL1722
(1 Total)
Cocoon Support Post
w/ Bearing
ASY0258
(1 Total)
3/8" Button Head Nut
BAE0663
(4 Total)
3/8" Flat Washer
BAE0595
(4 Total)
3/8" x 3/4"
Button Head Bolt
BAE0659
(4 Total)
Detail C
Step 6
Attach the cocoon support post to the
cocoon post casting.
3/8" x 2-3/4"
Button Head Bolt
BAE06677
(3 Total)
3/8" Button Head Nut
BAE0663
(3 Total)
Plastic Washer
BPL0300
(3 Total)
3/8" Flat Washer
BAE0595
(3 Total)
3/8" I.D. x 1-1/4" O.D.
Fender Washer
BAE0936
(3 Total)
Detail E
Step 9
Insert the bolt caps into the plastic washers.
Bolt Cap
BPL0300
(14 Total)

Model XX0483
PA1380
Page 5 of 8
Installation Instructions
Notes Before You Begin: Do not over tighten bolts during assembly, only snug
tighten them until assembly is complete. Do not install bolt caps until the structure
is completely assembled and properly footed.
Carefully read and understand these installation instructions before you
begin.
Step 1: Before attempting to assemble your equipment, please review all
installation information carefully. Should you experience any diffi culty during the
installation process, please call us at the phone number shown on the last page
of these instructions.
Step 2: Separate and identify all components and hardware.
Step 3: Excavate the footing as shown in the Footing Details in the Annex at
the end of this document. Use the Support Post footing detail for the cocoon
support post.
Step 4: Attach the cocoon cover casting to a cocoon half. See Detail A. Insert
the casting onto a cocoon half and attach as shown. Fully tighten the connections
according to tightening torque specifi cations.
Torque Specifi cations:
Bolts and nuts - Snug tighten and then tighten an additional one half turn.
Step 5: Attach the cocoon halves together. See Detail B. Place the two cocoon
halves together and attach as shown. Fully tighten the connections according to
tightening torque specifi cations.
Step 6: Attach the cocoon support post w/ bearing to the cocoon post casting.
See Detail C. Position the support post and casting plate against the bottom
of the cocoon post casting and attach as shown. Fully tighten the connections
according to tightening torque specifi cations.
Step 7: Attach the cocoon support post assembly to the bottom of the cocoon.
See Detail D. Place support post assembly against the bottom of the cocoon and
attach as shown. Fully tighten the connections according to tightening torque
specifi cations.
Final Details.
Step 8: Plumb and level the component in it's footing. Block and brace for
concrete. Pour concrete after all equipment has been assembled. Allow 72 hours
for concrete to completely cure.
Step 9: Select plastic bolt caps and press into the plastic washers. See Detail
E.
Hint: The bolt caps install more easily when they are warm.
Step 10: For areas complying with ASTM standard F1487 or the CSA Z-614, apply
the age appropriate label to the component at eye level or at a visible location.
 Loading...