

Playworld Systems UN8727, UN8727S Installation Instructions Manual

Installation Instructions
Models *UN8727 and UN8727S
PA1395, *ECN2643
Page 1 of 12
Installation Instructions
Universal Models UN8727 and UN8727S
Ground Level PlayCube
In-Ground and Surface Mount
Installation Preparation
Recommended Crew: ...........................Two (2) adults
Installation Time (In-Ground): ................1.5 man-hours
Installation Time (Surface Mount): ........1 man-hour
Concrete Required: ............................... 0.12 cubic yard (0,09 cubic meters)
Use Zone: .............................................. See the master layout drawing
User Group Age (single cube): .............. ASTM/CSA: 2-12, EN: 2-14
User Group Age (multiple cubes): ......... ASTM/CSA: 5-12, EN: 6-14
Assembly View (representative model)
ICON KEY
Fully Tighten
Hardware
Add 1 Drop of
Thread Locking Adhesive
Do Not Fully Tighten
Hardware
Pour Concrete
Drill Dig Footing Holes
Hammer Critical Fall Height
Installation Instructions
Models *UN8727 and UN8727S
PA1395, *ECN2643
Page 2 of 12
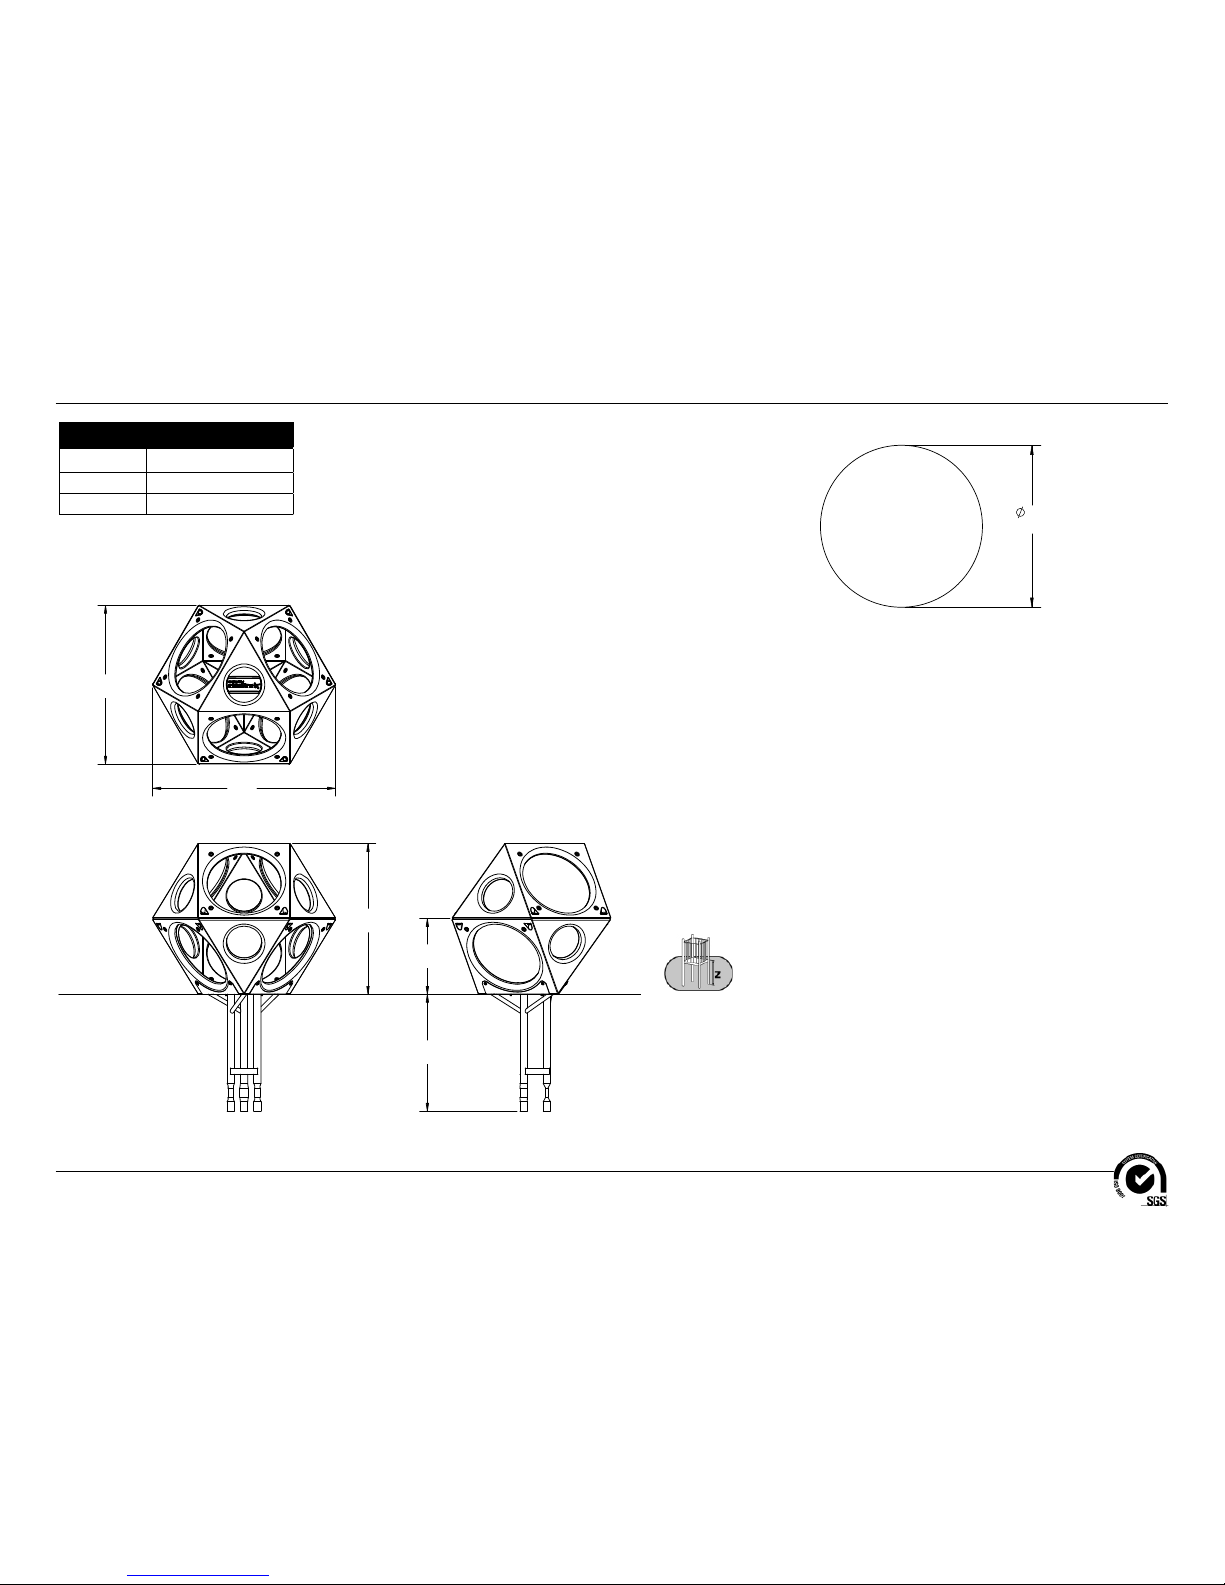
Top View
Elevation Views
UN8727
Footing Diagram
49" (1245 mm)
Footed as shown
KEY
Position
Unit of Measurement
Top #
Inches
Bottom #
[Millimeters]
>@
>@
>@
0,1
>@0,1
>@
685)$&(/(9(/
>@
Installation Instructions
Models *UN8727 and UN8727S
PA1395, *ECN2643
Page 3 of 12
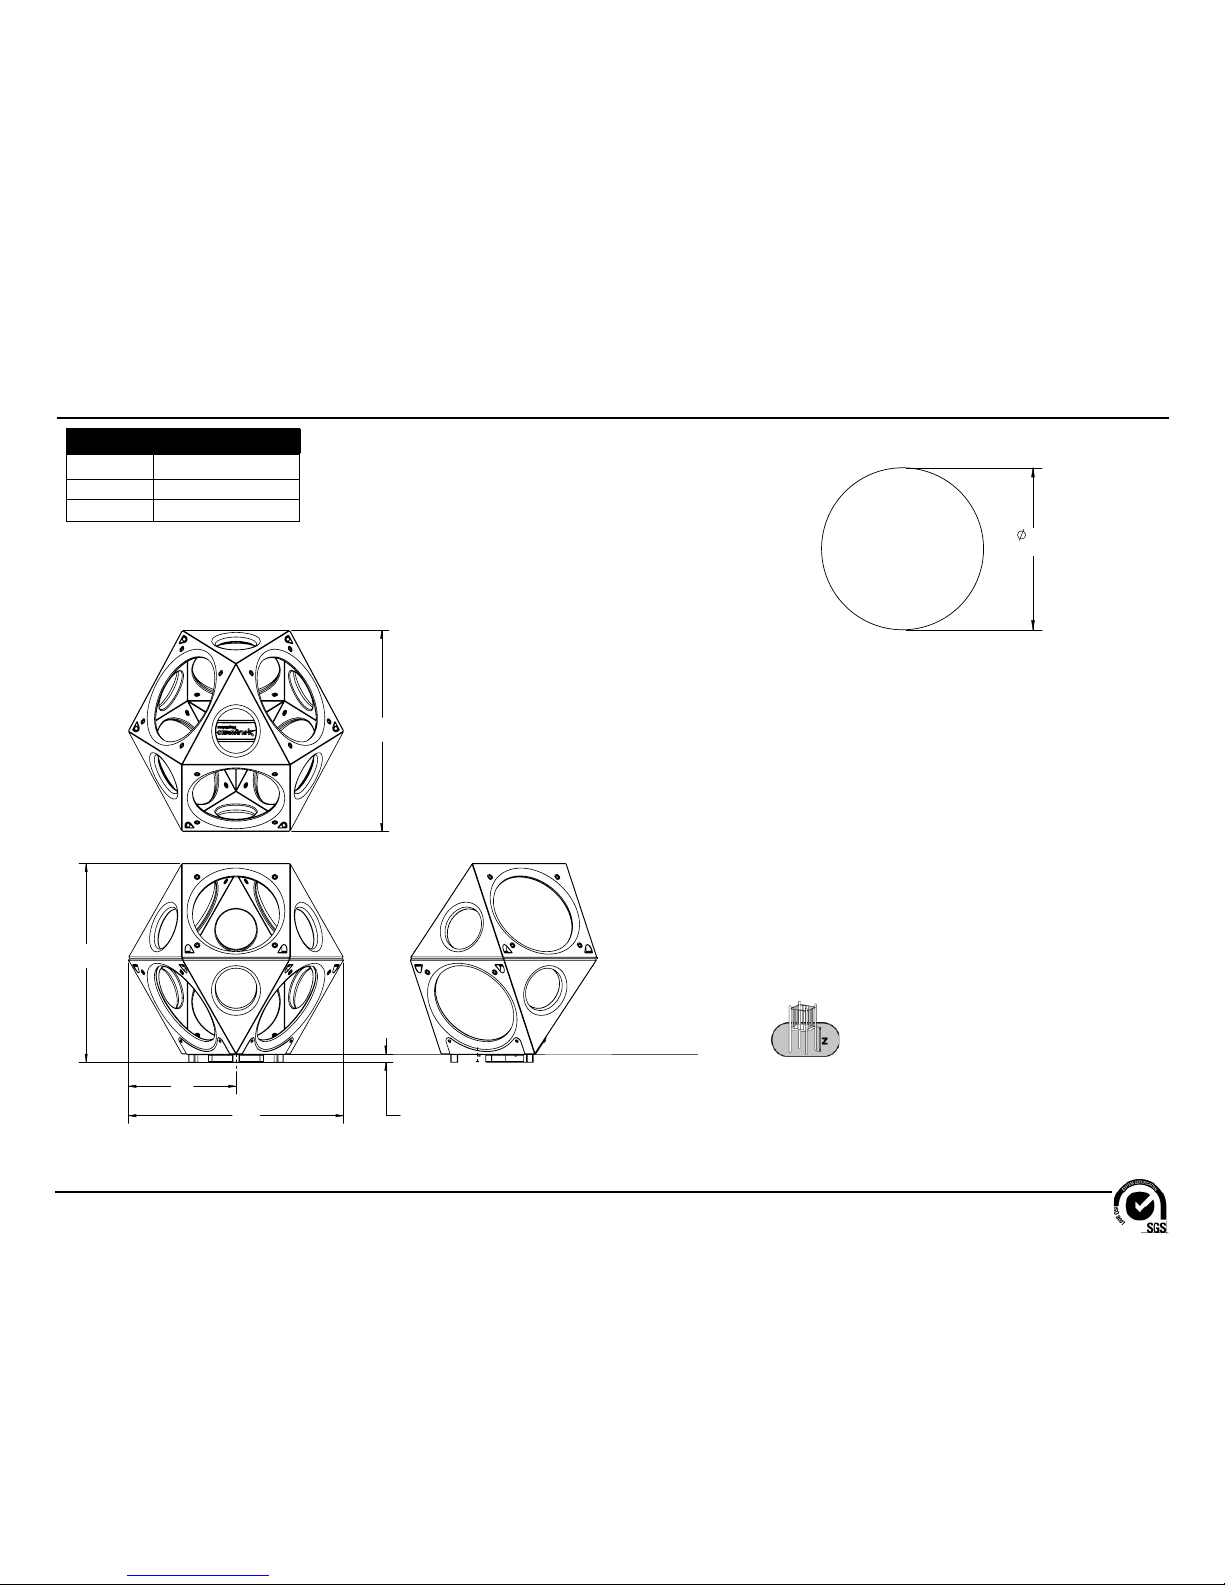
Elevation Views
UN8727S
Footing Diagram
KEY
Position
Unit of Measurement
Top #
Inches
Bottom #
[Millimeters]
Top View
49" (1245 mm)
Footed as shown
>@
>
>@
>@
>@
>@
685)$&(/(9(/
127(6
Installation Instructions
Models *UN8727 and UN8727S
PA1395, *ECN2643
Page 4 of 12
Follow the details in alphabetical order. For clarifi cation, each detail references the
step description. The step descriptions start on page 9.
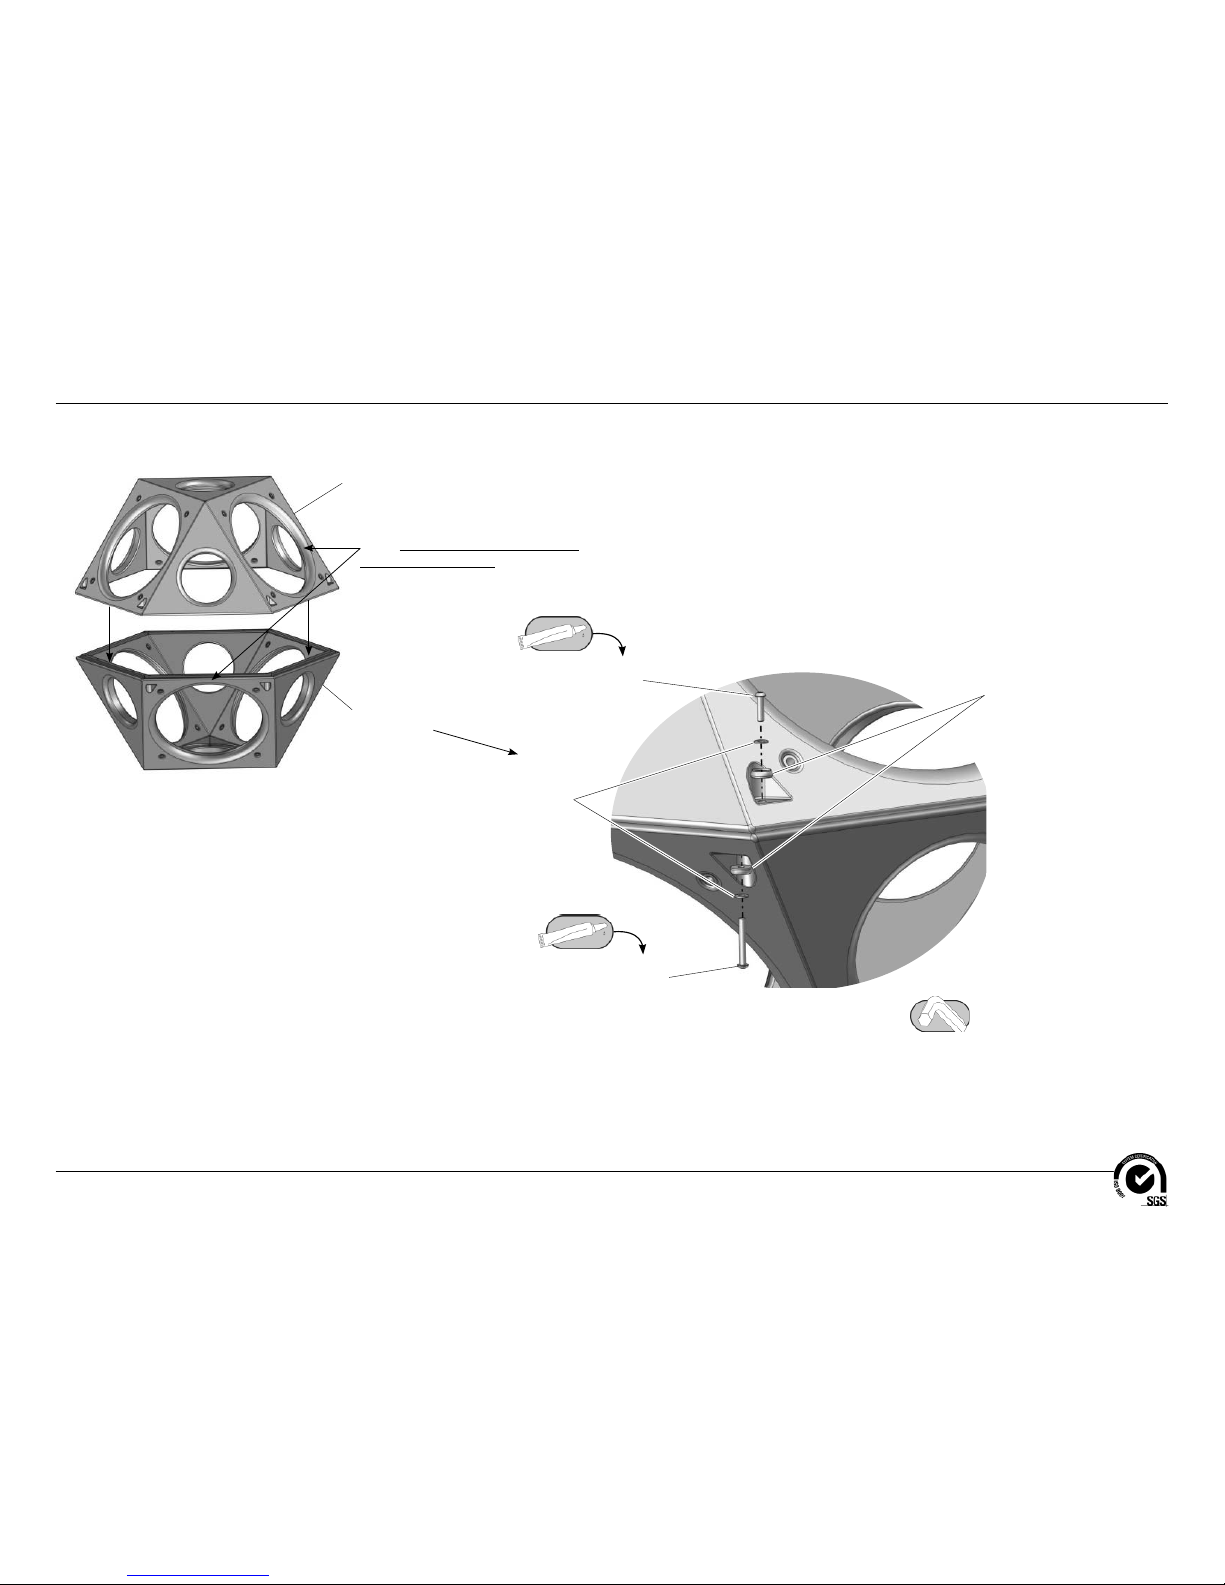
Detail A
Step 4
Attach the top cube to the bottom cube.
Top Cube
BPL3186
(1 Total)
Bottom Cube
BPL3187
(1 Total)
3/8" Flat Washer
BAE0595
(12 Total)
Plastic Washer
(half of a two-piece assembly)
BPL0300
(12 Total)
3/8" x 2-3/4"
Button Head Bolt
BAE06677
(6 Total)
3/8" x 1-1/2"
Button Head Bolt
BAE06645
(6 Total)
Note: Large holes in the cubes are
offset from each other.
Installation Instructions
Models *UN8727 and UN8727S
PA1395, *ECN2643
Page 5 of 12
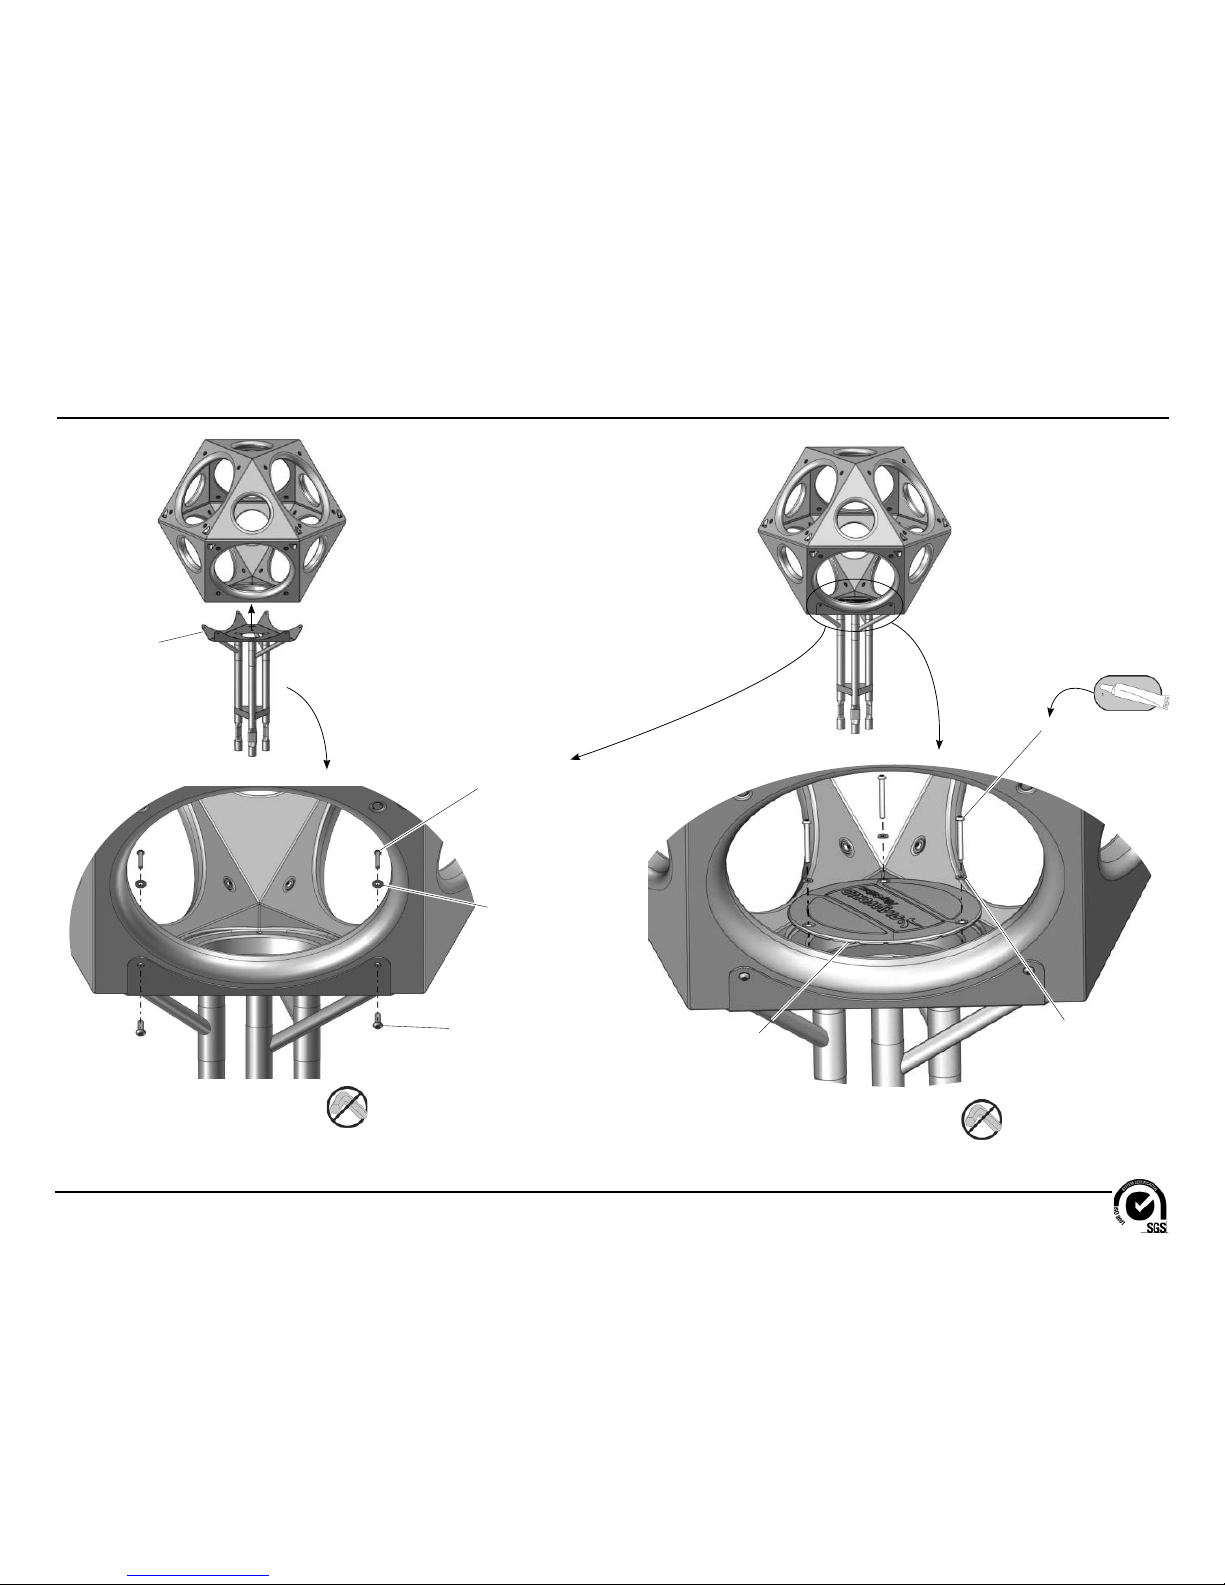
Detail B
Step 5
(In-Ground Model)
Attach the anchor post to the bottom cube.
Anchor Post
AFR1820
(1 Total)
Logo Casting
AAU0906
(1 Total)
3/8" x 3"
Button Head Bolt
BAE06681
(3 Total)
1" O.D. Flat Washer
BAE0600
(6 Total)
3/8" Flat Washer
BAE0595
(3 Total)
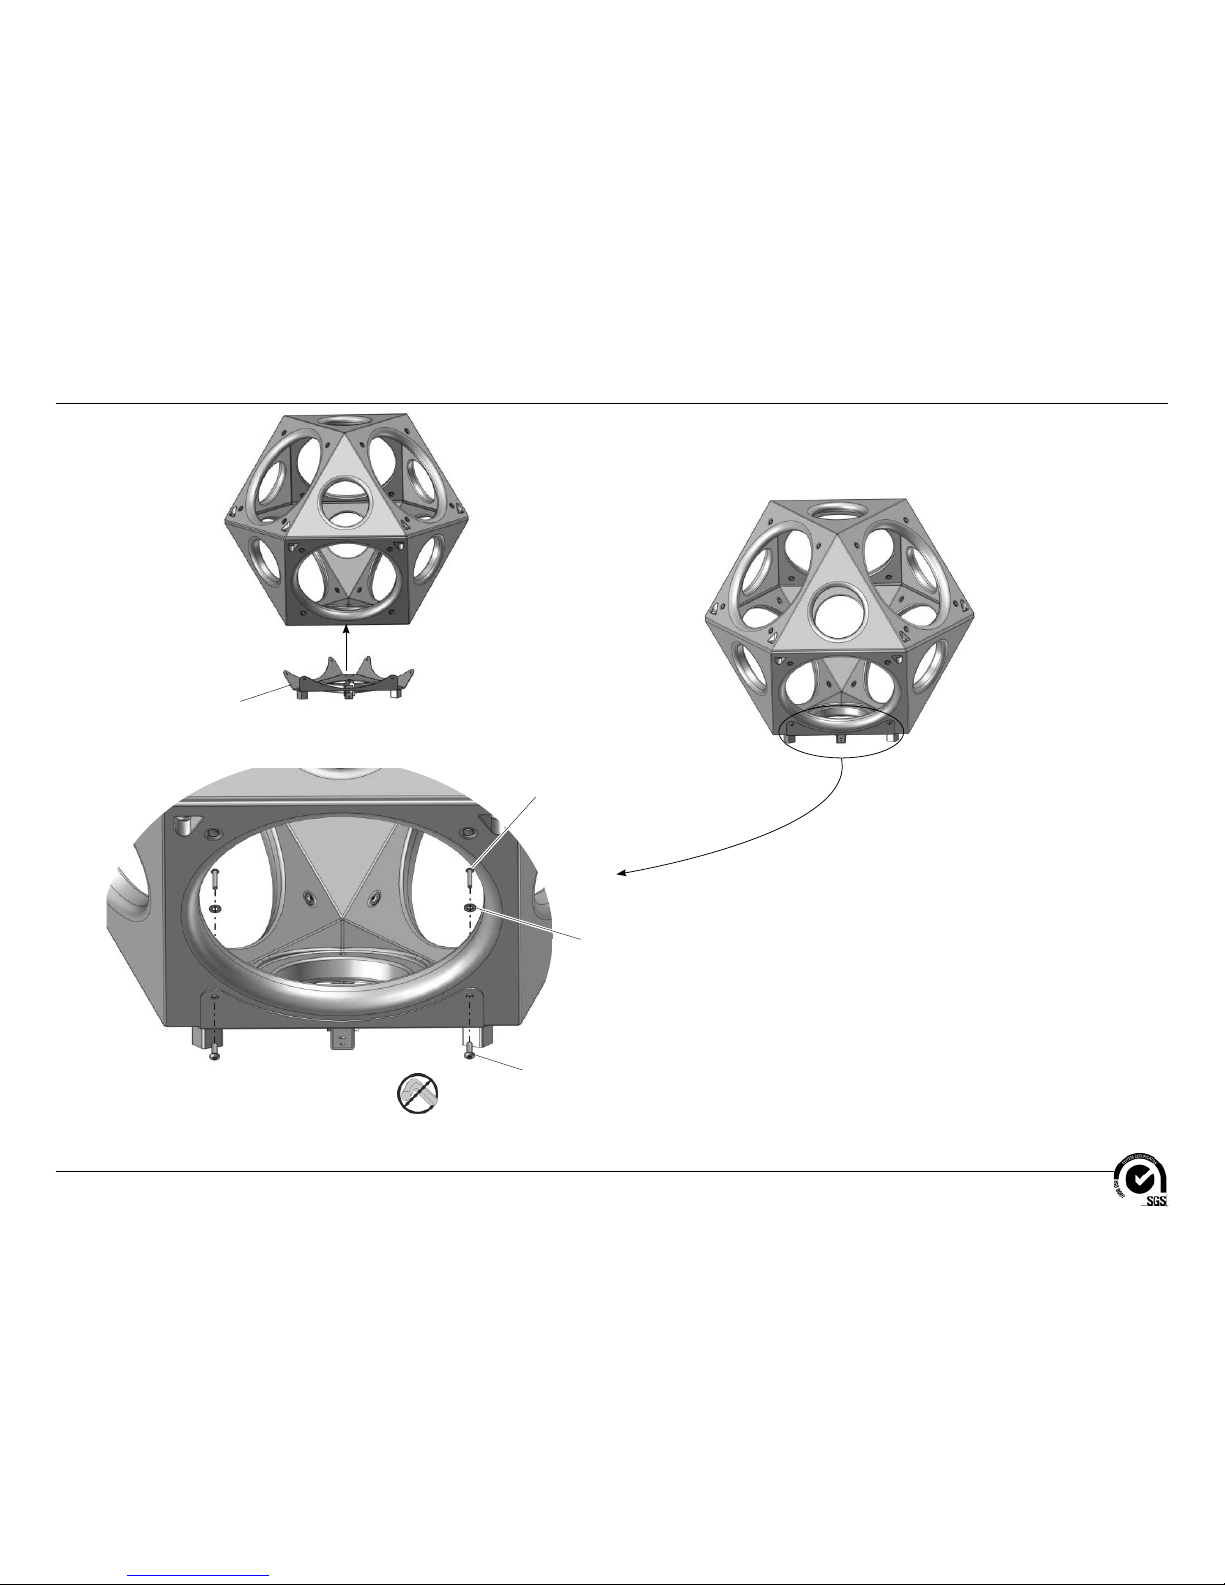
Detail C
Step 6
(In-Ground Model)
Attach the logo casting to the bottom cube.
3/8" x 1-3/4"
Button Head Bolt
BAE0665
(6 Total)
3/8" Barrel Nut
BAE0632
(6 Total)
Installation Instructions
Models *UN8727 and UN8727S
PA1395, *ECN2643
Page 6 of 12
Detail D
Step 7
(Surface Mount Model)
Attach the anchor frame to the bottom cube.
Anchor Frame
AFR1874
(1 Total)
1" O.D. Flat Washer
BAE0600
(6 Total)
3/8" x 1-3/4"
Button Head Bolt
BAE0665
(6 Total)
3/8" Barrel Nut
BAE0632
(6 Total)
Note: For the surface mount
model do not attach the logo
casting until the component has
been secured on its footing.
 Loading...