

Page 1
AGES 3+
6601
Adventure Bob’s
Construction Site
™*
*
Thank you for choosing the Adventure
Bob’s Construction Site™* playset!
www.bobthebuilder.com
©HIT Entertainment PLC and Keith Chapman 2002
Music composed by Paul K. Joyce. Music published by Hit
Entertainment PLC/EMI Blackwood Music Inc.
®* and/or ™* & © 2002 Hasbro, Pawtucket, RI 02862 USA. All Rights
Reserved.
6601 P/N 6159840000
Requires 2 "AA" alkaline batteries (not included).
Phillips screwdriver (not included) required for
battery installation and assembly.
Adult assembly required.
HASBROPRESCHOOL.COM
FOR NEW PRODUCTS AND OFFERS
HASBROPRESCHOOL.COM
FOR NEW PRODUCTS AND OFFERS
Questions? Call: 1-800-PLAYSKL
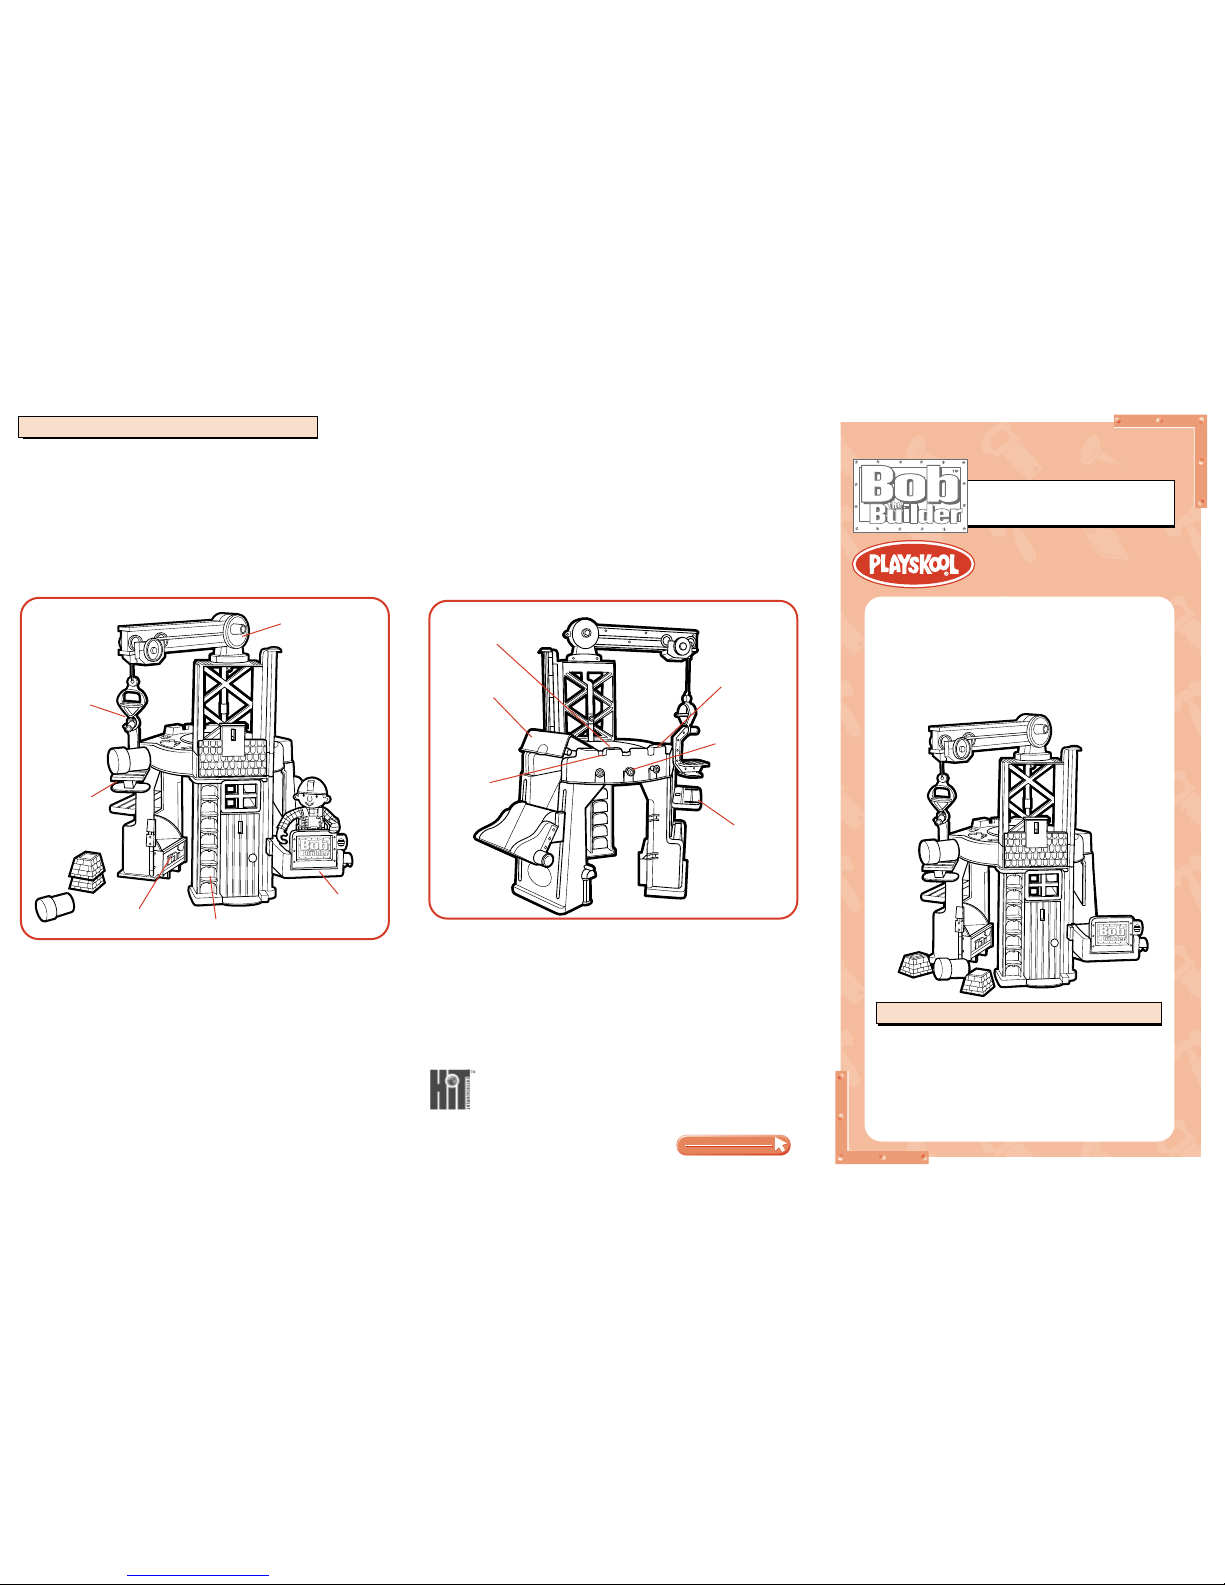
• Seat • House • House Door
• Workshop • Lift Leg • Crane
• Crane Platform • Tower • Trap Door
• Workshop Door • Elevator • Elevator Door
• Drainpipe • Elevator Connector • Scaffolding Board
• Roof • Pipes (2) • Brick Bundles (2)
• Large Window • Small Window • Label Sheet
• 4 Screws
PARTS LIST
•
There are even lots of areas for fix n’ fun tool play with
Adventure Bob™* figures.
- Pretend to "drill" holes with the Adventure Bob™* Drill ‘n Fix™* drill
(not included).
-"Cut into the wood" with the Adventure Bob™* Tunnel Rescue™*
chainsaw (not included).
- Then after a hard day’s work, you can store tools (not included) on
the tool hangers!
PLAY FEATURES
Just like Bob the Builder™, preschoolers can enjoy building and fixing fun
with this action-packed playset! Best of all, kids can sit on top of the playset
and really get into the action!
• Hear 4 electronic phrases plus the Bob the Builder™ theme song!
To activate sounds:
- Press the seat button!
- Press the foot-shaped button inside the crane tower!
- Lift the trap door!
- Turn the crane crank!
•
Playset is designed for lots of play with Adventure Bob™* figures
(not included).
- Go for a lift! Fit an Adventure Bob™* figure’s foot into the opening
above the crane hook. Wind up the crane and watch Bob rise to the
top!
- Climb the ladder! Fit an Adventure Bob™* figure’s foot into the rungs
on the ladder on the side of the house!
- Ride the elevator! Place an Adventure Bob™* figure in the elevator
and take him for a ride all the way to the top of the crane!
- Place an Adventure Bob™* figure inside the crane tower…he can activate sounds by standing on the button!
• Working crane lifts bricks, pipes and other parts!
- Turn the crane crank clockwise to raise the hook; counterclockwise to
lower it!
- Use the crane platform to lift heavy loads!
- All accessories have slots that fit the crane hook! Give ‘em a lift!
• Lift and lower the elevator!
• Open the trapdoor and watch the bricks and pipes slide down the
chute and into the lift bucket! Or, place a load in the lift bucket, open
the trap door, and drop the load down and out of the chute!
• Open the workshop door and store things inside the toolbox! Or
play in Bob’s workshop. The scaffolding board even turns into a
workbench by placing it on top of the workbench base!
Trap Door
Seat Button
Crane Crank
Crane
Platform
Elevator
Toolbox/Work
Bench Base
Scaffold Board/
Workbench
Ladder
Tool Hangers
Crane
Hook
(Figure not
included.)
Notches
Drill Holes
Page 2
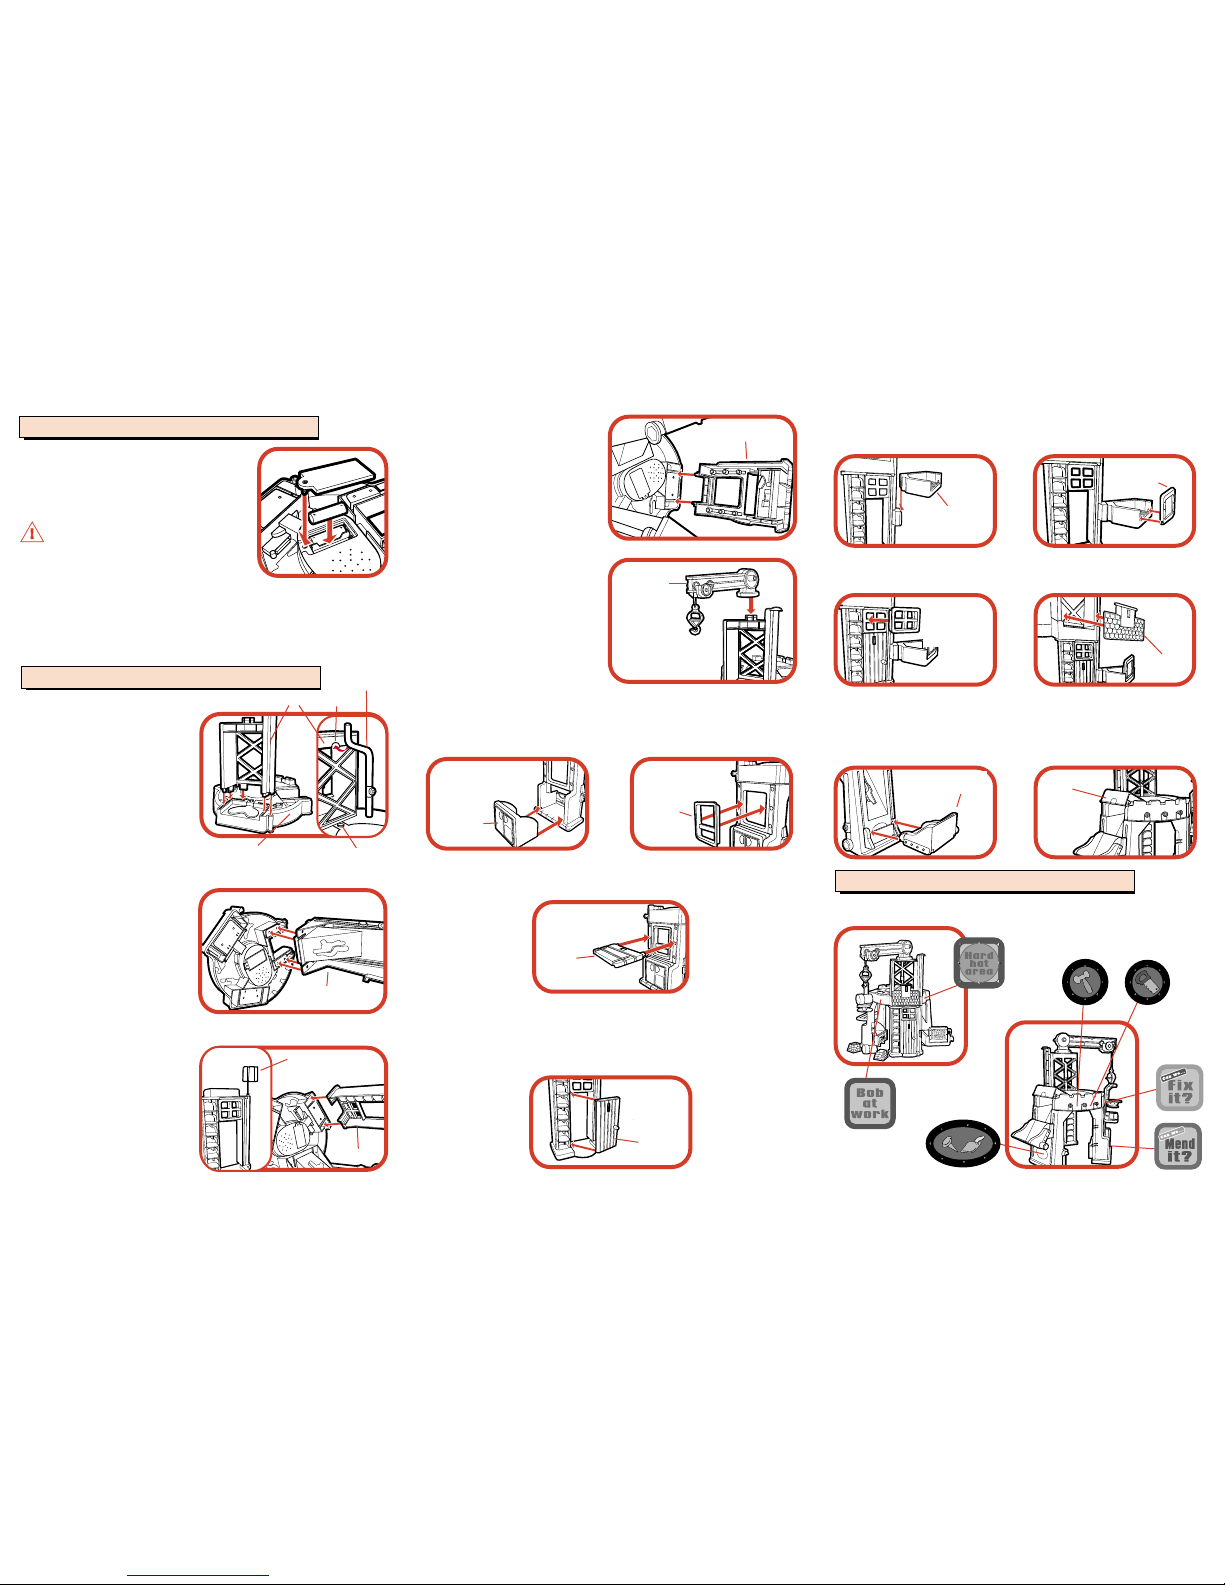
5.
CRANE
•
Snap crane onto tower.
1.
TOWER
•
Align tabs and posts on tower
with slots and holes in seat.
Snap tower into place.
• Tighten 4 screws through
underside of seat to secure
tower to seat.
•
Insert drainpipe through slot
and into hole under tower
roof. Be sure bottom end of
drainpipe is inserted into
round flange on seat.
CAUTION:
TO
AVOID BATTERY LEAKAGE
1) Be sure to insert the batteries correctly
and always follow the toy and battery
manufacturers’ instructions;
2) Do not mix old and new batteries or alkaline, standard (carbon-zinc)
or rechargeable (nickel-cadmium) batteries;
3) Always remove weak or dead batteries from the product.
Use a Phillips screwdriver to loosen screw in
battery compartment door (screw remains
attached to door). Remove door. Insert 2 fresh
"AA" alkaline batteries as indicated. Replace
door and tighten screw.
BATTERY INSTALLATION
ASSEMBLY
3.
HOUSE
•
Slide elevator connector onto
side rail on house. Be sure to
do this before installing
house.
•
Align lip on house with
inside square on seat, and
align side rail on house with
side rail on tower. Snap
house into place.
Tower
Drainpipe
Seat
2.
LIFT
•
Align lip and squares on
lift with slots and squares
on underside of seat, and
snap lift into place.
4.
WORKSHOP
•
Align lip on workshop with
square on seat, and snap
workshop onto seat.
•
Fit workshop door onto
workshop (bumps into holes).
7.
HOUSE DOOR, ELEVATOR, WINDOW
8.
LIFT BUCKET & TRAP DOOR
Peel and apply labels as shown.
Workshop
Workshop
Door
Crane
Large
Window
Scaffolding
Board
•
Fit large window into area
above workshop door.
•
Fit posts on scaffolding board into holes on the side of the large
window. (Fit board into any of the 3 sets of holes.)
•
Insert bottom bump on house door into bottom hole in house
doorway, then snap top bump into top recess on house doorway.
•
Slide tabs on elevator
connector into grooves on
elevator to attach elevator.
•
Fit elevator door onto
elevator (bumps into
holes).
•
Fit small window into area
above top of door.
•
Fit roof onto bottom of
crane tower.
6.
WORKSHOP DOOR, WINDOW, SCAFFOLDING BOARD
LABEL PLACEMENT
Elevator
Door
Elevator
Small
Window
Roof
Trap Door
Door
House
Lift
Elevator
Connector
Lift
Bucket
•
Fit lift bucket onto lift
bracket (bumps into holes).
•
Fit trap door onto seat
(bumps into holes).
Round
flange
Slot
 Loading...