

Page 1
This Market meets the
ammability requirements of
CPAI-84. The fabric may burn
if left in continuous contact
with any ame source. The
application of any foreign
substance to the Market fabric
may render the ame resistant
properties ineective.
KEEP ALL FLAME
AND HEAT SOURCES
AWAY FROM THE
CHERRY BLOSSOM
TM
MARKET FABRIC.
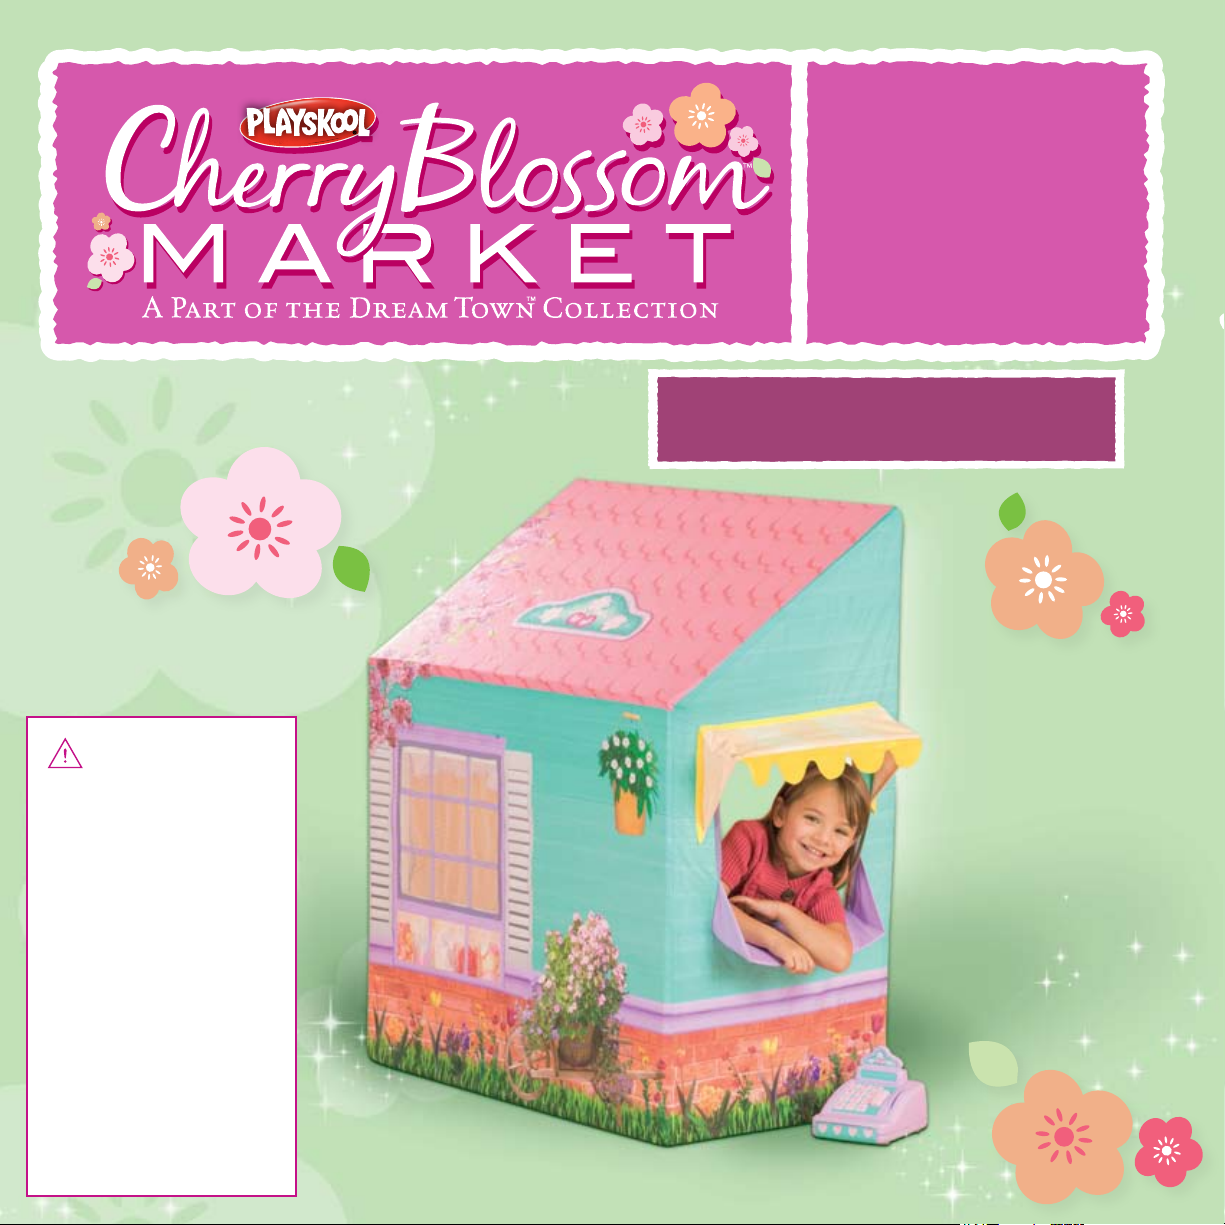
WARNING:
AGES 3+
Thanks for
purchasing the
CHERRY BLOSSOM Market.
Please read and retain
these instructions.
68625
Adult assembly
required.
For video assembly instructions, please visit
www.cherryblossommarket.com
Page 2
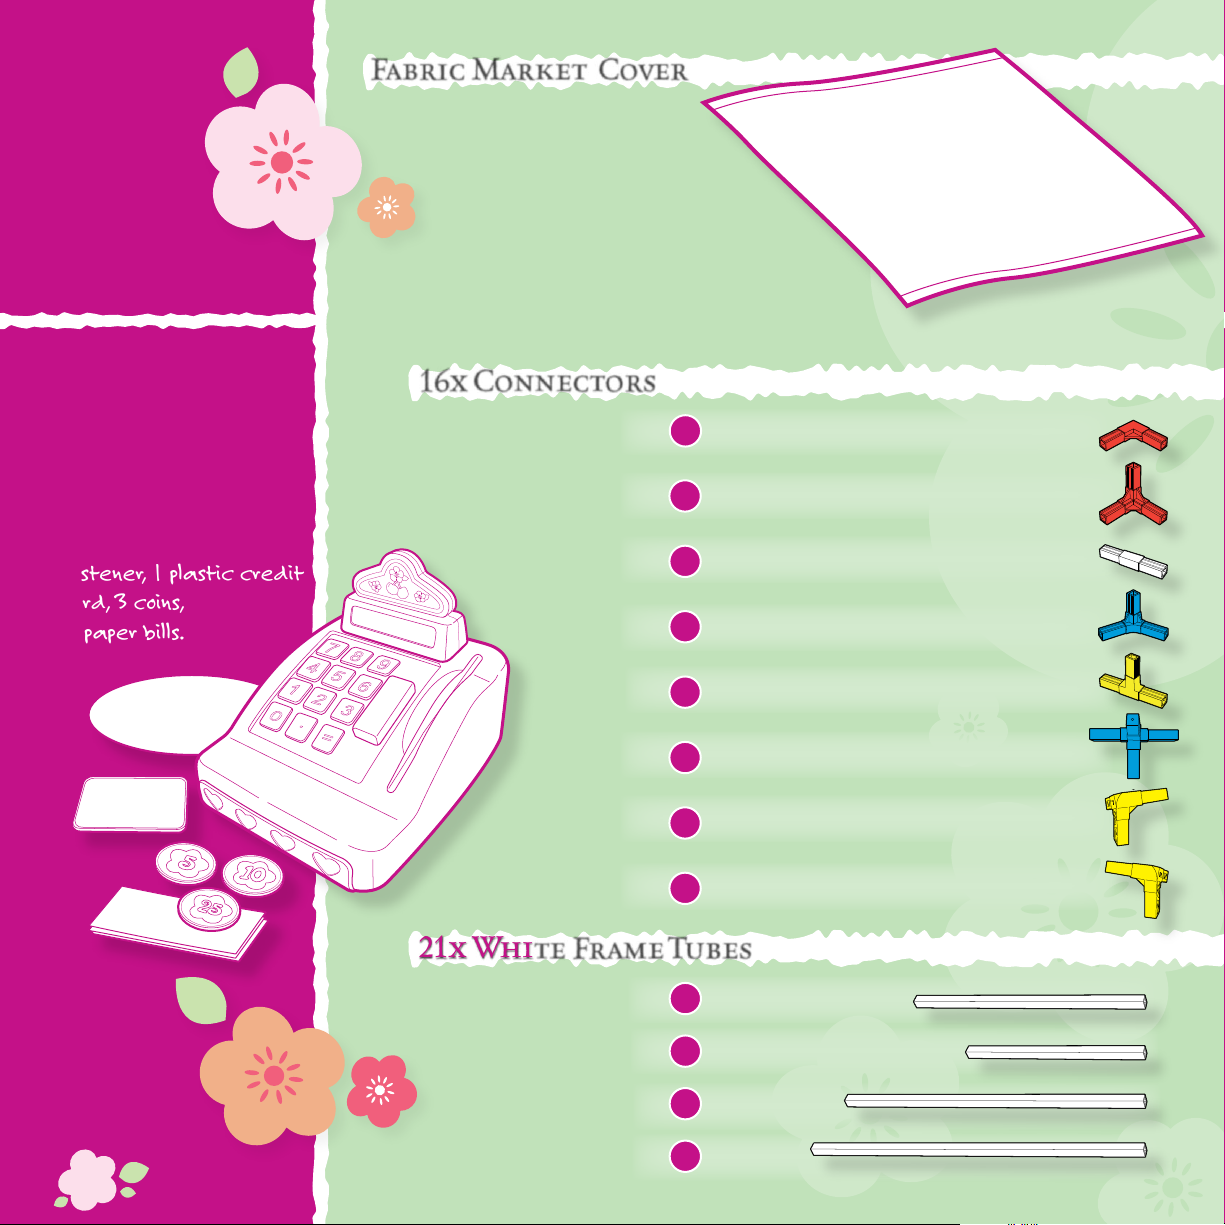
Includes:
MARKET
COVER
Fabric Market Cover
16x Connectors
Also includes:
1 cash register
(1 register top section
and 1 register base unit),
1 clock with fabric
fastener, 1 plastic credit
card, 3 coins,
10 paper bills.
2 x front bottom connectors (red)
#1
2 x 2 back bottom connectors (red)
#2
5 x straight connectors (white)
#3
2 x roof base end connectors (blue)
#4
2 x Tee connectors (yellow)
#6
1 x roof base middle connector (blue)
#7
1 x roof peak left connector (yellow)
#8
1 x 9 roof peak right connector (yellow)
#9
21x White Frame Tubes
#1
8 x
1
6 x
4 x
3 x
#2
#3
#4
Page 3
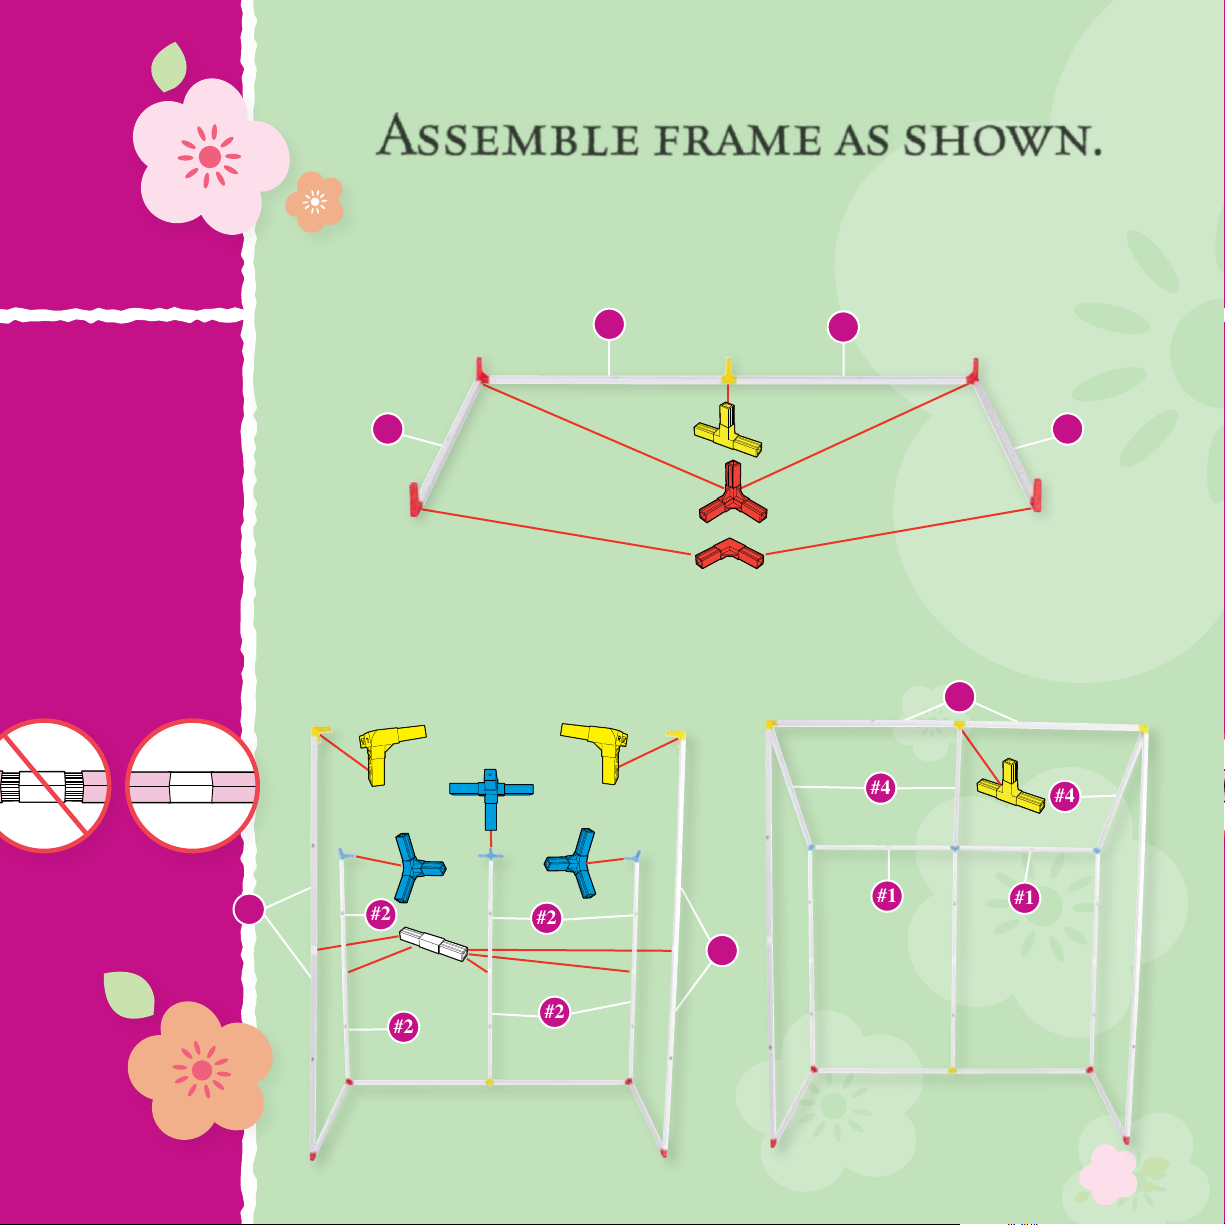
Assemble frame as shown.
This will be done in three steps:
1. Assemble the base – the four tubes and ve
connectors that lay on the oor.
#3
#1
#1 #1
2. Add all the vertical posts with
the connectors on the top.
#2
#2
3. Finish by adding the tubes and
connectors for the roof.
#3
#1
#4
#1
#1
#4
#1
#2
#2
2
Page 4

CHERRY BLOSSOM Market Cover
MARKET
COVER
1.
Assemble white frame as shown on page 2.
2.
Remove the CHERRY BLOSSOM Market cover
from the bag.
CHERRY
BLOSSOM
Market
Cover:
Parts required
for this step:
- Completed Frame
- CHERRY BLOSSOM
Market Cover
3.
Completely unzip the front edge of the
CHERRY BLOSSOM Market, and detach the
fabric fasteners around the window.
4.
Lay the CHERRY BLOSSOM Market cover out
with the printed tile oor up
.
Fold the inside wall over
the tile oor and lay
the outside wall around
3
the outside of the oor,
exposing the red seam
between the two walls.
Page 5

6.
Lift the inside wall and fasten the hook and loop
fasteners around the roof tubes as shown.
5.
Set the frame directly on top of the
red seams.
Note: Place frame exactly as shown.
4
Page 6

7.
Lift the outside wall
completely over the frame.
5
8.
Zip the inside and outside walls together
around the front of the Market
.
Page 7

10.
Adjust hook-and-loop fastener
9.
Place the front awning over the peak
of the roof.
attachments around both windows.
11.
Attach clock with hook-and-loop fastener.
Place clock wherever you like!
6
Page 8

Questions? Call 1-800-PLAYSKL
To assemble cash register:
Snap register top section into register
Cash
Register
Assembly:
Storage:
base unit as shown.
Quick, simple storage with
TM
the ROSE PETAL
Cottage and accessories shown each sold separately.
Cottage
For the entire
Dream TownTM Collection
© 2007 Hasbro. All Rights Reserved.
TM & ® denote U.S. Trademarks.
© 2007 Worlds Apart Ltd. All rights Reserved. PN# 6793750000
 Loading...