

PlayNetwork COMBO C500 Quick Start Manual

QUICK START GUIDE
TM
Hard Drive Player C500

Thank You for Choosing PlayNetwork
This document describes the main features of PlayNetwork’s Combo™ digital music player, how to set it
up, and how to use it. Please take the time to read the easy step-by-step "Quick Start Guide". Familiarize
yourself with the basic features, follow the easy to install instructions, and in no time, you and your
customers will be enjoying the custom music programming created uniquely for your business.
What Is The Combo™ Player?
The Combo player is an advanced, commercial grade digital music player that was built specifically for
use in business environments. It's easy to turn on, plays your custom music programming (and
messaging) according to a pre-selected playlist and schedule, and has control features that allows for
local playback options. Best of all, once you turn the Combo player on it is basically a hands free player.
You and your staff can forget about it and spend your time focusing on your customers.
For control reasons, the Combo player does not play consumer CDs and makes use of a special type of
music file format that cannot be downloaded or played on regular music players. If you are receiving CDROM updates from PlayNetwork, these discs are also formatted specifically for use with the Combo
player and will not work in any other device. Our customers love this feature as it guarantees that only the
music that has been approved can be transferred to the Combo player.
Basic Combo Player Features
Operates hands-free. Turn it on and forget about it.
Stores hundreds of hours of quality music on its hard drive. The Combo player comes preloaded with
music to get you started right away.
Receive song updates via CD-ROM or network where applicable. This usually occurs monthly
depending on your service agreement.
The LCD display shows artist and song information. This is handy when a customer asks you what’s
playing.
Controls let you change programs, channels and advance songs depending on your service
agreement.
NOW THAT YOU HAVE A BETTER UNDERSTANDING OF WHAT’S IN THE BOX, LET’S GET YOU
STARTED.
1
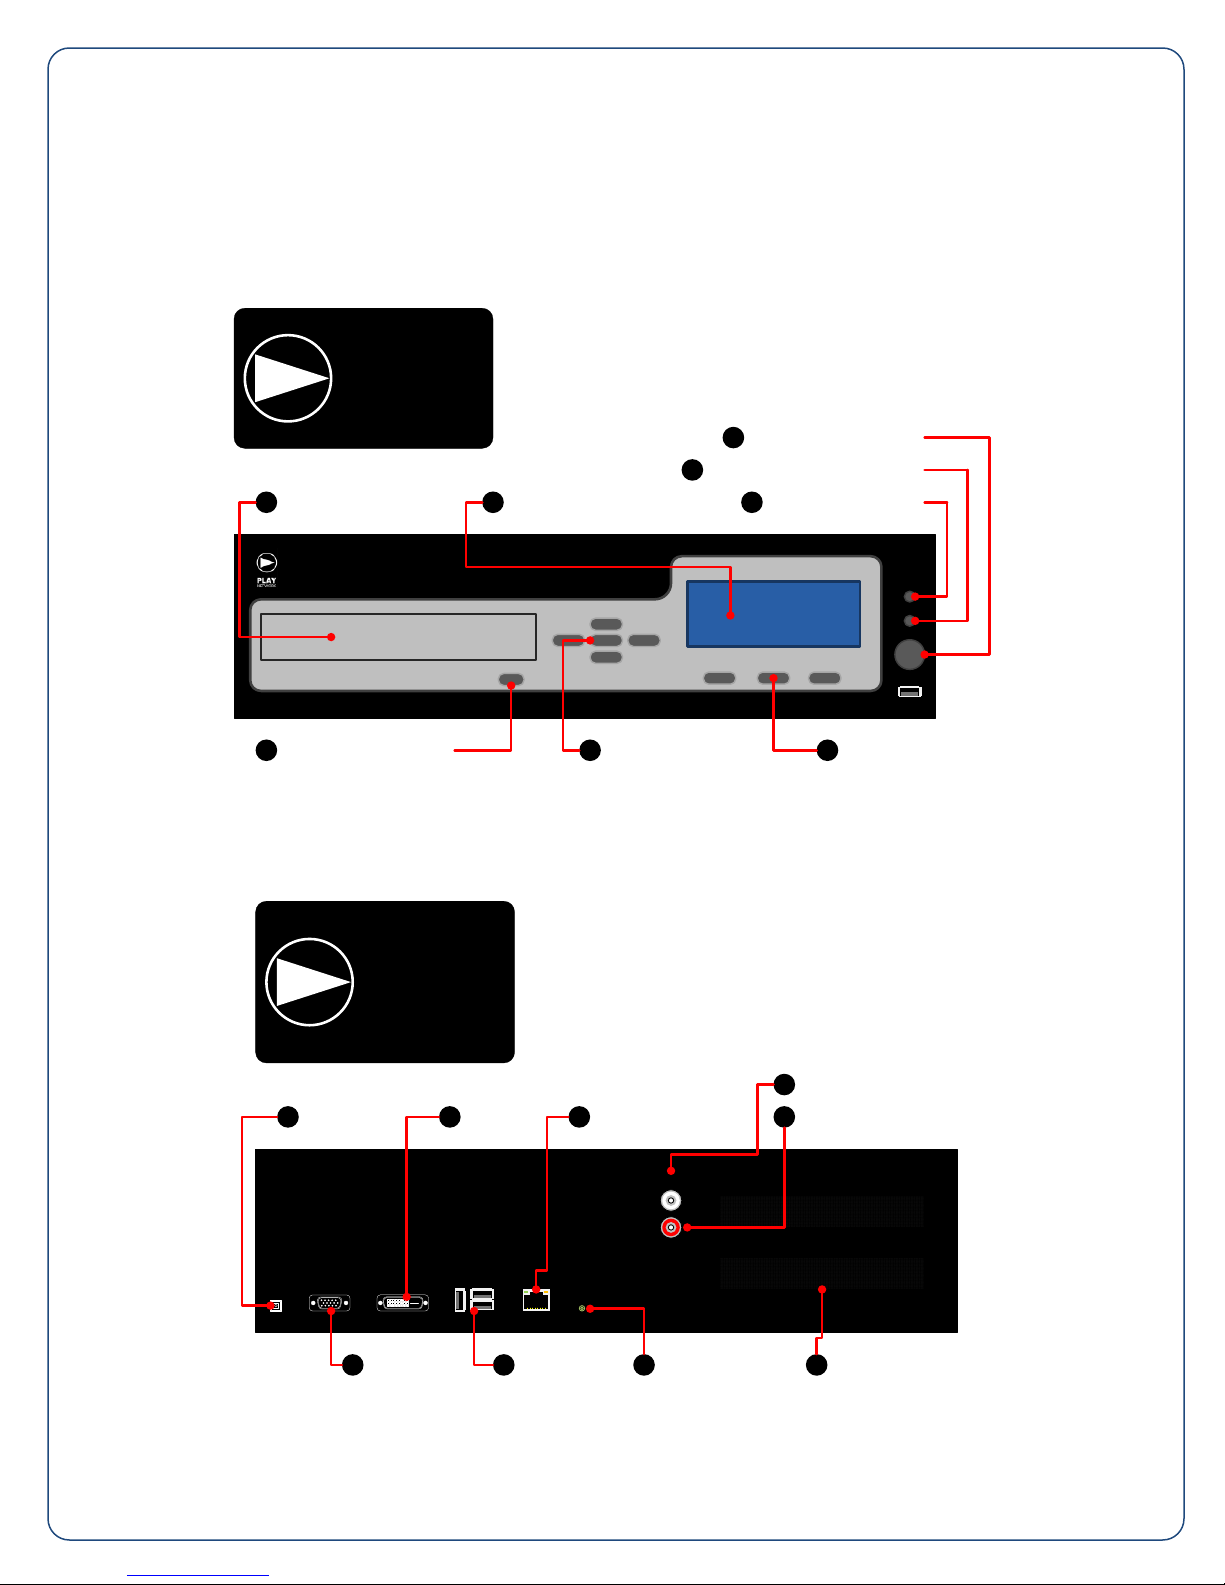
A. CD-ROM Drive
B. LCD Display
C. Power/Standby Button
D. Hard Drive Activity Indicator
E. Power On Indicator
F. Shortcut Keys
G. Navigation Buttons
H. CD-ROM Eject Button
C
Power/Standby Button
CD-ROM Drive
A
H
CD-ROM Eject Button
G
Navigation Buttons
D
Hard Drive Activity Indicator
LCD Display
B
Shortcut Keys
F
E
Power On Indicator
I. Power Inlet
J. DVI Port (reserved)
K. Network Connector
L. Zone 1 Output
M. Zone 2 Output
N. Vents
O. Stereo Mini Jack (reserved)
P. USB Ports (reserved)
Q. VGA Port (reserved)
ZONE 1
ZONE 2
Power Inlet
I
DVI Port
J
Network Connector
K
Zone 1 Output
L
Zone 2 Output
M
Vents
N
Stereo Mini Jack
O
USB Ports
P
VGA Port
Q
STEP 1. GET FAMILIAR WITH THE PLAYER FEATURES
Front View
Back View
2
 Loading...