

Page 1
TM
JackAX Instructions
Instruction Sheet: P/N 13210, 13211C, 13212C
®
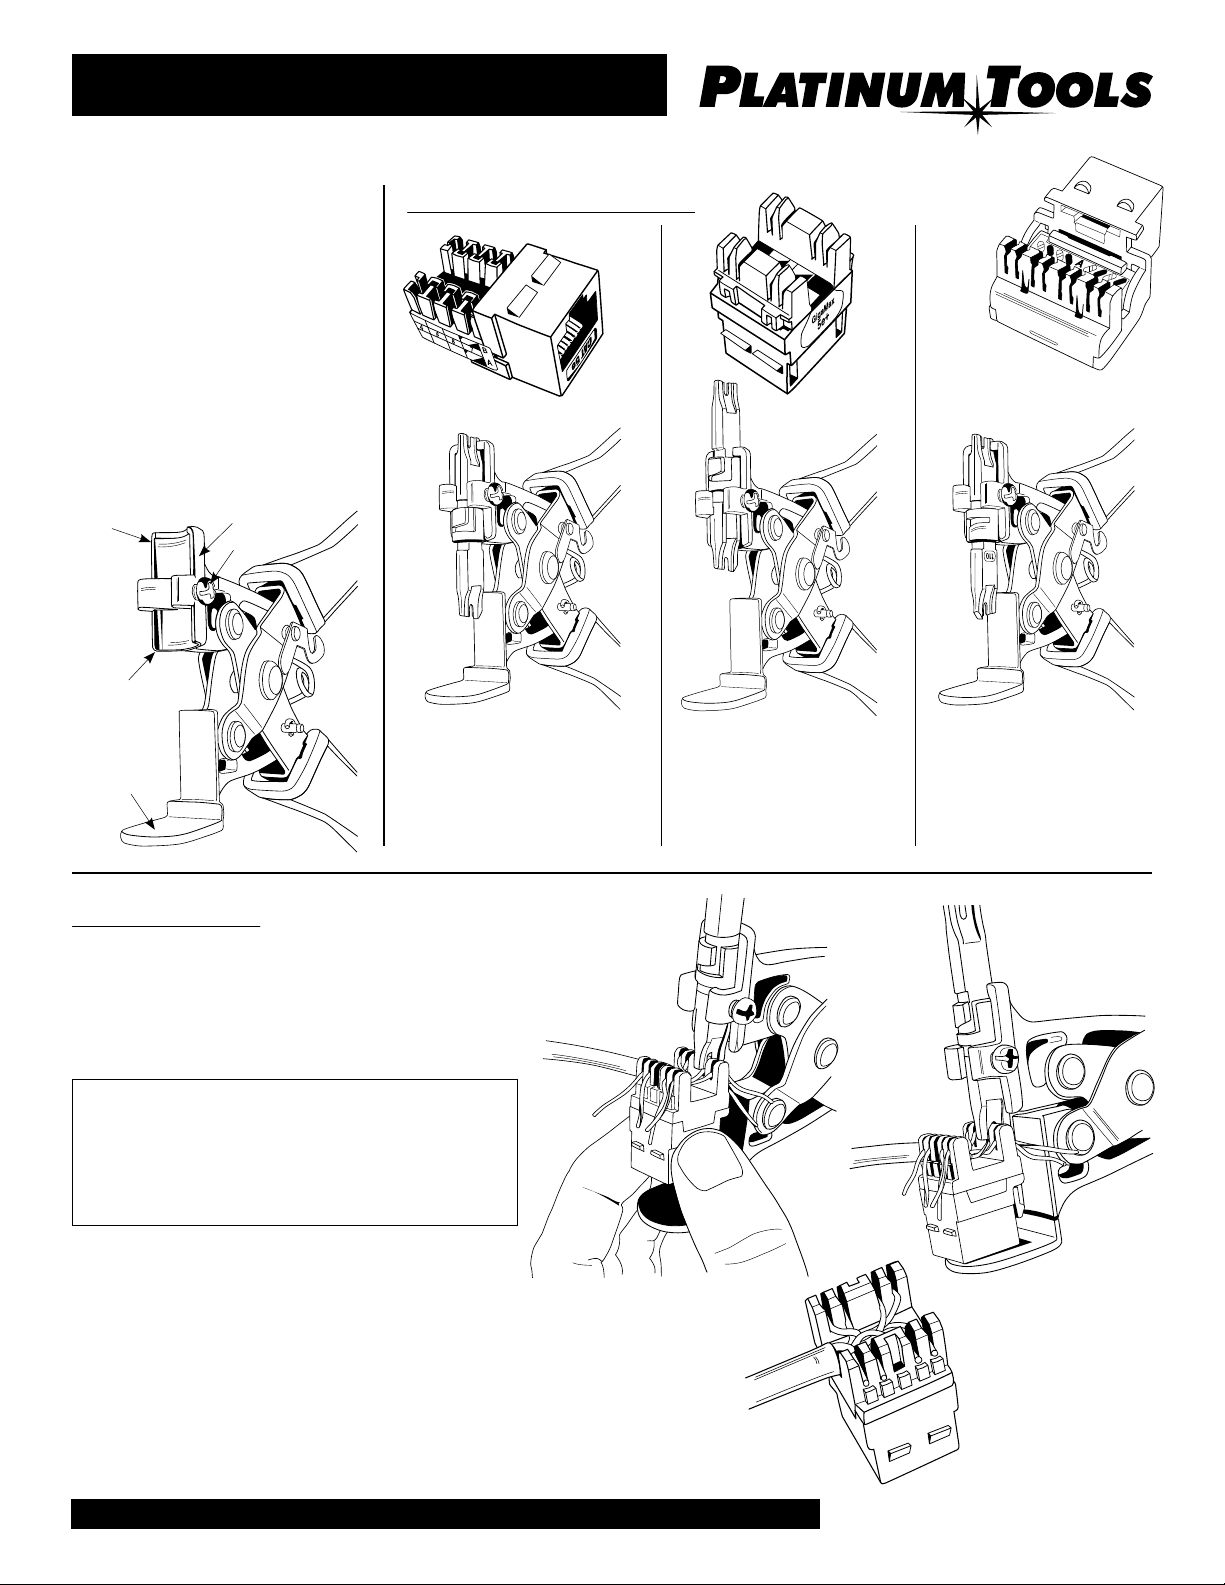
Using either a Philips or slotted
screwdriver, back the holding screw
off enough to insert and seat the
110 blade. The type of jack used will
determine how to position the 110
blade in the holding xture of the
JackAX. Install the blade as shown
below to correspond to the jack.
Once properly seated, hold the blade
rmly in place & tighten the screw
down securely. Be careful not to
over tighten.
JackAX: Tool only, no blade.
Upper Position
Lower
Position
Base
Holding Fixture
Screw
Jacks and Blade Positions:
90° Jack
90° Jacks: Insert the 110 blade
in the
lower
holding xture, with the cutting
knife of the blade facing the tool.
position of the
180° Jacks: Insert the 110
blade in the
of the holding xture, with
the cutting knife of the blade
facing the tool.
upper
180° Jack Single Row
Pairing Jack
Single Row Pairing Jacks:
position
Insert the 110 blade in the
lower
position of the holding
xture, with the cutting knife
of the blade facing away from
the tool.
Prep & Terminate:
1) Strip cable jacket.
2) Prep all 4 pairs (8 conductors or wires).
Choose your wiring scheme, A or B, and
insert each conductor into the proper IDC
slot per the color code chart on the jack.
Inserting the conductors into the IDC, choose what
works best for you:
n All 4 pairs & terminate.
n 2 pairs per side & terminate one side at a time.
n 2 pairs at the front end & terminate.
Repeat on the back end.
3) Position the prepared jack into the blade (Fig 1)
lining up the IDC with the blade. Squeeze the tool
until the jack and the base come together.
4) Once the jack ts snugly on the tool’s base (Fig 2),
continue to squeeze slowly, seating the conductor until
it is seated & cut. Once cut, release handles.
Do not over squeeze!
5) Repeat steps 3 & 4 until all conductors are terminated
as shown in Fig 3.
Fig 2
Fig 1
Fig 3
www.platinumtools.com
©2010 Platinum Tools Inc. All rights reserved. 7/10
 Loading...