

plasma PVQ42VGB User Manual
PLASMA TV
USER MANUAL
Please READ this manual carefully before
operating your TV, and retain it for future
reference.
MODEL :PVQ42VGB
1
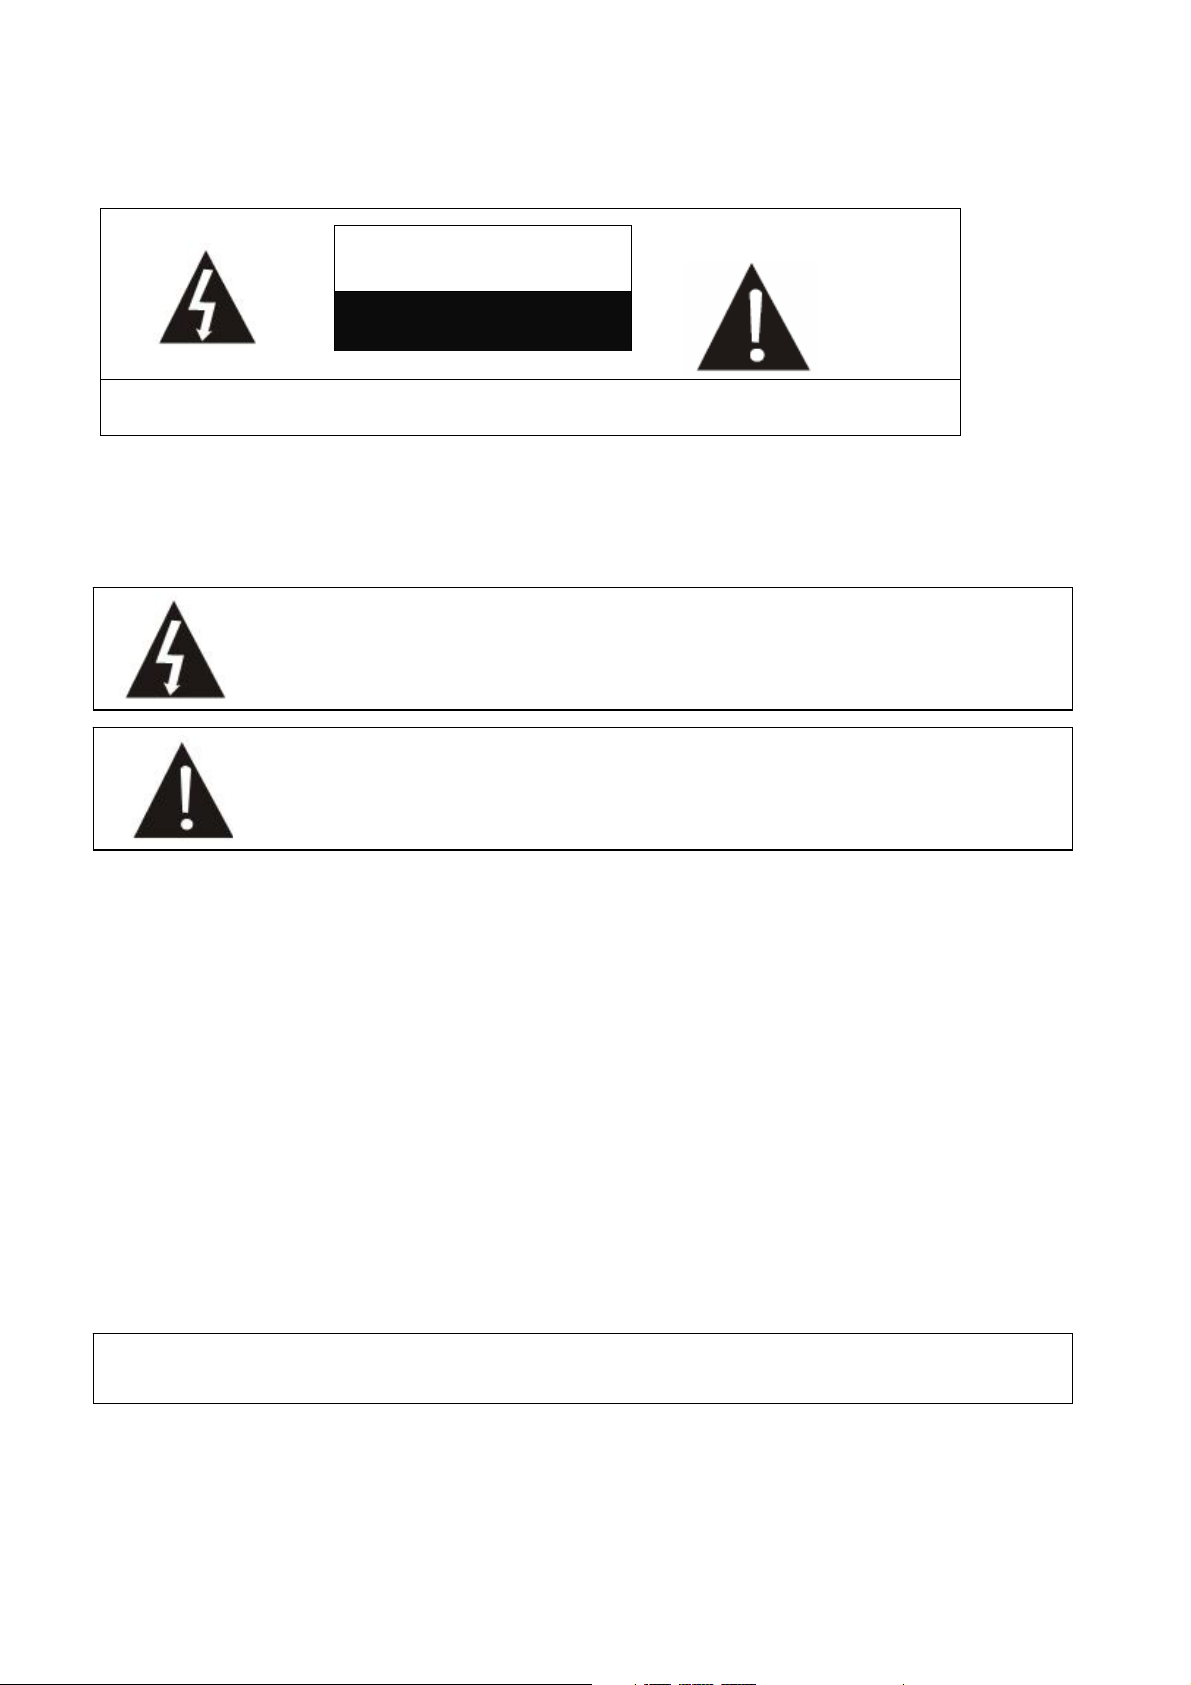
WARNING
RISK ELECTRIC SHOCK
DO NOT OPEN
WARNING : To reduce the risk of electric shock do not remove cover or back.
No user-serviceable parts inside refer service to qualified service personnel.
Operator Safety has been taken into consideration at the design and manufacture phase, but inappropriate
operation may cause electric shock or fire. To prevent the product from being damaged, the following rules
should be observed for the installation, use and maintenance of the product. Read the following safety
instruction before starting the operation.
The User Manual uses the following symbols to ensure a safe operation and prevent any damage to
operators’ r properties:
THIS SYMBOL INDICATES THAT HIGH VOLTAGE IS PRESENT INSIDE.
IT IS DANGEROUS TO MAKE ANY KIND OF CONTACT WITH ANY
INSIDE PART OF THIS PRODUCT.
THIS SYMBOL INDICATES THAT THERE ARE IMPORTANT OPERATING
AND MAINTENANCE INSTRUCTIONS IN THE LITERATUR
ACCOMPANYING THE APPLIANCE.
CANADIAN NOTICE:
This Class B digital apparatus compiles with Canadian ICES-003.
2

IMPORTANT SAFETY INSTRUCTIONS
Read all of the instructions before using this appliance. When using this
appliance, always exercise basic safety precautions, including the following:
1) Read these instructions.
2) Keep these instructions.
3) Heed all warnings.
4) Follow all instructions.
5) Do not use this apparatus near water.
6) Clean only with dry cloth.
7) Do not block any ventilation openings. Install in accordance with the manufacturer`s instructions.
8) Do not install near any heat sources such as radiators, heat registers, stoves, or other apparatus
(including amplifiers) that produce heat.
9) Do not defeat the safety purpose of the polarized or grounding-type plug. A polarized plug has two
blades with one wider than the other. A grounding type plug has two blades and a third grounding prong.
The wide blade or the third prong are provided for your safety. If the provided plug does not fit into your
outlet, consult an electrician for replacement of the obsolete outlet.
10) Protect the power cord from being walked on or pinched particularly at plugs, convenience receptacles,
and the point where they exit from the apparatus.
11) Only use attachments/accessories specified by the manufacturer.
12) Use only with the cart, stand, tripod, bracket, or table specified by the manufacturer,
or sold with the apparatus. When a cart is used, use caution when moving the
cart/apparatus combination to avoid injury from tip-over.
13) Unplug this apparatus during lightning storms or when unused for long periods of
time.
14) Refer all servicing to qualified service personnel. Servicing is required when the
apparatus has been damaged in any way, such as power-supply cord or plug is
damaged, liquid has been spilled or objects have fallen into the apparatus, the
apparatus has been exposed to rain or moisture, does not operate normally, or has
been dropped.
15) WARNING-to reduce the risk of fire or electric shock, do not expose this apparatus to rain or moisture.
Apparatus shall not be exposed to dripping or splashing and no objects filled with liquids, such as vases,
shall be placed on the apparatus.
The apparatus shall not be exposed to dripping or splashing and that no objects filled
with liquids, such as vases, shall be placed on the apparatus.
The mains plug is used as the disconnect device, remain it readily operable during the
apparatus normal use.
3

SAVE THESE INSTRUCTIONS
Thank you for purchasing the Haier product. This easy-to-use manual will guide you in getting the best use
of your product. Remember to record the model and serial number. They are on label in back of the unit.
Model number
Serial number
Date of purchase
Staple your receipt to your manual. You will need it to obtain warranty service.
4

Contents
Warning…………………………….. …………………………....……………….……………....……………………………..…………2
Important Safety Instructions ……………………………..……………………...………..…………………………….. ………………3
Save These Instructions…………………………….. …………………………..….. …………………………………………….. ……4
Controls …………………………….. …………………………….. …………….……………………………….. ………………………5
Connection Options…………………………….. ……………………………….……………………………….. ………………………7
Universal Remote Control…………………………….. ………………………………………………………….. …………………….8
Accessories…………………………….. ………………………………………………………….. …………………………………….9
Antenna Connection…………………………….. ………………………………………………………….. ………………………….10
External Equipment Connections…………………………….. ………………………………………………………….. ……………11
Operation………………….. …………………………….. ………………………………………………………….. …………….……17
Menu Operation…………………………….. ………………………………………………………….. ……………………………….18
Maintenance………………………….. ……………………...…………………………………….. ……………………………………30
Cleaning the screen…………………………….. ………………………………………………………….……………………………30
Cleaning the Cabinet……………..…………….. ………………………………………………………….……………………………30
Extended absence………………………….………………………………………………….……………………………………….…30
Product specification………………………….………………………………...……………………….………………………………..31
5
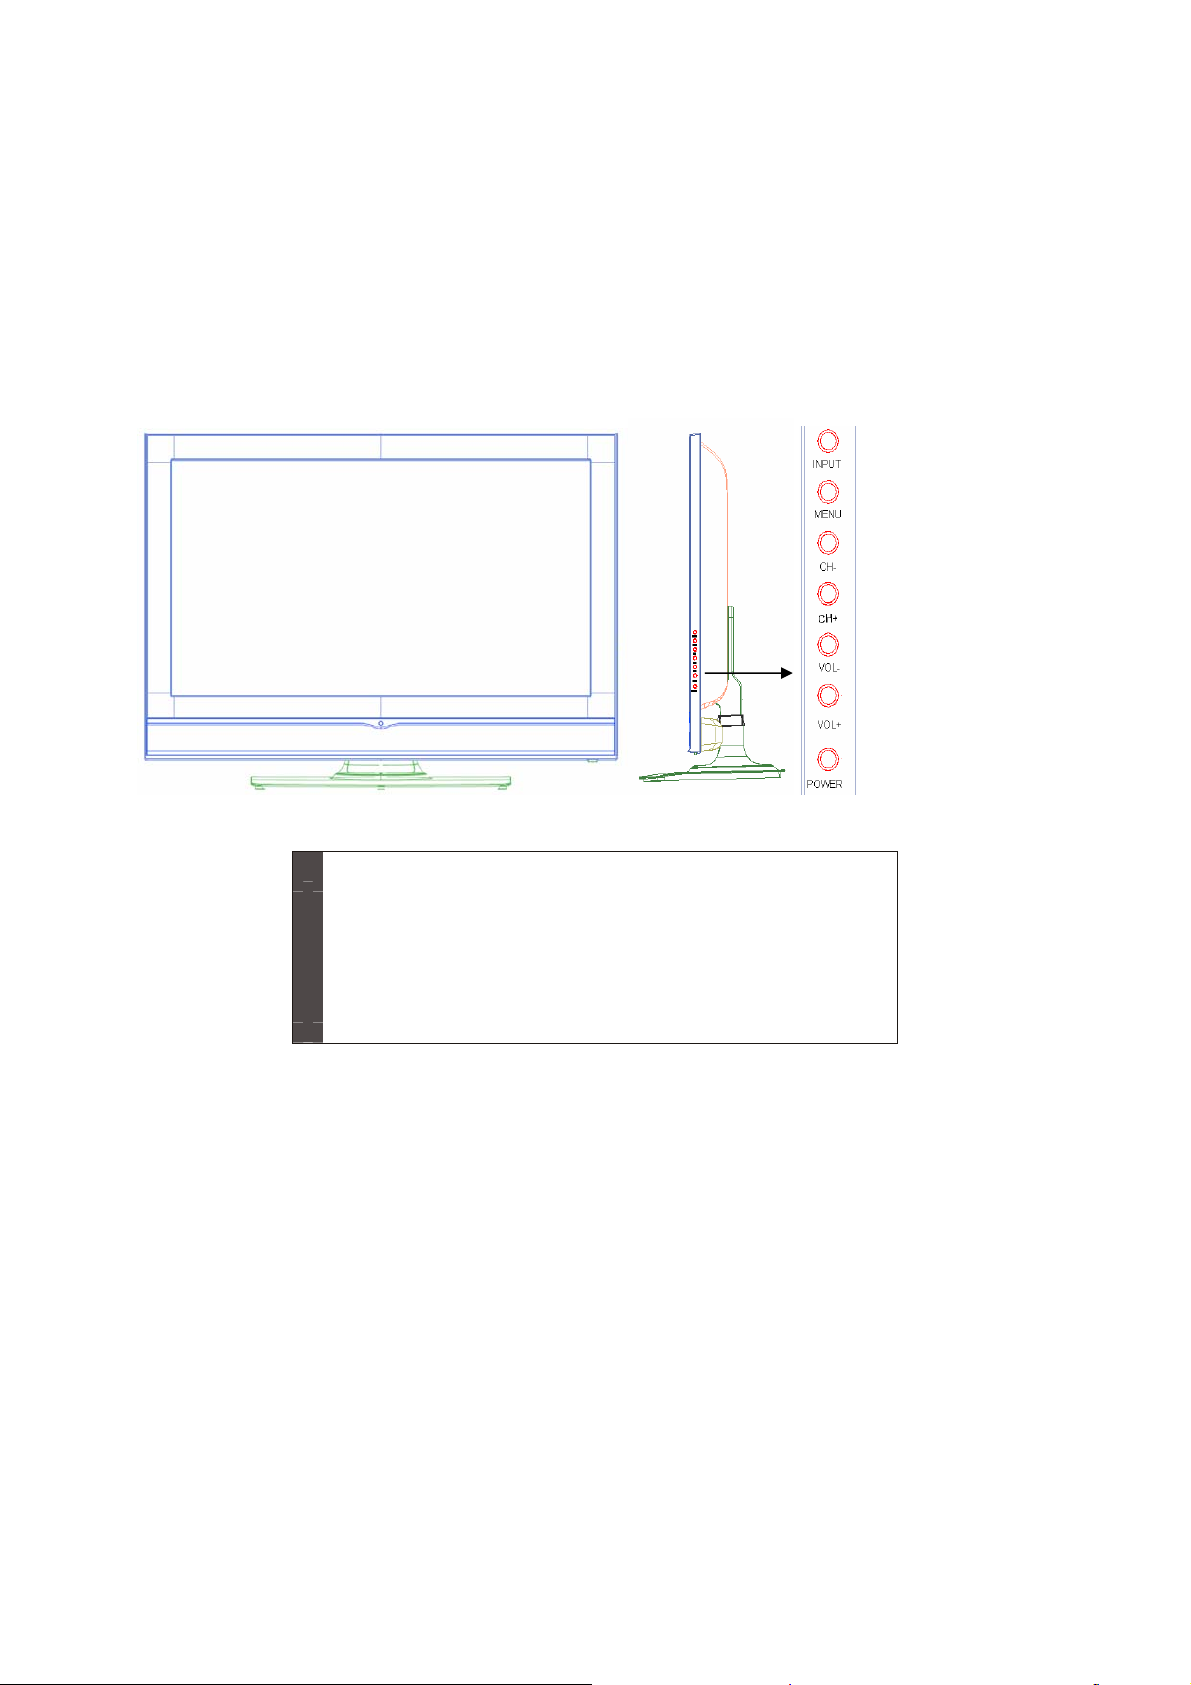
Controls
This is a simplified representation of front panel.
Here shown may be somewhat different from your TV.
Front panel controls
INPUT: Press to show the input source mode. In the MENU/INPUT
1
2 MENU: Menu display.
3 CH-/+ : Press to scan through channels. To scan quickly through
4 VOL -/+ : Press to adjust the volume .In the MENUscreen, these
buttons serve as Ż/Ź buttons.
5 POWER: Press to turn on and off the TV.
screen, these buttons serve as ENTER buttons.
channels, press and hold down either +/- . In the MENU
screen, these buttons serve as Ÿ/ź buttons.
6
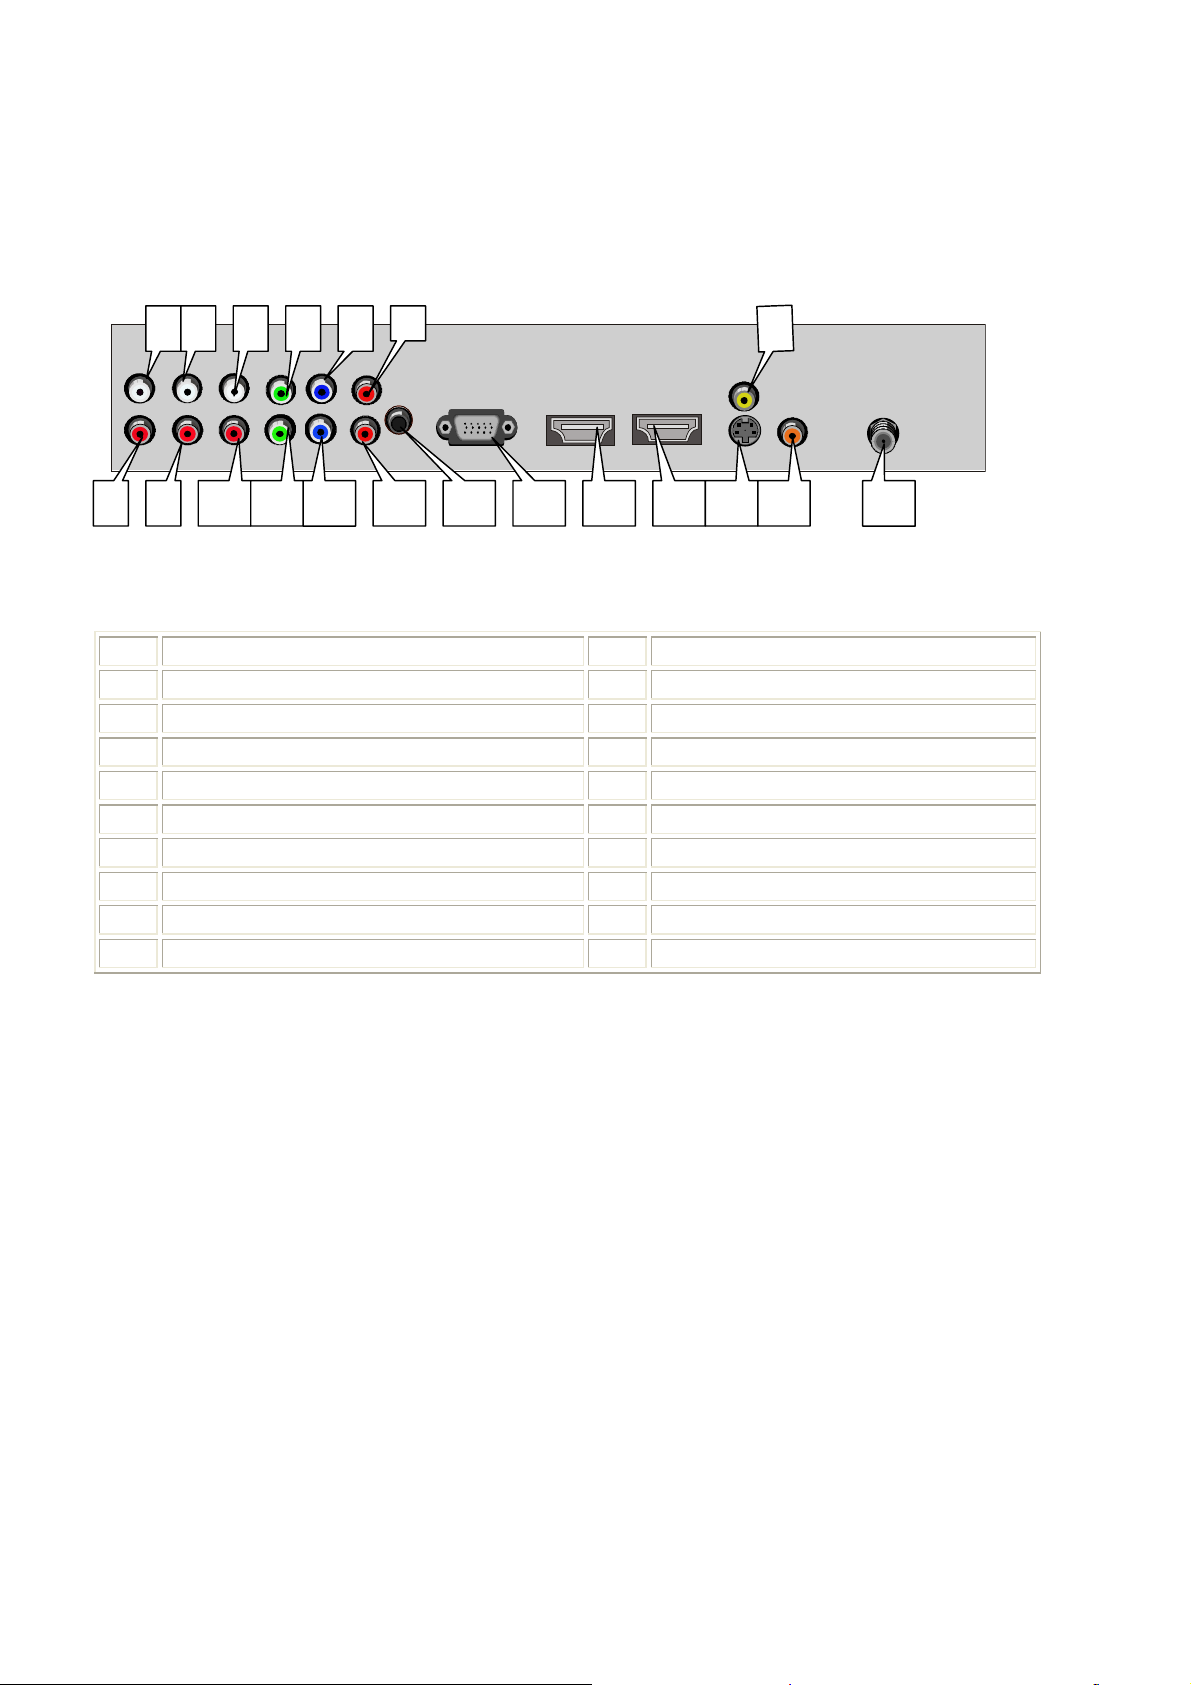
Connection options
Back panel controls
1 3 4 5 762
8 12 13 16 17 18 19 20 14 159 10 11
1 YPbPr 1-Left Audio In 11 YPbPr 2-Y in
2 YPbPr 2-Left Audio In 12 YPbPr 2-Pb In
3 CVBS & S-Video Left Audio In 13 YPbPr 2- Pr In
4 YPbPr 1-Y in 14 PC- Audio In
5 YPbPr 1-Pb In 15 PC-RGB In
6 YPbPr 1- Pr In 16 HDMI 1 In
7 CVBS In 17 HDMI 2 In
8 YPbPr 1-Right Audio In 18 S-Video In
9 YPbPr 2-Right Audio In 19 Coaxial output terminal
10 CVBS & S-Video Right Audio In 20 TV signal In
7
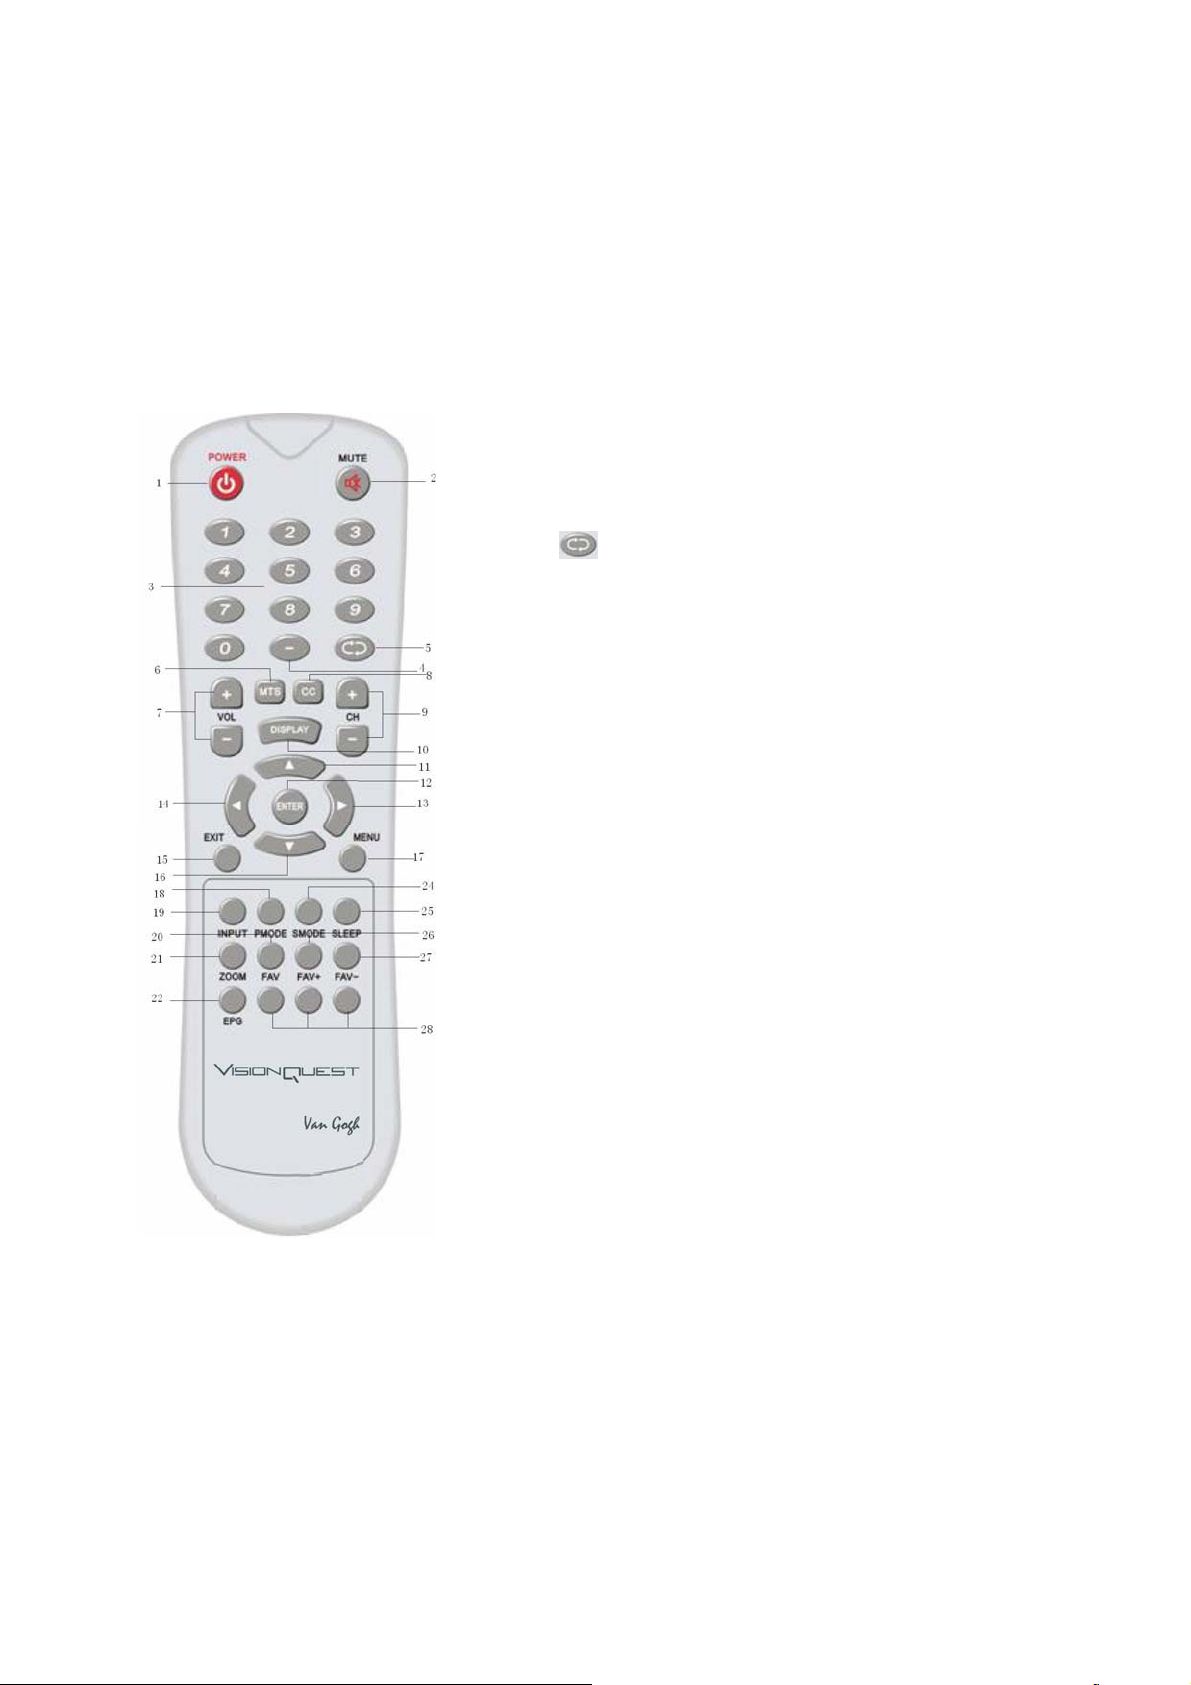
Universal Remote Control
The remote control cannot be operated unless the batteries are properly loaded.
When using the remote control, aim it at the remote control sensor on the TV.
Fonctions introduction
1 POWER
Press toturn on and off the TV
2 MUTE
Switches the sound on or off.
3 Numeric buttons
Press to change the channel.
4 - Button
Press to select additional channels (digital) being broadcast by
the same station. For example, to select channel “54-3”, press
“54”, then press “-” and “3”.
5
Tv mode recall
6 MTS
Mono”,”Stereo”and “Sap”.
7.VOLUME UP/DOWN
Press to adjust the volume.
8 CC(closed caption)
Select a closed caption.
9CHANNEL UP/DOWN
Press to scan through channels. To scan quickly through
channels, press and hold down either +/- .
10 Display
Display present mode
11,16 Ÿ/ź
UP/DOWN
14,13Ż/Ź
RIGHT/LEFT
15 EXIT
Clears all on-screen displays and returns to TV viewing from any
MENU
17 MENU
Brings up the main menu to the screen.
18 PMODE
Selects the picture mode appropriate for the program's character.
19 INPUT
Show the input source mode.
20 FAV
Favorite television programs
21 ZOOM
The zoom mode settings can be alse in the screen setting
22 EPG
Electronic program guide
24 SMODE
Selects the sound mode appropriate for the program's character.
25 SLEEP
Displays the Sleep Timer option.
26 ,27 FAV+/-
Favorite television programs up/down
28 NC : No use buttoms.
8
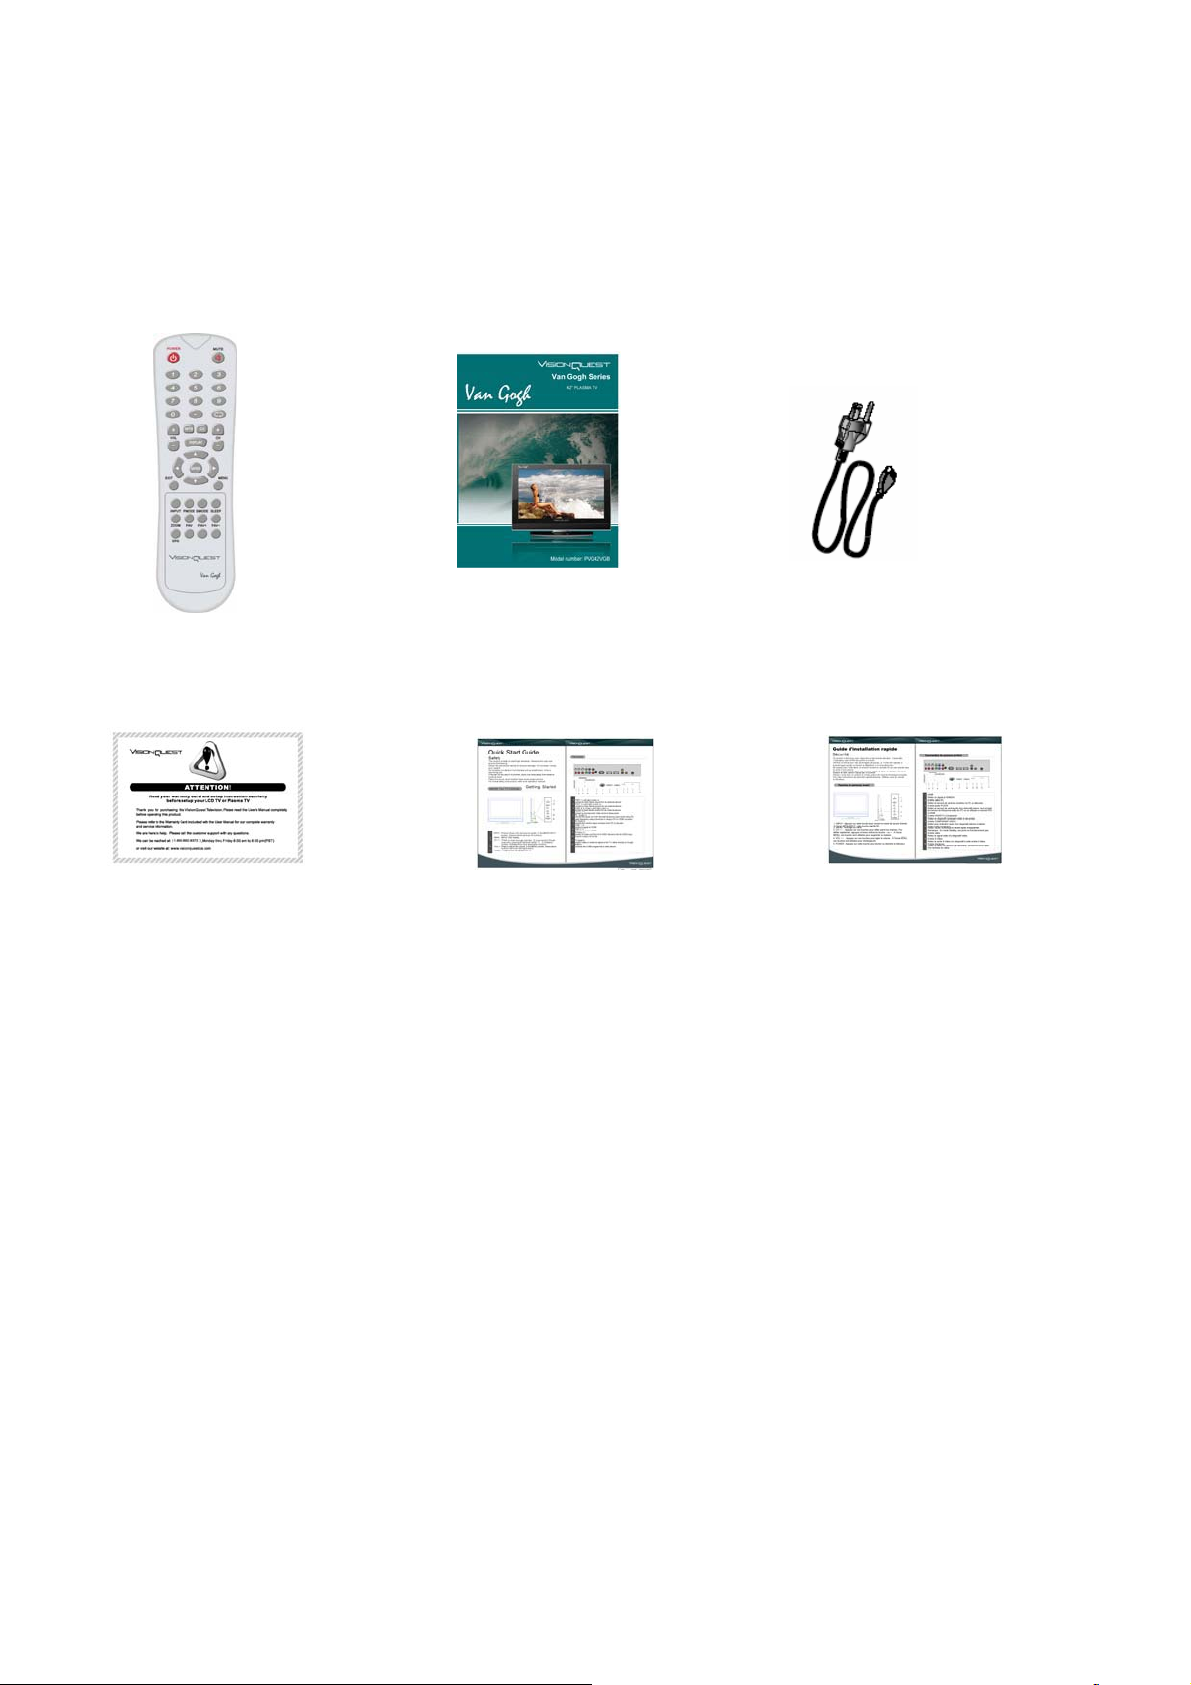
Accessories
Remote control User manual Power cable
Attention Card Quick Start Guide(English Version) Quick Start Guide(French Version)
9
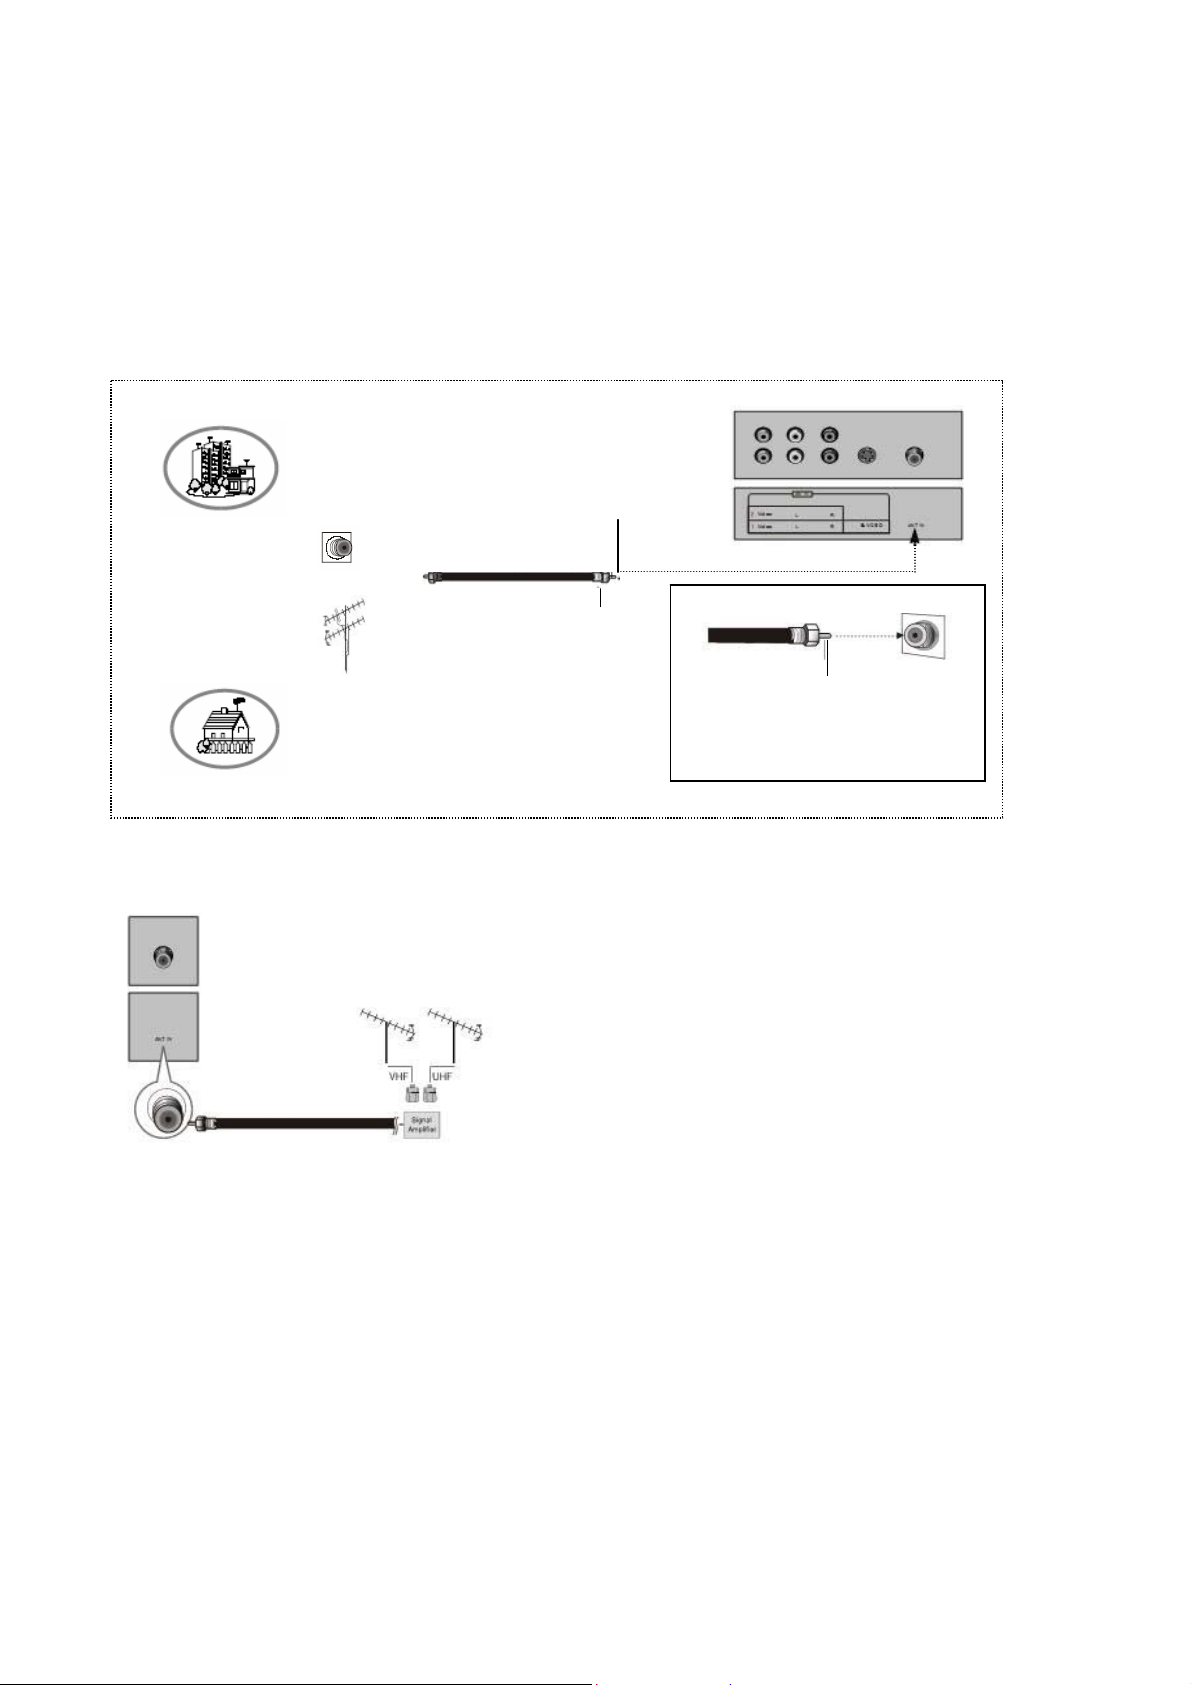
Antenna Connection
Generally speaking, to enjoy a clearer picture,we recommand that you use a CATV system or an
outdoor antenna. Over-the-air TV reception quality will depend on your antenna type,antenna location
and antenna positioning.
Multi-family Dwellings/Apartments
(Connect to wall antenna socket)
Wall Antenna
Socket
RF Coaxial Wire (75
Bronze Wire
VHF Antenna
UHF Antenna
Single-family Dwellings /Houses
(Connect to wall jack for outdoor
antenna)
Outdoor Antenna
Turn clockwise to tighten
Connexions de l'équipement externe
Quick set-up
Bronze Wire
Be careful not to bend the
bronze wire
gTo improve the picture quality in a poor signal
area, please purchase a signal amplifier and install
properly.
gIf the antenna needs to be split for two TV’s, install
a 2-Way Signal Splitter in the connections.
gTo install the antenna properly please contact a
professional in your area.
10
 Loading...