

Plantronics SP2 User Manual
SP2TM
Single-Line Phone
HEADSET
Introduction
Congratulations on your purchase of the new SP2 Single Line Phone Headset
from Plantronics. SP2 is the highest quality headset available today. SP2
allows you hours of convenient hands-free telephone use in both your home
and office. Please spend a few minutes reading this User Guide to learn how
to install, use and care for your new SP2 headset and to become more
comfortable with its new and unique features. If you have any questions,
please call Plantronics, 1-800-544-4660 or 831-458-7700.
Compatibility
SP2 is compatible with most single line modular telephones, both standard and
electronic. The exception would be a wall phone placed so that connection of
SP2 is physically impossible.
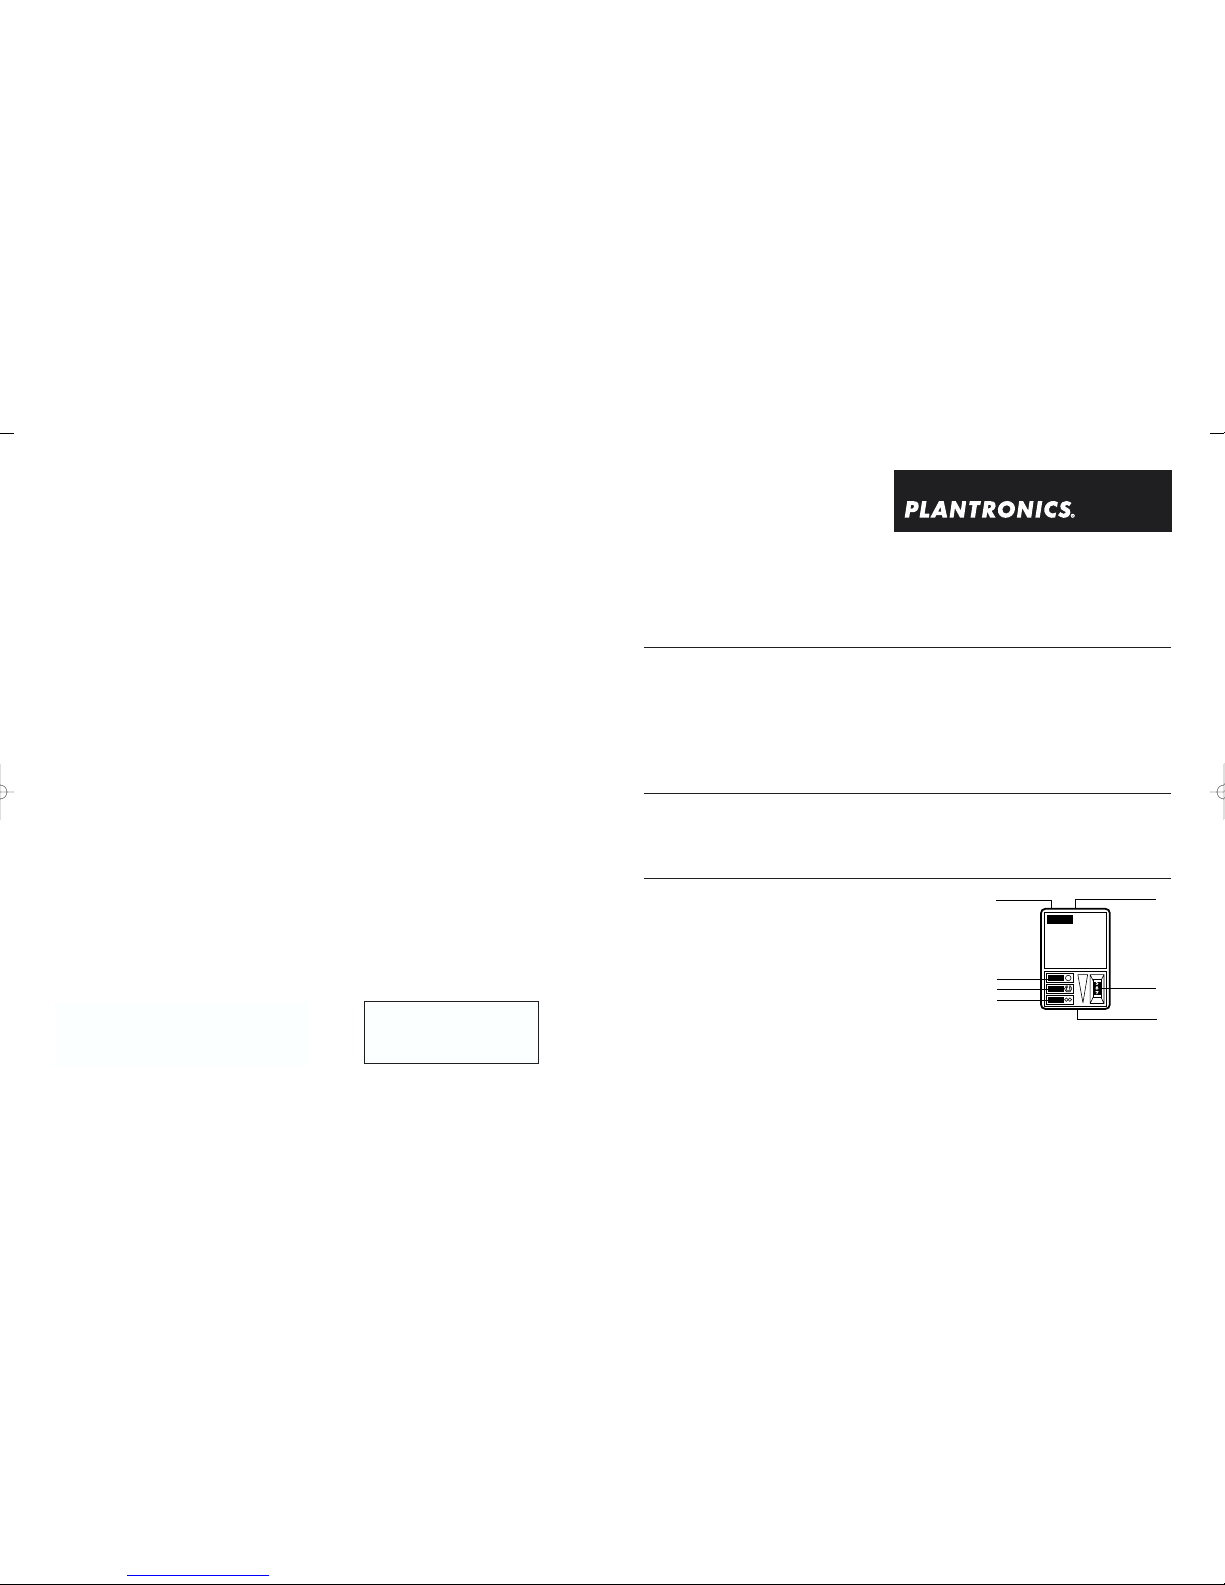
Configuration
1. Modular jack for line from wall connection
2. Modular jack for line from telephone or autodialer
3. “Flash” button
4. “Mute” button
5. “On/Off” button
6. Volume control dial
7. Modular jack for line to headset
Note: SP2 does not contain a ringer.
1
3
4
5
6
7
2
WARRANTY AND SERVICE
The following warranty and service information applies
only to the U.S. and Canada. For information in other
countries, contact your local distributor and our web
site, www.plantronics.com.
To obtain in or out of warranty service, prepay
shipment and return the unit to the appropriate
facility listed below:
IN THE UNITED STATES
Plantronics Service Center
345 Encinal Street
Santa Cruz, CA 95060
Tel: 800-544-4660
831-458-7700
Fax: 831-426-7555
IN CANADA
Plantronics Service Center
1455 Pitfield Boulevard
Saint-Laurent, Quebec H4S 1G3
Tel: 800-540-8363
514-956-8363
Fax: 514-956-1825
Please use the original container, or pack the unit(s)
in a carton with sufficient packing material to prevent
damage. Include the following information:
1. Proof of purchase indicating model number and date
of purchase.
2. Bill-to address.
3. Ship-to address.
4. Number and description of units shipped.
5. Name and telephone number of person to call,
should contact be necessary.
6. Reason for return and description of the problem.
Damage occurring during shipment is deemed the
responsibility of the carrier, and claims should be
made directly with the carrier.
FCC Registration Information
This equipment complies with Part 68 of the FCC
Rules. The FCC Part 68 Label is located on the bottom
of the unit. This label contains the FCC Registration
Number and Ringer Equivalence Number (REN) for
this equipment. If requested this information must
be provided to your telephone company.
The REN is useful to determine the quantity of devices
you may connect to your telephone line and still have
all of those devices ring when your telephone number
is called. In most, but not all areas, the sum of the
RENs of all devices connected to one line should
not exceed five (5.0). To be certain of the number
of devices you may connect to your line, as
determined by the REN, you should contact your
local telephone company to determine the maximum
REN for your calling area.
Connection to the telephone network should be made
by using standard modular telephone jacks, type RJ11.
The plug and/or jacks used must comply with FCC Part
68 rules. If this telephone equipment causes harm to
the telephone network, the telephone company will
notify you in advance that temporary discontinuance
of service may be required. But if advance notice isn't
practical, the telephone company will notify the
customer as soon as possible. Also, you will be
advised of your right to file a complaint with the FCC
if you believe it is necessary.
The telephone company may make changes in it's
facilities, equipment, operations or procedures that
could affect the proper functioning of your equipment If
they do, you will be notified in advance in order for you
to make necessary modifications to maintain
uninterrupted service.
Questions
Should you have any questions or problems with your
unit first contact your distributor. If your distributor
cannot assist you with your particular problem, please
write to us at the above address or contact us at:
PLANTRONICS - TOLL FREE
1.800.544.4660
CANADAAND U.S.A.
Plantronics Inc. 345 Encinal Street, Santa Cruz, CA 95060
(800) 544-4660 www.plantronics.com
© 1999-2003 Plantronics, Inc. All rights reserved. Plantronics, the logo
design, and Plantronics and the logo design combined, are trademarks
or registered trademarks of Plantronics, Inc
Printed in USA. 22795-01 (1-03)
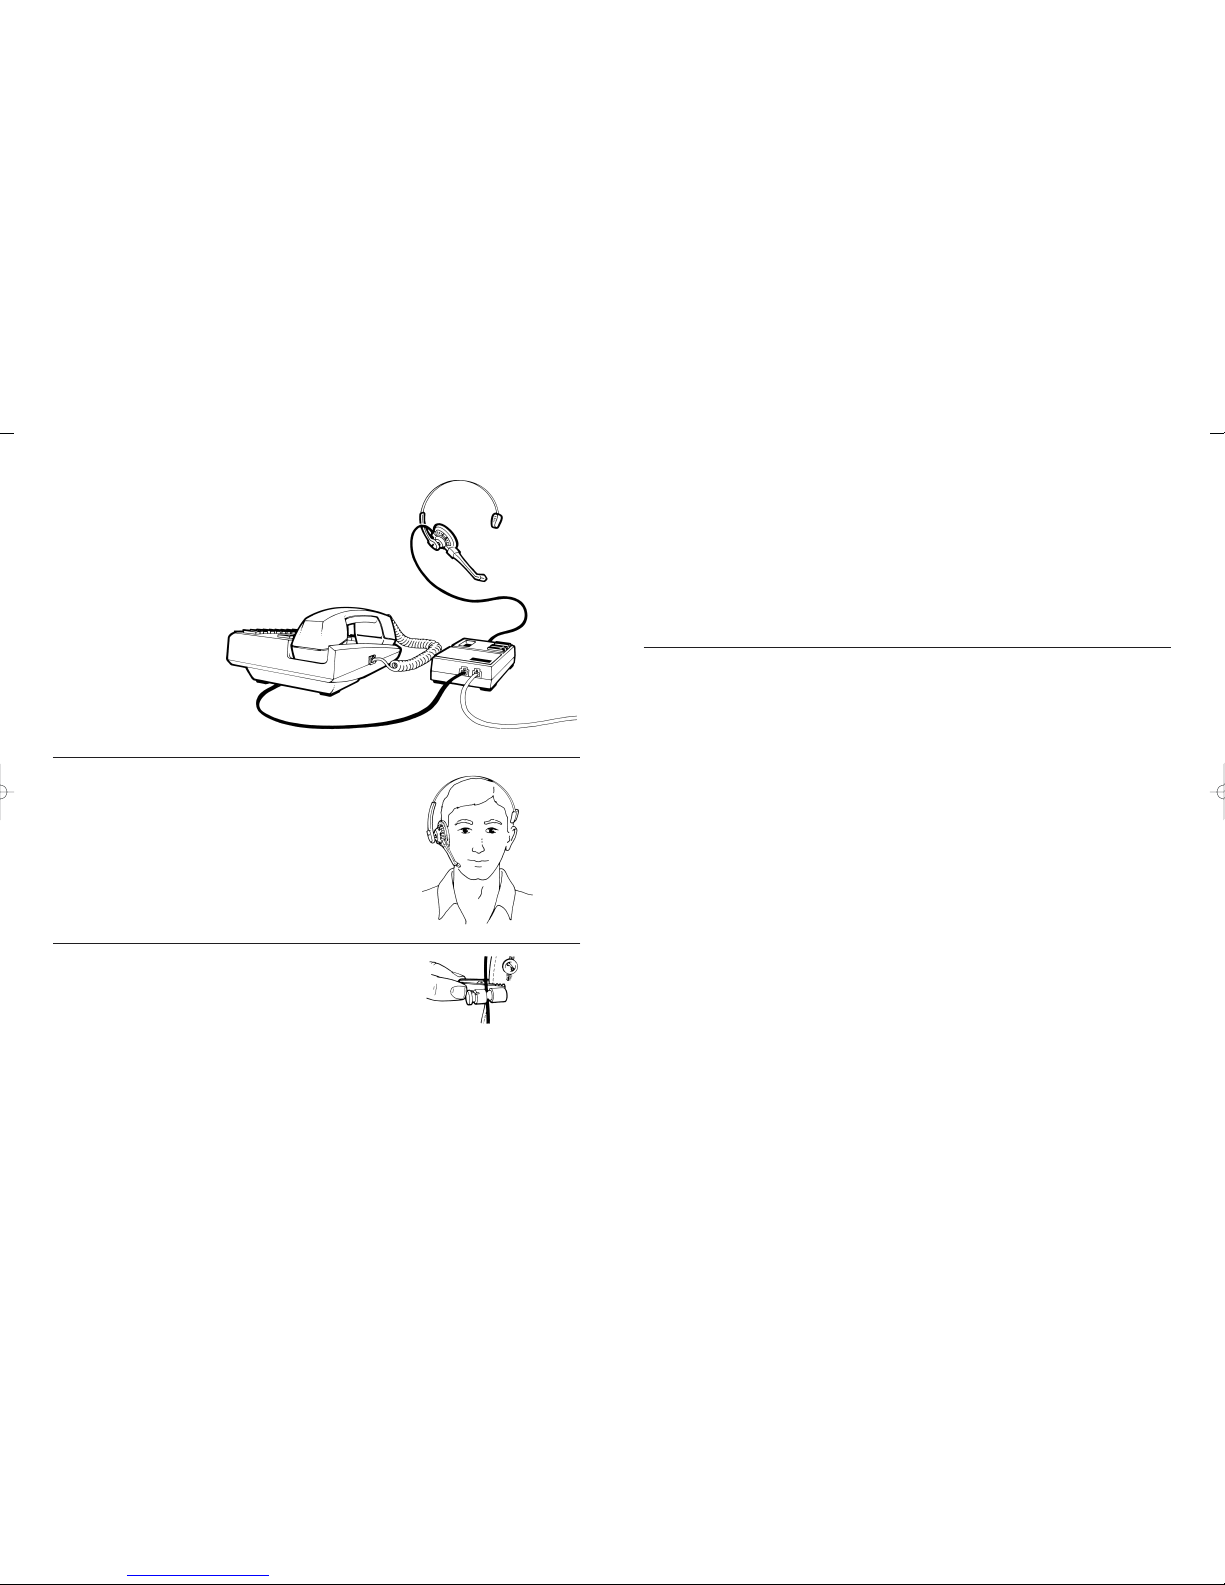
Connecting SP2
SP2 plugs in between the wall jack and your telephone. Unplug the wall
cord from the base of your phone and plug it into SP2’s rear jack (#1),
marked “wall” on the underside of the SP2 base unit. You will find a
modular telephone cord included in the SP2 packages. Remove the
cord from the package and plug one end of it into SP2’s rear jack (#2),
marked “phone” on the underside of the SP2 base unit. Plug the other
end of the cord into the base (rear phone jack) of your telephone. SP2
will work only if properly connected.
To W all
1
2
Positioning the Headset
Be sure the headset cord is plugged into SP2’s front jack (#7).
Adjusting the headband: Your SP2 headband is fully adjustable.
Lengthen or shorten the metal part of the headband for a comfortable
fit. If necessary, you may carefully bend the metal section for a tighter
or looser fit.
Positioning the receiver: Place the center of the foam-covered receiver over the center of your ear. Make sure that hair does not cover
your ear. Put the rubber pad located at the end of the headband above
your other ear.
Positioning the microphone: Adjust the microphone so that the tip is
located near the corner of your mouth.
Adjusting the Clothing Clip
You must allow for enough slack (approx. 6 in./15 cm.) in the cord
between the headset and the clothing clip to permit head movement
without displacing the headset. Slide the clip along the cord to adjust
the slack. Attach the clothing clip to the front of your clothes at chest
level.
Receiving and Placing Calls
Receiving a call: When your telephone rings, press SP2’s On/Off
button (#5). When the color indicator is visible, your call is on the line,
and SP2 is on. You do not need to pick up your telephone headset.
Placing a call: Turn on SP2. Remove your telephone headset from
its cradle. Dial normally. When the phone begins to ring, return the
handset to the telephone cradle.
Ter minating a call: To end a call, press the On/Off button so that the
color indicator is no longer visible.
Adjusting the volume: To increase the volume, rotate the volume
dial (#6) to a higher number. To decrease the volume, turn the dial to
a lower number.
Features
The Flash Button: If you use Centrex or PBX feature-such as call
waiting-which are accessed by hookswitch control, you can also use
these features through SP2. User the “Flash” button (#3) as you would
the hookswitch on your telephone. When the telephone signals a
second call coming in, press the “Flash” button. This puts the first
caller on hold. You can “Flash” to either caller at any time.
The Mute Button: The center button of the three buttons on top of SP2
is the “Mute” button (#4). This button allows you to place a caller on
hold. Press the button. When the color indicator is visible, you can hear
your caller, but they cannot hear you. To resume communication, press
the button again so that the indicator is not visible.
 Loading...