

Plantronics Savi W720-M, Savi W710, Savi W720 User Manual

Savi® W710-M/W720-M
Multi Device Wireless Headset System
User Guide

Contents
Welcome 4
System Requirements 4
DECT Enhanced Security 4
DECT Information 4
What's in the Box 6
Base and Headset Basics 7
Accessories 8
Customize Your Headset 9
Adjust the Headband 9
Adjust the Mouthpiece 9
Charge Your Headset 11
Desk Phone: Connect and Call 12
Choose Desk Phone Setup 12
Make a Desk Phone Call 13
Mobile: Connect and Call 14
Computer: Connect and Call 15
Connect Your Computer 15
Place a Softphone Call 15
Position Your Base 15
Audio streaming 15
Headset Features 17
Headset Controls 17
Headset Power 17
Headset Battery Level 18
Mute your Headset During a Call 18
Adjust Your Headset Volume 19
Turn On/Off Headset LED 19
Out of Range Warning Tones 19
Base Features 21
Base Buttons 21
Base Subscription Button 21
Bluetooth Pairing Button 23
Daily Use 24
Incoming Calls 24
Outgoing Calls 24
Multi-Phone Status 26
Mobile Phone and Headset Audio 26
Combine Audio From Any Two Lines or Channels 26
Conference Up to Three Additional Headsets 26
Conferencing Additional Headsets and Security Levels 27
Advanced Use 28
Install Plantronics Hub 28
Start Hub 28
Hub Tabs 28
Hub Settings Options 29
Ring Tones and Volumes 31
2

Softphones and Media Players 31
Presence 32
Wireless 32
Advanced 33
Additional Device Management Tools 34
3

Welcome
System Requirements
Congratulations on purchasing your new Plantronics product. This guide contains instructions
for setting up and using your Savi W710-M/W720-M
Please refer to the safety instructions in the quick start guide for important product safety
information prior to installation or use of the product.
Computer
• Supported Operating Systems: Windows Vista® Windows® 7, Windows® 8, 8.1
• Processor: 400 MHz Pentium® processor or equivalent (Minimum); 1 GHz Pentium processor or
equivalent (Recommended)
• RAM: 96 MB (Minimum); 256 MB (Recommended)
• Hard Disk: 280 MB (Minimum); 500 MB or more (Recommended)
• Microsoft® Windows XP® Service Pack 3 (SP3) or later (Recommended) Microsoft Windows
Vista Service Pack 1 (SP1) or later (Recommended)
DECT Enhanced Security
Display
• At least 800 x 600, 256 colors
• 1024 x 768 high color, 32-bit (Recommended)
Browser
• Internet Explorer® V10 or better must be on the user’s system (Required)
Plantronics is a member of the DECT Forum has fully adopted their recommendations for
enhancements to security within all DECT products.
Plantronics DECT-based products now fully incorporate the latest recommendations on
Enhanced Security from the DECT Forum and ETSI. These improvements cover registration,
authentication, authorization and encryption procedures. Plantronics DECT products are now
secure against all the known vulnerabilities that were highlighted by the public
announcements of the Chaos Council in 2009.
Plantronics Savi 700 Series DECT products have been tested against and passed the DECT
Forum security certification requirements and consequently have been granted 'DECT Forum
security' logo certification.
Plantronics products using the new enhanced version of DECT that includes these security
improvements are marked on the base with the DECT Forum security logo.
DECT Information
The enclosed DECT 6.0 wireless product uses restricted wireless radio frequencies which vary
by country. DECT 6.0 devices are generally authorized for use in The Americas. Use of this
DECT 6.0 product in unauthorized countries is a violation of law, may disrupt
telecommunications networks and devices, and can subject you to fines and penalties by
regulatory agencies. For specific countries in which DECT 6.0 devices may be lawfully used,
please consult the following: http://www.dect.org/content.aspx?id=28
4

5
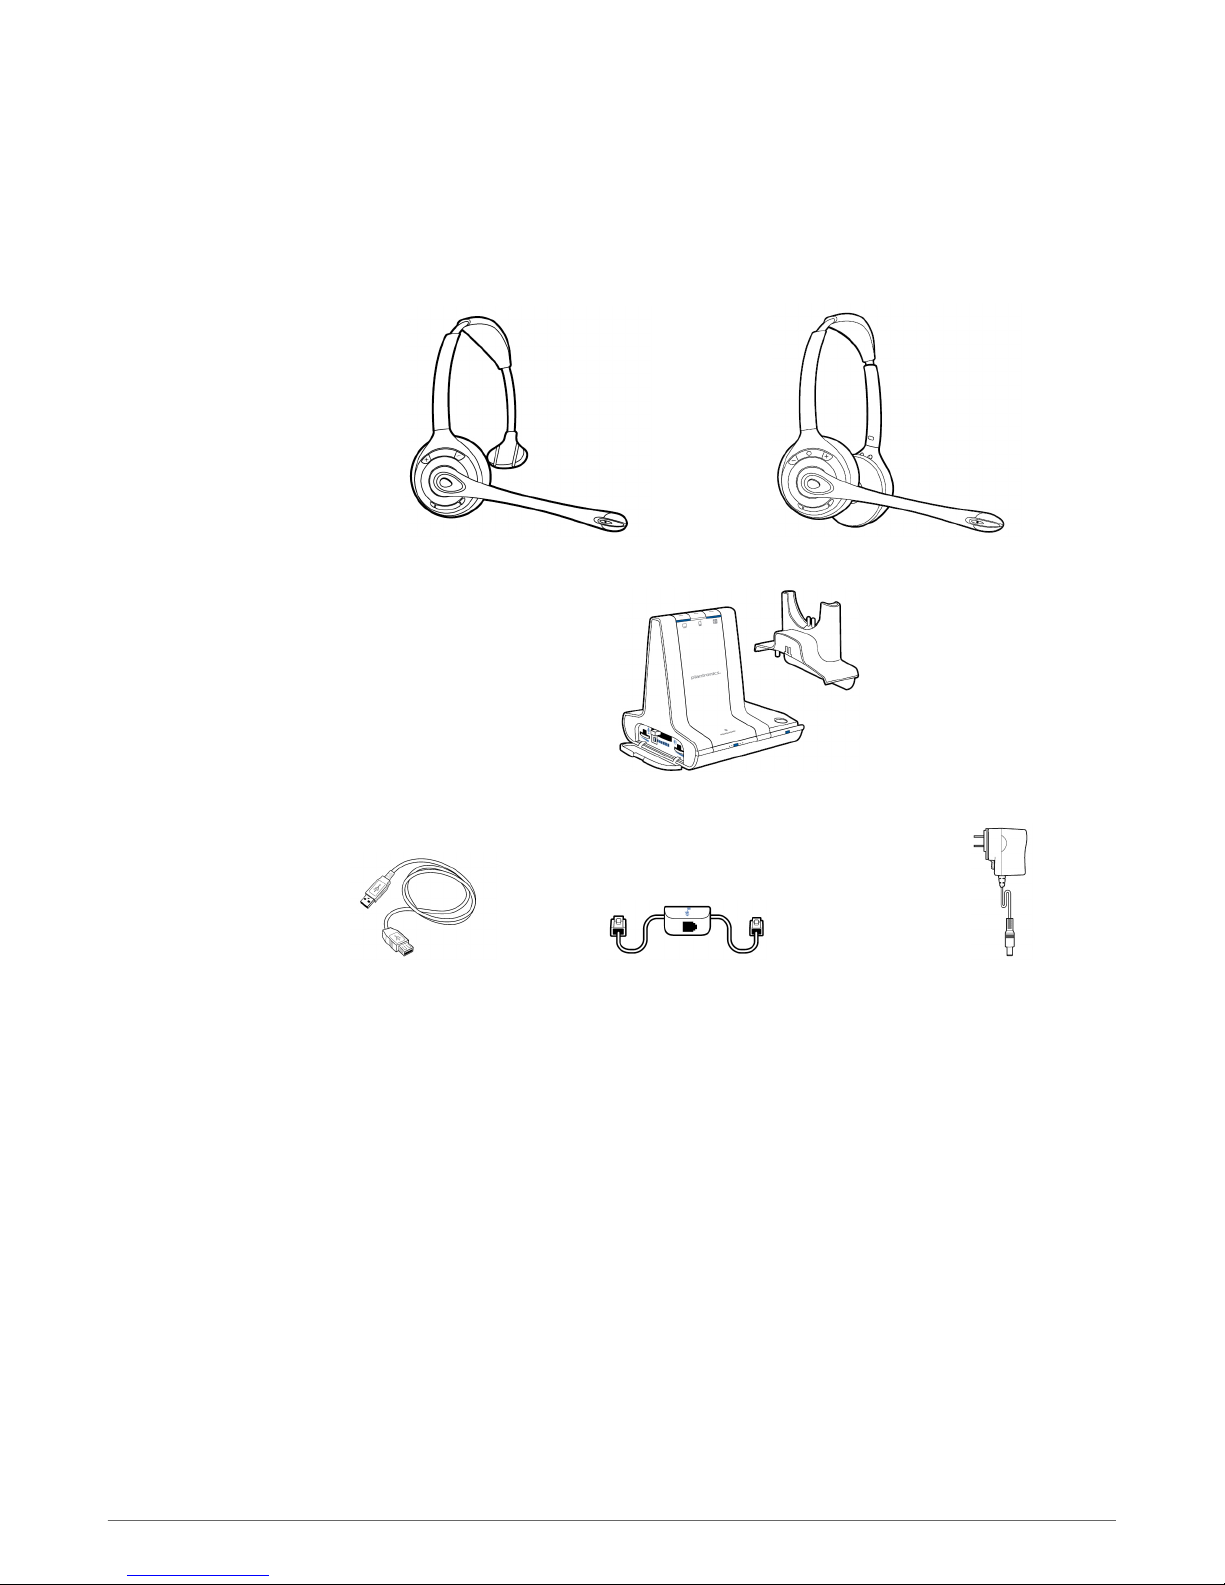
What's in the Box
WH300 headset (monaural) WH350 headset (binaural)
Base and charge cradle
USB cable Telephone interface cable Power supply
6
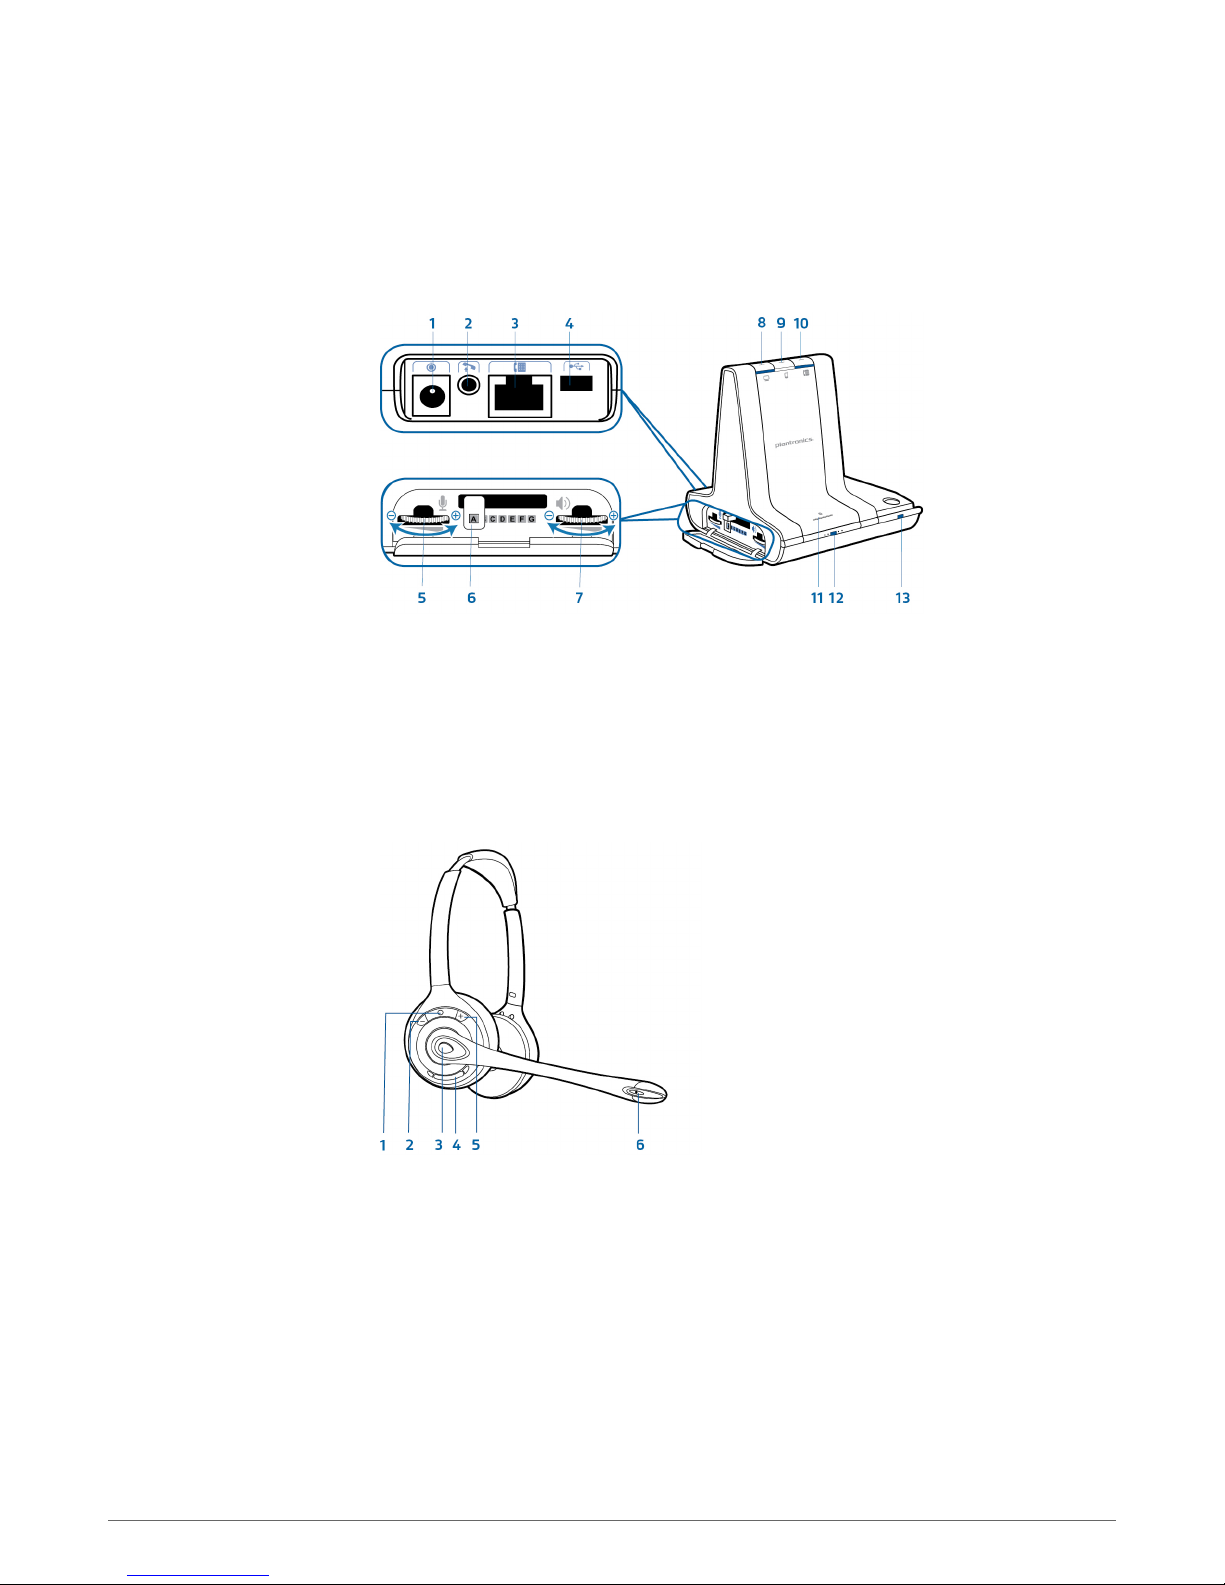
Base and Headset Basics
Base
Power jack
1
Handset lifter jack
2
Telephone interface cable jack
3
USB port
4
Desk phone speaking volume
5
Desk phone configuration switch
6
Desk phone listening volume
7
Headset
Headset LED
1
Volume up button
2
Call control button
3
Computer button
8
Mobile phone button
9
Desk phone button
10
Bluetooth pairing button/LED
11
Subscription button/LED
12
Charging LED
13
Mute button
4
Volume down button
5
Microphone
6
7
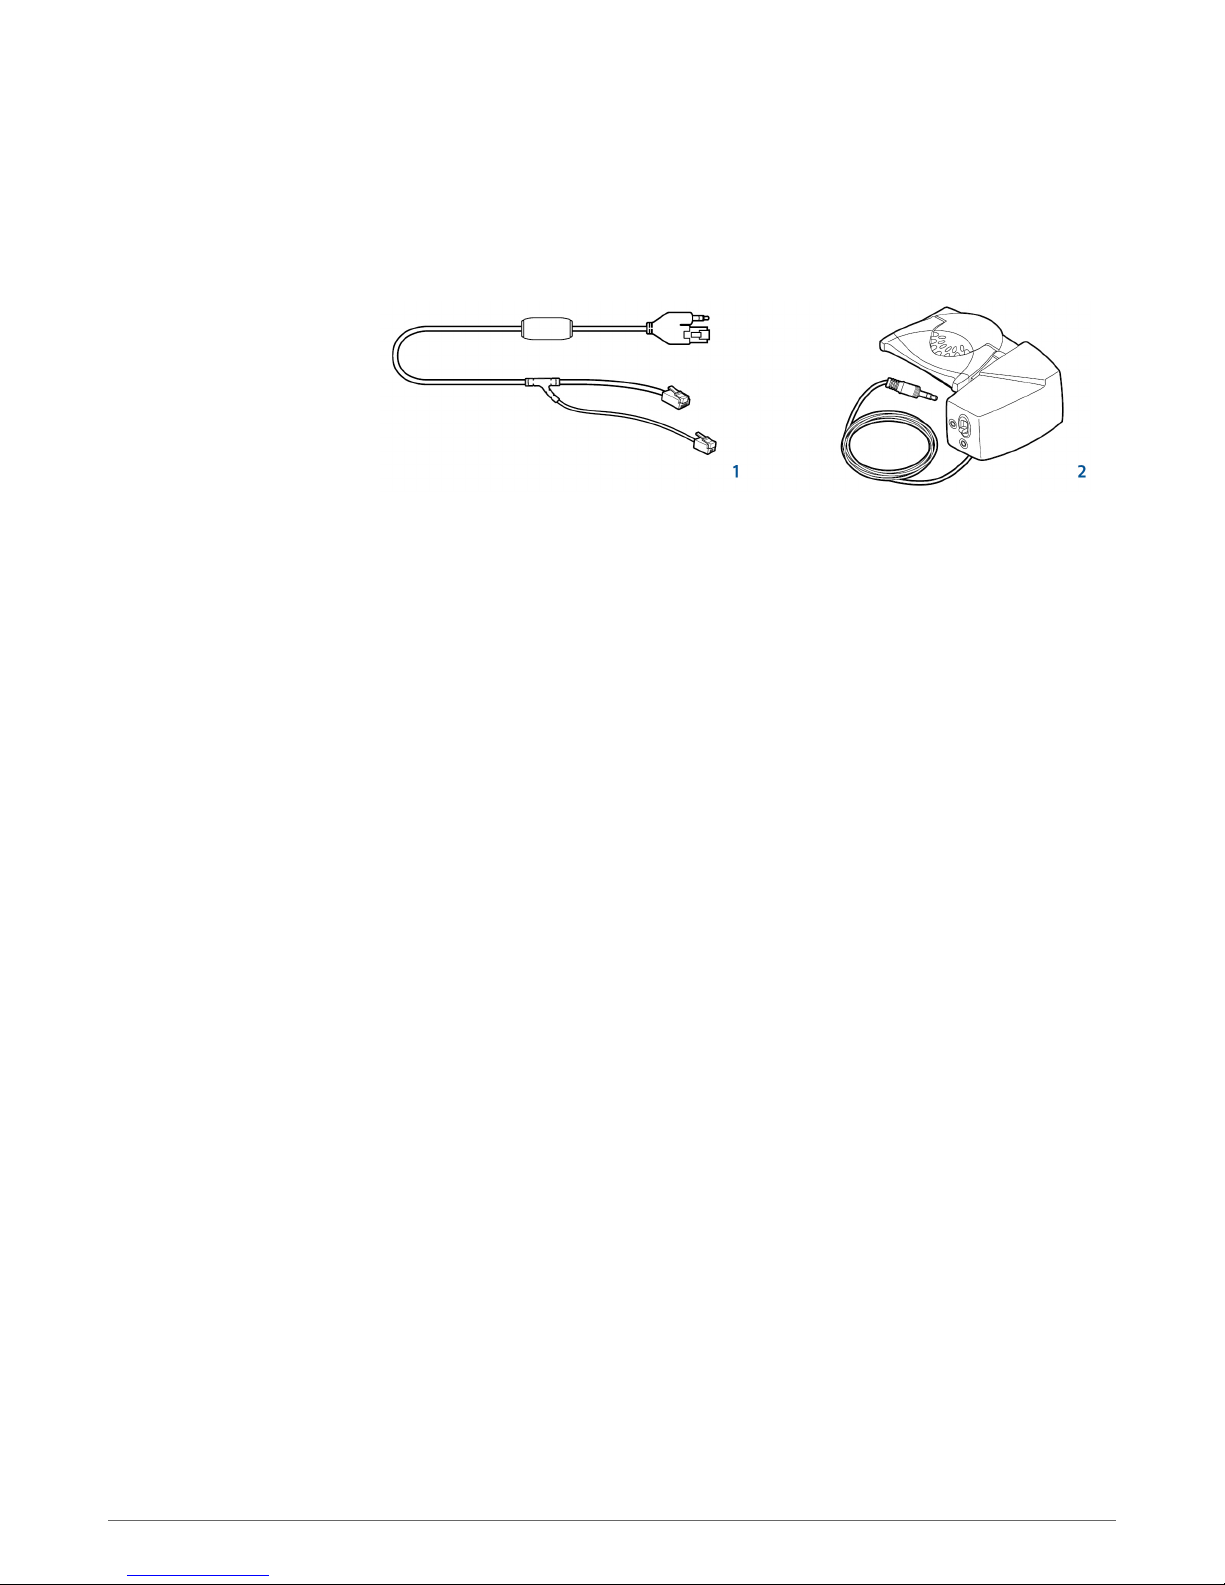
Accessories
Electronic hookswitch cable (EHS cable) Electronically and automatically takes your desk
1
phone handset off hook. Enables remote call control with your headset.
HL10 lifter Automatically lifts handset and returns it to the cradle. Enables remote call
2
control with your headset.
8
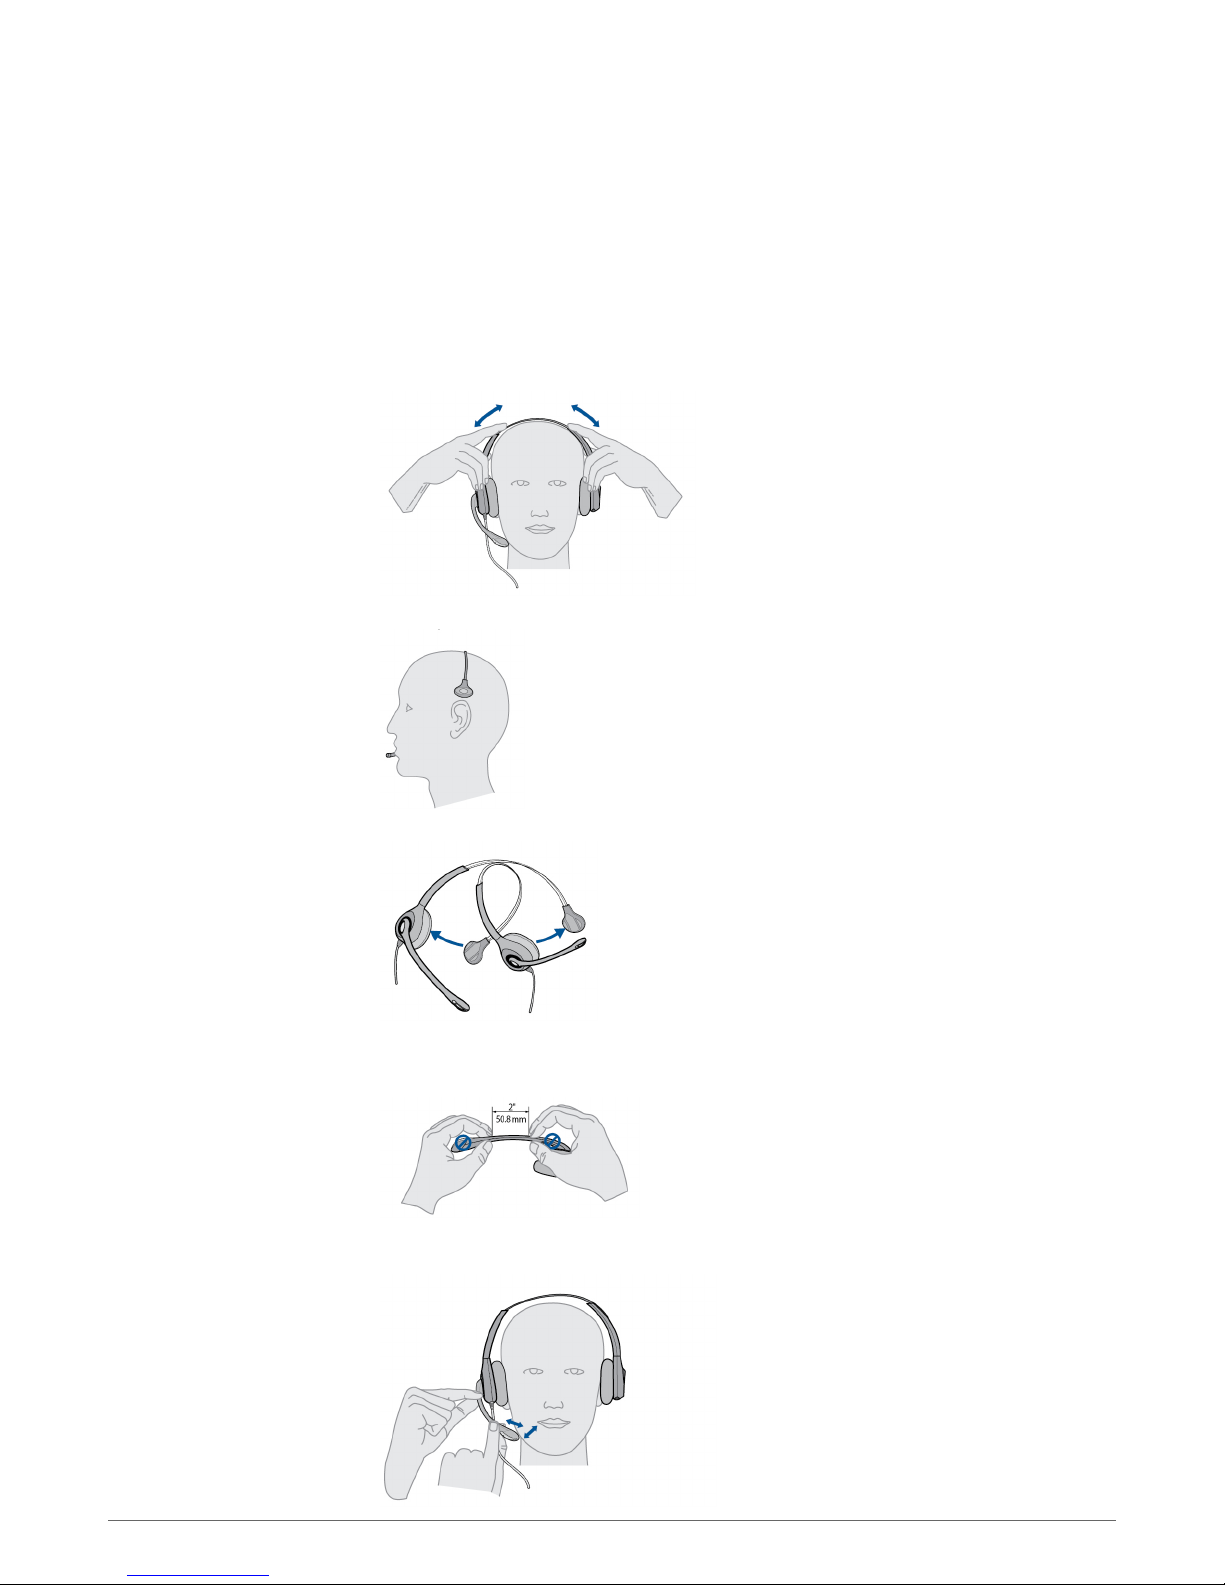
Customize Your Headset
Optimize the comfort and fit of your headset.
1
Adjust the Headband
To adjust the headband, lengthen or shorten the band until it fits comfortably. Position the
headset receivers so that the foam cushions sit comfortably over the center of your ears.
2
On the WH300, position the stabilizer T-bar above your ear.
Adjust the Mouthpiece
3
For a tighter fit, gently pull the opposite ends of the headset inward as shown.
1
Carefully bend and shape the boom with both hands as shown. Avoid bending or twisting the
boom near the microphone or earpiece.
2
Position the click-stop turret and boom so that the microphone is two finger-widths from the
corner of your mouth.
9

3
Make sure the front of the microphone faces your mouth. If necessary, twist the microphone
slightly so it’s in the proper position. Do not use forceful twisting motions or try to turn the
microphone completely around.
10
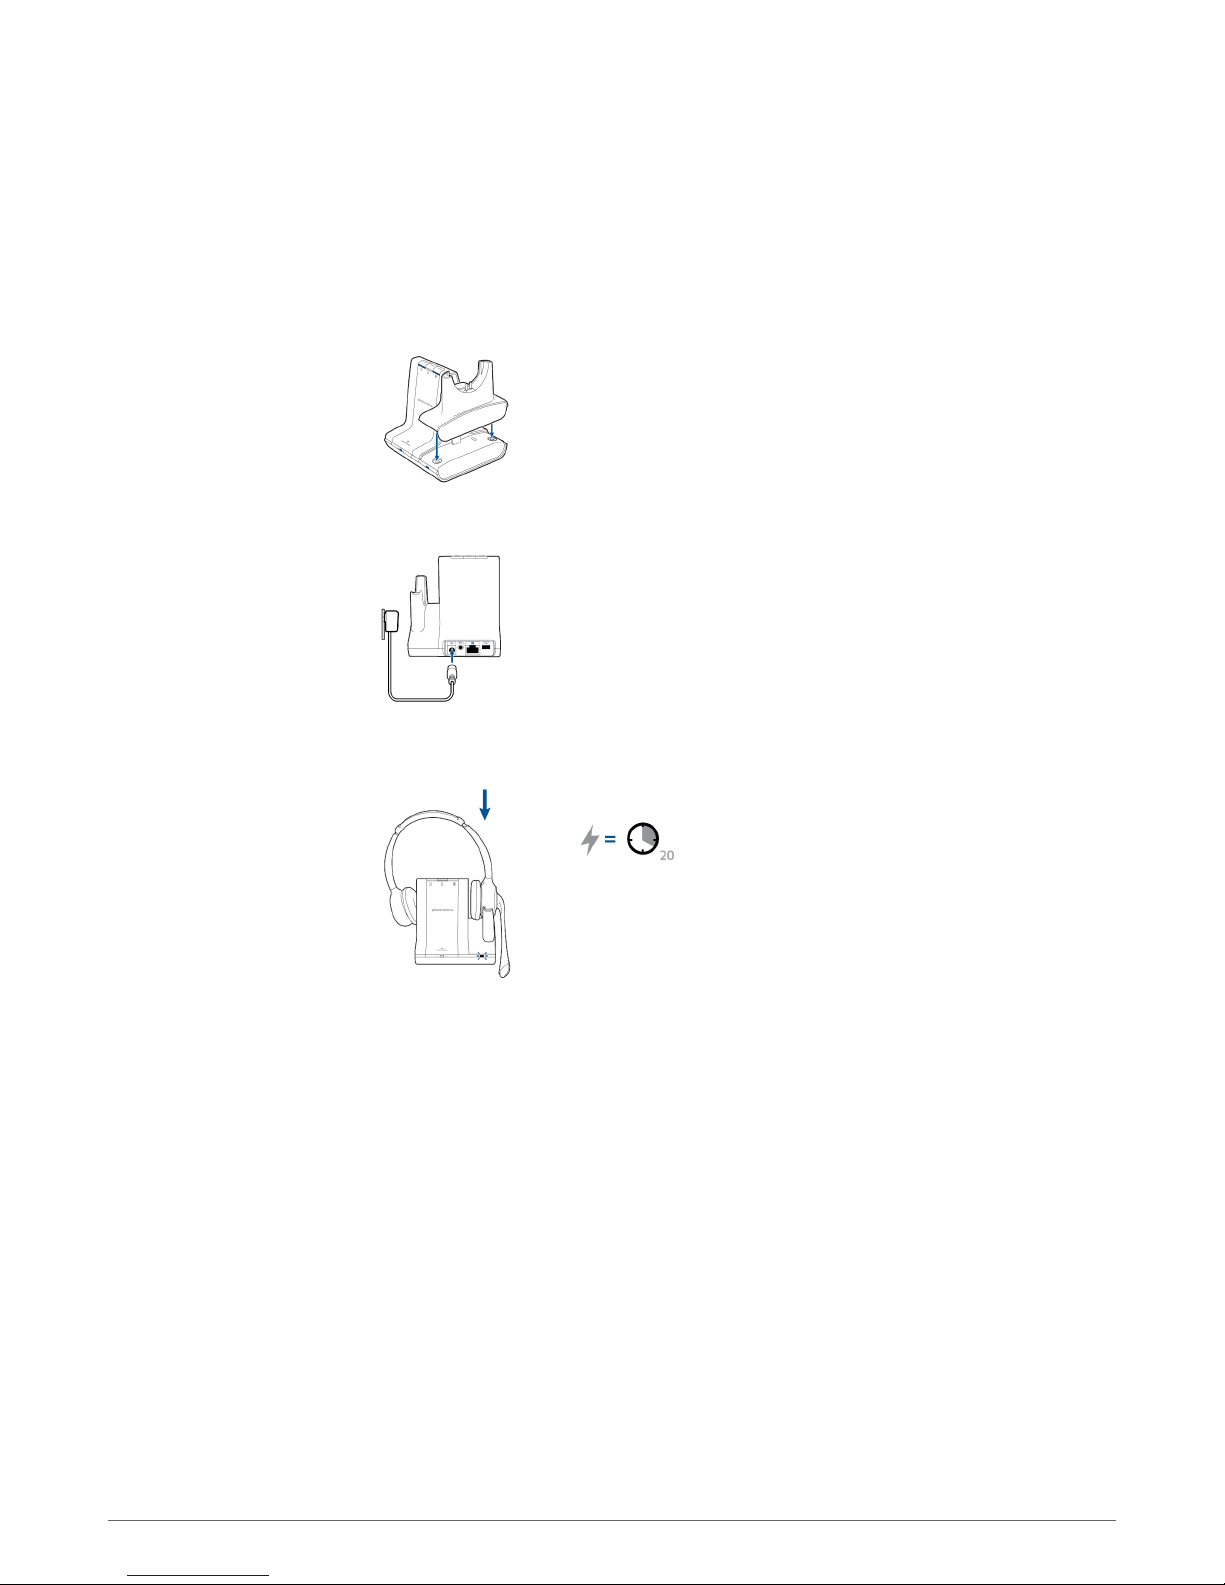
Charge Your Headset
1
Align the charging cradle pins with the base and press firmly until the cradle rests evenly on the
base.
2
Plug one end of power supply into power jack on back of the base and other end into working
power outlet.
3
Place the headset in the charge cradle. The charging LED will flash green when charging the
headset and turn solid green when the headset is fully charged. Charge for at least 20 minutes
prior to the first use. A full charge takes 3 hours.
NOTE This product has a replaceable battery. Use only the battery type supplied by Plantronics.
11
 Loading...