


Mini-101U
10M/100Mbps USB2.0 Print Server
Mini-101U

Foreword
Explanation of the signals
In order to let you set up and use this product correctly, please pay attention when reading or
browsing the manual as you see these signals listed below.
Warning/ Danger
Users should read the explanation carefully and understand it completely, otherwise
users might be in danger or even be injured.
Caution/ Be Careful
Remind users to be careful when setting up the product and to avoid damaging the
product or its system programs.
Seeking for service or searching for an agent or a distributor
Thank you for purchasing products from Planex Communications Inc. If you have any
operational problems while conÀguring or setting up the product, you may contact with our
Customer Service Department or ask the agent or the distributor from which you bought
the product for help. Moreover, during warranty, if you Ànd any defect or breakdown of the
product, you may bring the product, assembly, and its warranty card to our company or to
where you bought the product to ask for repair.
ŘEvery product has different warranty period and contract; please refer to our
company for further information or consult the agent or the distributor.
Planex Communications Inc.
Support PhoneĈ
+65-6338-1704
(Singapore)
+886-2-7705-6172/6173/6174
(Taiwan)
Customer Service E-MailĈtechsupport@planex.net
Contact Us
TelĈ+886-2-7705-6166
FaxĈ+886-2-7705-6177
Agents & DistributorsĈhttp://www.planex.net/where/index.htm

FCC Certifications
This Equipment has been tested and found to comply with the limits for a Class A digital
device, pursuant to part 15 of the FCC Rules. These limits are designed to provide reasonable
protection against harmful interference when the equipment is operated in a commercial
environment. This equipment generates, uses, and can radiate radio frequency energy and,
if not installed and used in accordance with the instruction manual, may cause harmful
interference to radio communications.
Operation of this equipment in a residential area is likely to cause harmful interference in
which case the user will be required to correct the interference at his/her own expense.
This device complies with Part 15 of the FCC Rules. Operation is subject to the following two
conditions: (1) this device may not cause harmful interference, and (2) this device must accept
any interference received; including interference that may cause undesired operation.
CE Mark Warning
Trademarks:
All trade names and trademarks are the properties of their respective companies.
Copyright © 2007 All Rights Reserved.

Contents
Foreword
Chapter 1 Introduction to Mini-101U ................1
1. Contents of Package ................
1
2. Specification .......................2
3. Product Functions ...................3
4. How to Set Up Mini-101U3 .............4
Chapter 2 Basic Setup & Configuration ..............5
1. Software Installation & Setup ..........
5
1.1 Administrator Installation ...........7
1.2
How to Use PrintServer Configuration Utility
14
1.2.1 PrintServer Configuration .....14
1.2.2 Network Ports Quick Setup . . . .30
1.2.3 Remote Ports ...............32
1.2.4 Uninstall ...................33
2. Add a New Printer on Windows .......34
2.1 Windows 98.....................34
2.2 Windows ME ....................40
2.3 Windows 2000...................46
2.4 Windows XP ....................53
3. Web Setup and Configuration ........60
3.1 Web Management Interface ......60
3.2 Device Setup→Status.............62
3.2.1 System ....................62
3.2.2 Printer .....................63
Mini-101U Contents

3.2.3 TCP/IP.....................64
3.2.4 SMB.......................65
3.2.5 SNMP .....................66
3.2.6 NetWare...................67
3.2.7 AppleTalk ..................68
3.3 Setup Wizard→Status .............69
3.3.1 System ....................69
3.3.2 Advanced Settings . . . . . . . . . .70
3.3.3 TCP/IP.....................71
3.3.4 SMB.......................73
3.3.5 SNMP .....................74
3.3.6 NetWare...................75
3.3.7 AppleTalk ..................76
3.3.8 Save Settings ...............77
3.4 System Tools→System .............78
3.4.1 Load Default ...............78
3.4.2 Upgrade from Browser .......79
Chapter3 AdvancedSetup&Configuration ......... 81
1. IPP(Interent Printer Protocol) ..........
81
2.
How to Install Network Printer on Apple OS/X
..85
Mini-101U Contents

1
1
Chapter 1 Introduction to Mini-101U
1
Introduction to Mini-101U
Thank you for purchasing PCI Mini-101U Print Server. It is a device which
can connect with the Ethernet and reinforce the management over any
printers and brings the performance into full play. Please be aware that
Mini-101U print server does NOT support host-based printers, such as
printers using CAPT, GDI, PPI standards.
Mini-101U Print Server has a 10/100Mbps Ethernet network port and a
USB printer port. Moreover, this print server can comply with multiple
Operating Systems, such as Windows 98/ME/NT/2000/XP/2003, NetWare,
Unix/Linux, and Apple MAC OS9/OS10. It also supports PPTP (Peer-to-
Peer Printing), TCP/IP (LPR), IPP, NetWare Bindery, A ppleTalk, SMB
protocols.
With the help of the installation wizard of Mini-101U, you can set up and
configure the settings easily and completely and enjoy the convenience
brought by it instantly. The following chapters will introduce you the
fantastic functions of Mini-101U, the installation methods, and system
configuration in different environments. With all these features, Mini-101U
must be the best solution for both beginners and advanced users.
1. Contents of Package
After purchasing Mini-101U Print Server form a distributor or an agency,
please open the package and check that all the components listed below are
included. If there is any item missing, please contact with the distributor or
the agency at once.

1
2
Mini-101U
œMini-101U Print Server x 1
œCD-ROM (including Driver & Utility, and UserŅsManual)x1
œAC Adapter & Power Cord x 1
œMini-101U Warranty Card x 1
If plug the AC adapter which includes in the product package into
a socket with different voltage power supply, it will cause damage
and that is not included in warranty.
2. SpeciÀcation
Network Management
œWindows Operating System with an installed Ethernet adapter and
support TCP/IP protocol
œInternet browser with Internet Explorer 4.0 or Netscape 4.0 or later.
œA printer with a USB port
œRJ-45 Ethernet cable
Network Management
Mi ni-101U Print Server support SNMP (Simple Network Management
Protocol), which enables Mini-101U to manage printers and alerts from
remote hosts. Mi ni-101U has SNMP Agent, so any related applications
supporting SNMP can access and manage it.
Network Configuration
Mini-101U has a built-in Web server, thus it can access its settings through
Web browsers, such as IE, Netscape, Firefox, and so on. It also supports
Server Manager utility program, which uses Windows Interface, so it can
help an administrator to set up and manage every setting easily.

1
3
Chapter 1 Introduction to Mini-101U
3. Product Functions
LED Status Meaning
LAN
Blinking /
On
When the power is on, the LAN LED will blink several times and then become green all the time. When
transmitting data, the LED will be blinking.
Status On
The Status LED will be on only when printing or
there are some problems with the printer or the print
server.
Ready On
After power on Mini-101U, its Ready LED will be
on all the time, and it means you may start to use it.
Button Function Usage
Reset Restart
Press the button for 3-5 seconds, and then unplug the
power cord, but do not release the Reset button and
wait for 3 seconds before plugging the power cord
back. Release the Reset button and Mini-101U will
automatically restart and back to the default settings.

1
4
Mini-101U
4.How to Set Up Mini-101U
1.Unw rap t he p ac ka ge o f Mi ni-101U P rin t Se rv er a nd c hec k i f th e
components are complete with nothing missing.
2.Use USB cable to connect Mini-101U Print Server with the printer which
you want to share with others.
3.Plug the RJ-45 cable into the UTP port on Mini-101U Print Server.
4.At last, connect the AC adapter with Mini-101U and plug the other
side of the power cord into the power socket. Power on Mini-101U
Print Server and it will automatically start the POST (Power-On-Self-
Test). While detecting, the Ready LED will be on and LAN LED will
be blinking for a while and then the Mini-101U will be ready in a short
time.
Plug the AC Adapter which comes with Mini-101U in a different
voltage power supply will cause damage on Mini-101U, and it is
not included in warranty.

2
5
Chapter 2 Basic Setup & Configuration
2
Basic Setup & Configuration
1.Software Installation & Setup
In order to meet users'network printing needs in nowadays heterogeneous
and multiple protocol networking environments, Mini-101U Print Server
supports industrial standard protocols, including TCP/IP, IPX/SPX,
NetBEUI and AppleTalk. It also supports many kinds of Operating
Systems, such as NetWare, Windows 98/ME/NT/2000/XP/2003, UNIX
system, and Macintosh Computer; therefore, it can be set up through many
OS.
Mini-101U Supports:
ŚNovell NetWare 3.12, 4.x, 5.x (Only with NDS mode)
ŚMicrosoft Windows 98/Me/2000/XP/2003
ŚApple OS9, OS X
ŚUNIX-like, Linux system
ŚInternet printing (through Internet Printer Connection software)
If your host computer has more than one Network Interface Card
(NIC), please disable the NIC which is not in use; otherwise the
utility may have difficulty in detecting the print server.

2
6
Mini-101U
Before Configuration
The computers on your LAN need to be set up to cooperate with Mini-
101U Print Server.
Please make sure that your operating system already enabled your interface
card on the host and connected to one of the LAN ports on Mini-101U
through Cat.5 cable. Be sure that LEDs on Mini-101U are already on.
In addition, the default IP address of Mini-101U isņ192.168.1.200.Ň
If your operating system is Windows 98/2000/XP, you may be able to
use command ofņipconfigŇto inquire whether you have the correct
IP address or not. If you are using Linux/Unix-Like system, you can use
ņifconfigŇto check your NIC (Network Interface Card) address. The
instructions are as follows:
œWindows98
1.ClickņStartƖProgramsƖMS-DOSŇorņStartƖRunĀŇand type
in ņcommand.exeŇand then press enter.
2.ņMS-DOSŇwindow will appear.
3.TypeņipconfigŇafter the command ofņc:>Ňand then press enter.
4.MS-DOS will appear your NIC address in the window, please take notice
of the value ofņIP AddressŇandņDefault Gateway.Ň
5.The value ofņDefault GatewayŇis the IP address of Mini-101U.
œWindows2000/XP
1.Please make sure that you do have the authority to access as anņ
AdministratorŇor you are already one of theņSystem Administrators.Ň
2.ClickņStartƖProgramsƖAccessoriesƖCommand PromptŇor
ņStartƖRunĀ,Ňand then type inņcmd.exeŇand press enter.
3.It will appear aņMS-DOSŇwindow.
4.TypeņipconfigŇafter the command ofņc:>Ňand then press enter.
5.MS-DOS will appear your NIC address in the window, please take notice
of the value ofņIP AddressŇandņDefault Gateway.Ň
6.The value ofņDefault GatewayŇis the IP address of Mini-101U.

2
7
Chapter 2 Basic Setup & Configuration
œLinux / Unix-Like
1.At first please make sure that your NIC are already enabled and works
properly.
2.And be sure you haveņrootŇnumber or your already are one of the
members of aņrootŇgroup.
3.Please typeņifconfigŇofņifconfig -aŇafterņ#Ňand then press enter.
4.It will appear your present NIC address in the window, please take notice
of the value ofņIP AddressŇandņGateway.Ň
5.The value ofņGatewayŇis the IP address of Mini-101U.
If you can getņIP AddressŇandņGateway,Ňnormally, it means that
you may use web browser to configure Mini-101U. Type your destination
ęņhttp://192.168.1.200Ň(default IP Address of Mini-101U) on th e
Address Bar in the web browser. If you have changed the default IP
Address of Mini-101U, please type in the new address on the address bar.
1.1.Administrator Installation
The installation wizard will install the following programs:
ŜInstall all the necessary utilities and drivers
ŜGuide you through the print server setup process to install and configure
your print server (including setting up several protocols and settings)
ŜAdd a new print server network port on your computer.
In order to let you make a connection successfully between Mini-101U
Print Server and your network/computer, we suggest that you should assign
a static IP address for your computer, for example, 192.168.1.100 (Mini-
101U Print Server's default IP address is 192.168.1.200) that will help
while setting up the connection. After giving an IP address, please follow
the steps below to start the Installation:

2
8
Mini-101U
1.Put the Mini-101U CD-ROM into the CD-ROM driver, and go to the root
directory. Double click onņPCI PS Utilities-Admin(Multilingual).exe
Ňand you can start to install the print server and set up the printer which
connects with Mini-101U.
The following pictures of installing Utilities and Driver are all
captured from Windows XP operating system. These installations
steps are all similar in Windows 98/ME/2000/2003.
2.First, please select the language for the installation and then clickņOKŇ.
3.After getting into the InstallShield Wizard, it will show the following
page. Please make sure that your Mini-101U print server is ready and the
hardware of the printer was installed and the power is on. If you want to
continue, please clickņNext.ŇAnd if you want to install the utility later,
you may clickņCancel.Ň

2
9
Chapter 2 Basic Setup & Configuration
4.ClickņNextŇto install the utility into the default folderņC:\Program
Files\PrintServer Utilities,Ňor you can clickņChangeŇto assign
another location for the utilities.

2
10
Mini-101U
5.You may choose the programs which you want to use in the following
page. We suggest that you should install both these two components
to have better control over Mini-101U Print Server. ClickņNextŇto
continue installing.
6.ClickņInstallŇto start the installation.

2
11
Chapter 2 Basic Setup & Configuration
7.The wizard will start to install the utilities. After completing the
installation, it will show the detected print server on the list and you may
start to configure the print server.ņChoose print serverŇlist will show
all the print servers on the LAN. If the print server you want to configure
does not show on the list, please clickņRefreshŇ. Choose the print
server you want to configure and clickņNextŇto continue installing.
1.Print Server Name is the last 6 digit of MAC ID marked on the
back of the print server and plus theņPSŇprefix.
2.Here only shows the print servers which have the same brand
and in the same LAN.

2
12
Mini-101U
8.You may give a distinguishable alias name for Mini-101U Print Server
or you can leave the default name and clickņNextŇto continue the
installation.
9.You can clickņAssign the Print Server an IP addressŇto manually
set up an IP address for Mini-101U or you can just clickņNextŇand
leave the default IP address.
The default IP address of Mini-101U Pr in t Se rv er isņ
192.168.1.200Ň. If you chooseņDon't Change,Ňit will keep
the default IP address.

2
13
Chapter 2 Basic Setup & Configuration
10.Enter theņAdd Network PortŇpage, the left side of the page will
show the previous configuration. If the settings are correct, clickņFinish
Ňto proceed.
11.At last, it will show theņInstallShield Wizard CompleteŇpage.
Click ņFinishŇto exit the installation wizard program.

2
14
Mini-101U
12.After completing the installation, the following PrintServer Utilities
window will pop up and you can start to configure and manage Mini-
101U Print Server.
1.2. How to Use PrintServer
ConÀguration Utility
1.2.1. PrintServer ConÀguration
1.Double click on theņPrintServer ConfigurationŇicon to use the
utility. The Server Manager will start to search for the print servers
present on the LAN.

2
15
Chapter 2 Basic Setup & Configuration
2.The detected print servers will list under the Mini-101U. And at the
bottom of the right side of the page will showņ1 server foundŇ
message. If the print server just initializes and has not been found, you
may click
and search again.

2
16
Mini-101U
3.Click on the icon and choose the print server which you want to
use. Right side of the window will show you the MAC ID, Model Type,
Firmware Version, and etc.
4.You can follo w the st eps and set up Mini-101U Print Server on the
network through the Print Server Setup Wizard in the Server Manager
utility. If you want to change any settings later on, you may click on the
icon and choose the item you want to configure and modify the
settings. Now you may click on the
icon, and clickņPrint Server
Setup WizardŇto enter the wizard program.

2
17
Chapter 2 Basic Setup & Configuration
5.Before entering the wizard, you must key in the User Name and
Password for Mini-101U Print Sever. The default User Name isņadmin
Ňand Password isņ0000Ň. If you want to change the password, please
click
andgotoņGeneralŇsettings to configure it.
6.The first page shows the General Settings and you can change the name
of the print server or you may leave the default name and clickņNextŇ
to continue setting up.

2
18
Mini-101U
7.Choose the printing protocols needed by the system. All you need to do
is to check the check box or cancel the check to set up system settings.
ClickņNextŇto go to the next step.
8.According to your network settings to set up TCP/IP Settings for
the print server. You may chooseņStatic IPŇorņAuto IP.ŇIt is
recommended that you should assign a static IP for Mini-101U. If the
LAN does not have any DHCP server, you can chooseņDHCP Server
Ň to enable the DHC P server in Mini-101U. If you do not know the
related settings of DHCP Server, you can just chooseņDHCP Server
ęAuto.ŇBut before configuring DHCP server, you have to choose
assign a static IP address for Mini-101U, then you can continue configure
DHCP S erver. ClickņNextŇto go to the next step.

2
19
Chapter 2 Basic Setup & Configuration

2
20
Mini-101U
9.When configuring AppleTalk, if you cannot be sure about theņZone
NameŇof AppleTalk, you can fill in the blank withņ*Ňor specified
your AppleTalk Zone. The Printer Type Port 1 shows the type of the
printer which connecting to the Mini-101U print server. ClickņNextŇto
continue setting up.
10.ņPolling TimeŇfunction can be set to inquire the status of the NetWare
Server on the network every period of time. You can set the Polling
Time interval for several seconds.ņNetWare ServerŇblankintheņ
File Server to be servicedŇcolumn can be filled in the Print Server
Name showing in the NetWare Tree for Mini-101U Print Server. Click
ņNextŇto continue setting up.

2
21
Chapter 2 Basic Setup & Configuration
11.Print Server Setup Wizard will show you all the setting you just
configured and if the settings are correct, clickņSave.ŇIf you want to
change any settings, you can clickņBackŇto go back to the previous
setting pages, or clickņCancelŇand set it up later.
12.After clickingņSave,Ňit will show the following warning at once. If
you want to proceed and save the settings, you may clickņOKŇ.

2
22
Mini-101U
13.After clickingņOK,Ňit will go back to the main page and will show
you the message ofņSettings Updated. Please Reboot Server To
Take Effect!ŇAt that time, you have to click the reboot icon
on
the task bar to reboot the print server. During rebooting, please DO NOT
turn off the power or set up other things. After restarting, the message
will show at the lower right corner of the main page.
14.If you want to change any settings of t he print server which you set
before, you can click
icon. The right side of the window will show
you all kinds of settings and you can choose a setting to set up according
to your needs. But before you start changing the settings, it will ask you
to enter the User Name and the Password. Key inņadminŇas the User
Name andņ0000Ňas the Password, and you may start setting up the
print server.

2
23
Chapter 2 Basic Setup & Configuration
15.Click the icon on the Setup page, it will show you the information
about the device which you are using now. And you can change the
Server Name or put a check in theņSet User Name/PasswordŇ
checkbox to change the password of the admin (Server Manager). Click
ņSaveŇto activate the settings.

2
24
Mini-101U
16.If you want to configure protocol, please follow the following
description. According to your network settings to set up TCP/IP
Settings for the print server. You may chooseņStatic IPŇorņAuto
IP.ŇIt is recommended that you should assign a static IP for Mini-
101U. If the LAN does not have any DHCP server, you can choose
ņDHCP Server.ŇIf you do not know the related settings of DHCP
Server, you can just chooseņDHCP Server ęAuto.ŇBut before
configuring DHCP server, you have to choose assign a static IP address
for Mini-101U, then you can continue configure DHCP Server. Click
ņSaveŇto apply the settings.

2
25
Chapter 2 Basic Setup & Configuration
17.Click and theņPolling TimeŇfunction can be set to inquire the
status of the NetWare Server on the network every period of time. You
can set the Polling Time interval for several seconds.ņNetWare Server
ŇblankintheņFile Server to be servicedŇcolumn can be filled in
the Print ServerName showing in the NetWare ree for Mini-101U Print
Server. ClickņSaveŇto enable the settings.

2
26
Mini-101U
18.When configuring , if you cannot be sure about theņZone
Name
Ňof AppleTalk, you can fill in the blank withņ*Ňor specified your
AppleTalk Zone. The Printer Type Port 1~3 shows the type of the
printer which connecting to the print server. ClickņSaveŇto enable the
settings.
19.Clic k
, SNMP (Simple Network Management Protocol) is a
protocol which uses on controlling and monitoring the network device
from the remote network. You need fill the information inņContactŇ
andņLocationŇfield. Enter the user name inņContactŇcolumn and
the IP address inņLocationŇcolumn.

2
27
Chapter 2 Basic Setup & Configuration
20.Click . Mini-101U Print Server supports SMB (Server Message
Block) protocol; users can send printing jobs through the Network
Neighborhood without installing any drivers of the print servers.ņSMB
Group NameŇcan let you choose a group name on the Network
Neighborhood for the print server. Windows can identify the print
servers on the network through their names, so please choose the Group
Name according to the LAN which you belongs to. You can also check
the ņPass Job When Error OccurredŇcheckbox, and set the interval
of ņWaiting time to Pass JobŇto prevent printer no response when
the printer or network connection fail.
21.On the upper page of
settings you can choose the printing
protocols which you need, and cancel the check in the checkbox if you
do not want to use certain kinds of protocols. At the bottom of the page,
includingņUpgradeŇandņLoad DefaultŇfunctions.

2
28
Mini-101U
22.If you want to update firmware, please go to Planex Communication
Inc. website: http://www.planex.net to find the suitable version of
firmware, and download it to your computer. After that, click
icon
to browse the files and find the latest firmware file you've downloaded.
After finding the firmware file, please clickņUpgradeŇto start
firmware upgrading. During upgrading, please DO NOT cut off the
power to avoid failing of upgrading. When upgrading complete, you
may clickņOKŇto go back to the main page.
1.If upgrading the wrong firmware or upgrading failure might
both damage Mini-101U. And these kinds of problems will be
considered as operation error and we must charge a service fee.
2.Please DO NOT cut off the power by haphazard, or the
firmware upgrade might be failed and cause the system disorder.
Please DO NOT cut off the power or close the upgrading
program until the system notify that the system upgrading
successful.

2
29
Chapter 2 Basic Setup & Configuration
23.If you want to go back to the default s ettings, you can clickņLoad
Default.ŇAnd if you are sure you want to restore the settings, you can
just clickņYe sŇ. If you want to restore the system settings later, you
can clickņNoŇ.
24.If you want to check related information about Mini-101U, you can
click
icon on the task bar and it will show as the following picture.
25.If you want to check the latest status of the print server, you can click
icon, and all the status will refresh immediately, and show the
message at the bottom right corner.

2
30
Mini-101U
1.2.2. Network Ports Quick Setup
1.Click on theņNetwork Ports Quick SetupŇicon on the PrintSerer
Utilities list, and start to configure the print server port.
2.Right side of the window shows theņChosen PortsŇbox and the
print server port in use right now. Choose the port which you want to
configure and the lower columnņConfigure PortŇwill show you
several printing protocols, and you may configure it by just a click. If
you do not need to use the port temporarily, you can click the arrowhead
to the left, and make print server port to the leftņAvailable PortsŇbox.
Click right arrowhead can choose and configure the port again.

2
31
Chapter 2 Basic Setup & Configuration
3.If you have already chosen and configured the print server port, Mini-
101U will automatically add a printer port in the computer. You can click
ņStartƖSettingsƖPrinters and FaxesŇand check the setting of the
printer there.
4.Enter the settings of the printer page, and clickņFileƖServer
PropertiesŇto check the properties of the server.Ą
5.ClickņPortsŇtab and you will seeņPS + last 6 digit of Print Server's
MAC IDŇas the printer port name and that means the printer server is
on the network and can communicate with other devices.

2
32
Mini-101U
1.2.3. Remote Ports
Remote ports can let you connect to the printer which locates on the other
LAN, but be aware that this utility only support TCP/IP protocols. Please
follow the steps below to start configuration.
1.ClickņStartƖProgramsƖPrintServer UtilitiesŇand choose
on the list. If you want to set up remote ports, please clickņAddŇto
start setting up.
2.Type in the Print Server Name, IP Address and then choose the port
number which the print server is connecting to. ClickņOKŇand the
information of print server port which you just set up will shows in the
ņRemote port listŇbox.
3.In order to use remote ports, you have toņAdd a new printerŇand
choose the remote port which you just configured as the printer port
which you want to use.

2
33
Chapter 2 Basic Setup & Configuration
1.2.4. Uninstall
If you want to install any new versions of utilities or drivers, please
uninstall all the components of the current utilities and drivers. At first,
click
ņStartƖProgramsƖPrintServer UtilitiesŇand choose on
the list. After choosing the language you want to use, the InstallShield
Wizard will ask you if you really want to completely remove the selected
application and all of its components. ClickņYes Ňand the wizard will
start to uninstall. After finishing uninstalling, it will show the following
page, and you may clickņFinishŇto exit the wizard.

2
34
Mini-101U
2. Add a New Printer on Windows
If you already install the utilities, no matter using Administrator mode or
Client mode, and set up a new printer port, you may follow the steps below
to add a new printer to the Windows OS
2.1. Windows 98
1.ClickņStartƖSettingsƖPrintersŇon the task bar to start adding a
printer.
Add Printer Wizard might need the driver for your printer, please
prepare the print server's driver disk or download the driver from
the Internet in advance.

2
35
Chapter 2 Basic Setup & Configuration
2.Enter the Printers setting page, please clickņAdd PrinterƖOpenŇ
and then the Add Printer Wizard window will pop up. ClickņNextŇto
continue adding a printer.

2
36
Mini-101U
3.ChooseņLocal printerŇand clickņNextŇto add a new printer.
4.Please choose the model of your printer according to the printer you are
connecting to. And clickņNextŇto continue adding a printer. If there
does not have the driver for your printer or your printer has the latest
driver, you can clickņHave DiskĀŇto find the file of the printer's
driver.

2
37
Chapter 2 Basic Setup & Configuration
5.If you clickņHave diskĀ,Ňyou will have to clickņBrowseĀŇ
to find the folder which has the printer's driver. After making sure of
the manufacture and the printer's model name, please clickņNextŇto
continue adding the printer.
6.After installing the driver for the printer, Windows98 will as you to
choose the printer port type. Please chooseņPSxxxxxx-P1Ň(xxxxxx is
the last 6 digit of your print server's MAC ID). ClickņNextŇto go to
the next step.

2
38
Mini-101U
7.You can give the printer a new name or you can just leave the default
name and clickņFinish.Ň
8.After finishing copying the printer's driver, it will show the following
notice to tell you the setup is completed. ClickņOKŇto exit Add
Printer Wizard.

2
39
Chapter 2 Basic Setup & Configuration
9.To make sure that you already installed the printer completely, please go
back to the desktop and clickņStartƖSettingsƖPrintersŇon the task
bar. There will show you the icon of the printer which you just installed.
Right click on the printer icon and then clickņProperties.ŇChoose
theņDetailsŇtab to check if the printer port was installed correctly (It
should show the name of PSxxxxxx-P1). ClickņOKŇto exit.

2
40
Mini-101U
10.If you want to print test page and check if the connection between print
server and printer is O.K., please clickņGeneralƖPrint Test Page.Ň
2.2. Windows ME
1.ClickņStartƖSettingsƖPrintersŇon the task bar to start adding a
printer.

2
41
Chapter 2 Basic Setup & Configuration
2.Enter the Printers setting page, please clickņAdd PrinterƖOpen.Ň
3.And then the Add Printer Wizard window will pop up. ClickņNextŇto
continue adding a printer.

2
42
Mini-101U
4.ChooseņLocal printerŇand clickņNextŇto add a new printer.
5.Please choose the model of your printer according to the printer you are
connecting to. And clickņNextŇto continue adding a printer. If there
does not have the driver for your printer or your printer has the latest
driver, you can clickņHave DiskĀŇto find the file of the printer's
driver.

2
43
Chapter 2 Basic Setup & Configuration
6.If you clickņHave diskĀ,Ňyou will have to clickņBrowseĀŇ
to find the folder which has the printer's driver. After making sure of
the manufacture and the printer's model name, please clickņNextŇto
continue adding the printer.
7.After installing the driver for the printer, Windows ME will as you to
choose the printer port type. Please chooseņPSxxxxxx-P1Ň(xxxxxx is
the last 6 digit of your print server's MAC ID). ClickņNextŇto go to
the next step.

2
44
Mini-101U
8.You can give the printer a new name or you can just leave the default
name and clickņFinish.Ň
9.After finishing copying the printer's driver, it will show the following
notice to tell you the setup is completed. ClickņOKŇto exit Add
Printer Wizard.

2
45
Chapter 2 Basic Setup & Configuration
10.To make sure that you already installed the printer completely, please go
back to the desktop and clickņStartƖSettingsƖPrintersŇon the task
bar. There will show you the icon of the printer which you just installed.
Right click on the printer icon and then clickņProperties.ŇChoose
theņDetailsŇtab to check if the printer port was installed correctly (It
should show the name of PSxxxxxx-P1). ClickņOKŇto exit.

2
46
Mini-101U
11.If you want to print test page and check if the connection between print
server and printer is O.K., please clickņGeneralƖPrint Test Page.Ň
2.3. Windows 2000
1.ClickņStartƖSettingsƖPrintersŇon the task bar to start adding a
printer.

2
47
Chapter 2 Basic Setup & Configuration
2.Enter the Printers setting page, please clickņAdd PrinterƖOpen.Ň
3.And then the Add Printer Wizard window will pop up. ClickņNextŇto
continue adding a printer.

2
48
Mini-101U
4.ChooseņLocal printerŇand cancel the check in theņAutomatically
detect and install my Plug and Play printer.ŇClickņNextŇto
continue adding a new printer.
5.Please chooseņPSxxxxxx-P1Ň(xxxxxx is the last 6 digit of your print
server's MAC ID). ClickņNextŇto go to the next step.

2
49
Chapter 2 Basic Setup & Configuration
6.Please choose the model of your printer according to the printer you are
connecting to. And clickņNextŇto continue adding a printer. If there
does not have the driver for your printer or your printer has the latest
driver, you can clickņHave DiskĀŇto find the file of the printer's
driver.
7.If you clickņHave diskĀ,Ňyou will have to clickņBrowseĀŇto
find the folder which has the printer's driver.

2
50
Mini-101U
8.You can give the printer a new name or you can just leave the default
name and clickņFinish.Ň
9.The Wizard will ask you if you want to share this printer with others. You
can chooseņDo not share this printerŇorņShare asŇ. ClickņNext
Ň to continue installing.

2
51
Chapter 2 Basic Setup & Configuration
10.The Wizard will ask you if you want to print a test page. You can click
ņYesŇhere and start printing, or clickņNoŇto print a test page later.
ClickņNextŇto finish adding a new printer.
11.The system will automatically complete adding the printer and show
the information as follows. The new printer port already became
ņPSxxxxxx-P1Ň(xxxxxx is the last 6 digit of print serverŅs MAC
ID). After checking the information below, please clickņFinishŇto
exit the Add Printer Wizard.

2
52
Mini-101U
12.To make sure that you already installed the printer completely, please go
back to the desktop and clickņStartƖSettingsƖPrintersŇon the task
bar. There will show you the icon of the printer which you just installed.
Right click on the printer icon and then clickņProperties.ŇChoose
theņPortsŇtab to check if the printer port was installed correctly (It
should show the name of PSxxxxxx-P1). ClickņOKŇto exit.

2
53
Chapter 2 Basic Setup & Configuration
13.If you want to print test page and check if the connection between print
server and printer is O.K., please clickņGeneralƖPrint Test Page.Ň
2.4. Windows XP
1.ClickņStartƖSettingsƖPrinters and FaxesŇon the task bar to start
adding a printer.

2
54
Mini-101U
2.Enter the Printers setting page, please double click onņAdd a PrinterŇ
icon.
3.And then theņAdd Printer WizardŇwindow will pop up. Click
ņNextŇto continue adding a printer.

2
55
Chapter 2 Basic Setup & Configuration
4.ChooseņLocal printer attached to this computerŇand cancel the
check in theņAutomatically detect and install my Plug and Play
printer.ŇClickņNextŇto continue adding a new printer.
5.Please chooseņUse the following port: PSxxxxxx-P1 (Print Server
Network Port)Ň(xxxxxx is the last 6 digit of your print server's MAC
ID). ClickņNextŇto go to the next step.

2
56
Mini-101U
6.Please choose the model of your printer according to the printer you are
connecting to. And clickņNextŇto continue adding a printer. If there
does not have the driver for your printer or your printer has the latest
driver, you can clickņHave DiskĀŇto find the file of the printer's
driver.
7.If you clickņHave diskĀ,Ňyou will have to clickņBrowseĀŇto
find the folder which has the printer's driver.

2
57
Chapter 2 Basic Setup & Configuration
8.You can give the printer a new name or you can just leave the default
name and clickņFinish.Ň
9.The Wizard will ask you if you want to print a test page. You can click
ņYesŇhere and start printing, or clickņNoŇto print a test page later.
ClickņNextŇto finish adding a new printer.

2
58
Mini-101U
10.The system will automatically comp lete addin g the printer and show
the information as follows. The new printer port already became
ņPSxxxxxx-P1Ň(xxxxxx is the last 6 digit of print server's MAC ID).
After checking the information below, please clickņFinishŇto exit the
Add Printer Wizard.
11.To make sure that you already installed the printer completely, please go
back to the desktop and clickņStartƖSettingsƖPrintersŇon the task
bar. There will show you the icon of the printer which you just installed.
Right click on the printer icon and then clickņProperties.ŇChoose
theņPortsŇtab to check if the printer port was installed correctly (It
should show the name of PSxxxxxx-P1). ClickņOKŇto exit.

2
59
Chapter 2 Basic Setup & Configuration
12.If you want to print test page and check if the connection between print
server and printer is O.K., please clickņGeneralƖPrint Test Page.Ň

2
60
Mini-101U
3. Web Setup and ConÀguration
Mini-101U printerservercontainsaWEBmanagement interface,
and is able to be connected from the network with a web browser to its
web setup page. It is recommended that you use IE 4.0, Netscape 4.0 or
newer versions of web browser. The built-in WEB server can be managed
through web browsers and can manage printer server settings.
In order to let you successfully build a connection between Mini-
101U and your network/computer while installing the print
server. We suggest that you should set a static IP address for your
computer, for example, 192.168.1.100 (the default IP address of
Mini-101U is 192.168.1.200) that will help when configuring the
server.
3.1 Web Management Interface
If the IP address of your Mini-101U print server has been set, you should
be able to manage its status from a web browser. The print server status
menu can assist administrators in managing the latest status of the systems
and printers connected with the print server, and also NetWare, TCP/IP,
SNMP, and AppleTalk protocols.
1.Please enter the IP address of the print server on the address bar of the
web browser.

2
61
Chapter 2 Basic Setup & Configuration
2.The following dialog box will appear. Please enter User Nameņadmin
Ňand Passwordņ0000.ŇClickņOKŇto enter the print server's home
page. If you need to save the password on the web browser, please check
theņRemember my passwordŇcheckbox to save the password in the
browser. If you are using a public PC, we do not recommend you to use
this function.
The default User Name of Mini-101U isņadminŇand password
isņ0000.ŇWe suggest that you should change the password as
soon as possible.
2
62
Mini-101U
3.2 Device SetupƖStatus
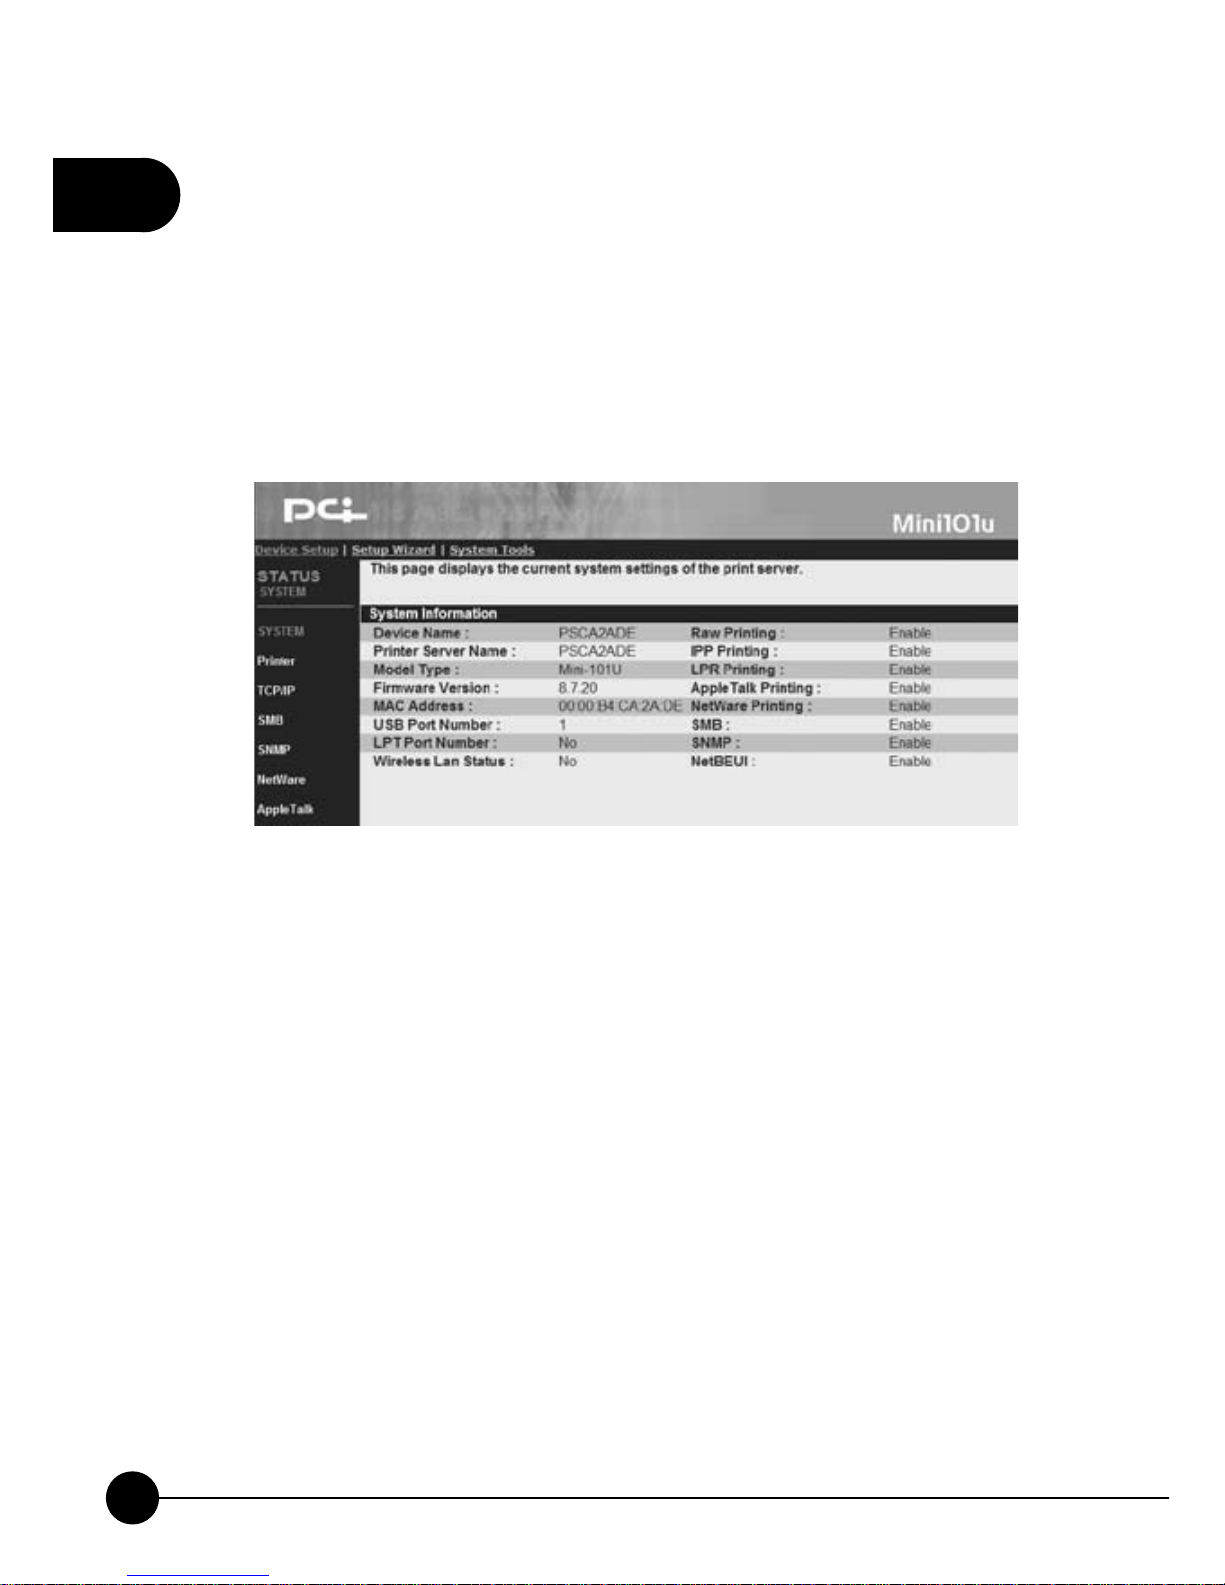
3.2.1 System
After logging in the system, Mini-101U status page will display the
current system status. You can view the latest system status and the current
printing job status.
œDevice NameĈMini-101U can d etect the device name automatically
and shows the last 6 digit of its MAC ID and a prefix PS in the front.
œPrint Server NameĈHere displays the current print serverŅs name
and it can be changed if needed.
œModel TypeĈIt shows the model type of the print server which in use
now.
œFirmware VersionĈYou can check the current firmware version and
update the latest version at any time.
œMAC AddressĈMAC Address/Node ID is unique to each device.
Therefore, every print server has different MAC Address.
œUSB Port NumberĈThe current connecting and using port will be
shown here.
2
63
Chapter 2 Basic Setup & Configuration
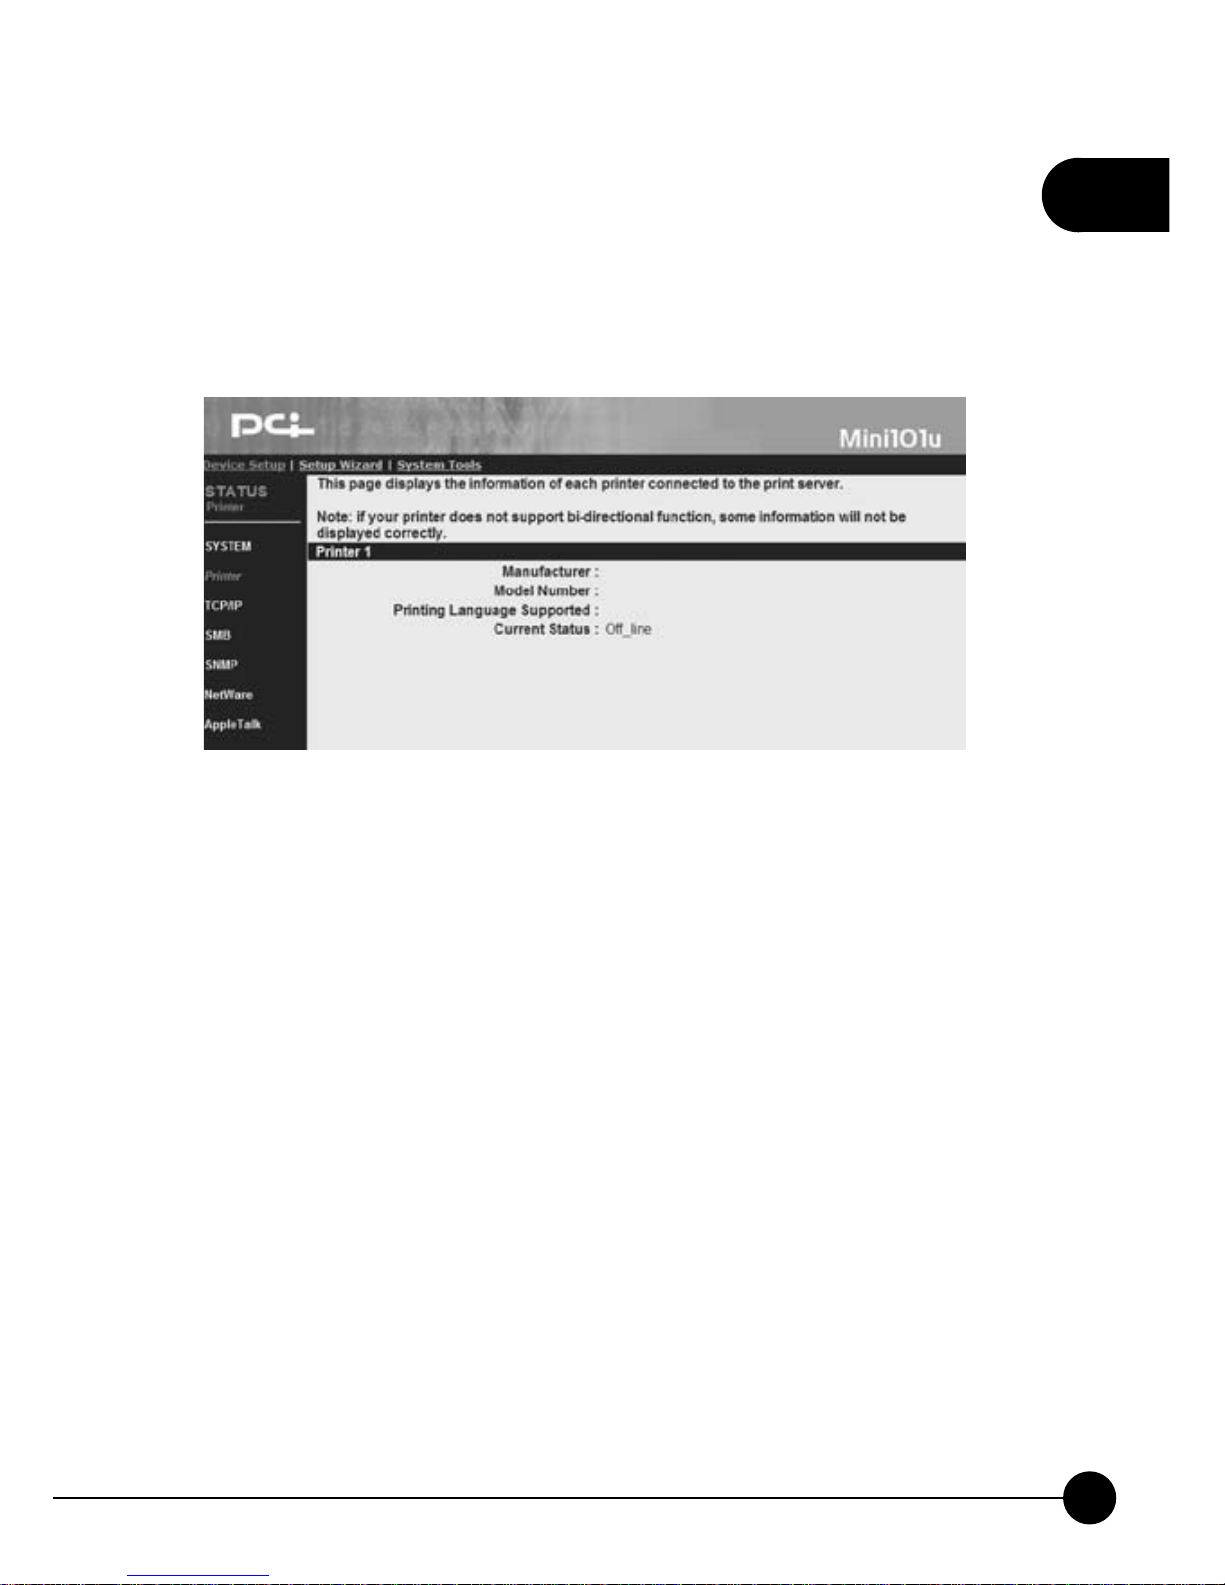
3.2.2. Printer
ClickņDevice SetupŇand it will display a subdirectory. Then click
ņPrinter,Ňthe following page will show you the status and information
of the printer which connects with the print server.
œManufacturerĈYou can check the manufacturer of the printer
connected to printer server.
œModel NumberĈWhen the printer is connected to printer server, it will
display the printer maker and model.
œPrinting Language SupportedĈThis entry displays the support or
usable printing language types.
œCurrent StatusĈThis entry displays the current status of the printer,
for exampleņWaiting for jobŇmeans that the printer is ready to begin
printing anytime.

2
64
Mini-101U
3.2.3. TCP/IP
ClickņDevice SetupŇand the subdirectory will show. Then clickņTCP/
IP,Ňthe following picture will show you the TCP/IP value of the print
server.
œUse DHCP/BOOTPĈIf your network has DHCP/BOOTP server, you
can see if the server distribute IP address to print server or not.
œIP AddressĈHere you can check the current IP address of the print
server. (The default IP address is 192.168.1.200)
œSubnet MaskĈThis entry shows the subnet mask of the print server.
œGatewayĈIt shows the IP address of the print server's gateway.
œUse DHCP ServerĈThis entry will tell you the DHCP server isņOffŇ
orņOn.Ň

2
65
Chapter 2 Basic Setup & Configuration
3.2.4. SMB
ClickņDevice SetupŇand then clickņSMB,Ňthe following page will
display. It shows the SMB settings of the print server.
œSMN functionĈThe SMB function can be Enable or Disable.
œSMB Group NameĈYou can check the SMB Group Name of Mini-
101U Print Server on Windows network here. This name should match
your Windows Network Neighbor's Group Name.
œPass Job When Error OccurredĈHere shows the functionņPass Job
When Error OccurredŇis Enable or Disable.
œWaiting time to pass jobĈIf you enable theņPass Job When Error
OccurredŇfunction, here will show the waiting period which set by
you.

2
66
Mini-101U
3.2.5. SNMP
ClickņDevice SetupŇand then clickņSNMP,Ňthe following page will
show. And it display the SNMP settings of this print server.
œSNMP System ContactĈThis entry shows the related information
about the print server's manager.
œSNMP System LocationĈThis entry displays the location where the
print server locates.

2
67
Chapter 2 Basic Setup & Configuration
3.2.6. NetWare
ClickņDevice SetupŇand click theņNetWareŇon the left side of the
page, it will show you the NetWare settings of the print server.
General Settings
œPolling TimeĈPolling function can be used to inquire the status of the
NetWare server on the network for every period of time.
NetWare Bindery Settings
œUse Bindery ModeĈYou may choose whether Mini-101U need to use/
enable Bindery mode or disable this function.
œName of the File ServerĈHere shows the NetWare server which is
providing the service now.
NetWare Port Settings
œPort1 Attached QueueĈIt shows the status of the print server which
connects to the NetWare port. It can be Connected or Disconnected.

2
68
Mini-101U
3.2.7. AppleTalk
ClickņDevice SetupŇand clickņAppleTalk,Ňthe following picture will
display the settings of the AppleTalk.
AppleTalk Settings
œAppleTalk Zone NameĈIf you are not sure the zone settings of the
AppleTalk, you can set this name asņ*(asterisk)Ňby using Web
Manager Utility.
Printer 1
œPrinter TypeĈThis setting shows the type of the printer which connects
to the print server. If you are using PostScript printer, you can choose
LaserWriter 8 icon on your Macintosh Computer to set up the printer's
driver.
2
69
Chapter 2 Basic Setup & Configuration
3.3. Setup WizardƖSetup
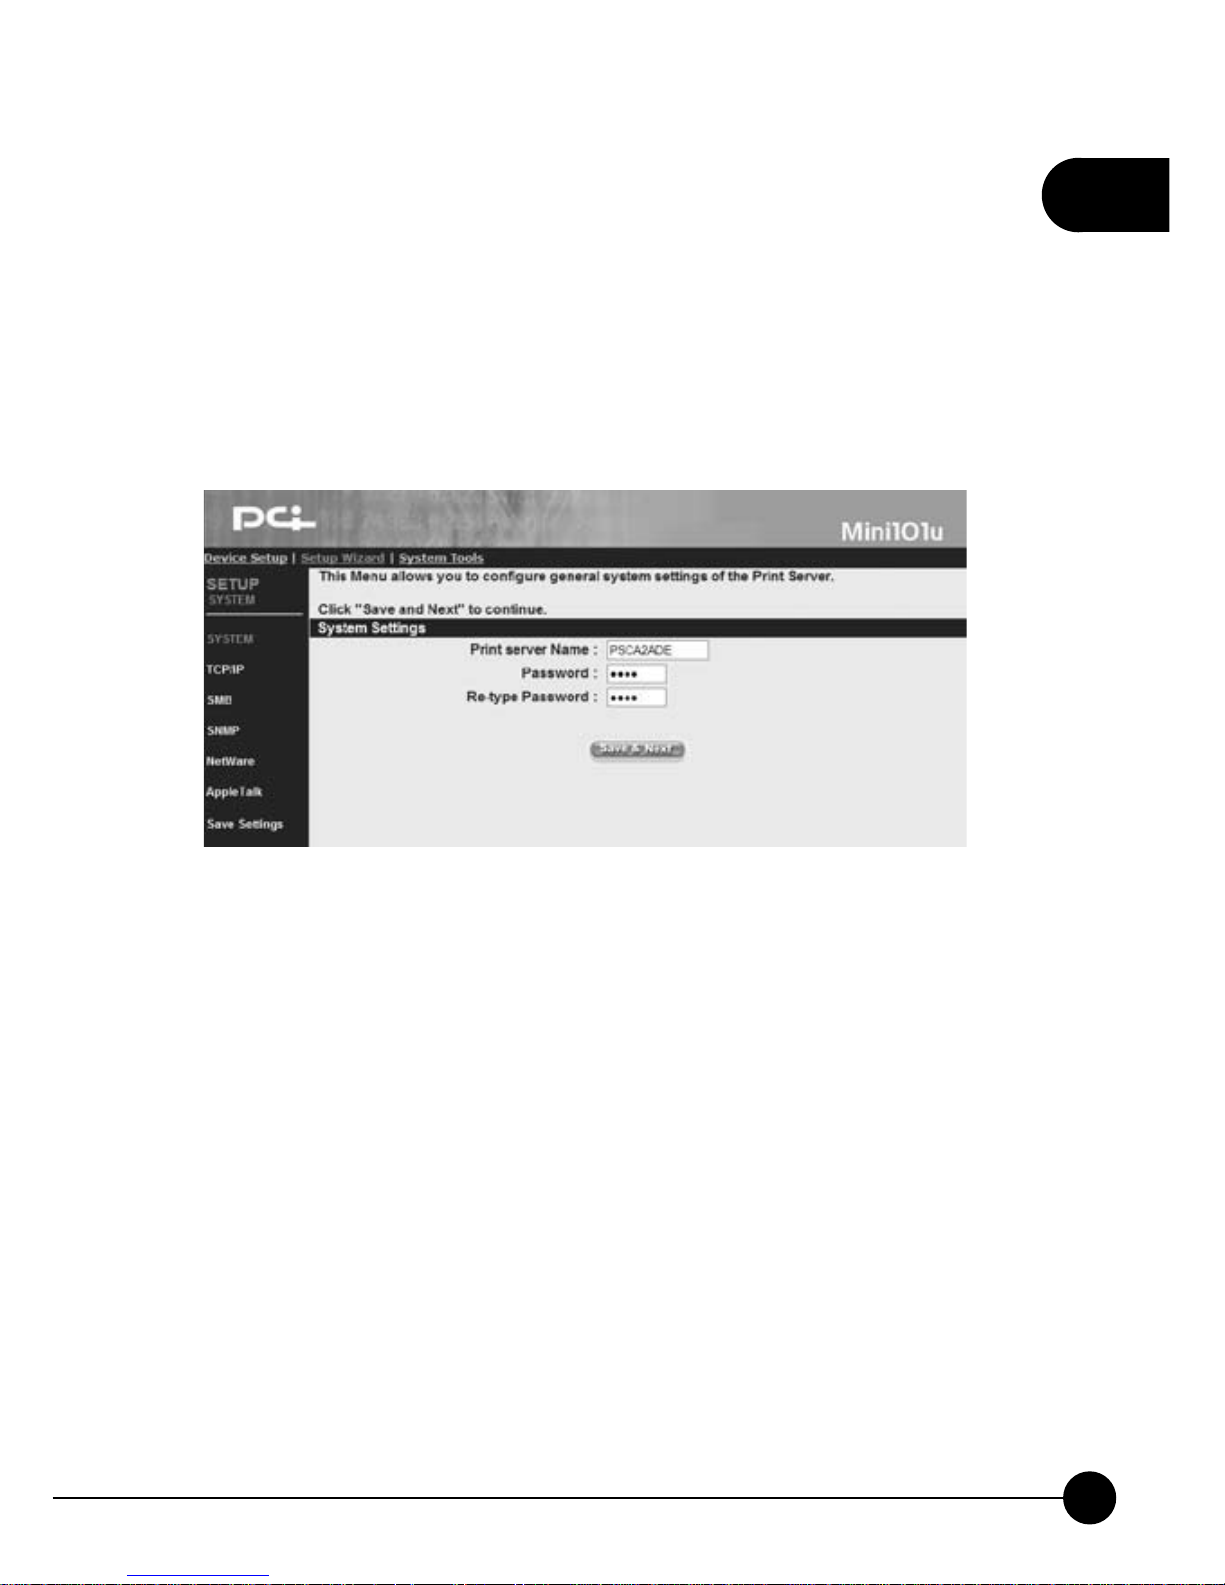
3.3.1. System
ClickņSetup WizardŇon the web browser of the print server's home
page. And clickņSystemŇthen it will show the following picture. It
allows you to configure the general system settings of this print server.
System Settings
œPrint Server NameĈYou can give Mini-101U Print Server a new name
and fill the name in this blank.
œPasswordĈThis password is used for entering the Web configuration
page. You can type a 7 digits password. The default password isņ0000.Ň
œRe-type PasswordĈTo verify the password, please type the new
password again.
œSave & NextĈAfter completing the system settings, please click this
button to go to the next step.

2
70
Mini-101U
3.3.2. Advanced Settings
ClickņSetup WizardŇon the web browser of the print server's home
page. And clickņSystemƖAdvanced SettingsŇthen it will show
the following picture. You can Enable or Disable the two-way printing
function of the print server.
System Configure
You can set the print server's two-way printing functions by Enable or
Disable the item.
œIPXĈInternet Packet eXchange is a kind of protocol which set up by
Novell, if you want Mini-101U support IPX protocol please selectņ
enableŇ.
œT CP/I P Pri nt ing (L PR/I PP/RAW/SMB)ĈTransmission Control
Protocol/Internet Protocol supports LPR/IPP/RAW/SMB printing.
œNetBEUIĈNetBIOS Extended User Interface is a kind of LAN
transmission protocol invented by Microsoft through reinforcing the
NetBIOS features. It can do peer-to-peer protocol.
œAppleTalk PrintingĈLAN of Macintosh Computer uses its printer
port to connect to other computers, and it can use AppleTalk protocol to
communicate printing job with other Macintosh Computers.

2
71
Chapter 2 Basic Setup & Configuration
3.3.3. TCP/IP
ClickņSetup WizardŇon the web browser of the print server's home
page. And clickņTCP/IPŇthen it will show the following picture. You
can change the TCP/IP settings of the print server on this page.

2
72
Mini-101U
TCP/IP Settings
œEnable Obtain TCP/IP settings automatically (Use DHCP/
BOOTP)ĈIf your network has DHCP/BOOTP function, you can
enable this function and let related IP settings to have the IP addresses
automatically from the DHCP server.
œDisable Use the following TCP/IP settingsĈIf you do not use DHCP/
BOOTP, please select this entry and fill in the following information.
œIP Address, Subnet Mask, GatewayĈ If you choose to disable DHCP
server, you have to enter the IP Address, Subnet Mask,andGateway
Address which are at the same network with your computer. If you want
to let Mini-101U provide Internet printing function, you will have to
configure the Gateway Address; otherwise, you can leave it blank.
œPrint Server DHCP ServerĈ You can choose Enable, Disable,or
Auto status. The default status is Disable. If you want to choose Enable
or Auto, you have to assign a range for the IP addresses. Fill in Start IP,
Range, DNS, Subnet Mask, Gateway, and then the DHCP server will
distribute IP addresses to the LAN side users.
1.In order to build a connection successfully, we suggest that you
should give Mini-101U a static IP address.
2.If you choose Auto, DHCP server will only boot when there is
no other DHCP server on the LAN.

2
73
Chapter 2 Basic Setup & Configuration
3.3.4. SMB
Mini-101U Print Server supports SMB (Server Message Block) protocol.
Users can use Network Neighbor to pass printing jobs without installing
the driver of the print server.
ClickņSetup WizardŇon the web browser of the print server's home
page. And clickņSMBŇthen it will show the following picture. You can
change the SMB of the print server on this page.
SMB Configure
œSMB EnableĈChoose Enable or Disable SMB. If you choose to
enable SMB, please enter the SMB Group Name which the print server
belongs to.
œSMB Group NameĈPlease enter the Group Name according to the
LAN you are in.
œPass Job When Error OccurredĈYou can Enable or Disable this
ņPass Job When Error OccurredŇfunction.
œWaiting time to pass jobĈWhen you chooseņPass Job When Error
OccurredŇfunction, this entry will show. You can set the waiting
period from 1~200 seconds.

2
74
Mini-101U
3.3.5. SNMP
ClickņSetup WizardŇon the web browser of the print server's home
page. And clickņSNMPŇthen it will show the following picture. You
can change the SNMP of the print server on this page. SNMP (Simple
Network Management Protocol) is a protocol which uses on controlling
and monitoring the network device from the remote network.
You need fill the information inņContactŇandņLocationŇfield.

2
75
Chapter 2 Basic Setup & Configuration
3.3.6. NetWare
ClickņSetup WizardŇon the web browser of the print server's home
page. And clickņNetWareŇthen it will show the following picture. You
can change the NetWare settings of the print server on this page
General Settings
œPolling TimeĈThe polling interval of Mini-101U can be set from 3 to
29 seconds.
NetWare Bindery Settings
œName of the File ServerĈ If you want to use Bindery mode, please
enter the NetWare's file server name, and the information of the server
can be added from the utilities.

2
76
Mini-101U
3.3.7. AppleTalk
Mini-101U Print Server accepts the printing job sent from the Macintosh
workstation by using AppleTalk protocol through the Ethernet. To do the
basic print server setup in the AppleTalk environment, you only need to
openņChooserŇwindow and choose a printer which connects to the print
server, and then you can start printing.
AppleTalk Settings
œAppleTalk EnableĈYou can choose Enable or Disable the AppleTalk
function.
œAppleTalk Zone NameĈYou can change the AppleTalk Zone Name
which belongs to your print server, or leave the default name (If you set
up this entry, you can make the print server automatically search and
link to the default zone which set up by the AppleTalk.). Only those
workstations which are working in the same zone can share the printer.
If you want to share this printer with all the people, please enter ņ
*(asterisk)Ň in this blank.
Printer 1
œPrinter TypeĈYou can choose default type which is automatically
detected by the print serever (Recommended).

2
77
Chapter 2 Basic Setup & Configuration
3.3.8. Save Settings
After finishing all the settings and clickņSave & Next,Ňit will show the
save settings and reboot dialog box. ClickņOKŇto continue, and please
DO NOT shut down the power when system rebooting. After 20 seconds,
the system will complete saving the settings and show theņReboot
process is completeŇbox, please clickņOKŇto go back to the system
status page.

2
78
Mini-101U
3.4. System ToolsƖSystem
3.4.1. Load Default
Wh e n t h e sys t e m of M i n i-101U P r i n t S e r v e r h a s e rror or wrong
configuration, you may clickņSystem ToolsƖLoad DefaultŇand the
following page will show. If you want to load factory default, please click
ņOK.Ň
If you clickņOKŇto load default, the previous settings will
be erased. Please make sure that you do want to load the factory
default before clickingņOK.Ň

2
79
Chapter 2 Basic Setup & Configuration
3.4.2. Upgrade from Browser
ClickņSystem ToolsƖUpgrade from BrowserŇon the web browser of
the print server's home page, and the following picture will show. If you
want to upgrade your print server, please download the correct firmware
file from our website to your computer: http://www.planex.net . Upgrade
the wrong firmware file will make Mini-101U cannot work, and this kind
of upgrade failure we will take it as operation error, thus we will charge
service fee when repairing.

2
80
Mini-101U
œBrowse
Before upgrading the firmware, please check the current version of
the firmware first, and then download the firmware from the website.
ClickņBrowseŇto search for the downloaded firmware file in your
computer, and then clickņOKŇto start upgrading.
œReboot
After uploading the firmware, you have to reboot the system to activate
the new firmware.
DO NOT cut off the power by haphazard, or the firmware upgrade
might be failed and cause the system disorder. Please DO NOT
cut off the power or close the upgrading program until the system
notify that the system upgrading successful.

81
3
Chapter 3 Advanced Setup & Configuration
3
Advanced Setup & Configuration
1. IPP(Internet Printer Protocol)
Mini-101U supports IPP (Internet Printing Protocol). You can install
proper software to set up an IPP printing path on your Operating System,
for example, on Windows OS.
If you are using Windows NT/2000/XP/2003 OS, you can use web browser
supported by the OS to check print server's built-in web server. Contact
with your network administrator to get the printer server's IP address or
printer's URL, and you may browse the print server's configuration page on
the web browser.
The following steps will demonstrate how to add an IPP printer to the
Windows 2000 OS (The installation steps are all similar even in different
Windows OS)Ĉ
1.ClickņStartƖSettingsƖPrinterŇon the desktop of Windows 2000.
2.ClickņAdd PrinterŇicon and it shows theņAdd Printer WizardŇ
window. You can continue clickņNextŇto start to install the IPP printer.

3
82
Mini-101U
3.ChooseņNetwork PrinterŇand clickņNextŇto go on setting up.
4.ChooseņConnect to a printer on the Internet or on your intranetŇ
and enter the IP address and port number 631 of Mini-101U after a colon
in theņURLŇcolumn. After that, you have to put the appointed print
server name after the URL you just filled in. The default print server
name isņlpt1.ŇClickņNextŇto go to the next step.

83
3
Chapter 3 Advanced Setup & Configuration
If the system can connect with the print server and show the following
page, you may clickņOKŇto continue installing.
5.If the system shows you the following dialog box, it means the name
of the print or the printerŅs URL might be wrong. Please check your
settings and correct the name or the URL of the printer.
6.Please choose the proper driver for your printer. If the driver of your
printer does not exist in the list or you have the latest driver for your
printer, please clickņHave DiskŇto install the printer's driver.

3
84
Mini-101U
7.The wizard will show the following page and you may clickņFinishŇ
to complete the installation of IPP printer.

85
3
Chapter 3 Advanced Setup & Configuration
2. How to Install Network Printer on
Apple OS/X
Mini-101U also supports installation of Network printer on Apple OS/X.
Please follow the steps below to set up the Network printer. Because Apple
OS/X does not support many drivers of the printers, you have to make sure
you have the driver of your printer or Apple OS/X does support the driver
of your printer. Moreover, some of the printers do not support PostScript,
so you have to find the proper driver for your printer; otherwise, there
might be mistakes or failure when printing.
The following example usesĈ
œApple OS/X 10.3.9 system
œPowerMac host which compliant with Apple OS/X
œPrinter's driver which support the printer and compliant with Apple OS/X.
œHP LaserJet 6L
1.Clickņcontrol panelŇon the system tray.Ą

3
86
Mini-101U
2.Click onņPrint and FAXŇicon.
3.After entering theņPrint and FAXŇpage, please click onņSetting
PrinterĀŇ

87
3
Chapter 3 Advanced Setup & Configuration
4.Click onņAddŇicon to add a new printer.
5.ChooseņAppleTalkŇand wait for a while to let Apple OS/X search for
the print servers on the network.

3
88
Mini-101U
6.If Min i-101U has alr eady activated on the LAN, and has enabled the
related settings of Apple on the Web and utility, Apple OS/X will
automatically detect the devices which support AppleTalk. Please choose
ņLocal AppleTalk Zone,Ňand the window will show you the name of
Mini-101U asņPSxxxxxx_P1.Ň
7.If there are any compatible devices, you can find the names of the
devices in the following list.

89
3
Chapter 3 Advanced Setup & Configuration
8.Choose the manufacture of your printer. If you have the compatible or
latest driver of your printer which supports Apple OS/X, please install it
first and then enterņPrint and FAXŇafter finishing installing.
9.Choose the suitable driver for your printer on the list, and clickņAddŇ
to finish installing adding a printer.

3
90
Mini-101U
10.The list of the printers will show the printer which you just added, and
you may print a test page to make sure the printer can work properly.

 Loading...