

Page 1

801.11n Wireless Broadband Router
WNRT-625
Quick Installation Guide
Page 2

Table of Contents
Package Content ............................................................................. 3
Hardware Installation ...................................................................... 4
Web Conguration .......................................................................... 5
Further Conguration ...................................................................... 8
Page 3
Thank you for purchasing PLANET 801.11n Wireless Broadband Router,
Note
WNRT-625. In this Quick Installation Guide, it illustrates the hardware
installation and the basic conguration.
Package Content
1 x WNRT-625
l
1 x Ethernet Cable
l
1 x Power Adapter
l
1 x CD Disk
l
1 x Quick Installation Guide
l
If any of the above items are missing or damaged,
contact your local dealer for support.
3
Page 4
4
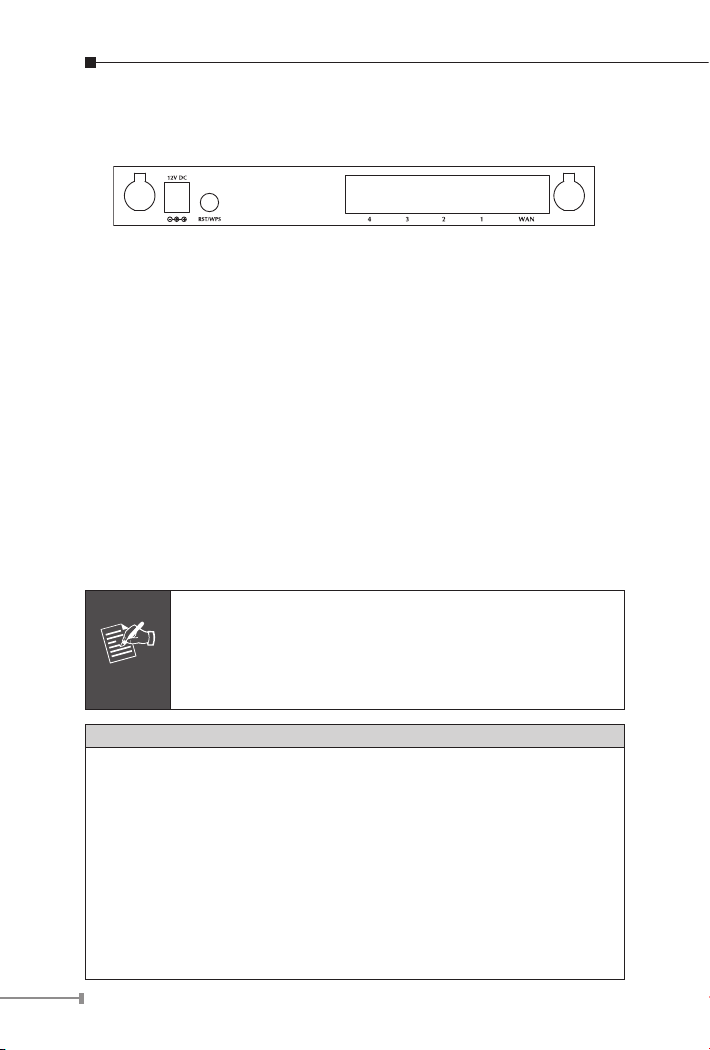
Hardware Installation
Note
1. Locate an optimum location for the WNRT-625.
The best place for your WNRT-625 is usually at the center of your
wireless network, with line of sight to all of your mobile stations.
2. Adjust the antennas of WNRT-625.
Try to adjust them to a position that can best cover your wireless
network. The antenna’s position will enhance the receiving sensitivity.
3. Connect RJ-45 cable to WNRT-625 LAN port.
Connect one of the LAN ports on WNRT-625 to your LAN switch/hub
or a computer with a RJ-45 cable.
4. Connect RJ-45 cable to WNRT-625 WAN port.
Connect the supplied Ethernet cable to xDSL/Cable Modem and the
WAN port on WNRT-625.
5. Plug in power adapter and connect to power source.
After power on, WNRT-625 will start to operate.
ONLY use the power adapter supplied with the WNRT-
625. Otherwise, the product may be damaged.
If you want to reset WNRT-625 to default settings,
press and hold the RST/WPS button over 30 seconds
and release. And then wait for WNRT-625 restart.
RST / WPS Button
This button has two functions:
To Clear All Data and restore the factory default values:
Press the RST (reset) button for longer than 30 seconds until the
LED of power ash, and then the router will reset itself to the factory
default settings.
(warning: your original congurations will be replaced with the factory
default settings)
To make Wi-Fi Protected Setup (WPS) simple and easier:
Press the WPS button (for less than 20 seconds), machine will start
WPS function to build connection between wireless network clients
and this wireless router.
Page 5

Web Conguration
WNRT-625 provides a user friendly interface for users to congure it
via web browser. Please follow the steps below to congure WNRT-625
basic settings.
1. Open your web browser and type WNRT-625 default IP address
(192.168.0.1) into the “Address Field” of you web browser. Before
conguration, please make sure your PC’s IP address is in the same
IP range with WNRT-625.
2. After enter the IP address and press Enter key, you can see the
dialog box appear as below, please enter the User name and Password with “admin”. Then press “OK”.
5
Page 6

6
3. Please click “Quick Setup” on the left panel to setup your WNRT-625.
4. Select a Time Zone that corresponds to your country. Time Zone
setting will affect functions such as Log entries and Firewall. You may
keep the default Time Server address or set a new Time Server’s IP
address for WNRT-625 to adjust it’s time on the Internet. Please click
“Next” to continue.
Page 7

5. The WNRT-625 supports six Internet connection types. This information must be provided by your local ISP.
6. The IP Address Info page appears after you choose suitable Broadband Type. Different Broadband Type will have different IP settings.
You must obtain all necessary information from your local ISP and
enter the correct parameters in this page.
7. Click “Apply” to save the settings.
7
Page 8

8. Please wait for 30 seconds for WNRT-625 restart. Then click “OK”.
Further Conguration
For more detail settings on WNRT-625, please refer to user manual in
the CD-ROM. If you have any difculty on resolving the problem while
installing or using WNRT-625, please feel free to contact PLANET for
support.
8
 Loading...