

Page 1

802.11n Wireless USB Adapter
WNL-U553
User’ s Manual
Version: 2.00
Date: August 2008
Page 2

Copyright
Copyright © 2008 by PLANET Technology Corp. All rights reserved. No part of this publication may be
reproduced, transmitted, transcribed, stored in a retrieval system, or translated into any language or computer
language, in any form or by any means, electronic, mechanical, magnetic, optical, chemical, manual or
otherwise, without the prior written permission of PLANET.
PLANET makes no representations or warranties, either expressed or implied, with respect to the contents
hereof and specifically disclaims any warranties, merchantability or fitness for any particular purpose. Any
software described in this manual is sold or licensed "as is". Should the programs prove defective following
their purchase, the buyer (and not PLANET, its distributor, or its dealer) assumes the entire cost of all
necessary servicing, repair, and any incidental or consequential damages resulting from any defect in the
software. Further, PLANET reserves the right to revise this publication and to make changes from time to time
in the contents hereof without obligation to notify any person of such revision or changes.
All brand and product names mentioned in this manual are trademarks and/or registered trademarks of their
respective holders.
Federal Communication Commission Interference Statement
This equipment has been tested and found to comply with the limits for a Class B digital device, pursuant to
Part 15 of FCC Rules. These limits are designed to provide reasonable protection against harmful
interference in a residential installation. This equipment generates, uses, and can radiate radio frequency
energy and, if not installed and used in accordance with the instructions, may cause harmful interference to
radio communications. However, there is no guarantee that interference will not occur in a particular
installation. If this equipment does cause harmful interference to radio or television reception, which can be
determined by turning the equipment off and on, the user is encouraged to try to correct the interference by
one or more of the following measures:
1. Reorient or relocate the receiving antenna.
2. Increase the separation between the equipment and receiver.
3. Connect the equipment into an outlet on a circuit different from that to which the receiver is
connected.
4. Consult the dealer or an experienced radio technician for help.
FCC Caution
To assure continued compliance. (example-use only shielded interface cables when connecting to computer
or peripheral devices). Any changes or modifications not expressly approved by the party responsible for
compliance could void the user’s authority to operate the equipment.
This device complies with Part 15 of the FCC Rules. Operation is subject to the Following two conditions: ( 1 )
This device may not cause harmful interference, and ( 2 ) this Device must accept any interference received,
including interference that may cause undesired operation.
Federal Communication Commission (FCC) Radiation Exposure
Statement
This equipment complies with FCC radiation exposure set forth for an uncontrolled environment. In order to
avoid the possibility of exceeding the FCC radio frequency exposure limits, human proximity to the antenna
shall not be less than 20 cm (8 inches) during normal operation.
R&TTE Compliance Statement
This equipment complies with all the requirements of DIRECTIVE 1999/5/CE OF THE EUROPEAN
PARLIAMENT AND THE COUNCIL OF 9 March 1999 on radio equipment and telecommunication terminal
Equipment and the mutual recognition of their conformity (R&TTE). The R&TTE Directive repeals and
replaces in the directive 98/13/EEC (Telecommunications Terminal Equipment and Satellite Earth Station
Equipment) As of April 8,2000.
Safety
This equipment is designed with the utmost care for the safety of those who install and use it. However,
special attention must be paid to the dangers of electric shock and static electricity when working with
electrical equipment. All guidelines of this and of the computer manufacture must therefore be allowed at all
times to ensure the safe use of the equipment.
EU Countries Intended for Use
Page 3

The ETSI version of this device is intended for home and office use in Austria Belgium, Denmark, Finland, and
France (with Frequency channel restrictions). Germany, Greece, Ireland, Italy, Luxembourg .The Netherlands,
Portugal, Spain, Sweden and United Kingdom.
The ETSI version of this device is also authorized for use in EFTA member states Iceland, Liechtenstein,
Norway and Switzerland.
WEEE regulation
To avoid the potential effects on the environment and human health as a result of the presence of
hazardous substances in electrical and electronic equipment, end users of electrical and
electronic equipment should understand the meaning of the crossed-out wheeled bin symbol. Do
not dispose of WEEE as unsorted municipal waste and have to collect such WEEE separately.
Revision
User’s Manual for PLANET 802.11n Wireless USB Adapter
Model: WNL-U553
Rev: 2.0 (August 2008)
Part No. EM-WNLU553v2
Page 4

Table of Contents
CHAPTER 1: INTRODUCTION ........................................................................................................................ 5
1-1 FEATURES................................................................................................................................................. 5
1-2 SAFETY INFORMATION................................................................................................................................5
1-3 SPECIFICATION .......................................................................................................................................... 5
1-4 PACKAGE CONTENTS ................................................................................................................................. 6
1-5 MINIMUM SYSTEM REQUIREMENTS ............................................................................................................. 6
CHAPTER 2: INSTALLATION.......................................................................................................................... 7
Hardware Installation................................................................................................................................9
CHAPTER 3: GENERAL CONFIGURATION..................................................................................................11
3-1 LINK INFORMATION....................................................................................................................................11
3-2 CONFIGURATION...................................................................................................................................... 12
3-3 SITE SURVEY .......................................................................................................................................... 15
3-4 PROFILE.................................................................................................................................................. 16
3-5 WPS ...................................................................................................................................................... 17
3-6 ABOUT .................................................................................................................................................... 22
CHAPTER 4: TROUBLESHOOTING ............................................................................................................. 23
Page 5

Chapter 1: Introduction
Complying with the most innovative 802.11n technology, PLANET delivers a reliable and cost effective
solution - WNL-U553. WNL-U553 is a USB2.0 wireless adapter which integrates one transmit channel and
two concurrent receive channels; thus, it supports up to 150Mbps upload and 300Mbps download data rate.
Using 2.4GHz frequency band; it is backward compatible with 802.11b and 802.11g for users to create a new
wireless environment based on existing wireless network.
The WNL-U553 provides WEP , WPA(2)-PSK, WPA(2) EAP-TLS high-level security mechanisms, to protect
the information exchange through wireless. Moreover, in order to simplify the security configurations, WPS
(Wi-Fi Protected Setup) is enhanced in WNL-U553. This design helps inexperienced users to secure their
wireless network quickly and easily.
The WNL-U553 supports most popular operating systems, Windows 2000 / XP / Vista. With advanced
features and high speed capability, the WNL-U553 gives users the greatest performance anytime anywhere.
1-1 Features
z 2.4GHz ISM band, unlicensed operation
z Compliant with IEEE 802.11b, IEEE 802.11g, IEEE 802.11n (draft 2.0)
z USB 2.0 attached interface
z Antenna: Internal two Antennas with one TX and two RX
z Provides up to 300Mbps download and 150Mbps upload data rate
z Supports Wi-Fi Protected Setup (WPS)
z Supports WEP , WPA(2)-PSK, WPA(2) EAP TLS high-level security mechanisms
z Supports most popular operating systems including Windows 2000 , XP and Vista
1-2 Safety Information
In order to keep the safety of users and your properties, please follow the following safety instructions:
1. This USB wireless network card is designed for indoor use only. DO NOT expose this network card to
direct sun light, rain, or snow.
2. DO NOT put this network card at or near hot or humid places, like kitchen or bathroom. Also, do not left this
wireless network card in the car in summer.
3. This network card is small enough to put in a child’s mouth, and it could cause serious injury or could be
fatal. If they throw the network card, the card will be damaged. PLEASE KEEP THIS NETWORK CARD
OUT THE REACH OF CHILDREN!
4. This network card will become hot when being used for long time (This is normal and is not a malfunction).
DO NOT put the network card on a paper, cloth, or other flammable objects after the network card has been
used for a long time.
5. There’s no user-serviceable part inside the network card. If you found that the network card is not working
properly, please contact your dealer of purchase and ask for help. DO NOT disassemble the network card
by your self, warranty will be void.
6. If the network card falls into water, DO NOT USE IT AGAIN BEFORE YOU SEND THE CARD TO THE
DEALER OF PURCHASE FOR INSPECTION.
7. If you smell something strange or even see some smoke coming out from the network card, switch the
computer off immediately, and call dealer of purchase for help.
1-3 Specification
Page 6

Interface USB 2.0
Standards
Conformance
Range Coverage
Operating Mode Infrastructure / Ad-Hoc Mode
Security
RF Modulation
Output Power
Frequency Band 2412-2484MHz
Operating systems Windows 2000 / XP / Vista
Environmental & Mechanical Characteristics
Temperature
Operating Humidity
Dimensions 86.5 x 30 x 13 mm (D x W x H)
Weight 22g
Certifications FCC, CE
Compliant with 802.11b / 802.11g / 802.11n (draft 2.0)
Indoor: Up to 100 meters (depends on environment)
Outdoor: Up to 300 meters (depends on environment)
WEP 64/128bit, WPA-PSK, WPA2-PSK,
WPA EAP-TLS, WPA2 EAP-TLS
DBPSK/DQPSK/CCK/OFDM
(BPSK/QPSK/16-QAM/64-QAM)
11n mode: 14dBm
11g mode: 14dBm
11b mode: 15dBm
Operating: 0 - 40 Degree C
Storage: -10 - 70 Degree C
Operating: 0 - 85%
Storage: 0 - 95% Non-Condensing
1-4 Package Contents
Before you begin the installation, please check the items of your package. The package should include the
following items:
WNL-U553 x 1
USB Cable x 1
Quick Installation Guide x 1
CD x 1 (Included driver and User’s Manual)
If any above item is missing, contact your supplier as soon as possible.
1-5 Minimum System Requirements
Before installation, please check the following requirements with your equipment.
• Make sure your computer is running at least a 300MHz or above processor with 256MB RAM or above
• Make sure the USB ports are is USB 2.0 port
• The operating system on your computer must be the following: Windows 2000 (Service Pack 4), XP
(Service Pack 2), Windows Vista
• A draft 802.11n or 802.11b/g access point.
• Make sure the environment has minimal interference and obstructions.
Page 7

Chapter 2: Installation
Note 1: If you had ever installed the other Wireless Cards before,
please uninstall the existed drivers and utilities first.
Note 2: Please do NOT insert WNL-U553 to PC’s USB port before
installing utility.
1. Insert Drivers and User’s manual CD to your CD drive, then a welcome web will appear.
2. Please click the utility hyper link to start install driver and utility. If the web screen doesn’t
appear, please click the “Start” and choose “Run”. When dialog box appears, enter
“E:\Utility\setup.exe”.
3. When this screen appears, please press “Next” to continue.
4. Installation will start copy driver and utility to your OS.
Page 8
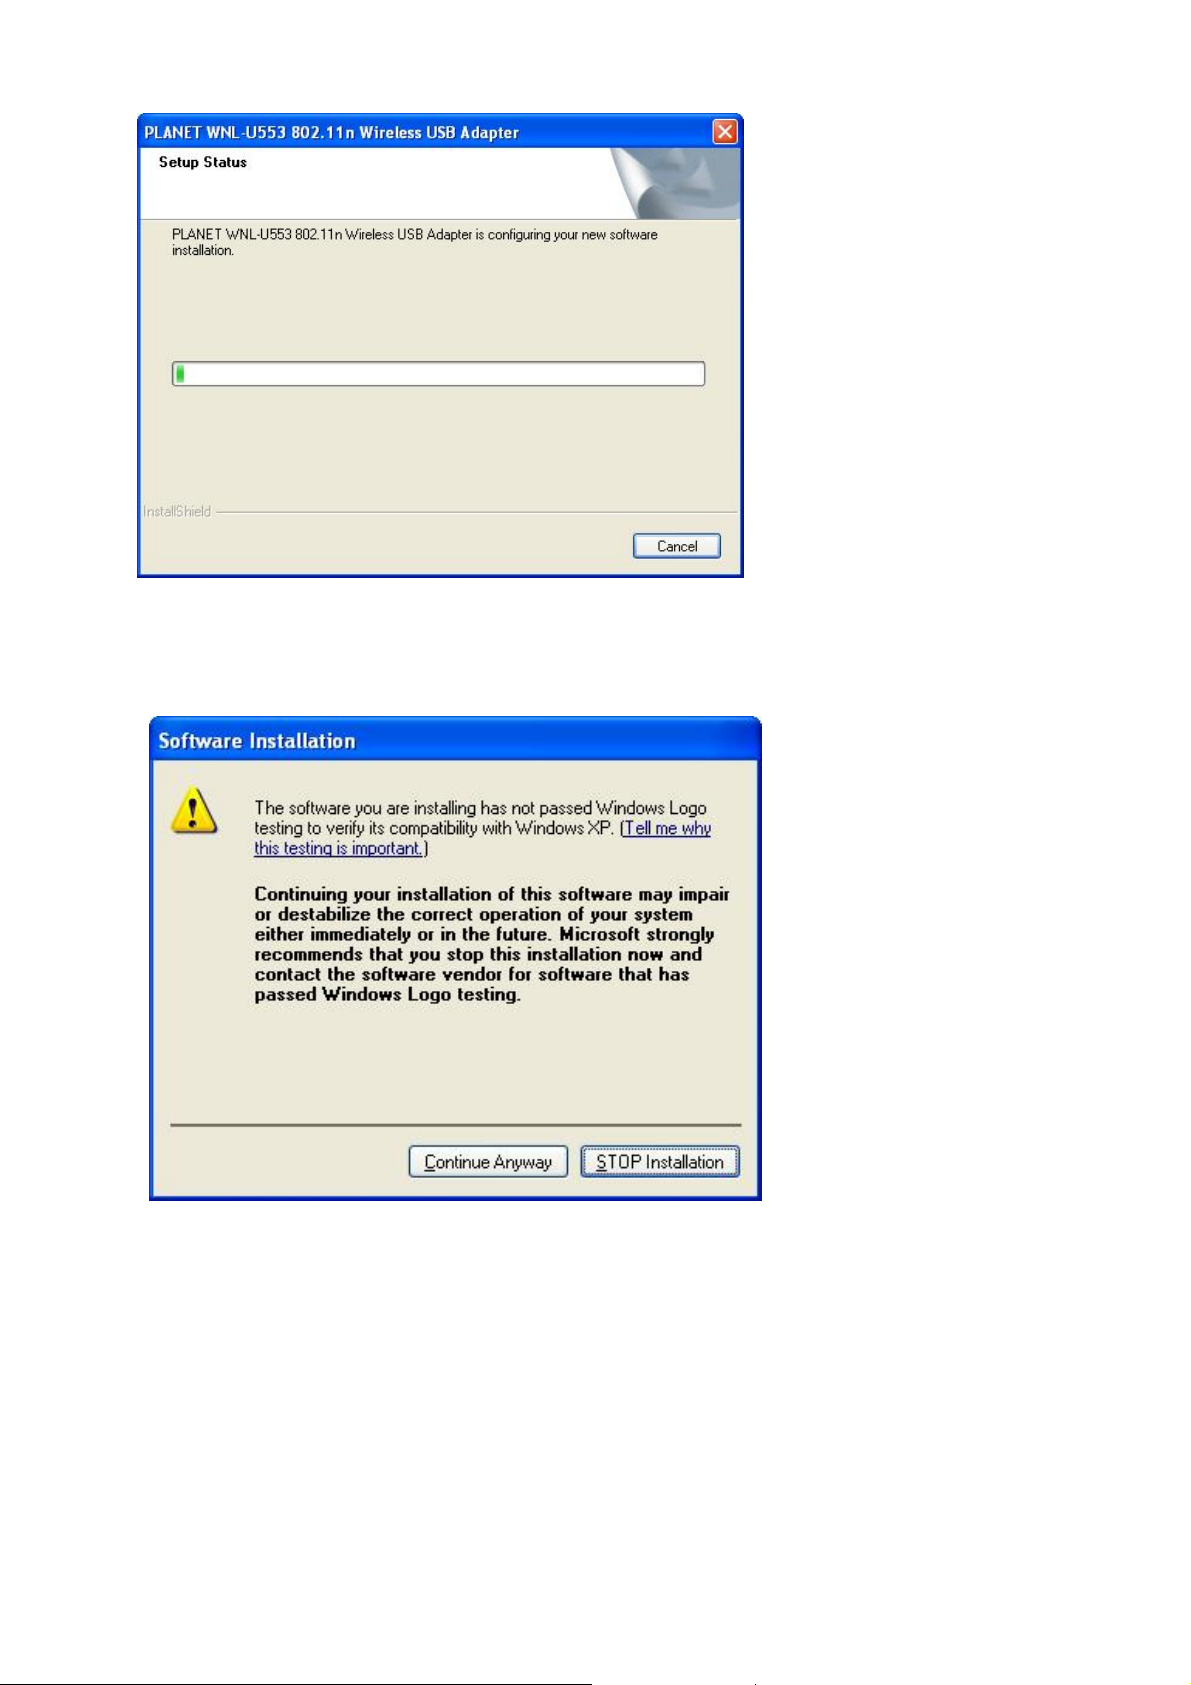
5. When this dialog box appear, please click “Continue Anyway”.
6. Please click “Finish” to complete the installation.
Page 9

Hardware Installation
1. Please connect WNL-U553 to your PC’s USB port. If your PC’s USB interface is not
USB 2.0, Windows will prompt you there is a “High-Speed USB Device Plugged into
non-High-Speed USB hub”. Please don’t worry about this and keep installing.
2. After properly connect the WNL-U553 to your PC, Windows will detect WNL-U553 and
show you this dialog box. You can see the device name in this dialog box. If the device
name is correct, please press ”Next” to the driver installation.
3. Windows may show you this driver is not passed Windows Logo test, please select
Page 10

“Continue Anyway” to continue.
4. After the driver installation complete appears. Please click “Finish”.
Page 11

Chapter 3: General Configuration
3-1 Link Information
The default page is as below after you launch the Utility program.
Status: Shows the SSID associated, which can be used to identify the wireless network.
SSID: Shows current SSID, which must be the same for the wireless client and AP in order
for communication to be established.
Wireless Mode: Shows the current wireless mode used for wireless communication.
Encryption: Shows the current encryption mode used for wireless network.
Tx Rate: Shows the current data rate used for transmitting.
Channel: Shows the current channel for communication.
Signal Strength: Shows the wireless signal strength of the connection between the
108Mbps Wireless Network USB Dongle with the Access Point.
Data Rate: Shows the statistics of data transfer, and the calculation is based on the
number of packets transmitted and received.
Page 12

3-2 Configuration
This is the page where you can change the basic settings of the Access Point with the
minimum amount of effort to implement a secure wireless network environment.
Profile Name: Shows the Profile Name.
SSID: Service Set Identifier, which is a unique name shared among all clients in a wireless
network. The SSID must be identical for each client in the wireless network.
Wireless Mode: There are two modes available for selection
● Infrastructure – to establish wireless communication with the LAN and other
wireless clients through the use of Access Points.
● Ad-Hoc – to establish point-to-point wireless communication directly with other
wireless client devices.
Authtication: The following options are available: Open System, Shared Key, WPA-PSK,
WPA2-PSK, WPA EAP-TLS, WPA2 EPA-TLS. Select Open System, Shared Key for
WEP data encryption feature.
Open System or Shared Key
Open System and Shared Key require the user to set a WEP key to exchange data with
other wireless clients that have the same WEP key.
Page 13

Default Key: select one of the 4 keys to use.
Network Key: choose the encryption way, either in HEX or ASCII formats, and enter the
password in the blank space.
Key Length: select 64 or 128 bits as the length of the keys
Key Format: HEX or ASCII
WPA-PSK / WPA2-PSK
If using the WPA-PSK/WPA2-PSK authentication method, please select the Encryption
type for TKIP or AES then enter the Passphrase key. The minimum length is 8 characters.
WPA EAP-TLS
If using the WPA/WPA2 EAP-TLS authentication method, please select the Encryption type
for TKIP or AES then select the WPA/WPA2 Certificate from drop down list.
Page 14

Page 15

3-3 Site Survey
This page allows you to enable the Site Survey function to scan for the available wireless
network (wireless clients and Access Points) and establish wireless communications with
one.
Available Network – displays the wireless networks (wireless clients and Access Points)
that are in your signal range. Select any one of them to establish communications by simply
mouse double-click or click on the “Connect” button. Click “Refresh” button to start
scanning for available network again.
Page 16

3-4 Profile
You can create and manage the created profiles for Home, offices or public areas. By
double-clicking on one of the created profile, the setting will adapt to the configuration such
as SSID, channel, and WEP settings saved by that particular profile.
Add: To add a profile. Then, the following screen would appear.
Remove: To remove the selected the profile
Properties: To view and change its settings of the profile.
Edit: Edit an exist profile. The screen will back to profile. Edit the SSID and select the
Wireless Mode, Authentication and Encryption then click Apply to save the profile. When
the Profile name was changed, a new profile will be added in the list.
Connect: Selected a profile from list then click the Connect to connecting to the wireless
network with the profile setting.
Page 17
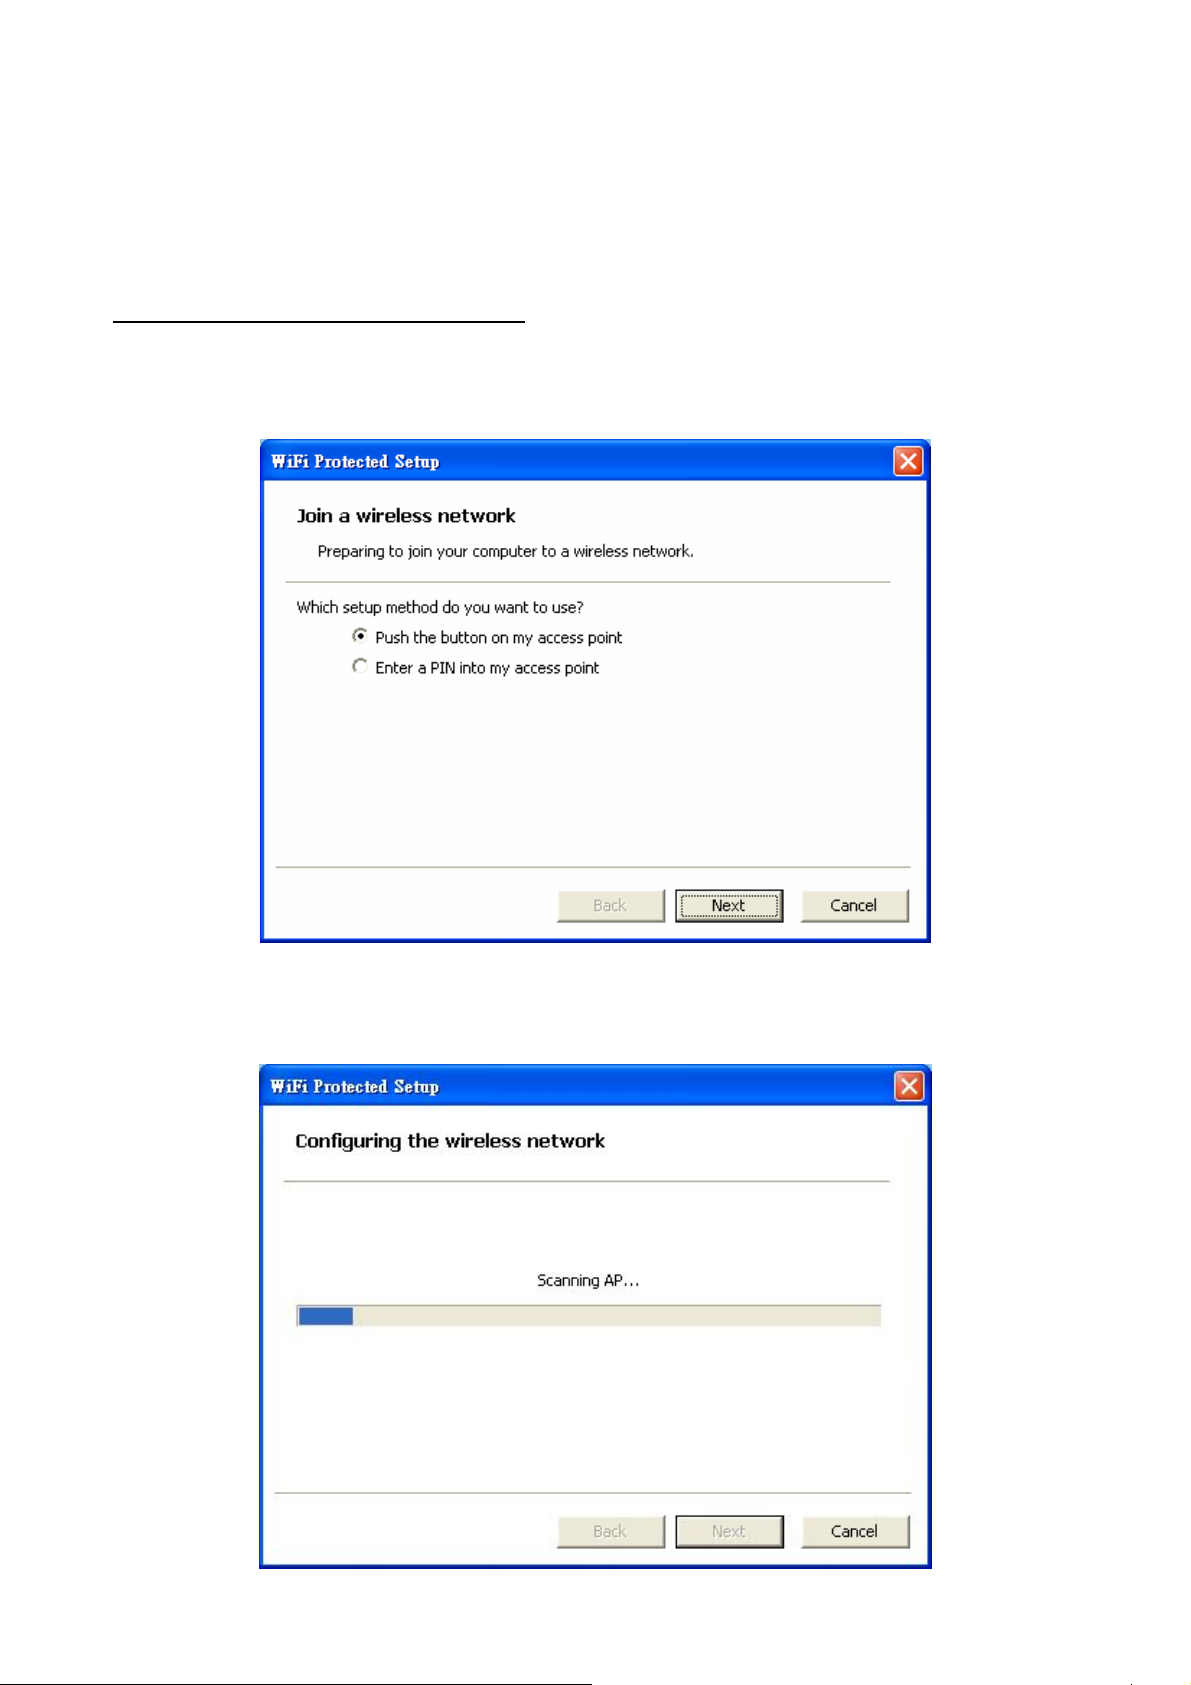
3-5 WPS
WiFi Protected Setup (WPS) is an optional certification program from the Wi-Fi Alliance that
is designed to ease the task of setting up and configuring security on a wireless network.
There are two methods used in the WPS as below instruction.
Push the button on my access point
Using the WPS configuration with the “Push the button on my access point” method, the
configuration steps as below:
1) Selected the “Push the button on my access point”.
2) Push the WPS configuration button on your wireless access point or router.
3) Cliek the Next button start the WPS configuration.
Page 18
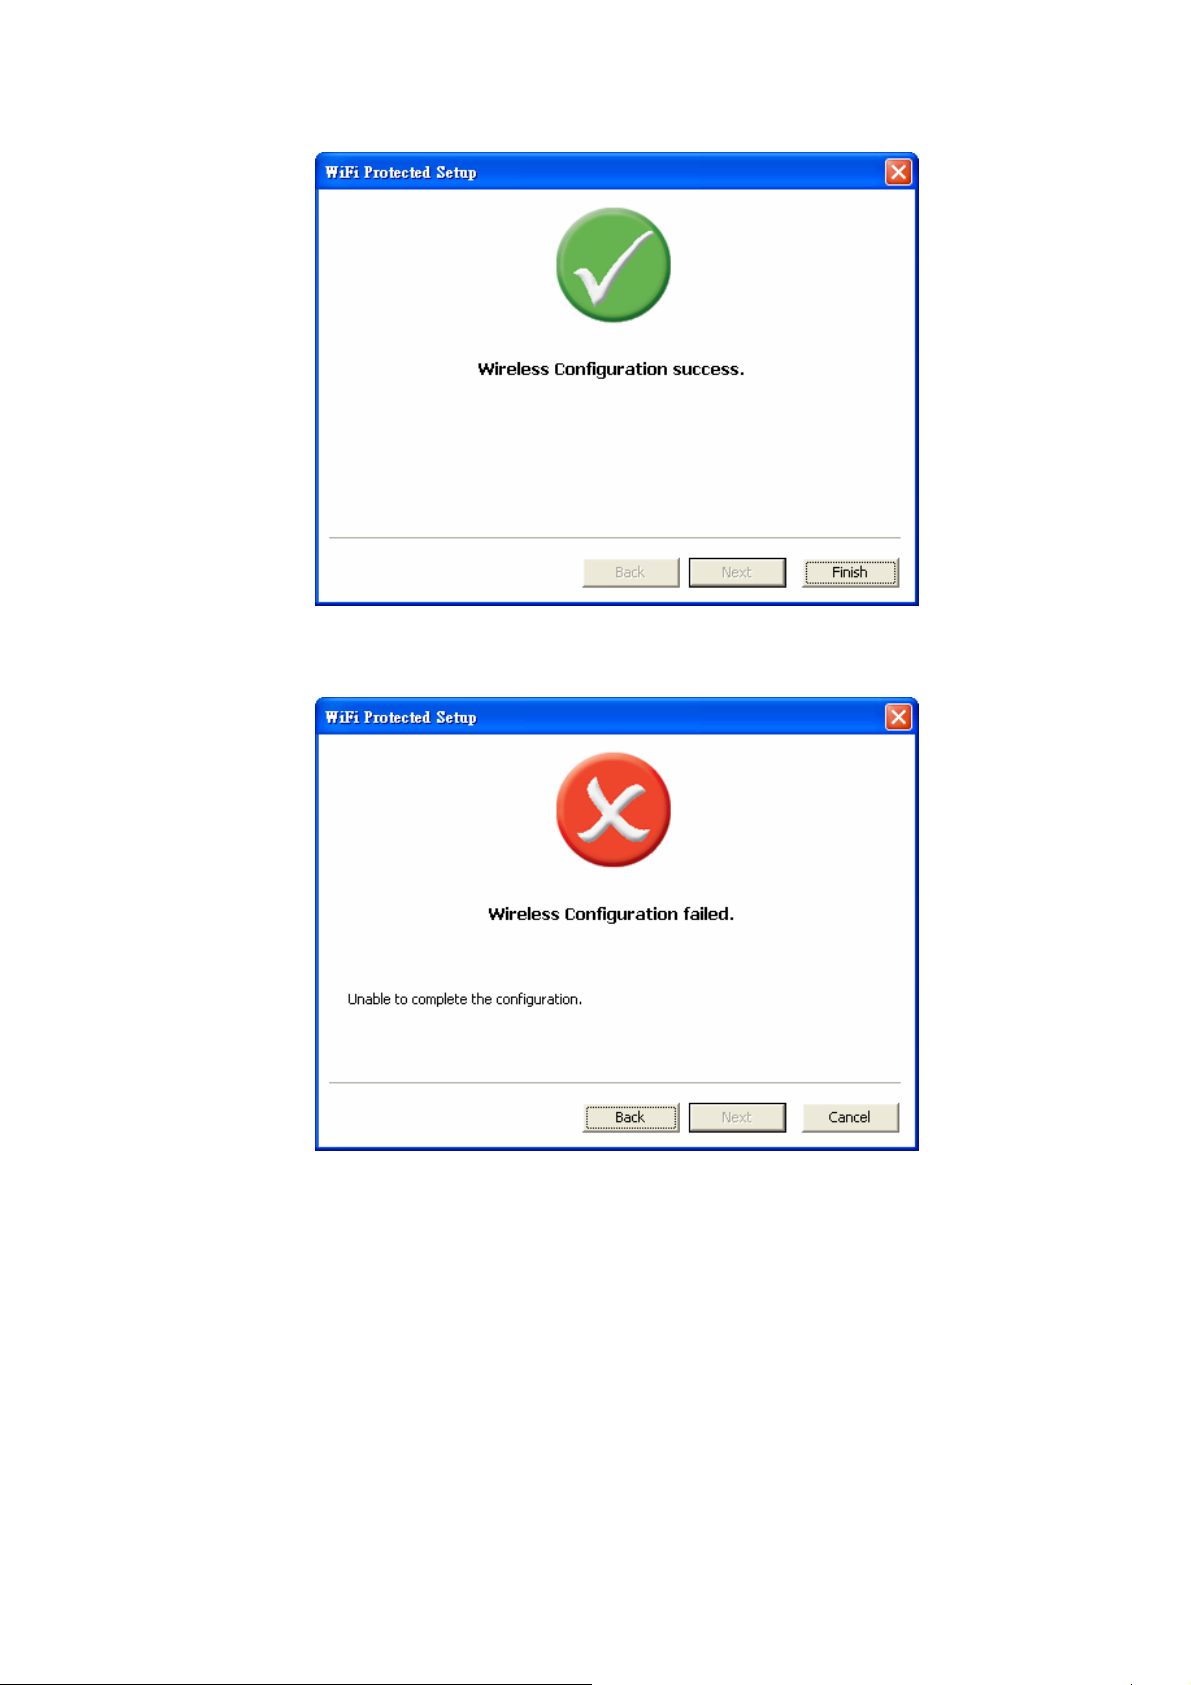
4) If the WPS configuration was successful, the follow window will show on.
5) If the WPS configuration was failed, the follow window will show on.
Page 19

Enter a PIN into my access point
Using the WPS configuration with the “Enter a PIN into my access point”
method, the configuration steps as below:
1) Selected the “Enter a PIN into my access point”, the PIN will be show on
the button of the windows.
2) Enter the PIN code into the WPS “Clint PIN number” of you wireless access
point or router then click the Start PIN button, the wireless access point or
router will start the WPS configuration process.
3) Selected a wireless access point or router which one will be connecting
then click the Next button start the WPS configuration. If the “Automatically
select the network” was checked, the setup step will be skip.
Page 20

4) If the WPS configuration was successful, the follow window will show on.
Page 21

5) If the WPS configuration was failed, the follow window will show on.
Page 22

3-6 About
This screen displays information about WNL-U553 Adapter, such as the Driver
and Utility version. When a new version of the utility becomes available for
upgrade, users will be able to identify by version numbers.
Page 23

Chapter 4: Troubleshooting
This section provides solutions to problems usually encountered during the
installation and operation of the USB adapter. Read the description below to
diffuse your doubts.
What is the IEEE 802.11g standard?
802.11g is the latest IEEE standard for high-speed WLAN
communications that provides up to 54Mbps data rate in the 2.4GHZ
band. It has become the mainstream technology of current WLAN
networks. It uses OFDM modulation to reach higher data
transmission rate and backward compatible with 802.11b
What is the IEEE 802.11b standard?
The IEEE 802.11b WLAN standard subcommittee, which formulates
a standard for the industry. The objective is to enable WLAN
hardware from different manufacturers to interoperate.
What features does the IEEE 802.11 standard provide?
The product supports the following IEEE 802.11 functions:
‧ CSMA/CA plus Acknowledge protocol
‧ Multi-Channel Roaming
‧ Automatic Rate Selection
‧ RTS/CTS feature
‧ Fragmentation
‧ Power Management
What is Ad-hoc?
An Ad-hoc mode is a wireless network type in which a group of
computers equipped with wireless adapters are connected as an
independent wireless LAN without any access point. All computers
operating in this mode must be configured to share the same radio
channel and SSID.
What is Infrastructure?
The difference between Infrastructure network and Ad-hoc network
is that the former requires an Access point. The Infrastructure mode
is appropriate for enterprise-scale wireless access to a central
database or provides various wireless applications for mobile users.
What is BSS ID?
An Infrastructure network is called a Basic Service Set (BSS). All the
wireless stations in a BSS must share the same BSS ID.
What is TKIP?
It is another encryption method to overcome the inherent
weaknesses of WEP, a next generation of WEP. It adopts new
algorithm (Michael) to generate 128/192-bit encryption keys and
provides per-packet key mixing, a message integrity check and a
re-keying mechanism.
Page 24

What is AES?
AES (Advanced Encryption Standard) is a chip-based encryption
method of new generation and has been incorporated into the
newly-approved security standard 802.11i. It supports 128, 192 and
256-bit encryption key length and adopts Rijndael algorithm. It is
widely believed it is impossible to crack AES.
What is DSSS? What is FHSS? And w hat are their differences?
Frequency-hopping spread-spectrum (FHSS) uses a narrowband
carrier that changes frequency in a pattern that is known to both
transmitters and receivers. Properly synchronized, the net effect is to
maintain a single logical channel. To an unintended receiver, FHSS
appears to be short-duration impulse noise. Direct-sequence
spread-spectrum (DSSS) generates a redundant bit pattern for each
bit to be transmitted. This bit pattern is called a chip (or chipping
code). The longer the chip is, the greater the probability that the
original data can be recovered. Even if one or more bits in the chip
are damaged during transmission, statistical techniques embedded
in the radio can recover the original data without-the need for
retransmission. To an unintended receiver, DSSS appears as low
power wideband noise and is rejected (ignored) by most narrowband
receivers.
What is Spread Spectrum?
Spread Spectrum technology is a wideband radio frequency
technique developed by the military for use in reliable, secure,
mission-critical communication systems. It is designed to trade off
bandwidth efficiency for reliability, integrity, and security. In other
words, more bandwidth is consumed than in the case of narrowband
transmission, but the trade off produces a signal that is, in effect,
louder and thus easier to detect, provided that the receiver knows
the parameters of the spread-spectrum signal being broadcast. If a
receiver is not tuned to the right frequency, a spread –spectrum
signal looks like background noise. There are two main alternatives,
Direct Sequence Spread Spectrum (DSSS) and Frequency Hopping
Spread Spectrum (FHSS).
 Loading...