

Page 1
Wireless Access Point
WAP-1963
User’s Manual
Page 2

Copyright
Copyright 2003 by PLANET Technology Corp. All rights reserved. No part of this publication may
be reproduced, transmitted, transcribed, stored in a retrieval system, or translated into any language or
computer language, in any form or by any means, electronic, mechanical, magnetic, optical, chemical,
manual or otherwise, without the prior written permission of PLANET.
PLANET makes no representations or warranties, either expressed or implied, with respect to the
contents hereof and specifically disclaims any warranties, merchantability or fitness for any particular
purpose. Any software described in this manual is sold or licensed "as is". Should the programs prove
defective following their purchase, the buyer (and not PLANET, its distributor, or its dealer) assumes
the entire cost of all necessary servicing, repair, and any incidental or consequential damages resulting
from any defect in the software. Further, PLANET reserves the right to revise this publication and to
make changes from time to time in the contents hereof without obligation to notify any person of such
revision or changes.
All brand and product names mentioned in this manual are trademarks and/or registered trademarks of
their respective holders.
Federal Communication Commission Interference Statement
This equipment has been tested and found to comply with the limits for a Class B digital device,
pursuant to Part 15 of FCC Rules. These limits are designed to provide reasonable protection against
harmful interference in a residential installation. This equipment generates, uses, and can radiate radio
frequency energy and, if not installed and used in accordance with the instructions, may cause harmful
interference to radio communications. However, there is no guarantee that interference will not occur in
a particular installation. If this equipment does cause harmful interference to radio or television
reception, which can be determined by turning the equipment off and on, the user is encouraged to try
to correct the interference by one or more of the following measures:
1. Reorient or relocate the receiving antenna.
2. Increase the separation between the equipment and receiver.
3. Connect the equipment into an outlet on a circuit different from that to which the receiver is
connected.
4. Consult the dealer or an experienced radio technician for help.
FCC Caution
To assure continued compliance. (example-use only shielded interface cables when connecting to
computer or peripheral devices). Any changes or modifications not expressly approved by the party
responsible for compliance could void the user’s authority to operate the equipment.
This device complies with Part 15 of the FCC Rules. Operation is subject to the Following two
conditions: ( 1 ) This device may not cause harmful interference, and ( 2 ) this Device must accept any
2
Page 3

interference received, including interference that may cause undesired operation.
Federal Communication Commission (FCC) Radiation Exposure
Statement
This equipment complies with FCC radiation exposure set forth for an uncontrolled environment. In
order to avoid the possibility of exceeding the FCC radio frequency exposure limits, human proximity to
the antenna shall not be less than 20 cm (8 inches) during normal operation.
R&TTE Compliance Statement
This equipment complies with all the requirements of DIRECTIVE 1999/5/CE OF THE EUROPEAN
PARLIAMENT AND THE COUNCIL OF 9 March 1999 on radio equipment and telecommunication
terminal Equipment and the mutual recognition of their conformity (R&TTE)
The R&TTE Directive repeals and replaces in the directive 98/13/EEC (Telecommunications Terminal
Equipment and Satellite Earth Station Equipment) As of April 8,2000.
Safety
This equipment is designed with the utmost care for the safety of those who install and use it. However,
special attention must be paid to the dangers of electric shock and static electricity when working with
electrical equipment. All guidelines of this and of the computer manufacture must therefore be allowed
at all times to ensure the safe use of the equipment.
EU Countries Not Intended for Use
The ETSI version of this device is intended for home and office use in Austria Belgium, Denmark,
Finland, France (with Frequency channel restrictions). Germany, Greece, Ireland, Italy,
Luxembourg .The Netherlands, Portugal, Spain, Sweden and United Kingdom.
The ETSI version of this device is also authorized for use in EFTA member states Iceland,
Liechtenstein, Norway and Switzerland.
Potential restrictive use
France: Only channels 10,11,12 and 13
Revision
User’s Manual for PLANET Wireless Access Point
Model: WAP-1963
Rev: 1.0 (November, 2003)
Part No. EM-WAP1963
3
Page 4

TABLE OF CONTENTS
Chapter 1 Introduction 1
1.1 Package Contents 1
1.2 System Requirements 1
1.3 Features 1
1.4 Specification 2
Chapter 2 Hardware Installation 3
2.1 Hardware Connection 3
Chapter 3 Configuration 4
3.1 Configure through Web Browser 4
3.1.1 Home: 5
3.1.2 Wireless Settings: 6
3.1.3 Wireless Advance Settings: 8
3.1.4 Security: 12
3.1.5 MAC Filtering: 14
3.1.6 System Utility: 16
3.1.7 Configuration Tool 18
3.1.8 Upgrade 19
3.1.9 Reset 20
Chapter 4 Application 21
4.1 Access Point mode 21
4.2 Wireless Station mode 21
Chapter 5 Troubleshooting 22
4
Page 5

Chapter 1 Introduction
If any of the above items are missing, contact your supplier as soon as
Thank you for purchasing WAP-1963. This device is an access point for IEEE 802.11b 2.4GHz wireless
network. You can use this access point to build up a wireless LAN, any wireless LAN station can join the
wireless network. It has support 64/128-bit WEP (Wired Equivalent Privacy) Encryption and MAC
address filter function to consolidate the wireless network security, you can prevent unauthorized
wireless stations from accessing your wireless network.
With it’s Station mode, that can served as a wireless station (Infrastructure or Ad-Hoc). Connected to
you LAN, it is able to access the network via Access Point or join to a small wireless network without
Access Points. It’s data rate support 11, 5.5, 2 and 1 Mbps. Maximize network efficiency while minimizing
your network investment and maintenance costs.
This product provides easy to use user interface and allows users to configuring from web browser. Also
it integrates DHCP server to provide multiple wireless and wired users to get an IP address automatically.
With the versatile of features, this product is the best choice for you to integrate your wireless and wired
network seamlessly.
1.1 Package Contents
Make sure that you have the following items:
• One WAP-1963
• One AC Power Adapter
• One User’s Manual CD
• One Quick Installation Guide
• One External Antenna
Note:
possible.
1.2 System Requirements
Before installation, please check the following requirements with your equipment.
• Pentium Based (And Above) IBM-Compatible PC System
• CD-ROM drive
• Windows 98/ME/2000/XP/Server2003 Operating System with TCP/IP protocol
1.3 Features
• Compliant with the IEEE 802.11b (DSSS) 2.4GHz specification
• High data rate 11, 5.5, 2 and 1Mbps network speed, Auto rate fallback
1
Page 6

• Seamlessly integrate wireless and wired Ethernet LAN networks
• Interferences Provide 64/128-bit WEP Encryption and MAC Filter to protect the wireless data
transmissions
• Supports Wireless AP/Station mode
• Built-in DHCP server supports auto IP addresses assignment
• Web-based configuration
• Auto Fall-Back Data Rate for Long-Distance Communication and Noisy Environments
1.4 Specification
Standard IEEE 802.11b Compliant
Signal Type DSSS (Direct Sequence Spread Spectrum)
Modulation QPSK / BPSK / CCK
Port One 10/100BASE-TX
Antenna One Dipole Antenna
Data Encryption 64 bit / 128 bit WEP encryption
Frequency 2.4GHz - 2.4835GHz
11 Channels (US/ Canada, FCC)
Channel
13 Channels (Europe, ETSI)
14 Channels (Japan, TELEC)
Data Rate Up to 11Mbps(with automatic scale back)
(In Open Environment)
11M 448 feet = 140m
Range Coverage
LED Indicators PWR, WLAN, LAN
Power Requirement 12V DC, 0.5A
Temperature
Humidity
Dimensions 160 x 87 x 28 mm
Output Power 18dBm
Antenna Gain 2dBi
Antenna Connector Reversed Polarity SMA Male
5.5M 640 feet = 200m
2M 864 feet = 270m
1M 1100 feet = 340m
Operating :0 ~ 55 degree C
Storage: -20 ~ 70 degree C
Operating: 10 ~ 90%
Storage: 10 ~ 90% Non-Condensing
2
Page 7

Chapter 2 Hardware Installation
1963 to default settings, press the Reset button 5 second. And
Before you proceed with the installation, it is necessary that you have enough information about the
WAP-1963.
2.1 Hardware Connection
12V DC
+
1. Locate an optimum location for the WAP-1963. The best place for your WAP-1963 is usually
at the center of your wireless network, with line of sight to all of your mobile stations.
2. Assemble the antennas to WAP-1963. Try to place them to a position that can best cover your
wireless network. The antenna’s position will enhance the receiving sensitivity.
3. Connect RJ-45 cable to WAP-1963. Connect this WAP-1963 to your LAN switch/hub or a single
PC.
4. Plug in power adapter and connect to power source. After power on, WAP-1963 will start to
work.
LAN
RESETANT
Note: ONLY use the power adapter supplied with the WAP-1963. Otherwise, the product may be
damaged.
If you want to reset your WAP-
then wait for 10 seconds for WAP-1963 restart.
3
Page 8
Chapter 3 Configuration
3.1 Configure through Web Browser
Web configuration provides a user-friendly graphical user interface (web pages) to manage your
WAP-1963. An AP with an assigned IP address (e.g. http://192.168.0.1) will allow you via web browser
(e.g., MS Internet Explorer or Netscape) to monitor and configure.
1. Open your web browser.
2. Enter WAP-1963 IP address (default IP address is http://192.168.0.1) into the address field of the web
browser. Please also make sure your PC’s IP address is in the same IP range of WAP-1963.
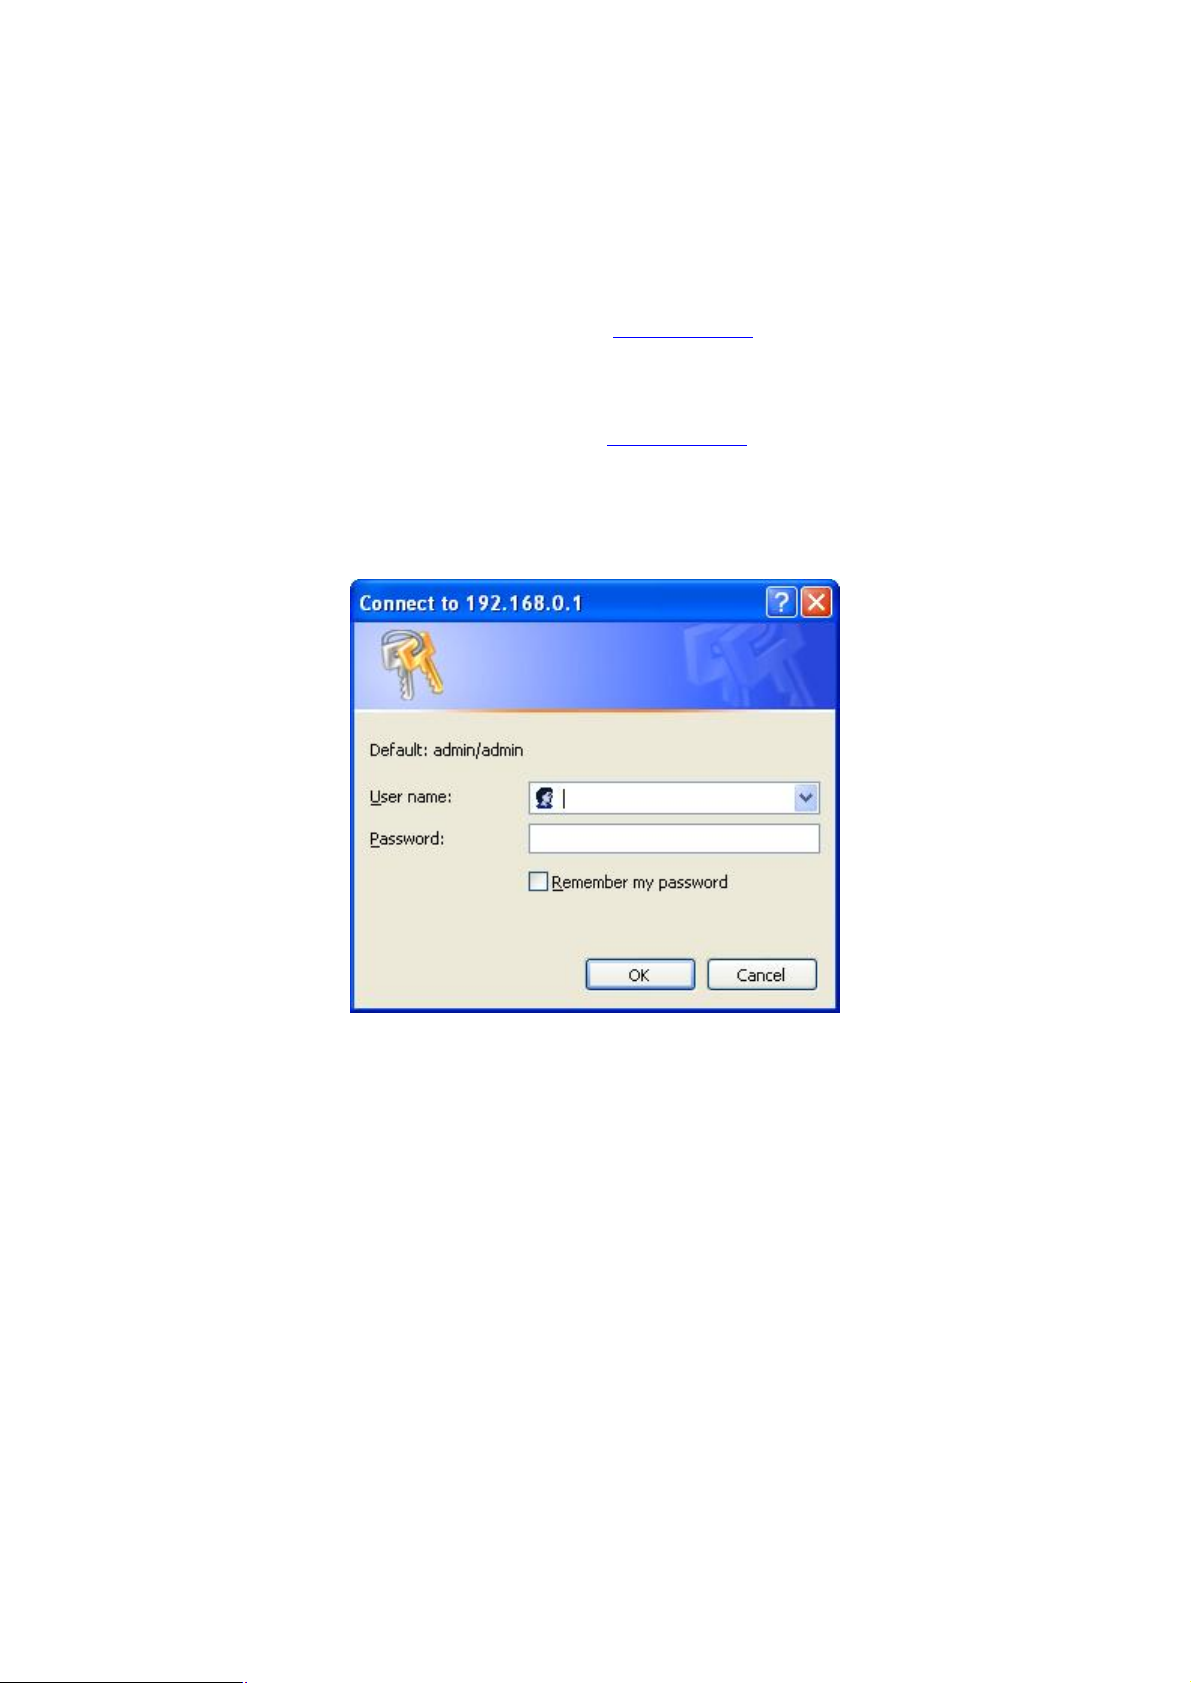
3. A User Name and Password dialog box will appear. Please enter your User Name and Password here.
Default User Name and Password is “admin” and “admin”. Click “OK”.
4. Then you will see the WAP-1963 information in the web page as the picture in section 3.1.1.
4
Page 9
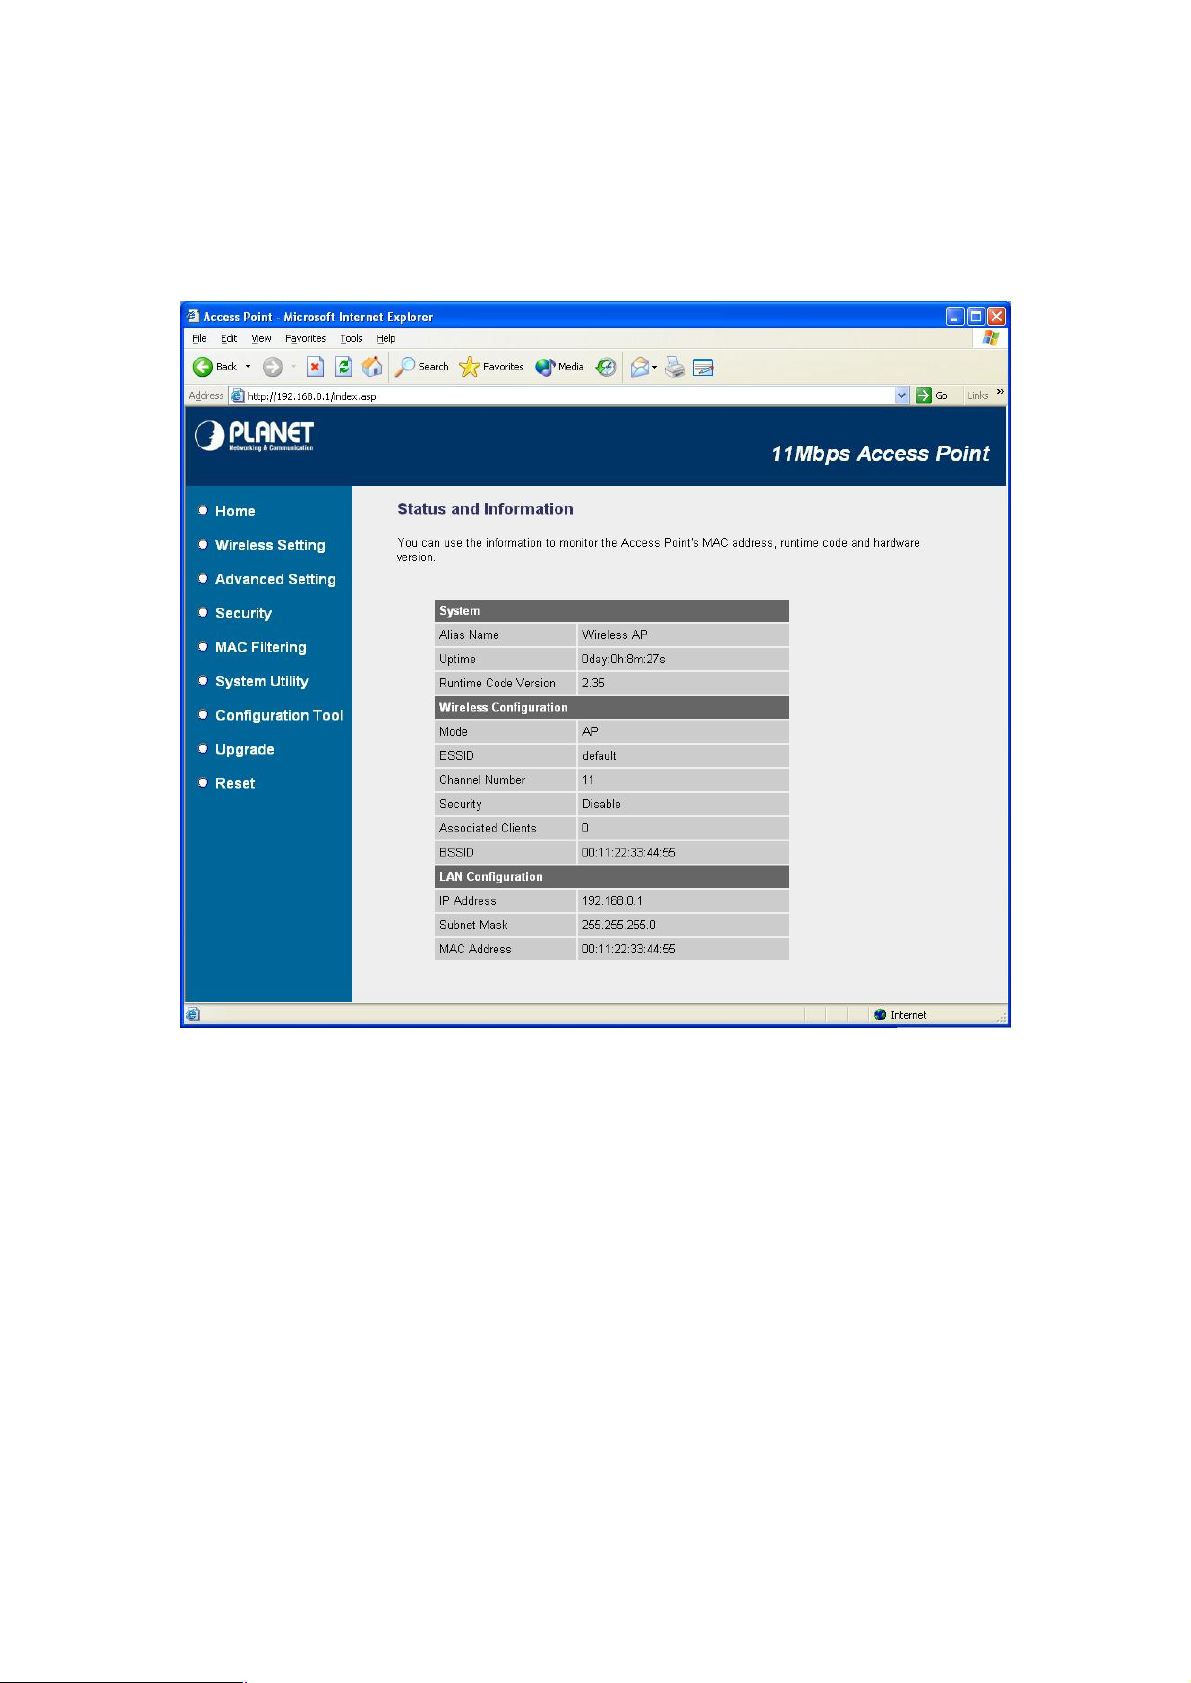
3.1.1 Home:
On this screen, you can see the general information of the Access Point including Alias Name,
Firmware Version, SSID, Channel Number, Security, Number of Associated Clients, IP Address, MAC
Address, etc.
5
Page 10

3.1.2 Wireless Setting:
Please make sure that the ESSID of all stations in the same WLAN network are the
In this option, you can set the Mode, Alias Name, ESSID and Work Channel to this Access Point.
When configuration finished, please click “Apply” to save.
3.1.2.1 AP MODE
This mode is set to WAP-1963 by default. It served as a transparent Media Access Control (MAC)
bridge between wired and wireless network.
Parameters Description
Alias Name The alias name of this access point.
ESSID The ESSID (up to 31 printable ASCII characters) is the unique name identified in a
WLAN. The ID prevents the unintentional merging of two co-located WLANs.
same. The default ESSID is “default”.
Channel Number Select the appropriate channel from the list provided to correspond with your
network settings. Channels differ from country to country.
Channel 1-11 (North America)
Channel 1-14 (Japan)
6
Page 11

7
Channel 1-13 (Europe)
will pop up
The time in second before dissociation. If the wireless keeps idle long than the
it. The wireless client station has to
Associated Clients Click “Show Active Clients” button, then a “Active Wireless Client Table”
as below. You can see the status of all active wireless stations that are connecting
to the access point.
“Active Wireless Client Table” records the status of all active wireless stations that are connecting to
the access point. You can lookup the MAC Address, Number of Transmitted Packets, Number of
Received Packets and Encryption Status of each active wireless client in this table.
Parameters Description
MAC Address MAC address of this active wireless station.
Tx Packet The number of transmitted packets that are sent out from this active wireless
station.
Rx Packet The number of received packets that are received by this active wireless station.
TX Rate The transmission rate in Mbps.
Power Saving Shows if the wireless client is in Power Saving mode.
Expired Time
expired time, this access point will dissociate
associate again when it become active.
Refresh Refresh the “Active Wireless Client Table”.
Close Close “Active Wireless Client Table” window.
Page 12

3.1.2.2 STATION-AD HOC MODE
Served as a wireless station (Ad-hoc). Connected to a PC or a small LAN, this station along with
other wireless stations can establish a small wireless network without Access Points.
Parameters Description
Alias Name The alias name of this access point.
ESSID The ESSID (up to 31 printable ASCII characters) is the unique name identified in a
WLAN. Please set it as the WLAN’s ESSID that you want to join. In default, the
ESSID is “default”.
Channel Number Select the appropriate channel from the list provided to correspond with your
network settings.
3.1.2.3 STATION-INFRASTRUCTURE MODE
Served as a wireless station (infrastructure). Connected to a PC or a small LAN, it allows the PC or
small LAN able to access the wireless network via Access Point.
8
Page 13

Parameters Description
Alias Name The alias name of this access point.
ESSID The ESSID (up to 31 printable ASCII characters) is the unique name identified in a
WLAN. Please set it as the AP’s ESSID that you want to connect to. In default, the
ESSID is “default”.
9
Page 14

3.1.3 Wireless Advance Settings:
. When you
, wireless stations can associate with this access point
, you should also setup
page and wireless stations should use WEP
encryption in the authentication phase to associate with this access point. If you
te with this access point by using
specifies the maximum size of packet during the
fragmentation of data to be transmitted. If you set this value too low, it will result
You can set advanced parameters of this WAP-1963. The parameters include Authentication Type,
Fragment Threshold, RTS Threshold, Beacon Interval, Data Rate, Preamble Type, and Broadcast
ESSID. You should not change these parameters unless you know what effect the changes will have
on WAP-1963. When configuration finished, please click “Apply” to save the settings.
Parameters Description
Authentication Type There are two authentication types: “Open System” and “Shared Key”
select “Open System”
without WEP encryption. When you select “Shared Key”
WEP key in the “Encryption”
select “Both”, the wireless client can associa
any one of these two authentication types.
Fragment Threshold “Fragment Threshold”
in bad performance.
10
Page 15

RTS Threshold
When the packet size is smaller the RTS threshold, the access point will not use
The interval of time that this access point broadcast a beacon. Beacon is used to
is the rate this access point uses to transmit data packets. The
access point will use the highest possible selected transmission rate to transmit
efines the length of CRC block in the frames during the wireless
is suitable for high traffic wireless network.
wireless station located within the
coverage of this access point can discover this access point easily. If you are
building a public wireless network, enabling this feature is recommended.
the RTS/CTS mechanism to send this packet.
Beacon Interval
synchronize the wireless network.
Data Rate The “Data Rate”
the data packets.
Preamble Type Preamble type d
communication. “Short Preamble”
“Long Preamble” can provide more reliable communication.
Broadcast ESSID If you enable “Broadcast ESSID”, every
Disabling “Broadcast ESSID” can provide better security.
11
Page 16

3.1.4 Security:
y select to select ASCII Characters (alphanumeric format) or Hexadecimal
ion from the setting item. The selections
select it in the
The WEP keys are used to encrypt data transmitted in the wireless network. Fill the
WEP is an authentication algorithm, which protects authorized Wireless LAN users against
eavesdropping. The Authentication type and WEP key of wireless stations must be the same with the
Access Point. WAP-1963 has support 64/128-bit WEP Encryption function. With this function, your
data will be transmitted over the wireless network securely. In default, this function is “Disable”. When
configuration finished, please click “Apply” to save the settings.
Parameters Description
Key Format You ma
Digits (in the “A-F”, “a-f” and “0-9” range) to be the WEP Key. For example:
ASCII Characters: guest
Hexadecimal Digits: 12345abcde
Key Length You may enable or disable the WEP funct
in the setting item are changed based on the key format. Default is “Disable”.
Default Key Select one of the four keys to encrypt your data. Only the key you
“Default key” will take effect.
Key 1 - Key 4
12
Page 17

text box by following the rules below.
or
64-bit WEP: input 10-digit Hex values (in the “A-F”, “a-f” and “0-9” range) or 5-digit
ASCII character as the encryption keys.
128-bit WEP: input 26-digit Hex values (in the “A-F”, “a-f” and “0-9” range)
10-digit ASCII characters as the encryption keys.
13
Page 18

3.1.5 MAC Filtering:
This table records the MAC addresses of wireless stations you want to allow to
field is the description of the wireless station
and is helpful for you to recognize the wireless
area, fill in
to be added and then
MAC Address Filtering
above. If you find any typo before adding it and want to retype again. Just
,
Delete
Delete
This Access Point provides MAC Address Filtering, which prevents the unauthorized MAC Addresses
from accessing your wireless network.
Parameters Description
MAC Address
Filtering Table
Add MAC address
into the table
Remove MAC
address from the
table
access your network. The “Comment”
associated with the “MAC Address”
station.
Please click “Enable Wireless Access Control” first. In the bottom “New”
the “MAC Address” and “Comment” of the wireless station
click “Add”. Then this wireless station will be added into the “
Table”
click “Clear” and both “MAC Address” and “Comment” fields will be cleared.
If you want to remove some MAC address from the “MAC Address Filtering Table”
select the MAC addresses you want to remove in the table and then click “
Selected”. If you want remove all MAC addresses from the table, just click “
14
Page 19

15
All” button.
Reset Click “Reset” will clear your current selections.
Page 20

3.1.6 System Utility:
digit alphanumeric string) of the Access
. Note that the
digit alphanumeric string) you want to login to
From here, you can define the Access Point’s IP Address and Login Password and enable the Access
Point to be a DHCP Server. After configure, please press “Apply” button to save the settings.
Parameters Description
Password Settings
Current Password Enter the current password (up to 15-
New Password Enter the password (up to 15-
16
Point. The default password for the Access Point is admin
password is case-sensitive.
the Access Point. Note that the password is case-sensitive.
Page 21

17
Re-Enter Password Reconfirm the password (up to 15-
digit alphanumeric string) you want to
s IP Address. This IP Address should be unique
The Subnet Mask of the
n your network. This IP address should be different
they gave you; or you can
your DHCP server to
By default the IP range is from: Start
your LAN client an IP
the
Server
login to the Access Point. Note that the password is case-sensitive.
Management IP
IP Address Designate the Access Point’
in your network. The default IP Address is 192.168.0.1.
Subnet Mask Specify a Subnet Mask for your LAN segment.
Access Point is fixed and the value is 255.255.255.0.
DHCP Server Enable or disable the DHCP Server.
DHCP Server
Default Gateway IP Specify the gateway IP i
from the Management IP.
Domain Name Server IP This is the ISP’s DNS server IP address that
specify your own preferred DNS server IP address.
Start IP/End IP You can designate a particular IP address range for
issue IP addresses to your LAN Clients.
IP 192.168.0.100 to End IP 192.168.0.200.
Domain Name You can specify the Domain Name for your Access Point.
Lease Time
The DHCP Server when enabled will temporarily give
address. In the Lease Time setting you can specify the time period that
DHCP Server lends an IP address to your LAN clients. The DHCP
will change your LAN client’s IP address when this time threshold period is
reached.
Page 22

3.1.7 Configuration Tool
The Configuration Tool screen allows you to backup, restore and reset WAP-1963 configuration
settings. Saving the configuration settings provides an added protection and convenience should
problems occur with the WAP-1963 and you have to reset to factory default. When you save the
configuration setting (Backup) you can re-load the saved configuration into the Access Point through
the Restore selection. If extreme problems occur you can use the Restore to Factory Default
function, this will set all configurations to its original default settings.
Parameter Description
Backup Settings Please click “Save…” button. That will save the Access Point’s current
configuration to a file named "config.bin" on your PC.
Restore Settings Please click “Browse…” to find out the config.bin, and then click “Upload” to
restore the saved configuration to the Access Point.
Restore to Factory
Default
Click “Reset”. This function will restore WAP-1963 to original factory settings.
18
Page 23

3.1.8 Upgrade
Please power off and on
This page allows you to upgrade WAP-1963 with when the new firmware released.
Parameter Description
Firmware Upgrade You can use the “Browse…” button to find the firmware location on your PC, and
then press “Apply” button to upgrade your Access Point.
the Access Point when the upgrade process is complete. That can let the new
firmware work properly on WAP-1963.
19
Page 24

3.1.9 Reset
You can reset the Access Point’s system should any problem exist. The reset function essentially
Re-boots your Access Point’s system.
Parameter Description
Reset In the event that the system stops responding correctly or in some way stops
functioning, you can perform a reset. Your settings will not be changed. To
perform the reset, click on the “Apply” button. You will be asked to confirm your
decision. Once the reset process is complete you may start using the Access Point
again.
20
Page 25

Chapter 4 Application
This chapter describe the four operating mode of your WAP-1963. The four working modes of WAP-1963
are Access Point, Access Point Client Mode, Wireless Bridge mode and Multiple Bridge mode.
4.1 Access Point mode
With this mode, your Wireless network connection could act as following.
Any of your IEEE802.11b end nodes should found the nearest Access Point to communication with any
other Wireless end-nodes or the wired Ethernet network.
There are two things need to be check for your wireless end nodes, the services set ID (SSID) and the
Wired Equivalent Protocol (WEP), both parameters should the same with your Access Point.
4.2 Wireless Station mode
Infrastructure: Served as a wireless station (infrastructure). Connected to you PCs, it is able to access
the network via Access Point. WAP-1963 soon makes your connected PCs a wireless end node.
Ad-Hoc: Served as a wireless station (Ad-hoc). Connected to your PCs, this station adapter along with
other wireless stations can establish a small wireless network without Access Points.
SwitchSwitch
StationAd-Hoc
StationInfrastructure
Access Point
mode
21
Page 26

Chapter 5 Troubleshooting
This chapter gives tips on how to configure the communication software. This chapter provides solutions
to problems usually encountered during the installation and operation of the Wireless Network Access
Point. Read the description below to solve your problems.
Q. Can I run an application from a remote computer over the wireless network?
A. This will depend on whether or not the application is designed to be used over a network. Consult the
application’s user guide to determine if it supports operation over a network.
Q. Can, I play games with other members of the cordless network?
A. Yes, as long as the game supports multiple plays over a LAN (local area network). Refer to the game’s
user guide for more information.
Q. What is the IEEE 802.11b standard?
A. The IEEE 802.11b Wireless LAN standards subcommittee, which is formulating a standard for the
industry. The objective is to enable wireless LAN hardware from different manufactures to
communicate.
Q. What IEEE 802.11 features are supported?
A. The product supports the following IEEE 802.11 functions:
• CSMA/CA plus Acknowledge protocol
• Multi-Channel Roaming
• Automatic Rate Selection
• RTS/CTS feature
• Fragmentation
• Power Management
Q. What is Ad-hoc?
A. An Ad-hoc integrated wireless LAN is a group of computers, each with a WLAN adapter, Connected as
an independent wireless LAN. Ad hoc wireless LAN is applicable at a departmental scale for a branch
or SOHO operation.
Q. What is Infrastructure?
A. An integrated wireless and wired LAN is called an Infrastructure configuration. Infrastructure is
applicable to enterprise scale for wireless access to central database, or wireless application for mobile
workers.
Page 27

Q. What is Roaming?
A. Roaming is the ability of a portable computer user to communicate continuously while moving freely
throughout an area greater than that covered by a single Wireless Network Access Point. Before using
the roaming function, the workstation must make sure that it is the same channel number with the
Wireless Network Access Point of dedicated coverage area.
23
 Loading...