

Page 1

Wired / Wireless
USB2.0 MFP Print Server
FPS-1010M / FPS-1010MG
Quick Installation Guide
Page 2

Table of Contents
Package Content .............................................................................................. 4
Hardware Installation ....................................................................................... 5
Management Software Installation ..................................................................... 6
Install the MFP Drivers/Utilities ........................................................................14
Using the MFP ................................................................................................19
Share Printer and Fax .....................................................................................20
Share Scanner ................................................................................................21
An example: HP 5600 Series Utilities...........................................................21
Windows XP Scanning Utility ....................................................................... 22
Share Card Reader .........................................................................................23
Further Conguration ......................................................................................24
Page 3
Thank you for purchasing and using our MFP print server. This FPS-1010M /
Note
FPS-1010MG allows your Multi-function printer (called for short: MFP) or printer
to become a shared device on the network. Unlike many print servers, it can
communicate with MFP and printer as if it is connected directly to your computer.
Because of the features, all users can share print, scan, fax and card reader
functions through the network. Furthermore, the FPS-1010M / FPS-1010MG can
build the bi-directional communication with MFPs and Printers so that it can help to
monitor important information such as ink levels and paper levels.
For other environments, or any problems, please refer to the full
User’s Manual in the CD-ROM
Page 4
4
Package Content
Note
1 x FPS-1010M / FPS-1010MG
1 x Quick Installation Guide
1 x User’s Manual and Utility CD
1 x Power Adapter
1 x Dipole Antenna (For FPS-1010MG)
If any of the above items are missing, please contact your dealer
immediately.
Page 5
5
Hardware Installation
Note
1. Unpack the FPS-1010M / FPS-1010MG package and verify the items listed in the
previous section are provided.
2. Use USB cable to connect FPS-1010M / FPS-1010MG to the MFP or printer that
you want to share to your network.
3. Use a RJ-45 cable to connect the FPS-1010M / FPS-1010MG to your LAN.
4. Connect dipole antenna to FPS-1010MG antenna connector. (FPS-1010MG only)
5. Connect the bundled power adapter to FPS-1010M / FPS-1010MG. The MFP
Server will perform the Power-On-Self-Test (POST) after power on. Please wait
for 20 seconds.
1. Please use the power adapter which bundled with MFP Server.
DO NOT use any other power adapter from other sources. That
may cause your FPS-1010M / FPS-1010MG damage.
2. To prevent the compatibility problem between FPS-1010M /
FPS-1010MG and a few MFP or printer, it is recommended that
you power on the FPS-1010M / FPS-1010MG before the MFP or
printer.
Page 6
6
Management Software Installation
Note
This FPS-1010M / FPS-1010MG management software can be run in Windows
2000 SP4 or above, Windows XP SP1 or above and Windows Vista. The following
procedures are running in Windows XP, the procedures are similar for Windows
2000 and Windows Vista.
Some MFP printers will ask the user connect MFP to the PC directly
and install the printer driver, before MFP Server installation. That
may cause the MFP Server installation adds one more MFP (printer/
scanner/fax/card reader) to your PC. You can delete the devices
which the MFP driver installed after MFP Server installation, or you
can keep those devices exist in your PC.
1. Insert User’s Manual and utility CD into the CD-ROM drive to initiate the autorun
program. Once completed a menu screen will appear.
2. Click on “MFP Server Utility” hyper link to initiate the installation. Or you can
click the “Start” button and choose “Run”. (Suppose “E” is your CD-ROM drive).
When the dialog box appears, enter “E:\Utility\Setup.exe” and press enter key.
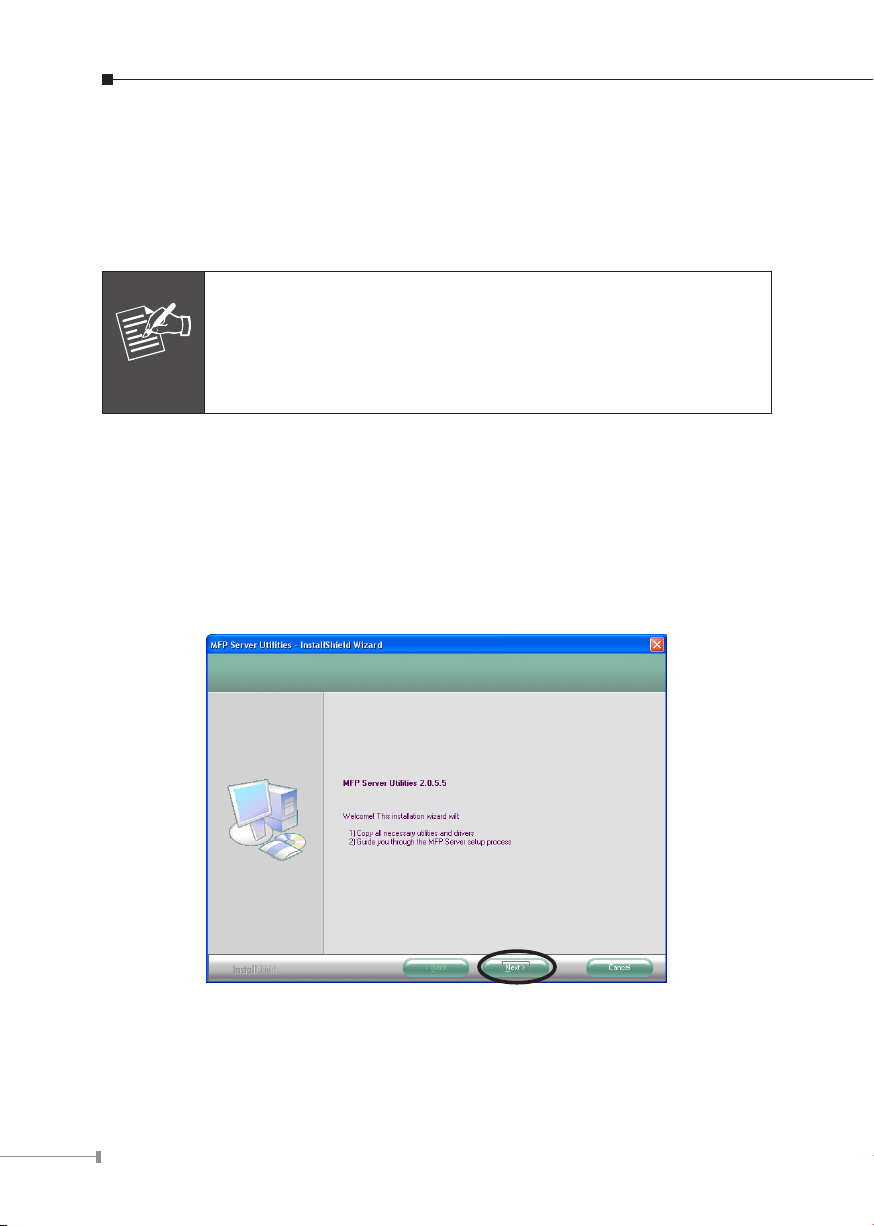
You will see the dialog box as below. Please click “Next” to continue.
3. The “MFP Server Utilities - InstallShiled Wizard” is displayed, click “Next”.
Page 7
7
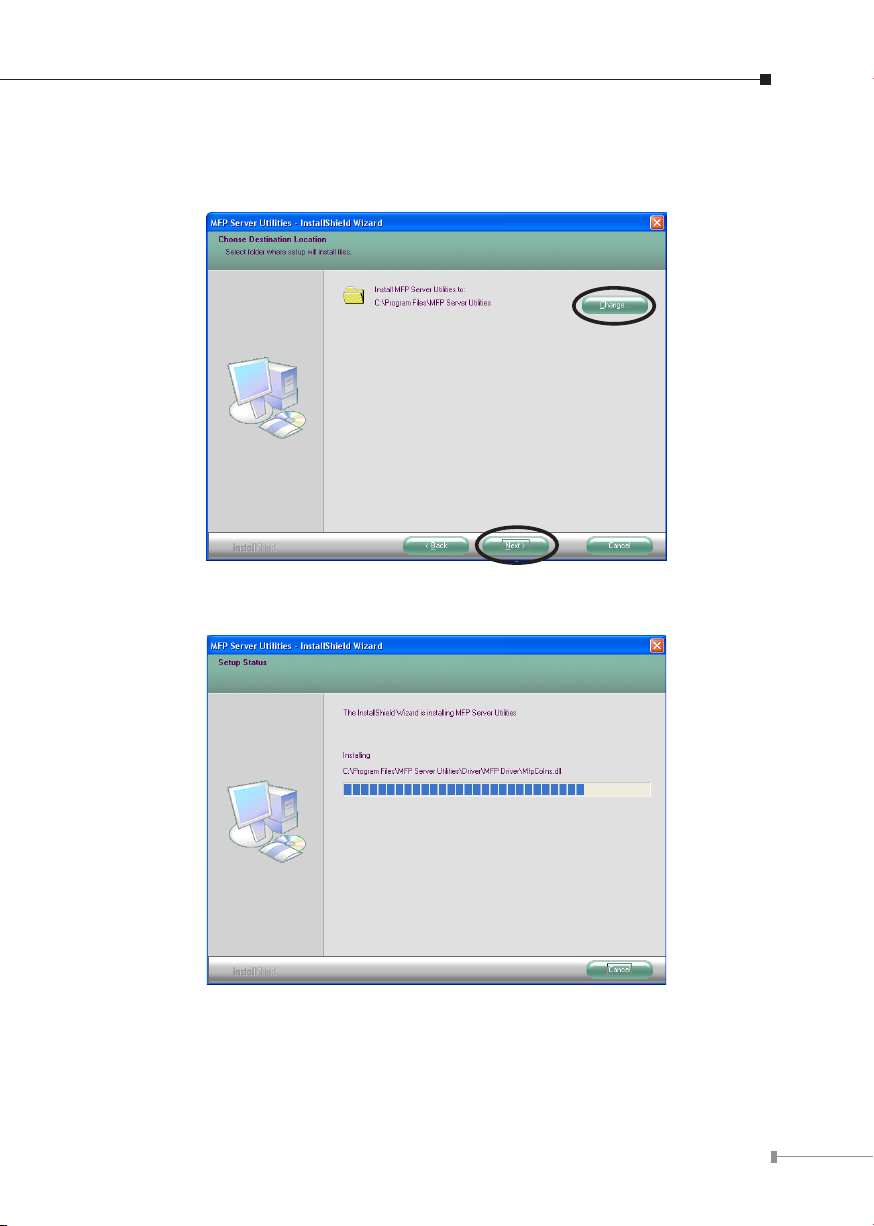
4. Click “Next” to install the MFP Server utilities in the default folder or click
“Change” to specify the destination folder where you would like to install the
MFP Server utilities.
5. The system starts installing the MFP Server Utilities.
Page 8
8
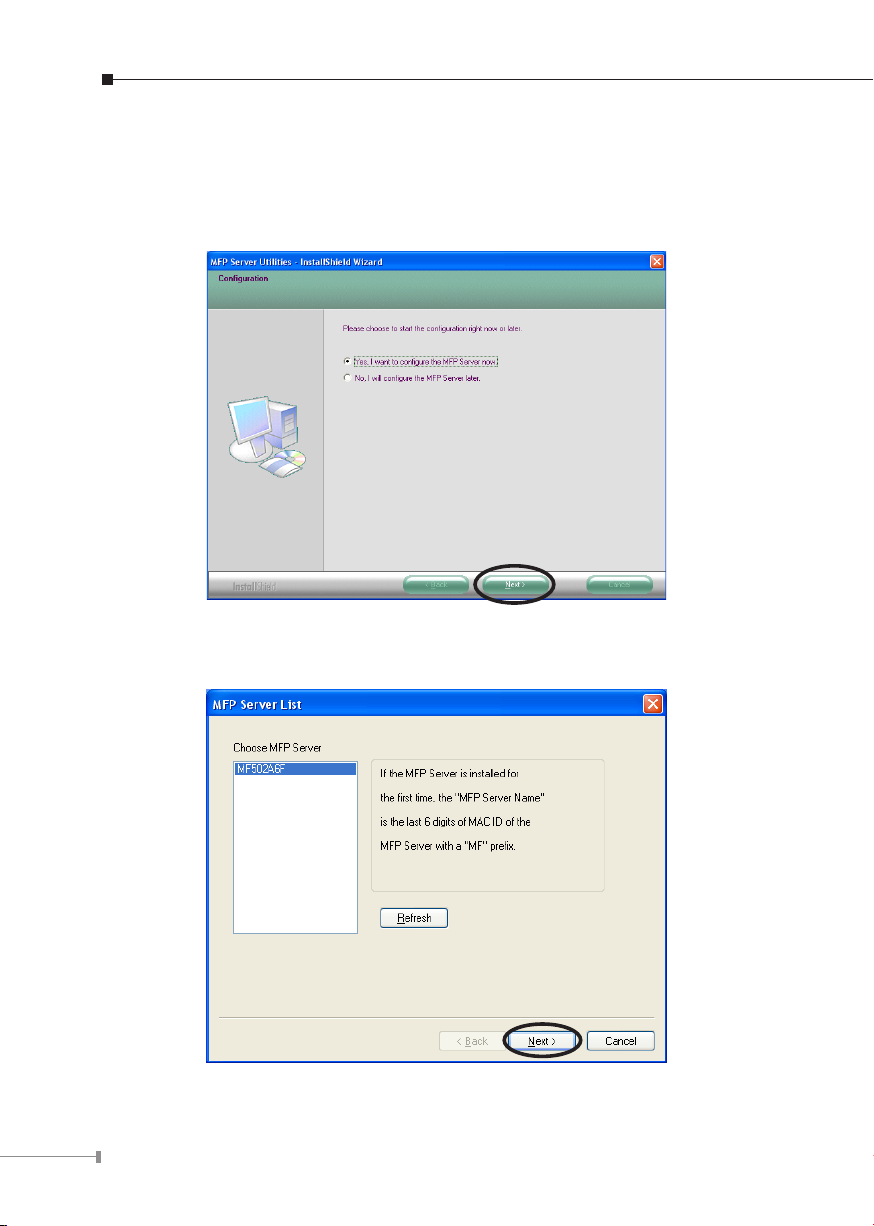
6. The “MFP Server Conguration” screen is displayed. If you want to congure the
MFP Server, please select “Yes, I want to congure the MFP Server now.” and
click “Next”. Then refer to the following steps to congure your MFP server. Or
you can select “No, I will congure the MFP Server later” and click “Next” to
complete the installation.
7. The MFP Server List will auto search the MFP Servers in the network. Select the
MFP Server you wan to setup and click “Next” to continue.
Page 9

9
8. Enter the “User Name” and “Password” of the MFP Server you have selected to
Note
login the MFP Server. The default “User Name” and “Password” is “admin”. Click
“OK”.
9. Set the “Alias Name” and the “MFP Server Description” to the MFP Server here.
Click “Next”.
You can define the location or other information of the MFP Server
for easy to find the MFP by filling “MFP Server Description”.
Page 10

10
10. Please set the network settings for the FPS-1010M / FPS-1010MG manually.
Note
The default network value is as below:
IP Address: 192.168.0.1 Subnet Mask: 255.255.255.0
If you have selected “DHCP”, the FPS-1010M / FPS-1010MG will try to
determine your network settings automatically. The FPS-1010M / FPS-1010MG
will automatically obtain and congure the network settings assigned by the
DHCP server and assigned IP Address will be shown in the IP Address elds.
If no DHCP server is present within the network, please select “Manual IP” and
assign the network settings of FPS-1010M / FPS-1010MG manually. Please click
“Next” to continue.
11. The FPS-1010MG will nd available wireless network automatically. You could
also press the “Refresh” button to nd the available wireless network manually.
After refresh procedure, there will show the available wireless networks. Please
select the appropriate wireless network that you would like to connect from the
list and click “Next” to continue.
Only FPS-1010MG has the “Wireless Network Settings” window.
Page 11

11
12. If you choose to connect to an encrypted wireless network, the “Wireless Se-
Note
curity Settings“screen will be appeared. Please select the security mode, key
length and key format and key in the key value the same as the settings on
your wireless devices. Please click “Next” to continue.
Only FPS-1010MG has the “Wireless Network Settings” window.
Page 12

12
13. The congurations are nished. Please click “Finish” to apply new settings.
Note
Only FPS-1010MG shows the wireless mode, SSID, channel and
security information.
14. Select “Yes, I want to restart my computer now” and click “Finish” to complete
the installation.
Page 13

13
15. The “MFP Manager” will display on your screen automatically that after you in-
stall management software nish and your computer get into Windows XP rst
time. Choose “Yes” that enable “MFP Manager” utility automatically when Windows starts.
Page 14
14
Install the MFP Drivers/Utilities
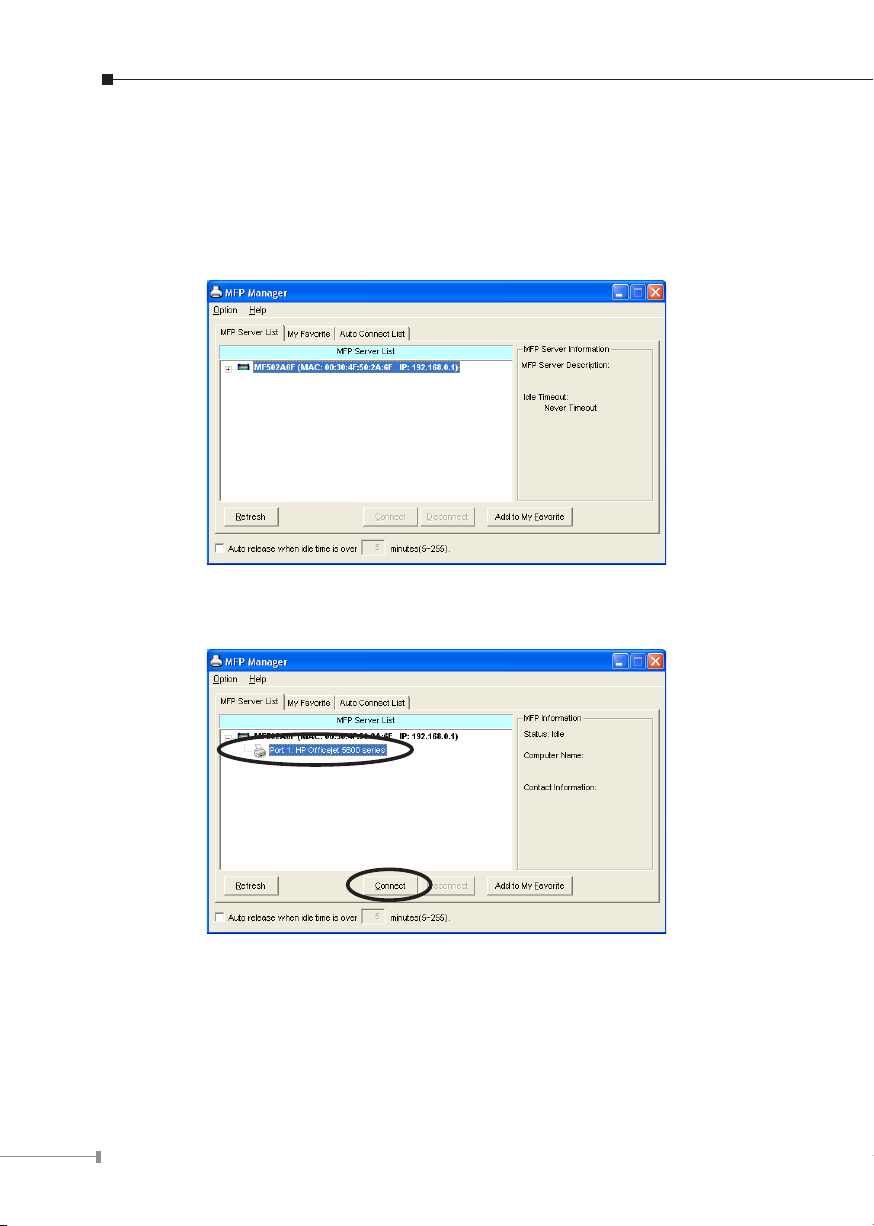
1. When the installation is completed, the “MFP Server Control Manager” will pop
up. It will automatically nd the MFP Servers and the connected MFP and show
it in the “MFP Server List”. To start installing the MFP Drivers/Utilities, please follow the steps below.
2. Select the MFP which you want to install in the “MFP Sever List” and click “Connect”.
3. The following message is displayed to warn you that you have to follow the installation instructions in the manual of the MFP. If the MFP is requiring you to
connect the MFP to your computer directly, please click “Connect”.
Page 15

15
Note
Some MFP requires users to install the drivers/utilities before
connecting the MFP to your computer, please make sure you have
followed the instructions of MFP. When the MFP requires checking
if you have connected the USB cable to MFP and your computer,
please click “Connect” to create the connection. Please refer to the
below illustration of “HP OfficeJet 5610” as an example.
4. If the MFP has required you to plug the USB cable between the MFP and your
computer, please click “Yes”.
Page 16

16
5. Before creating the connection, you have to install two kinds of drivers: the drivers for MFP Server and the drivers for MFP. Please click “Next” to start the installation.
6. When you are installing the MFP Server Drivers, the following message will be
displayed to notify you. When the MFP Server drivers are all installed, the message will be disappeared automatically.
Page 17

17
7. Select “Install the software automatically (Recommended)” to auto install the
“MFP Server Enhanced Controller” driver, then click “Next”.
8. The driver will be installed automatically. Click “Finish” to complete this driver
installation.
Page 18

18
9. The following message is displayed to remind you that you are now installing the
MFP Drivers. When you are sure that the MFP has been connected to MFP Server
and the MFP driver CD is insert to your CD-ROM completely, please click “Finish”.
10. Windows will start install the MFP. Please refer to your MFP manual and follow
the steps to install MFP driver and utility.
Page 19

19
Using the MFP
Note
After you have followed the install wizard to nish the MFP installation, the MFP is
now connected to your computer. You can start sharing print, scan, fax and card
reader functions provided on the MFP.
If you have finished using the MFP, please click “Disconnect”
to release the MFP from your PC. When there is a user using or
connecting MFP, the other users can’t use the MFP until the MFP
is released. You may refer to MFP Server manual to setup the
disconnect time to make the users auto-disconnect when the MFP
is no operation over the time.
Page 20

20
Share Printer and Fax
The MFP will be added to “Printers and Faxes” after the MFP is installed. When
you have connected to the MFP by clicking “Connect” in the “MFP Server Control
Manager”, the MFP Server will auto create the connection between the MFP and
your computer and then you can print a document or send a fax just follows the
same steps as usual.
Page 21

21
Share Scanner
Most of the MFP provides scan utility for users. You can scan pictures or documents
through the utility. In Windows XP, user can also scan from Windows XP scanning
utility.
An example: HP 5600 Series Utilities
Page 22

22
Windows XP Scanning Utility
You can double click the scanner in “My Computer”, and then the WinXP scan utility
will appear for service.
Page 23

23
Share Card Reader
When the MFP supports card reader function, you can reach the data of your
memory card from the card reader through the MFP Server.
Page 24

Further Conguration
If you want to set more detail settings of FPS-1010M / FPS-1010MG, please refer
to our manual and congure with conguration utility or your Web Browser. If you
have any difculty on resolving the problem while installing or using FPS-1010M /
FPS-1010MG, please feel free to contact PLANET for support.
24
 Loading...